Chapter 2 Working with topographic maps - PEGSnet
Chapter 2 Working with topographic maps - PEGSnet
Chapter 2 Working with topographic maps - PEGSnet
Create successful ePaper yourself
Turn your PDF publications into a flip-book with our unique Google optimized e-Paper software.
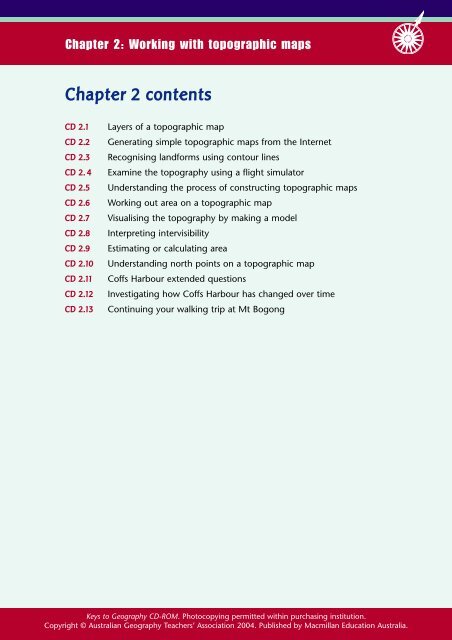
<strong>Chapter</strong> 2: <strong>Working</strong> <strong>with</strong> <strong>topographic</strong> <strong>maps</strong><br />
<strong>Chapter</strong> 2 contents<br />
CD 2.1<br />
CD 2.2<br />
CD 2.3<br />
CD 2. 4<br />
CD 2.5<br />
CD 2.6<br />
CD 2.7<br />
CD 2.8<br />
CD 2.9<br />
CD 2.10<br />
CD 2.11<br />
CD 2.12<br />
CD 2.13<br />
Layers of a <strong>topographic</strong> map<br />
Generating simple <strong>topographic</strong> <strong>maps</strong> from the Internet<br />
Recognising landforms using contour lines<br />
Examine the topography using a flight simulator<br />
Understanding the process of constructing <strong>topographic</strong> <strong>maps</strong><br />
<strong>Working</strong> out area on a <strong>topographic</strong> map<br />
Visualising the topography by making a model<br />
Interpreting intervisibility<br />
Estimating or calculating area<br />
Understanding north points on a <strong>topographic</strong> map<br />
Coffs Harbour extended questions<br />
Investigating how Coffs Harbour has changed over time<br />
Continuing your walking trip at Mt Bogong<br />
Keys to Geography CD-ROM. Photocopying permitted <strong>with</strong>in purchasing institution.<br />
Copyright © Australian Geography Teachers’ Association 2004. Published by Macmillan Education Australia.
<strong>Chapter</strong> 2: <strong>Working</strong> <strong>with</strong> <strong>topographic</strong> <strong>maps</strong><br />
CD 2.1<br />
Layers of a <strong>topographic</strong> map<br />
Activity<br />
Cartographers plot a number of layers of different physical features to construct a <strong>topographic</strong><br />
map. Use the labels below to complete this table:<br />
A blue shadings, lines and symbols<br />
B usually black and red to pink shadings, lines and symbols<br />
C green shadings<br />
D brown or red contour lines, brown shadings and black spot points.<br />
Land surface<br />
(topography)<br />
Water<br />
Vegetation<br />
Human<br />
Included on the map<br />
Places of equal height joined by<br />
contour lines. Other surface features<br />
such as sand and cliffs. Spot heights.<br />
Water on land (for example, rivers,<br />
lakes, swamps) and off-shore<br />
(for example, sea depth).<br />
Natural vegetation (for example,<br />
rainforest, woodland) and vegetation<br />
planted by humans (for example,<br />
pine plantation, orchard).<br />
Transport linkages, settlement patterns,<br />
land use (for example, roads, towns,<br />
quarries, mines).<br />
Indicated on the map by<br />
Keys to Geography CD-ROM. Photocopying permitted <strong>with</strong>in purchasing institution.<br />
Copyright © Australian Geography Teachers’ Association 2004. Published by Macmillan Education Australia.
<strong>Chapter</strong> 2: <strong>Working</strong> <strong>with</strong> <strong>topographic</strong> <strong>maps</strong><br />
CD 2.2<br />
Generating simple <strong>topographic</strong> <strong>maps</strong> from the<br />
Internet<br />
LINK<br />
Activity<br />
Detailed <strong>topographic</strong> <strong>maps</strong> of different regions of the world can be found at http://www.expedia.com.<br />
To learn how to create or customise simple <strong>topographic</strong> <strong>maps</strong>, go to the website and do the<br />
following steps:<br />
1 Select the Maps tab on the upper horizontal menu, then select ‘Find a Map’.<br />
2 In the field, search for a place; select ‘World (<strong>topographic</strong> <strong>maps</strong>)’.<br />
3 Enter place of interest, e.g. Grampians National Park.<br />
4 Print your <strong>topographic</strong> map.<br />
Keys to Geography CD-ROM. Photocopying permitted <strong>with</strong>in purchasing institution.<br />
Copyright © Australian Geography Teachers’ Association 2004. Published by Macmillan Education Australia.
<strong>Chapter</strong> 2: <strong>Working</strong> <strong>with</strong> <strong>topographic</strong> <strong>maps</strong><br />
CD 2.3<br />
Recognising landforms using contour lines<br />
Activity<br />
Match each of the following landform names to the correct contour map:<br />
A cliff<br />
B ridge<br />
C river valley<br />
D round hill<br />
E saddle<br />
F spur.<br />
Click on the link to see the answers.<br />
ANSWERS<br />
Keys to Geography CD-ROM. Photocopying permitted <strong>with</strong>in purchasing institution.<br />
Copyright © Australian Geography Teachers’ Association 2004. Published by Macmillan Education Australia.
<strong>Chapter</strong> 2: <strong>Working</strong> <strong>with</strong> <strong>topographic</strong> <strong>maps</strong><br />
CD 2.4<br />
Examine the topography using a flight simulator<br />
Click on the clip of the flight simulator, which uses aerial photography to give you a view of the<br />
Adelaide Hills travelling towards Adelaide. In this clip, contour lines have been overlaid onto the<br />
image. Start the clip using the play button at the bottom left of the screen.<br />
FLIGHT SIMULATOR<br />
1 Describe the landscape that you travel over.<br />
2 Return the clip to the beginning and examine this still image. Would you describe<br />
Woodforde as:<br />
a a round hill<br />
a a valley<br />
c a ridge<br />
d a spur<br />
e a plateau<br />
Hint: you can check these landforms using figure [2.4] on page 40 of Keys to<br />
Geography.<br />
3 Replay the flight simulator and stop at 24 seconds. What feature is in the centre of the<br />
aerial photograph Is this area forested<br />
4 Based on the landscape in this clip, would you agree <strong>with</strong> this statement: ‘More land has<br />
been cleared for agriculture and settlement on less steep slopes’<br />
Keys to Geography CD-ROM. Photocopying permitted <strong>with</strong>in purchasing institution.<br />
Copyright © Australian Geography Teachers’ Association 2004. Published by Macmillan Education Australia.
<strong>Chapter</strong> 2: <strong>Working</strong> <strong>with</strong> <strong>topographic</strong> <strong>maps</strong><br />
CD 2.5<br />
Understanding the process of constructing<br />
<strong>topographic</strong> <strong>maps</strong><br />
LINK<br />
http://www.topoimagery.com/makingkonza.html<br />
Activity<br />
1 Read the article at the link above and list any unfamiliar words. Share the words <strong>with</strong><br />
the class. Use a dictionary of geography to develop a glossary of these words.<br />
2 List the process of map development using dot points or a flow diagram.<br />
3 Discuss a statement made by the map-maker (Doug Armknech), that ‘a good map is<br />
equal parts cartographic accuracy and artistry’.<br />
Keys to Geography CD-ROM. Photocopying permitted <strong>with</strong>in purchasing institution.<br />
Copyright © Australian Geography Teachers’ Association 2004. Published by Macmillan Education Australia.
<strong>Chapter</strong> 2: <strong>Working</strong> <strong>with</strong> <strong>topographic</strong> <strong>maps</strong><br />
CD 2.6<br />
<strong>Working</strong> out area on a <strong>topographic</strong> map<br />
There are two main ways to work out area on a <strong>topographic</strong> map.<br />
Estimating area<br />
The area of a map feature can be calculated by counting every grid square that is covered by the<br />
feature, then adding any squares that are more than half covered. This ignores any squares that<br />
are less than half covered, but this underestimate is balanced by the overestimate from counting<br />
the squares that are more than half covered, giving a fairly accurate result.<br />
Then examine the scale of the map and calculate the area covered by each grid square. The<br />
answer should be stated as square metres or square kilometres (m 2 or km 2 ).<br />
Calculating area<br />
When calculating areas you need to be able to identify regular shapes such as a square, rectangle,<br />
triangle or circle and then apply the correct formula for the area of the shape:<br />
● area of a square or rectangle = length x breadth<br />
●<br />
area of a triangle = 1_ 2 base x height<br />
● area of a circle = π x radius squared (πr 2 )<br />
Activity<br />
1 Estimate the area of Lake Bonney in figure 2.17, pages 46–47 of the textbook.<br />
Keys to Geography CD-ROM. Photocopying permitted <strong>with</strong>in purchasing institution.<br />
Copyright © Australian Geography Teachers’ Association 2004. Published by Macmillan Education Australia.
<strong>Chapter</strong> 2: <strong>Working</strong> <strong>with</strong> <strong>topographic</strong> <strong>maps</strong><br />
2 Estimate the area of Kangaroo Island in the map below.<br />
3 Calculate the area of Kangaroo Island by smoothing out the island into a series of<br />
geometric shapes and calculating the area of each shape.<br />
Keys to Geography CD-ROM. Photocopying permitted <strong>with</strong>in purchasing institution.<br />
Copyright © Australian Geography Teachers’ Association 2004. Published by Macmillan Education Australia.
<strong>Chapter</strong> 2: <strong>Working</strong> <strong>with</strong> <strong>topographic</strong> <strong>maps</strong><br />
CD 2.7<br />
Visualising the topography by making a model<br />
Activity<br />
One way to create a view of the earth is to make a model. Follow these steps to make a model of<br />
Uluru.<br />
1 Obtain a <strong>topographic</strong> map of the area or use the contour diagram of Uluru below.<br />
2 Place a pin hole in the centre of the area you wish to construct.<br />
3 Trace equally spaced contours. You don’t need to trace every contour line, but the lines<br />
you trace should be equally spaced, e.g. every 100 metres.<br />
4 Ensure that you mark the pin hole in each layer of the tracings.<br />
5 Use your tracing to cut each layer out in a separate sheet of thick cardboard or<br />
polystyrene, and be sure to mark the pin hole in each layer.<br />
6 Assemble the layers in order, matching the pin holes.<br />
7 You can use modelling clay to smooth out the ‘steps’ if you wish.<br />
8 Label the model, and include a scale and a north point.<br />
Keys to Geography CD-ROM. Photocopying permitted <strong>with</strong>in purchasing institution.<br />
Copyright © Australian Geography Teachers’ Association 2004. Published by Macmillan Education Australia.
<strong>Chapter</strong> 2: <strong>Working</strong> <strong>with</strong> <strong>topographic</strong> <strong>maps</strong><br />
CD 2.8<br />
Interpreting intervisibility<br />
LINK<br />
http://www.learn.co.za/content/grade10/Geography/Mapwork/Cross/Unit1/<br />
10geoT1L4_2.htm<br />
Activity<br />
Complete the cross-section activity to investigate intervisibility.<br />
Keys to Geography CD-ROM. Photocopying permitted <strong>with</strong>in purchasing institution.<br />
Copyright © Australian Geography Teachers’ Association 2004. Published by Macmillan Education Australia.
<strong>Chapter</strong> 2: <strong>Working</strong> <strong>with</strong> <strong>topographic</strong> <strong>maps</strong><br />
CD 2.9<br />
Estimating or calculating area<br />
There are two main ways to work out area on a map.<br />
Estimating area<br />
The area of a map feature can be calculated by counting every grid square that is covered by the<br />
feature, then adding any squares that are more than half covered. This ignores any squares that<br />
are less than half covered, but this underestimate is balanced by the overestimate from counting<br />
the squares that are more than half covered, giving a fairly accurate result.<br />
Then examine the scale of the map and calculate the area covered by each grid square. The<br />
answer should be stated as square metres or square kilometres (m 2 or km 2 ).<br />
Calculating area<br />
When calculating areas you need to be able to identify regular shapes such as a square, rectangle,<br />
triangle or circle and then apply the correct formula for the area of the shape:<br />
● area of a square or rectangle = length x breadth<br />
●<br />
area of a triangle = 1_ 2 base x height<br />
● area of a circle = π x radius squared (πr 2 )<br />
Keys to Geography CD-ROM. Photocopying permitted <strong>with</strong>in purchasing institution.<br />
Copyright © Australian Geography Teachers’ Association 2004. Published by Macmillan Education Australia.
<strong>Chapter</strong> 2: <strong>Working</strong> <strong>with</strong> <strong>topographic</strong> <strong>maps</strong><br />
CD 2.10<br />
Understanding north points on a <strong>topographic</strong> map<br />
Topographic <strong>maps</strong> usually have three north points:<br />
●<br />
●<br />
●<br />
true north — This is the true direction of the north pole. Meridians of longitude meet at<br />
the north pole.<br />
grid north — This is the direction in which the north–south grid lines are drawn on the<br />
<strong>topographic</strong> map. They do not form a true north–south position. Grid lines are parallel<br />
to each other. Grid north is used to read direction, because bearings are plotted from grid<br />
north. The difference between true north and grid north is called the grid convergence.<br />
magnetic north — This is the direction in which the north point of a compass needle<br />
points. It points to the magnetic north pole. (The south point of the needle points to the<br />
magnetic south pole.) The positions of the magnetic poles change slightly over time.<br />
The direction of magnetic north varies from place to place on the earth, so always check<br />
the direction indicator on the <strong>topographic</strong> map for the area you are working on. The<br />
difference between magnetic north and grid north is known as the grid–magnetic angle.<br />
Keys to Geography CD-ROM. Photocopying permitted <strong>with</strong>in purchasing institution.<br />
Copyright © Australian Geography Teachers’ Association 2004. Published by Macmillan Education Australia.
<strong>Chapter</strong> 2: <strong>Working</strong> <strong>with</strong> <strong>topographic</strong> <strong>maps</strong><br />
CD 2.11<br />
Coffs Harbour extended questions<br />
Activity<br />
Complete the following extended questions on Coffs Harbour. (Refer to page 48 of the textbook<br />
and the link below.)<br />
9 The release of this film is likely to stimulate a massive interest in Coffs Harbour. Its<br />
population is currently around 63 000 and is growing by 1–2% per year. A significant<br />
increase in population over the next 10 years is predicted after the film’s release. Among<br />
other stresses this will place on the small city is additional sewage treatment, which is<br />
a significant environmental concern. Some of the questions you need to explore will<br />
help your understanding of the human impact on the environment of Coffs Harbour.<br />
a Outline four environmental concerns for Coffs Harbour in relation to its sewage<br />
disposal.<br />
b What is ‘reclaimed water’ Discuss how Coffs Harbour plans to manage this. Is this<br />
treatment of water widely used<br />
c Explore treatment plants in your state that use this practice.<br />
d Give three examples of how Coffs Harbour will benefit from this strategy. Use the<br />
website below and others to help answer your questions.<br />
LINK<br />
http://www.chcc.nsw.gov.au<br />
Keys to Geography CD-ROM. Photocopying permitted <strong>with</strong>in purchasing institution.<br />
Copyright © Australian Geography Teachers’ Association 2004. Published by Macmillan Education Australia.
<strong>Chapter</strong> 2: <strong>Working</strong> <strong>with</strong> <strong>topographic</strong> <strong>maps</strong><br />
CD 2.12<br />
Investigating how Coffs Harbour has changed<br />
over time<br />
LINK<br />
Activity<br />
Use the hyperlink to go to the website http://www.lpi.nsw.gov.au/airview/. Click on Coffs Harbour<br />
on the map, and it will be outlined by a square. Then click on the ‘Display Photo’ tab on the top<br />
of this map, and it will bring up an image of the area <strong>with</strong>in the square.<br />
Compare the vertical aerial photograph <strong>with</strong> the <strong>topographic</strong> map of Coffs Harbour.<br />
1 On what date was each view made<br />
2 What is the scale of each view<br />
3 List the major changes in Coffs Harbour in this period. You might like to use the<br />
following categories to structure your answer:<br />
● transport infrastructure<br />
● water features<br />
● settlement<br />
● vegetation<br />
● other.<br />
4 How has the use of a <strong>topographic</strong> map and an aerial photograph assisted you in<br />
developing an understanding of Coffs Harbour<br />
5 Predict changes that might occur in the next five years in Coffs Harbour. Share your<br />
answers <strong>with</strong> the class.<br />
6 What are the implications of your predicted changes<br />
Keys to Geography CD-ROM. Photocopying permitted <strong>with</strong>in purchasing institution.<br />
Copyright © Australian Geography Teachers’ Association 2004. Published by Macmillan Education Australia.
<strong>Chapter</strong> 2: <strong>Working</strong> <strong>with</strong> <strong>topographic</strong> <strong>maps</strong><br />
CD 2.13<br />
Continuing your walking trip at Mt Bogong<br />
Day 3<br />
11 After walking from campsite 2 (GR 247304) the group will be picked up at GR 267275.<br />
a Identify this location.<br />
b You look at the map before you go to check the gradient of the day’s walk. Describe<br />
the slope of the walk.<br />
12 The group arrives at the finish, tired and delighted. The sick member is well and has<br />
returned to greet you. Describe the length of the hike on day 3 as well as the general<br />
direction you came from.<br />
13 You are standing at the finish point waiting for the bus and admiring the view of Cairn<br />
Creek to the north. In which direction is the water flowing How do you know this<br />
Keys to Geography CD-ROM. Photocopying permitted <strong>with</strong>in purchasing institution.<br />
Copyright © Australian Geography Teachers’ Association 2004. Published by Macmillan Education Australia.


