PL-D2100 DVD Home Theater System - TEAC Europe GmbH
PL-D2100 DVD Home Theater System - TEAC Europe GmbH
PL-D2100 DVD Home Theater System - TEAC Europe GmbH

You also want an ePaper? Increase the reach of your titles
YUMPU automatically turns print PDFs into web optimized ePapers that Google loves.
Z<br />
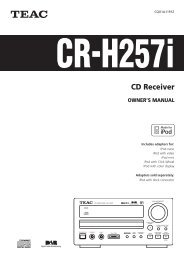
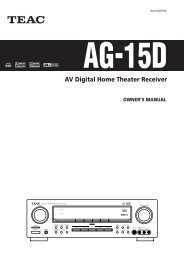
9A09877100<br />
<strong>PL</strong>-<strong>D2100</strong><br />
<strong>DVD</strong> <strong>Home</strong> <strong>Theater</strong> <strong>System</strong><br />
OWNER’S MANUAL
Contents<br />
Thank you for choosing <strong>TEAC</strong>. Read this manual carefully to get<br />
the best performance from this unit.<br />
Contents . . . . . . . . . . . . . . . . . . . . . . . . . . . . . . . . . . . . . . . . . . . . . . . . . 3<br />
Important Safety Instructions . . . . . . . . . . . . . . . . . . . . . . . . . . . . . . . 3<br />
Before Use . . . . . . . . . . . . . . . . . . . . . . . . . . . . . . . . . . . . . . . . . . . . . . . 4<br />
Discs. . . . . . . . . . . . . . . . . . . . . . . . . . . . . . . . . . . . . . . . . . . . . . . . . . . . . 5<br />
Remote Control Unit . . . . . . . . . . . . . . . . . . . . . . . . . . . . . . . . . . . . . . 7<br />
Connecting Antennas . . . . . . . . . . . . . . . . . . . . . . . . . . . . . . . . . . . . . . 7<br />
Connection . . . . . . . . . . . . . . . . . . . . . . . . . . . . . . . . . . . . . . . . . . . . . . . 8<br />
Speaker Connections . . . . . . . . . . . . . . . . . . . . . . . . . . . . . . . . . . . . . 10<br />
Positioning of the Speakers . . . . . . . . . . . . . . . . . . . . . . . . . . . . . . . . 11<br />
Names of Each Control . . . . . . . . . . . . . . . . . . . . . . . . . . . . . . . . . . . . 12<br />
Basic Operation . . . . . . . . . . . . . . . . . . . . . . . . . . . . . . . . . . . . . . . . . . 14<br />
Surround Mode. . . . . . . . . . . . . . . . . . . . . . . . . . . . . . . . . . . . . . . . . . . 16<br />
Playback . . . . . . . . . . . . . . . . . . . . . . . . . . . . . . . . . . . . . . . . . . . . . . . . 17<br />
To skip to a specific chapter/track . . . . . . . . . . . . . . . . . . . . . . . . . . 19<br />
Search for a part of a chapter/track . . . . . . . . . . . . . . . . . . . . . . . . . 19<br />
Slow-Motion Playback . . . . . . . . . . . . . . . . . . . . . . . . . . . . . . . . . . . . 19<br />
Single Stepping Playback . . . . . . . . . . . . . . . . . . . . . . . . . . . . . . . . . . 19<br />
Direct playback (except <strong>DVD</strong>/MP3) . . . . . . . . . . . . . . . . . . . . . . . . . 20<br />
Picture Zoom. . . . . . . . . . . . . . . . . . . . . . . . . . . . . . . . . . . . . . . . . . . . . 20<br />
Change the Angle . . . . . . . . . . . . . . . . . . . . . . . . . . . . . . . . . . . . . . . . 20<br />
Select a Subtitle Language. . . . . . . . . . . . . . . . . . . . . . . . . . . . . . . . . 20<br />
Select an Audio Language . . . . . . . . . . . . . . . . . . . . . . . . . . . . . . . . . 21<br />
Audio Channel Selection. . . . . . . . . . . . . . . . . . . . . . . . . . . . . . . . . . . 21<br />
Programmed Playback . . . . . . . . . . . . . . . . . . . . . . . . . . . . . . . . . . . . 21<br />
Title and Chapter Select . . . . . . . . . . . . . . . . . . . . . . . . . . . . . . . . . . . 22<br />
Time Select . . . . . . . . . . . . . . . . . . . . . . . . . . . . . . . . . . . . . . . . . . . . . . 23<br />
Repeat Playback. . . . . . . . . . . . . . . . . . . . . . . . . . . . . . . . . . . . . . . . . . 24<br />
A-B Repeat . . . . . . . . . . . . . . . . . . . . . . . . . . . . . . . . . . . . . . . . . . . . . . 25<br />
Display . . . . . . . . . . . . . . . . . . . . . . . . . . . . . . . . . . . . . . . . . . . . . . . . . . 25<br />
Settings . . . . . . . . . . . . . . . . . . . . . . . . . . . . . . . . . . . . . . . . . . . . . . . . . 26<br />
TV Display . . . . . . . . . . . . . . . . . . . . . . . . . . . . . . . . . . . . . . . . . . . . 27<br />
TV Type . . . . . . . . . . . . . . . . . . . . . . . . . . . . . . . . . . . . . . . . . . . . . . 27<br />
Video Output. . . . . . . . . . . . . . . . . . . . . . . . . . . . . . . . . . . . . . . . . . 27<br />
Angle Mark . . . . . . . . . . . . . . . . . . . . . . . . . . . . . . . . . . . . . . . . . . . 27<br />
Selecting the Language for OSD. . . . . . . . . . . . . . . . . . . . . . . . . 28<br />
Screen Saver . . . . . . . . . . . . . . . . . . . . . . . . . . . . . . . . . . . . . . . . . 28<br />
Delay Time (Center/Rear). . . . . . . . . . . . . . . . . . . . . . . . . . . . . . . 28<br />
Test Tone . . . . . . . . . . . . . . . . . . . . . . . . . . . . . . . . . . . . . . . . . . . . 28<br />
Audio Out . . . . . . . . . . . . . . . . . . . . . . . . . . . . . . . . . . . . . . . . . . . . 29<br />
Dynamic Range Compression . . . . . . . . . . . . . . . . . . . . . . . . . . . 29<br />
Setting the Language . . . . . . . . . . . . . . . . . . . . . . . . . . . . . . . . . . 29<br />
Defaults . . . . . . . . . . . . . . . . . . . . . . . . . . . . . . . . . . . . . . . . . . . . . . 29<br />
Parental Control . . . . . . . . . . . . . . . . . . . . . . . . . . . . . . . . . . . . . . . . . . 30<br />
Tuner . . . . . . . . . . . . . . . . . . . . . . . . . . . . . . . . . . . . . . . . . . . . . . . . . . . 31<br />
Preset Tuning . . . . . . . . . . . . . . . . . . . . . . . . . . . . . . . . . . . . . . . . . . . . 32<br />
Troubleshooting . . . . . . . . . . . . . . . . . . . . . . . . . . . . . . . . . . . . . . . . . . 33<br />
Specifications . . . . . . . . . . . . . . . . . . . . . . . . . . . . . . . . . . . . . . . . . . . . 34<br />
Important Safety Instructions<br />
IMPORTANT(for U.K.Customers)<br />
DO NOT cut off the mains plug from this equipment. If the plug<br />
fitted is not suitable for the power points in your home or the<br />
cable is too short to reach a power point, then obtain an<br />
appropriate safety approved extension lead or consult your<br />
dealer.<br />
If nonetheless the mains plug is cut off, remove the fuse and<br />
dispose of the plug immediately, to avoid a possible shock<br />
hazard by inadvertent connection to the mains supply.<br />
If this product is not provided with a mains plug, or one has to be<br />
fitted, then follow the instructions given below:<br />
IMPORTANT. DO NOT make any connection to the larger<br />
terminal which is marked with the letter E or by the safety earth<br />
symbol | or coloured GREEN or GREEN-and-YELLOW.<br />
The wires in the mains lead on this product are coloured in<br />
accordance with the following code:<br />
BLUE : NEUTRAL<br />
BROWN : LIVE<br />
As these colours may not correspond with the coloured<br />
markings identifying the terminals in your plug proceed as<br />
follows:<br />
The wire which is coloured BLUE must be connected to the<br />
terminal which is marked with the letter N or coloured BLACK.<br />
The wire which is coloured BROWN must be connected to the<br />
terminal which is marked with the letter L or coloured RED.<br />
When replacing the fuse only a correctly rated approved type<br />
should be used and be sure to re-fit the fuse cover.<br />
IF IN DOUBT — CONSULT A COMPETENT ELECTRICIAN.<br />
VARING: APPARATEN INNEHÅLLER LASER KOMPONENT MED<br />
STRÅLNING ÖVERSTIGANDE KLASS 1.<br />
"ADVARSEL: USYNLIG LASERSTRÅLING VED ÅBNING NAR<br />
SIKKERHEDSAFBRYDERE ER UDE AF FUNKTION. UNDGÅ<br />
UDSAETTELSE FOR STRÅLING"<br />
"VAROITUS! SUOJAKOTELOA EI SAA AVATA. LAITE SISÄLTÄÄ<br />
LASERDIODIN. JOKA LÄHETTÄ (NÄKYMÄTÖNTÄ) SILMILLE<br />
VAARALLISTA LASERSÄTEILYÄ".<br />
ADVARSEL: USYNLIG LASERBESTRÅLING NÅR DENNE DELEN ER<br />
ÅPEN OG SIKKERHETSSPERREN ER UTKOBLET UNNGÅ<br />
UTSETTELSE FOR STRÅLING.<br />
Obs! nätströmställaren skiljer ej hela apparaten fran nätet.<br />
3
What's in the box<br />
Please confirm that the following accessories are in the box<br />
when you open it.<br />
4<br />
Front speaker x2<br />
Center speaker x1<br />
Surround speaker x2<br />
Subwoofer x1<br />
Front/Center speaker cable (5 m x 3)<br />
Surround speaker cable (10 m x 2)<br />
Subwoofer RCA pin cord (5 m)<br />
AM loop antenna x 1<br />
FM antenna x 1<br />
RCA video cable x 1<br />
Remote control unit x 1<br />
Batteries (AA, R6, SUM-3) x 2<br />
Conventions about This Manual<br />
< Instructions in this manual describe the controls on the remote<br />
control. You can also use the buttons on the front panel if they<br />
have the same or similar names as those on the remote.<br />
< The types of functions and operations that can be used for a<br />
particular disc vary depending on the features of that disc. In<br />
some cases, these functions and operations may differ from<br />
the descriptions given in this Owner's Manual. In this event,<br />
follow the instructions given on the screen. This Owner's<br />
Manual only covers basic disc operations.<br />
< For some operations, the PROHIBIT icon " " may appear on<br />
the screen. This indicates that the operation described in this<br />
Operations Manual is not permitted for the current disc.<br />
< The drawings about the TV screen and front panel display<br />
used in this Operations Manual are purely for the purposes of<br />
explanation. The actual displays may differ slightly from what<br />
are shown here.<br />
Read this before operation<br />
< As the unit may become warm during operation, always leave<br />
sufficient space around the unit for ventilation.<br />
< The voltage supplied to the unit should match the voltage as<br />
printed on the rear panel. If you are in any doubt regarding this<br />
matter, consult an electrician.<br />
< Choose the installation location of your unit carefully. Avoid<br />
placing it in direct sunlight or close to a source of heat. Also<br />
avoid locations subject to vibrations and excessive dust, heat,<br />
cold or moisture.<br />
< Do not place the unit on the amplifier/receiver.<br />
< Do not open the cabinet as this might result in damage to the<br />
circuitry or electrical shock. If a foreign object should get into<br />
the unit, contact your dealer or service company.<br />
< When removing the power plug from the wall outlet, always<br />
pull directly on the plug, never yank the cord.<br />
< To keep the laser pickup clean, do not touch it, and always<br />
close the disc tray.<br />
< Do not attempt to clean the unit with chemical solvents as this<br />
might damage the finish. Use a clean, dry cloth.<br />
< Keep this manual in a safe place for future reference.<br />
Before Use<br />
DO NOT MOVE THE UNIT DURING <strong>PL</strong>AYBACK<br />
During playback, the disc rotates at high speed. Do NOT lift or<br />
move the unit during playback. Doing so may damage the disc<br />
or the unit.<br />
WHEN MOVING THIS UNIT<br />
When changing places of installation or packing the unit for<br />
moving, be sure to remove the disc and return the disc tray to<br />
its closed position in the player. Then, press the power switch<br />
to turn the power off, and disconnect the power cord. Moving<br />
this unit with the disc loaded may result in damage to this unit.<br />
Memory Backup<br />
Settings (such as preset stations, speaker configuration, <strong>DVD</strong><br />
settings) are stored almost permanently, even when power is<br />
turned off and the unit is unplugged.<br />
CAUTION<br />
The product shall not be exposed to dripping or splashing and<br />
that no object filled with liquids, such as vases, shall be placed<br />
on the product.<br />
Do not install this equipment in a confined space such as a<br />
book case or similar unit.<br />
“DTS” and “DTS Digital Surround” are trademarks of Digital <strong>Theater</strong><br />
<strong>System</strong>s, Inc. ©1996 Digital <strong>Theater</strong> <strong>System</strong>s, Inc. All rights reserved.<br />
Manufactured under license from Dolby Laboratories. “Dolby”, “Pro Logic”<br />
and the double-D symbol are trademarks of Dolby Laboratories.<br />
This product incorporates copyright protection technology that is protected<br />
by method claims of certain U.S. patents and other intellectual property<br />
rights owned by Macrovision Corporation and other rights owners. Use of<br />
this copyright protection technology must be authorized by Macrovision<br />
Corporation, and is intended for home and other limited viewing uses only,<br />
unless otherwise authorized by Macrovision Corporation. Reverse<br />
engineering or disassembly is prohibited.<br />
Kodak is a trademark of Eastman Kodak Company.
Type of Discs That Can be Played on This<br />
<strong>System</strong><br />
This player can playback discs bearing any of the following logos:<br />
<strong>DVD</strong> Video:<br />
• Single-sided or double-sided discs<br />
• Single layer or dual layer discs<br />
• Dolby Digital, DTS, MPEG or Linear PCM digital<br />
audio<br />
• MPEG-2 digital video<br />
• This unit can play <strong>DVD</strong>-R/<strong>DVD</strong>-RW/<strong>DVD</strong>+R/<br />
<strong>DVD</strong>+RW discs recorded in <strong>DVD</strong> video format.<br />
Discs are generally divided into one or more titles.<br />
Titles may be further subdivided into chapters.<br />
Audio CD:<br />
• 12cm or 8cm discs<br />
• Linear PCM digital audio<br />
Audio CDs are divided into tracks.<br />
Video CD:<br />
• 12cm or 8cm discs<br />
• MPEG-1 digital audio<br />
• MPEG-1 digital video<br />
Video CDs are divided into tracks.<br />
SVCD:<br />
• 12cm or 8cm discs<br />
• MPEG-1 Audio Layer2<br />
• MPEG-2 digital video<br />
Region Number of <strong>DVD</strong> Video discs:<br />
<strong>DVD</strong> players and discs are designed with region numbers that<br />
dictate the regions in which a disc can be played. If the region<br />
number on the disc you want to play does not match the region<br />
number of your <strong>DVD</strong> player, you will not be able to play the disc.<br />
In that case, an error message will appear on the screen.<br />
The region number is printed on the rear panel of this unit.<br />
About CD-R/CD-RW<br />
<strong>Europe</strong> model Australia model<br />
CD-R/RW discs recorded in Audio CD format and finalized<br />
correctly are playable. But depending on the quality of the disc<br />
and/or the condition of the recording, some CD-R & CD-RW discs<br />
may not be playable.<br />
MP3/JPEG compatibility<br />
This player is compatible with CD-R, CD-RW and CD-ROM (Kodak<br />
picture CD, etc.) discs that contain MP3 audio tracks or JPEG<br />
files.<br />
< File names of MP3/JPEG should be alphanumeric characters.<br />
This unit cannot display symbols and full-size or 2 bytes-wide<br />
characters (such as Japanese, Chinese, etc.) correctly. Also,<br />
be sure to use the file extension ".mp3", ".jpg" or ".jpeg".<br />
Discs 1<br />
< Only the first 8 characters of folder and track names<br />
(excluding the ".mp3", ".jpg" or ".jpeg" extension) are displayed.<br />
< Use CD-R or CD-RW media for recording your MP3 or JPEG<br />
files. The disc must be finalized in order to play.<br />
< The CD-ROM must be ISO 9660 compatible.<br />
< This player is not compatible with multi-session discs.<br />
< When more than 200 files or folders are recorded on the disc,<br />
the unit might not be able to play it correctly.<br />
< It may take time to display a progressive JPEG picture.<br />
< Depending on the file size and compression rate, some JPEG<br />
pictures cannot be displayed correctly.<br />
< Mono or stereo MPEG-1 Audio Layer 3 format, 44.1 or 48kHz,<br />
fixed bit-rate.<br />
< Not compatible with variable bit-rate (VBR) files.<br />
< Audio encoded at 128Kbps should sound close to regular audio<br />
CD quality. Although this player will play lower bit-rate MP3<br />
tracks, the sound quality becomes noticeably worse at lower<br />
bit-rates.<br />
Caution:<br />
< If you record a disc using a personal computer or a <strong>DVD</strong><br />
recorder, even if it is recorded in a compatible format, there<br />
are cases in which it may not play because of the settings of<br />
the application software used to create the disc. (Check with<br />
the software publisher for more detailed information.)<br />
< Unfinalized <strong>DVD</strong>-R/RW discs cannot be played.<br />
Following discs cannot be played with this<br />
unit:<br />
• CD-G, Data part of CD-EXTRA, PHOTO CD, CD-ROM, SACD, <strong>DVD</strong>-<br />
Audio, <strong>DVD</strong>-RAM and <strong>DVD</strong>-ROM discs<br />
• discs recorded in a color system other than PAL or NTSC<br />
• illegally produced discs<br />
• scratched discs<br />
• discs that are dusty, soiled or marked with fingerprints<br />
Warning:<br />
If you attempt to play back such discs, there is a risk that sudden<br />
loud noise can blast over the speakers at full volume and cause<br />
damage to the speakers and your hearing.<br />
Copy-protected discs and other discs which do not conform to<br />
the CD standard may not play back correctly in this player. If you<br />
use such discs in this unit, <strong>TEAC</strong> Corporation and its subsidiaries<br />
cannot be responsible for any consequences or guarantee the<br />
quality of reproduction. If you experience problems with such<br />
non-standard discs, you should contact the producers of the disc.<br />
5
Example of Icons used on <strong>DVD</strong> discs:<br />
6<br />
number of audio tracks recorded<br />
on the disc<br />
number of subtitles recorded on<br />
the disc<br />
screen aspect ratio<br />
disc recorded with multiple<br />
camera angles<br />
region code<br />
Glossary of Disc Terms<br />
Title (<strong>DVD</strong>)<br />
The longest sections of a picture or a music piece on a <strong>DVD</strong>; a<br />
movie, et cetera, for a picture piece on a video software; or an<br />
album, etc., for a music piece on an audio disc. Each title is<br />
assigned a title number enabling you to locate the title you<br />
want. On most <strong>DVD</strong> movies, there will be only one title.<br />
Chapter (<strong>DVD</strong>)<br />
Sections of a picture or a music piece that are smaller than<br />
titles. A title is composed of several chapters. Each chapter is<br />
assigned a chapter number enabling you to locate the chapter<br />
you want. Depending on the disc, there may be only one<br />
chapter per title recorded.<br />
Track (Video or Audio CD)<br />
Sections of a picture or a music piece on a VIDEO or an audio<br />
CD. Each track is assigned a track number enabling you to<br />
locate the track you want. On most audio CD's, one track is<br />
equal to one song.<br />
<strong>DVD</strong><br />
VCD<br />
CD<br />
Title 1<br />
Title 2<br />
Chapter 1 Chapter 2 Chapter 1 Chapter 2<br />
Track 1 Track 2 Track 3 Track 4<br />
Track 1 Track 2 Track 3 Track 4<br />
Discs 2<br />
< Always place the disc on the disc tray with the label side<br />
uppermost. (Compact discs can be played or recorded only on<br />
one side.)<br />
< To remove a disc from its storage case, press down on the<br />
center of the case and lift the disc out, holding it carefully by<br />
the edges.<br />
How to remove the disc How to hold the disc<br />
< Should the disc become dirty, wipe the surface radially (from<br />
the center hole outward towards the outer edge) with a soft,<br />
dry cloth:<br />
< Never use such chemicals as record sprays, antistatic sprays<br />
or fluid, benzine or thinner to clean the discs. Such chemicals<br />
will do irreparable damage to the disc's plastic surface.<br />
< Discs should be returned to their cases after use to avoid dust<br />
and scratches that could cause the laser pickup to "skip."<br />
< Do not expose discs to direct sunlight or high humidity and<br />
temperature for extended periods. Long exposure to high<br />
temperatures will warp the disc.<br />
< Do not play any disc that is warped, deformed or damaged.<br />
Playing such discs may cause irreparable harm to the playing<br />
mechanisms.<br />
< CD-R and CD-RW discs are more sensitive to the effects of<br />
heat and ultraviolet rays than ordinary CDs. It is important that<br />
they are not stored in a location where direct sunlight will fall<br />
on them, and which is away from sources of heat such as<br />
radiators or heat-generating electrical devices.<br />
< Printable CD-R and CD-RW discs aren't recommended, as the<br />
label side might be sticky and damage the unit.<br />
< Do not stick papers or protective sheets on the discs and do<br />
not use any protective coating spray.<br />
< Use a soft oil-based felt-tipped pen to write the information on<br />
the label side. Never use a ball-point or hard-tipped pen, as<br />
this may cause damage to the recorded side.<br />
< Never use a stabilizer. Using commercially available CD<br />
stabilizers with this unit will damage the mechanisms and<br />
cause them to malfunction.<br />
< Do not use irregular shape CDs (octagonal, heart shaped,<br />
business card size, etc.). CDs of this sort can damage the unit:<br />
< If you are in any doubt as to the care and handling of a CD-<br />
R/CD-RW disc, read the precautions supplied with the disc, or<br />
contact the disc manufacturer directly.
Remote Control Unit<br />
The provided Remote Control Unit allows the unit to be operated<br />
from a distance.<br />
When operating the remote control unit, point it towards the<br />
REMOTE SENSOR on the front panel of the unit.<br />
< Even if the remote control unit is operated within the effective<br />
range, remote control operation may be impossible if there are<br />
any obstacles between the unit and the remote control.<br />
< If the remote control unit is operated near other products<br />
which generate infrared rays, or if other remote control<br />
devices using infrared rays are used near the unit, it may<br />
operate incorrectly. Conversely, the other products may<br />
operate incorrectly.<br />
Battery Installation<br />
1 Remove the battery compartment cover.<br />
2 Insert two “AA“ (R6, SUM-3) dry batteries. Make sure that the<br />
batteries are inserted with their positive “+“ and negative “_“<br />
poles positioned correctly.<br />
3 Close the cover.<br />
Battery Replacement<br />
If the distance required between the remote control unit and main<br />
unit decreases, the batteries are exhausted. In this case replace<br />
the batteries with new ones.<br />
Precautions concerning batteries<br />
< Be sure to insert the batteries with correct positive “+“ and<br />
negative “_“ polarities.<br />
< Use batteries of the same type. Never use different types of<br />
batteries together.<br />
< Rechargeable and non-rechargeable batteries can be used.<br />
Refer to the precautions on their labels.<br />
< When the remote control unit is not to be used for a long time<br />
(more than a month), remove the batteries from the remote<br />
control unit to prevent them from leaking. If they leak, wipe<br />
away the liquid inside the battery compartment and replace the<br />
batteries with new ones.<br />
< Do not heat or disassemble batteries and never dispose of old<br />
batteries by throwing them in a fire.<br />
A<br />
B<br />
B<br />
Connecting Antennas<br />
AM Indoor Loop Antenna<br />
The high-performance AM loop antenna provided with this<br />
unit is sufficient for good reception in most areas.<br />
To stand the loop antenna on a surface, fix the claw to the<br />
slot.<br />
1 2<br />
Connect the loop antenna to the AM antenna terminal.<br />
Place the antenna on a shelf, for example, or hang it on a<br />
window frame, etc., in the direction which gives the best<br />
reception, as far away as possible from the entire system,<br />
speaker cords and the power cord, to prevent unwanted<br />
noise.<br />
FM Indoor Antenna<br />
Connect the lead-type FM antenna to the FM 75Ω socket,<br />
extend the lead and fix it to a window frame or wall with<br />
thumbtacks, or the like, where reception is best.<br />
FM Outdoor Antenna<br />
In an area where FM signals are weak, it will be necessary<br />
to use an outdoor FM antenna. Generally, a 3-element<br />
antenna will be sufficient; if you live in an area where the<br />
FM signals are particularly weak, it may be necessary to use<br />
one with 5 or more elements.<br />
A<br />
7
8<br />
R LL R<br />
LINE<br />
OUT<br />
LINE<br />
IN<br />
VIDEO<br />
IN S-VIDEO<br />
IN SCART<br />
DIGITAL<br />
IN<br />
Connection<br />
CAUTION:<br />
< Switch off the power to all equipment before making connections.<br />
< Read the instructions of each component you intend to use with this unit.<br />
< Be sure to insert each plug securely. To prevent hum and noise, avoid bundling the<br />
signal interconnection cables together with the AC power cord or speaker cables.<br />
RCA cable<br />
D<br />
TV (Monitor)<br />
RCA cable<br />
B<br />
Optical digital cable<br />
S-VIDEO cable<br />
C<br />
SCART cable<br />
CD recorder, MD deck, Cassette tape deck, etc.<br />
Connect one of<br />
these cables<br />
A<br />
F<br />
E<br />
Wall socket
Connection to a TV<br />
A<br />
B<br />
Connect the unit using one of the following terminations to<br />
your TV or monitor.<br />
Connecting the RGB SCART output (AV CONNECTOR) using<br />
an RGB-ready SCART cable provides the best picture<br />
quality.<br />
S-VIDEO is your second choice. Composite video output<br />
(SCART-COMPOSITE or VIDEO OUT) would be your last<br />
choice.<br />
< For better picture quality, do not connect more than one<br />
video cable.<br />
< Please connect this unit to a TV directly. If the TV is<br />
connected through a video cassette recorder, playback of a<br />
copy protected <strong>DVD</strong> disc could result in distorted picture<br />
quality.<br />
AV Connector (SCART)<br />
If your TV or monitor is compatible with RGB SCART,<br />
connect the component with a 21-pin RGB-ready SCART<br />
cable, and select "SCART" in the SETUP menu. (see page 27)<br />
< Both audio and video signals are output from this socket.<br />
< The audio signal output from this socket is stereo.<br />
S-VIDEO or VIDEO jacks<br />
S-VIDEO connection is better than composite connection.<br />
If the component has a S-VIDEO jack, connect them with a<br />
S-VIDEO cable.<br />
S-VIDEO OUT (<strong>PL</strong>-<strong>D2100</strong>) q S-VIDEO IN (TV)<br />
If neither SCART nor S-VIDEO is available, connect the<br />
component with a high quality RCA cable designed for video<br />
applications.<br />
CAUTION:<br />
VIDEO OUT (<strong>PL</strong>-<strong>D2100</strong>) q VIDEO IN (TV)<br />
In the default setting, S-VIDEO jack is not active. If you want<br />
to use S-VIDEO OUT, follow the following steps.<br />
1. Connect the VIDEO jacks with a RCA video cable. You can<br />
use the provided yellow cable.<br />
2. Connect the S-VIDEO jacks with a S-VIDEO cable.<br />
3. Turn the unit and TV on, and select "S-VIDEO" in the SETUP<br />
menu. (See page 27)<br />
4. Turn the unit off and disconnect the RCA video cable from<br />
the VIDEO jacks.<br />
Changing the Color <strong>System</strong> (NTSC/PAL)<br />
You may need to change the color system to match your TV.<br />
When all the connection has been done, turn the <strong>DVD</strong> player<br />
and the connected TV on.<br />
If your TV is MULTI or NTSC, press the PAL/NTSC button<br />
repeatedly until "MULTI" or "NTSC" appears on the TV<br />
screen.<br />
The default setting is PAL.<br />
PAL :<br />
Select PAL when a PAL TV(<strong>Europe</strong>an standard) is<br />
connected.<br />
NTSC :<br />
Select NTSC When a NTSC TV is connected.<br />
MULTI :<br />
Select MULTI When a MULTI TV is connected.<br />
< The PAL/NTSC button is for temporary use only.<br />
Please select the correct color system in the SETUP menu<br />
(see page 27).<br />
< The PAL/NTSC button will not work when the SETUP menu is<br />
shown on the screen.<br />
Connection to other audio components<br />
C<br />
D<br />
E<br />
F<br />
DIGITAL OUT terminal<br />
If the component has a DIGITAL IN terminal, connect them<br />
with an optical cable.<br />
DIGITAL OUT (<strong>PL</strong>-<strong>D2100</strong>)<br />
q DIGITAL IN (CD-R, MD, etc.)<br />
< Select the proper digital output mode in accordance with<br />
your connection. (see page 29)<br />
< When using DIGITAL OUT terminals, remove the caps from<br />
the terminals. When you do not use them, leave the caps in<br />
place.<br />
AUDIO IN/OUT jacks<br />
Analog 2-channel audio signal is input or output from these<br />
jacks. Connect the component with an RCA pin cable.<br />
Make sure to connect :<br />
white plug q white jack (L: left channel)<br />
red plug q red jack (R: right channel)<br />
AC Power Cord<br />
When all the connections have been finished, plug the AC<br />
power cord into an AC wall socket.<br />
Cooling Fan<br />
The unit may become warm during operation.<br />
Do NOT cover the cooling fan.<br />
9
10<br />
FRONT<br />
SPEAKER<br />
SURROUND<br />
SPEAKER<br />
Speaker Connections<br />
CENTER<br />
SPEAKER<br />
SURROUND<br />
SPEAKER<br />
FRONT<br />
SPEAKER<br />
How to connect:<br />
Press the lever, insert the stripped and twisted end of the cord,<br />
then release the lever. Make sure it is fastened securely by<br />
pulling the cord lightly.<br />
LINE IN<br />
SUBWOOFER<br />
Caution:<br />
< To avoid damaging the speakers with a sudden high-level signal, be sure to switch the power<br />
off before connecting the speakers.<br />
< Do not connect the supplied speakers to other amplifier or receiver. Also, do not connect<br />
other speakers to the <strong>PL</strong>-<strong>D2100</strong>. It may damage the unit.<br />
< The speaker terminals and cables are distinguished by colors.<br />
Be sure to match the color of the cables with the color of the terminals.<br />
< The metal portions of the two separate wires should not touch or an electrical short can<br />
occur. Shorted wires can create a fire hazard or induce a failure in your equipment.
The positioning of speakers differs according to the size and acoustics of the listening room.<br />
While actually listening to a program source, try various speaker positions to determine<br />
which layout provides the best surround effect.<br />
< Ideally, position all the speakers in a circle, with the same distance from your listening<br />
position.<br />
If the speakers cannot be placed at the same distance from your listening position, adjust the<br />
delay time setting (see page 28).<br />
< Place the speakers connected to "L" to your left, and "R" to your right.<br />
< The supplied front and center speakers are magnetically shielded.<br />
A Front speakers<br />
Place the front speakers in front of the listening position, to the left and right of a TV.<br />
B Center speaker<br />
Place a center speaker between the front speakers, on or below the TV. This speaker<br />
stabilizes the sound image.<br />
C Surround Left and Right speakers<br />
Install these speakers above the level of the listener's ears, directly to the left and right (or<br />
slightly behind) of your listening position.<br />
D Subwoofer<br />
Positioning of the Speakers<br />
SURROUND<br />
(LEFT)<br />
FRONT<br />
(LEFT)<br />
B<br />
CENTER<br />
FRONT<br />
(RIGHT)<br />
A A<br />
C C<br />
SUBWOOFER<br />
SURROUND<br />
(RIGHT)<br />
When all the connections have been finished, plug the AC power cord into an AC wall socket.<br />
Because of variances in room sizes and shapes, you should experiment with subwoofer<br />
placement to maximize the bass sound at your primary listening position. Bass sound is nondirectional<br />
to the human ear so place your subwoofer anywhere that sounds best from your<br />
favorite chair.<br />
< Before use, turn on the subwoofer by pressing down the switch on the subwoofer. The<br />
indicator on the front turns blue. If no signal is detected, the indicator turns red (power<br />
standby mode).<br />
< Using the PHASE switch on the back of the subwoofer select either 0 or 180 to achieve the<br />
most seamless integration of energy with the front speakers.<br />
D<br />
11
12<br />
B<br />
A<br />
J<br />
B<br />
C<br />
D<br />
E<br />
F<br />
G<br />
H<br />
I<br />
Names of Each Control<br />
A B C D E F G H I J K<br />
L M<br />
J<br />
K<br />
K<br />
L<br />
M<br />
N<br />
O<br />
I<br />
W<br />
X<br />
Y<br />
R<br />
S<br />
F<br />
P<br />
Q<br />
E<br />
G<br />
D<br />
T<br />
U<br />
V<br />
A<br />
STANDBY indicator<br />
This indicator lights when the unit is in the standby mode.<br />
When the unit is turned on, it goes off.<br />
B POWER switch<br />
Press this switch to turn the unit on or off (standby).<br />
The equipment draws nominal non-operating power from<br />
the AC outlet with its POWER switch in the OFF position.<br />
C Disc tray<br />
D <strong>PL</strong>AY/PAUSE (y/J)<br />
In <strong>DVD</strong> mode, use this button to start or pause playback.<br />
E OPEN/CLOSE (L)<br />
Use this button to open and close the disc tray.<br />
F STOP (H)<br />
In <strong>DVD</strong> mode, use this button to stop playback.<br />
G SKIP/TUNING (.//)<br />
In <strong>DVD</strong> mode, use these buttons to skip chapters or tracks.<br />
In TUNER mode, use these buttons to tune in a station.<br />
H REMOTE SENSOR<br />
I<br />
When operating the remote control unit, point it towards the<br />
REMOTE SENSOR.<br />
SELECT<br />
Select a speaker by pressing this button repeatedly, and adjust<br />
the level using the VOLUME buttons.<br />
J FUNCTION (<strong>DVD</strong>, TUNER, AUX1, AUX2)<br />
Used to select a function.<br />
K Display<br />
When the unit is on, the current status of the unit is displayed.<br />
L VOLUME/ADJUST<br />
Press the VOLUME buttons to adjust the master volume.<br />
M PHONES<br />
For private listening, insert the headphones plug into this jack,<br />
and adjust the volume using the VOLUME buttons.
A numeric buttons<br />
R DOLBY <strong>PL</strong> II MODE<br />
Use these buttons to key in track numbers, password, preset<br />
channels, etc.<br />
B SETUP<br />
Use this button to display the SETUP menu.<br />
C RESET<br />
Use this button to reset the volume, tone control and channel<br />
level to the factory defaults.<br />
D REPEAT, A-B<br />
These buttons are used for repeat playback.<br />
E SCAN/PRESET (m/,)<br />
In <strong>DVD</strong> mode, use these buttons for scanning.<br />
In TUNER mode, use these buttons to select a preset channel.<br />
F FM MODE/STEP<br />
In <strong>DVD</strong> mode, this button is used for single stepping playback.<br />
In TUNER mode, use this button to select stereo or monaural.<br />
G MEMORY/SLOW<br />
In <strong>DVD</strong> mode, this button is used for slow-motion playback.<br />
In TUNER mode, use this button to store preset channels into<br />
memory.<br />
H MENU<br />
I<br />
Use this button to display the title menu of <strong>DVD</strong>.<br />
DIS<strong>PL</strong>AY<br />
Use this button to display the disc's information during<br />
playback.<br />
J PAL/NTSC<br />
Use this button to select PAL, NTSC or MULTI temporarily to<br />
match your TV.<br />
K MUTING<br />
Use this button to mute the sound.<br />
L MONO/STEREO<br />
Use this button to select an audio channel.<br />
M ZOOM<br />
Use this button to zoom the picture.<br />
N GO TO<br />
Use this button to activate the title, chapter or time select<br />
mode.<br />
O AUDIO<br />
Use this button to select an audio language.<br />
P SLEEP<br />
Use this button to set sleep timer.<br />
Q LISTENING<br />
Use this button to select a listening mode.<br />
Use this button to change the Dolby Pro Logic II mode.<br />
S PROGRAM<br />
Used for programmed playback.<br />
T TOP MENU/PBC<br />
Use this button to display the title menu of <strong>DVD</strong>.<br />
When a VCD(version 2.0) is loaded, use this button to turn the<br />
PBC function on or off.<br />
During PBC playback, use this button to display a menu.<br />
U ENTER, DIRECTION<br />
Use these buttons to select an item in a menu.<br />
V RETURN<br />
Use this button to return to the previously displayed menu<br />
screen.<br />
W EEPS<br />
The EEPS button offers rock, pop, jazz and classic modes to<br />
enhance your listening.<br />
X SUBTITLE<br />
Use this button to select a subtitle language.<br />
Y ANGLE<br />
During playback of <strong>DVD</strong> recorded with multiple angles, this<br />
button is used to change the angle.<br />
Front Panel Display<br />
a b c d e f g h<br />
o<br />
n<br />
m l<br />
a speaker icons<br />
b Illuminates during playback of a <strong>DVD</strong> disc recorded in DOLBY<br />
DIGITAL format.<br />
c Illuminates during pause.<br />
d title<br />
e track<br />
f chapter<br />
g Illuminates during programmed playback.<br />
h Illuminates when SLEEP TIMER is set.<br />
i Illuminates during repeat playback.<br />
j frequency<br />
k Displays current status, play time, etc.<br />
l Illuminates during playback.<br />
m type of the disc loaded<br />
n surround mode<br />
o Illuminates during playback of a <strong>DVD</strong> disc recorded in DTS<br />
format.<br />
k<br />
i<br />
j<br />
13
1 Press the POWER switch to turn the unit on.<br />
Recording a Source<br />
You can record a source such as a Compact Disc onto a CD-R or<br />
a cassette tape connected to the DIGITAL OUT terminal or the<br />
AUDIO OUT jacks.<br />
1 Select a source to be recorded by pressing the FUNCTION<br />
buttons.<br />
2 Start recording.<br />
14<br />
The power can be also turned on by pressing the FUNCTION<br />
buttons or OPEN/CLOSE button.<br />
< Turn the subwoofer on when necessary.<br />
2 Select a source by pressing one of the FUNCTION buttons (or<br />
press the FUNCTION button of the main unit repeatedly).<br />
The selected source is shown on the front panel's display.<br />
<strong>DVD</strong>/CD<br />
AUX1 IN<br />
AUX2 IN<br />
FM (frequency is displayed)<br />
AM (frequency is displayed)<br />
< Pressing theTUNER button alternates between FM and AM.<br />
3 Play the source, and gradually turn up the volume to the<br />
required level by pressing the VOLUME buttons.<br />
Basic Operation<br />
Headphones<br />
For private listening, first reduce the volume level on the<br />
receiver to minimum. Then insert the plug from your<br />
headphones into the PHONES jack, and adjust the volume by<br />
pressing the VOLUME buttons. The sound from speakers will<br />
be cut off while the headphones are plugged in.<br />
< When the headphones plug is inserted, the Surround mode is<br />
changed to STEREO automatically.<br />
< When you plug in or unplug the headphones, the sound and<br />
video stop momentarily. Do not plug in or unplug the<br />
headphones during recording.<br />
Tone Control<br />
1. Press the SELECT button.<br />
Each time the SELECT button is pressed, the mode is changed<br />
as follows :<br />
TRE BAS FL CNT<br />
SUB<br />
SR FR<br />
To adjust the level of high frequency sound range, select "TRE<br />
(treble)".<br />
To adjust the level of low frequency sound range, select "BAS<br />
(bass)".<br />
2. Press the VOLUME buttons to change the setting.<br />
SL<br />
The level can be adjusted in 2 dB steps from -10 dB to +10 dB.
Channel Level<br />
1 Press the SELECT button.<br />
Each time the SELECT button is pressed, the channel is<br />
changed as follows:<br />
FL: Front Left speaker<br />
CNT: Center speaker<br />
FR: Front Right speaker<br />
SR: Surround Right speaker<br />
SL: Surround Left speaker<br />
SUB: subwoofer<br />
< When the listening mode is set to LT/RT, STEREO or VSS, the<br />
center and surround speakers (CNT, SR, SL) will not appear on<br />
the display (see page 16).<br />
2 Within 3 seconds, press the VOLUME buttons to change the<br />
level.<br />
< The level of speakers can be adjusted in 1 dB steps from -15<br />
dB to +10 dB. The default setting is 0 dB.<br />
Repeat step 1 and 2 to change other settings.<br />
When all the configurations have been finished, leave the unit<br />
idle for 3 seconds to exit the Channel Select mode.<br />
Reset button<br />
TRE BAS FL CNT<br />
SUB<br />
SL<br />
SR FR<br />
If you press the RESET button, the following settings will be<br />
reset to the factory defaults:<br />
Volume, Tone Control, Channel level of speakers<br />
EEPS (Electronic Equalizer Preset <strong>System</strong>)<br />
The EEPS button offers rock, pop, jazz and classic modes to<br />
enhance your listening.<br />
Each time the EEPS button is pressed, the mode is changed as<br />
follows:<br />
Muting<br />
To mute the sound temporarily, press the MUTING button.<br />
Press the MUTING button again to restore the sound. If you<br />
change the volume during the muting, the muting will be<br />
cancelled.<br />
Sleep Timer<br />
CLASSIC (flat)<br />
ROCK POP JAZZ<br />
The power can be switched off after a specified amount of<br />
time.<br />
Press the SLEEP button repeatedly until desired time appears<br />
on the display.<br />
The sleep time can be changed by 10 minutes' step.<br />
120 MIN (110, 100...or 10)<br />
The SLEEP indicator lights, and the power will be switched off<br />
120 (110, 100...or 10) minutes later.<br />
OFF<br />
Sleep timer is off.<br />
< If you want to check the remaining time, press the SLEEP<br />
button once. The remaining time will be displayed for 3<br />
seconds, and return to the normal display.<br />
15
DTS<br />
16<br />
During playback of a <strong>DVD</strong> disc recorded in DTS format, the<br />
surround mode is set to DTS automatically.<br />
DTS Digital Surround delivers up to 5.1 channels with lower<br />
audio compression than Dolby Digital. It provides the clarity<br />
and dynamics of the original master soundtrack.<br />
Dolby Digital<br />
During playback of a <strong>DVD</strong> disc recorded in DOLBY DIGITAL<br />
format, the surround mode is set to DOLBY DIGITAL<br />
automatically.<br />
Dolby Digital delivers up to 5 totally discrete, full frequency<br />
audio channels (front left and right, center, and surround left<br />
and right), plus 0.1 channel called LFE (Low-Frequency<br />
Effects). LFE delivers a separate non-directional bass signal to<br />
the sub-woofer for more dynamic deep bass sound effects.<br />
Surround Mode<br />
Listening Mode Dolby Pro Logic II<br />
Each time the LISTENING button is pressed, the mode is<br />
changed as follows:<br />
Normal mode:<br />
Select this to enjoy surround sound. The sound is output from 5<br />
speakers and the subwoofer.<br />
Dolby Pro Logic II, Dolby Digital or DTS indicator lights on the<br />
front panel display.<br />
LT/RT:<br />
This mode is useful when recording multi-channel sound on a<br />
cassette tape deck or CD recorder connected via the AUDIO<br />
OUT jacks. With a Dolby Pro Logic decoder (including <strong>TEAC</strong><br />
<strong>PL</strong>-<strong>D2100</strong>), the recorded sound can be decoded into multichannel<br />
sound.<br />
STEREO:<br />
Sound is output from front speakers and the subwoofer.<br />
VSS:<br />
This mode employs sophisticated digital processing to create<br />
the illusion of "phantom" speakers. This mode allows you to<br />
experience surround sound effects from Dolby Digital, Dolby<br />
Surround or 2-channel (recorded in digital PCM or analog<br />
stereo) sources, through just a single pair of front speakers.<br />
< If you select STEREO or LT/RT during playback of <strong>DVD</strong><br />
recorded with DTS or DOLBY DIGITAL, the multi-channel<br />
sound is downmixed to 2 channel.<br />
< The LISTENING button doesn't work when the function is set<br />
to "<strong>DVD</strong>" and no disc is set.<br />
Dolby Pro Logic II is an advanced matrix decoder that gives<br />
you 5.1-channel surround sound (front left, center, front right,<br />
surround left and surround right) from any stereo program<br />
material, as well as Dolby Surround encoded material.<br />
Compared with Pro Logic's monaural, limited-bandwidth<br />
surround channel, Pro Logic II can provide two full-range<br />
surround channels.<br />
< DOLBY PRO LOGIC II will not work on monaural source.<br />
Each time the U <strong>PL</strong> II MODE button is pressed, the mode is<br />
changed as follows:<br />
MUSIC:<br />
The Music mode creates a rich and enveloping surround<br />
ambience from stereo sources such as music CDs.<br />
MOVIE:<br />
This mode is optimized for movies or Dolby Surround encoded<br />
materials. This mode is also appropriate for use with video<br />
games.<br />
MATRIX:<br />
You might try this mode when you cannot get pleasing<br />
surround effect in other modes.<br />
PRO LOGIC:<br />
Dolby Pro Logic is a matrix decoder that decodes the four<br />
channels of surround sound (front left, center, front right and<br />
surround) that have been encoded onto the stereo<br />
soundtracks of Dolby Surround encoded material such as VHS<br />
movies. The surround channel is monaural, but is played<br />
through two surround speakers.<br />
VIRTUAL:<br />
Select this only when a virtualizer is connected.<br />
< The U <strong>PL</strong> II MODE button doesn't work when the listening<br />
mode is set to LT/RT, STEREO or VSS.<br />
< The U <strong>PL</strong> II MODE button doesn't work during playback of a<br />
<strong>DVD</strong> disc recorded in DTS or DOLBY DIGITAL 5.1 format.
<strong>DVD</strong> VCD CD MP3 JPEG<br />
< Turn the TV on and set its input to the correct position for <strong>DVD</strong><br />
viewing (VIDEO etc.).<br />
1 Press the POWER switch to turn the unit on.<br />
2 Press the <strong>DVD</strong> button (or the FUNCTION button) to select<br />
"<strong>DVD</strong>".<br />
< When a disc is loaded, playback will start automatically.<br />
3 Press the OPEN/CLOSE button (L).<br />
4 Place a disc on the tray with the printed label face up.<br />
Never place more than one disc on the tray.<br />
4 Press the OPEN/CLOSE button (L) to close the tray.<br />
Playback will start automatically.<br />
Playback 1<br />
<strong>DVD</strong><br />
When a <strong>DVD</strong> is loaded, the playback may start automatically.<br />
If a title menu appears on the screen, select an item by<br />
pressing the 5/b/g / t buttons and then press the ENTER<br />
button.<br />
< Depending on the disc, you can use the numeric buttons to<br />
select an item.<br />
< "Title menu" may simply be called "menu" or "title" in the<br />
instructions supplied with the disc.<br />
< If you press the MENU, the TOP MENU or the RETURN button<br />
during playback, title menu will appear on the screen. (In some<br />
cases, the playback might restart from the beginning of the<br />
disc automatically.)<br />
Video CDs with PBC<br />
When a Video CD (Version 2.0) with Playback Control<br />
functions(PBC) is loaded, a menu will appear on the screen.<br />
Select an item by pressing the numeric buttons to start<br />
playback.<br />
< Press the / button to advance to the next page. Press the<br />
.button to return to the previous page.<br />
< If you press the RETURN button during playback, the menu<br />
will appear on the screen.<br />
< Following buttons does not work during PBC playback.<br />
REPEAT, PROGRAM<br />
< Press the PBC button to turn the PBC function on or off.<br />
If you press the PBC button during playback, playback will<br />
stop.<br />
When the PBC function is off:<br />
If you press the <strong>PL</strong>AY/PAUSE button (y/J) in the stop mode,<br />
playback will start from the first track.<br />
When the PBC function is on:<br />
If you press the <strong>PL</strong>AY/PAUSE button (y/J) in the stop mode,<br />
a menu will appear on the screen.<br />
Select an item by pressing the numeric buttons to start<br />
playback.<br />
< If you press the numeric buttons in the stop mode, the PBC<br />
function will be turned off, and the playback will start from the<br />
selected track.<br />
MP3<br />
When an MP3 disc is loaded, the recorded directories will be<br />
shown on the screen (MP3 MENU).<br />
Select a directory by pressing the 5/b buttons and press the<br />
ENTER button.<br />
A list of track numbers and titles(file names) will be shown on<br />
the right side of the screen. Select a track and press the<br />
ENTER button or the <strong>PL</strong>AY/PAUSE button. Playback will start<br />
from the selected track.<br />
< 5/b/g / t buttons don't work during playback.<br />
< Press the PBC button to turn on or off the MP3 MENU.<br />
< Depending on the disc, invisible directories such as "TRASH"<br />
might be shown on the screen.<br />
Please disregard directories which do not contain MP3 files.<br />
17
<strong>DVD</strong> VCD CD MP3 JPEG<br />
JPEG<br />
When a disc containing JPEG files is loaded, slide show will<br />
start.<br />
< Press the PBC button (in the stop mode) to turn on or off the<br />
MP3 MENU.<br />
< Press the g / t buttons to rotate the picture.<br />
< Press the 5/b buttons to mirror the picture.<br />
A<br />
B<br />
C<br />
18<br />
To start playback<br />
In the stop mode, press the <strong>PL</strong>AY/PAUSE button (y/J).<br />
To suspend playback temporarily<br />
(pause mode)<br />
Press the <strong>PL</strong>AY/PAUSE button (y/J) during playback.<br />
The video will stop on a single frame on <strong>DVD</strong>, VCD and JPEG<br />
discs, and music will interrupt on MP3 and CD discs.<br />
To resume playback, press the <strong>PL</strong>AY/PAUSE button (y/J).<br />
Play will continue from where you paused the playback.<br />
To open the disc tray<br />
Press the OPEN/CLOSE button (L) to open and close the<br />
disc tray.<br />
< When the function isn't set to "<strong>DVD</strong>", this button doesn't<br />
work.<br />
Playback 2<br />
D<br />
E<br />
To stop playback of CD, VCD, MP3 and<br />
JPEG<br />
Press the STOP button (H).<br />
To stop and resume playback of <strong>DVD</strong><br />
If you press the STOP button (H) during playback of <strong>DVD</strong>,<br />
"PRESS <strong>PL</strong>AY TO CONTINUE" briefly appears on the screen,<br />
and the unit enters RESUME mode.<br />
If you want to cancel the RESUME mode and stop playback<br />
completely, press the STOP button (H) again.<br />
How to resume playback<br />
During playback of <strong>DVD</strong>, press the STOP button (H) at the<br />
point where you want to interrupt playback.<br />
"PRESS <strong>PL</strong>AY TO CONTINUE" briefly appears on the screen,<br />
and the time counter of the front panel display stops.<br />
Press the <strong>PL</strong>AY/PAUSE button (y/J) to start playback from<br />
the interrupted point.<br />
< This function may not work with some discs.<br />
< If one of the following buttons is pressed, resume function<br />
will be cancelled:<br />
STOP in the stop mode, OPEN/CLOSE, POWER<br />
FUNCTION (AUX1, AUX2, TUNER)
<strong>DVD</strong> VCD CD MP3<br />
To skip to a specific chapter/track<br />
During playback, press the SKIP button(. or/ )<br />
repeatedly until the desired chapter or track is found. The<br />
selected chapter/track will be played from the beginning.<br />
When the . button is pressed during playback, the chapter<br />
(or track) being played will be played from the beginning. To<br />
return to the beginning of the previous chapter (or track),<br />
press the . button twice.<br />
< During PBC playback of VCD, you cannot return to the previous<br />
track.<br />
<strong>DVD</strong> VCD CD<br />
Search for a part of a chapter/track<br />
During playback, press the SCAN button (mor,) of the<br />
remote control unit. Press the <strong>PL</strong>AY button when the part you<br />
want to listen to is found.<br />
Each time the SCAN button is pressed, the scan speed is<br />
incremented.<br />
: FF 1XqFF 2XqFF 3XqFF 4Xq(normal play)<br />
: FR 1XqFR 2XqFR 3XqFR 4Xq(normal play)<br />
< The sound is muted during playback of <strong>DVD</strong>/VCD. The sound<br />
skips during playback of CD.<br />
< When the search speed of a <strong>DVD</strong> is 2X or faster, subtitles will<br />
not appear on the screen.<br />
< This function may not work with some discs.<br />
<strong>DVD</strong> VCD<br />
Slow-Motion Playback<br />
To play a disc in slow-motion, press the SLOW button ( ) during<br />
playback.<br />
Each time the SLOW button ( ) is pressed, the speed is changed.<br />
<strong>DVD</strong>: SF 2XqSF 4XqSF 8XqSR 2X<br />
qSR 4XqSR 8Xq(normal play)<br />
VCD: SF 2XqSF 4XqSF 8Xq(normal play)<br />
(SF : slow forward playback, SR : slow reverse playback)<br />
To resume normal playback, press the <strong>PL</strong>AY button (y).<br />
< The sound is muted during slow-motion playback.<br />
< This function is not available for CD and MP3.<br />
<strong>DVD</strong> VCD<br />
Single Stepping Playback<br />
To play a disc frame by frame, press the STEP button ( ) during<br />
playback. The <strong>DVD</strong> will “freeze” on a single video frame. Each<br />
time the STEP button ( ) is pressed, the picture advances by<br />
one frame.<br />
To resume normal playback, press the <strong>PL</strong>AY button (y).<br />
< This function is not available for CD and MP3.<br />
19
VCD CD MP3<br />
20<br />
Direct playback (except <strong>DVD</strong>)<br />
Select a track by pressing the numeric buttons. Playback starts<br />
from the selected track.<br />
example : To select track No.5<br />
example : To select track No.15<br />
Press "+10", and press "5" within 8 seconds.<br />
< This function doesn't work when MP3 MENU is on. Press the<br />
PBC button to turn the menu off.<br />
<strong>DVD</strong> VCD<br />
Picture Zoom<br />
To zoom the picture, press the ZOOM button during playback.<br />
Each time the ZOOM button is pressed, the magnification level<br />
changes.<br />
< You can shift the zoom point by pressing the 5/b/g / t<br />
buttons during zoom playback.<br />
< Zooming does not work on subtitles or menu screens.<br />
<strong>DVD</strong><br />
Change the Angle<br />
When a scene recorded with multiple angles is played, the angle<br />
icon appears on the screen. Each time you press the ANGLE<br />
button while the angle icon is displayed, the camera angle<br />
changes.<br />
< When no other angle is recorded, the PROHIBIT icon " " will<br />
be displayed.<br />
< You can change the setting so that the angle icon isn't<br />
displayed even when a scene recorded with multiple angles is<br />
played. See 27 page for details.<br />
< The maximum number of angles stipulated by the<br />
manufacturer is 9.<br />
<strong>DVD</strong><br />
Select a Subtitle Language<br />
To select a subtitle language, press the SUBTITLE button during<br />
playback.<br />
Each time you press the SUBTITLE button, the subtitle languages<br />
included on the disc appear on the display.<br />
< It may take a few seconds till a selected subtitle appears on<br />
the screen.<br />
< When no subtitles are recorded on the disc, "SUBTITLE OFF"<br />
will be displayed.<br />
< In some cases, a subtitle cannot be turned off even if you<br />
select "OFF". Movies recorded in a foreign language for the<br />
region being played often have “permanent” subtitles.<br />
< Some discs allow you to change subtitles only via the disc<br />
menu. In that case, press the MENU, TOP MENU or RETURN<br />
button and change the settings.<br />
< The maximum number of subtitle languages stipulated by the<br />
manufacturer is 32.
<strong>DVD</strong><br />
Select an Audio Language<br />
To select an audio language, press the AUDIO button during<br />
playback.<br />
Each time you press the AUDIO button, a language and its sound<br />
recording system included on the disc appears on the screen.<br />
the total number of the<br />
audio included on the disc<br />
sound recording system<br />
language<br />
< When no other audio is recorded on the disc, PROHIBIT icon<br />
will be displayed.<br />
< Some discs allow you to change audio language only via the<br />
disc menu. In that case, press the MENU button and change<br />
the settings.<br />
VCD CD<br />
Audio Channel Selection<br />
When playing Karaoke discs, you can enjoy with or without vocal.<br />
While you are playing a Karaoke disc with different channels<br />
recorded, press the MONO/STEREO button.<br />
Each time the MONO/STEREO button is pressed, the audio<br />
channel is changed.<br />
Example:<br />
AUDIO 1/2 : DTS 5.1 ENGLISH<br />
MONO LEFT MONO RIGHT<br />
STEREO<br />
VCD CD<br />
Programmed Playback<br />
Up to 99 tracks can be programmed in the desired order.<br />
Note that the total time of the programmed tracks cannot exceed<br />
"1 hour 39 minutes 59 seconds".<br />
1 Press the PROGRAM button in the stop mode.<br />
2 Press the numeric button to select a track.<br />
program number<br />
PROGRAM P01:04<br />
selected track number<br />
The track is programmed.<br />
Repeat step 2 to program more tracks.<br />
< If you press any other buttons than the numeric buttons or the<br />
<strong>PL</strong>AY/PAUSE button, the program mode will be cancelled.<br />
3 When the selection of track numbers has been finished, press<br />
the <strong>PL</strong>AY/PAUSE button to start programmed playback.<br />
< If you press the REPEAT button and select "REPEAT ALL", the<br />
programmed tracks will be played repeatedly.<br />
< During programmed playback, the numeric buttons don't work.<br />
< If one of the following buttons is pressed, program mode will<br />
be cancelled :<br />
OPEN/CLOSE, POWER, FUNCTION<br />
PROGRAM in the stop mode<br />
21
<strong>DVD</strong><br />
1 Press the GO TO button.<br />
2 To highlight a title number, press the g button.<br />
3 Press the numeric button to select a title.<br />
22<br />
current title number current chapter number<br />
TITLE 01/58 CHAPTER 001/021<br />
total number of the titles<br />
on the disc<br />
< This function doesn't work in the RESUME mode. Press the<br />
STOP button to cancel the resume mode.<br />
< When no button is pressed for 10 seconds, chapter select<br />
mode will be cancelled.<br />
< When you don't want to change the title, go to step 5 .<br />
TITLE 01/58<br />
TITLE 02/58<br />
Title and Chapter Select<br />
total number of the chapters<br />
in the current title<br />
CHAPTER 001/021<br />
CHAPTER 001/018<br />
4 Press the t button.<br />
TITLE 02/58<br />
5 Press the numeric button to select a chapter.<br />
TITLE 02/58<br />
6 Press the ENTER button.<br />
CHAPTER 001/018<br />
CHAPTER 008/018<br />
Playback starts from the selected chapter.<br />
< If you select the numbers which doesn't exist on the disc,<br />
PROHIBIT icon will be displayed.
<strong>DVD</strong> VCD CD<br />
<strong>DVD</strong><br />
1 Press the GO TO button twice.<br />
The title number "01" will be highlighted.<br />
< During playback, " -- : -- : -- " will be highlighted. If you want<br />
to change the title, press the g button to highlight the title<br />
number.<br />
< When you don't want to change the title, go to step 3 .<br />
2 Press the numeric button to select a title.<br />
3 Press the t button.<br />
TITLE 01/58<br />
TITLE 02/58<br />
TITLE 02/58<br />
TIME -- : -- : --<br />
TIME -- : -- : --<br />
TIME -- : -- : --<br />
4 Input the time by pressing the numeric buttons.<br />
example:<br />
To select a scene 2 hours 30 minutes 10 seconds from the<br />
beginning of the selected title, press 023010.<br />
Time Select<br />
5 Press the ENTER button.<br />
Playback starts from the selected part.<br />
< If you select the numbers which doesn't exist on the disc,<br />
PROHIBIT icon will be displayed.<br />
VCD CD<br />
1 Press the GO TO button during playback.<br />
< When no button is pressed for 10 seconds, Time select mode<br />
will be canceled.<br />
2 Input the time from the beginning of the current track by<br />
pressing the numeric buttons.<br />
example: To select a part 1 minute 10 seconds from the<br />
beginning of the curren track, press 0110.<br />
Playback starts from the selected part.<br />
< If you select the numbers which doesn't exist on the disc,<br />
PROHIBIT icon will be displayed.<br />
< This function doesn't work during<br />
PBC playback of a VCD.<br />
23
<strong>DVD</strong> VCD CD MP3<br />
Repeat Playback of <strong>DVD</strong><br />
Each time the REPEAT button is pressed during playback, the<br />
mode is changed as follows:<br />
Chapter Repeat<br />
24<br />
The chapter being played will be played repeatedly. If you<br />
select another chapter in CHAPTER REPEAT mode, the chapter<br />
you selected will be played repeatedly.<br />
< REPEAT 1 indicator lights on the front panel display.<br />
Title Repeat<br />
CHAPTER REPEAT TITLE REPEAT<br />
(OFF)<br />
All the chapters of the current title will be played repeatedly.<br />
During programmed playback, programmed chapters will be<br />
played repeatedly.<br />
< REPEAT indicator lights on the front panel display.<br />
< The REPEAT button does not work in the stop mode.<br />
< If one of the following buttons is pressed, repeat mode will be<br />
cancelled:<br />
STOP in the stop mode, A-B, OPEN/CLOSE, POWER<br />
FUNCTION<br />
Repeat Playback<br />
Repeat Playback of CD, VCD, MP3<br />
Each time the REPEAT button is pressed, the mode is changed as<br />
follows:<br />
Repeat One<br />
CD/VCD/MP3*<br />
MP3**<br />
REP-ONE<br />
REP-ALL (OFF)<br />
REP-ONE FOLDER REPEAT<br />
(OFF)<br />
* : When MP3 MENU is off.<br />
** : When MP3 MENU is on.<br />
The track being played will be played repeatedly. If you select<br />
another track in REPEAT ONE mode, the track you selected<br />
will be played repeatedly.<br />
It is also possible to select a track in the stop mode. Press the<br />
REPEAT button and then select the track number by pressing<br />
the numeric buttons.<br />
< REPEAT 1 indicator lights on the front panel display.<br />
Repeat All/Folder Repeat<br />
All the tracks of the disc (or all the MP3 files of the current<br />
directory) will be played repeatedly.<br />
During programmed playback, programmed tracks will be<br />
played repeatedly.<br />
< REPEAT indicator lights on the front panel display.<br />
< If one of the following buttons is pressed, repeat mode will be<br />
cancelled:<br />
STOP, A-B, PBC (VCD), OPEN/CLOSE, POWER, FUNCTION
<strong>DVD</strong> VCD CD <strong>DVD</strong> VCD CD MP3<br />
1<br />
2<br />
A-B Repeat<br />
Repeat Playback of a Designated Section<br />
(A-B Repeat)<br />
This function isn't available for MP3.<br />
Start playback and designate the point at which the A-B<br />
repeat should start (point A) by pressing the A-B button.<br />
"A TO B SET A" appears on the screen.<br />
When the point at which repeat playback should end (point B)<br />
is reached, press the A-B button again.<br />
"A TO B SET B" appears on the screen, and "A-B" lights on the<br />
front panel display.<br />
The designated section will be played repeatedly.<br />
< When playing a CD/VCD, the point A and B should be selected<br />
from the same track.<br />
< When playing a <strong>DVD</strong>, the point A and B should be selected<br />
from the same chapter.<br />
< There should be more than one second between A and B.<br />
< If one of the following buttons is pressed, A-B repeat mode will<br />
be cancelled:<br />
STOP (CD, VCD), STOP in the stop mode (<strong>DVD</strong>)<br />
SKIP, A-B, OPEN/CLOSE, POWER, FUNCTION<br />
Display<br />
Each time the DIS<strong>PL</strong>AY button is pressed during playback,<br />
following information will appear on the screen.<br />
< Select "OFF" to turn the time counter off.<br />
<strong>DVD</strong><br />
Elapsed time of the current title<br />
Remaining time of the current title<br />
Elapsed time of the current chapter<br />
Remaining time of the current chapter<br />
(OFF)<br />
VCD/CD<br />
Elapsed time of the current track<br />
Remaining time of the current track<br />
Elapsed time of the disc<br />
Remaining time of the disc<br />
(OFF)<br />
VCD(PBC)/MP3<br />
Elapsed time of the current track<br />
Remaining time of the current track<br />
(OFF)<br />
25
This chapter describes how to use the SETUP menu. Most<br />
settings and adjustments are required to be set when you first<br />
use the system.<br />
Using the SETUP menu, you can adjust the picture size, set a<br />
language for the subtitles and the OSD (on screen displays), limit<br />
playback by children, et cetera.<br />
Notes<br />
< Some settings cannot be selected during playback and<br />
RESUME mode. In that case, press the STOP button once or<br />
twice to stop playback completely.<br />
MAKE SURE YOUR TV IS CONNECTED TO THE <strong>DVD</strong> <strong>PL</strong>AYER AND<br />
TURNED ON. SET UP USES ON-SCREEN MENUS TO PROGRAM.<br />
1 If another function is selected, press the <strong>DVD</strong> button to select<br />
<strong>DVD</strong>.<br />
2 Press the SETUP button in the stop mode.<br />
26<br />
SETUP MENU -- MAIN PAGE<br />
GENRAL SETUP<br />
GENERAL SETUP<br />
SPEAKER SETUP<br />
AUDIO SETUP<br />
PREFERENCES<br />
EXIT SETUP<br />
The setup menu appears on the TV screen.<br />
3 Select an item using the 5/b buttons, and then press the<br />
ENTER button.<br />
Settings<br />
3 Select an item you want to change using the 5/b buttons.<br />
Press the t button to go to the right option list.<br />
-- GENERAL PAGE --<br />
TV DIS<strong>PL</strong>AY<br />
TV TYPE<br />
VIDEO OUTPUT<br />
ANGLE MARK<br />
OSD LANG<br />
SCREEN SAVER<br />
MAIN PAGE<br />
SET OSD LANGUAGE<br />
ENGLISH<br />
FRENCH<br />
GERMAN<br />
ITALIAN<br />
SPANISH<br />
To change the setting, use the 5/b buttons until the item you<br />
want to change is highlighted, then press the ENTER button to<br />
confirm your selection.<br />
Use the numeric buttons (0 to 9) to key in numbers, such as the<br />
password for parental control.<br />
Use the 5/b/g / t buttons and the ENTER button to select<br />
and set other items.<br />
4 When the settings have been finished, press the SETUP button<br />
to exit the SETUP menu.
TV Display<br />
-- GENERAL PAGE --<br />
TV DIS<strong>PL</strong>AY<br />
TV TYPE<br />
VIDEO OUTPUT<br />
ANGLE MARK<br />
OSD LANG<br />
SCREEN SAVER<br />
MAIN PAGE<br />
SET TV DIS<strong>PL</strong>AY MODE<br />
NORMAL /PS<br />
NORMAL /LB<br />
WIDE<br />
Select the aspect ratio to match your TV.<br />
NORMAL/PS (Pan & Scan mode) (default)<br />
When you connect a normal TV to the system, this setting<br />
displays a wide picture on the whole TV screen with a portion<br />
(right and left sides of the picture) automatically cut off.<br />
NORMAL/LB (Letterbox mode)<br />
When you connect a normal TV to the system, this setting<br />
displays a wide picture with bands displayed on the upper and<br />
lower portions of the screen.<br />
WIDE (Wide-screen mode)<br />
Use this setting when you connect a wide-screen TV to the<br />
system.<br />
< Some wide-screen discs that do not permit Pan & Scan mode<br />
playback are automatically played in Letterbox mode.<br />
< Depending on the <strong>DVD</strong>, 4:3 Letterbox may be selected<br />
automatically instead of 4:3 Pan & Scan and vice versa.<br />
< You must also set the screen mode on your wide-screen TV to<br />
"FULL".<br />
< If WIDE is selected and a normal TV is connected, 16:9 content<br />
will appear distorted during playback (objects look thin).<br />
TV Type<br />
-- GENERAL PAGE --<br />
TV DIS<strong>PL</strong>AY<br />
TV TYPE<br />
VIDEO OUTPUT<br />
ANGLE MARK<br />
OSD LANG<br />
SCREEN SAVER<br />
MAIN PAGE<br />
SET TV STANDARD<br />
PAL<br />
NTSC<br />
MULTI<br />
PAL (default):<br />
Select PAL when a PAL TV(<strong>Europe</strong>an standard) is connected.<br />
NTSC:<br />
Select NTSC When a NTSC TV is connected.<br />
MULTI:<br />
Select MULTI When a MULTI TV is connected.<br />
Settings (General Setup)<br />
Video Output<br />
SET VIDEO OUTPUT<br />
-- GENERAL PAGE --<br />
TV DIS<strong>PL</strong>AY<br />
TV TYPE<br />
VIDEO OUTPUT<br />
ANGLE MARK<br />
OSD LANG<br />
SCREEN SAVER<br />
MAIN PAGE<br />
SCART<br />
S-VIDEO<br />
SCART (default):<br />
Select this when your TV or monitor is compatible with RGB.<br />
RGB video signal is output from the AV CONNECTOR.<br />
S-VIDEO:<br />
Select this when your TV or monitor is connected via the S-<br />
VIDEO jack.<br />
S-VIDEO signal is output from the S-VIDEO jack.<br />
< Regardless of the setting, the VIDEO OUT jack is always active.<br />
Angle Mark<br />
-- GENERAL PAGE --<br />
TV DIS<strong>PL</strong>AY<br />
TV TYPE<br />
VIDEO OUTPUT<br />
ANGLE MARK<br />
OSD LANG<br />
SCREEN SAVER<br />
MAIN PAGE<br />
ANGLE MARK ON/OFF<br />
ON<br />
OFF<br />
Select whether the angle mark appears on the TV screen or<br />
not during playback of a multi-angles scene.<br />
ON (default):<br />
ANGLE MARK appears on the TV screen.<br />
OFF:<br />
ANGLE MARK does not appear.<br />
You can change the angles using the ANGLE button. (see page<br />
20)<br />
27
Screen Saver<br />
28<br />
Settings (General Setup) Settings (Speaker Setup)<br />
Selecting the Language for OSD<br />
-- GENERAL PAGE --<br />
TV DIS<strong>PL</strong>AY<br />
TV TYPE<br />
VIDEO OUTPUT<br />
ANGLE MARK<br />
OSD LANG<br />
SCREEN SAVER<br />
MAIN PAGE<br />
SCREEN SAVER SETTING<br />
OFF<br />
ON<br />
Turns on or off the screen saver.<br />
If you turn on the screen saver, the screen saver image<br />
appears when you leave the system in pause or stop mode for<br />
1 minute. The screen saver is useful to prevent your display<br />
from becoming damaged.<br />
The default setting is "OFF".<br />
-- GENERAL PAGE --<br />
TV DIS<strong>PL</strong>AY<br />
TV TYPE<br />
VIDEO OUTPUT<br />
ANGLE MARK<br />
OSD LANG<br />
SCREEN SAVER<br />
MAIN PAGE<br />
SET OSD LANGUAGE<br />
ENGLISH<br />
FRENCH<br />
GERMAN<br />
ITALIAN<br />
SPANISH<br />
You can select the language for OSD (On Screen Display). This<br />
setting allows you select a preferred language for the SETUP<br />
menu and operating messages. The default language is<br />
ENGLISH.<br />
Delay Time (Center/Surround)<br />
-- SPEAKER SETUP PAGE --<br />
CENTER DELAY<br />
SURROUND DELAY<br />
TEST TONE<br />
MAIN PAGE<br />
SET CENTER DELAY<br />
5MS<br />
3MS<br />
1MS<br />
OFF<br />
If the speakers cannot be placed at the same distance from<br />
your listening position, adjust the delay time to improve the<br />
surround effect.<br />
The delay time of 1MS corresponds to 30 cm.<br />
Adjustable range<br />
Center: 0MS(OFF) to 5MS<br />
Surround: 0MS(OFF) to 15MS in 3MS steps<br />
For example, if the center speaker is closer to the listening<br />
position than the front speakers by about 90cm, set the<br />
CENTER DELAY to 3MS.<br />
< You cannot adjust delay time when the listening mode is set to<br />
LT/RT, STEREO or VSS. In this case, press the SETUP button to<br />
exit the setup menu, press the LISTENING button repeatedly to<br />
select PRO LOGIC, and then press the SETUP button again.<br />
< The delay time for the front speaker and the subwoofer isn't<br />
available.<br />
< Delay time setting will not work properly when the center or<br />
surround speaker is farther than others.<br />
Test Tone<br />
TEST TONE<br />
-- SPEAKER SETUP PAGE --<br />
CENTER DELAY<br />
REAR DELAY<br />
TEST TONE<br />
MAIN PAGE<br />
ON<br />
OFF<br />
ON:<br />
Test tone is emitted from each speaker at 2.5-second intervals.<br />
You can use the test tone to check if the speakers are<br />
connected properly.<br />
OFF (default):<br />
Test tone is off.<br />
-- SPEAKER SETUP PAGE --<br />
CENTER DELAY<br />
SURROUND DELAY<br />
TEST TONE<br />
MAIN PAGE<br />
SET SURROUND DELAY<br />
15MS<br />
9MS<br />
3MS<br />
OFF
Audio Out<br />
Settings (Audio Setup) Settings (Preferences)<br />
AUDIO OUT<br />
DYNAMIC<br />
MAIN PAGE<br />
-- AUDIO SETUP --<br />
SELECT AUDIO OUTPUT<br />
SPDIF/RAW<br />
SPDIF/PCM<br />
ANALOG<br />
SPDIF/RAW:<br />
Select this when the unit is connected to an audio component<br />
equipped with a built-in Dolby Digital or DTS decoder via the<br />
DIGITAL OUT terminal.<br />
SPDIF/PCM:<br />
Select this when the unit is connected to an audio component<br />
such as CD recorder or MD deck via the DIGITAL OUT<br />
terminal.<br />
ANALOG (default):<br />
Select this when you don't use the DIGITAL OUT terminal. No<br />
signal will be output from the DIGITAL terminal.<br />
< When SPDIF/RAW or SPDIF/PCM is selected, no sound is<br />
output from the speakers, the PHONES jack and the AUDIO<br />
OUT jacks. To listen to the sound from speakers, select<br />
ANALOG.<br />
Dynamic Range Compression<br />
AUDIO OUT<br />
DYNAMIC<br />
MAIN PAGE<br />
-- AUDIO SETUP --<br />
FULL<br />
OFF<br />
DYNAMIC RANGE COMPRESSION<br />
In many listening situations, you may find loud passages<br />
objectionable. Adjusting this setting allows you to compress<br />
the sounds into a range that you may find more suitable for a<br />
particular listening situation. Dolby Digital satisfies these<br />
needs through the dynamic range controlling.<br />
Select one of the followings to fit the individual listening<br />
situation of the audience.<br />
FULL:<br />
Audio with fully compressed dynamic range.<br />
7/8 to 1/8 :<br />
Audio with partially compressed dynamic range.<br />
OFF (default):<br />
Audio with uncompressed dynamic range.<br />
< This function is effective only when playing back a <strong>DVD</strong> disc<br />
recorded with Dolby Digital. This control has no effect on other<br />
discs.<br />
6/8<br />
4/8<br />
2/8<br />
Setting the Language<br />
-- PREFERENCES PAGE --<br />
AUDIO<br />
SUBTITLE<br />
DISC MENU<br />
PARENTAL<br />
PASSWORD<br />
DEFAULTS<br />
MAIN PAGE<br />
ENGLISH<br />
FRENCH<br />
GERMAN<br />
ITALIAN<br />
SPANISH<br />
PREFERRED AUDIO LANGUAGE<br />
-- PREFERENCES PAGE --<br />
AUDIO<br />
SUBTITLE<br />
DISC MENU<br />
PARENTAL<br />
PASSWORD<br />
DEFAULTS<br />
MAIN PAGE<br />
ENGLISH<br />
FRENCH<br />
GERMAN<br />
ITALIAN<br />
SPANISH<br />
OFF<br />
PREFERRED SUBTITLE LANGUAGE<br />
-- PREFERENCES PAGE --<br />
AUDIO<br />
SUBTITLE<br />
DISC MENU<br />
PARENTAL<br />
PASSWORD<br />
DEFAULTS<br />
MAIN PAGE<br />
ENGLISH<br />
FRENCH<br />
GERMAN<br />
ITALIAN<br />
SPANISH<br />
PREFERRED MENU LANGUAGE<br />
You can select a preferred language for audio, subtitle and<br />
disc menu respectively.<br />
< When you select a preferred language that is not recorded on<br />
the <strong>DVD</strong>, one of the actual recorded languages is<br />
automatically selected.<br />
< You can select any recorded language for audio by pressing<br />
the AUDIO button when playing a <strong>DVD</strong> disc. (It doesn't affect<br />
this setting.)<br />
< You can select any recorded language for subtitle using<br />
SUBTITLE button when playing a <strong>DVD</strong> disc. (It doesn't affect<br />
this setting.)<br />
Defaults<br />
-- PREFERENCES PAGE --<br />
AUDIO<br />
SUBTITLE<br />
DISC MENU<br />
PARENTAL<br />
PASSWORD<br />
DEFAULTS<br />
MAIN PAGE<br />
LOAD FACTORY SETTINGS<br />
RESET<br />
To reset the settings, select "RESET" and press the ENTER<br />
button.<br />
All the items in the SETUP menu (except for Parental Control<br />
and its Password) will be reset to the default settings.<br />
< The parental control and its unlocking password will not be<br />
reset.<br />
29
<strong>DVD</strong><br />
Playing some <strong>DVD</strong> discs can be limited depending on the age of<br />
the users. The parental control function in this system allows<br />
playback limitation level to be set by the parent. The default<br />
setting is "NO PARENTAL".<br />
When you use this function for the first time, you have to set a<br />
password.<br />
Notes<br />
< The lower the level is set, the stricter the limitation is offered.<br />
< To change the parental control level, a correct password is<br />
needed to key in.<br />
How to set and change the password for<br />
Parental Control<br />
1 Select "CHANGE" and press the ENTER button.<br />
30<br />
-- PREFERENCES PAGE --<br />
AUDIO<br />
SUBTITLE<br />
DISC MENU<br />
PARENTAL<br />
PASSWORD<br />
DEFAULTS<br />
MAIN PAGE<br />
CHANGE PASSWORD<br />
CHANGE<br />
2<br />
Enter your old password using the numeric buttons (0 to 9).<br />
When you use this unit for the first time, enter the default<br />
password "3308".<br />
-- PASSWORD CHANGE PAGE --<br />
OLD PASSWORD:<br />
NEW PASSWORD:<br />
CONFIRM:<br />
<strong>PL</strong>EASE ENTER OLD PASSWORD<br />
XXX<br />
3 Enter your 4-digit password using the numeric buttons (0 to 9).<br />
4 To confirm, press your password once again.<br />
5 Press the ENTER button.<br />
Notes<br />
The password is used to change the parental control level.<br />
Please write your password down and put in a safe place.<br />
If you forget your password, enter "3308."<br />
Parental Control<br />
Setting the Parental Control Level<br />
1 Select a parental control level using the 5/bbuttons.<br />
-- PREFERENCES PAGE --<br />
AUDIO<br />
SUBTITLE<br />
DISC MENU<br />
PARENTAL<br />
PASSWORD<br />
DEFAULTS<br />
MAIN PAGE<br />
SET PARENTAL CONTROL<br />
1 G<br />
2<br />
3 PG<br />
4 PG 13<br />
5<br />
6 R<br />
7 NC-17<br />
NO PARENTAL<br />
2 Press the ENTER button.<br />
3 Enter your password using the numeric buttons (0 to 9).<br />
-- PASSWORD VERIFY PAGE --<br />
INPUT PASSWORD: XXX<br />
<strong>PL</strong>EASE ENTER PASSWORD<br />
If you enter the wrong password, "PASSWORD INCORRECT"<br />
appears on the screen, and you cannot go to the next step.<br />
< If you want to quit setting the parental control level, press the<br />
SETUP button.<br />
4 Press the ENTER button.<br />
Now the parental lock level has been changed.<br />
< If the rating of the loaded <strong>DVD</strong> disc is higher than the level you<br />
set, the system will require a password. Enter your password<br />
to start playback.
1 Press the TUNER button (or the FUNCTION button) to select<br />
"TUNER".<br />
Make sure the antennas have been connected (see page 7).<br />
2 Select AM or FM by pressing the TUNER button.<br />
3 Select the station you want to listen to (auto selection).<br />
Hold down the TUNING button for 0.5 to 2 seconds.<br />
When a station is tuned in, the tuning process will stop<br />
automatically.<br />
If you want to stop the tuning process, press the TUNING<br />
button.<br />
Selecting stations which cannot be tuned automatically<br />
(manual selection)<br />
When the TUNING button is pressed momentarily (0.5 second<br />
or less), the frequency changes by a fixed step.<br />
FM : 50 kHz steps<br />
AM : 9 kHz steps<br />
Press the TUNING button repeatedly until the station you want<br />
to listen to is found.<br />
Tuner<br />
FM MODE Button<br />
Pressing this button alternates between Stereo mode and Mono<br />
mode.<br />
Stereo<br />
FM stereo broadcasts are received in stereo.<br />
Mono<br />
To compensate for weak FM stereo reception, select this<br />
mode. Reception will now be forced monaural, reducing<br />
unwanted noise.<br />
RDS (<strong>Europe</strong>an model only)<br />
The Radio Data <strong>System</strong> (RDS) is a broadcasting service which<br />
allows stations to send additional information along with the<br />
regular radio programme signal.<br />
RDS works on the FM waveband in <strong>Europe</strong> only.<br />
1 Tune in an FM station you want to listen to (see steps 1 to 3<br />
of page 31).<br />
When a RDS station is tuned, the station's name will appear on<br />
the front panel display.<br />
2<br />
Press the DIS<strong>PL</strong>AY button.<br />
Each time the DIS<strong>PL</strong>AY button is pressed, the RDS mode is<br />
changed as follows:<br />
PTY (Programme Type)<br />
displays the programme type. If there is no PTY data, "NO<br />
PTY" will be displayed.<br />
Frequency<br />
PS (Programme Service name)<br />
displays PS or a station's name. If there is no PS data, "NO<br />
NAME" will be displayed.<br />
< If there is no RDS data, "NO RDS" will be displayed.<br />
31
Manual Memory Presetting<br />
You can store up to 40 stations.<br />
1 Tune in a station you want to listen to (see steps 1<br />
page 31).<br />
to 3 of<br />
2 Press the MEMORY button.<br />
3 While the "MEMORY" indicator is blinking, select a preset<br />
channel to store the station using the numeric buttons or the<br />
PRESET buttons, and then press the MEMORY button.<br />
32<br />
example : To select No.5<br />
example : To select No.25<br />
To store more stations, repeat steps 1 to 3 .<br />
Preset Tuning<br />
How to select preset stations<br />
Press a preset number.<br />
Preset stations can also be selected by the PRESET button.<br />
Press the PRESET button repeatedly until the desired preset<br />
station is found.
In case you experience any problem with this unit, please take<br />
the time to look through this chart and see if you can solve the<br />
problem yourself before you call your dealer or a <strong>TEAC</strong> service<br />
center.<br />
No power<br />
eCheck the connection to the AC wall outlet. Make sure the<br />
outlet is not switched by a lamp switch by plugging in<br />
another electrical device to see if the outlet is “live”.<br />
PROHIBIT icon " " appears on the screen<br />
eThe operation is not permitted by the disc or the unit.<br />
eNote that during playback of a title part (cautions, software<br />
maker's logo, etc.), most operations are prohibited by the<br />
disc.<br />
eIf another operation is still in process, wait a moment and try<br />
again.<br />
Picture playback stops and operation buttons do not work.<br />
eTurn the unit off and back on again and restart the playback.<br />
No picture.<br />
eTurn on the TV.<br />
eCheck that the system is connected properly.<br />
eMake sure you have selected the proper video input on the<br />
TV so that you can view the pictures from the <strong>DVD</strong> player.<br />
Picture noise.<br />
eIf video from this system has to go through your VCR to get<br />
to your TV, the copy-protection applied to some <strong>DVD</strong><br />
programs could affect picture quality. Please connect the<br />
unit directly to your TV.<br />
The image is distorted or monochromatic.<br />
eThe color system selected does not match your TV. Press<br />
the PAL/NTSC button of the remote control unit once or<br />
twice, and then select correct color system in the SETUP<br />
menu (see page 9 and 27).<br />
eSelect the aspect ratio to match your TV.<br />
The aspect ratio of the screen cannot be changed.<br />
eThe aspect ratio might be fixed by the disc.<br />
eDepending on the TV, you may not be able to change the<br />
aspect ratio.<br />
There is no sound or only a very low-level sound is heard.<br />
eCheck the audio output setting (see page 29).<br />
eAdjust the volume by pressing the VOLUME buttons.<br />
eCheck that the speakers and components are connected<br />
securely.<br />
eCheck the operation of the connected component.<br />
eThe sound is muted during pause, slow-motion, fast<br />
forward/reverse, and stepping playback. Press the <strong>PL</strong>AY<br />
button to resume normal playback.<br />
eSelect the proper source using the FUNCTION button.<br />
eSelect the proper surround mode (see page 16).<br />
No sound from surround or center speakers.<br />
eCheck the channel level setting (see page 15).<br />
eSelect the proper surround mode (see page 16).<br />
ePlay a multi-channel source.<br />
Troubleshooting<br />
Severe hum or noise is heard.<br />
eCheck that the speakers and components are connected<br />
securely.<br />
eMake sure the line cords and speaker cables are as far<br />
away from the AC supply as possible.<br />
eThis unit cannot play such discs as CD-ROMs. Use a<br />
playable disc.<br />
Remote control doesn't work.<br />
eIf the batteries are dead, change the batteries.<br />
eUse remote control unit within the range (5m /15ft) and point<br />
at the front panel.<br />
eClear obstacles between the remote control unit and the<br />
main unit.<br />
eIf a strong light is near the unit, turn it off.<br />
Cannot play.<br />
eLoad a disc with the playback side facing down.<br />
If the disc is dirty, clean the surface of the disc.<br />
eA blank disc has been loaded. Load a prerecorded disc.<br />
eCheck the region code of the <strong>DVD</strong>.<br />
Sound skips.<br />
ePlace the unit on a stable place to avoid vibration and shock.<br />
eIf the disc is dirty, clean the surface of the disc.<br />
eDon't use scratched, damaged or warped discs.<br />
Cannot listen to any station, or signal is too weak.<br />
eMake sure the antenna is properly connected.<br />
eTune in the station properly.<br />
eIf a TV is near the unit, turn it off.<br />
eInstall the antenna again after relocating it to a better<br />
reception position.<br />
Though the broadcast is stereo, it sounds monaural.<br />
ePress the FM MODE button.<br />
If normal operation cannot be recovered, unplug the power cord<br />
from the outlet and plug it in again. This resets the internal<br />
micro-computer which can be disturbed during electrical<br />
storms, power interruptions, et cetera.<br />
Beware of condensation<br />
When the unit (or a disc) is moved from a cold to a warm place, or<br />
used after a sudden temperature change, there is a danger of<br />
condensation; vapor in the air could condense on the internal<br />
mechanism, making correct operation impossible. To prevent this,<br />
or if this occurs, leave the unit for one or two hours with the<br />
power turned on. Then the unit will stabilize at the temperature of<br />
its surroundings.<br />
Maintenance<br />
If the surface of the unit gets dirty, wipe with a soft cloth or use<br />
diluted neutral cleaning liquid. Be sure to remove any fluid<br />
completely. Do not use thinner, benzine or alcohol as they may<br />
damage the surface of the unit.<br />
33
<strong>DVD</strong> Player<br />
34<br />
Pickup . . . . . . . . . . . . Semiconductor laser, Wavelength 650 nm<br />
Signal system. . . . . . . . . . . . . . . . . . . . . . . . . . . . . . . . . . NTSC/PAL<br />
Video signal horizontal resolution. . . More than 480 lines (<strong>DVD</strong>)<br />
Video signal-to-noise ratio . . . . . . . . . . . More than 55 dB (<strong>DVD</strong>)<br />
Audio frequency response (at 2 CH stereo mode)<br />
20 Hz ~ 20 kHz (+1/-3 dB)<br />
Audio signal-to-noise ratio. . . . . . . . . . . . . . . . . More than 80 dB<br />
Total harmonic distortion. . . . . . . . . . . . . . . . . . . Less than 0.01%<br />
FM Tuner<br />
<strong>System</strong>. . . . . . . . . . <strong>PL</strong>L quartz-locked digital synthesizer system<br />
Tuning range . . . . . . . . . . . . . . . 87.50 ~ 108.00 MHz (50 kHz step)<br />
Antenna terminals . . . . . . . . . . . . . . . . . . . . 75 ohms, unbalanced<br />
Intermediate frequency . . . . . . . . . . . . . . . . . . . . . . . . . . 10.7 MHz<br />
AM Tuner<br />
<strong>System</strong>. . . . . . . . . . <strong>PL</strong>L quartz-locked digital synthesizer system<br />
Tuning range . . . . . . . . . . . . . . . . . 522~ 1620 kHz (9 kHz interval)<br />
Video outputs<br />
CVBS Video . . . . . . . . . . . . . . . . . . . . . . . . . . . . . . . . . . 1 Vp-p 75 Ω<br />
S-video. . . . . . . . . . . . . . . . . . . . . Y: 1 Vp-p 75 Ω, C: 0.3 Vp-p 75 Ω<br />
AV Connector . . . . . . . . . . . . . . . . . . . . . . . . . . . . . . . . . . SCART x 1<br />
Audio Outputs<br />
Line outputs . . . . . . . . . . . . . . . . . . . . . . . . . . . . 300mVrms, 2.2 kΩ<br />
Output Power (RMS, 1 kHz, 8 Ω, only one channel driven)<br />
30 W per channel<br />
General<br />
Power requirements . . . . . . . . . . 230V AC, 50Hz (<strong>Europe</strong> model)<br />
240V AC, 50Hz (Australia model)<br />
Power consumption . . . . . . 120 W (STANDBY: less than 0.5 W)<br />
Dimensions (WxHxD) . . . . . . . . . . . . . . . . . . . . . 430 x 348 x 48 mm<br />
Weight . . . . . . . . . . . . . . . . . . . . . . . . . . . . . . . . . . . . . . . . . . . . 4.1 kg<br />
Operating temperature . . . . . . . . . . . . . 5 ˚C ~ 35 ˚C (40 ˚F ~ 95 ˚F)<br />
Operating humidity . . . . . . . . . . . . . . . . . . . . . . . . . . . . . . 5% ~ 90%<br />
Storage temperature . . . . . . . . . . . . -20 ˚C ~ 55 ˚C (-4 ˚F ~ 131 ˚F)<br />
Specifications<br />
Active Subwoofer<br />
Output Power . . . . . . . . . . . . . . . . . . . . . . . 75 W (80 Hz, THD 10%)<br />
Speaker unit . . . . . . . . . . . . . . . . . . . . . . . . . . . . 165 mm, cone type<br />
Dimensions (WxHxD) . . . . . . . . . . . . . . . . . . . . 200 x 330 x 321 mm<br />
Weight . . . . . . . . . . . . . . . . . . . . . . . . . . . . . . . . . . . . . . . . . . . . 7.0 kg<br />
Power consumption . . . . . . . . . . . . . . . . . . . . . . . . . . . . . . . . . 70 W<br />
Speakers<br />
Input Power . . . . . . . . . . . . . . . . . . . . . . . . . . . . . . . 30 W maximum<br />
Speaker unit . . . . . . . . . . . . . . . . . . . . . . . 75 mm (Front/Surround)<br />
65 mm x 2 (Center)<br />
Rated impedance . . . . . . . . . . . . . . . . . . . . . . . . . . . . . . . . . . . . . 8 Ω<br />
Dimensions (WxHxD) . . . . . . . . . . . 90 x 130 x 81 mm (Front/Rear)<br />
200 x 77 x 81 mm (Center)<br />
Weight. . . . . . . . . 0.8 kg (Front)/0.6 kg (Surround)/1.0 kg (Center)<br />
Accessories<br />
Front/Center speaker cable (5 m x 3)<br />
Surround speaker cable (10 m x 2)<br />
Subwoofer RCA pin cord (5 m)<br />
AM loop antenna x 1<br />
FM antenna x 1<br />
RCA video cable x 1<br />
Remote control unit x 1<br />
Batteries (AA, R6, SUM-3) x 2<br />
• Design and specifications are subject to change without<br />
notice.<br />
• Weight and dimensions are approximate.<br />
• Illustrations may differ slightly from production models.
Z<br />
<strong>TEAC</strong> CORPORATION 3-7-3, Nakacho, Musashino-shi, Tokyo 180-8550, Japan Phone: (0422) 52-5081<br />
<strong>TEAC</strong> AMERICA, INC. 7733 Telegraph Road, Montebello, California 90640 Phone: (323) 726-0303<br />
<strong>TEAC</strong> CANADA LTD. 5939 Wallace Street, Mississauga, Ontario L4Z 1Z8, Canada Phone: (905) 890-8008<br />
<strong>TEAC</strong> MEXICO, S.A. De C.V Campesinos N°184, Colonia Granjas Esmeralda, Delegacion Iztapalapa, CP 09810, México DF Phone: (525) 581-5500<br />
<strong>TEAC</strong> UK LIMITED 5 Marlin House, Croxley Business Park, Watford, Hertfordshire, WD18 8TE, U.K. Phone: 01923-819699<br />
<strong>TEAC</strong> DEUTSCHLAND <strong>GmbH</strong> Bahnstrasse 12, 65205 Wiesbaden-Erbenheim, Germany Phone: 0611-71580<br />
<strong>TEAC</strong> FRANCE S.A. 17, Rue Alexis-de-Tocqueville, CE 005 92182 Antony Cedex, France Phone: (1) 42.37.01.02<br />
<strong>TEAC</strong> ITALIANA S.p.A. Via C. Cantù 11, 20092 Cinisello Balsamo, Milano, Italy Phone: 02-66010500<br />
<strong>TEAC</strong> AUSTRALIA PTY., LTD. 106 Bay Street, Port Melbourne, Victoria 3207, Australia Phone: (03) 9644-2442<br />
A.B.N. 80 005 408 462<br />
This appliance has a serial number located on the rear panel. Please record<br />
the model number and serial number and retain them for your records.<br />
Model number Serial number<br />
0703 . MA-0822A