
You also want an ePaper? Increase the reach of your titles
YUMPU automatically turns print PDFs into web optimized ePapers that Google loves.
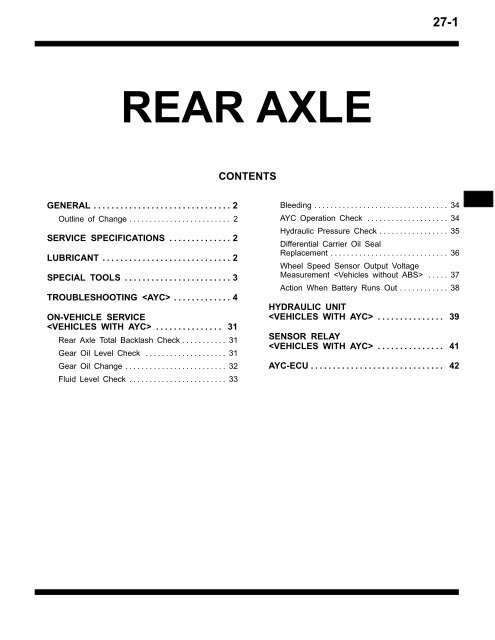
27-1<br />
<strong>REAR</strong> <strong>AXLE</strong><br />
CONTENTS<br />
GENERAL . . . . . . . . . . . . . . . . . . . . . . . . . . . . . . . 2<br />
Outline of Change . . . . . . . . . . . . . . . . . . . . . . . . . 2<br />
SERVICE SPECIFICATIONS . . . . . . . . . . . . . . 2<br />
LUBRICANT . . . . . . . . . . . . . . . . . . . . . . . . . . . . . 2<br />
SPECIAL TOOLS . . . . . . . . . . . . . . . . . . . . . . . . 3<br />
TROUBLESHOOTING . . . . . . . . . . . . . 4<br />
ON-VEHICLE SERVICE<br />
. . . . . . . . . . . . . . . 31<br />
Rear Axle Total Backlash Check . . . . . . . . . . . 31<br />
Gear Oil Level Check . . . . . . . . . . . . . . . . . . . . 31<br />
Gear Oil Change . . . . . . . . . . . . . . . . . . . . . . . . . 32<br />
Fluid Level Check . . . . . . . . . . . . . . . . . . . . . . . . 33<br />
Bleeding . . . . . . . . . . . . . . . . . . . . . . . . . . . . . . . . . 34<br />
AYC Operation Check . . . . . . . . . . . . . . . . . . . . 34<br />
Hydraulic Pressure Check . . . . . . . . . . . . . . . . . 35<br />
Differential Carrier Oil Seal<br />
Replacement . . . . . . . . . . . . . . . . . . . . . . . . . . . . . 36<br />
Wheel Speed Sensor Output Voltage<br />
Measurement . . . . . 37<br />
Action When Battery Runs Out . . . . . . . . . . . . 38<br />
HYDRAULIC UNIT<br />
. . . . . . . . . . . . . . . 39<br />
SENSOR RELAY<br />
. . . . . . . . . . . . . . . 41<br />
AYC-ECU . . . . . . . . . . . . . . . . . . . . . . . . . . . . . . 42
27-2<br />
<strong>REAR</strong> <strong>AXLE</strong> – General / Service Specifications / Lubricant<br />
GENERAL<br />
OUTLINE OF CHANGE<br />
<br />
The descriptions of the service procedures for the AYC system including the troubleshooting using<br />
an MUT-II tester has been incorporated.<br />
SERVICE SPECIFICATIONS<br />
<br />
Items Standard value Limit<br />
Rear axle total backlash mm – 5<br />
Pressure generated by hydraulic unit MPa 0 – 1.6 –<br />
Wheel bearing axial play mm – 0.05<br />
Wheel bearing rotation starting torque Nm – 1.0 or less<br />
LUBRICANT<br />
<br />
Items Specified lubricant Capacity<br />
Gear oil<br />
Torque<br />
transfer<br />
differential<br />
Differential<br />
Torque transfer<br />
mechanism<br />
Hypoid gear oil API classification GL-5 or higher<br />
SAE viscosity No. 90, 80W<br />
MITSUBISHI GENUINE DIA QUEEN AYC FLUID<br />
0.41 ± 0.02 <br />
0.70<br />
0<br />
0.05 <br />
Hydraulic piping fluid Dia Queen ATF SPII or equivalent 1 <br />
Torque transfer mechanism oil seal lips Vaseline As required
<strong>REAR</strong> <strong>AXLE</strong> – Special Tools 27-3<br />
SPECIAL TOOLS<br />
Tool Number Name Use<br />
MB991502<br />
MUT-II subassembly<br />
Inspection of AYC<br />
(diagnosis display by MUT-II)<br />
MB991529<br />
Diagnosis code<br />
check harness<br />
Inspection of AYC<br />
(diagnosis display by AYC warning lamp)<br />
MD998330<br />
(MD998331)<br />
Oil pressure<br />
gauge<br />
(2,942 kPa)<br />
Hydraulic pressure measurement<br />
<br />
MB991705<br />
Hose adapter<br />
MB990925<br />
Bearing & oil seal<br />
installer set<br />
Pressfitting of oil seal <br />
MB991115 Oil seal installer Pressfitting of oil seal <br />
(used in combination with MB990938)<br />
MD998812 Installer cap Pressfitting of oil seal <br />
MD998813 Installer 100<br />
MD998829<br />
Installer adapter<br />
(60)
27-4<br />
<strong>REAR</strong> <strong>AXLE</strong> – Special Tools / Troubleshooting <br />
MB990925<br />
Brass bar<br />
Toolbox<br />
Installer adapter<br />
Bar (one-touch type)<br />
Tool number (MB990925) O.D. mm Tool number (MB990925) O.D. mm<br />
A MB990926 39.0 A MB990933 63.5<br />
MB990927 45.0 MB990934 67.5<br />
MB990928 49.5 MB990935 71.5<br />
MB990929 51.0 MB990936 75.5<br />
MB990930 54.0 MB990937 79.0<br />
MB990931 57.0 B MB990938 –<br />
MB990932 61.0 C MB990939 –<br />
TROUBLESHOOTING <br />
BASIC TROUBLESHOOTING CONDITIONS<br />
Refer to Group 00 – How to Use Troubleshooting / Inspection Service Points.<br />
NOTE<br />
Before starting the troubleshooting procedure, make sure that the following items have been checked<br />
okay.<br />
The correct steering wheel has been properly installed in the neutral position of the steering column<br />
shaft.<br />
Tire and wheel sizes are correct with correct specifications. Inflation pressure, balance, and wear<br />
conditions are okay.<br />
Wheel alignment is correct.<br />
The engine, suspension, and other parts have not been remodeled so as to affect the AYC system.<br />
DIAGNOSIS FUNCTION<br />
READING THE DIAGNOSIS CODE<br />
Read the diagnosis code using an MUT-II tester or the AYC warning lamp.<br />
(Refer to Group 00 – How to Use Troubleshooting / Inspection Service Points.)<br />
ERASING THE DIAGNOSIS CODE<br />
Refer to Group 00 – How to Use Troubleshooting / Inspection Service Points.
<strong>REAR</strong> <strong>AXLE</strong> – Troubleshooting 27-5<br />
3. INSPECTION CHART FOR DIAGNOSIS CODE<br />
Diagnosis<br />
code No.<br />
Diagnosis items<br />
Ref. page<br />
12 Power supply voltage (valve power supply) system (open- or short-circuit) 27-6<br />
21 FR wheel speed sensor system (open- or short-circuit) 27-6<br />
22 FL wheel speed sensor system (open- or short-circuit) 27-6<br />
23 RR wheel speed sensor system (open- or short-circuit) 27-6<br />
24 RL wheel speed sensor system (open- or short-circuit) 27-6<br />
25 Wrong-diameter tire 27-8<br />
26 Faulty wheel speed sensor 27-9<br />
31 Steer sensor (ST-1, ST-2, ST-N) system (open-circuit) 27-10<br />
32 Steer sensor (ST-N) system (short-circuit) 27-10<br />
33 Steer sensor (ST-N) system 27-11<br />
34 Steer sensor (ST-1, ST-2) system (short-circuit) 27-11<br />
41 TPS system (open- or short-circuit) 27-12<br />
51 Longitudinal acceleration sensor system (open- or short-circuit) 27-12<br />
52 Longitudinal acceleration sensor 27-13<br />
56 Lateral acceleration sensor system (open- or short-circuit) 27-12<br />
61 Stop lamp switch system (open-circuit) 27-13<br />
65 ABS monitor system (open-circuit or defective ABS) 27-14<br />
71 Proportioning valve system (open- or short-circuit) 27-14<br />
72 Directional control valve (right) system (open- or short-circuit) 27-15<br />
73 Directional control valve (left) system (open- or short-circuit) 27-16<br />
81 AYC relay system (open- or short-circuit) 27-17<br />
82 Electric pump system 27-18<br />
83 Electric pump system 27-19
27-6<br />
<strong>REAR</strong> <strong>AXLE</strong> – Troubleshooting <br />
4. INSPECTION PROCEDURES FOR DIAGNOSIS CODES<br />
Code No. 12: Power supply voltage (valve power supply)<br />
system<br />
This code is output when the AYC-ECU power supply voltage drops below, goes<br />
beyond, a specified level.<br />
Probable cause<br />
<br />
<br />
<br />
Defective harness or connector<br />
Defective battery<br />
Defective AYC-ECU<br />
NOTE<br />
Refer to the corresponding item if any other diagnosis code is being output.<br />
Is the battery voltage correct<br />
OK<br />
Measure at B-96 AYC-ECU connector.<br />
Disconnect the connector and<br />
measure at the harness side.<br />
Ignition switch: ON<br />
Voltage across 31 and body ground<br />
OK: System voltage<br />
Replace AYC-ECU.<br />
OK<br />
NG<br />
NG<br />
Replace<br />
Check the following connectors:<br />
B-96, B-94, B-49, B-75, B-76<br />
OK<br />
Check the trouble symptom.<br />
NG<br />
Check and repair harness between<br />
ignition switch (IG 2 ) and AYC-ECU.<br />
NG<br />
Repair<br />
Code Nos. 21, 22, 23, 24: Wheel speed sensor system<br />
This code is output if any one of three wheel speed sensors fails to provide an input<br />
even after the other wheel exceeded 8 km/h.<br />
Probable cause<br />
Defective harness or connector<br />
Defective ABS-ECU<br />
Defective AYC-ECU<br />
<br />
Is an ABS diagnosis code No. 21, 22,<br />
23, or 24 output<br />
NO<br />
Measure at B-95 AYC-ECU connector.<br />
Disconnect the connector and<br />
measure at the harness side.<br />
Ignition switch: ON<br />
Turn tire at 1/2 to 1 revolution/sec.<br />
Voltage across 6/7/8/9 and body<br />
ground<br />
OK:<br />
42 mV or more (when measured<br />
with a circuit tester)<br />
120 mV-P or more (when<br />
measured with an oscilloscope)<br />
NG<br />
Check the following connectors:<br />
B-24, B-95<br />
OK<br />
YES<br />
OK<br />
NG<br />
Refer to Group 35B – Troubleshooting<br />
Check the following connector:<br />
B-95<br />
OK<br />
Check the trouble symptom.<br />
Replace AYC-ECU.<br />
Repair<br />
NG<br />
NG<br />
Repair<br />
Check the trouble symptom.<br />
NG<br />
Check harness between AYC-ECU<br />
and ABS-ECU.<br />
OK<br />
NG<br />
Repair<br />
Replace ABS-ECU.
<strong>REAR</strong> <strong>AXLE</strong> – Troubleshooting 27-7<br />
<br />
Check the installation of wheel speed<br />
sensor.<br />
NG<br />
Repair<br />
OK<br />
Measure at B-95 AYC-ECU connector.<br />
Disconnect the connector and<br />
measure at the harness side.<br />
Resistance across 7-20 (front, LH),<br />
6-19 (front, RH), 9-22 (rear, LH),<br />
and 8-21 (rear, RH).<br />
OK: 1.4 – 1.8 kΩ.<br />
OK<br />
NG<br />
Check the wheel speed sensor. (Refer<br />
to Group 35B.)<br />
OK<br />
Check the following connectors:<br />
B-95, B-52, B-17, A-26, A-50, D-04,<br />
D-14, D-19<br />
OK<br />
NG<br />
NG<br />
Replace<br />
Repair<br />
Check the trouble symptom.<br />
NG<br />
Check and repair the harness between<br />
wheel speed sensor and AYC-ECU.<br />
Check the wheel speed sensor output<br />
voltage. (Refer to P.27-37)<br />
OK<br />
NG<br />
Check the wheel speed sensor and<br />
ABS rotor. (Refer to Group 35B.)<br />
OK<br />
NG<br />
Replace<br />
Check the wheel bearing.<br />
Check the following connector:<br />
B-95<br />
NG<br />
Repair<br />
OK<br />
Check the trouble symptom.<br />
NG<br />
Replace AYC-ECU.
27-8<br />
<strong>REAR</strong> <strong>AXLE</strong> – Troubleshooting <br />
Code No. 25: Wrong-diameter tire<br />
This code is output if the speed of any one of the four wheels exceeds a specified<br />
level with respect to the average of the four wheel speed sensor outputs when the<br />
steering wheel is in the straight-ahead position and the vehicle speed exceeds 20<br />
km/h. At this time, the warning lamp does not light up.<br />
Probable cause<br />
Defective harness or connector<br />
Defective AYC-ECU<br />
Defective ABS-ECU<br />
<br />
Are correct tires mounted on all four<br />
wheels<br />
YES<br />
NO<br />
Repair<br />
Is ABS diagnosis code No. 15 output YES Group 35* – Refer to Troubleshooting<br />
NO<br />
OK<br />
Measure at B-95 AYC-ECU connector.<br />
Disconnect the connector and<br />
measure at the harness side.<br />
Ignition switch: ON<br />
Turn tire at 1/2 to 1 revolution/sec.<br />
Voltage across 6/7/8/9 and body<br />
ground.<br />
OK: 42 mV or more (when measured<br />
with a circuit tester)<br />
120 mV-P or more (when<br />
measured with an oscilloscope)<br />
NG<br />
Check the following connectors:<br />
B-24, B-95<br />
OK<br />
NG<br />
Check the following connector:<br />
B-95<br />
Replace AYC-ECU.<br />
Repair<br />
OK<br />
Check the trouble symptom.<br />
NG<br />
NG<br />
Repair<br />
Check the trouble symptom.<br />
NG<br />
Check harness between AYC-ECU<br />
and ABS-ECU.<br />
OK<br />
NG<br />
Repair<br />
Replace ABS-ECU.<br />
<br />
Are correct tires mounted on all four<br />
wheels<br />
NO<br />
Repair<br />
YES<br />
Check Wheel speed sensor for installation.<br />
NG<br />
Repair<br />
OK<br />
Check wheel speed sensor output voltage.<br />
(Refer to p. 27-37.)<br />
OK<br />
Check the following connector:<br />
B-95<br />
OK<br />
NG<br />
NG<br />
Check wheel speed sensor and ABS<br />
rotor. (Refer to Group 35B.)<br />
Repair<br />
OK<br />
Check wheel bearing.<br />
NG<br />
NG<br />
Replace<br />
Replace<br />
Check the trouble symptom.<br />
Replace AYC-ECU.<br />
NG<br />
OK<br />
Check the following connectors:<br />
B-95, B-52, B-17, A-26, A-50, D-04,<br />
D-14, D-19<br />
OK<br />
Check the trouble symptom.<br />
NG<br />
NO<br />
Repair<br />
Check and repair the harness between<br />
wheel speed sensor and AYC-ECU.
<strong>REAR</strong> <strong>AXLE</strong> – Troubleshooting 27-9<br />
Code No. 26: Wheel speed sensor system (faulty output<br />
signal)<br />
This code is output if the speed of one of the four wheels exceeds a specified level<br />
when the vehicle speed is 20 km/h or more. At this time, the warning lamp is turned<br />
on.<br />
Probable cause<br />
Defective harness or connector<br />
Defective AYC-ECU<br />
Defective ABS-ECU<br />
<br />
Is ABS diagnosis code No. 15 output YES Refer to Group 35B – Troubleshooting<br />
NO<br />
NG<br />
Measure at B-95 AYC-ECU connector.<br />
Disconnect the connector and<br />
measure at the harness side.<br />
Ignition switch: ON<br />
Turn tire at 1/2 to 1 revolution/sec.<br />
Voltage across 6/7/8/9 and body<br />
ground.<br />
OK: 42 mV or more (when measured<br />
with a circuit tester)<br />
120 mV-P or more (when<br />
measured with an oscilloscope)<br />
NG<br />
Check the following connectors:<br />
B-24, B-95<br />
OK<br />
NG<br />
Check the following connector:<br />
B-95<br />
Replace AYC-ECU.<br />
Repair<br />
OK<br />
Check the trouble symptom.<br />
NG<br />
NG<br />
Repair<br />
Check the trouble symptom.<br />
NG<br />
Check harness between AYC-ECU<br />
and ABS-ECU.<br />
OK<br />
NG<br />
Repair<br />
Replace ABS-ECU.<br />
<br />
Check wheel speed sensor for installation.<br />
NG<br />
Repair<br />
Replace AYC-ECU.<br />
OK<br />
Check wheel speed sensor output voltage.<br />
(Refer to P.27-37.)<br />
OK<br />
Check the following connector:<br />
B-95<br />
OK<br />
Check the trouble symptom.<br />
NG<br />
NG<br />
NG<br />
Check wheel speed sensor and ABS<br />
rotor. (Refer to Group 35B.)<br />
Repair<br />
OK<br />
Check wheel bearing.<br />
OK<br />
Check the following connectors:<br />
B-95, B-52, B-17, A-26, A-50, D-04,<br />
D-14, D-19<br />
OK<br />
NG<br />
NG<br />
NG<br />
Replace<br />
Replace<br />
Repair<br />
Check the trouble symptom.<br />
NG<br />
Check and repair the harness between<br />
wheel speed sensor and AYC-ECU.
27-10<br />
<strong>REAR</strong> <strong>AXLE</strong> – Troubleshooting <br />
Code No. 31: Steer sensor (ST-1, ST-2, ST-N) system<br />
This code is output when any of the steer sensors ST-1, ST-2, and ST-N is open-circuited<br />
or the steer sensor ground wire is open-circuited.<br />
Probable cause<br />
Defective steer sensor<br />
Defective harness or connector<br />
Defective AYC-ECU<br />
Measure at B-95 AYC-ECU connector.<br />
OK<br />
Connector connected.<br />
NG: Voltage<br />
Ignition switch: ON<br />
remains<br />
Voltage across 4/5/17 and body ground. at 0 V.<br />
OK: The voltage alternates between about<br />
3 V and about 0.5 V when the steering<br />
wheel is turned.<br />
NG: Voltage alternates<br />
between 4 V or<br />
more and 0.5 V.<br />
NG: Voltage remains<br />
at 4 V or more.<br />
Measure at B-98 steer sensor connector.<br />
Disconnect the connector and<br />
measure at the harness side.<br />
Continuity across 3 and body<br />
ground<br />
OK: Conducting<br />
OK<br />
Check the following connectors:<br />
B-95, B-65, B-98<br />
OK<br />
NG<br />
NG<br />
Check the following connector:<br />
B-95<br />
Replace AYC-ECU.<br />
Check the following connectors:<br />
B-98, B-50<br />
OK<br />
Check the trouble symptom.<br />
NG<br />
Check and repair the harness between<br />
speed sensor and AYC-ECU.<br />
Repair<br />
OK<br />
Check the trouble symptom.<br />
NG<br />
NG<br />
NG<br />
Repair<br />
Repair<br />
Check the trouble symptom.<br />
NG<br />
Check the harness between steer sensor<br />
and AYC-ECU.<br />
OK<br />
Replace the steer sensor.<br />
NG<br />
Repair<br />
Code No. 32: Steer sensor (ST-N) system<br />
This code is output when the steering wheel is considered to be turned 40 or more<br />
as determined with ST-1 and ST-2 with ST-N ON (LOW voltage).<br />
Probable cause<br />
Defective steer sensor<br />
Defective harness or connector<br />
Defective AYC-ECU<br />
Measure at B-95 AYC-ECU connector.<br />
Connector connected.<br />
Ignition switch: ON<br />
Turn steering wheel about 90 in<br />
either direction from the straightahead<br />
position.<br />
Voltage across 17 and body<br />
ground.<br />
OK: The voltage increases from<br />
about 0.5 V or less to about<br />
3 V.<br />
NG<br />
Measure at B-95 AYC-ECU connector.<br />
Disconnect the connector and<br />
measure at the harness side.<br />
Ignition switch: ON<br />
Turn steering wheel about 90 in<br />
either direction from the straightahead<br />
position.<br />
Voltage across 17 and body<br />
ground.<br />
OK: No continuity<br />
OK<br />
OK<br />
NG<br />
Check the following connector:<br />
B-95<br />
Replace AYC-ECU.<br />
OK<br />
Check the trouble symptom.<br />
NG<br />
Check the following connectors:<br />
B-95, B-65, B-98<br />
OK<br />
Check the trouble symptom.<br />
NG<br />
Check the harness between steer sensor<br />
and AYC-ECU.<br />
OK<br />
NG<br />
NG<br />
NG<br />
Repair<br />
Repair<br />
Repair<br />
Replace AYC-ECU.<br />
Replace the steer sensor.
<strong>REAR</strong> <strong>AXLE</strong> – Troubleshooting 27-11<br />
Code No. 33: Steer sensor (ST-N) system<br />
This code is output when the steering wheel is turned 400 or more in the same<br />
direction with ST-N OFF (HIGH voltage).<br />
Probable cause<br />
Defective steer sensor<br />
Defective harness or connector<br />
Defective AYC-ECU<br />
Measure at B-95 AYC-ECU connector.<br />
Connector connected.<br />
Ignition switch: ON<br />
Turn steering wheel about 90 in<br />
either direction from the straightahead<br />
position.<br />
Voltage across 17 and body<br />
ground.<br />
OK: The voltage increases from<br />
about 0.5 V or less to about<br />
3 V.<br />
Replace AYC-ECU.<br />
OK<br />
NG<br />
Check the following connectors:<br />
B-95, B-65, B-98<br />
OK<br />
Check the trouble symptom.<br />
NG<br />
Check the harness between steer sensor<br />
and AYC-ECU.<br />
OK<br />
Replace the steer sensor.<br />
NG<br />
NG<br />
Repair<br />
Repair<br />
Check the trouble symptom.<br />
NG<br />
Replace AYC-ECU.<br />
Code No. 34: Steer sensor (ST-1, ST-2) system<br />
This code is output if a turning condition is detected for a cumulative period of time<br />
of 15 min. or more, during which there is no change in the steer sensor (ST-1, ST-2)<br />
signals with the wheel speed 15 km/h or more.<br />
Probable cause<br />
Defective steer sensor<br />
Defective harness or connector<br />
Defective AYC-ECU<br />
Measure at B-95 AYC-ECU connector.<br />
Connector connected.<br />
Ignition switch: ON<br />
Voltage across 4/5 and body<br />
ground<br />
OK: The voltage alternates<br />
between about 0.5 V and<br />
about 3 V as the steering<br />
wheel is turned.<br />
Replace AYC-ECU.<br />
OK<br />
NG<br />
Check the following connectors:<br />
B-95, B-65, B-98<br />
OK<br />
Check the trouble symptom.<br />
NG<br />
Check the harness between steer sensor<br />
and AYC-ECU.<br />
OK<br />
Replace the steer sensor.<br />
NG<br />
NG<br />
Repair<br />
Repair<br />
Check the trouble symptom.<br />
NG<br />
Replace AYC-ECU.
27-12<br />
<strong>REAR</strong> <strong>AXLE</strong> – Troubleshooting <br />
Code No. 41: TPS system<br />
This code is output when the input from the throttle position sensor falls short of<br />
0.2 V.<br />
Probable cause<br />
Defective TPS<br />
Defective harness or connector<br />
Defective AYC-ECU<br />
Is the MPI diagnosis code No. 14 output<br />
NO<br />
Measure at B-95 AYC-ECU connector.<br />
Connector connected.<br />
Ignition switch: ON<br />
Voltage across 18 and body ground<br />
Fully open the throttle valve.<br />
OK: 4.5 – 5.0 V<br />
Replace AYC-ECU.<br />
OK<br />
YES<br />
NG<br />
Refer to GROUP 13A TROUBLE-<br />
SHOOTING.<br />
Check the following connector:<br />
B-95<br />
OK<br />
Check the trouble symptom.<br />
NG<br />
Check and repair the harness between<br />
AYC-ECU and TPS.<br />
NG<br />
Repair<br />
Code No. 51: Longitudinal acceleration sensor system<br />
Code No. 56: Lateral acceleration sensor system<br />
This code is output when the output from the acceleration sensor becomes 0.5 V<br />
or less or 4.5 V or more.<br />
Probable cause<br />
Defective longitudinal acceleration sensor<br />
Defective lateral acceleration sensor<br />
Defective harness or connector<br />
Defective AYC-ECU<br />
OK<br />
Measure at B-95 AYC-ECU connector.<br />
Connector connected.<br />
Ignition switch: ON<br />
Voltage across 1/3 and body<br />
ground<br />
OK: 0.5 – 4.5 V<br />
NG<br />
OK<br />
Measure at D-20, D-32 acceleration<br />
sensor connector.<br />
Connector connected.<br />
Ignition switch: ON<br />
Voltage across 2 and body ground<br />
OK: 0.5 – 4.5 V<br />
NG: 0.5 V or less NG: 4.5 V or more<br />
Check the following connector:<br />
B-95<br />
OK<br />
Check the trouble symptom.<br />
Check the following connectors:<br />
D-20, D-32<br />
OK<br />
Check the trouble symptom.<br />
Check the acceleration sensor. (Refer<br />
to P.27-42.)<br />
NG<br />
NG<br />
NG<br />
NG<br />
NG<br />
NG<br />
Repair<br />
Replace AYC-ECU.<br />
Repair<br />
Check and repair the harness between<br />
acceleration sensor and AYC-ECU.<br />
Replace<br />
Check and repair the harness between<br />
acceleration sensor and AYC-ECU.<br />
Check at D-20, D-32 acceleration sensor<br />
connector.<br />
Disconnect the connector and<br />
measure at the harness side.<br />
Ignition switch: ON<br />
Voltage across 1 and body ground<br />
OK: System voltage<br />
OK<br />
Check the following connectors:<br />
D-20, D-32<br />
OK<br />
Check the trouble symptom.<br />
NG<br />
Replace the acceleration sensor.<br />
NG<br />
NG<br />
Check the following connectors:<br />
D-20, D-32, B-49, B-75, B-76<br />
OK<br />
Check the trouble symptom.<br />
Replace<br />
OK<br />
Check and repair the harness between<br />
acceleration sensor and ignition<br />
switch.
<strong>REAR</strong> <strong>AXLE</strong> – Troubleshooting 27-13<br />
Code No. 52: Longitudinal acceleration sensor system<br />
This code is output when the longitudinal acceleration exceeds a predetermined value<br />
while the vehicle is running with both ABS and brakes being inactive.<br />
Probable cause<br />
Defective longitudinal acceleration sensor<br />
Defective harness or connector<br />
Defective AYC-ECU<br />
Check the acceleration sensor.<br />
(Refer to P.27-42.)<br />
NG<br />
Replace<br />
OK<br />
Measure at B-95 AYC-ECU connector.<br />
Connector connected<br />
Ignition switch: ON<br />
Voltage across 3 and body ground<br />
OK: 2.4 V to 2.6 V (where vehicle<br />
in horizontal position)<br />
OK<br />
Check the following connector:<br />
B-95<br />
OK<br />
Check the trouble symptom.<br />
NG<br />
NG<br />
NG<br />
Check the following connectors:<br />
B-95, B-52, D-20<br />
OK<br />
Check the trouble symptom.<br />
Repair<br />
NG<br />
Check and repair the harness between<br />
longitudinal acceleration sensor and<br />
AYC-ECU.<br />
NG<br />
Repair<br />
Replace AYC-ECU.<br />
Code No. 61: Stop lamp switch system<br />
This code is output under either of the following conditions:<br />
Stop lamp switch remains ON for 15 min. or more.<br />
There is an open-circuit in the harness between AYC-ECU and stop lamp switch.<br />
Probable cause<br />
Defective stop lamp switch<br />
Defective harness or connector<br />
Defective AYC-ECU<br />
Check the stop lamp switch.<br />
Replace AYC-ECU.<br />
OK<br />
Measure at the B-95 AYC-ECU connector.<br />
Disconnect the connector and<br />
measure at the harness side.<br />
Voltage across 11 and body ground<br />
Brake pedal not depressed.<br />
OK: 1 V or less<br />
OK<br />
Check the following connector:<br />
B-95<br />
OK<br />
Check the trouble symptom.<br />
NG<br />
NG<br />
NG<br />
NG<br />
Replace<br />
Check and repair the harness between<br />
AYC-ECU and stop lamp switch.<br />
Repair
27-14<br />
<strong>REAR</strong> <strong>AXLE</strong> – Troubleshooting <br />
Code No. 65: ABS monitor system<br />
This code is output when ABS is considered to remain activated (motor relay remains<br />
ON) for a continuous 1-min.-or-more period.<br />
It is output also when there is an open-circuit in the harness between ABS motor<br />
relay and AYC-ECU.<br />
Probable cause<br />
Defective harness or connector<br />
Defective AYC-ECU<br />
Is the ABS diagnosis code output<br />
Replace AYC-ECU.<br />
NO<br />
Check the following connector:<br />
B-95<br />
OK<br />
Check the trouble symptom.<br />
NG<br />
Check the harness between ABS<br />
motor relay and AYC-ECU.<br />
OK<br />
YES<br />
NG<br />
NG<br />
Refer to Group 35B – Troubleshooting<br />
Repair<br />
Repair<br />
Code No. 71: Proportioning valve system<br />
Probable cause<br />
This code is output when the proportioning valve control circuit is open- or short-circuited. Defective proportioning valve<br />
Defective harness or connector<br />
Defective AYC-ECU<br />
Measure at F-27 proportioning valve<br />
connector.<br />
Disconnect the connector and<br />
measure at the proportioning valve.<br />
Resistance across 2 – 3<br />
OK: 4.7 Ω or less<br />
OK<br />
Measure at F-27 proportioning valve<br />
connector.<br />
Disconnect the connector and<br />
measure at the harness side.<br />
Continuity across 2 and body<br />
ground<br />
OK: Conducting<br />
OK<br />
NG<br />
NG<br />
Replace the hydraulic unit.<br />
Check the following connectors:<br />
F-27, F-30<br />
OK<br />
Check the trouble symptom.<br />
OK<br />
Check and repair the harness between<br />
proportioning valve and body ground.<br />
NG<br />
Repair<br />
Check the following connectors:<br />
B-96, B-94, D-06, F-30, F-27<br />
NG<br />
Repair<br />
OK<br />
Check the trouble symptom.<br />
NG<br />
Check the harness between proportioning<br />
valve and AYC-ECU.<br />
OK<br />
NG<br />
Repair<br />
Replace AYC-ECU.
<strong>REAR</strong> <strong>AXLE</strong> – Troubleshooting 27-15<br />
Code No. 72: Directional control valve (right) system<br />
This code is output when the directional control valve (right) control circuit is openor<br />
short-circuited.<br />
Probable cause<br />
Defective directional control valve (right)<br />
Defective harness or connector<br />
Defective AYC-ECU<br />
Measure at F-29 directional control<br />
valve (right) connector.<br />
Disconnect the connector and<br />
measure at the directional control<br />
valve side.<br />
Resistance across 1 – 2<br />
OK: 19 – 21 Ω or less<br />
NG<br />
Replace the hydraulic unit.<br />
OK<br />
Measure at F-29 directional control<br />
valve (right) connector.<br />
Disconnect the connector and<br />
measure at the directional control<br />
valve side.<br />
Continuity across 1 and body<br />
ground<br />
OK: Conducting<br />
OK<br />
NG<br />
Check the following connectors:<br />
F-29, F-30<br />
OK<br />
Check the trouble symptom.<br />
OK<br />
Check and repair the harness between<br />
directional control valve (right) and<br />
body ground.<br />
NG<br />
Repair<br />
Check the following connectors:<br />
B-96, B-94, D-06, F-30, F-29<br />
NG<br />
Repair<br />
OK<br />
Check the trouble symptom.<br />
NG<br />
Check the harness between directional<br />
control valve (right) and AYC-ECU.<br />
OK<br />
NG<br />
Repair<br />
Replace AYC-ECU.
27-16<br />
<strong>REAR</strong> <strong>AXLE</strong> – Troubleshooting <br />
Code No. 73: Directional control valve (left) system<br />
This code is output when the directional control valve (left) control circuit is openor<br />
short-circuited.<br />
Probable cause<br />
Defective directional control valve (left)<br />
Defective harness or connector<br />
Defective AYC-ECU<br />
Measure at F-28 directional control<br />
valve (left) connector.<br />
Disconnect the connector and<br />
measure at the directional control<br />
valve side.<br />
Resistance across 1 – 2<br />
OK: 19 – 21 Ω or less<br />
NG<br />
Replace the hydraulic unit.<br />
OK<br />
Measure at F-28 directional control<br />
valve (left) connector.<br />
Disconnect the connector and<br />
measure at the directional control<br />
valve side.<br />
Continuity across 1 and body<br />
ground<br />
OK: Conducting<br />
OK<br />
NG<br />
Check the following connectors:<br />
F-28, F-30<br />
OK<br />
Check the trouble symptom.<br />
NG<br />
Check and repair the harness between<br />
directional control valve (left) and body<br />
ground.<br />
NG<br />
Repair<br />
Check the following connectors:<br />
B-96, B-94, D-06, F-30, F-28<br />
NG<br />
Repair<br />
OK<br />
Check the trouble symptom.<br />
NG<br />
Check the harness between directional<br />
control valve (left) and AYC-ECU.<br />
OK<br />
NG<br />
Repair<br />
Replace AYC-ECU.
<strong>REAR</strong> <strong>AXLE</strong> – Troubleshooting 27-17<br />
Code No. 81: AYC relay system<br />
Probable cause<br />
This code is output when the coil circuit of the AYC relay is open- or short-circuited. Defective AYC relay<br />
Defective harness or connector<br />
Defective AYC-ECU<br />
Check the AYC relay.<br />
(Refer to P.27-42.)<br />
OK<br />
Measure at A-126 AYC relay connector.<br />
Disconnect the connector and<br />
measure at the harness side.<br />
Continuity across 1 and body<br />
ground<br />
OK: Conducting<br />
OK<br />
NG<br />
NG<br />
Replace the AYC relay.<br />
Check the following connector:<br />
A-126<br />
OK<br />
Check the trouble symptom.<br />
NG<br />
Check and repair the harness between<br />
AYC relay and body ground.<br />
NG<br />
Repair<br />
Check the following connectors:<br />
B-96, B-126<br />
NG<br />
Repair<br />
NG<br />
Check the trouble symptom.<br />
NG<br />
Check the harness between AYC relay<br />
and AYC-ECU.<br />
OK<br />
NG<br />
Repair<br />
Replace AYC-ECU.
27-18<br />
<strong>REAR</strong> <strong>AXLE</strong> – Troubleshooting <br />
Code No. 82: Electric pump system<br />
This code is output if the pressure switch is not set to high-pressure position despite<br />
the AYC-ECU’s command to drive the AYC relay for a given period of time.<br />
Probable cause<br />
Low hydraulic oil level<br />
Oil leak<br />
Defective fusible link<br />
Defective AYC relay<br />
Defective harness or connector<br />
Defective AYC motor<br />
Defective accumulator pressure switch<br />
Defective AYC-ECU<br />
Is the hydraulic oil level correct in the reservoir tank<br />
(Refer to P.27-33.)<br />
YES<br />
NO<br />
Is there a hydraulic oil leak<br />
YES<br />
Add hydraulic oil.<br />
NO<br />
Repair the leak.<br />
Is diagnosis code no. 81 output<br />
OK<br />
Check the following<br />
connectors:<br />
A-126, B-94, B-27, F-32<br />
OK<br />
NG<br />
NO<br />
MUT-II Actuator test:<br />
No. 12 Electric pump operation check<br />
OK: Pump operation sounds are heard<br />
Measure at A-126 AYC relay connector.<br />
Disconnect the connector and measure at the harness side.<br />
Voltage across 5 and body ground<br />
OK: System voltage<br />
OK<br />
NG<br />
<br />
<br />
Check AYC relay for<br />
continuity.<br />
(Refer to P.27-42.)<br />
Check AYC motor for<br />
operation.<br />
NG<br />
NG<br />
Check the following<br />
connector: A-126<br />
OK<br />
Check the trouble symptom.<br />
Repair<br />
NG<br />
Check and repair the harness<br />
between fusible link<br />
no. 10 and AYC relay.<br />
Repair<br />
YES<br />
OK<br />
NG<br />
Check the AYC relay system. (Refer to P.27-17.)<br />
Measure at F-31 accumulator pressure switch connector.<br />
Disconnect the connector and measure at the harness side.<br />
Ignition switch: ON<br />
Voltage across 2 and body ground<br />
OK: System voltage<br />
NG<br />
OK<br />
Repair<br />
Check the following<br />
NG<br />
connectors: B-95, B-94,<br />
D-06, F-30, F-31<br />
OK<br />
Check the trouble symptom.<br />
NG<br />
Check the harness<br />
between AYC-ECU and<br />
accumulator pressure<br />
switch.<br />
OK<br />
Replace AYC-ECU.<br />
NG<br />
Replace the hydraulic unit<br />
for a defective accumulator<br />
pressure switch.<br />
Repair<br />
Repair<br />
Check the trouble symptom.<br />
NG<br />
Check the harness<br />
between AYC relay and<br />
AYC motor, and between<br />
AYC motor and body<br />
ground.<br />
OK<br />
NG<br />
Replace<br />
Replace AYC-ECU.
<strong>REAR</strong> <strong>AXLE</strong> – Troubleshooting 27-19<br />
Code No. 83: Electric pump system<br />
This code is output if the pressure switch is not set to low-pressure position despite<br />
the AYC-ECU’s command to change the driving force.<br />
Probable cause<br />
Defective accumulator pressure switch<br />
Defective harness or connector<br />
Does the AYC motor continue turning<br />
when the ignition switch is turned ON<br />
NO<br />
YES<br />
Check the AYC relay for continuity.<br />
(Refer to P.27-42.)<br />
OK<br />
NG<br />
Repair<br />
Check and repair the harness between<br />
AYC relay and AYC motor.<br />
Is diagnosis code no. 71, 72, or 73<br />
output<br />
NO<br />
YES<br />
<br />
<br />
<br />
Check the proportioning valve<br />
system (code no. 71).<br />
(Refer to P.27-14.)<br />
Check the directional control valve<br />
(right) system (code no. 72).<br />
(Refer to P.27-15.)<br />
Check the directional control valve<br />
(left) system (code no. 73).<br />
(Refer to P.27-16.)<br />
Measure at F-31 accumulator pressure<br />
switch connector.<br />
Disconnect the connector and<br />
measure at the harness side.<br />
Ignition switch: ON<br />
(1) Voltage across 2 and body ground<br />
OK: System voltage<br />
(2) Continuity across 1 and body<br />
ground<br />
OK: Conducting<br />
(2) NG<br />
OK<br />
(1) NG<br />
Replace the hydraulic unit for a defective<br />
accumulator pressure switch.<br />
Check the following connectors:<br />
B-95, B-94, D-06, F-30, F-31<br />
OK<br />
Check the trouble symptom.<br />
NG<br />
Check the harness between AYC-ECU<br />
and accumulator pressure switch.<br />
OK<br />
NG<br />
NG<br />
Repair<br />
Repair<br />
Replace AYC-ECU.<br />
Check the following connectors:<br />
F-31, F-30<br />
NG<br />
Repair<br />
OK<br />
Check the trouble symptom.<br />
NG<br />
Check and repair the harness between<br />
accumulator pressure switch and body<br />
ground.
27-20<br />
<strong>REAR</strong> <strong>AXLE</strong> – Troubleshooting <br />
5. INSPECTION CHART FOR TROUBLE SYMPTOMS<br />
Trouble symptom<br />
Inspection<br />
procedure No.<br />
Ref. page<br />
Communication between MUT-II and the whole system is not possible. 1 27-20<br />
Communicatio between MUT-II and AYC-ECU is not possible. 2 27-21<br />
AYC warning lamp does not light up when the ignition key is turned to “ON” (engine<br />
stationary).<br />
3 27-22<br />
AYC warning lamp remains lit up after the engine has started. 4 27-23<br />
AYC is inoperative.<br />
Unable to start or accelerate on slippery road surfaces.<br />
Rear tires are noisy during low-speed cornering.<br />
Vehicle skews.<br />
5 27-23<br />
6 27-24<br />
6. INSPECTION PROCEDURE FOR TROUBLE SYMPTOMS<br />
INSPECTION PROCEDURE 1<br />
Communication between MUT-II and the whole system is<br />
not possible.<br />
The cause may be a malfunction of the power supply circuit or the ground circuit<br />
of the diagnosis connector.<br />
Probable cause<br />
<br />
<br />
Defective diagnosis connector<br />
Defective harness or connector<br />
Measure at B-22 diagnosis combination<br />
meter connector.<br />
Voltage across 16 and body ground<br />
OK: System voltage<br />
OK<br />
NG<br />
Check the following connectors:<br />
B-22, B-49, B-75, B-73<br />
OK<br />
Check the trouble symptom.<br />
NG<br />
NG<br />
Repair<br />
Check and repair the harness between<br />
power supply and diagnosis connector.<br />
Measure at B-22 diagnosis connector.<br />
Disconnect the connector and<br />
measure at the harness side.<br />
Continuity across 4/5 and body<br />
ground<br />
OK: Conducting<br />
Replace MUT-II.<br />
OK<br />
NG<br />
Check the following connectors:<br />
B-22, B-50<br />
OK<br />
Check the trouble symptom.<br />
NG<br />
Check and repair the harness between<br />
body ground and diagnosis connector.<br />
NG<br />
Repair
<strong>REAR</strong> <strong>AXLE</strong> – Troubleshooting 27-21<br />
INSPECTION PROCEDURE 2<br />
Communication between MUT-II and the AYC-ECU is not<br />
possible.<br />
The cause may be a malfunction of the AYC-ECU power supply circuit or an open<br />
circuit in the diagnosis output circuit.<br />
Probable cause<br />
Blown fuse<br />
Defective harness or connector<br />
Defective AYC-ECU<br />
Measure at B-22 diagnosis connector<br />
and B-95 AYC-ECU connector.<br />
Disconnect the connectors and<br />
measure at the harness side.<br />
Continuity across 1 of B-22 and<br />
10 of B-95<br />
Continuity across 7 of B-22 and<br />
23 of B-95<br />
OK: Conducting<br />
NG<br />
Check the following connectors:<br />
B-95, B-65, B-22<br />
OK<br />
Check the trouble symptom.<br />
NG<br />
Check and repair the harness between<br />
AYC-ECU and diagnosis connctor.<br />
NG<br />
Repair<br />
OK<br />
Measure at B-96 AYC-ECU connector.<br />
Disconnect the connector and<br />
measure at the harness side.<br />
Ignition switch: ON<br />
Voltage across 31 and body ground<br />
OK: System voltage<br />
OK<br />
NG<br />
Check the following connectors:<br />
B-96, B-94, B-49, B-75, B-76<br />
OK<br />
Check the trouble symptom.<br />
NG<br />
Check and repair the harness between<br />
ignition switch (IG 2 ) and AYC-ECU.<br />
NG<br />
Repair<br />
Measure at B-95 and B-96 AYC-ECU<br />
connectors.<br />
Disconnect the connectors and<br />
measure at the harness side.<br />
Continuity across 26/46 and body<br />
ground<br />
OK: Conducting<br />
NG<br />
Check the following connectors:<br />
B-95, B-96<br />
OK<br />
Check the following symptom.<br />
NG<br />
NG<br />
Replace<br />
Replace AYC-ECU.<br />
OK<br />
Check and repair the harness between<br />
AYC-ECU and earth.
27-22<br />
<strong>REAR</strong> <strong>AXLE</strong> – Troubleshooting <br />
INSPECTION PROCEDURE 3<br />
AYC warning lamp does not light up when the ignition key<br />
is turned to “ON” (engine stationary).<br />
The lamp power supply circuit is probably open-circuited, lamp bulb is out, or the<br />
circuit between AYC warning lamp and AYC-ECU or AYC-ECU itself is defective.<br />
Probable cause<br />
Blown fuse<br />
AYC warning lamp out<br />
Defective harness or connector<br />
Defective AYC-ECU<br />
Measure at B-08 combination meter<br />
connector.<br />
Disconnect the connector and<br />
measure at the harness side.<br />
Ignition switch: ON<br />
Voltage across 48 and body ground<br />
OK: Symptom voltage<br />
OK<br />
NG<br />
Check the following connectors:<br />
B-08, B-74, B-76<br />
OK<br />
Check the trouble symptom.<br />
NG<br />
Check and repair the harness between<br />
ignition switch (IG 2 ) and AYC warning<br />
lamp.<br />
NG<br />
Repair<br />
Measure at B-96 AYC-ECU connector.<br />
Disconnect the connector and<br />
measure at the harness side.<br />
Ignition switch: ON<br />
Warning lamp when 36 is grounded<br />
to body<br />
OK: Lit up<br />
NG<br />
Check the lamp bulb.<br />
OK<br />
Check the following connectors:<br />
B-96, B-94, B-08<br />
OK<br />
NG<br />
NG<br />
Replace<br />
Repair<br />
Replace AYC-ECU.<br />
OK<br />
Check the trouble symptom.<br />
NG<br />
Check the harness between AYC<br />
warning lamp and AYC-ECU.<br />
OK<br />
NG<br />
Repair<br />
Replace combination meter.
INSPECTION PROCEDURE 4<br />
<strong>REAR</strong> <strong>AXLE</strong> – Troubleshooting 27-23<br />
AYC warning lamp remains lit up after the engine has<br />
started.<br />
Probable cause<br />
The AYC warning lamp ON circuit is probably short-circuited. Defective combination meter<br />
Defective harness (short-circuit)<br />
Defective AYC-ECU<br />
NOTE<br />
This symptom is limited only when the communication with MUT-II is possible with AYC-ECU power supply<br />
in normal condition and the diagnosis code is correct.<br />
Does the AYC warning lamp goes out<br />
when the B-96 AYC-ECU connector<br />
is disconnected<br />
NO<br />
Check the harness between AYC<br />
warning lamp and AYC-ECU.<br />
OK<br />
Replace combination meter.<br />
YES<br />
NG<br />
Replace AYC-ECU.<br />
Repair<br />
INSPECTION PROCEDURE 5<br />
AYC is inoperative.<br />
Unable to start or accelerate on slippery road surfaces.<br />
The hydraulic oil level is probably low, there is an oil leak, the hydraulic unit is defective,<br />
or the torque transfer differential is defective.<br />
Probable cause<br />
Low hydraulic oil level<br />
Oil leak<br />
Defective hydraulic unit<br />
Defective torque transfer differential<br />
NOTE<br />
This symptom is limited only when the diagnosis code is correct.<br />
Check the hydraulic oil level.<br />
OK<br />
NG<br />
Check for oil leak.<br />
NG<br />
OK<br />
Repair<br />
Add hydraulic oil.<br />
Check the AYC for operation.<br />
(Refer to P.27-34.)<br />
NG<br />
OK<br />
Check the AYC fluid.<br />
NG<br />
Replace AYC fluid.<br />
OK<br />
Correct<br />
Check the trouble symptom.<br />
NG<br />
Replace the torque transfer differential.<br />
Check hydraulic pressure..<br />
(Refer to P.27-35.)<br />
NG<br />
Bleed the system of air.<br />
(Refer to P.27-34.)<br />
OK<br />
Is foreign matter trapped in the hydraulic<br />
line<br />
NO<br />
Replace the torque transfer differential.<br />
YES<br />
Repair<br />
Check the trouble symptom.<br />
NG<br />
Replace the hydraulic unit.
27-24<br />
<strong>REAR</strong> <strong>AXLE</strong> – Troubleshooting <br />
INSPECTION PROCEDURE 6<br />
Rear tires are noisy during low-speed cornering.<br />
Vehicle skews.<br />
Probable cause<br />
The hydraulic unit or torque transfer differential is probably defective. Defective hydraulic unit<br />
Defective torque transfer differential<br />
NOTE<br />
This symptom is limited only when the diagnosis code is correct.<br />
Check the AYC for operation..<br />
(Refer to P.27-34.)<br />
NG<br />
OK<br />
Check the AYC fluid.<br />
NG<br />
Replace AYC fluid.<br />
OK<br />
Correct<br />
Check the trouble symptom.<br />
NG<br />
Replace the torque transfer differential.<br />
Check hydraulic pressure.<br />
(Refer to P.27-35.)<br />
OK<br />
Is foreign matter trapped in the hydraulic<br />
line<br />
NO<br />
Replace the torque transfer differential.<br />
NG<br />
YES<br />
Bleed the system of air..<br />
(Refer to P.27-34.)<br />
Repair<br />
Check the trouble symptom.<br />
NG<br />
Replace the hydraulic unit.
DATA LIST REFERENCE TABLE<br />
<strong>REAR</strong> <strong>AXLE</strong> – Troubleshooting 27-25<br />
The following items can be read by t01he MUT- from the ECU input data.<br />
Item No. Check item Checking requirements Normal value<br />
01 Front-right wheel speed Perform a test run. Vehicle speeds<br />
displayed on the<br />
02 Front-left wheel speed<br />
speedometer and<br />
03 Rear-right wheel speed<br />
MUT-II are identical.<br />
04 Rear-left wheel speed<br />
05 Front-right wheel speed<br />
(0.2 km/h)<br />
06 Front-left wheel speed (0.2<br />
km/h)<br />
07 Rear-right wheel speed<br />
(0.2 km/h)<br />
08 Rear-left wheel speed (0.2<br />
km/h)<br />
10 Vehicle speed<br />
11 System voltage Ignition switch: ON Battery voltage<br />
15 TPS opening Accelerator pedal position/Igni-<br />
tion switch: ON<br />
Fully closed<br />
Partially open<br />
Fully open<br />
300 – 1000mV<br />
Gradually increases<br />
from the above value.<br />
4500 – 5000mV<br />
19 Longitudinal acceleration<br />
sensor<br />
Vehicle stands on level ground 2.4 – 2.6V<br />
Perform a test run.<br />
Reading fluctuates<br />
up or down with 2.5V<br />
as its center.<br />
20 Lateral acceleration sensor Vehicle stands on level ground 2.4 – 2.6V<br />
Perform a test run.<br />
22 Steering wheel operation Steering wheel turning direction<br />
Ignition switch: ON<br />
90 deg. clockwise<br />
90 deg counterclockwise<br />
Reading fluctuates<br />
up or down with 2.5V<br />
as its center.<br />
R90 deg<br />
L90 deg<br />
23 Steering wheel turning<br />
angular velocity<br />
Steering wheel position<br />
Ignition switch: ON<br />
Not turned<br />
Turned<br />
0 deg/s<br />
Reading varies according<br />
to turning<br />
speeds.<br />
45 Idle position switch Accelerator pedal position<br />
Ignition position: ON<br />
Not depressed<br />
Depressed<br />
ON<br />
OFF
27-26<br />
<strong>REAR</strong> <strong>AXLE</strong> – Troubleshooting <br />
Item No.<br />
Check item<br />
Checking requirements<br />
Normal value<br />
46 Steer sensor (ST-N) Steering wheel position<br />
Ignition switch: ON<br />
Neutral position<br />
90 deg. turned<br />
from neutral<br />
position<br />
ON<br />
OFF<br />
47 Steer sensor (ST-1) Steering wheel position: Turn slowly counterclockwise.<br />
Ignition switch: ON<br />
48 Steer sensor (ST-2) Steering wheel position: Turn slowly clockwise.<br />
Ignition switch: ON<br />
ON and OFF are<br />
indicated alternately.<br />
ON and OFF are<br />
indicated alternately.<br />
50 Stop lamp switch Accelerator pedal position<br />
Ignition switch: ON<br />
56 Pressure switch Forced activation No.13 or<br />
No.14 is being executed.<br />
Depressed<br />
Released<br />
Electric pump in<br />
operation<br />
Electric pump<br />
not in operation<br />
ON<br />
OFF<br />
Low<br />
High<br />
59 ABS monitor ABS monitor ON<br />
ABS not in operation<br />
OFF
ACTUATOR TEST REFERENCE TABLE<br />
<strong>REAR</strong> <strong>AXLE</strong> – Troubleshooting 27-27<br />
The following items can be tested by driving the corresponding actuator forcibly using the MUT-II.<br />
Item No. Check item Checking requirements Normal value<br />
10 Air bleeding Supply current to proportioning<br />
valve in accordance with steering<br />
angle to operate directional valve.<br />
11 Oil level check Let the directional valve operate to<br />
left and right 20 times.<br />
12 Electric pump operation Let the electric pump operate for 5<br />
seconds.<br />
13 Clutch operation (left) Let the directional valve operate to<br />
supply the maximum pressure to the<br />
left clutch.<br />
14 Clutch operation (right) Let the directional valve operate to<br />
supply the maximum pressure to the<br />
right clutch.<br />
15 Control OFF Turn off the electric pump relay to<br />
deactivate AYC control.<br />
No air is to be bled from the<br />
bleeder plug on the torque transfer<br />
differential.<br />
To be checked by oil level in<br />
reservoir tank.<br />
Operation sounds of the electric<br />
pump are to be heard.<br />
The operation conditions are to be<br />
checked by the speed difference<br />
between left and right rear wheels<br />
with the wheels raised. For details,<br />
refer to AYC Operation Check on<br />
P.27-34.<br />
The operation conditions are to be<br />
checked by the speed difference<br />
between left and right rear wheels<br />
with the wheels raised. For details,<br />
refer to AYC Operation Check on<br />
P.27-34.<br />
During the test run, some<br />
differences are to be recognized in<br />
running behaviors between when<br />
the system is ON and when it is<br />
OFF.<br />
NOTE<br />
(1) The actuator test is feasible only when the following requirements are all satisfied.<br />
All of inputs from four wheel speed sensors show 20 km/h or lower.<br />
No system failure is registered.<br />
The steering angle is within ±30 deg. from the neutral position.<br />
(2) The actuator test comes to an end when either of the following conditions is met since the forced<br />
actuation is canceled.<br />
Either of inputs from four wheel sensors shows higher than 20 km/h (with exception of Item<br />
No.15 “Control OFF”).<br />
Some trouble with the system is registered.<br />
Forced activation time expires.<br />
MUT-II is removed.<br />
The clear key of MUT-II is operated.
27-28<br />
<strong>REAR</strong> <strong>AXLE</strong> – Troubleshooting <br />
CHECK AT AYC-ECU TERMINALS<br />
TERMINAL VOLTAGE LISTING<br />
The voltage is to be measured across each terminal and ground terminal.<br />
Fig. below shows the arrangement of the terminals.<br />
Terminal<br />
No.<br />
Check item Check requirement Normally<br />
1 Lateral acceleration sensor Ignition switch: ON 2.4 – 2.6 V<br />
(horizontal position)<br />
2 Longitudinal acceleration<br />
sensor ground<br />
Lateral acceleration sensor<br />
ground<br />
3 Longitudinal acceleration<br />
sensor<br />
At all times<br />
Ignition switch: ON<br />
0 V<br />
2.4 – 2.6 V<br />
(horizontal position)<br />
4 Steer sensor (ST-2) Engine: Idle speed<br />
Turn steering wheel slowly.<br />
5 Steer sensor (ST-1) Engine: Idle speed<br />
Turn steering wheel slowly.<br />
0 V ↔ approx. 3 V<br />
flashing<br />
0 V ↔ approx. 3 V<br />
flashing<br />
6* 1 FR wheel speed Vehicle stationary 1 V or less<br />
Forward vehicle slowly.<br />
0 – 5 V<br />
7* 1 FL wheel speed Vehicle stationary 1 V or less<br />
Forward vehicle slowly.<br />
0 – 5 V<br />
8* 1 RR wheel speed Vehicle stationary 1 V or less<br />
Forward vehicle slowly.<br />
0 – 5 V<br />
9* 1 FL wheel speed Vehicle stationary 1 V or less<br />
Forward vehicle slowly.<br />
0 – 5 V<br />
10 Diagnosis selection input When MUT-II is connected 1 V or less<br />
When MUT-II is disconnected<br />
System voltage<br />
11 Stop lamp switch Ignition switch:<br />
ON<br />
Stop lamp switch: ON<br />
Stop lamp switch: OFF<br />
System voltage<br />
1 V or less<br />
12* 1 ABS monitor When ABS monitor is activated System voltage<br />
When ABS monitor is deactivated<br />
1 V or less
<strong>REAR</strong> <strong>AXLE</strong> – Troubleshooting 27-29<br />
Terminal<br />
No.<br />
Check item<br />
Check requirement<br />
Normally<br />
17 Steer sensor (ST-N) Engine:<br />
Idle speed<br />
18 TPS Ignition switch:<br />
ON<br />
Steering wheel: Neutral position<br />
Steering wheel: Turned 90 from<br />
neutral position<br />
Accelerator pedal: Fully closed<br />
Accelerator pedal: Fully open<br />
0.5 V or less<br />
2.5 – 3.5 V<br />
0.3 – 1.0 V<br />
4.5 – 5.0 V<br />
23 Diagnosis data input/output When MUT-II is connected Serial communication<br />
with MUT-II<br />
When MUT-II is disconnected<br />
1 V or less<br />
24 Idle position switch Ignition switch:<br />
ON<br />
Accelerator pedal: Fully closed<br />
Accelerator pedal: Fully open<br />
2 V or less<br />
4.5 – 5.0 V<br />
25 Accumulator pressure<br />
switch<br />
Ignition switch:<br />
ON<br />
Accumulator internal pressure:<br />
Low<br />
2 V or less<br />
Accumulator internal pressure:<br />
High<br />
System voltage<br />
26 ECU ground At all times 0 V<br />
31 AYC-ECU power supply Ignition switch: ON System voltage<br />
Ignition switch: OFF<br />
0 V<br />
35 AYC motor relay Ignition switch:<br />
ON<br />
36 AYC warning lamp Ignition switch:<br />
ON<br />
When motor is energized<br />
When motor is deenergized<br />
When lamp is OFF<br />
When lamp is ON<br />
System voltage<br />
2 V or less<br />
System voltage<br />
2 V or less<br />
37 Directional control valve<br />
(right)<br />
Ignition switch:<br />
ON<br />
Right clutch: ON<br />
Right clutch: OFF<br />
System voltage<br />
0 V<br />
38 Proportioning valve Ignition switch:<br />
ON<br />
AYC-ON<br />
AYC-OFF<br />
0 V to system voltage<br />
0 V<br />
39 ECU backup power supply At all times System voltage<br />
45 Directional control valve<br />
(left)<br />
Ignition switch:<br />
ON<br />
Left clutch: ON<br />
Left clutch: OFF<br />
System voltage<br />
0 V<br />
46 ECU ground At all times 0 V<br />
NOTE<br />
*1: Indicates the vehicles with ABS.
27-30<br />
<strong>REAR</strong> <strong>AXLE</strong> – Troubleshooting <br />
LISTING OF RESISTANCE AND CONTINUITY ACROSS CONNECTOR TERMINALS ON HARNESS<br />
SIDE<br />
Measure the resistance and check for continuity with the ignition switch in the “OFF” position and<br />
AYC-ECU connector disconnected.<br />
Measure the resistance and check for continuity across terminals listed below.<br />
Fig. below shows the arrangement of terminals.<br />
Terminal No. Signal name Normally<br />
2 – body ground Longitudinal acceleration sensor ground, lateral acceleration sensor ground Conducting<br />
26 – body ground ECU ground Conducting<br />
35 – body ground AYC motor relay Conducting<br />
37 – body ground Directional control valve (right) 15.4 – 16.4 Ω<br />
38 – body ground Proportioning valve 3.4 – 4.0 Ω<br />
45 – body ground Directional control valve (left) 15.4 – 16.4 Ω<br />
46 – body ground ECU ground Conducting<br />
6 – 19* 2 Speed sensor (front, RH) 1.4 – 1.8 kΩ<br />
7 – 20* 2 Speed sensor (front, LH) 1.4 – 1.8 kΩ<br />
8 – 21* 2 Speed sensor (rear, RH) 1.4 – 1.8 kΩ<br />
9 – 22* 2 Speed sensor (rear, LH) 1.4 – 1.8 kΩ<br />
NOTE<br />
*2: Indicates the vehicles without ABS.
<strong>REAR</strong> <strong>AXLE</strong> – On-vehicle Service 27-31<br />
Alignment marks<br />
ON-VEHICLE SERVICE<br />
<br />
<strong>REAR</strong> <strong>AXLE</strong> TOTAL BACKLASH CHECK<br />
If the drive system roars or the vehicle vibrates, use the<br />
following procedure to measure total backlash in the rear<br />
axle. Based on the measurement taken, determine whether<br />
the differential carrier assembly needs to be removed or not.<br />
1. Place the shift lever in the neutral position and operate<br />
the parking brake.<br />
2. Turn the propeller shaft fully clockwise and make an<br />
alignment mark on the companion flange dust cover and<br />
gear carrier.<br />
3. Turn the propeller shaft fully counterclockwise and<br />
measure the deviation between the alignment marks.<br />
Limit: 5 mm<br />
4. If the backlash exceeds the limit, replace the differential<br />
carrier assembly.<br />
Filler plug<br />
49 Nm<br />
Upper<br />
limit<br />
Lower<br />
limit<br />
Gear oil<br />
GEAR OIL LEVEL CHECK<br />
DIFFERENTIAL<br />
1. Remove the filler plug.<br />
2. Check that the gear oil level is within the specified range<br />
from the bottom end of the filler plug hole.<br />
Standard value (A): 6 mm<br />
3. If the gear oil level exceeds the standard value, add the<br />
specified gear oil up to the bottom end of the filler plug<br />
hole.<br />
Specified gear oil:<br />
Hypoid gear oil API classification GL-5 or higher<br />
SAE viscosity Number 90, 80W.<br />
NOTE<br />
10C or more: #90, less than 10C: #80<br />
4. Fit the filler plug and tighten it to the specified torque.
27-32<br />
<strong>REAR</strong> <strong>AXLE</strong> – On-vehicle Service <br />
Filler plug<br />
49 Nm<br />
TORQUE TRANSFER MECHANISM<br />
1. Remove the filler plug.<br />
2. Check that the gear oil level is up to the bottom end<br />
of the filler plug hole.<br />
3. If the gear oil level is lower than the bottom end of the<br />
filler plug hole, add the specified gear oil up to the bottom<br />
end of the filler plug hole.<br />
Specified gear oil:<br />
MITSUBISHI GENUINE DIA QUEEN SUPER AYC<br />
FLUID<br />
4. Fit the filler plug and tighten it to the specified torque.<br />
Gear oil<br />
Filler plug<br />
49 Nm<br />
Gear oil<br />
Drain plug<br />
GEAR OIL CHANGE<br />
DIFFERENTIAL<br />
1. Remove the drain plug to discharge the gear oil.<br />
2. Fit the drain plug and tighten it to the specified torque.<br />
Tightening torque: 49 Nm<br />
3. Remove the filler plug and add the specified gear oil<br />
up to the bottom end of the filler plug hole.<br />
Specified gear oil:<br />
Hypoid gear oil API classification GL-5 or higher<br />
SAE viscosity Number 90, 80W.<br />
Quantity used: 0.41 ± 0.02 <br />
NOTE<br />
10C or more: #90, less than 10C: #80<br />
4. Fit the filler plug and tighten it to the specified torque.
<strong>REAR</strong> <strong>AXLE</strong> – On-vehicle Service 27-33<br />
Oil syringe<br />
(Recommended tool)<br />
Gear oil<br />
Filler plug<br />
49 Nm<br />
Drain plug<br />
49 Nm<br />
TORQUE TRANSFER MECHANISM<br />
1. Remove the drain plug to discharge the gear oil.<br />
2. Fit the drain plug and tighten it to the specified torque.<br />
3. Remove the filler plug.<br />
4. Pour the specified gear oil up to the bottom end of the<br />
filler plug hole using an oil syringe (recommended tool)<br />
through the gap between the body and the differential<br />
support arm.<br />
Specified gear oil:<br />
MITSUBISHI GENUINE DIA QUEEN SUPER AYC<br />
FLUID<br />
Quantity used: 0.70 0<br />
0.05 <br />
5. Fit the filler plug and tighten it to the specified torque.<br />
FLUID LEVEL CHECK<br />
1. Remove the maintenance lid located in the luggage<br />
compartment.<br />
2. <br />
If the vehicle has been run, leave it for 5 min. or more<br />
in an ordinary temperature (10C to 30C) to allow the<br />
accumulator internal pressure to drop.<br />
NOTE<br />
If the ambient temperature is less than 10C or less,<br />
allow more time to leave the vehicle to stand idle.<br />
<br />
Connect the MUT-II to the 16-pin diagnosis connector.<br />
Turn on the ignition switch. Operate the MUT-II (Item<br />
No.11) to activate the hydraulic unit forcibly for removing<br />
the pressure from inside the accumulator.<br />
Caution<br />
Before connecting or disconnecting the MUT-II,<br />
always turn off the ignition switch.<br />
NOTE<br />
(1) The forced activation (oil level check mode) will be<br />
automatically canceled as soon as the directional<br />
valve in the hydraulic unit is activated to the left and<br />
right 20 times.<br />
It can also be canceled forcibly by operating the clear<br />
key on the MUT-II.<br />
(2) While this function is being disabled by the fail-safe<br />
function, the forced activation of the hydraulic unit<br />
can not be executed.<br />
3. Check that the fluid level in the oil reservoir is in the<br />
range between MAX and MIN.<br />
4. If the fluid level is lower than MIN, add the specified<br />
fluid.<br />
Specified fluid: Dia Queen ATF SP II or equivalent<br />
5. Reinstall the maintenance lid.
27-34<br />
<strong>REAR</strong> <strong>AXLE</strong> – On-vehicle Service <br />
BLEEDING<br />
1. Lift up the vehicle.<br />
2. Connect the MUT-II to the 16-pin diagnosis connector.<br />
Caution<br />
Before connecting or disconnecting the MUT-II,<br />
always turn off the ignition switch.<br />
3. Turn on the ignition switch.<br />
4. Operate the MUT-II (Item No.10) to activate the hydraulic<br />
unit forcibly.<br />
Vinyl hose<br />
Bleeder<br />
screws<br />
NOTE<br />
(1) The forced activation (air bleeding mode) will be<br />
automatically canceled after 5 minutes operation. It<br />
can also be canceled forcibly by operating the clear<br />
key on the MUT-II.<br />
(2) While this function is being disabled by the fail-safe<br />
function, the forced activation of the hydraulic unit<br />
can not be executed.<br />
5. Remove the cap of the left bleeder screw on the torque<br />
transfer differential and connect a vinyl hose.<br />
6. Gradually turn the steering wheel clockwise from the<br />
straight-ahead position. At this time, loosen the left bleeder<br />
screw and check that fluid is discharged with air.<br />
7. After air has been completely discharged, tighten the<br />
bleeder screw.<br />
Caution<br />
While the system is being bled of air, add fluid as<br />
necessary to ensure that it is left in the oil reservoir<br />
during the entire procedure.<br />
8. Repeat steps (6) and (7) two to three times until no air<br />
bubbles are recognized in the fluid that comes out. Then,<br />
tighten the bleeder screw to the specified torque.<br />
Tightening torque: 9 Nm<br />
9. Perform steps (5) through (8) for the right bleeder screw.<br />
Note, however, that the steering wheel should be turned<br />
counterclockwise.<br />
10. After the system has been completely bled of air, check<br />
for the fluid level. (Refer to P.27-33.)<br />
Caution<br />
If the system is not completely bled of air, the hydraulic<br />
unit could generate noise, degrading pump durability.<br />
AYC OPERATION CHECK<br />
1. Lift up the vehicle.<br />
2. Connect the MUT-II to the 16-pin diagnosis connector.<br />
Caution<br />
Before connecting or disconnecting the MUT-II, always<br />
turn off the ignition switch.<br />
3. Start the engine.<br />
4. Operate the MUT-II with the transmission in 2nd or a<br />
higher gear and check to ensure that the vehicle speed<br />
is higher than 10 km/h using the Data List (Item 10).
<strong>REAR</strong> <strong>AXLE</strong> – On-vehicle Service 27-35<br />
MB991705<br />
NOTE<br />
(1) Hold the steering wheel in the neutral position.<br />
(2) If the steering wheel is turned, it may happen that<br />
the AYC system continues to operate (operation<br />
sounds are heard from the torque transfer differential).<br />
However, it does not mean a system failure. If such<br />
a case is encountered, perform the following<br />
operations with the steering wheel in the neutral<br />
position to cancel the AYC function.<br />
Disengage the clutch.<br />
Set the transmission to neutral.<br />
Stop the engine.<br />
5. Operate the MUT-II (Item Nos.13 and 14) to activate<br />
the torque transfer differential.<br />
NOTE<br />
(1) The forced activation (clutch operation mode) will be<br />
automatically canceled after 1 minute operation.<br />
It can also be canceled forcibly by operating the clear<br />
key on the MUT-II.<br />
(2) While this function is being disabled by the fail-safe<br />
function, the forced activation of the torque transfer<br />
differential can not be executed.<br />
6. Operate the MUT-II to confirm that the several speeds<br />
of the wheels are as shown below, using the Data List<br />
(Item Nos.07 and 08).<br />
<br />
The speed of left rear wheel is more than 2 km/h<br />
higher than that of right rear wheel.<br />
<br />
The speed of right rear wheel is more than 2 km/h<br />
higher than that of left rear wheel.<br />
NOTE<br />
If the above requirements are not satisfied, the system<br />
is probably failed. Check the hydraulic pressure.<br />
HYDRAULIC PRESSURE CHECK<br />
1. Lift up the vehicle.<br />
2. Connect the MUT-II to the 16-pin diagnosis connector.<br />
Caution<br />
Before connecting or disconnecting the MUT-II,<br />
always turn off the ignition switch.<br />
MD998330<br />
3. Turn on the ignition switch.<br />
4. Disconnect the joint between the hydraulic unit and the<br />
hydraulic unit hose assembly. Connect the special tool<br />
to the L port. To the R port, attach a blind plug or connect<br />
the L port of the removed hydraulic unit hose assembly.<br />
5. Operate the MUT-II (Item No.13) to activate the hydraulic<br />
unit.<br />
NOTE<br />
(1) The forced activation (clutch left side operation check<br />
mode) will be automatically canceled after 1 minute<br />
operation.<br />
It can also be canceled forcibly by operating the clear<br />
key on the MUT-II.
27-36<br />
<strong>REAR</strong> <strong>AXLE</strong> – On-vehicle Service <br />
(2) While this function is being disabled by the fail-safe<br />
function, the forced activation of the hydraulic unit<br />
can not be executed.<br />
6. Check to ensure that the hydraulic pressure generated<br />
by the hydraulic unit conforms to the standard value.<br />
Standard value: 1.0 – 1.6 MPa<br />
NOTE<br />
During checking the hydraulic pressure, occasionally<br />
replenish the oil reservoir with fluid so that it does not<br />
become empty.<br />
7. Check the hydraulic pressure of the clutch right side by<br />
repeating the steps (4) through (6). At this time, however,<br />
the special tool must be connected to the R port and<br />
the blind plug or the R port of the removed hydraulic<br />
unit hose assembly must be attached to the L port. Further,<br />
the MUT-II must be operated in the forced activation mode<br />
Item No. 14 (clutch right side operation check mode).<br />
8. If the measured value exceeds the standard value, replace<br />
the hydraulic unit.<br />
9. Connect the hydraulic unit hose assembly to the hydraulic<br />
unit and to the torque transfer differential and tighten<br />
the flare nuts to the specified torque.<br />
MB990938<br />
MB991115<br />
MD998829<br />
MD998812<br />
Specified torque: 34 Nm<br />
10. Pour the specified fluid in the oil reservoir up to the MAX<br />
mark. Then, bleed the system.<br />
Specified fluid: Dia Queen ATF SP II or equivalent<br />
Fluid amount used: Approx. 1 <br />
DIFFERENTIAL CARRIER OIL SEAL<br />
REPLACEMENT<br />
DIFFERENTIAL<br />
1. Remove the drive shaft.<br />
2. Remove the oil seal from the differential carrier.<br />
3. Using the special tool, drive a new oil seal all the way<br />
into position.<br />
4. Coat the oil seal lips and the drive shaft surface in contact<br />
with the oil seal with multi-purpose grease.<br />
5. Replace the drive shaft circlip with a new one and mount<br />
the drive shaft to the differential carrier.<br />
6. Check for correct wheel alignment.<br />
TORQUE TRANSFER MECHANISM<br />
1. Remove the drive shaft.<br />
2. Remove the oil seal from the differential carrier.<br />
3. Using the special tool, drive a new oil seal all the way<br />
into position.<br />
4. Coat the oil seal lips and the drive shaft surface in contact<br />
with the oil seal with the specified grease.<br />
Specified grease: Vaseline<br />
5. Replace the drive shaft circlip with a new one and mount<br />
the drive shaft to the differential carrier.<br />
6. Check for correct wheel alignment.<br />
MD998813
<strong>REAR</strong> <strong>AXLE</strong> – On-vehicle Service 27-37<br />
AYC-ECU connector harness side<br />
WHEEL SPEED SENSOR OUTPUT VOLTAGE<br />
MEASUREMENT <br />
1. Lift up the vehicle and release the parking brake.<br />
2. Disconnect the AYC-ECU harness connector and take<br />
measurements on the harness side connector.<br />
Caution<br />
Insert the probe from the harness side with the double<br />
lock of the connector unlocked. Inserting it to the<br />
terminal side could result in poor contact.<br />
3. Turn the wheel to be tested at about 1/2 to one<br />
revolution/sec. and check for the output voltage using<br />
a circuit tester (AC mV range) or oscilloscope.<br />
Terminal nos.<br />
Front LH Front RH Rear LH Rear RH<br />
7 6 9 8<br />
20 19 22 21<br />
Output voltage:<br />
When circuit tester is used: 70 mV or more<br />
When oscilloscope is used: 200 mVp-p or more<br />
(4) If the output voltage is lower than the above value, it<br />
is probably attributable to the following faults. Check or<br />
replace the wheel speed sensor as necessary.<br />
Excessive clearance between the pole piece and rotor<br />
of the wheel speed sensor<br />
Defective wheel speed sensor<br />
When turned manually<br />
At idle (5 to 6 km/h)<br />
1st gear<br />
Waveform Check Using Oscilloscope<br />
Check the harness and connector of the wheel speed sensor<br />
for connection. Then, use an oscilloscope to check for output<br />
voltage waveform of each sensor as follows.<br />
Start the engine and monitor the sensor by turning the wheel;<br />
for a driving wheel, let it turn by shifting into the 1st gear<br />
and for a driven wheel turn it manually at a constant speed.<br />
NOTE<br />
(1) Waveform may be observed by actually running the<br />
vehicle.<br />
(2) The output voltage is low when the wheel speed remains<br />
low and builds up as the wheel speed increases.
27-38<br />
<strong>REAR</strong> <strong>AXLE</strong> – On-vehicle Service <br />
Waveform Observation Points<br />
Symptom Probable cause Action<br />
Waveform amplitude is too small, or no<br />
waveform.<br />
Defective wheel speed sensor<br />
Replace sensor.<br />
Waveform amplitude varies greatly. (No Excessive axle hub lateral and radial runout Replace hub.<br />
problem if the smallest amplitude is 100<br />
mV or more) Poor AYC-ECU grounding Repair.<br />
Noise on waveform or disturbed<br />
waveform<br />
Open-circuited sensor<br />
Open-circuited harness<br />
Improperly mounted wheel speed sensor<br />
Missing or collapsed ABS rotor tooth<br />
Replace sensor.<br />
Repair harness.<br />
Correct sensor installation.<br />
Replace ABS rotor.<br />
Caution<br />
Since the wheel speed sensor cable follows the movement of the front or rear suspension, it<br />
may be open-circuited only when the vehicle is run on rough roads and not on ordinary road.<br />
The wheel speed sensor output voltage waveform should therefore be checked also by rocking<br />
the sensor harness so that driving on rough roads may be simulated.<br />
AYC fusible link<br />
ACTION WHEN BATTERY RUNS OUT<br />
When the engine is started using a booster cable where the<br />
battery has completely run down and you attempt to start<br />
the vehicle without waiting for the battery to recover a certain<br />
charge, the engine can misfire and you just cannot start to<br />
move it. In such cases, charge the battery sufficiently; or,<br />
remove the AYC fusible link from the engine compartment<br />
relay box to make AYC inactive before attempting to start<br />
the vehicle. When the fusible link is removed, the AYC warning<br />
lamp lights up. After the battery has been recharged, fit the<br />
fusible link back again and start the engine to ensure that<br />
the AYC warning lamp is off.
<strong>REAR</strong> <strong>AXLE</strong> – Hydraulic Unit 27-39<br />
HYDRAULIC UNIT <br />
REMOVAL AND INSTALLATION<br />
Caution<br />
(1) When connecting the return hose and suction hose, do not apply lubricant.<br />
(2) No foreign matter should be allowed in the hydraulic piping and joints.<br />
Pre-removal Operation<br />
Trunk Side Trim Removal<br />
Hydraulic Piping Fluid Draining<br />
Post-installation Operation<br />
Hydraulic Piping Fluid Filling and Bleeding<br />
(Refer to P.27-32, 34.)<br />
Trunk Side Trim Installation<br />
14<br />
12 Nm<br />
12<br />
9<br />
13<br />
11<br />
4<br />
12 Nm<br />
18 Nm<br />
4<br />
6<br />
7<br />
8<br />
5<br />
2<br />
18 Nm<br />
10<br />
34 Nm<br />
3<br />
12 Nm<br />
1<br />
12 Nm<br />
34 Nm<br />
A<br />
C<br />
Removal steps<br />
1. Dust guard<br />
2. Suction hose and return hose connection<br />
3. Hydraulic unit hose assembly connection<br />
4. Hydraulic unit and bracket assembly<br />
mounting bolt<br />
5. Hydraulic unit and bracket assembly<br />
6. Hydraulic unit<br />
7. Hydraulic unit bracket<br />
8. AYC harness<br />
9. Hydraulic unit bracket<br />
10. Hydraulic unit hose assembly<br />
B 11. Return hose<br />
B 12. Suction hose<br />
A 13. Grommet<br />
14. Oil reservoir
27-40<br />
<strong>REAR</strong> <strong>AXLE</strong> – Hydraulic Unit <br />
REMOVAL SERVICE POINTS<br />
A HYDRAULIC UNIT REMOVAL<br />
Should the hydraulic unit be discarded, drill a hole in the<br />
accumulator at the illustrated position beforehand in order<br />
to release the inside gas.<br />
Caution<br />
(1) The hydraulic unit has its accumulator filled with a<br />
high pressure gas. Never throw it into a fire. Also,<br />
never attempt to disassemble, press, weld or melt<br />
it.<br />
(2) When drilling a hole in the accumulator, be sure to<br />
wear safety goggles since drill chips may blow out<br />
together with the gas.<br />
Grommet<br />
INSTALLATION SERVICE POINTS<br />
A GROMMET INSTALLATION<br />
On the vehicle mounted with a sunroof, mount the drain pipe<br />
to the grommet as illustrated.<br />
25 ± 5 mm<br />
Drain pipe<br />
15 mm<br />
B SUCTION HOSE / RETURN HOSE INSTALLATION<br />
Fit the suction hose and return hose to the nipple of hydraulic<br />
unit as illustrated.<br />
Nipple<br />
Suction hose and<br />
return hose<br />
Hook<br />
C HYDRAULIC UNIT AND BRACKET ASSEMBLY<br />
INSTALLATION<br />
Hook the hydraulic unit bracket hook to the rear floor side<br />
member and install the hydraulic unit and bracket assembly<br />
mounting bolt.<br />
Rear floor side member
<strong>REAR</strong> <strong>AXLE</strong> – Sensor Relay 27-41<br />
SENSOR RELAY <br />
REMOVAL AND INSTALLATION<br />
Caution: SRS<br />
For vehicles with SRS, before removal of air bag module and clock spring, refer to GROUP 52B<br />
– Service Precautions and Air Bag Module and Clock Spring.<br />
2<br />
1<br />
3<br />
4<br />
A<br />
Steer sensor removal steps<br />
Steering wheel and column cover<br />
1. Steer sensor<br />
Acceleration sensor and AYC relay<br />
removal<br />
2. Longitudinal acceleration sensor<br />
3. Lateral acceleration sensor<br />
4. AYC relay<br />
NOTE<br />
For the wheel speed sensor, refer to GROUP 35B.<br />
Slit plate<br />
Steer sensor<br />
REMOVAL SERVICE POINT<br />
A STEER SENSOR REMOVAL<br />
Remove the steer sensor from the column switch.<br />
Caution<br />
(1) A photocoupler is used as the steer sensor. Use care<br />
not to allow dust or grease to be on the sensor.<br />
(2) Do not bend or dirty with grease the slit plate on<br />
the column switch side.
27-42<br />
<strong>REAR</strong> <strong>AXLE</strong> – Sensor Relay / AYC-ECU<br />
INSPECTION<br />
1. LONGITUDINAL AND LATERAL ACCELERATION<br />
SENSOR CHECK<br />
Refer to GROUP 35B – Acceleration Sensor.<br />
2. AYC RELAY CONTINUITY CHECK<br />
Battery voltage<br />
When not energized<br />
When energized<br />
Terminal No.<br />
1 3 4 5<br />
AYC-ECU<br />
REMOVAL AND INSTALLATION<br />
Pre-removal and Post-installation Operation<br />
Front Floor Console Removal and Installation<br />
5 Nm<br />
AYC-ECU<br />
5 Nm