Droplet , automated LED luminaire User manual v2.0
Droplet , automated LED luminaire User manual v2.0
Droplet , automated LED luminaire User manual v2.0

Create successful ePaper yourself
Turn your PDF publications into a flip-book with our unique Google optimized e-Paper software.
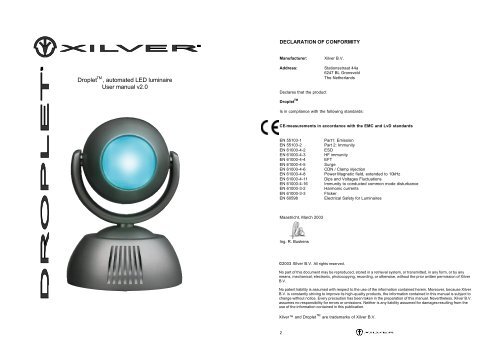
DECLARATION OF CONFORMITY<br />
Manufacturer:<br />
Xilver B.V.<br />
<strong>Droplet</strong> TM , <strong>automated</strong> <strong>LED</strong> <strong>luminaire</strong><br />
<strong>User</strong> <strong>manual</strong> <strong>v2.0</strong><br />
Address:<br />
Declares that the product<br />
Stationsstraat 44a<br />
6247 BL Gronsveld<br />
The Netherlands<br />
<strong>Droplet</strong> TM<br />
Is in compliance with the following standards:<br />
CE-measurements in accordance with the EMC and LvD standards<br />
EN 55103-1<br />
EN 55103-2<br />
EN 61000-4-2<br />
EN 61000-4-3<br />
EN 61000-4-4<br />
EN 61000-4-5<br />
EN 61000-4-6<br />
EN 61000-4-8<br />
EN 61000-4-11<br />
EN 61000-4-16<br />
EN 61000-3-2<br />
EN 61000-3-3<br />
EN 60598<br />
Part1: Emission<br />
Part 2: Immunity<br />
ESD<br />
HF immunity<br />
EFT<br />
Surge<br />
CDN / Clamp injection<br />
Power Magnetic field, extended to 10kHz<br />
Dips and Voltages Fluctuations<br />
Immunity to conducted common mode disturbance<br />
Harmonic currents<br />
Flicker<br />
Electrical Safety for Luminaires<br />
Maastricht, March 2003<br />
Ing. R. Buskens<br />
©2003 Xilver B.V. All rights reserved.<br />
No part of this document may be reproduced, stored in a retrieval system, or transmitted, in any form, or by any<br />
means, mechanical, electronic, photocopying, recording, or otherwise, without the prior written permission of Xilver<br />
B.V.<br />
No patent liability is assumed with respect to the use of the information contained herein. Moreover, because Xilver<br />
B.V. is constantly striving to improve its high-quality products, the information contained in this <strong>manual</strong> is subject to<br />
change without notice. Every precaution has been taken in the preparation of this <strong>manual</strong>. Nevertheless, Xilver B.V.<br />
assumes no responsibility for errors or omissions. Neither is any liability assumed for damages resulting from the<br />
use of the information contained in this publication.<br />
Xilver and <strong>Droplet</strong> TM are trademarks of Xilver B.V.<br />
2
TABLE OF CONTENTS<br />
Declaration of conformity ............................................................................................................... 2<br />
1. Introduction......................................................................................................................... 4<br />
2. Product description.............................................................................................................. 5<br />
2.1. Configuration ...................................................................................................................... 5<br />
2.1.1. Unpack the <strong>Droplet</strong> .......................................................................................................... 5<br />
2.1.2. Install the <strong>Droplet</strong> ............................................................................................................. 5<br />
2.2. Functionality ....................................................................................................................... 9<br />
2.3. Accessories .......................................................................................................................12<br />
2.4. Place of usage ...................................................................................................................12<br />
2.5. Maintenance ......................................................................................................................13<br />
2.6. Safety warnings .................................................................................................................13<br />
3. Terms of warranty ..............................................................................................................14<br />
4. Appendices ........................................................................................................................15<br />
1. INTRODUCTION<br />
Thank you for buying the Xilver <strong>Droplet</strong> TM , an entirely new concept in lighting technology and lighting<br />
application.<br />
The <strong>Droplet</strong> TM is the smallest and first moving <strong>LED</strong> <strong>luminaire</strong> with accurate 16 bit fully adjustable pan<br />
and tilt. With a pan travel of 360° and a tilt of 260°. The <strong>LED</strong> light source is comparable in white output<br />
to a 50 Watts halogen reflector bulb and in colors even brighter. It has an expected lifetime of 100.000<br />
hours.<br />
The color combining system enables you to produce virtually any color with HSI (Hue, Saturation and<br />
Intensity) or RGB color mixing without having multi-color shadows. It is possible to create either fluent<br />
or lightning fast color changes. Impressive white and full color strobes can be controlled by the<br />
frequency and duration channel.<br />
Prepared for installation: low power consumption, light weight, small size, universal mounting plate, no<br />
cables or connectors visible, extension shaft available and custom housing colors make full integration<br />
in its environment possible.<br />
The <strong>luminaire</strong> is convection cooled, direct driven by stepper motors and needs therefore low<br />
maintenance.<br />
Read this <strong>manual</strong> carefully Before using the <strong>Droplet</strong> TM and use it as a guide to guarantee proper use of<br />
this new concept in lighting. If you have any questions please contact your supplier.<br />
This <strong>manual</strong> will first explain you how to use the <strong>Droplet</strong> TM , 2.1 Configuration. In part 2.2 Functionality<br />
you can find a detailed description of all the functions. To adapt the <strong>Droplet</strong> TM fully to your desires we<br />
offer some accessories to extend the applicability. The place of usage, maintenance requirements and<br />
terms of warranty will be quoted in the last 3 paragraphs.<br />
To this <strong>manual</strong> is added 1 appendix, one sheet that gives you an overview of the technical<br />
specifications, the dipswitch functions and the DMX mapping.<br />
3<br />
4
Step 1: Mounting the Base Plate<br />
2. PRODUCT DESCRIPTION<br />
2.1. Configuration<br />
2.1.1. Unpack the <strong>Droplet</strong><br />
The <strong>Droplet</strong> TM is delivered in a custom designed packing to protect the unit during transport. Refuse<br />
parcels in damaged condition!<br />
Use this package always to transport the <strong>Droplet</strong> TM .<br />
The package contains:<br />
<strong>Droplet</strong> TM <strong>luminaire</strong><br />
<strong>User</strong> <strong>manual</strong><br />
<strong>Droplet</strong> TM quick reference sheet<br />
Mounting plate, including 4 Plastic feet<br />
2 M3*10 counter sink screws<br />
2.1.2. Install the <strong>Droplet</strong><br />
Make sure the unit is installed in an environment that complies with the prescriptions of paragraph 2.4.<br />
Place of usage. Install the <strong>Droplet</strong> TM in 4 steps:<br />
Make sure that the base plate is always equipped with the 4 plastic feet when using or installing the<br />
<strong>Droplet</strong> TM .<br />
Standing <strong>Droplet</strong> TM :<br />
The Base Plate is provided with 4 holes. These holes can be used to mount the delivered plastic feet.<br />
Click the narrow part of the foot into the hole, then push the rod into the foot and it is fixed on the Base<br />
Plate.<br />
Hanging <strong>Droplet</strong> TM :<br />
In the centre of the Base Plate is a hole with a diameter of 10mm (0,39inch) reserved for the fixing of<br />
hooks and clamps, for example a G-clamp.<br />
Caution: the Nut, O-ring or Bolt that will be turned to the inside of the <strong>Droplet</strong> TM should not be higher<br />
than 10mm (0,39 inch).<br />
Fixed installation:<br />
There are 2 slotted holes in the base plate, 1 is reserved for the power cable(s) and the other is<br />
reserved for the data cable(s). Before mounting the plate put the wiring for the <strong>Droplet</strong> TM trough the<br />
holes.<br />
The base plate can be fixed on a electric wall box. It is also possible to mount the base plate on wood<br />
or other rigid materials, respecting proper and flat mounting of the base plate. Use screws with a max.<br />
diameter of 3mm / 0.12inch and make sure the base plate is fixed well.<br />
The <strong>Droplet</strong> TM may be used in virtually any direction: standing, hanging in vertical direction as fixed on<br />
a wall, hanging horizontally.<br />
Caution: to guarantee the stability and durability of the unit in horizontal direction make sure that the unit<br />
is placed with the logo’s on the base placed on the vertical axis!<br />
Step<br />
1<br />
Mounting the Base Plate<br />
Warning: A <strong>Droplet</strong> TM with extension shaft may only operate hanging (max. extension length: 55cm /<br />
21.65inch) in vertical direction or standing (max. extension length: 20cm / 7.87inch).<br />
Step<br />
2<br />
Step<br />
3<br />
Step<br />
4<br />
Wiring the Base Plate<br />
Addressing the <strong>Droplet</strong> TM<br />
Mounting the <strong>Droplet</strong> TM on<br />
the Base Plate<br />
Step 2: Wiring the Base Plate<br />
Power<br />
Input<br />
The <strong>Droplet</strong> TM is provided with an internal wide range power supply. It operates on a voltage range<br />
from 100 to 240VAC at a frequency of 50 to 60Hz, no switches that need to be changed.<br />
Consumption<br />
The fixture has a maximum power consumption of 35 Watts.<br />
Figure 1.: Install the <strong>Droplet</strong> TM in 4 steps<br />
Wiring<br />
You need a 2 pole power cable of 0.75mm 2 to 1.5mm 2 / 18AWG to 16AWG to provide the <strong>Droplet</strong> TM<br />
with power. Use always stranded wire for the power.<br />
Warning: Do not apply power while connecting the cables!<br />
Connection of the 2 poles into the power connector on the Base Plate:<br />
Fig 2: schematic top view of the Power connector block<br />
5<br />
6
Pin / Hole Mark Description<br />
a “L” Live<br />
b “N” Neutral<br />
Table 1: power cable specification<br />
The power cables should be stripped for 5mm (0.20inch), crimp a ferrule on the stripped part for a<br />
reliable connection. Push the first conductor into hole ‘a’ until the cable isolation touches the<br />
connector. Then tighten screw 1, hand fixed, make sure the cable is well fixed, check this by pulling it<br />
strong. Do the same for the second conductor.<br />
Attention: after turning off the power of the <strong>Droplet</strong> TM wait at least for 5 seconds before turning the<br />
power on again, otherwise it might occur that the <strong>Droplet</strong> TM does not initialize correctly.<br />
Data<br />
Control<br />
The <strong>Droplet</strong> TM can be controlled by the USITT DMX512 protocol, hereinafter called DMX. The<br />
<strong>Droplet</strong> TM uses minimal 7 channels (reduced mode HSI) and maximal 12 channels (normal mode<br />
RGB).<br />
Wiring<br />
You need a 3 pole data cable to provide the <strong>Droplet</strong> TM with data. For cable requirements see the<br />
USITT DMX512 protocol. Connection of the Data in / out into the data connector on the Base Plate:<br />
picture<br />
Fig 3: schematic top view of the Data connector block<br />
Pin / Hole Mark Description<br />
1 Ground out<br />
2 + Hot out<br />
3 - Cold out<br />
4 Ground in<br />
5 + Hot in<br />
6 - Cold in<br />
Table 2: Data cable specification<br />
The data cables should be stripped for 5mm (0.20inch), crimp a ferrule on the stripped part for a<br />
reliable connection.. Push the first cable: ‘ground out’ into hole 1 until the cable isolation touches the<br />
connector. Then tighten screw 1, hand fixed, make sure the cable is well fixed, check this by pulling it<br />
once. Repeat this actions for the hot out and cold out, hot in and cold in and for the ground in.<br />
Termination at the end of a DMX line:<br />
for fixed installation, place a resistor of 120ohm between hole 2 and 3 of the “data out” connector<br />
termination plug with a resistor of 120ohm between pole 2 and pole 3<br />
Address settings<br />
To control each <strong>Droplet</strong> TM individually via DMX, each unit should have a unique identity. This identity<br />
can be given by the DMX address settings. There is a dipswitch on the bottom of the fixture to set the<br />
DMX address.<br />
Warning: when changing the dipswitch settings of the <strong>Droplet</strong> TM make sure the power of the unit is<br />
turned off!<br />
7<br />
Step 3: Addressing the <strong>Droplet</strong> TM<br />
Dipswitch functions<br />
Dipswitch 1 2 3 4 5 6 7 8 9 10 11 12<br />
Function DMX-LSB DMX-MSB Mixing Method Address Range Reserved<br />
Position 0 Address setting (binary) H S I Normal<br />
1 1 2 4 8 16 32 64 128 256 R G B Compact<br />
Table 3: Dipswitch functions<br />
The Dipswitch of the <strong>Droplet</strong> TM has 12 switches. The first nine switches are meant for the DMX<br />
address setting. Switch number 10 is meant for the method of color mixing and switch 11 defines<br />
whether the <strong>Droplet</strong> TM functions in normal or compact mode to reduce the number of required<br />
channels.<br />
DMX Mapping<br />
Compact<br />
Normal<br />
Channel H S I color mixing R G B color mixing H S I color mixing R G B color mixing<br />
1 Reset Reset Reset Reset<br />
2 Pan Pan Pan Pan<br />
3 Tilt Tilt Tilt Tilt<br />
4 Strobe frequency Strobe frequency Speed Speed<br />
5 Hue Red Pan Fine Pan Fine<br />
6 Saturation Green Tilt Fine Tilt Fine<br />
7 Intensity Blue Strobe frequency Strobe frequency<br />
8 Intensity Strobe Duration Strobe Duration<br />
9 Hue Red<br />
10 Saturation Green<br />
11 Intensity Blue<br />
12 Intensity<br />
Table 4: DMX - mapping<br />
For example:<br />
You have 5 <strong>Droplet</strong>s and you want to control them individually. If you choose for the normal mode and<br />
HSI color mixing each fixture has 11 channels (this is also the default setting), this means each<br />
<strong>Droplet</strong> TM uses 11 addresses from the set start address. So the first <strong>Droplet</strong> TM receives address<br />
number 1, the second 12, the third 23, the fourth 34 and the fifth 45. Make sure the <strong>Droplet</strong>s have<br />
separated addresses!<br />
Mode and address settings with the dipswitch:<br />
Fixture 1: 1 2 3 4 5 6 7 8 9 10 11 12<br />
1 0 0 0 0 0 0 0 0 0 0 0<br />
Fixture 2:<br />
Fixture 3:<br />
Fixture 4:<br />
Fixture 5:<br />
8<br />
1 2 3 4 5 6 7 8 9 10 11 12<br />
0 0 1 1 0 0 0 0 0 0 0 0<br />
1 2 3 4 5 6 7 8 9 10 11 12<br />
1 1 1 0 1 0 0 0 0 0 0 0<br />
1 2 3 4 5 6 7 8 9 10 11 12<br />
0 1 0 0 0 1 0 0 0 0 0 0<br />
1 2 3 4 5 6 7 8 9 10 11 12<br />
1 0 1 1 0 1 0 0 0 0 0 0
Step 4: Mounting the unit on the Base plate<br />
Make sure spacer 1 fits into hole 1 and spacer 2 fits into hole 2. Push until the power and date pins<br />
slide into the connectors I and II on the base plate. The unit will cover the whole base plate.<br />
Fix the unit on the base plate with help of the M3*10 counter sink screws. The screws must be placed<br />
in the two holes on top of the base near the Xilver TM logo.<br />
2.2. Functionality<br />
Movement<br />
The <strong>Droplet</strong> TM has a 16bit pan and tilt movement in the normal mode and a 8bit in the compact mode.<br />
In the normal mode the movement is controlled by 5 channels (pan, tilt, pan fine, tilt fine and motor<br />
speed). In the compact mode there is no pan and tilt fine and no motor speed channel.<br />
The pan and tilt movement is direct driven by stepper motors. The travel of the pan movement is 360°<br />
and the travel of the tilt movement is 270°. Divided over 255 steps the pan moves 1,41° per step and<br />
the tilt 1,05° per step, with the fine channels each step is divided again in 255 steps. The pan and tilt<br />
fine are used for precision positioning.<br />
Motor speed<br />
The speed of the pan and tilt movement can be adapted via the motor speed channel. When the<br />
channel is zero (in the compact mode this channel is not available), the <strong>Droplet</strong> TM moves at full speed.<br />
Strobe<br />
The <strong>Droplet</strong> TM has a 2 channel strobe function in the normal mode. The Frequency and the duration<br />
are adjustable. With frequency you can determine how many times the <strong>Droplet</strong> TM should flash per<br />
second, with the duration channel you can determine how long one flash should take. In the compact<br />
mode only the frequency function is available.<br />
Color mixing<br />
HSI-mode<br />
HSI stands for Hue, Saturation and Intensity. The HSI color mixing mode uses 3 channels.<br />
The Hue channel enables you to choose a color, via this way you can choose up to 255 saturated<br />
colors. The Saturation channel enables you to choose between fully saturated colors and pastel<br />
colors. The Intensity channel functions like a normal dimmer, from no output to full output. By Hue and<br />
Saturation channel zero and the Intensity channel full max, the output of the <strong>Droplet</strong> TM is white.<br />
Changing the Saturation channel to max the output will turn into Red. Now you can choose a color with<br />
the Hue channel.<br />
RGB-mode<br />
RGB is stands for Red, Green and Blue. Each of these colors use one channel, via this channel you<br />
can adjust the output of the concerned color. To vary the output of the 3 colors, you can make each<br />
desired color. Besides there is an Intensity channel to make it easy dimming the total output of the<br />
<strong>Droplet</strong> TM . If the three color channels are max the <strong>Droplet</strong> TM gives no real white, you have to vary the<br />
output of the separate colors to get white.<br />
Reset<br />
Via the reset channel the <strong>Droplet</strong> TM can be given its starting values again, so the fixture returns to its<br />
point of departure.<br />
It may occur, due to external causes that the <strong>Droplet</strong> TM gets out of its position. The reset channel can<br />
be used to make sure that the unit follows the given DMX values the right way again.<br />
To give the <strong>Droplet</strong> TM a reset, set the reset channel for 5 seconds max.<br />
Normal mode RGB<br />
DMX Function Decimal Percent Description<br />
Channel<br />
1 Reset 0 - 249<br />
250 -255<br />
0 - 97<br />
98 - 100<br />
Reserved for special functions<br />
Hold for 5 seconds to reset the <strong>Droplet</strong> TM<br />
2 Pan 0 - 255 0 - 100 Position from 0° - 360°<br />
3 Tilt 0 - 255 0 - 100 Position from 0° - 260°<br />
4 Speed 0<br />
255<br />
0 - 100 Full speed of pan and tilt movement<br />
Slowest pan and tilt movement<br />
5 Pan fine 0 - 255 0 - 100 Fine Positioning of the pan within an angle of 1,41°<br />
6 Tilt fine 0 - 255 0 - 100 Fine Positioning of the tilt within an angle of 1,02°<br />
7 Strobe<br />
Frequency<br />
0 - 4<br />
5 - 204<br />
205 - 255<br />
0 - 2<br />
3 - 80<br />
81 - 100<br />
Full on, no strobe<br />
Strobe linear from 1Hz to 25Hz<br />
Strobe linear from 25Hz to 50Hz<br />
8 Strobe 0 - 255 0 - 100 Linear from 0 – 100% with steps of 1,6%<br />
Duration<br />
9 Red 0 - 255 0 - 100 Linear Red output from 0 – 100%<br />
10 Green 0 - 255 0 - 100 Linear Green output from 0 – 100%<br />
11 Blue 0 - 255 0 - 100 Linear Blue output from 0 – 100%<br />
12 Intensity 0 - 255 0 - 100 Linear overall output from 0 – 100%<br />
Compact mode RGB<br />
DMX Function Decimal Percent Description<br />
Channel<br />
1 Reset 0 - 249<br />
250 -255<br />
0 - 97<br />
98 - 100<br />
Reserved for special functions<br />
Hold for 5 seconds to reset the <strong>Droplet</strong> TM<br />
2 Pan 0 - 255 0 - 100 Position from 0° - 360°<br />
3 Tilt 0 - 255 0 - 100 Position from 0° - 260°<br />
4 Strobe<br />
Frequency<br />
0 - 4<br />
5 - 204<br />
0 - 2<br />
3 - 80<br />
Full on, no strobe<br />
Strobe linear from 1Hz to 25Hz<br />
Strobe linear from 25Hz to 50Hz<br />
205 - 255 81 - 100<br />
5 Red 0 - 255 0 - 100 Linear Red output from 0 – 100%<br />
6 Green 0 - 255 0 - 100 Linear Green output from 0 – 100%<br />
7 Blue 0 - 255 0 - 100 Linear Blue output from 0 – 100%<br />
8 Intensity 0 - 255 0 - 100 Linear overall output from 0 – 100%<br />
9<br />
10
Normal mode HSI<br />
DMX ch Function Decimal Percent Description<br />
1 Reset 0 - 249<br />
250 -255<br />
0 - 97<br />
98 - 100<br />
Reserved for special functions<br />
Hold for 5 seconds to reset the <strong>Droplet</strong> TM<br />
2 Pan 0 - 255 0 - 100 Position from 0° - 360°<br />
3 Tilt 0 - 255 0 - 100 Position from 0° - 260°<br />
4 Speed 0<br />
255<br />
0 - 100 Full speed of pan and tilt movement<br />
Slowest pan and tilt movement<br />
5 Pan fine 0 - 255 0 - 100 Fine Positioning of the pan within an angle of 1,41°<br />
6 Tilt fine 0 - 255 0 - 100 Fine Positioning of the tilt within an angle of 1,02°<br />
7 Strobe<br />
Frequency<br />
0 - 4<br />
5 - 204<br />
205 - 255<br />
0 - 2<br />
3 - 80<br />
81 - 100<br />
Full on, no strobe<br />
Strobe linear from 1Hz to 25Hz<br />
Strobe linear from 25Hz to 50Hz<br />
8 Strobe 0 - 255 0 - 100 Linear from 0 – 100% with steps of 1,6%<br />
Duration<br />
9 Hue<br />
11 Intensity 0 - 255 0 - 100 Linear fading from 0 – 100% output<br />
Compact mode HSI<br />
DMX ch Function Decimal Percent Description<br />
1 Reset 0 - 249<br />
250 -255<br />
0 - 97<br />
98 - 100<br />
Reserved for special functions<br />
Hold for 5 seconds to reset the <strong>Droplet</strong> TM<br />
2 Pan 0 - 255 0 - 100 Position from 0° - 360°<br />
3 Tilt 0 - 255 0 - 100 Position from 0° - 260°<br />
4 Strobe<br />
Frequency<br />
Full on, no strobe<br />
Strobe linear from 1Hz to 25Hz<br />
5 Hue<br />
0<br />
1 - 42<br />
43<br />
44 - 84<br />
85<br />
86 - 127<br />
128<br />
129 -170<br />
171<br />
172 - 212<br />
213<br />
214 - 254<br />
255<br />
0 - 4<br />
5 - 204<br />
205 - 255<br />
0<br />
1 - 42<br />
43<br />
44 - 84<br />
85<br />
86 - 127<br />
128<br />
129 -170<br />
171<br />
172 - 212<br />
213<br />
214 - 254<br />
255<br />
0<br />
1 - 16<br />
17<br />
18 - 32<br />
33<br />
34 - 49<br />
50<br />
51 - 66<br />
67<br />
68 - 82<br />
83<br />
84 - 99<br />
100<br />
0 - 2<br />
3 - 80<br />
81 - 100<br />
0<br />
1 - 16<br />
17<br />
18 - 32<br />
33<br />
34 - 49<br />
50<br />
51 - 66<br />
67<br />
68 - 82<br />
83<br />
84 - 99<br />
100<br />
Linear fading through all saturated colors if the<br />
Saturation channel has value 255<br />
Red<br />
Red Yellow<br />
Yellow<br />
Yellow Green<br />
Green<br />
Green Cyan<br />
Cyan<br />
Cyan Blue<br />
Blue<br />
Blue Magenta<br />
Magenta<br />
Magenta Red<br />
Red<br />
10 Saturation 0 - 255 0 - 100 Linear fading from white to saturated color chosen via<br />
the Hue channel<br />
Strobe linear from 25Hz to 50Hz<br />
Primary colors if Saturation channel has value 255<br />
Red<br />
Red Yellow<br />
Yellow<br />
Yellow Green<br />
Green<br />
Green Cyan<br />
Cyan<br />
Cyan Blue<br />
Blue<br />
Blue Magenta<br />
Magenta<br />
Magenta Red<br />
Red<br />
6 Saturation 0 - 255 0 - 100 Linear fading from white to saturated color chosen via<br />
the Hue channel<br />
7 Intensity 0 - 255 0 - 100 Linear fading from 0 – 100% output<br />
2.3. Accessories<br />
Standard supplied<br />
Lenses<br />
When delivered the has a beam angle of 10°. Additional supplied with each <strong>Droplet</strong> TM are two lenses,<br />
one with a beam angle of 18° and the other with a beam angle of 30°.<br />
Replacing a lens<br />
To replace a lens of the <strong>Droplet</strong> TM first take of the front hood by pulling the front hood. The existing lens<br />
or lens dome can be taken out. When you want to have a larger beam angle and the lens dome take<br />
out the black synthetic ring. Than first place the 18° or 30° lens and than the lens dome. The lenses<br />
should be placed with the uncurved side pointing to the <strong>Droplet</strong> TM and the curved side to the outside.<br />
Extension shaft<br />
The head of the <strong>Droplet</strong> TM can be taken of of the base and can be extended this way. Xilver B.V.<br />
supplies optional extension shafts for this purpose.<br />
The following sizes of extension shafts can be delivered out of stock:<br />
15cm (5,91inch)<br />
25cm (9,84inch)<br />
35cm (13,78inch)<br />
Other sizes can be delivered on request.<br />
The extension shaft is standard colored in silver (RAL 9006), black (RAL 9005) or white (RAL 9003).<br />
On request it can be delivered in any RAL color or even in custom color.<br />
Warning: A <strong>Droplet</strong> TM with extension shaft may only operate hanging (max. extension length: 55cm /<br />
21.65inch) in vertical direction or standing (max. extension length: 20cm / 7.87inch).<br />
Cables<br />
The <strong>Droplet</strong> TM is standard delivered without cables and connectors. On request the <strong>Droplet</strong> TM can be<br />
pre-wired with Data and power cable with the desired connector.<br />
2.4. Place of usage<br />
The <strong>Droplet</strong> TM is mentioned for indoor use only! The product may not be exposed to water or extreme<br />
hot or cold environments.<br />
The <strong>Droplet</strong> TM should not be used in humid environments. The minimum operation temperature of the<br />
<strong>Droplet</strong> TM is 0°C (32°F) and the maximum is 40°C (104°F). The minimum storage temperature of the<br />
<strong>Droplet</strong> TM is -10°C (14°F) and the maximum is 60°C (140°F).<br />
In case of building-in the base of the <strong>Droplet</strong> TM make sure there is enough ventilation so the unit<br />
becomes not overheated.<br />
Should the <strong>Droplet</strong> TM get overheated in case of a too high environment temperature or not enough<br />
ventilation, the <strong>Droplet</strong> TM will limit its light output to protect the <strong>LED</strong>s.<br />
Warning: during the use of the <strong>Droplet</strong> TM make sure that no persons or objects get in contact with the<br />
unit in a direct way. The pan and tilt travel should always be free to make sure the unit doesn’t looses its<br />
position.<br />
11<br />
12
2.5. Maintenance<br />
Cleaning<br />
The interior of the <strong>Droplet</strong> TM needs low or even no maintenance because the fixture is convection<br />
cooled and the head of the <strong>Droplet</strong> TM is completely closed.<br />
The exterior of the <strong>Droplet</strong> TM can be easily whipped of with a slightly moistened cloth. Make sure that<br />
when doing this, the power of the fixture is turned off!<br />
3. TERMS OF WARRANTY<br />
By ‘normal’ use of the product the manufacturer, Xilver B.V. gives 2 years of warranty. Normal use<br />
means:<br />
Use within the specifications as prescribed in paragraph 2.1. Install the <strong>Droplet</strong> TM .<br />
Use within the specifications as prescribed in paragraph 2.4. Place of usage.<br />
Taking in consideration the maintenance prescriptions of paragraph 2.5. Maintenance.<br />
Returning of the product in case of warranty, always contact your supplier for further instructions.<br />
2.6. Safety warnings<br />
Warning: Do not touch the fixture during operation, the temperature of some parts of the fixture can rise<br />
up to 80°C (176°F).<br />
Warning: Do not stare into the beam of the <strong>Droplet</strong> TM , the intense light output can cause injuries to your<br />
eyes.<br />
13<br />
14
4. APPENDICES<br />
Technical Specifications<br />
Voltage<br />
Power<br />
Data<br />
100-240VAC 50-60Hz<br />
Max. 35W<br />
USITT DMX 512 Protocol<br />
XSI Xilver Serial Interface<br />
Compact HSI mode: 7 channels<br />
Compact RGB mode: 8 channels<br />
Normal HSI mode : 11 channels<br />
Normal RGB mode : 12 channels<br />
Standard beam angle 10° (supplied lenses: 18° and 30°)<br />
Dimensions<br />
Ø130mm x h185mm (Ø5,11inch x h7,25inch)<br />
Weight<br />
1,5kg (3,3lbs)<br />
Pan<br />
Tilt<br />
Operation temperature<br />
Storage temperature<br />
360° travel<br />
260° travel<br />
Min. 0°C (32°F)<br />
Max. 40°C (104°F).<br />
Min. -10°C (14°F)<br />
Max. 60°C (140°F).<br />
Dipswitch functions<br />
Dipswitch 1 2 3 4 5 6 7 8 9 10 11 12<br />
Function DMX-LSB DMX-MSB Mixing Method Address Range Reserved<br />
Position 0 Address setting (binary) H S I Normal<br />
1 1 2 4 8 16 32 64 128 256 R G B Compact<br />
DMX mapping<br />
Compact<br />
Normal<br />
Channel H S I color mixing R G B color mixing H S I color mixing R G B color mixing<br />
1 Reset Reset Reset Reset<br />
2 Pan Pan Pan Pan<br />
3 Tilt Tilt Tilt Tilt<br />
4 Strobe frequency Strobe frequency Speed Speed<br />
5 Hue Red Pan Fine Pan Fine<br />
6 Saturation Green Tilt Fine Tilt Fine<br />
7 Intensity Blue Strobe frequency Strobe frequency<br />
8 Intensity Strobe Duration Strobe Duration<br />
9 Hue Red<br />
10 Saturation Green<br />
11 Intensity Blue<br />
12 Intensity<br />
15