Majestic Duo - Hunter Pacific
Majestic Duo - Hunter Pacific
Majestic Duo - Hunter Pacific

Create successful ePaper yourself
Turn your PDF publications into a flip-book with our unique Google optimized e-Paper software.
Electrician<br />
Installation Manual<br />
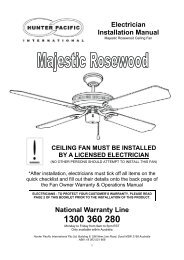
<strong>Majestic</strong> <strong>Duo</strong> Ceiling Fan<br />
CEILING FAN MUST BE INSTALLED<br />
BY A LICENSED ELECTRICIAN<br />
(NO OTHER PERSONS SHOULD ATTEMPT TO INSTALL THIS FAN)<br />
*After installation, electricians must tick off all items on the<br />
quick checklist and fill out their details onto the back page of<br />
the Fan Owner Warranty & Operations Manual<br />
ELECTRICIANS - TO PROTECT YOUR CUSTOMER’S WARRANTY, PLEASE READ<br />
PAGE 2 OF THIS BOOKLET PRIOR TO THE INSTALLATION OF THIS PRODUCT.<br />
National Warranty Line<br />
1300 360 280<br />
Monday to Friday from 9am to 5pm EST<br />
Only available within Australia<br />
<strong>Hunter</strong> <strong>Pacific</strong> International Pty Ltd, Building 8, 256 New Line Road, Dural NSW 2158 Australia<br />
ABN :18 063 521 666<br />
1
Electrician<br />
Installation Manual<br />
<strong>Majestic</strong> <strong>Duo</strong> Ceiling Fan<br />
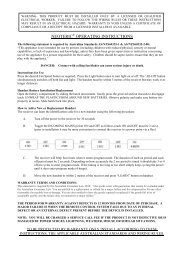
IMPORTANT INFORMATION<br />
ELECTRICIANS MUST READ PRIOR TO INSTALLATION<br />
1. Distributor and installer details and purchase receipts are essential for on-site warranty claims<br />
and must be presented to repair personnel, make sure you record your details in the Fan Owner<br />
Warranty and Operations Manual.<br />
2. Fans and fixed wiring products must only be installed by persons who are appropriately licensed<br />
by the applicable State regulatory body. Therefore, to protect our repair personnel, on-site<br />
warranty claims will not be accepted if products have been installed by unlicensed persons.<br />
3. Damage caused by incorrect installation, force-majeure, electrical surges, lightning, power grid<br />
fluctuations, water or by connection to alternative power supply sources (such as solar inverters,<br />
etc.) is not eligible for warranty repair.<br />
4. Blades must be replaced only as a complete set. Blades are supplied only as a pre-balanced set<br />
and the replacement of individual blades may void the warranty by causing mechanical<br />
damage to the motor, excessive noise or premature wear.<br />
5. When products are installed in a location requiring special access equipment (such as<br />
scaffolding or scissor lifts, etc) the cost of providing, installing and operating special access<br />
equipment must be borne by the site owner.<br />
For safety, and to protect your customers warranty, the following must be taken into<br />
account when installing and operating the product(s):<br />
(a) DO NOT USE SOLID-STATE WALL CONTROLLERS. Neither leading nor lagging edge<br />
controllers will give satisfactory performance. Wall controls must only be types approved<br />
for use by <strong>Hunter</strong> <strong>Pacific</strong> International.<br />
(b) The fan, light and bracket must be earthed.<br />
(c)<br />
(d)<br />
(e)<br />
(f)<br />
Fan and light must be run from the same final circuit.<br />
Mounting bracket must be firmly screwed to a solid structure such as a concrete ceiling,<br />
steel structure or timber framing. If additional bracing is added it must be firmly secured to<br />
the rafters and not left floating on the ceiling. Special mounts, such as T-hooks, are<br />
available for certain types of installation.<br />
After installation, fan blades must be at least 2.1 m (7 feet) above floor level.<br />
The use of these products by children and the infirm must be under supervision.<br />
IF THERE ARE ANY PROBLEMS WITH THE PRODUCT AT TIME OF<br />
INSTALLATION THE INSTALLER MUST CONTACT THE WARRANTY<br />
HOT LINE NUMBER 1300 360 280. BEFORE LEAVING THE JOB<br />
SITE. PLEASE DO NOT REMOVE THE FAN FROM THE CEILING<br />
ONCE INSTALLED UNLESS INSTRUCTED TO DO SO.<br />
2
Electrician<br />
Installation Manual<br />
<strong>Majestic</strong> <strong>Duo</strong> Ceiling Fan<br />
Parts List - <strong>Majestic</strong> <strong>Duo</strong><br />
Mounting Plate (Optional)<br />
Hanger Bracket<br />
Canopy Cover Screw<br />
Standard<br />
Down Rod<br />
Hex Head Screw<br />
Ball Joint<br />
Canopy Cover<br />
Down Rod Screw<br />
Down Rod Pin Screw<br />
Motor Unit<br />
Rotator Washer<br />
Rotator<br />
Rotator Screw<br />
Retaining Nut<br />
Motor Unit Base Plate<br />
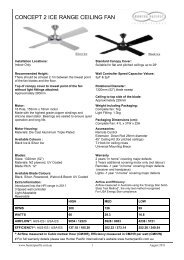
CODE SIZE FAN MODEL NAME COLOUR<br />
850 2x 40cm (16”) fan heads <strong>Majestic</strong> <strong>Duo</strong> Brushed Aluminium<br />
3
Electrician<br />
Installation Manual<br />
<strong>Majestic</strong> <strong>Duo</strong> Ceiling Fan<br />
PARTS LIST TABLE:<br />
Please refer to the parts list image on the previous and the parts list table below when installing this<br />
fan. It is also a good idea to use this table to check that all the parts you require to install this fan<br />
properly is in the fan box.<br />
<strong>Majestic</strong> <strong>Duo</strong> Parts List<br />
Part Qty Part Qty Part Qty<br />
Mounting Plate (Optional) 1 Rotator Washer 2 Motor Unit Base Plate 2<br />
Hanger Bracket 1 Rotator 2 Retaining Nuts 2<br />
Hex Head Screws 2 Rotator Screws 4 Wall Speed Capacitor 1<br />
Canopy Cover Screws 2 Knurled Knobs 4 HPI Wall Controller 1<br />
Canopy Cover 1 Motor Unit 2<br />
Ball Joint 1 Standard Down Rod 1<br />
Ball Joint Screw 1 Down Rod Pin Screw 1<br />
Ball Joint Pin 1 Down Rod Screw 2<br />
(these parts come<br />
preassembled in the box)<br />
1. Do not attempt to operate the fan (or optional light kit) with any wall control that is<br />
not approved by <strong>Hunter</strong> <strong>Pacific</strong> for use with its fans. DO NOT use solid state<br />
controllers. The use of unapproved controllers will void your warranty.<br />
2. Do not mix blade sets from one fan to another as this may upset the balance of<br />
the fan. If only one blade is damaged you are still required to replace with a new set.<br />
4
Installation Instructions<br />
(Assembling the fan)<br />
Electrician<br />
Installation Manual<br />
<strong>Majestic</strong> <strong>Duo</strong> Ceiling Fan<br />
Mounting Plate<br />
Timber Nogging<br />
STEP 1 (Fig. 1 & 2)<br />
Use the hex head screws to secure the hanger<br />
bracket onto the mounting plate (optional) and into<br />
the timber nogging in the ceiling. Timber nogging<br />
should be supported in between two ceiling joist<br />
as shown in the diagram below (figure 2).<br />
Hanger Bracket<br />
Timber Nogging<br />
Hanger<br />
Bracket<br />
FIG (1)<br />
Hex Head Screw<br />
FIG (2)<br />
Hex Head<br />
Screw<br />
Fan Wires<br />
Ball Joint<br />
FIG (4)<br />
Canopy Cover<br />
Blue<br />
Brown<br />
Green<br />
FIG (3)<br />
Hanger Bracket<br />
Down Rod<br />
Down Rod Pin Screw<br />
Down Rod<br />
Pin Screw Hole<br />
Fan Wires<br />
Down Rod Screw<br />
Adjustable Arms<br />
Joining Point<br />
Down Rod<br />
Ball Joint<br />
STEP 2 (Fig. 3)<br />
With the ball joint attached to the down rod,<br />
slot the ball joint into the hanger bracket.<br />
Refer to page 6 for wiring instructions.<br />
STEP 3 (Fig. 4)<br />
a) Feed the fan wires from the adjustable arms joining point through the down rod and the ball joint.<br />
b) Then connect the adjustable arms joining point with the down rod using the screws provided.<br />
c) Now, lock the ball joint onto the down rod using the ball joint pin, carefully move the wires to the<br />
sides and avoid pinching them.<br />
1. Do not attempt to operate the fan (or optional light kit) with any wall control that is<br />
not approved by <strong>Hunter</strong> <strong>Pacific</strong> for use with its fans. DO NOT use solid state<br />
controllers. The use of unapproved controllers will void your warranty.<br />
2. Do not mix blade sets from one fan to another as this may upset the balance of<br />
the fan. If only one blade is damaged you are still required to replace with a new set.<br />
5
Electrician<br />
Installation Manual<br />
<strong>Majestic</strong> <strong>Duo</strong> Ceiling Fan<br />
Supply<br />
E N<br />
A<br />
Installation Instructions<br />
(Assembling the fan )<br />
Wiring Instructions<br />
Note: 2 Wall switches are included for<br />
individual operation of the motor units.<br />
Green-yellow<br />
Black<br />
Red<br />
Red<br />
Red<br />
A<br />
A<br />
Brown<br />
White<br />
Green-yellow<br />
Blue<br />
Combi<br />
Control<br />
Separate<br />
Control<br />
Separate terminal<br />
for when 3 pole<br />
block is fitted.<br />
FA LA E<br />
Fan Wiring<br />
N<br />
Wiring for use with 3 pole block<br />
- Colours representative only<br />
- Separate extension terminal for active<br />
wire for light when 3 pole block fitted.<br />
Hanger Bracket<br />
FIG (6)<br />
FIG (5)<br />
Canopy Cover<br />
Canopy Cover Screw<br />
Motor Unit<br />
Knurled Knob<br />
STEP 4 (Fig 5)<br />
a) Slide canopy cover up and over the<br />
hanger bracket.<br />
b) Twist canopy cover as shown in diagram<br />
until the screws holes can be seen.<br />
c) Half loosen canopy cover screws.<br />
d) Now twist canopy cover in the opposite<br />
direction to the diagram and fully tighten the<br />
canopy covers screws, this will stabilise the<br />
canopy cover.<br />
Knurled Knob<br />
STEP 5 (Fig.6) Take the motor unit and<br />
remove the knurled knobs as shown in the<br />
diagram above.<br />
1. Do not attempt to operate the fan (or optional light kit) with any wall control that is<br />
not approved by <strong>Hunter</strong> <strong>Pacific</strong> for use with its fans. DO NOT use solid state<br />
controllers. The use of unapproved controllers will void your warranty.<br />
2. Do not mix blade sets from one fan to another as this may upset the balance of<br />
the fan. If only one blade is damaged you are still required to replace with a new set.<br />
6
Installation Instructions<br />
(Assembling the fan )<br />
Electrician<br />
Installation Manual<br />
<strong>Majestic</strong> <strong>Duo</strong> Ceiling Fan<br />
FIG (7)<br />
FIG (8)<br />
Motor Unit<br />
Locating Lug<br />
Adjustable Arms<br />
Locating Slots<br />
STEP 6 (Fig.7) Take the motor unit and lock<br />
the locating lug into the locating slot.<br />
Knurled Knob<br />
STEP 7 (Fig. 8) Secure the motor unit on to<br />
the adjustable arms using the knurled knobs.<br />
Motor Unit<br />
FIG (10)<br />
Motor Unit<br />
FIG (9)<br />
Motor Shaft<br />
Washer<br />
Motor Unit<br />
Base Plate<br />
Retaining<br />
Nut<br />
Rotator<br />
STEP 9 (Fig. 10) Tighten the retaining nut<br />
to the motor shaft at the bottom of the<br />
rotator and then place the motor unit base<br />
plate on to the rotator. Secure the motor<br />
unit base plate by pressing it against the<br />
rotator and turning it clockwise.<br />
Screw<br />
STEP 8 (Fig. 9) Fit the washer onto the motor<br />
shaft, then put the rotator on after it. Once the<br />
rotator is on, tighten the screws to secure the<br />
rotator in place.<br />
1. Do not attempt to operate the fan (or optional light kit) with any wall control that is<br />
not approved by <strong>Hunter</strong> <strong>Pacific</strong> for use with its fans. DO NOT use solid state<br />
controllers. The use of unapproved controllers will void your warranty.<br />
2. Do not mix blade sets from one fan to another as this may upset the balance of<br />
the fan. If only one blade is damaged you are still required to replace with a new set.<br />
7
Installation Instructions<br />
(Assembling the fan )<br />
Electrician<br />
Installation Manual<br />
<strong>Majestic</strong> <strong>Duo</strong> Ceiling Fan<br />
FIG (11)<br />
Adjustable Arms<br />
STEP 10 (Fig. 11) Manually adjust the adjustable arms as<br />
shown in the diagram above to the position that suits you.<br />
FIG (12)<br />
Motor Unit<br />
STEP 11 (Fig. 12) Manually adjust the motor units to<br />
the angle that suits you. Refer to the diagram above.<br />
1. Do not attempt to operate the fan (or optional light kit) with any wall control that is<br />
not approved by <strong>Hunter</strong> <strong>Pacific</strong> for use with its fans. DO NOT use solid state<br />
controllers. The use of unapproved controllers will void your warranty.<br />
2. Do not mix blade sets from one fan to another as this may upset the balance of<br />
the fan. If only one blade is damaged you are still required to replace with a new set.<br />
8
Electrician<br />
Installation Manual<br />
<strong>Majestic</strong> <strong>Duo</strong> Ceiling Fan<br />
Installation Instructions<br />
(Attaching an extension rod - <strong>Hunter</strong> <strong>Pacific</strong> rods to be used ONLY)<br />
Fig. 13<br />
Down Rod Pin<br />
Screw Hole<br />
Ball Joint<br />
Fan Wires<br />
Screws<br />
Ball Joint<br />
Screw<br />
Ball Joint Pin<br />
Fig. 14<br />
Down Rod<br />
Down Rod Pin Screws<br />
Adjustable Arms Centre Point<br />
Step 1) (Fig. 13)<br />
Loosen the down rod screws and unlock the<br />
down rod pin screw to remove the standard<br />
down rod from the adjustable arm centre point.<br />
Step 2) (Fig. 14)<br />
Loosen the ball joint screw, take out the<br />
ball joint pin and remove the ball joint.<br />
Then slide off the canopy cover.<br />
Ball Joint Pin<br />
Fig. 16<br />
Down Rod Pin<br />
Screw Hole<br />
Fan Wires<br />
Ball Joint<br />
Tighten Ball<br />
Joint Screw<br />
Screws<br />
Down Rod<br />
Fig. 15<br />
Down Rod Pin Screws<br />
Adjustable Arms Centre Point<br />
Step 3) (Fig. 15 & 16)<br />
Now install the extension rod and<br />
reverse step 1 & 2 to secure the rod to<br />
the fan and the ball joint.<br />
NOTE: If the extension rod needs to be shortened, cut the rod to the required length and drill the<br />
appropriate hole size to fit the ball joint pin. The cut end of the rod should be used on the ball joint<br />
end only. When installing a 1.8m extension rod the wiring will need to be extended and joined. This<br />
should be done using crimp style connectors.<br />
1. Do not attempt to operate the fan (or optional light kit) with any wall control that is<br />
not approved by <strong>Hunter</strong> <strong>Pacific</strong> for use with its fans. DO NOT use solid state<br />
controllers. The use of unapproved controllers will void your warranty.<br />
2. Do not mix blade sets from one fan to another as this may upset the balance of<br />
the fan. If only one blade is damaged you are still required to replace with a new set.<br />
9
Electrician<br />
Installation Manual<br />
<strong>Majestic</strong> <strong>Duo</strong> Ceiling Fan<br />
Trouble Shooting Tips - Fan<br />
Fan will not start<br />
Check that the reversing switch is pushed into its Summer or Winter position.<br />
Check wire connections in the wall switch and terminal blocks, ensure all wires<br />
are making proper contact.<br />
If it is a Typhoon fan, check and ensure the reversing switch plate under the<br />
switch cover is not bent, also check the 3 wires coming from the switch plate are<br />
straight. Occasionally the switch plate may get bent during transportation, this<br />
allows the switch cover to press against the plate and stop the fan from working.<br />
If it is a Typhoon fan, check the nine pin plug under the switch cover is properly<br />
connected and the colours on the plug are corresponding.<br />
If it is a Concept fan and it has an external start up capacitor, check that this<br />
external capacitor is properly connected.<br />
Fan speed is not corresponding to the wall controller<br />
Check the speeds on the wall controller has been wired correctly and are making<br />
proper contact. Brown = speed 1, Purple= speed 2, Red = speed 3.<br />
Check wires in the terminal block are connected properly, connection wires<br />
should be stripped back at the connection point and unused wires should be<br />
sealed and capped off.<br />
Check that the reversing switch is pushed into its Summer or Winter position.<br />
Fan is not corresponding to the remote control<br />
Check for flat battery. Make sure the dipswitch settings in the hand piece and the<br />
remote receiver for the same fan are corresponding.<br />
Fan is wobbling<br />
Check the ball joint slot is locked into the hanger bracket groove.<br />
Make sure blades are a matching set; the letters on matching sets of blades<br />
should be identical with the numbers varying within 3 grams of each other.<br />
Check blade screws are tightened firmly. If necessary use balancing kit provided<br />
to settle the wobble.<br />
Fan is noisy<br />
Check all screws and parts are secured firmly. Ensure there are no loose parts<br />
moving inside the motor housing.<br />
Make sure the fan is installed with a <strong>Hunter</strong> <strong>Pacific</strong> wall controller only, do not use<br />
solid state controllers as they can cause unpleasant motor noises.<br />
National Warranty Line 1300 360 280<br />
Monday to Friday from 9am to 5pm EST<br />
Only available within Australia<br />
1. Do not attempt to operate the fan (or optional light kit) with any wall control that is<br />
not approved by <strong>Hunter</strong> <strong>Pacific</strong> for use with its fans. DO NOT use solid state<br />
controllers. The use of unapproved controllers will void your warranty.<br />
2. Do not mix blade sets from one fan to another as this may upset the balance of<br />
the fan. If only one blade is damaged you are still required to replace with a new set.<br />
10
Quick Checklist<br />
Electrician<br />
Installation Manual<br />
<strong>Majestic</strong> <strong>Duo</strong> Ceiling Fan<br />
Electricians make sure everything on this checklist is ticked off before you leave the installation site.<br />
If you have trouble installing our product please refer to the trouble shooting section on the previous<br />
page first then phone the <strong>Hunter</strong> <strong>Pacific</strong> Warranty Line on 1300 360 280 (open 9am to 5pm EST).<br />
DO NOT uninstall the fan and DO NOT return fan to retailer.<br />
1.<br />
Ceiling fan is not installed to a solid-state wall controller. Neither leading nor<br />
lagging edge controllers will give satisfactory performance. Wall controllers<br />
must only be types approved for use by <strong>Hunter</strong> <strong>Pacific</strong> International.<br />
2. The fan, optional fan light and bracket is earthed.<br />
3. Fan and optional fan light are run from the same final circuit.<br />
4.<br />
Mounting bracket must be firmly secured to a solid structure such as a concrete<br />
ceiling, steel structure or timber framing. If additional bracing is added it must be<br />
firmly secured to the rafters and not left floating on the ceiling. Special mounts,<br />
such as T-hooks, are available for certain types of installation.<br />
5. Fan blades are at least 2.1m (7feet) above floor level.<br />
6.<br />
If fan is installed on a wall controller, check the fan is operating correctly on all<br />
three speeds using the wall controller.<br />
7. If light is installed. Check light switch is functioning properly.<br />
8.<br />
9.<br />
10.<br />
If remote control is installed. Check the fan (and light if installed) is responding to<br />
the remote control correctly.<br />
If remote control is installed. Check where possible a separate isolation switch has<br />
been installed for the fan.<br />
Check electrician’s details have been recorded onto the back page of the Owner’s<br />
Operations and Warranty Manual.<br />
1. Do not attempt to operate the fan (or optional light kit) with any wall control that is<br />
not approved by <strong>Hunter</strong> <strong>Pacific</strong> for use with its fans. DO NOT use solid state<br />
controllers. The use of unapproved controllers will void your warranty.<br />
2. Do not mix blade sets from one fan to another as this may upset the balance of<br />
the fan. If only one blade is damaged you are still required to replace with a new set.<br />
11