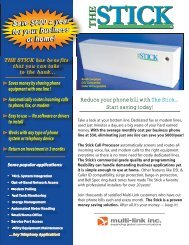
The Stick Manual - Multi-Link Inc: Dependable Fax Switch
The Stick Manual - Multi-Link Inc: Dependable Fax Switch
The Stick Manual - Multi-Link Inc: Dependable Fax Switch

Create successful ePaper yourself
Turn your PDF publications into a flip-book with our unique Google optimized e-Paper software.
HIGGINS INTERNATIONAL<br />
<strong>The</strong> <strong>Stick</strong> <strong>Manual</strong><br />
<strong>Fax</strong><strong>Switch</strong>.com<br />
Call Toll Free:<br />
Sales & Help: 866-337-0965<br />
Tech Support: 800-535-4651
RELAX. This is NOT rocket science.<br />
About This <strong>Manual</strong><br />
We are serious about making the finest products on the market. And we are<br />
serious about the information you need to make the product function correctly....<br />
but we can't get real serious about writing product manuals.<br />
<strong>The</strong>re are enough bad product manuals out there to sink an aircraft carrier.<br />
You've probably seen them -the ones that take a degree in Electrical Engineering<br />
to figure out, or they are written in every language except English or... they are<br />
just plain boring.<br />
Our humor or wit (or lack of either) in the rhetoric of this manual is not put here to<br />
lessen any aspect of the product except maybe the painful task of getting through<br />
some very dry material.<br />
Thanks<br />
Something you should know now that you have<br />
purchased our product-<br />
You are the most important person in the world and we at <strong>Multi</strong>-<strong>Link</strong> want to<br />
THANK YOU for your business. We can't say it enough! At one time in America,<br />
business was conducted face to face where a word and a handshake were good<br />
enough.<br />
While we seldom get the opportunity to personally meet and thank the people<br />
who buy our products, we realize your purchase of <strong>The</strong> <strong>Stick</strong> is a vote of<br />
confidence and trust in our product and our company. We will not betray this<br />
confidence or trust-that is our word and handshake to you.<br />
You are the backbone of our business. <strong>The</strong> ultimate goal we, as a company,<br />
have targeted is your satisfaction. We want you as a customer and a<br />
commitment to your complete satisfaction AFTER THE SALE is our pledge.<br />
If at any time you have a problem, comment or question<br />
About <strong>The</strong> <strong>Stick</strong>, its operation, functions or features call toll free:<br />
Tech Support: (800) 535 4651<br />
Sales or Help: (866) 337-0965<br />
We want to hear from you. And again, THANKS for the opportunity to do<br />
business with you. You are important to us.
THE STICK OPERATING MANUAL Table of Contents<br />
SAFETY INSTRUCTIONS<br />
1. HOW THE STICK WORKS page 5<br />
1.1. Programmable Features page 6<br />
1.2. Standard Features page 9<br />
2. PROGRAMMING THE STICK page 10<br />
2.1. Programming and Quick Reference Guide page 11<br />
2.2. Initial Check, Power Up, Connect To <strong>The</strong> Phone Line page 13<br />
3. THE “HOW TO” OF PROGRAMMING page 14<br />
3.1. Tones / Programming Commands page 15<br />
3.2. Audible “Read Back” of Programming page 17<br />
4. POINTERS FOR HOOK-UP page 19<br />
4.1. Voice Data Equipment page 19<br />
4.2. FAX / PC <strong>Fax</strong> Cards page 19<br />
4.3. Answering Machines page 20<br />
4.4. Computer Modems page 21<br />
4.5. Other Stuff page 22<br />
5. INSTALLATION- Introduction page 23<br />
5.1. On Single Phone Line page 25<br />
5.1.1. Simple Plug-In page 25<br />
5.1.2. Simple Plug-In W/Extensions page 26<br />
5.1.3. “Barge-In Protection” For Simple Plug-In W/Extensions page 27<br />
5.1.4. Not-So-Simple In Line Installation page 29<br />
5.2. On <strong>Multi</strong>ple Phone Line System page 30<br />
5.2.1. Key System or PBX page 30<br />
5.2.2. RJ-14 Two Line Phone System page 31<br />
6. MOUNTING THE STICK page 32<br />
7. TECHNICAL SPECIFICATIONS page 33<br />
8. FCC/DOC/LIMITED WARRENTY page 34<br />
9. SERVICE AND INSTALLATION ASSISTANCE page 37<br />
10. HOW TO PURCHASE A STICK page 38
Important Safety Instructions<br />
When using your telephone equipment, basic safety precautions should always be<br />
followed to reduce the risk of fire, electric shock and injury to persons, including the<br />
following:<br />
1. Read and understand all instructions.<br />
2. Follow all warnings and instructions marked on the product.<br />
3. Unplug this product from the wall outlet before cleaning. Do not use liquid cleaners or<br />
aerosol cleaners. Use a damp cloth for cleaning.<br />
4. Do not use this product near water, for example, near a bathtub, washbowl, kitchen sink<br />
or laundry tub, in a wet basement, or near a swimming pool.<br />
5. Do not place this product on an unstable cart, stand, or table. <strong>The</strong> product may fall<br />
causing serious damage to the product.<br />
6. This product should never be placed near or over a radiator or heat register. This product<br />
should not be placed in a built-in installation unless proper ventilation is provided.<br />
7. This product should be operated only from the type of power source indicated on the<br />
marking label. If you are not sure of the type of power supply to your home, consult your<br />
dealer or local power company.<br />
8. Do not allow anything to rest on the power cord. Do not locate this product where the<br />
cord will be abused by persons walking on it.<br />
9. Do not overload wall outlets and extension cords as this can result in the risk of fire or<br />
electric shock.<br />
10. Never push objects of any kind into this product through slots in cabinet as they may<br />
touch dangerous voltage points or short out parts that could result in a risk of fire or<br />
electric shock. Never spill liquid of any kind on the product<br />
11. To reduce the risk of electric shock, do not disassemble this product, but take it to a<br />
qualified serviceman when some service or repair work is required. Opening or removing<br />
covers may expose you to dangerous voltages or other risks. <strong>Inc</strong>orrect reassembly can<br />
cause electric shock when the appliance is subsequently used.<br />
12. Unplug this product from the wall outlet and refer servicing to qualified service personnel<br />
under the following conditions:<br />
a. When the power supply cord or plug is damaged or frayed.<br />
b. If liquid has been spilled into the product.<br />
c. If the product has been exposed to rain or water.<br />
d. If the product does not operate normally by following the operating instructions.<br />
Adjust only those controls that are covered by the operating instructions because<br />
improper adjustment of other controls may result in damage and will often require<br />
extensive work by a qualified technician to restore the product to normal<br />
operation.<br />
e. If the product has been dropped or the cabinet has been damaged.<br />
f. If the product exhibits a distinct change in performance.<br />
13. Avoid using a telephone (other than a cordless type) during an electrical storm. <strong>The</strong>re<br />
may be a remote risk of electric shock from lightning.<br />
14. Do not use the telephone to report a gas leak in the vicinity of the leak.<br />
INSTALLATION INSTRUCTIONS<br />
1. Never install telephone wiring during a lightning storm.<br />
2. Never install telephone jacks in wet locations unless the jack is specially designed for wet<br />
locations.<br />
3. Never touch uninsulated telephone wires or terminals unless the telephone line has been<br />
disconnected at the network interface.<br />
4. Use caution when installing or modifying telephone lines.<br />
"SAVE THESE INSTRUCTIONS!"
1. Introduction<br />
Congratulations! You have purchased the highest quality voice/fax/modem call<br />
processor in the industry-<strong>The</strong> <strong>Stick</strong>! This manual has been designed to get you,<br />
your communications devices and <strong>The</strong> <strong>Stick</strong> operating on the phone line with a<br />
minimal amount of work.<br />
Please read this manual carefully and BE SURE TO FILL OUT AND MAIL YOUR<br />
WARRANTY CARD!<br />
How <strong>The</strong> <strong>Stick</strong> Works<br />
When installed on a phone line, <strong>The</strong> <strong>Stick</strong> automatically answers all inbound calls<br />
and "screens” for one of three things.<br />
1. <strong>Fax</strong> tones (CNG - CalliNG tones)<br />
2. Security Access Codes (in the form of DTMF/touch tones)<br />
3. Nothing - No tones (normally voice calls)<br />
While performing the "screening" function for fax tones, security access codes or<br />
the absence of tones, <strong>The</strong> <strong>Stick</strong> transmits phone company-simulated "ring back"<br />
tones to the calling party so they are “fooled” into thinking that the phone is<br />
ringing but what is really happening is <strong>The</strong> <strong>Stick</strong> is “listening” for these tones.<br />
After the screening function is performed, the call is routed to the proper device<br />
leaving other phones/devices undisturbed over a single phone line.<br />
Eliminating dedicated fax lines and<br />
incorporating the line sharing technology<br />
of <strong>The</strong> <strong>Stick</strong> adds up to giant savings.<br />
Remote diagnostics and programming<br />
capabilities make it easy for our factorytrained<br />
technicians to make any<br />
programming changes right over the<br />
phone for you. Call 800-535-4651 if you<br />
need any assistance with installation or<br />
configuration of your <strong>Stick</strong>.<br />
<strong>The</strong> <strong>Stick</strong>'s performance is dependent on how it is installed on a home or<br />
business phone line and what programmable features are activated. <strong>The</strong> next<br />
section explains the different features, which optimize performance in particular<br />
installations.
Programmable Features<br />
Read This First!!!!!<br />
<strong>Fax</strong> Tone Detection-This feature, when activated, tells <strong>The</strong> <strong>Stick</strong> to detect<br />
the presence of CNG/fax tones which may be transmitted by a calling fax<br />
machine or PC <strong>Fax</strong> card.<br />
All calls accompanied by CNG tones, whether they be from a fax machine<br />
or PC <strong>Fax</strong> card, are routed through to equipment connected to the device<br />
port labeled FAX.<br />
If no fax-type equipment is used on <strong>The</strong> <strong>Stick</strong>, simply deactivate this<br />
feature.<br />
Factory preset is "on".<br />
Protected Hook Flash-This feature allows <strong>The</strong> <strong>Stick</strong> to be compatible<br />
with certain multi-line KSU phone systems.<br />
Some KSU systems do not allow touch tones (DTMF tones) to be<br />
generated from a telephone keypad after an inbound call has arrived.<br />
With Protected Hook flash "on" the phone system can be "fooled" into<br />
generating touch-tones by striking the flash key Calls can then be<br />
manually transferred between devices by dialing the proper security<br />
access code.<br />
Factory preset is "off."<br />
Unanswered Call Silent Transfer-This feature was engineered for those<br />
of you who may receive manual fax or modem calls after normal business<br />
hours but do not use an answering machine.<br />
<strong>Manual</strong> fax calls (not accompanied by CNG fax tones) and modem calls<br />
usually wind up routed to the phone when the caller cannot execute the<br />
proper access code.<br />
With Unanswered Call Silent Transfer "on", the inbound call (routed to the<br />
phone) will be switched over to a designated port (see Silent Transfer<br />
Destination) after the unanswered phone has been rung the maximum<br />
number of rings.<br />
Factory preset is "off."
Programmable Features Continued<br />
Answering Machine Silent Transfer-This feature works like Unanswered<br />
Call Silent Transfer except that it is designed for calls of 45 seconds or<br />
less.<br />
It should only be activated when you are using an answering machine to<br />
field after-hours calls. When a manual fax or modem call arrives and the<br />
answering machine has answered, the caller will still be able to get to a<br />
destination device by staying on the line after the answering machine<br />
"times out".<br />
If you answer a call and hang up before 45 seconds, <strong>The</strong> <strong>Stick</strong> will transfer<br />
the call to the designated device.<br />
Factory preset is "off."<br />
Silent Transfer Destination- After activating either Silent Transfer<br />
feature, you will want to tell <strong>The</strong> <strong>Stick</strong> where to route the call.<br />
<strong>The</strong> "Destination" program feature gives you the option of routing all afterhours<br />
calls to either the fax or modem.<br />
Factory preset is to the port labeled "FAX".<br />
Programmable Security Access Codes (SAC's)-Transfer of a call is<br />
executed by dialing the programmed SAC for each voice/data device<br />
connected to <strong>The</strong> <strong>Stick</strong>.<br />
SAC's are programmable (using a touch tone phone only) up to 4<br />
characters long -digits 0 through 9 and symbols * (star) and # (pound).<br />
<strong>The</strong> <strong>Stick</strong> will not detect SAC's dialed from "calling" pulse phones - only<br />
from touch-tone phones.<br />
Call transfers dialed by a pulse phone are limited to phones hooked to or<br />
on the same line as <strong>The</strong> <strong>Stick</strong> and are limited to transfer to the "FAX" port<br />
only.<br />
<strong>The</strong> pulse dial SAC for this is fixed at "2" You must also have the "Pulse<br />
Detect" feature on if you use a pulse dial phone to transfer a call.
Do’s and Don’t Of SAC Programming<br />
Programmable Features Continued<br />
1 Digit Security Access Codes ARE NOT recommended. (refer to<br />
“Programming” Section, page 9).<br />
DO NOT use the codes “9”, “#”, “##”, or anything beginning with “9”<br />
or “##”. <strong>The</strong>se codes are reserved of the “Call Grab” feature and<br />
the programming access to <strong>The</strong> <strong>Stick</strong>, respectively.<br />
DO NOT select an access code that may be the first part of a dialed<br />
number or control code of your answering machine.<br />
Factory preset Security Access Codes are as follows:<br />
Touch Tone Pulse Dial<br />
Voice 1 and Voice 2 Ports - *1 None<br />
FAX Port - *2 2<br />
MODEM Port - *3 None<br />
Pulse Detection-<strong>The</strong> Pulse Detection feature, when activated, allows <strong>The</strong><br />
<strong>Stick</strong> to detect the factory-preset code "2" and "Call Grab" preset code "9"<br />
when dialed from a pulse dial phone.<br />
<strong>The</strong> factory preset for this feature is "off."<br />
Rings To Answer- This feature directs <strong>The</strong> <strong>Stick</strong> to answer an inbound<br />
call after a programmed number of phone company rings (0 to 10 rings)<br />
from the phone company.<br />
If RTA is programmed to "0", <strong>The</strong> <strong>Stick</strong> will answer the call during the first<br />
ring. Extension phones elsewhere in your location will only "chirp" the first<br />
ring before going quiet.<br />
If the RTA is greater than "0", <strong>The</strong> <strong>Stick</strong> will allow all incoming calls to ring<br />
extensions and devices connected to the ports labeled VOICE 1 and<br />
VOICE 2 for the programmed number of rings.<br />
Factory preset is 0 rings.
Programmable Features Continued<br />
Call Override- With Call Override "on"-when <strong>The</strong> <strong>Stick</strong> "answers" a call<br />
and you pick up an extension more than one second later, <strong>The</strong> <strong>Stick</strong> will<br />
recognize the lifting of the handset and stop transmitting ring back tone to<br />
the caller. You can immediately begin to talk or (within 15 seconds)<br />
transfer the call to another device.<br />
In some areas of the country, your local telephone company's lines and<br />
switching equipment may cause this feature to not function properly. Just<br />
deactivate the feature. (See the "Call Grab" feature explanation in the<br />
Standard Features section for another option to Call Override.)<br />
Factory preset is "off."<br />
Maximum Rings-This feature allows you to program the number of rings<br />
transmitted to your phones/answering machine, fax and modem by <strong>The</strong><br />
<strong>Stick</strong>. Maximum Rings can be programmed anywhere from 4 rings<br />
(minimum) to up to 30 rings.<br />
Factory preset is 8 rings to all equipment.<br />
Unrestricted <strong>Manual</strong> Transfer- With the UMT feature "off," <strong>The</strong> <strong>Stick</strong> will<br />
only allow a manual transfer to be done during the first 15 seconds of an<br />
inbound call when answered from an extension.<br />
<strong>The</strong> UMT feature, when activated, enables a transfer to be executed from<br />
an extension phone and by either party at any time during the call, no<br />
matter if the call is inbound or outbound.<br />
Of course, inbound calls answered by equipment through the VOICE 1 or<br />
2 ports may be transferred at any time using the appropriate SAC,<br />
regardless of the setting for this feature.<br />
Factory preset is "on."
Standard Features<br />
- No Programming Needed!<br />
Barge-In Protection- When installed on an incoming telephone line<br />
before ALL telephone equipment (extension wall jacks or multi-line phone<br />
systems), <strong>The</strong> <strong>Stick</strong> will protect any voice or data call from being accessed<br />
by other telephone equipment on the same line. Any phone device that<br />
goes "off-hook" during a conversation or data transmission will receive a<br />
silent line.<br />
Note: <strong>The</strong> Barge-In Protection feature will control only those phone/data<br />
devices connected directly to <strong>The</strong> <strong>Stick</strong>. For optimum performance and<br />
protection, it is recommended that all premise extension phones be wired<br />
into <strong>The</strong> <strong>Stick</strong> at either the Voice 1 or Voice 2 ports. Relax! This is not a<br />
difficult operation to perform.<br />
See the section titled "Installation Procedures" for the easiest way to get<br />
the job done.<br />
Call Grab- If the Call Override feature does not perform due to any line<br />
problems with your local phone service provider, this standard feature will<br />
allow you to override <strong>The</strong> <strong>Stick</strong>'s tone detect and call routing operation.<br />
Call Grab can be initiated from any touch-tone or pulse extension phone<br />
by dialing "9" on the telephone keypad. When "9" is dialed, <strong>The</strong> <strong>Stick</strong> will<br />
immediately cease its call routing function. This feature is standard and<br />
will work regardless of the status of the "Call Override" feature.<br />
Note: YOU must enable the "Pulse Detect" feature if you want to grab a<br />
call from a pulse dial phone.<br />
Power/Call Status Light-<strong>The</strong> LED on the front of <strong>The</strong> <strong>Stick</strong> demonstrates<br />
two functions-when lit, it tells you the unit is powered up and while<br />
processing inbound and outbound calls,<br />
the LED signals which port is being used.<br />
A "one blink" pattern tells you a voice call<br />
is being processed, a repeating "two blink"<br />
pattern says <strong>The</strong> <strong>Stick</strong> has either detected<br />
CNG tones and is routing the call to your<br />
fax machine or a fax is outbound.<br />
A repeating "three blink" pattern denotes the proper security access code<br />
has been monitored and a caller has been monitored and a caller has<br />
been routed to your computer modem or data is being transmitted<br />
outbound from your computer modem.
<strong>The</strong> “How To” of Programming<br />
Programming <strong>The</strong> <strong>Stick</strong><br />
<strong>The</strong> average consumer usually starts to freak when they open up any product<br />
manual and see the word "PROGRAMMING". We have all experienced<br />
"programming" anxiety with VCR's, computers, fax machines. . ...whatever.<br />
Relax. This is relatively painless.<br />
All you have to do is understand each programmable feature and how you want<br />
<strong>The</strong> <strong>Stick</strong> to operate in your chosen installation.<br />
On the next page is the Programming and Quick Reference Guide. This table<br />
was developed as an easy reference/record for program features with<br />
corresponding Register Number, programming range of each feature, the factory<br />
preset of each feature (how <strong>The</strong> <strong>Stick</strong> works "out of the box" if you don't bother to<br />
program anything), program recommendations for certain types of installations<br />
and finally, a space for writing down what you've done (or what you want <strong>The</strong><br />
<strong>Stick</strong> to do).<br />
Please use the Programming and Quick Reference Guide. Mark on it. Highlight it.<br />
If you can't remember which Register Number controls which feature. . . .refer<br />
back to it. And take a tip from us, pencil in how you have programmed all the<br />
features. It will save you some time and frustration.<br />
We advise you to read through the Programmable Features section again if you<br />
are not quite sure of how you want <strong>The</strong> <strong>Stick</strong> to operate.
Register<br />
Number<br />
01<br />
Tones / Programming Commands<br />
THE STICK PROGRAMMING AND QUICK REFERENCE GUIDE<br />
Programmable<br />
Feature<br />
FAX Tone<br />
Detection<br />
02 Protected<br />
Hook Flash<br />
03<br />
04<br />
05<br />
06<br />
Unanswered Call<br />
Silent Transfer<br />
Silent Transfer<br />
Destination<br />
Program<br />
Range<br />
0 = off<br />
1 = on<br />
0 = off<br />
1 = on<br />
0 = off<br />
1 = on<br />
0 = fax<br />
1 = modem<br />
Pulse Detection 0 = off<br />
1 = on<br />
Call Override 0 = off<br />
1 = on<br />
07 Unrestricted<br />
<strong>Manual</strong> Transfer<br />
0 = off<br />
1 = on<br />
Factory<br />
Preset<br />
Programming<br />
and Installation<br />
Recommendations<br />
ON Regardless of how<br />
you install the <strong>Stick</strong>,<br />
if a FAX/PC <strong>Fax</strong><br />
Card is used-<br />
Program this feature<br />
"ON"<br />
OFF With older KEY and<br />
PBX systems, you<br />
may need to<br />
program this feature<br />
"ON"<br />
OFF "UCST" routes all<br />
unanswered afterhours<br />
calls to<br />
fax or modem ports<br />
(on any installation) -<br />
program "ON"<br />
FAX This feature<br />
determines what<br />
device will receive a<br />
call after it has been<br />
"silently transferred"<br />
OFF If you have pulsedial<br />
phones and<br />
wish to transfer or<br />
"grab" a call -<br />
program this feature<br />
"ON"<br />
OFF If <strong>The</strong> <strong>Stick</strong> is<br />
installed at a wall<br />
jack and you want to<br />
answer a call from<br />
any extension phone<br />
- program "ON"<br />
ON Gives transfer ability<br />
at any time, from<br />
either party from any<br />
phone,<br />
recommended<br />
programming "ON"<br />
Your<br />
Program
08 Answering<br />
Machine<br />
Silent Transfer<br />
11 Security<br />
Access Code<br />
for VOICE Ports<br />
12 Security<br />
Access Code<br />
for FAX Port<br />
13 Security<br />
Access Code<br />
for MODEM Port<br />
14<br />
15<br />
0 = off<br />
1 = on<br />
Digits 0-9 *<br />
and #<br />
4 digits<br />
max.<br />
Digits 0-9 *<br />
and #<br />
4 digits<br />
max.<br />
Digits 0-9 *<br />
and #<br />
4 digits<br />
max.<br />
Rings to answer 0 to 10<br />
Rings<br />
OFF After answering<br />
machine times out,<br />
call will be routed to<br />
fax or modem port<br />
(any installation) -<br />
program "ON"<br />
*1 This register<br />
contains the code for<br />
transfer of a voice or<br />
modem call to<br />
devices connected<br />
to voice 1 & 2 ports<br />
*2 This register<br />
contains the code for<br />
transfer of a voice or<br />
modem call to FAX /<br />
PC <strong>Fax</strong> Card<br />
CONNECTED to fax<br />
port<br />
*3 This code is usually<br />
sent by calling<br />
modem - we<br />
recommend<br />
programming a 4<br />
digit code for<br />
security purposes<br />
0 Rings If <strong>The</strong> <strong>Stick</strong> is used<br />
on a KSU or PBX<br />
set to "0" - home<br />
installs w/ext. phone<br />
access, program<br />
needed no. of rings<br />
Maximum rings 4-30 Rings 8 Rings This feature controls<br />
the number of times<br />
a device (voice, fax,<br />
modem) is rung by<br />
the stick before<br />
dropping the call
Initial Check<br />
<strong>Inc</strong>luded with <strong>The</strong> <strong>Stick</strong> are additional items that make life a whole lot easier.<br />
Please check the box and make sure you have:<br />
<strong>The</strong> <strong>Stick</strong> Voice/<strong>Fax</strong>/Modem Call Processor<br />
One 12 Volt Class 2 Power Source<br />
One Silver Modular Line Cord<br />
If any of these items are missing,<br />
please alert the Sales<br />
Department toll free at 866-337-<br />
0965 and also Technical Support<br />
at 800-535-4651<br />
POWER UP<br />
<strong>The</strong> first thing you must do before programming <strong>The</strong> <strong>Stick</strong> is to "power up" the<br />
unit. It is recommended that you choose a power outlet close to a telephone wall<br />
jack. Plug the power supply (supplied) into the 110 volt outlet and insert the<br />
barrel plug into the port labeled:<br />
USE ONLY WITH<br />
12 VAC 0.8-1.0A<br />
CLASS 2<br />
POWER SOURCE<br />
At the rear of the unit. <strong>The</strong> red light beside "<strong>The</strong> <strong>Stick</strong>" logo should be lit at this<br />
time.<br />
CONNECTING TO THE PHONE LINE<br />
Before programming <strong>The</strong> <strong>Stick</strong>, you will need to<br />
install it on your existing telephone line and connect<br />
a touch-tone (DTMF) telephone to the port labeled<br />
"VOICE 1" at the bottom of the unit.<br />
A silver Modular Line Cord has been supplied for<br />
connecting <strong>The</strong> <strong>Stick</strong> to a phone line. Plug one end of the line cord into the port<br />
labeled "LINE". Plug the other end into a telephone wall jack. At this time you<br />
should hear dial tone when the handset on your touch-tone phone is lifted<br />
off-hook.
Overview of Programming<br />
<strong>The</strong> "How To" of Programming<br />
Now that you've gotten everything hooked up and in place, the fun begins! We<br />
advise that you read through this section once or twice for familiarity with the<br />
process. You may also want to refer back to the Programming and Quick<br />
Reference Guide table to pencil in selected programming values for each feature<br />
you wish to control.<br />
<strong>The</strong> first thing you should do is to place a local call to your best buddy. Ask him<br />
or her to lay their phone receiver down for a moment.... but don't hang it up. This<br />
will keep you from incurring any long distance phone charges or "freaking out"<br />
the local phone company with all the numbers you will dial to program <strong>The</strong> <strong>Stick</strong>.<br />
After placing a call to your friend, wait at least five seconds before proceeding.<br />
First, DIAL "# # 7 7" on your telephone keypad. <strong>The</strong> LED light will begin blinking<br />
rapidly. Immediately listen for three rapid high - pitch beeps in your handset.<br />
Three high-pitched tones indicate that you have entered the programming mode<br />
and may "PROCEED".<br />
At this time, you should enter the Register Number of the feature you wish to<br />
program and proper value(s). If the proper register number and programming<br />
value(s) are entered, <strong>The</strong> <strong>Stick</strong> will answer with a high-pitch tone immediately<br />
followed by a mid-pitch tone. It kind of sounds like "bee-blip". This means "OK".<br />
If the numbers you enter are invalid (either for the Feature Register or program<br />
value), <strong>The</strong> <strong>Stick</strong> will respond with a single low-pitch "ERROR" tone. This tone<br />
might remind you of the sound you hear when you "blow it" on your favorite video<br />
game.<br />
In either case, three rapid high-pitch tones will immediately follow telling you to<br />
"PROCEED". At this time you may either access and program a new feature<br />
register or correct the previous attempt by entering new numbers.<br />
Summary of the types of tones you will hear.<br />
"PROCEED''-Three high-pitch tones in rapid succession tell you <strong>The</strong> <strong>Stick</strong> is<br />
ready to program a register or receive more commands in the form of touch<br />
tones. "Bee-Bee-Beep"<br />
"OK"- (or "Okay" for you purists)- One high-pitch tone immediately followed by a<br />
mid-pitch tone means that the numbers that you have entered are acceptable<br />
and within range for the Register Number and feature value. "Bee-Bip"<br />
“ERROR’‘- A single low-pitch tone indicates that the Register Number, feature<br />
value or program commands (we talk about those next) you have entered are<br />
invalid. Common errors committed when programming could be:
<strong>The</strong> "How To" of Programming Continued<br />
Entering the Register Number for a feature, let’s say it’s “Protected Hook<br />
Flash”, and you enter only part of the number. <strong>The</strong> Register Number for<br />
“Protected Hook Flash” is “02”. If you enter "2" <strong>The</strong> <strong>Stick</strong> will give you an<br />
“ERROR” tone.<br />
Entering a feature value that is outside of the program range. As an<br />
example, we will use “Protected Hook Flash” again. You are only allowed<br />
to program this feature value as “0” (off) or " 1” (on). If you enter the<br />
number “2” after the correct Register Number, <strong>The</strong> <strong>Stick</strong> will give you an<br />
“ERROR” tone.<br />
Programming Commands<br />
Save To Memory/Exit- After programming all feature values you wish to<br />
manipulate, you will need to save the program to memory and exit the<br />
programming mode. This can be done by dialing “80”. At that time you will hear<br />
the “OK” tone twice. <strong>The</strong> LED will go back to normal operation. Even if there is a<br />
power loss to <strong>The</strong> <strong>Stick</strong>, all programming is saved.<br />
No Save/Exit- If you wish to “dump” any programming you’ve done and exit the<br />
programming mode, dial "90" At that time you will only hear the “OK” tone once.<br />
<strong>The</strong> LED will go back to normal operation.<br />
Set Registers To Factory Preset- This command sets all program registers to<br />
the factory presets (refer to the Programming and Quick Reference Guide).<br />
When you dial "60" all registers automatically revert to factory preset. <strong>The</strong> <strong>Stick</strong><br />
will answer with an “OK” tone followed immediately by a “PROCEED” tone. Dial<br />
“80” to save and exit.<br />
A Overview of Programming<br />
This is “the big picture” for how to program <strong>The</strong> <strong>Stick</strong>.<br />
Being the good consumer you are, you’ve read the manual thoroughly (NOT!),<br />
penciling in the feature changes on your Programming and Quick Reference<br />
Guide. You call your mom (a local call) and ask her to lay the phone down for a<br />
moment while you program this neat new call processor you’ve just purchased.<br />
She says OK.<br />
You’ve decided to reprogram the Security Access Code for the MODEM port,<br />
turn the “Unrestricted <strong>Manual</strong> Transfer” feature off and turn the “Pulse Detect”<br />
feature on.
Programming Commands continued<br />
1. Since five seconds has more than elapsed since you initiated the your<br />
mom, you can enter the programming mode. You dial " # # 7 7” on your<br />
touch-tone phone connected to the “VOICE 1"' port.<br />
<strong>The</strong> <strong>Stick</strong> Response: Answers with a “PROCEED” tone. <strong>The</strong> LED is<br />
blinking very rapidly. You have 30 seconds to begin the next command.<br />
2. You change the SAC for the MODEM port to “007”, by dialing 13007, “13”<br />
selects Register 13 (Security Access Code for MODEM port) and 007 is<br />
the new SAC.<br />
<strong>The</strong> <strong>Stick</strong> Response: Answers with an “OK” tone, then a “PROCEED”<br />
tone. You have 30 seconds to begin the next command.<br />
3. You change the “Unrestricted <strong>Manual</strong> Transfer” feature to “OFF” (factory<br />
preset “ON”) by dialing 070. “07” selects Register 7 and "0" turns the<br />
feature off.<br />
<strong>The</strong> <strong>Stick</strong> Response: Answers with an “OK” tone, then a “PROCEED”<br />
tone. You have 30 seconds to begin the next command.<br />
4. You change the “Pulse Detect” feature to “ON” (factory preset “OFF”) by<br />
dialing 051. "05" selects Register 5 and "1" turns the feature on.<br />
<strong>The</strong> <strong>Stick</strong> Response: Answers with an “OK” tone, then a “PROCEED”<br />
tone. You have 30 seconds to begin the next command.<br />
5. You have finished programming the desired feature changes and wish to<br />
save them to nonvolatile memory and exit the programming mode. You<br />
dial “80”.<br />
<strong>The</strong> <strong>Stick</strong> Response: Answers with the “OK” tone twice. <strong>The</strong> LED returns<br />
to normal blinking which demonstrates that your touch-tone phone<br />
connected to the “VOICE 1" port is off-hook.<br />
Check and see if your mom is on the other end of the line.<br />
If not, hang up the phone.<br />
NOTE: If <strong>The</strong> <strong>Stick</strong> does not receive a command within 30 seconds, it will give<br />
you an “OK” tone and exit the programming mode without saving any<br />
programming. Basically it is acting as if you have dialed "90".<br />
(See section titled Programming Commands.)
Audible "Read Back" of Programming<br />
PROGRAMMING-BEEP BEEP BEEP-BOOOOOOOP!<br />
<strong>The</strong>re is a programming command that allows <strong>The</strong> <strong>Stick</strong> to audibly “read back”<br />
(via the phone) the values of any program register.<br />
This feature is handy when you forget what you have just programmed and want<br />
a quick read back or checking to see if a feature is (de)activated before leaving<br />
your home or office.<br />
<strong>The</strong>re are two types of tones that <strong>The</strong> <strong>Stick</strong> will transmit through your receiver on<br />
the audible “read -back”:<br />
A clipped, high-pitched “bip” which has a numerical value of one.<br />
A long low-pitched “beep” which has the numerical value of five.<br />
<strong>The</strong> chart below describes the audible tones, which coincide with each number or<br />
symbol in a register.<br />
Number / Symbol Audible Tones<br />
1 "BIP"<br />
2 "BIP BIP”<br />
3 “BIP BIP BIP”<br />
4 “BIP BIP BIP BIP”<br />
5 “BEEP”<br />
6 “BEEP BIP”<br />
7 “BEEP BIP BIP”<br />
8 “BEEP BIP BIP BIP”<br />
9 “BEEP BIP BIP BIP BIP”<br />
0 “BEEP BEEP”<br />
* “BEEP BEEP BIP"<br />
# “BEEP BEEP BIP BIP”<br />
Executing Audible “Read Back” With <strong>The</strong> <strong>Stick</strong>:<br />
First, you must enter the programming mode by<br />
dialing "# # 7 7”. <strong>The</strong>n press "*" and the Register<br />
Number you wish to read back.
An example:<br />
Audible "Read Back" of Programming continued<br />
First, you press "# # 7 7” on your touch-tone phone to enter the<br />
programming mode.<br />
<strong>The</strong> <strong>Stick</strong> responds with a “PROCEED” tone.<br />
You press "* 0 5”<br />
(telling <strong>The</strong> <strong>Stick</strong> to audibly read back the value in Register 5).<br />
<strong>The</strong> <strong>Stick</strong> transmits 2 ‘Beeps” signifying the value “0”<br />
(the feature is turned off).<br />
After a short pause, <strong>The</strong> <strong>Stick</strong> will transmit an “OK” tone followed by a<br />
“PROCEED” tone.<br />
At that time you may either “read back” or program any register.<br />
For Registers Containing More Than A Single Value<br />
Some registers can (or are required to) contain more than .a single value, i.e.,<br />
Registers 11 to 15. Here’s a short example of what a “read back” would sound<br />
like where more than 2 digits or symbols are programmed in the register.<br />
Let’s say the register you want to “read back” is number 13, the Security Access<br />
Code for the MODEM port, and it is programmed as "* 7 5”:<br />
You first enter programming (# # 7 7).<br />
Press "* 1 3" to “read back” Register 13.<br />
<strong>The</strong> <strong>Stick</strong> transmits "Beep Beep Bip (pause) Beep Bip Bip (pause) Beep”.<br />
(Equivalent to * 75).<br />
<strong>Stick</strong> immediately transmits the “OK” and “PROCEED” tones.<br />
Note: You will receive an “Error” tone when entering an incorrect Register<br />
Number on audible “read back”. Never fear-try again!
Pointers for hook-up of voice/data equipment<br />
Voice / Data Equipment<br />
This section involves the connection of communications equipment to <strong>The</strong> <strong>Stick</strong>.<br />
You may configure the “hook up” of different types equipment in a number of<br />
ways. Whatever suits your operational needs and your installation requirements!<br />
Although each device port is labeled with generic titles designating what<br />
equipment would connect to what port, YOU CAN CONFIGURE IT ANY WAY<br />
YOU LIKE! Just be sure to read this section thoroughly before trying anything<br />
weird (that might not work).<br />
FAX / PC <strong>Fax</strong> Cards<br />
<strong>The</strong> <strong>Stick</strong> has special features that make it work extremely well with either a PC<br />
FAX Card or a FAX machine. <strong>The</strong> feature that enables <strong>The</strong> <strong>Stick</strong> to route an<br />
incoming FAX call to your “FAX” type device is “FAX Tone Detection”.<br />
What’s a “FAX Tone”?<br />
In a nutshell, most FAX machines generate a tone when they are operated<br />
“automatically”. Automatic generally means you just drop the paper(s) to be<br />
faxed in the document carriage, the machine loads it, the desired phone number<br />
is entered, you hit the “START” button and you’re done.<br />
<strong>The</strong> machine automatically dials the<br />
number and begins emitting the tone<br />
(commonly known as CNG or AUTO-FAX<br />
tone) to identify itself as a FAX-type device.<br />
This tone is continuously transmitted until<br />
the called FAX machine answers the call<br />
and “handshakes” with the sending FAX.<br />
With <strong>The</strong> <strong>Stick</strong> at the receiving end, the call is “answered” and the FAX Tone is<br />
detected. At that time the call is routed to the port labeled “FAX”. Hence, we<br />
suggest if you use either a FAX machine or PC FAX Card connect it to the port<br />
labeled “FAX”.<br />
From <strong>The</strong> "...... .And Here’s Another Curve Ball” File.<br />
Sometimes people pick up the handset on their FAX machine and dial the phone<br />
number of the fax machine they want to connect with. By doing this they have<br />
told their FAX machine they want to use it for voice purposes only.
Pointers for hook-up of voice/data equipment continued<br />
No problem for the FAX machine.....but now it will not transmit any AUTO-FAX<br />
tones after dialing a phone number. If <strong>The</strong> <strong>Stick</strong> is at the receiving end, it will<br />
answer the call and detect the absence of FAX tones, assume it is a voice call<br />
and route it to the VOICE 1 & 2 ports.<br />
When you answer the phone, the person at the other end will say, “I am trying to<br />
send you a FAX!” Of course you can manually transfer the call to your FAX by<br />
pressing *2 (or another code if reprogrammed).<br />
But before you do, we suggest you share the nugget of brilliant information found<br />
in the preceding paragraph with your misguided (no pun intended) caller and<br />
suggest the next time they fax you, try calling without lifting the FAX machine<br />
handset. It will make everything a whole lot easier at both ends of the<br />
conversation.<br />
PC FAX Cards And <strong>The</strong> Meaning of Life...<br />
If a PC FAX Card is connected to <strong>The</strong> <strong>Stick</strong> at the port labeled “FAX”, you should<br />
have no operational problems when a call is routed. <strong>The</strong>re are about a half-amillion<br />
different types of PC FAX Cards on the market today and each has its<br />
own operational idiosyncrasies.<br />
If you do experience a problem, check the operations manual included with the<br />
PC FAX Card. If you can’t figure the problem out on your own - call our Tech<br />
Support gurus at 1-800-535-4651, they’re pretty sharp about stuff like that.<br />
Answering Machines<br />
An answering machine is an effective tool when used with <strong>The</strong> <strong>Stick</strong>. When<br />
connected to either “VOICE” port, the answering machine will field any<br />
unanswered voice calls, and via a message, provide instructions on how to<br />
access other equipment.<br />
A sample message might go something like this:<br />
Hi! You have reached (Name/Company/Phone<br />
Number). We are not in right now, but if you wish to<br />
leave a message, wait for the beep.<br />
If you want to send us a FAX, press * 2 (or reprogrammed code). If you<br />
can’t dial * 2 on your phone, just stay silent after the beep and wait until the<br />
answering machine stops.<br />
You will then be transferred to the FAX automatically. Start transmission<br />
when you hear our FAX signal. Thanks and have a nice day!
This message reflects the use of three programmable features-the SAC for the<br />
FAX port, Answering Machine Silent Transfer and Silent Transfer Destination.<br />
<strong>The</strong> SAC for transfer to the FAX machine is factory preset at *2 “Answering<br />
Machine Silent Transfer” has been programmed “on” and the ‘Silent Transfer<br />
Destination” used is factory preset to the “FAX” port.<br />
Retrieving An Answering Machine Message- Most answering machines on the<br />
market today have factory preset “retrieval codes” for accessing a message from<br />
a remote phone. <strong>The</strong>re is no special feature on <strong>The</strong> <strong>Stick</strong> for accessing your<br />
answering machine: just call your phone number, let the machine answer the<br />
line, and dial your “retrieval code”.<br />
Again, we remind you to program all SAC’s used for voice/data equipment<br />
differently from your answering machine “retrieval code”.<br />
Computer Modems<br />
<strong>The</strong> <strong>Stick</strong> is compatible with all dial-up modems that use a “single pair” RJ-11 line<br />
cord to connect to a phone line. We suggest connecting the modem to the port<br />
labeled “MODEM” (we bet you’ve already figured that one out!). Most incoming<br />
calls to your modem are from remote (off location) computer modems. <strong>The</strong> <strong>Stick</strong><br />
will route calls to your computer modem when the calling modem dials the proper<br />
SAC after <strong>The</strong> <strong>Stick</strong> has answered the call.<br />
<strong>The</strong> “How To” Of Calling Your Modem- For any person to<br />
access your modem through <strong>The</strong> <strong>Stick</strong>, they must know your<br />
programmed Security Access Code for the “MODEM” port.<br />
Dialing your telephone number and SAC is done on the remote<br />
computer communications software. It should look something<br />
like this (for a HAYES-compatible modem):<br />
ATDT 1606 555 1234,,*3<br />
<strong>The</strong> commas after the phone number are commands telling the modem to wait<br />
two seconds per comma before dialing the SAC * 3. You should instruct your<br />
friends to “time” a call to your residence. Tell them to count the seconds between<br />
the last digit dialed and the last ring to the phone before <strong>The</strong> <strong>Stick</strong> answers the<br />
call (how many rings before <strong>The</strong> <strong>Stick</strong> answers). Divide that amount of seconds<br />
by two and you have the needed number of commas between the phone number<br />
and SAC.<br />
It is safe to repeat the SAC twice in the dialing string like so:<br />
ATDT 1 606 555 1234,,*3,,*3
Note that additional commas will need to be inserted between the SACs at the<br />
end of the dialing string. A minimum of 2 seconds between SACs is needed for<br />
<strong>The</strong> <strong>Stick</strong> to recognize and register the proper sequence of digits and symbols.<br />
Some modems cannot dial the * and # symbols. You may want reprogram a<br />
specific code for one time access by an outside caller.<br />
Again, if you have any questions, call our Tech Support line at 1-800-535-4651.<br />
Our factory-trained technicians can help you out on timing or SACS.<br />
Other Stuff That Works<br />
<strong>The</strong> <strong>Stick</strong> can operate on virtually all multi-line Key and PBX phone systems. We<br />
do recommend a specific type of installation for <strong>The</strong> <strong>Stick</strong> on either system. Refer<br />
to the section on Installation.<br />
<strong>The</strong> <strong>Stick</strong> is also compatible with virtually all Credit Card Authorization Terminals,<br />
Point of Sale Terminals, Loop-Start dial-up TELEX machines, dictation machines,<br />
Answering Machines, cordless telephones, CALLER ID Display equipment-<br />
anything that requires a phone line to communicate.<br />
If you have a CALLER ID Display device, we do recommend that it be installed<br />
on the telephone line BEFORE <strong>The</strong> <strong>Stick</strong> and the “Rings To Answer” feature be<br />
set for 2 or more rings. <strong>The</strong> data transmitted by the local Telco, which identifies<br />
the calling party’s phone number, arrives between the first and second ring so it<br />
should register on the display device without a problem.<br />
Services Offered by Your Local Telco- Most telephone companies are now<br />
marketing “Call Packages” that allow subscribers to customize their phone<br />
service in a multitude of ways. Most of the different services available are<br />
compatible with <strong>The</strong> <strong>Stick</strong>, but some may impede performance. Here are a few:<br />
Call Waiting-<strong>The</strong> “beep” heard during a phone conversation, alerting you<br />
of another call, will not affect the performance of <strong>The</strong> <strong>Stick</strong>. However,<br />
pressing the hook switch to field a call will cause <strong>The</strong> <strong>Stick</strong> to do strange<br />
things....like inadvertently transferring a call to your fax machine. We do<br />
not advise having call waiting on the same line with <strong>The</strong> <strong>Stick</strong>.<br />
Call Forwarding-<strong>The</strong> <strong>Stick</strong>’s automatic answering function (answer after a<br />
programmed number of rings) will not allow calls to be forwarded to<br />
another phone number. You may want to weigh the pros and cons of<br />
using <strong>The</strong> <strong>Stick</strong> versus the Call Forwarding service.
Installation<br />
Introduction<br />
This next section covers installation for <strong>The</strong> <strong>Stick</strong> in various configurations and<br />
applications. We have tried to cover virtually all installation, scenarios that may<br />
be found in the home and business. If we missed yours or you have something<br />
weird in mind for an installation - please call tech support at 1-800-535-4651.<br />
Maybe we can help you out or save you some time and unneeded expense.<br />
Where You Gonna Put It?<br />
It really makes no difference if you are installing <strong>The</strong> <strong>Stick</strong> in a business or a<br />
home- the main considerations for installation really have to do with how you<br />
require <strong>The</strong> <strong>Stick</strong> to perform and what you are willing to do with it as far as<br />
installation requirements go. Below are the three main questions you should ask<br />
yourself:<br />
1. Do You Require “Barge-In” Protection or Call Access From All Extensions?<br />
2. Is <strong>The</strong>re A <strong>Multi</strong>-line Phone System Present?<br />
3. How Much Hassle and Expense Do I Want To <strong>Inc</strong>ur Installing <strong>The</strong> <strong>Stick</strong>?<br />
How Do You Want It To Work?<br />
To better understand the type of installation/placement that may be right for you,<br />
think of <strong>The</strong> <strong>Stick</strong> as either a “traffic cop” or a “personal secretary”.<br />
!@&?)+!! Traffic Cops!<br />
“Traffic cops” aren’t the most popular people in the world so we’ll keep this<br />
analogy short and sweet. If installed into the phone-line BEFORE all phone<br />
extensions, wall jacks, multi-line phone systems, etc., <strong>The</strong> <strong>Stick</strong> acts like a “traffic<br />
cop” at an intersection. All inbound call “traffic” is intercepted by <strong>The</strong> <strong>Stick</strong> via its<br />
automatic answer feature and routed to its proper destination (i.e. phone, fax,<br />
modem).<br />
<strong>The</strong> standard feature that makes this type of installation attractive is “Barge-In<br />
Protection” and <strong>The</strong> <strong>Stick</strong>’s ability to transfer a call between devices. If a voice<br />
call is answered and routed, only the phones will ring. If a call, accompanied by<br />
CNG, is answered and routed, only the fax machine will receive the call. Once a<br />
call is directed to its intended device, our “traffic cop” also keeps equipment<br />
connected to <strong>The</strong> <strong>Stick</strong> from “Barging-In” on the existing call.<br />
Once again, for <strong>The</strong> <strong>Stick</strong> to perform in this manner, it must be installed on the<br />
phone line BEFORE all phone extensions, wall jacks or phone systems.
Your Own Personal Secretary<br />
Everybody needs their own personal secretary to screen calls when they are<br />
busy with other things. If you install <strong>The</strong> <strong>Stick</strong> on the phone line by plugging it into<br />
a telephone wall jack, that is basically what you've got- somebody to answer an<br />
incoming call and either:<br />
A. Tell you it is a voice call (by ringing the phone connected to a VOICE port) or<br />
B. Route it to the appropriate equipment<br />
Here’s the scenario-you are in the basement working one Saturday and the<br />
phone rings. Of course you have 3 or 4 extension phones scattered about your<br />
palatial estate, and particularly, one in the basement.<br />
With <strong>The</strong> <strong>Stick</strong> plugged into a telephone wall jack upstairs, you have the option of<br />
either “grabbing” the call before <strong>The</strong> <strong>Stick</strong> does via the basement extension or<br />
allowing <strong>The</strong> <strong>Stick</strong> to answer the call and route it to the appropriate device.<br />
This type of installation gives you the advantage of accessing an inbound call<br />
from any extension- but you lose “Barge-In Protection”. <strong>Manual</strong> transfers can still<br />
be executed from an extension phone if needed.<br />
<strong>The</strong> Right Features For <strong>The</strong> Right Installation<br />
In the next section, we have outlined different types of installations and included<br />
some recommendations for feature settings that should optimize performance of<br />
<strong>The</strong> <strong>Stick</strong> for that particular installation.<br />
<strong>The</strong>se are just recommendations. If you don’t like the way it works-mutter<br />
something under your breath about “busybodies” and change feature settings.<br />
We don’t mind.
On Single Phone Line<br />
INSTALLING THE STICK ON A SINGLE PHONE LINE<br />
Single line installation is pretty much a no-brainer. If this is how your home or<br />
office is wired, then you should browse through each wiring configuration to find<br />
out the best one for your needs.<br />
SIMPLE PLUG-IN (ONE WALL JACK, NO EXTENSIONS)<br />
Pros:<br />
Great Barge-In Protection!<br />
Easy Installation!<br />
Cons:<br />
Fat Chance You’ll Be Lucky Enough To Have This Wiring Configuration<br />
Installation:<br />
Simply unplug whatever is in the wall jack and connect the “LINE” input of<br />
<strong>The</strong> <strong>Stick</strong> to the wall jack with the supplied line cord.<br />
Reattach your phone to the VOICE 1 port and connect your answering<br />
machine and data equipment to their respective ports.<br />
Feature Recommendations Pertinent To This Installation:<br />
Rings To Answer - Set To “0”. <strong>The</strong> <strong>Stick</strong> will answer the call immediately.<br />
If You Have A Pulse Dial Phone, Set Pulse Detection ON.
SIMPLE PLUG-IN WITH MULTIPLE EXTENSIONS<br />
Pros:<br />
Can Access Calls From Extension Phones!<br />
Easy Installation!<br />
Installation Can Occur At Any Wall Jack.<br />
Cons:<br />
No Barge-In Protection-Sorry!<br />
Note: This installation is the same as the “Simple Plug-In, No Extensions”.<br />
Connection to a telephone wall jack is the same.<br />
Feature Recommendations Pertinent To This Installation<br />
If any phones are pulse dial, program Pulse Detect ON.<br />
If you wish to access a call from an extension phone prior to <strong>The</strong> <strong>Stick</strong>s<br />
answering, program the needed amount of rings in the “Rings To Answer”<br />
feature.<br />
Program “Call Override” to ON for call access AFTER <strong>The</strong> <strong>Stick</strong> has<br />
answered a call.
SIMPLE PLUG-IN WITH EXTENSIONS<br />
AND TOTAL BARGE-IN PROTECTION<br />
Pros:<br />
Provides Total Barge-In Protection.<br />
Only voice calls will ring phone extensions.<br />
<strong>The</strong> best installation for total control of inbound calls.<br />
Cons:<br />
Calls cannot be accessed from an extension phone before <strong>The</strong> <strong>Stick</strong><br />
answers.<br />
Installation requires splitter/adapters (not included) and an extra line cord.<br />
May need to do a little rewiring at each wall jack. (but probably not)<br />
Most homes and businesses are wired with either 2-pair or 3-pair telephone<br />
cable from extension to extension. This installation splitter/adapters utilizes the<br />
unused pair of wires in the cable to connect all phones to the VOICE 1 port.<br />
1. <strong>The</strong> point of connection to the telephone line for <strong>The</strong> <strong>Stick</strong> can be at any<br />
extension wall jack. Unplug anything connected to this wall jack and plug a<br />
splitter/adapter into the wall jack.<br />
2. Plug one end of the supplied line cord into the port labeled “LINE” on <strong>The</strong><br />
<strong>Stick</strong> and the other end in the “Line 1” port of the splitter/adapter.<br />
3. Connect the “VOICE 1” port of <strong>The</strong> <strong>Stick</strong> to the “Line 2” side of the<br />
splitter/adapter using an additional line cord (not supplied).<br />
4. At extension wall jacks located away from <strong>The</strong> <strong>Stick</strong>, unplug any phones<br />
from these jacks. Plug splitter/adapters in all wall jacks. Reconnect<br />
phones to the “Line 2” side of the splitter/adapters.<br />
At any point “down line” from <strong>The</strong> <strong>Stick</strong> where it is impractical to insert a<br />
splitter/adapter (for example: a wall mount telephone), this type of jack may be<br />
converted by:<br />
a. Swapping the GREEN wire with the BLACK wire<br />
b. Swapping the RED wire with the YELLOW wire<br />
<strong>The</strong> phone can then be plugged into the converted jack.
Feature Recommendations Pertinent To Installation<br />
Set Rings To Answer to “0”.<br />
If you are using Pulse dial phones at any point in installation, set Pulse<br />
Detection “ON”.<br />
* Many Telephone/Electronics Stores carry the Splitter/Adapter for this<br />
installation. Here is a couple of retailers with the right part numbers:<br />
ATT Phone Stores # 267C<br />
Radio Shack # 279-402
NOT-SO-SIMPLE IN LINE INSTALLATION<br />
Pros:<br />
Cons:<br />
Total Barge-In Protection!<br />
You may require the services of a telephone installation guru. Requires<br />
severing the phone line before all existing wall jacks and installing either<br />
modular jacks or RJ-11 modular plugs and an extra modular line cord.<br />
This one can be real difficult due to the materials required and the point of<br />
installation for <strong>The</strong> <strong>Stick</strong>. Remember, what we are trying to achieve in this<br />
scenario is “Barge-In Protection." All voice calls are routed to all phones and fax<br />
and modem calls go to their respective devices-without one being able to access<br />
the other.<br />
1. Find a point on the incoming phone line before all wall jacks or telephone<br />
equipment. Sever the phone line.<br />
2. Install two modular wall jacks on each end of the severed phone line.<br />
Make sure you are using the correct pair of wires when connecting the<br />
severed phone line to the modular jacks.<br />
3. Plug one end of the supplied line cord into the port labeled “LINE” on <strong>The</strong><br />
<strong>Stick</strong> and the other end into the first modular wall jack. An additional line<br />
cord will be needed to connect the port labeled “VOICE 1” to the second<br />
modular wall jack.<br />
4. From this location, additional wiring may need to be run to your fax<br />
machine and computer modem (if located in another room).<br />
Feature Recommendations Pertinent To Installation<br />
Set Rings To Answer to "0"<br />
*If you are using Pulse dial phones at any point, set Pulse Detection to<br />
ON.
On <strong>Multi</strong>ple Phone Line System<br />
INSTALLING THE STICK<br />
ON A MULTIPLE PHONE LINE SYSTEM<br />
<strong>The</strong> <strong>Stick</strong> can be installed in a multiple line application where either an electronic<br />
phone system (KSU or PBX) or a 2-line phone configuration exists. Installing <strong>The</strong><br />
<strong>Stick</strong> in these types of situations is a little bit more involved than the single line<br />
installations previously outlined. Review this section and if things get a little too<br />
hairy...call a telephone installer, show him this section and save yourself a lot of<br />
time and hassle.<br />
INSTALLING ON A KEY SYSTEM OR PBX<br />
Pros:<br />
Cons:<br />
Great Barge-In Protection!<br />
Installation is not for amateurs. Requires you to run station wiring from<br />
<strong>The</strong> <strong>Stick</strong> to the fax machine and computer modem location.<br />
Installation of <strong>The</strong> <strong>Stick</strong> on a multi-line phone system should always occur at the<br />
“Trunk” side. “Trunk” is telephone nerd-speak for the side closest to the<br />
telephone company where incoming lines connect to the phone system.<br />
Confused... just look at the picture below.<br />
We recommend that if you have rollover from your phone company, install <strong>The</strong><br />
<strong>Stick</strong> on the last line of the rollover sequence.<br />
1. Unplug the chosen line from your KSU or PBX. A modular wall jack will<br />
need to be installed on that line close to the KSU or PBX if the plug is not<br />
RJ-11 modular. If the plug is RJ-11 modular, then it can be plugged<br />
directly into the “LINE” port of <strong>The</strong> <strong>Stick</strong>.<br />
2. If a modular wall jack is installed, plug one end of the supplied line cord<br />
into the modular wall jack and plug the other end into the port labeled<br />
“LINE”. An additional line cord will be needed for connection from the<br />
“VOICE 1” port to the KSU/PBX. From this point phone wire is run to the<br />
fax machine and modem.<br />
Feature Recommendations Pertinent To This Installation<br />
Set Rings To Answer to "0"<br />
Set Protected Hook Flash to ON.<br />
If Pulse dial phones are used, set Pulse Detection to ON.
RJ-14 TWO LINE SYSTEM (NO KSU)<br />
Pros:<br />
Great Barge-In Protection For One Line<br />
Cons:<br />
This installation is not recommended for even the gutsiest do-it-yourselfer!<br />
<strong>The</strong> standard RJ-14 two-line phone system utilizes “two pair” phone line. To<br />
install <strong>The</strong> <strong>Stick</strong> in this scenario, you will have to access the pair that controls the<br />
chosen phone line and install modular wall jacks for connection to the line.<br />
This can get really involved. Standard color pairings for telephone wiring are Red<br />
with Green, Black with Yellow and Blue with White. To physically see what pairs<br />
coincide with each phone number, you may need to chase the wiring back to the<br />
“demarcation” point (where Telco wiring ends and residence wiring begins).<br />
Before you undertake such a sincere and monumental task, consider this . . .<br />
This wiring scheme has been the Waterloo of many an armchair telephone dude<br />
(or dudette). Either you or the wiring is going to win and odds are not in your<br />
favor. We strongly recommend- no, we beg of you- call a telephone installer for<br />
this one. Show your installer the picture on page 33 and/or ask him if he’s got a<br />
better idea. He might.<br />
Feature Recommendations Pertinent To Installation<br />
Set Rings To Answer to “0”.<br />
Most two-line phones are not pulse dial, but if you happen to own the only<br />
pulse dial two-line phone system in America, set Pulse Detect ON.
Mounting <strong>The</strong> <strong>Stick</strong><br />
<strong>The</strong> <strong>Stick</strong> can operate just about anywhere. Here are a few suggestions:<br />
a. Mounted to a baseboard at the bottom of a wall,<br />
b. On a desk top beside your fax, phone or PC modem or<br />
c. Tucked away underneath a desk.<br />
<strong>Stick</strong>en' It To <strong>The</strong> Wall<br />
We suggest using an adhesive double-sided mounting tape to keep <strong>The</strong> <strong>Stick</strong><br />
firmly attached to any surface. Keep in mind that the adhesive on the tape can be<br />
very strong. We recommend that you invest some thought into the best location<br />
before peeling back the cover and “going for it”.<br />
<strong>Stick</strong>en' It On A Desktop<br />
Anti-skid material works great to keep <strong>The</strong> <strong>Stick</strong> on a desk or counter top and off<br />
of the floor. We recommend this for people who might need to relocate <strong>The</strong> <strong>Stick</strong><br />
at some time in the future.
Technical Specifications<br />
INPUT POWER REQUIREMENTS-<br />
At AC Transformer: 110-125 Volts AC Only, 50-60 Hz<br />
At Power Jack On <strong>Stick</strong>: 12-14 Volts AC and DC<br />
POWER CONSUMPTION- 6.2 Watts<br />
CO INTERFACE-<br />
Ringer Equivalence Number: 0.5 B<br />
Input Ring Detection: 40-150 Volts AC, 15-68 Hz<br />
DEVICE INTERFACE-<br />
Battery: 48 Volts Nominal DC To All Devices<br />
Off-Hook Detection: 3-80 mA<br />
Ring Generator Frequency:<br />
30 Hz (+/- ..1) Hz Voltage Regulated and Current Limited<br />
Waveform: True Sinusoidal<br />
Ringing:<br />
No Load: Approx. 82.8 Volts RMS AC<br />
8000 Ohm Impedance (REN 1.0): Approx. 81.6 Volts RMS AC<br />
4000 Ohm Impedance (REN 2.0): Approx. 73.0 Volts RMS AC<br />
2667 Ohm Impedance (REN 3.0): Approx. 64.5 Volts RMS AC<br />
2000 Ohm Impedance (REN 4.0): Approx. 55.0 Volts RMS AC<br />
1800 Ohm Impedance (REN 5.0): Approx. 49.5 Volts RMS AC
FCC Registration<br />
This equipment complies with Part 68 of the FCC rules. On the bottom of this<br />
equipment is a label that contains, among other information, the FCC<br />
Registration Number and Ringer Equivalence Number (REN) for this equipment.<br />
You must, upon request, provide this information to your telephone company.<br />
<strong>The</strong> REN is used to determine the quantity of devices you may connect to the<br />
telephone line and still have all those devices ring when your telephone number<br />
is called. In most, but not all areas, the sum of the RENs of all devices connected<br />
to one line should not exceed five (5.0). To be certain of the number of devices<br />
you may connect to your line, as determined by the REN, you should contact<br />
your local telephone company to determine the maximum REN for your calling<br />
area.<br />
If your telephone equipment causes harm to the telephone network, the<br />
telephone company may discontinue your service temporarily. If possible, they<br />
will notify you in advance. But if advance notice is not practical, you will be<br />
notified as soon as possible. You will be informed of your right to file a complaint<br />
with the FCC.<br />
Your telephone company may make changes in its facilities, equipment,<br />
operations or procedures that could affect the proper functioning of your<br />
equipment. If they do, you will be notified in advance to give you an opportunity<br />
to maintain uninterrupted telephone service.<br />
If you experience trouble with <strong>The</strong> <strong>Stick</strong>, please contact your retailer or<br />
<strong>Multi</strong>-<strong>Link</strong>, <strong>Inc</strong>., for information on obtaining service and repairs. <strong>The</strong> telephone<br />
company may ask that you disconnect this equipment from the network until the<br />
problem has been corrected or until you are sure that the equipment is not<br />
malfunctioning.<br />
This equipment may not be used on coin service provided by the telephone<br />
company, and is not intended for use with a party line service. This equipment is<br />
intended for use only on loop start service, and will not operate on a ground start<br />
central office line.
Doc Registration<br />
DOC REGISTRATION<br />
<strong>The</strong> Department of Communications label identifies certified equipment. This<br />
certification means that the equipment meets certain telecommunications<br />
network protective, operational and safety requirements. <strong>The</strong> Department does<br />
not guarantee the equipment will operate to the user’s satisfaction. Before<br />
installing this equipment, users should ensure that it is permissible to be<br />
connected to the facilities of the local telecommunications company. <strong>The</strong><br />
equipment must also be installed using an accepted method of connection. In<br />
some cases, the company’s inside wiring associated with a single line individual<br />
service may be extended by means of a certified connector assembly (telephone<br />
extension cord). <strong>The</strong> customer should be aware that compliance with the above<br />
conditions may not prevent degradation of service in some situations.<br />
Repairs to certified equipment should be made by an authorized Canadian<br />
maintenance facility designated by the supplier. Any repairs or alterations made<br />
by the user to this equipment, or equipment malfunctions, may give the<br />
telecommunications company cause to request the user to disconnect the<br />
equipment.<br />
Users should ensure, for their own protection, that the electrical ground<br />
connections of the power utility, telephone lines and internal metallic water pipe<br />
system, if present, are connected together. This precaution may be particularly<br />
important in rural areas.<br />
Caution: Users should not attempt to make such connections themselves,<br />
but should contact the appropriate electric inspection authority, or<br />
electrician, as appropriate.<br />
<strong>The</strong> Load Number (LN) assigned to each terminal device denotes the percentage<br />
of the total load to be connected to a telephone loop, which is used by the<br />
device, to prevent overloading. <strong>The</strong> termination on a loop may consist of any<br />
combination of devices subject only to the requirement that the total of the Load<br />
Numbers of all devices does not exceed 100.<br />
Notice: This product has been tested and meets the Class B limits for radio noise<br />
emissions set out by the Radio Interference Regulations of the Canadian<br />
Department Of Communications.
Warranty Information<br />
To register your purchase, please fill out the warranty card and mail it.<br />
We warrant that if <strong>The</strong> <strong>Stick</strong> Voice/<strong>Fax</strong>/Modem Call Processor, manufactured by<br />
<strong>Multi</strong>-<strong>Link</strong>, <strong>Inc</strong>. and purchased by you, proves to be defective in material or<br />
workmanship, we will provide without charge, for a period of one year (USA<br />
only), the labor and parts necessary to remedy any such defect. Warranty<br />
commences on the date of purchase by the original retail consumer.<br />
<strong>The</strong> duration of any implied warranty of merchantability, fitness for a particular<br />
purpose, or otherwise, on this product shall be limited to the duration of the<br />
applicable express warranty set forth above. In no event shall we be liable for<br />
any loss, inconvenience or damage whether direct, incidental, consequential or<br />
otherwise resulting from breach of any express or implied warranty, of<br />
merchantability, fitness for a particular purpose, or otherwise with respect to this<br />
product, except as set forth herein.<br />
Some states do not allow limitations on how long an implied warranty lasts and<br />
some states do not allow the exclusion or limitation of incidental or consequential<br />
damages, so the above limitations or exclusions may not apply to you.<br />
To obtain service under this warranty, you must first request a RMA number from<br />
our technical support department. Present <strong>The</strong> <strong>Stick</strong> product with the RMA<br />
number and copy of a sales receipt (or credit card receipt) or other satisfactory<br />
proof of the date of the original retail purchase of the product to <strong>Multi</strong>-<strong>Link</strong>, <strong>Inc</strong>. or<br />
an authorized service repair center.<br />
<strong>The</strong> AC power supply used with this product is covered under this warranty. This<br />
warranty does not cover damage, which results from accident, misuse, abuse,<br />
improper line voltage, lightning strike, fire, flood, or damage resulting from<br />
unauthorized repairs or alterations performed by an unauthorized service center.<br />
This warranty gives you specific legal rights, and you may also have other rights,<br />
which vary from state to state.
Service Information<br />
SERVICE INFORMATION FOR THE U.S. AND CANADA<br />
Your machine has been registered with the Federal Communications<br />
Commission, and under this program, in the event of equipment malfunction, all<br />
repairs will be performed by <strong>Multi</strong>-<strong>Link</strong>, <strong>Inc</strong>. or a repair center we have<br />
authorized. <strong>The</strong> owner is restricted from performing any maintenance operation<br />
other than those specified within this instruction manual.<br />
If you require service, please contact <strong>Multi</strong>-<strong>Link</strong>, <strong>Inc</strong>orporated at:<br />
In <strong>The</strong> US:<br />
225 Industry Parkway<br />
Nicholasville, Kentucky 40356<br />
1-800-535-4651<br />
1-859-885-6363<br />
In Canada:<br />
Unit Al, 6120 - 2nd Street S.E.<br />
Calgary, AB T2H 2L8<br />
l-403-258-1646<br />
SERVICE INFORMATION OUTSIDE THE U.S. AND CANADA<br />
For units installed outside the U.S. and Canada, please contact your original<br />
point of purchase dealer for information regarding warranty and service.<br />
For more information and technical support visit our website at<br />
http://faxswitch.com
How to Buy Your <strong>Stick</strong><br />
Purchasing Information<br />
<strong>Multi</strong>-<strong>Link</strong> products can be purchased securely online from:<br />
faxswitch.com<br />
Or by phone at (217) 337 -0965<br />
Toll Free at (866) 337-0965 within US and Canada.<br />
We look forward to serving you now and in the future.<br />
Thank you.