ANTIK JUICE IPTV DEMO KIT 3.0 MANUAL_version2 - Antiktech.com
ANTIK JUICE IPTV DEMO KIT 3.0 MANUAL_version2 - Antiktech.com
ANTIK JUICE IPTV DEMO KIT 3.0 MANUAL_version2 - Antiktech.com

Create successful ePaper yourself
Turn your PDF publications into a flip-book with our unique Google optimized e-Paper software.
<strong>ANTIK</strong> <strong>JUICE</strong> <strong>IPTV</strong> <strong>DEMO</strong> <strong>KIT</strong> <strong>MANUAL</strong><br />
Thank you for purchasing the Juice <strong>IPTV</strong> Demo Kit (IDK). We have put together the Juice IDK to offer our client a good<br />
insight about <strong>IPTV</strong>, and to give you a hand-on experience on managing an <strong>IPTV</strong> system. We hope you will enjoy it, and find<br />
it useful.<br />
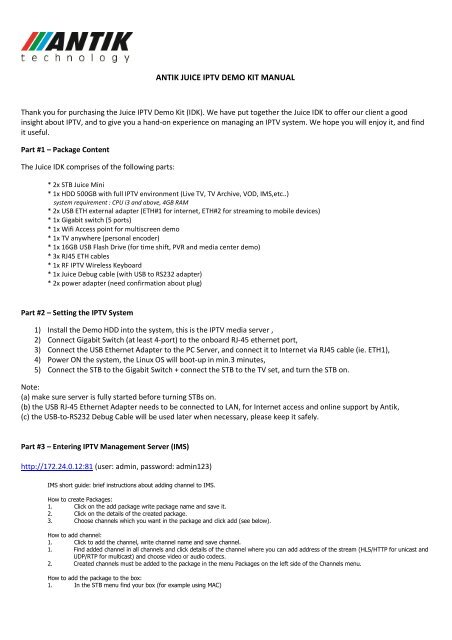
Part #1 – Package Content<br />
The Juice IDK <strong>com</strong>prises of the following parts:<br />
* 2x STB Juice Mini<br />
* 1x HDD 500GB with full <strong>IPTV</strong> environment (Live TV, TV Archive, VOD, IMS,etc..)<br />
system requirement : CPU i3 and above, 4GB RAM<br />
* 2x USB ETH external adapter (ETH#1 for internet, ETH#2 for streaming to mobile devices)<br />
* 1x Gigabit switch (5 ports)<br />
* 1x Wifi Access point for multiscreen demo<br />
* 1x TV anywhere (personal encoder)<br />
* 1x 16GB USB Flash Drive (for time shift, PVR and media center demo)<br />
* 3x RJ45 ETH cables<br />
* 1x RF <strong>IPTV</strong> Wireless Keyboard<br />
* 1x Juice Debug cable (with USB to RS232 adapter)<br />
* 2x power adapter (need confirmation about plug)<br />
Part #2 – Setting the <strong>IPTV</strong> System<br />
1) Install the Demo HDD into the system, this is the <strong>IPTV</strong> media server ,<br />
2) Connect Gigabit Switch (at least 4-port) to the onboard RJ-45 ethernet port,<br />
3) Connect the USB Ethernet Adapter to the PC Server, and connect it to Internet via RJ45 cable (ie. ETH1),<br />
4) Power ON the system, the Linux OS will boot-up in min.3 minutes,<br />
5) Connect the STB to the Gigabit Switch + connect the STB to the TV set, and turn the STB on.<br />
Note:<br />
(a) make sure server is fully started before turning STBs on.<br />
(b) the USB RJ-45 Ethernet Adapter needs to be connected to LAN, for Internet access and online support by Antik,<br />
(c) the USB-to-RS232 Debug Cable will be used later when necessary, please keep it safely.<br />
Part #3 – Entering <strong>IPTV</strong> Management Server (IMS)<br />
http://172.24.0.12:81 (user: admin, password: admin123)<br />
IMS short guide: brief instructions about adding channel to IMS.<br />
How to create Packages:<br />
1. Click on the add package write package name and save it.<br />
2. Click on the details of the created package.<br />
3. Choose channels which you want in the package and click add (see below).<br />
How to add channel:<br />
1. Click to add the channel, write channel name and save channel.<br />
1. Find added channel in all channels and click details of the channel where you can add address of the stream (HLS/HTTP for unicast and<br />
UDP/RTP for multicast) and choose video or audio codecs.<br />
2. Created channels must be added to the package in the menu Packages on the left side of the Channels menu.<br />
How to add the package to the box:<br />
1. In the STB menu find your box (for example using MAC)
2. Click on details of the box.<br />
3. In the channel package menu on the left side find your package and click add package.<br />
Updating the box with created channels:<br />
After the channels are created on IMS, you need to press Menu button on remote control, go to Settings, move to “About application” and on<br />
right side click Reload Sources “Yes”. New channel is now visible in the channel list on STB.<br />
Part #4 – Operating the STB<br />
It is possible to test:<br />
Live Streaming (from demo HDD), Picture in Picture- see page 64 in User manual<br />
Archive streaming (archived programs for 1 day, marked channel by yellow mark - e.g. Markiza)<br />
Local PVR or DVR (Recording + Pause TV) – USB flash drive/HDD with min. 20 MB/s, 8GB (e.g. Patriot Xporter XT RAGE 8GB)<br />
Time Shifting (Pause TV)<br />
VOD<br />
Browser (using Keyboard, best would be to use our <strong>IPTV</strong> Juice Wireless Keyboard)<br />
Media Player and DLNA – music, video, picture<br />
BitTorrent client – music, video, picture (not for downloading, only for viewing)<br />
Mediaportal – various applications under development<br />
Hospitality<br />
EPG<br />
PiP<br />
IMS – <strong>IPTV</strong> Management System (http://172.24.0.12:81 (user: admin, password: admin123))<br />
Part #5 : Setup for TV Anywhere<br />
Setting up TV Anywhere in Demo Kit Version <strong>3.0</strong>
1) Connect TV Anywhere (USB Dongle) and Access Point (AP) to the Demo Kit as shown in the above diagram.<br />
2) The system will detect it, and take about 30-50 seconds to initialize the TV Anywhere dongle.<br />
3) Next, setup TV Anywhere by going into [Menu]>> [Setup] >> [] . At the TV Anywhere section, setup the login and<br />
password. (default login and password: aaaa)<br />
4) Connect your PC or Connected Device (IOS or Android) to the Access Point. The STB has internal web server (DHCP),<br />
you will get IP Address with range 172.25.0.xx .<br />
5) ... Open the page with your Connected Device, select login and password (). Reload acutal channels and play it.<br />
Part #6 – Troubleshooting & FAQ<br />
Q: Channel list not visible/empty.<br />
A: Make sure server is started and restart the STB = disconnect and connect again the power supply.<br />
Q: If I connect the STB to public internet, will it work<br />
A: The STB is prepared to work on public IP address, too. After connecting the STB, it is needed to get right channel list, it<br />
means to - “Reload sources” (press Menu button on remote control, go to Settings, move to “About application” and on<br />
right side click Reload Sources “Yes”. New channel is now visible in the channel list on STB). The STB will be then connected<br />
to Antik Demo server, where you can watch our demo channel package.<br />
If any additional question, please contact juicesales@antiktech.sk