Programming MOBA for a Paver
Programming MOBA for a Paver
Programming MOBA for a Paver

You also want an ePaper? Increase the reach of your titles
YUMPU automatically turns print PDFs into web optimized ePapers that Google loves.
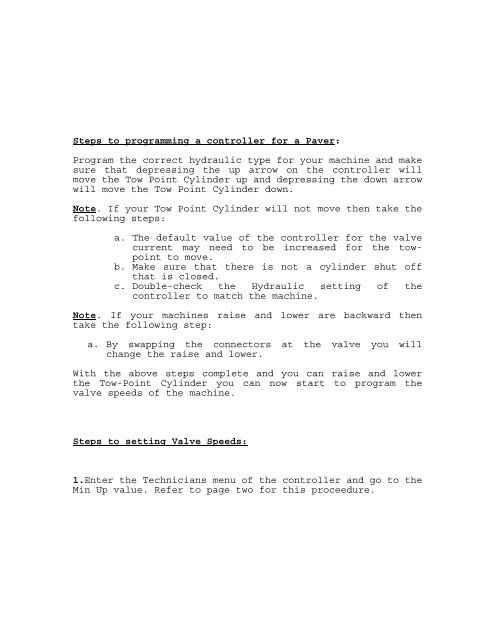
Steps to programming a controller <strong>for</strong> a <strong>Paver</strong>:<br />
Program the correct hydraulic type <strong>for</strong> your machine and make<br />
sure that depressing the up arrow on the controller will<br />
move the Tow Point Cylinder up and depressing the down arrow<br />
will move the Tow Point Cylinder down.<br />
Note. If your Tow Point Cylinder will not move then take the<br />
following steps:<br />
a. The default value of the controller <strong>for</strong> the valve<br />
current may need to be increased <strong>for</strong> the towpoint<br />
to move.<br />
b. Make sure that there is not a cylinder shut off<br />
that is closed.<br />
c. Double-check the Hydraulic setting of the<br />
controller to match the machine.<br />
Note. If your machines raise and lower are backward then<br />
take the following step:<br />
a. By swapping the connectors at the valve you will<br />
change the raise and lower.<br />
With the above steps complete and you can raise and lower<br />
the Tow-Point Cylinder you can now start to program the<br />
valve speeds of the machine.<br />
Steps to setting Valve Speeds:<br />
1.Enter the Technicians menu of the controller and go to the<br />
Min Up value. Refer to page two <strong>for</strong> this proceedure.
The standard parameter menu can be called up from the<br />
working menu only.<br />
There<strong>for</strong>e:<br />
First switch over to the operator menu by pressing the A/M<br />
key and the ENTER key at the same time.<br />
Hold on the ENTER key <strong>for</strong> 3 seconds until „PA“ is<br />
indicated.<br />
Within the next 3 seconds the key sequence:<br />
1) – ENTER key<br />
2) – DOWN key<br />
3) – UP key<br />
has to be pressed.<br />
1<br />
2<br />
3<br />
Note.<br />
After step 3 is complete you will see HYD in the Display. By<br />
depressing the blue button you will go to the Min Up symbol.<br />
( _C ) Min UP Current<br />
( _C ) Min DOWN Current<br />
( _C ) Max UP Current<br />
( _C ) Max DOWN Current
2. With the Min Up value in the display, lower this down to<br />
its lowest number. Then depress the blue button once and it<br />
will go to the Min Down value and lower this number as well.<br />
After this is complete depress the A/M button until you are<br />
at the working display.<br />
3. Lower the Screed and set it on a pipe that is going<br />
perpindicular with the machine.this pipe should be no<br />
smaller than 1.5“. By doing this step you have now made the<br />
screed so that it will pivot on the pipe and not be bound up<br />
at any point on the ground.<br />
4. Connect a grade sensor to the end-gate or tow-arm, center<br />
the towpoint and set your sensor hieght to 14“.<br />
5. Zero your sensor by depressing the Blue button on the<br />
controller and the display should read 0.0<br />
6. Put the controller in automatic by depressing the A/M<br />
button. At this time you should have 0.0 in the display and<br />
the Automatic light should be illuminated.<br />
7. Depress the up arrow two times until the display reads<br />
0.2. At this time you should have a flashing up arrow with<br />
the tow-point cylinder Not Moving Up.<br />
8. While the controller is in Automatic, enter the<br />
Technicians menu and go to the Min up value and raise the<br />
number slowly until the machine goes to grade.<br />
a. At this time you should still have Min Up in the<br />
display and you can now depress the Blue button and<br />
go to the Min Down value.<br />
9. By using the manual switch <strong>for</strong> the tow-point cylinder,<br />
just bump the switch to make the cylinder go up and the<br />
Controller will flash a down arrow.<br />
10. Increase the Min Down value slowly until the machine<br />
moves to grade and stops.<br />
11. Jog the manual switch up and it should come to<br />
grade. Jog the manual switch down and the machine should<br />
come to grade. If it still flashes a little then just<br />
increase the current value one or two until it goes to grade<br />
and repeat this step.
Adjusting the Max Up and Max Down.<br />
Note.<br />
For Machines with On / Off Valves you will not have Max Up<br />
or Max Down you will however find in the bottom menu a<br />
setting <strong>for</strong> Delta Pulse or ( dp ).<br />
a. Delta pulse is a combined number <strong>for</strong> max up and max<br />
down.<br />
b. The number that is displayed can be lowered to slow<br />
the large correction or raised to speed up a large<br />
responce.<br />
c. The default value of 80 is generaly fine <strong>for</strong> most<br />
applications.<br />
d. At this point your machine should be set-up and you<br />
can check the responce by dialing the controller up<br />
1.5“ and then down 1.5“ . Your tow-point should go to<br />
grade and stop without any Over Shooting.<br />
e. After checking the responce set–up is complete and<br />
you should proceed to step 14.<br />
Note.<br />
For machines with Proportional valves a good starting point<br />
<strong>for</strong> Max Current is to add 20 - 30 to the Min current <strong>for</strong><br />
example, if you have a Min Up value of 20 then you would set<br />
your Max UP to 40 - 50.<br />
After confirming steps 3,4,5 and 6 proceed to the next step.<br />
12. With the down arrow on the controller depressed, take<br />
the value down to –1.5“ and the tow-point should go down and<br />
stop.<br />
a. If it is too slow, go to the Technicians Menu,<br />
refer to the Max Down value and add another 5 to<br />
10 and repeat until its the speed you want.<br />
b. If it is too fast then drop your numbers another 5<br />
to 10 and repeat the step.<br />
c. Once the Down side is good, proceed to 13.<br />
13. With the Up arrow on the controller depressed, take the<br />
value down to 1.5“ and the tow-point should go UP and stop.<br />
a. If it is too slow, go to the Technicians Menu,<br />
refer to the Max Up value and add another 5 to 10<br />
and repeat until its the speed you want.<br />
b. If it is too fast then drop your numbers another 5<br />
to 10 and repeat the step.
c. Once the Up side is good, proceed to the next<br />
step.<br />
14. With the above steps complete you are ready to get the<br />
machine on the road. A great help in knowing that you have<br />
tuned this machine correctly is watching the lights on the<br />
controller while your paving.<br />
a. You should see the On Grade Symbol most of the<br />
time with a flashing up or down arrow from time to<br />
time.<br />
b. If you see a lot of flashing in one direction or<br />
both then leave it in Automatic, go to the<br />
Technicians menu and adjust your Min up or Min<br />
down 1 – 2 and see if this helps.<br />
c. After your changes depress the A/M button and<br />
return to the working display keeping in mind that<br />
the Automatic light should still be illuminated.