Open - Loctite.ph
Open - Loctite.ph
Open - Loctite.ph

You also want an ePaper? Increase the reach of your titles
YUMPU automatically turns print PDFs into web optimized ePapers that Google loves.
“Do it Right” User’s Guide<br />
The “WHEN, WHERE & HOW” to use<br />
<strong>Loctite</strong> ® Maintenance Products
TABLE OF CONTENTS<br />
CONTENTS<br />
PAGE<br />
The primary function of this User‘s Guide is to help you, the<br />
maintenance professional, with the proper selection and use of<br />
<strong>Loctite</strong>® products. A wide variety of preventative maintenance, as<br />
well as repair techniques, are explained in step-by-step detail.<br />
Consider this a supplemental service manual for every piece of<br />
equipment in your plant. Our goal is to make it easier for you to<br />
use our products, to your benefit, for faster repair times, reduced<br />
downtime, and extended equipment life. Additional information<br />
on these products, as well as others, is available by contacting<br />
your local Henkel adhesives and sealants representative at the<br />
tele<strong>ph</strong>one number listed on the back cover of this guide.<br />
TABLE OF CONTENTS<br />
PAGE<br />
INTRODUCTION Introduction to Anaerobic Adhesives and Sealants 4<br />
Why Use a Primer 4<br />
THREADLOCKING Thru Holes (Bolts and Nuts) 5<br />
Blind Holes (Cap Screws, etc.) 5<br />
Blind Holes (Studs, etc.) 6<br />
Adjustment Screws 6<br />
Pre-Assembled Fasteners 7<br />
Threadlocker Quick Selector 7<br />
THREAD REPAIR Stripped Thread Repair 8<br />
THREAD SEALING Standard Fittings – Pipes, Hydraulic, or Air 9<br />
Pipe Unions 9<br />
Compression Fittings 10<br />
Flared/Swaged Fittings 10<br />
Hose Ends – Air & Hydraulic 11<br />
Thread Sealant Quick Selector 11<br />
POROSITY SEALING Existing Weld Porosities and Castings 12<br />
Sealing New Welds – Preventative Maintenance 12<br />
FORM-IN-PLACE Sealing Cast Rigid Flanges 13<br />
GASKETING Gasketing Quick Selector 13<br />
GASKET DRESSING Sealed Flanges 14<br />
FORM-IN-PLACE Stamped or Sheet Metal Flanges 15<br />
SILICONES<br />
STRENGTHEN KEYED Standard Duty 16<br />
ASSEMBLIES Heavy Duty 17<br />
Repairing Badly Wallowed Keyway 18<br />
SHAFT MOUNTED Repairing Badly Worn Shaft 19<br />
ASSEMBLIES Slip Fit – Light/Heavy Duty 20<br />
Press Fit 21<br />
Shrink Fit 22<br />
HOUSED COMPONENTS Slip Fit 23<br />
Repairing Badly Worn Housing 24<br />
Component Centering 25<br />
Sealing/Retaining – Metallic Seal 26<br />
Retaining Compound Quick Selector 27<br />
DISASSEMBLY Threadlocking, Thread Sealing and Retaining 28<br />
Gasketing 28<br />
SHAFT REPAIR General Information 29<br />
BONDING Introduction to Bonding Adhesives 30<br />
Bonding Assembly 30<br />
Surface Preparation 31<br />
Adhesive Quick Selector 31<br />
O-Ring Making 32<br />
Bonding Metal Label 32<br />
Filling Cracks 33<br />
Structural Bonding 33<br />
RUSTPROOFING Optimum Use 34<br />
CLEANING General Purpose Parts Cleaning 35<br />
TROUBLESHOOTING Checklist 36<br />
ORDERING Product Listing 37-39<br />
2 3
INTRODUCTION<br />
INTRODUCTION TO ANAEROBIC ADHESIVES AND SEALANTS<br />
Anaerobic adhesives and sealants were developed by the founder of <strong>Loctite</strong><br />
Corporation, now Henkel Corporation, in 1953 and, since then, they have<br />
significantly evolved to meet the highest requirements of equipment<br />
manufacturers, maintenance and overhaul.<br />
Anaerobic adhesives and sealants are resins that convert from liquid to<br />
a tough structural solid in the absence of air and the presence of metal.<br />
The primary functions of anaerobic resins are:<br />
Apply Here<br />
THREADLOCKING<br />
THRU HOLES (BOLTS AND NUTS)<br />
LIQUID AND SEMI-SOLIDS<br />
Threadlocking Thread Sealing Gasketing Retaining<br />
Each one of these functions is based upon control of five major variables:<br />
strength, viscosity, adhesion, flexibility, and temperature resistance. These<br />
five parameters give anaerobics users considerable latitude in adjusting<br />
properties for optimum performance in specific application areas.<br />
Another variable that should be considered is the substrate in which<br />
the adhesive will be applied. For certain substrates or other special<br />
requirements, the use of primer is recommended.<br />
Not Here<br />
1. Clean all threads (bolt and nut) with <strong>Loctite</strong>® ODC-Free Cleaner & Degreaser.<br />
2. If necessary, spray all threads with <strong>Loctite</strong>® 7649 Primer N. Allow to dry.<br />
3. Select the proper strength <strong>Loctite</strong>® threadlocker.<br />
4. Insert bolt into thru hole assembly.<br />
5. Apply several drops of liquid threadlocker onto bolt at targeted tightened<br />
nut engagement area or, when using the stick product, completely fill<br />
the root of the threads at the area of engagement.<br />
6. Assemble and tighten nut as usual.<br />
BLIND HOLES (CAP SCREWS, ETC.)<br />
Onto<br />
Threads<br />
Onto<br />
Threads<br />
LIQUID ONLY<br />
WHY USE A PRIMER<br />
1. Primers activate inactive surfaces.<br />
2. Primers speed cure times for faster return to service.<br />
3. Primers speed curing through larger gaps and deep threads.<br />
4. Primers substantially speed cure times on cold parts.<br />
5. Primers act as cleaning agents.<br />
Active surfaces (Primer optional): Brass, copper, bronze, iron, soft steel, nickel.<br />
Inactive surfaces (Primer required): Aluminum, stainless steel, magnesium,<br />
zinc, black oxide, cadmium, titanium, others.<br />
1. Clean all threads (bolt and hole) with <strong>Loctite</strong>® ODC-Free Cleaner & Degreaser.<br />
2. If necessary, spray (bolt and hole) with <strong>Loctite</strong>® 7649 Primer N.<br />
Allow 30 seconds to dry.<br />
3. Select the proper strength <strong>Loctite</strong>® threadlocker.<br />
4. Squirt several drops down the sides of the female threads.<br />
5. Apply several drops to bolt.<br />
6. Tighten as usual.<br />
Note: Using <strong>Loctite</strong>® threadlockers will virtually eliminate stripped<br />
threads, in aluminum or magnesium housings, caused by<br />
galvanic corrosion.<br />
4 5
THREADLOCKING<br />
BLIND HOLES (STUDS, ETC.)<br />
LIQUID ONLY<br />
Onto<br />
Threads<br />
THREADLOCKING<br />
PRE-ASSEMBLED FASTENERS<br />
LIQUID ONLY<br />
220 or 290 Here<br />
Into<br />
Hole<br />
2440 <br />
1. Clean all threads (bolt and hole) with <strong>Loctite</strong>® ODC-Free Cleaner & Degreaser.<br />
2. If necessary, spray all threads with <strong>Loctite</strong>® 7649 Primer N. Allow to dry.<br />
3. Squirt several drops of <strong>Loctite</strong>® 2670 Threadlocker down the sides of<br />
the female threads.<br />
Note: Use <strong>Loctite</strong>® 277 Threadlocker if stud is over 1" diameter.<br />
4. Apply several drops of <strong>Loctite</strong>® 2670 Threadlocker onto stud threads.<br />
5. Install studs.<br />
6. Position cover, head, etc.<br />
7. Apply drops of <strong>Loctite</strong>® 2440 Threadlocker onto exposed threads.<br />
8. Tighten nuts as required.<br />
262 <br />
Not Here<br />
1. Clean bolts and nuts with <strong>Loctite</strong>® ODC-Free Cleaner & Degreaser.<br />
2. Assemble components.<br />
3. Tighten nuts.<br />
4. Apply several drops of <strong>Loctite</strong>® 220 or 290 Threadlocker at the nut<br />
and bolt juncture.<br />
5. Avoid touching bottle tip to metal.<br />
Note: For preventive maintenance on existing equipment:<br />
RETIGHTEN nuts and apply <strong>Loctite</strong>® 220 or 290<br />
Threadlocker at the nut and bolt juncture.<br />
ADJUSTMENT SCREWS<br />
Apply Here<br />
Plunger<br />
1. Adjust screw to proper setting.<br />
2. Apply several drops of <strong>Loctite</strong>® 220 or 290 Threadlocker at screw<br />
and body juncture.<br />
3. Avoid touching bottle tip to metal.<br />
Note: • If re-adjustment is difficult, apply heat to screw with soldering<br />
gun (450°F).<br />
LOCTITE ® BRAND THREADLOCKER QUICK SELECTOR<br />
Use Strength Product Color<br />
Small Screws Low 222MS Purple<br />
Nuts & Bolts Medium 2440 /QuickStix 248 Blue<br />
Pre-Assembled Medium 290 Green<br />
Pre-Assembled Low 220 Blue<br />
Nuts & Bolts High 2670 / QuickStix 268 Red<br />
Studs (up to 1") High 2760 Red<br />
Studs (over 1") High 277 Red<br />
• <strong>Loctite</strong>® 220 Threadlocker is a weaker version of <strong>Loctite</strong>®<br />
6 290 Threadlocker.<br />
7
THREAD REPAIR<br />
STRIPPED THREAD REPAIR<br />
Cleaned Bolt<br />
THREAD SEALING<br />
STANDARD FITTINGS – PIPES, HYDRAULIC, OR AIR<br />
PST ® Band<br />
PST ® Band<br />
Step 1<br />
STANDARD THREAD REPAIR<br />
1. Follow instructions on <strong>Loctite</strong>® FORM-A-THREAD® package.<br />
2. If cover plate is used for bolt alignment:<br />
(a) Apply release agent to mating faces around repair area.<br />
(b) Use “waxed” paper or similar film between faces.<br />
3. A “jiggling/twisting” motion when initially inserting bolt improves<br />
thread conformation.<br />
Note: NOT intended for engine stud repair.<br />
SMALL HOLE/FINE THREAD REPAIR<br />
OPTION 1.<br />
OPTION 2.<br />
Release Agent<br />
Stripped Threads<br />
FORM-A-THREAD ®<br />
1<br />
⁄2 Fill Only<br />
Tape<br />
Step 2<br />
Tape<br />
Threadlocker<br />
Release Agent<br />
FORM-A-THREAD ®<br />
Step 3<br />
Drill out damaged hole to oversize, then follow STANDARD<br />
THREAD REPAIR.<br />
Apply <strong>Loctite</strong>® FORM-A-THREAD® to screw and insert into<br />
damage hole. Clamp in place while product cures.<br />
Cover<br />
Plate<br />
New<br />
Threads<br />
1. Clean parts of contamination. If necessary, spray <strong>Loctite</strong>® 7649 Primer N<br />
onto threaded parts (male and female). Allow to dry.<br />
Note: Primer is not required for brass parts.<br />
2. Apply a band of <strong>Loctite</strong>® PST® Thread Sealant to male threads starting one<br />
to two threads from end of pipe.<br />
3. Assemble parts snugly. Do not overtighten.<br />
4. If initial pressure exceeds 1000 psi*, wait 30 minutes before pressurizing.<br />
Note: • For stainless steel components, use <strong>Loctite</strong>® 567 PST® Thread Sealant.<br />
• For general purpose thread sealing, use <strong>Loctite</strong>® 565 PST®<br />
Thread Sealant or <strong>Loctite</strong>® QuickStix 561 PST® Pipe Sealant.<br />
• For fine filtration systems requiring zero contamination, use<br />
<strong>Loctite</strong>® 545 Thread Sealant for hydraulic/pneumatic fittings.<br />
• For easier disassembly or large diameter fittings, use <strong>Loctite</strong>®<br />
564 Thread Sealant.<br />
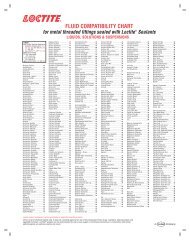
• If sealing chemicals or strong acids/bases, refer to Fluid<br />
Compatibility Chart (LT-836).<br />
• Do not use on oxygen or strong oxidizers (chlorine).<br />
• For PVC or ABS pipe, use <strong>Loctite</strong>® No More Leaks.<br />
*Depending on conditions<br />
PST ® Band PST ® Band PST ® Band<br />
PIPE UNIONS<br />
STUD INSTALLATION — PERMANENT (LIGHT DUTY)<br />
1. Use stud or cut “all thread” to desired length.<br />
2. Do NOT apply release agent to stud.<br />
3. Proceed as with STANDARD THREAD REPAIR.<br />
4. Allow 30 minutes to cure.<br />
5. Assemble as required.<br />
PST ® Coating (May be used for new or damaged seat)<br />
1. Disassemble and, if necessary, spray all components with <strong>Loctite</strong>®<br />
7649 Primer N. Allow to dry.<br />
2. Apply a thin coating of <strong>Loctite</strong>® PST® Thread Sealant to union face.<br />
3. Apply a band of <strong>Loctite</strong>® PST® Thread Sealant to male threads.<br />
8<br />
4. Assemble parts snugly.<br />
9
THREAD SEALING<br />
COMPRESSION FITTINGS<br />
THREAD SEALING<br />
HOSE ENDS – AIR & HYDRAULIC<br />
PST ® Coating<br />
PST ® Band<br />
PST ® Band<br />
PST ® Band<br />
1. Slide fitting nut and ferrule back approximately 3 ⁄4" from end of tubing.<br />
2. If necessary, spray the entire assembly with <strong>Loctite</strong>® 7649 Primer N.<br />
Allow to dry.<br />
Note: Primer is not required for brass parts.<br />
3. Apply a thin coating of <strong>Loctite</strong>® PST® Thread Sealant to tubing where<br />
ferrule will be located.<br />
4. Slide ferrule forward over <strong>Loctite</strong>® PST® Thread Sealant coated tubing,<br />
then apply a thin bead of <strong>Loctite</strong>® PST® Thread Sealant coating to ferrule.<br />
5. Slide ferrule forward over <strong>Loctite</strong>® PST® Thread Sealant coated tubing.<br />
6. Apply a small band of <strong>Loctite</strong>® PST® Thread Sealant to male threads.<br />
7. Assemble and tighten normally.<br />
Note: Do not use on plastic fittings or tubing.<br />
FLARED/SWAGED FITTINGS<br />
PST ® Coating (For new or damaged flare or seat)<br />
1. If necessary, spray adapter threads with <strong>Loctite</strong>® 7649 Primer N.<br />
Allow to dry.<br />
2. Insert barbed hose stem into hose I.D. with slight twisting motion.<br />
3. Install appropriate hose clamp.<br />
4. Apply a band of <strong>Loctite</strong>® PST® Thread Sealant to male hose stem threads<br />
upon installation or adding accessory device. Tighten snugly.<br />
Note: <strong>Loctite</strong>® PST® Thread Sealant may attack synthetic rubber tubing.<br />
LOCTITE ® BRAND THREAD SEALANT QUICK SELECTOR (TAPERED THREADS)<br />
Instant Max. Steam Temp.<br />
Application Product Primer Seal Pressure Pressure Range<br />
Stainless Steel 567 PST ® Pimer N 500 psi 10,000 psi 235 psi -65°F to<br />
and All Other Thread Sealant (24 hours) +400°F<br />
Metal Fittings<br />
Most Metal 565 or 561 Primer N 500 psi 10,000 psi n/a -65°F to<br />
Fittings Except PST ® Pipe (24 hours) +300°F<br />
Stainless Steel Sealant<br />
High Filtration/ 545 Thread Primer N 500 psi 10,000 psi n/a -65°F to<br />
Zero Contamination Sealant – (10 min.) (24 hours) +300°F<br />
Systems<br />
Hydraulic/Pneumatic<br />
Stainless Steel 564 Thread Primer N 500 psi 10,000 psi n/a -65°F to<br />
and All Other Sealant (24 hours) +300°F<br />
Metal Fittings<br />
(lower strength)<br />
DO NOT USE THESE PRODUCTS ON OXYGEN OR STRONG OXIDIZERS.<br />
PST ® Band<br />
1. Disassemble and if necessary, spray all components with <strong>Loctite</strong>® 7649<br />
Primer N. Allow to dry.<br />
2. Apply a thin coating of <strong>Loctite</strong>® PST® Thread Sealant to fitting face.<br />
3. Apply a band of <strong>Loctite</strong>® PST® Thread Sealant to male threads.<br />
4. Assemble parts snugly.<br />
FLUID COMPATIBILITY<br />
1. Refer to Fluid Compatibility Chart – LT-836.<br />
2. Contact your local Industrial Distributor.<br />
3. Call Henkel Technical Information. See back cover for the Henkel<br />
Technical Information number in your area.<br />
10 11
POROSITY SEALING<br />
EXISTING WELD POROSITIES AND CASTINGS<br />
FORM-IN-PLACE GASKETING<br />
SEALING CAST RIGID FLANGES<br />
<strong>Loctite</strong> ® 290 <br />
Weld Bead<br />
Continuous Bead<br />
Tank Wall<br />
Weld Porosity<br />
1. IMPORTANT! TAKE PROPER SAFETY PRECAUTIONS IF WORKING WITH<br />
FLAMMABLE LIQUID TANKS. AVOID USE WITH COMPRESSIBLE GASSES.<br />
2. Wire brush to remove paint, rust, etc. from repair area.<br />
3. Clean repair area with <strong>Loctite</strong>® ODC-Free Cleaner & Degreaser.<br />
4. Apply localized heat to bring repair area to approximately 250°F.<br />
5. Allow repair area to cool to approximately 185°F.<br />
6. Brush or spray sealant on repair area.<br />
Note: • Steel – Use <strong>Loctite</strong>® 290 Threadlocker at 185°F.<br />
• Aluminum/Stainless Steel – Use <strong>Loctite</strong>® 290 Threadlocker<br />
at 120°F.<br />
Note: • Not recommended for “blowholes”.<br />
• Maximum porosity sealed – .005".<br />
7. Allow to cure for 30 minutes (High Pressure, above 150 psi — 1 hour).<br />
8. Clean with <strong>Loctite</strong>® ODC-Free Cleaner & Degreaser to remove excess<br />
sealant. Do not grind.<br />
9. Paint as required.<br />
Note: Casting repair uses same procedure.<br />
SEALING NEW WELDS — PREVENTATIVE MAINTENANCE<br />
1. Remove all slag and scale while hot.<br />
2. Apply sealant when weld is 185°F and falling.<br />
3. Follow information above.<br />
Flat Flange<br />
Circle Bolt Holes<br />
Raised Flange<br />
1. Remove old gasketing material and other heavy contaminants with <strong>Loctite</strong>®<br />
Chisel® Gasket Remover. Use mechanical removal technique if required.<br />
Note: Avoid grinding.<br />
2. Clean both flanges with <strong>Loctite</strong>® ODC-Free Cleaner & Degreaser.<br />
3. Spray <strong>Loctite</strong>® 7649 Primer N on only one surface. Allow 1-2 minutes<br />
to dry.<br />
4. Apply a continuous bead of <strong>Loctite</strong>® Gasket Eliminator® Flange Sealant<br />
to the other surface.<br />
Note: Circle all bolt holes with sealant, if appropriate.<br />
5. Mate Parts. Assemble and tighten as required.<br />
Note: Immediate assembly not required; however avoid delays<br />
over 45 minutes.<br />
6. Allow to cure:<br />
a. No pressure – immediate service<br />
b. Low pressure (up to 500 psi) – 30 to 45 minutes<br />
c. High pressure (500 to 2500 psi) – 4 hours<br />
d. Extreme high pressure (2500 to 5000 psi) – 24 hours<br />
LOCTITE ® BRAND GASKETING QUICK SELECTOR<br />
Use Product Gap Fill Temp. Range<br />
General 518 Gasket Eliminator ® .050" -65°F to 300°F<br />
General 515 Gasket Eliminator ® .050" -65°F to 300°F<br />
High Temperature 510 Gasket Eliminator ® .020" -65°F to 400°F<br />
General/Overhead QuickStix 548 Gasket Eliminator ® .010" -65°F to 300°F<br />
12 13
GASKET DRESSING<br />
SEALED FLANGES<br />
Primer N and 518 Gasket Eliminator ®<br />
2440 (QuickStix 534 )<br />
2440 <br />
2440 <br />
Primer N Only<br />
1. Remove old gasketing material and other heavy contaminants with<br />
<strong>Loctite</strong>® Chisel® Gasket Remover. Use mechanical removal technique<br />
if required.<br />
Note: Avoid grinding.<br />
2. Clean both flanges with <strong>Loctite</strong>® ODC-Free Cleaner & Degreaser.<br />
3. Spray <strong>Loctite</strong>® 7649 Primer N on both flange faces and both sides of<br />
the precut gasket. Allow 1-2 minutes to dry.<br />
4. Smear <strong>Loctite</strong>® Gasket Eliminator® Flange Sealant to both sides of<br />
precut gasket with a clean applicator.<br />
5. Place coated gasket on flange surface and assemble parts immediately.<br />
Note: • If cover bolts into blind holes (as above), apply <strong>Loctite</strong>®<br />
2440 Threadlocker into hole and on threads.<br />
Tighten normally.<br />
• If it is a through bolt assembly, apply <strong>Loctite</strong>® 2440<br />
Threadlocker or <strong>Loctite</strong>® QuickStix 248 Threadlocker to<br />
bolt threads.<br />
6. Tighten normally.<br />
FORM-IN-PLACE SILICONES<br />
STAMPED OR SHEET METAL FLANGES<br />
1. Remove old gasketing material and other heavy contaminants with<br />
<strong>Loctite</strong>® Chisel® Gasket Remover.<br />
2. Clean both flanges with <strong>Loctite</strong>® ODC-Free Cleaner & Degreaser.<br />
3. Apply a continuous bead of <strong>Loctite</strong>® Instant Gasket or <strong>Loctite</strong>® high<br />
performance silicones to sealing surface. Circle all bolt holes.<br />
Note: • Use proper bead diameter to seal flange width and depth.<br />
• Minimize excessive material “squeeze in”.<br />
4. Assemble within 10 minutes by pressing together. Tighten as required.<br />
5. Clean up any excess or squeeze out.<br />
6. Cure times will vary with temperature, humidity, and gap. Typical full<br />
cure time is 24 hours.<br />
<strong>Loctite</strong> ® Instant Gasket*<br />
<strong>Loctite</strong> ® 587 Blue<br />
COLOR Black Blue<br />
VISCOSITY, cP Paste Paste<br />
GAP FILL<br />
1<br />
⁄4" 1<br />
⁄4"<br />
CURE METHOD Moisture/Oxime Moisture/Oxime<br />
CURE SPEED<br />
Tack-Free 30 minutes 30 minutes<br />
Full Cure 24 hours 24 hours<br />
SERVICE TEMP. RANGE<br />
Intermittent -75°F to 500°F -75°F to 500°F<br />
-59°F to 260°C -59°F to 260°C<br />
*<strong>Loctite</strong> ® Instant Gasket provides a low pressure instant seal (100 psi at zero gap).<br />
14 15
STRENGTHEN KEYED ASSEMBLIES<br />
STANDARD DUTY<br />
Dab 660 Quick Metal ® or 2440 here<br />
660 Quick Metal ®<br />
Coating Here<br />
STRENGTHEN KEYED ASSEMBLIES<br />
HEAVY DUTY<br />
Dab 660 Quick Metal ® or 2440 here<br />
660 Quick Metal ® Coating Here<br />
Dab 660 Quick Metal ® Here<br />
ASSEMBLY<br />
1. Clean all parts with <strong>Loctite</strong>® ODC-Free Cleaner & Degreaser.<br />
2. If necessary, spray all parts (I.D. and O.D.) with <strong>Loctite</strong>® 7649 Primer N.<br />
3. Apply <strong>Loctite</strong>® 660 Quick Metal® Retaining Compound coating into<br />
keyway and on key.<br />
4. Apply dab(s) of <strong>Loctite</strong>® 660 Quick Metal® Retaining Compound onto<br />
shaft opposite keyway or evenly spaced around shaft.<br />
5. Assemble parts. Wipe off excess.<br />
6. Apply <strong>Loctite</strong>® 660 Quick Metal® Retaining Compound dab to set screw.<br />
7. Tighten set screw.<br />
8. Allow 5-10 minutes prior to service.<br />
Note: • <strong>Loctite</strong>® 660 Quick Metal® Retaining Compound is NOT<br />
recommended for radial gaps exceeding .010" on shaft<br />
or keyway.<br />
• See REPAIRING BADLY WALLOWED KEYWAY for procedure<br />
page 18.<br />
DISASSEMBLY<br />
1. Tap component and key with hammer.<br />
2. Pull as usual.<br />
ASSEMBLY<br />
1. Clean all parts with <strong>Loctite</strong>® ODC-Free Cleaner & Degreaser.<br />
2. Apply a <strong>Loctite</strong>® 660 Quick Metal® Retaining Compound coating<br />
around shaft, into keyway, and on key.<br />
3. Assemble parts. Wipe off excess.<br />
4. Apply a <strong>Loctite</strong>® 660 Quick Metal® Retaining Compound dab to screw.<br />
5. Tighten set screw.<br />
6. Allow 30 minutes prior to service.<br />
Note: • If gap exceeds .005", use <strong>Loctite</strong>® 7649 Primer N on<br />
appropriate area (shaft or keyway).<br />
• <strong>Loctite</strong>® 660 Quick Metal® Retaining Compound is NOT<br />
recommended for radial gaps exceeding .010" on shaft<br />
or keyway.<br />
• See REPAIRING BADLY WALLOWED KEYWAY for procedure<br />
page 18.<br />
DISASSEMBLY<br />
1. Tap component and key with hammer.<br />
2. If necessary, apply localized heat (450°F for five minutes).<br />
3. Pull while hot.<br />
16 17
STRENGTHEN KEYED ASSEMBLIES<br />
REPAIRING BADLY WALLOWED KEYWAY<br />
SHAFT MOUNTED ASSEMBLIES<br />
REPAIRING BADLY WORN SHAFT<br />
660 Quick Metal ® Coated Keyway<br />
Bearing<br />
660 Quick Metal ®<br />
Sleeve<br />
680 or<br />
660 Quick Metal ®<br />
Shaft<br />
1. Clean all parts with <strong>Loctite</strong>® ODC-Free Cleaner & Degreaser.<br />
2. If necessary, spray all parts with <strong>Loctite</strong>® 7649 Primer N. Allow to dry.<br />
3. Apply a <strong>Loctite</strong>® 660 Quick Metal® Retaining Compound coating<br />
into keyway.<br />
4. Assemble as required using <strong>Loctite</strong>® 660 Quick Metal® Retaining<br />
Compound.<br />
5. Allow 30-60 minute cure time.<br />
Note: • <strong>Loctite</strong>® 660 Quick Metal® Retaining Compound is NOT<br />
recommended for lateral gaps exceeding .010".<br />
• Higher strengths are obtained by NOT using <strong>Loctite</strong>® 7649<br />
Primer N with small (.002"-.004") gap, and allowing longer<br />
cure (4-24 hours).<br />
1. Determine a minimum radial gap.<br />
2. Select and trim appropriate sleeve to allow component slip fit.<br />
3. Roughen sleeve O.D. with emery cloth.<br />
4. Clean all parts with <strong>Loctite</strong>® ODC-Free Cleaner & Degreaser.<br />
5. Apply a <strong>Loctite</strong>® 680 or <strong>Loctite</strong>® 660 Quick Metal® Retaining<br />
Compound coating around the shaft.<br />
6. Install sleeve.<br />
7. Apply a coating of <strong>Loctite</strong>® 660 Quick Metal® Retaining Compound to<br />
sleeve O.D.<br />
8. Install component as required onto sleeved shaft.<br />
9. Allow 30-60 minute cure.<br />
Note: • <strong>Loctite</strong>® 660 Quick Metal® Retaining Compound is NOT<br />
recommended for radial gaps exceeding .010".<br />
• Higher strengths are obtained by NOT using <strong>Loctite</strong>® 7649<br />
Primer N with small (.002"-.004") gap, and allowing longer<br />
cure (4-24 hours).<br />
18 19
SHAFT MOUNTED ASSEMBLIES<br />
SLIP FIT – LIGHT/HEAVY DUTY<br />
SHAFT MOUNTED ASSEMBLIES<br />
PRESS FIT<br />
Bearing<br />
Bearing<br />
660 Quick Metal ® or 680 <br />
ORIGINAL<br />
1. Machine shaft to .002" radial slip fit with 50-80 rms finish (second cut).<br />
2. Clean all parts with <strong>Loctite</strong>® ODC-Free Cleaner & Degreaser.<br />
3. Spray all parts (I.D. and O.D.) with <strong>Loctite</strong>® 7649 Primer N.<br />
Do NOT use primer for heavy duty applications.<br />
4. Apply a <strong>Loctite</strong>® 660 Quick Metal® Retaining Compound coating<br />
around shaft and engagement area.<br />
5. Assemble parts with rotating motion.<br />
6. Wipe off excess.<br />
7. Allow 2 hours prior to service.<br />
WORN SHAFT<br />
Follow directions above except:<br />
1. Determine radial gap.<br />
2. If radial gap exceeds .005", <strong>Loctite</strong>® 7649 Primer N must be used.<br />
3. Take steps to maintain concentricity with large gaps.<br />
4. Larger gaps require longer cure times (30-60 minutes).<br />
5. <strong>Loctite</strong>® 660 Quick Metal® Retaining Compound is NOT recommended<br />
for radial gaps exceeding .010".<br />
6. See procedure for BADLY WORN SHAFT page 19.<br />
Note: <strong>Loctite</strong>® 660 Quick Metal® Retaining Compound is very fast<br />
fixturing (30 seconds or less) with <strong>Loctite</strong>® 7649 Primer N.<br />
MAXIMUM STRENGTH<br />
1. Same as above, except use <strong>Loctite</strong>® 680 Retaining Compound with<br />
<strong>Loctite</strong>® 7471 Primer N or no primer.<br />
2. Allow 4-24 hours to cure.<br />
Shaft<br />
STANDARD<br />
609 (641 )<br />
1. Clean shaft O.D. and component I.D.<br />
2. Apply a bead of <strong>Loctite</strong>® 609 (641) Retaining Compound to circumference<br />
of shaft at leading edge of insertion or leading area of engagement.<br />
Note: • Retaining compound will always be squeezed to the outside<br />
when applied to shaft.<br />
• Do NOT use with <strong>Loctite</strong>® Anti-Seizes or similar product.<br />
3. Press as usual. Wipe off excess.<br />
4. No cure time required.<br />
Note: <strong>Loctite</strong>® 609 (641) Retaining Compound is used due to low<br />
viscosity and wetting properties.<br />
TANDEM MOUNT<br />
1. Apply retaining compound to bore of inside component.<br />
2. Continue assembly as above.<br />
MAXIMUM TEMPERATURE (400°F continuous)<br />
1. Same as above, except use <strong>Loctite</strong>® 620 Retaining Compound with<br />
<strong>Loctite</strong>® 7471 Primer N.<br />
20 21<br />
Shaft
SHAFT MOUNTED ASSEMBLIES<br />
SHRINK FIT<br />
HOUSED COMPONENTS<br />
SLIP FIT<br />
609 or 641 <br />
Shaft<br />
609 or 641 <br />
Housing<br />
ASSEMBLY<br />
1. Clean the shaft O.D. and component I.D.<br />
2. Cool the shaft to cause contraction, or heat the component to<br />
cause expansion.<br />
3. Apply a brush film of <strong>Loctite</strong>® 641 Retaining Compound to the<br />
shaft or lower temperature part.<br />
4. Install component and allow temperatures to equilibriate.<br />
5. Wipe off excess.<br />
Note: <strong>Loctite</strong>® 641 Retaining Compound will add lubricity for<br />
easier assembly while sealing and protecting the bond area<br />
from environmental exposure and filling gaps for a more<br />
complete contact area.<br />
ORIGINAL<br />
1. Select component to fit shaft.<br />
2. Machine to reduce component O.D. or increase housing I.D. to permit<br />
approximate .002"-.004" diametral slip fit.<br />
3. Clean all parts with <strong>Loctite</strong>® ODC-Free Cleaner & Degreaser and spray<br />
with <strong>Loctite</strong>® 7649 Primer N.<br />
4. Apply <strong>Loctite</strong>® 609 or 641 Quick Metal® Retaining Compound to<br />
component O.D.<br />
5. Install component. Do not rotate.<br />
6. Wipe off excess.<br />
7. Allow five minutes prior to service.<br />
WORN<br />
Procedures identical to original slip fit, except:<br />
1. Determine the maximum radial gap.<br />
2. If the maximum gap exceeds .005", <strong>Loctite</strong>® 7649 Primer N<br />
must be used.<br />
3. Take steps to maintain concentricity on large gaps.<br />
4. Large gaps require longer cure times (30-60 minutes).<br />
5. <strong>Loctite</strong>® 660 Quick Metal® Retaining Compound is NOT recommended<br />
for radial gaps exceeding .010".<br />
6. See procedure for BADLY WORN HOUSING page 24.<br />
22 23
HOUSED COMPONENTS<br />
REPAIRING BADLY WORN HOUSING<br />
HOUSED COMPONENTS<br />
COMPONENT CENTERING<br />
Bearing<br />
Shims<br />
660 Quick Metal ®<br />
Shim<br />
ASSEMBLY<br />
Fixmaster ® Superior Metal<br />
Housing<br />
1. Roughen housing I.D. with emery cloth or abrasive media.<br />
2. Clean the housing I.D. with <strong>Loctite</strong>® ODC-Free Cleaner & Degreaser.<br />
3. Clean the component O.D. and apply a release agent.<br />
4. Prepare (mix) <strong>Loctite</strong>® Fixmaster® Superior Metal.<br />
5. Apply a coating of <strong>Loctite</strong>® Fixmaster® Superior Metal to the I.D.<br />
of the housing.<br />
6. Position the component in housing. Maintain concentricity.<br />
7. Pack <strong>Loctite</strong>® Fixmaster® Superior Metal into the gaps and voids.<br />
8. Wipe off excess material.<br />
9. Allow to cure 30 minutes.<br />
10. Pull component.<br />
11. Clean the release agent from component O.D.<br />
12. Clean and roughen the housing I.D.<br />
13. Assemble with <strong>Loctite</strong>® 660 Quick Metal® Retaining Compound<br />
as required.<br />
14. Recommended for light duty service.<br />
Note: This procedure is for use when machining is not an option. If<br />
you want a procedure for using <strong>Loctite</strong>® Fixmaster® Superior<br />
Metal and machining back to original tolerance, then contact<br />
your local Henkel Adhesive and Sealants Specialist.<br />
EXCESSIVE / EVEN WEAR<br />
1. Position the component in bore.<br />
2. Select three equilateral mounting points.<br />
3. Determine the radial gap at those points.<br />
4. Select appropriate shim stock.<br />
5. Cut three pieces approximately 1 ⁄8" wide to fit bore depth.<br />
6. Bond the shims to bore at mounting points using <strong>Loctite</strong>® 380 Black<br />
Max® Instant Adhesive.<br />
7. Assemble per instructions on page 23.<br />
Shim<br />
Shims<br />
EXCESSIVE / UNEVEN WEAR<br />
1. Position the component in bore.<br />
2. Select three equilateral mounting points.<br />
3. Determine the radial gap at those points.<br />
4. Select and cut appropriate shim stock for each point.<br />
5. Bond the shims to bore at mounting points using <strong>Loctite</strong>® 380<br />
Black Max® Instant Adhesive.<br />
6. Assemble per instructions on page 24.<br />
24 25
HOUSED COMPONENTS<br />
SEALING/RETAINING — METALLIC SEAL<br />
RETAINING COMPOUNDS<br />
LOCTITE ® RETAINING COMPOUND QUICK SELECTOR<br />
Application <strong>Loctite</strong> ® Product <strong>Loctite</strong> ® Primer<br />
Shaft Mount – Press fit<br />
Medium Strength 609 (QuickStix 668 ) Retaining Compound NONE<br />
641 Retaining Compound N <br />
Shaft Mount – Shrink fit<br />
Medium Strength 641 Retaining Compound NONE<br />
Shaft Mount – Slip Fit<br />
Small Gap (.002" Radial max.) 609 (QuickStix 668 ) Retaining Compound N <br />
Larger Gap (.010" Radial max.) 660 Quick Metal ® Retaining Compound N <br />
Maximum Strength (.010" Radial max.) 680 Retaining Compound N <br />
2440 Bead<br />
1. Clean the housing I.D. and seal O.D. with <strong>Loctite</strong>® ODC-Free<br />
Cleaner & Degreaser.<br />
2. Spray both the housing and seal with <strong>Loctite</strong>® 7649 Primer N.<br />
3. Apply a bead of <strong>Loctite</strong>® 2440 (QuickStix 248) Threadlocker to the<br />
leading edge of metallic seal O.D.<br />
Note: Virtually any <strong>Loctite</strong>® Threadlocking product will work here.<br />
Medium strength liquid is recommended due to normal gap<br />
and strength requirement.<br />
4. Install as usual.<br />
5. Wipe off excess.<br />
6. Allow to cure 30 minutes.<br />
Note: • <strong>Loctite</strong>® 2440 (QuickStix 248) Threadlocker is normally<br />
used with worn seal housings to prevent leakage or slippage.<br />
• It is not generally necessary to remove pre-applied sealant from<br />
seal O.D.<br />
Maximum Temperature (400°F) 620 Retaining Compound N <br />
(.008" Radial max.)<br />
Medium Strength 641 Retaining Compound N <br />
Housing Mount – Press Fit<br />
Maximum Strength 609 (QuickStix 668 ) Retaining Compound NONE<br />
Medium Strength 641 Retaining Compound N <br />
Low Strength 2440 Threadlocker NONE<br />
Housing Mount – Slip Fit<br />
Maximum Strength 680 Retaining Compound NONE<br />
High Strength 660 Quick Metal ® Retaining Compound NONE<br />
Controlled Strength 660 Quick Metal ® Retaining Compound N <br />
Medium Strength 641 Retaining Compound N <br />
Low Strength 2440 (QuickStix 648 ) Threadlocker N <br />
Note: • Softer metals (Aluminum, Bronze, etc.) provide lower<br />
shear strengths than ferrous components.<br />
• Excessive gap reduces shear strengths.<br />
• Ideal surface finish — 50 to 80 rms.<br />
Refer to Technical Data Sheets for more information.<br />
26 27
DISASSEMBLY<br />
THREADLOCKING, THREAD SEALING & RETAINING<br />
LOW AND MEDIUM STRENGTH PRODUCTS<br />
Disassemble with hand tools.<br />
Figure A<br />
SHAFT REPAIR<br />
GENERAL INFORMATION<br />
Figure B<br />
HIGH STRENGTH PRODUCTS<br />
• Apply localized heat (500°F or higher) to assembly for 5 minutes.<br />
• Disassemble with hand tools while hot.<br />
Figure C<br />
GASKETING<br />
• Disassemble flange using hand tools.<br />
Note: For anaerobic gaskets, clean with <strong>Loctite</strong>® Chisel®<br />
Gasket Remover.<br />
For silicone gaskets, clean with <strong>Loctite</strong>® Chisel® MC-Free<br />
Gasket Remover.<br />
1. Using a lathe, undercut desired depth according to the table below:<br />
Shaft diameter<br />
Desired undercut<br />
1<br />
⁄2" to 1" (13 – 25 mm) 1<br />
⁄16" (1.5 mm)<br />
1" to 3" (25 – 74 mm) 1<br />
⁄8" (3.0 mm)<br />
2. Finish undercutting by machining a rough-cut surface or “gramo<strong>ph</strong>one”<br />
pattern; the larger the diameter of the shaft, the deeper the threads.<br />
(See Figure A)<br />
3. Clean the shaft of any cutting fluids or oils with <strong>Loctite</strong>® ODC-Free<br />
Cleanser & Degreaser.<br />
4. Apply a very thin layer of <strong>Loctite</strong>® Fixmaster® Superior Metal by forcing<br />
it into the bottom of the threads. Turn the shaft at a very low speed<br />
and continue to apply more material by using a tool, such as a putty<br />
knife, that can be bent. (See Figure B)<br />
5. Allow the product to cure for the required period at 70°F (20°C) or<br />
higher (if necessary, apply dry heat to speed up the cure).<br />
6. Machine repaired area to original dimensions of the shaft (see Figure C)<br />
using the guidelines below:<br />
Lathe Speed: 150 ft./min. (46 m/min.)<br />
Feed Rate: • Roughening: 0.025 in./rev. (0.64 mm/rev.)<br />
• Finishing: 0.010 in./rev. (0.25 mm/rev.)<br />
Top Rake/Side and Front Clearance: 3°<br />
Note: Cut dry; use carbide or high-speed steel bits. If polishing<br />
is required, use only wet 400 to 600 grit emery paper.<br />
28 29
BONDING<br />
INTRODUCTION TO BONDING ADHESIVES<br />
Within the broad range of <strong>Loctite</strong>® brand adhesives you will always<br />
find the solution to your bonding challenge. It is however, extremely<br />
important to have at least basic knowledge of adhesive methodology in<br />
order to successfully bond two substrates together. The three major<br />
causes of bonding failures are attributed to:<br />
• Poor evaluation of the bonding assembly<br />
• Inadequate substrate preparation<br />
• Improper adhesive selection<br />
BONDING ASSEMBLY<br />
Bonding assembly has a direct impact in the adhesive performance. Choose<br />
a combination of types of joints or joint stress distribution that maximizes<br />
bonding strength. Below are different types of joints and stress distribution:<br />
TYPES OF JOINTS<br />
Product<br />
BONDING<br />
SURFACE PREPARATION<br />
Abrasive Methods<br />
Rubbing or striking a surface with hard, coarse material.<br />
Abrasive examples:<br />
• Sanding: Rubbing with abrasive paper or cloth (for small area/superficial<br />
wear-down)<br />
• Blasting: Striking with steel grit, sand, or other abrasive material (for<br />
large areas/deep wear-down)<br />
Chemical Methods<br />
Cleaning process that uses solvents to dissolve contaminants.<br />
Chemical examples:<br />
• Solvent Dip: Immersing in solvent<br />
• Solvent Wipe: Rubbing with solvent-soaked wipe<br />
• Vapor Degreasing: Solvent in vapor form<br />
• Ultrasonic Cleaning: Solvent dip method with high-frequency sound<br />
waves that vibrate the dirt away<br />
LOCTITE ® BRAND ADHESIVE QUICK SELECTOR<br />
<strong>Loctite</strong> ® 404 <br />
Quick Set Instant<br />
Adhesive<br />
<strong>Loctite</strong> ® 330 <br />
Depend ®<br />
Adhesive<br />
<strong>Loctite</strong> ® Fixmaster ®<br />
Poxy Pak <br />
Adhesive<br />
<strong>Loctite</strong> ® H8600 <br />
Weld Eliminator <br />
Structural Adhesive<br />
BUTT<br />
FAIR<br />
OVERLAP<br />
GOOD<br />
SINGLE STRAP<br />
BETTER<br />
TYPES OF JOINT STRESS DISTRIBUTION<br />
DOUBLE STRAP<br />
BEST<br />
Color Clear Pale Yellow Clear Blue<br />
Temperature<br />
Range<br />
Up to 180°F Up to 250°F Up to 180°F Up to 300°F<br />
Bond Time* 20 to 40 seconds 5 minutes 5 minutes 45 minutes<br />
Full Cure* 24 hours 24 hours 1 hour 24 hours<br />
Gap Fill Small Gaps Medium Gaps Large Gaps Medium Gaps<br />
CLEAVAGE/PEEL<br />
FAIR<br />
JOINT WIDTH VS. OVERLAP<br />
A wider bond line (Width) will be stronger than a lengthier one (Overlap):<br />
OVERLAP<br />
TENSILE<br />
GOOD<br />
SHEAR<br />
BETTER<br />
WIDTH<br />
COMPRESSIVE<br />
BEST<br />
* Times are based on average room temperature of 70°F and may<br />
30<br />
vary depending on the temperature and substrates used.<br />
31<br />
Agency<br />
Approvals<br />
Bonds to a<br />
wide range<br />
of materials,<br />
including:<br />
Application<br />
Examples<br />
CFIA, ABS,<br />
Mil-Spec<br />
Metal, plastic,<br />
and rubber<br />
Make o-rings,<br />
bond cuts in<br />
conveyer belts,<br />
nylon rails in<br />
production line,<br />
brass rings on<br />
spacer shafts<br />
CFIA CFIA, ABS In Progress<br />
Ferrite, wood,<br />
ceramic, plastic,<br />
and metal<br />
Bond metal labels<br />
to equipment,<br />
aggregate wear<br />
plates, vibration<br />
analysis pickup<br />
discs to<br />
equipment<br />
Glass, hard<br />
plastics, rubber,<br />
and metal<br />
Repair cracks in<br />
equipment, fill<br />
in damage on<br />
fiberglass tanks,<br />
general purpose<br />
bonding<br />
Galvanized steel,<br />
other metals, and<br />
most plastics<br />
Patching metal<br />
surfaces, sleeving<br />
metal conduit<br />
and ducts, metal<br />
fabrication (e.g.<br />
wagons, box<br />
trailers, material<br />
handling containers)
BONDING<br />
O-RING MAKING<br />
BONDING<br />
FILLING CRACKS<br />
1. Cut the starting end of the cord stock with a clean razor blade. Ensure<br />
the cut is clean and square. Do not touch the clean cut end.<br />
2. Measure cord stock to appropriate length. For precise measurement, use<br />
<strong>Loctite</strong>® O-Ring Tool or the ruler provided in the <strong>Loctite</strong>® O-Ring Making Kit.<br />
3. Cut the measured end of the cord stock with a clean razor blade.<br />
Ensure the cut is clean and square to optimize bond area.<br />
4. Apply one drop of <strong>Loctite</strong>® 404 Quick Set Instant Adhesive and mate<br />
the two ends of the cord stock.<br />
BONDING METAL LABEL<br />
1. Clean surface.<br />
2. Mix <strong>Loctite</strong>® Fixmaster® Poxy Pak Epoxy Adhesive according to<br />
package directions.<br />
3. Spread mixed material over crack.<br />
4. Sets in 5 minutes, full cure in 8 hours.<br />
5. For maximum protection, a piece of material can be applied over<br />
the top of the crack to spread the load after applying the mixed<br />
adhesive. The adhesive will hold it in place.<br />
STRUCTURAL BONDING<br />
1. Clean surface.<br />
2. Spray <strong>Loctite</strong>® 7387 Depend® Activator onto main part. Let dry<br />
for two minutes.<br />
3. Apply <strong>Loctite</strong>® 330 Depend® Adhesive onto back of label.<br />
4. Press label onto activated surface and hold for a few seconds.<br />
5. Reaches handling strength in 5 minutes. Full cure in 24 hours.<br />
1. Prepare the surface using <strong>Loctite</strong>® ODC-Free Cleaner and Degreaser.<br />
2. Attach mix nozzle to the <strong>Loctite</strong>® H8600 Weld Eliminator Structural<br />
Adhesive cartridge.<br />
3. Dispense 50 mm (2") of material to prime nozzle.<br />
4. Apply a continuous bead of adhesive in the area you want to patch and/or seal.<br />
5. Assemble patch using pneumatic pins or rivets, or run screws to hold<br />
parts together while the adhesive reaches full cure.<br />
6. Equipment can be back in operation after 24 hours.<br />
32 33
RUSTPROOFING<br />
OPTIMUM USE OF LOCTITE ® EXTEND ® RUST TREATMENT<br />
SURFACE PREPARATION — OLD STEEL:<br />
Loose or “flaky” rust must be removed. Only conversion of firmly bonded rust<br />
will result in durable protection. Oil, grease, old paint, mill scale, form oil,<br />
fingerprints, water soluble surfaces and chlorides must be removed to allow<br />
<strong>Loctite</strong>® Extend® Rust Treatment to react with rust. Ideal surfaces will show<br />
light rust as well as bare metal surfaces.<br />
RUST CONVERSION TIME AND APPEARANCE:<br />
Two coats of <strong>Loctite</strong>® Extend® Rust Treatment are recommended.<br />
The first coat should develop a purple-black color within seconds. The second<br />
coat should dry to a black color. The second coat should be applied within<br />
15-30 minutes of the first coat.<br />
APPLICATION CONDITIONS:<br />
<strong>Loctite</strong>® Extend® Rust Treatment may be applied when surface and air<br />
are between 50°F and 90°F. Reaction is slower at lower temperatures. If<br />
temperature is too hot, film may surface dry and bubble. High humidity is<br />
beneficial; it slows drying but assists rust conversion. <strong>Loctite</strong>® Extend® Rust<br />
Treatment should not be applied in conditions of condensing humidity (e.g.<br />
fog, dew), on ice, in rain or in heavy sea (salt) spray atmos<strong>ph</strong>eres. Steel surface<br />
may be damp but not wet (i.e. continuous visible film of water). DO NOT APPLY<br />
LOCTITE® EXTEND® RUST TREATMENT TO SURFACES IN DIRECT SUNLIGHT.<br />
APPLICATION EQUIPMENT METHODS:<br />
<strong>Loctite</strong>® Extend® Rust Treatment may be applied by brush,<br />
roller, or spray. Brush or roller is suitable for small areas.<br />
Avoid sags and ridges and keep edges wet by coating about<br />
a square yard at a time. Roll away from previously coated<br />
area and then roll back. Do not pour unused material back<br />
into the original container. NEVER add solvents to <strong>Loctite</strong>®<br />
Extend® Rust Treatment.<br />
Spray application is recommended for larger areas. Airless<br />
spray equipment is faster, and provides more effective<br />
conversion due to improved surface penetration.<br />
Conventional air-spray equipment may be used, but<br />
<strong>Loctite</strong>® Extend® Rust Treatment may require thinning up<br />
to 10% with water for proper spraying.<br />
In general, <strong>Loctite</strong>® Natural Blue® Biodegradable<br />
Cleaner & Degreaser cleaning effectiveness is<br />
enhanced by:<br />
a. Higher concentrations of <strong>Loctite</strong>® Natural<br />
Blue® Biodegradable Cleaner & Degreaser<br />
b. Longer cleaner on-part times<br />
c. Dilution with warm water (150°F to 180°F)<br />
d. Agitation of parts or scrubbing<br />
CLEANING<br />
GENERAL PURPOSE PARTS CLEANING<br />
DIRECTIONS<br />
1. Dilute <strong>Loctite</strong>® Natural Blue® Biodegradable<br />
Cleaner & Degreaser concentrate with water to<br />
most economical/effectiveness level. See package<br />
labels for suggested ratios.<br />
2. Spray, dip or wipe dilution onto parts or surface<br />
to be cleaned.<br />
3. Soak parts or scrub (if needed).<br />
4. Flush soil/cleaner mixture off of parts or surfaces with water.<br />
5. Disposal: <strong>Loctite</strong>® Natural Blue® Biodegradable Cleaner & Degreaser<br />
contains no hazardous ingredients. It should be disposed of in<br />
accordance with state and local regulations and will not harm<br />
sewage treatment microorganisms. Once <strong>Loctite</strong>® Natural Blue®<br />
Biodegradable Cleaner & Degreaser is mixed with hazardous waste,<br />
it must be treated as hazardous waste and disposed of accordingly.<br />
Note: <strong>Loctite</strong>® ODC-Free Cleaner & Degreaser is recommended for<br />
cleaning substrates before <strong>Loctite</strong>® machinery adhesive use.<br />
34 35
TROUBLESHOOTING<br />
1. What type of failure is occurring Has the application worked before<br />
2. Was proper and adequate adhesive/sealant used<br />
3. Was proper and adequate primer/activator used<br />
4. Do service conditions exceed the capability of the adhesive sealant<br />
(a) operating temperature (c) fluid compatibility<br />
(b) excessive pressure too soon (d) impact on environment<br />
5. Were parts adequately cleaned prior to applying adhesive<br />
Note: If adhesive failure, is cured residue on one or both parts<br />
If one part is bare, check that part for contamination.<br />
6. Were proper assembly techniques utilized<br />
7. Was adhesive/sealant allowed adequate cure time prior to service<br />
8. Do assembly/part conditions exceed capability of the adhesive/sealant<br />
(a) excessive gaps<br />
(c) improper joint design<br />
(b) component materials (d) inadequate clamping/fixturing<br />
9. If additional assistance is required, please call our HENKEL TECHNICAL<br />
INFORMATION LINE. See back cover for the Henkel Technical<br />
Information number in your area.<br />
Note: Reference Materials<br />
(a) Product selection, cure times, gap fill, etc.; use Product<br />
Selector Slide Rule (LT-776)<br />
(b) Fluid Compatibility Chart (LT-836)<br />
LIMITATION OF WARRANTY<br />
The data contained herein are furnished for information<br />
only and are believed to be reliable. We cannot assume<br />
responsibility for the results obtained by others over whose<br />
methods we have no control. It is the user’s responsibility<br />
to determine suitability for the user’s purpose of any<br />
production methods mentioned herein and to adopt such<br />
precautions as may be advisable for the protection of<br />
property and of persons against any hazards that may<br />
be involved in the handling and use thereof.<br />
In light of the foregoing, HENKEL CORPORATION<br />
SPECIFICALLY DISCLAIMS ALL WARRANTIES OF<br />
MERCHANTABILITY OR FITNESS FOR A PARTICULAR<br />
PURPOSE ARISING FROM SALE OR USE OF HENKEL<br />
CORPORATION’S PRODUCTS. HENKEL CORPORATION<br />
SPECIFICALLY DISCLAIMS ANY LIABILITY FOR<br />
CONSEQUENTIAL OR INCIDENTAL DAMAGES OF ANY KIND,<br />
INCLUDING LOST PROFITS. The discussion herein of<br />
various processes or compositions is not to be interpreted<br />
as representation that they are free from domination of<br />
patents owned by others or as a license under any Henkel<br />
Corporation patents which may cover such processes or<br />
compositions. We recommend that each prospective user<br />
test the proposed application to determine its suitability<br />
for the purposes intended prior to incorporating any<br />
product or application in its manufacturing process using<br />
this data as a guide. Some products may be covered<br />
by one or more United States or foreign patents or<br />
patent applications.<br />
ORDERING<br />
PRODUCT LISTING/ORDER INFO.<br />
LOCTITE ® ADHESIVES SIZE ITEM NO.<br />
330 DEPEND ® ADHESIVE – NO-MIX 25 ml syringe kit 20251<br />
250 ml tube kit 20252<br />
250 ml tube 33058<br />
300 ml cartridge 33064<br />
380 BLACK MAX ® INSTANT ADHESIVE – TOUGHENED 3 g tube 38004<br />
1 oz. bottle 38050<br />
1 lb. bottle 38061<br />
404 QUICK SET INSTANT ADHESIVE 1<br />
⁄3 oz. bottle 46551<br />
4 oz. bottle 46548<br />
1 lb. bottle 46561<br />
H8600 WELD ELIMINATOR STRUCTURAL ADHESIVE 50 ml dual cartridge 40875<br />
400 ml dual cartridge 38762<br />
LOCTITE ® CLEANERS SIZE ITEM NO.<br />
CHISEL ® GASKET REMOVER 18 oz. net wt. 79040<br />
NATURAL BLUE ® BIODEGRADABLE CLEANER 24 fl. oz. spray 82249<br />
& DEGREASER 1 gallon bottle 82251<br />
ODC-FREE CLEANER & DEGREASER 15 oz. aerosol 22355<br />
16 fl. oz. pump spray 20162<br />
LOCTITE ® EPOXIES SIZE ITEM NO.<br />
FIXMASTER ® SUPERIOR METAL 1 lb. kit. 97473<br />
4 lb. kit. 40900<br />
FIXMASTER ® POXY PAK 1 oz. syringe 81120<br />
LOCTITE ® GASKETING PRODUCTS SIZE ITEM NO.<br />
510 GASKET ELIMINATOR ® FLANGE SEALANT – 50 ml tube 51031<br />
HIGH TEMPERATURE 250 ml tube 51041<br />
515 GASKET ELIMINATOR ® FLANGE SEALANT 6 ml tube 51517<br />
50 ml tube 51531<br />
300 ml cartridge 51580<br />
518 GASKET ELIMINATOR ® FLANGE SEALANT 6 ml tube 51817<br />
50 ml tube 51831<br />
300 ml cartridge 51845<br />
QUICKSTIX 548 GASKET ELIMINATOR ® FLANGE SEALANT 19 g stick 39156<br />
INSTANT GASKET 90 ml can 40479<br />
5 oz. cartridge 30509<br />
7 oz. can 30507<br />
587 BLUE RTV SILICONE GASKET MAKER 70 ml tube 58730<br />
8.75 oz. can 30567<br />
300 ml cartridge 58775<br />
300 ml cartridge 82046<br />
36<br />
37
ORDERING<br />
PRODUCT LISTING/ORDER INFO.<br />
ORDERING<br />
PRODUCT LISTING/ORDER INFO.<br />
LOCTITE ® GENERAL MAINTENANCE PRODUCTS SIZE ITEM NO.<br />
EXTEND ® RUST TREATMENT 10.25 oz. aerosol 30539<br />
1 quart bottle 75430<br />
1 gallon bottle 75448<br />
FORM-A-THREAD ® STRIPPED THREAD REPAIR 4.8 ml syringe 28654<br />
O-RING MAKING KIT Kit 00112<br />
LOCTITE ® PRIMERS SIZE ITEM NO.<br />
7387 DEPEND ® ACTIVATOR 1.75 fl. oz. bottle 18861<br />
7649 PRIMER N (Acetone) 25 g aerosol 21347<br />
1.75 fl. oz. bottle 19269<br />
4.5 oz. aerosol 21348<br />
LOCTITE ® RETAINING COMPOUNDS SIZE ITEM NO.<br />
609 RETAINING COMPOUND – GENERAL PURPOSE 10 ml bottle 60921<br />
50 ml bottle 60931<br />
250 ml bottle 60941<br />
620 RETAINING COMPOUND – HIGH TEMPERATURE 10 ml bottle 62015<br />
50 ml bottle 62040<br />
250 ml bottle 62070<br />
641 RETAINING COMPOUND – MEDIUM STRENGTH 10 ml bottle 28802<br />
50 ml bottle 21458<br />
660 QUICK METAL ® RETAINING COMPOUND – 6 ml tube 66010<br />
PRESS FIT REPAIR 50 ml tube 66040<br />
250 ml tube 30287<br />
680 RETAINING COMPOUND – 10 ml bottle 68015<br />
HIGH STRENGTH/HIGH VISCOSITY 50 ml bottle 68035<br />
250 ml bottle 68060<br />
LOCTITE ® THREADLOCKERS SIZE ITEM NO.<br />
220 THREADLOCKER – LOW STRENGTH WICKING 10 ml bottle 37388<br />
250 ml bottle 22041<br />
222MS THREADLOCKER – SMALL SCREWS 10 ml bottle 22221<br />
50 ml bottle 22231<br />
250 ml bottle 22241<br />
2440 THREADLOCKER – REMOVABLE 10 ml bottle 33946<br />
50 ml bottle 33947<br />
250 ml bottle 33948<br />
QUICKSTIX 248 THREADLOCKER – REMOVABLE 9 g stick 37684<br />
19 g stick 37087<br />
2760 THREADLOCKER – PERMANENT 10 ml bottle 32526<br />
50 ml bottle 32525<br />
250 ml bottle 32527<br />
QUICKSTIX 268 THREADLOCKER – HIGH STRENGTH 9 g stick 37685<br />
19 g stick 37686<br />
277 THREADLOCKER – LARGE STUD 10 ml bottle 21434<br />
50 ml bottle 27731<br />
250 ml bottle 27741<br />
290 THREADLOCKER – WICKING 10 ml bottle 29021<br />
50 ml bottle 29031<br />
250 ml bottle 29041<br />
LOCTITE ® THREAD SEALANTS SIZE ITEM NO.<br />
545 THREAD SEALANT – HYDRAULIC/PNEUMATIC 10 ml bottle 32439<br />
50 ml bottle 54531<br />
250 ml bottle 54541<br />
QUICKSTIX 561 PST ® PIPE SEALANT 19 g stick 37127<br />
564 THREAD SEALANT 50 ml tube 28754<br />
250 ml tube 28755<br />
565 PST ® THREAD SEALANT – CONTROLLED STRENGTH 50 ml tube 56531<br />
250 ml tube 56541<br />
300 ml cartridge 56571<br />
567 PST ® THREAD SEALANT – HIGH TEMPERATURE 50 ml tube 56747<br />
250 ml tube 56765<br />
350 ml brush can 33241<br />
38<br />
39
Henkel –<br />
Your worldwide partner<br />
For technical information and/or product<br />
availability, call:<br />
USA<br />
Henkel Corporation<br />
Engineering Adhesives<br />
1001 Trout Brook Crossing<br />
Rocky Hill, CT 06067<br />
Tel: 860.571.5100<br />
Fax: 860.571.5465<br />
1.800.LOCTITE (563.8483)<br />
Canada<br />
Henkel Canada Corporation<br />
Engineering Adhesives<br />
2225 Meadowpine Blvd.<br />
Mississauga, Ontario L5N 7P2<br />
Tel: 905.814.6511<br />
Fax: 905.814.5391<br />
1.800.263.5043 (within Canada)<br />
Mexico<br />
Henkel Capital, S.A. de C.V.<br />
Blvd. Magnocentro No. 8 Piso 2 Interlomas<br />
52760, Huixquilucan<br />
Edo. de México<br />
Tel: +52.55.3300.3644<br />
Fax: +52.55.5787.9404<br />
01.800.90.181.00 (within Mexico)<br />
Or visit www.loctite.com<br />
Henkel Corporation<br />
Engineering Adhesives<br />
1001 Trout Brook Crossing<br />
Rocky Hill, CT 06067 U.S.A.<br />
www.henkel.us<br />
www.loctite.com<br />
® and designate trademarks of Henkel Corporation or its affiliates. ® = registered in the<br />
U.S. Patent and Trademark Offices.<br />
© Henkel Corporation, 2006. All rights reserved. 3889/LT-1475 (11/06)