How to/Next Step Floor Care Procedures Manual .pdf
How to/Next Step Floor Care Procedures Manual .pdf
How to/Next Step Floor Care Procedures Manual .pdf

You also want an ePaper? Increase the reach of your titles
YUMPU automatically turns print PDFs into web optimized ePapers that Google loves.
RESTORING PROCEDURES (continued)<br />
STANDARD or HIGH-SPEED<br />
SPRAY BUFFING<br />
<strong>Procedures</strong><br />
Prior <strong>to</strong> spray buffing, perform routine maintenance procedures<br />
<strong>to</strong> ensure floor is free of soils before spray buffing. This ensures<br />
that dirt is not buffed in<strong>to</strong> the finish.<br />
1. Assemble your equipment<br />
2. Attach a red buffing pad <strong>to</strong> buffer.<br />
3. Spray <strong>Next</strong> <strong>Step</strong> 5 Spray Buff Reagent on<strong>to</strong> floor area with a correctly<br />
labeled spray bottle. Do not mist the product as it will result in coating<br />
the filter on the floor machine which may result in overheating<br />
the mo<strong>to</strong>r over time.<br />
4. Make three passes over spray buff solution or until a brilliant shine<br />
appears. Ensure <strong>to</strong> overlap as you go. Turn pad over often or switch<br />
<strong>to</strong> clean pad as pad begins <strong>to</strong> collect particles and dried spray buff<br />
solution.<br />
5. Clean equipment and return <strong>to</strong> its appropriate place.<br />
6. Dust mop floor <strong>to</strong> remove any powder residue and remove caution<br />
signs after task has been completed.<br />
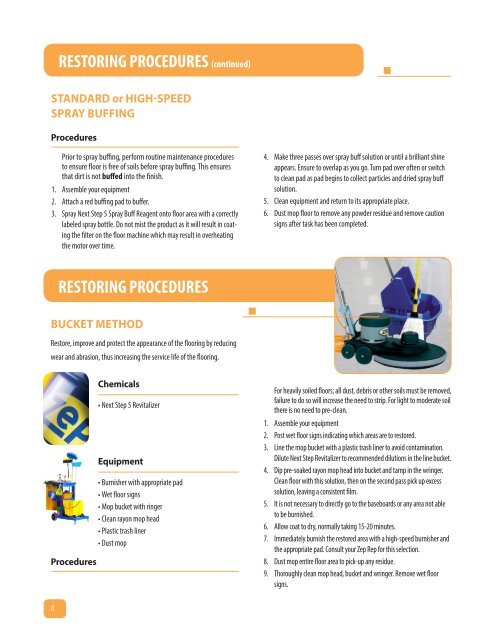
RESTORING PROCEDURES<br />
BUCKET METHOD<br />
Res<strong>to</strong>re, improve and protect the appearance of the flooring by reducing<br />
wear and abrasion, thus increasing the service life of the flooring.<br />
<strong>Procedures</strong><br />
Chemicals<br />
• <strong>Next</strong> <strong>Step</strong> 5 Revitalizer<br />
Equipment<br />
• Burnisher with appropriate pad<br />
• Wet floor signs<br />
• Mop bucket with ringer<br />
• Clean rayon mop head<br />
• Plastic trash liner<br />
• Dust mop<br />
For heavily soiled floors; all dust, debris or other soils must be removed,<br />
failure <strong>to</strong> do so will increase the need <strong>to</strong> strip. For light <strong>to</strong> moderate soil<br />
there is no need <strong>to</strong> pre-clean.<br />
1. Assemble your equipment<br />
2. Post wet floor signs indicating which areas are <strong>to</strong> res<strong>to</strong>red.<br />
3. Line the mop bucket with a plastic trash liner <strong>to</strong> avoid contamination.<br />
Dilute <strong>Next</strong> <strong>Step</strong> Revitalizer <strong>to</strong> recommended dilutions in the line bucket.<br />
4. Dip pre-soaked rayon mop head in<strong>to</strong> bucket and tamp in the wringer.<br />
Clean floor with this solution, then on the second pass pick up excess<br />
solution, leaving a consistent film.<br />
5. It is not necessary <strong>to</strong> directly go <strong>to</strong> the baseboards or any area not able<br />
<strong>to</strong> be burnished.<br />
6. Allow coat <strong>to</strong> dry, normally taking 15-20 minutes.<br />
7. Immediately burnish the res<strong>to</strong>red area with a high-speed burnisher and<br />
the appropriate pad. Consult your Zep Rep for this selection.<br />
8. Dust mop entire floor area <strong>to</strong> pick-up any residue.<br />
9. Thoroughly clean mop head, bucket and wringer. Remove wet floor<br />
signs.<br />
8