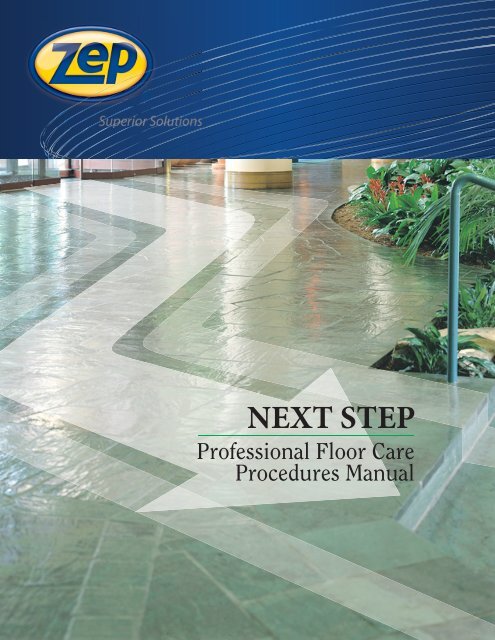
How to/Next Step Floor Care Procedures Manual .pdf
How to/Next Step Floor Care Procedures Manual .pdf
How to/Next Step Floor Care Procedures Manual .pdf

You also want an ePaper? Increase the reach of your titles
YUMPU automatically turns print PDFs into web optimized ePapers that Google loves.
Professional <strong>Floor</strong> <strong>Care</strong><br />
NEXT STEP<br />
<strong>Procedures</strong> <strong>Manual</strong>
TABLE OF CONTENTS<br />
STRIPPING PROCEDURES<br />
SINGLE DISK ROTARY<br />
AUTOSCRUBBER<br />
3<br />
4<br />
SEALING PROCEDURES<br />
MOP & BUCKET<br />
5<br />
FINISHING PROCEDURES<br />
MOP & BUCKET<br />
5<br />
FLOOR CLEANING PROCEDURES<br />
DUST & DAMP MOPPING<br />
DUST MOPPING and<br />
DAILY AUTOSCRUBBING<br />
6<br />
6-7<br />
RESTORING PROCEDURES<br />
STANDARD or HIGH<br />
SPEED SPRAY BUFFING<br />
BUCKET METHOD<br />
AUTOSCRUBBER<br />
7-8<br />
8<br />
9<br />
SCRUB & RECOAT PROCEDURES<br />
SINGLE DISK ROTARY<br />
AUTOSCRUBBER<br />
9-10<br />
11<br />
HIGH-SPEED BURNISHING<br />
DRY<br />
12<br />
TROUBLESHOOTING GUIDE<br />
13-16
STRIPPING PROCEDURES<br />
SINGLE DISK ROTARY<br />
The entrance and lobby provide the best opportunity <strong>to</strong> capture dust, dirt<br />
and potentially harmful particles before they make their way deeper in<strong>to</strong><br />
the building. Proper and effective cleaning at this stage can dramatically<br />
improve overall indoor environmental quality.<br />
<strong>Procedures</strong><br />
Chemicals<br />
• <strong>Next</strong> <strong>Step</strong> 1 Speed Stripper<br />
• <strong>Next</strong> <strong>Step</strong> 1 Perimeter Baseboard Stripper<br />
• Neutral Conditioner Prod. : 679201<br />
Equipment<br />
• Personal protection equipment<br />
• Wet floor signs<br />
• Dust mop<br />
• Putty knife or razor scraper<br />
• 2 mop buckets with ringers<br />
• 2 cot<strong>to</strong>n mop heads with handles<br />
• Rotary floor machine<br />
• Stripping pads<br />
• Dust pan and broom<br />
• Wet pick-up vacuum<br />
• Wiping cloths<br />
• pH papers<br />
• Doodlebug with black pad<br />
1. Assemble your equipment<br />
2. Remove any freestanding objects from the floor. Vacuum or clean<br />
the walk-off mats and set aside.<br />
3. Dust mop the area. As you are dust mopping, make note of any potential<br />
problem areas. Remove any gum or debris that may be stuck<br />
<strong>to</strong> the floor. Caution: Do not gouge the floor with the putty knife.<br />
4. Use all necessary safety gear.<br />
5. Post several wet floor signs indicating which areas are being<br />
stripped.<br />
6. Mix <strong>Next</strong> <strong>Step</strong> 1 Speed Stripper in accordance with label directions.<br />
Hot water is preferred unless the label indicates otherwise or the<br />
flooring manufacturer advises differently.<br />
7. Apply stripping solution <strong>to</strong> floor liberally. Under most conditions,<br />
don’t work in an area larger than 10’ x 10’. For problem floors, like<br />
grouted tile or heavy build-up, work in smaller sections.<br />
8. Leave stripping solution on floor for 7-10 minutes before scrubbing.<br />
Caution: Don’t allow stripper <strong>to</strong> dry on floor.<br />
9. For stripping close <strong>to</strong> baseboards, apply <strong>Next</strong> <strong>Step</strong> 1 Perimeter<br />
Baseboard Stripper and agitate using the Doodlebug with a black<br />
pad.<br />
10. Scrub floor with a floor machine, then scrub in the opposite<br />
direction <strong>to</strong> avoid pass lines. For heavy build-up, re-apply stripper<br />
before scrubbing <strong>to</strong> increase contact time. Allow stripper <strong>to</strong> stay on<br />
floor, then scrub.<br />
11. Pick-up slurry with wet vacuum or with a mop.<br />
12. Rinse floor with a liberal amount of water using a clean mop<br />
Heavy build-up<br />
Allow the stripper <strong>to</strong> stay on the floor for 7-10<br />
minutes, scrub, then add more stripping solution and<br />
scrub again. This will increase the amount of time that<br />
stripping solution remains in contact with the floor<br />
and will double the agitation applied.<br />
head. This step generally is <strong>to</strong> remove any dried slurry that may be<br />
present.<br />
13. Repeat <strong>Step</strong> 12 with Neutral Conditioner and allow <strong>to</strong> air-dry.<br />
14. After floor has dried, check <strong>to</strong> ensure that all stripper residue has<br />
been removed by running your hand over the floor. Continue <strong>to</strong><br />
rinse until all residue is gone and no foam remains in rinse water or<br />
the pH paper indicates neutral. A white powder indicates alkali is<br />
still present. Do a final pH test by applying a few drops of water <strong>to</strong><br />
a tile, then wiping with a pH paper strip. Compare colour on strip <strong>to</strong><br />
pH range on container.<br />
15. Clean all equipment, returning <strong>to</strong> its appropriate area.<br />
NOTE: The floor must now be sealed or finished before traffic is<br />
allowed on it.<br />
3
STRIPPING PROCEDURES<br />
AUTOSCRUB<br />
To remove floor finish and embedded soil from the floor before applying<br />
new floor finish.<br />
<strong>Procedures</strong><br />
Chemicals<br />
• <strong>Next</strong> <strong>Step</strong> 1 Speed Stripper<br />
• <strong>Next</strong> <strong>Step</strong> 1 Perimeter Baseboard Stripper<br />
• Neutral Conditioner Prod. : 679201<br />
Equipment<br />
• Personal protection equipment<br />
• Wet floor signs<br />
• Dust mop<br />
• Putty knife or razor scraper<br />
• 2 mop buckets with ringers<br />
• 2 cot<strong>to</strong>n mop heads with handles<br />
• <strong>Floor</strong> squeegee<br />
• Doodlebug with black pad<br />
• Au<strong>to</strong>scrubber<br />
• Stripping pads or stripping brushes<br />
• Broom and dustpan<br />
• Wiping cloths<br />
• pH papers<br />
1. Assemble your equipment<br />
2. Remove any freestanding objects from the floor. Vacuum or clean<br />
the walk-off mats and set aside.<br />
3. Dust mop the area. As you are dust mopping, make note of any potential<br />
problem areas. Remove any gum or debris that may be stuck<br />
<strong>to</strong> the floor. Caution: Do not gouge the floor with the putty knife.<br />
4. Post several wet floor signs indicating which areas are being<br />
scrubbed.<br />
5. Mix <strong>Next</strong> <strong>Step</strong> 1 Speed Stripper in accordance with label directions.<br />
Hot water is preferred unless otherwise indicated on the label. Fill<br />
mop bucket or larger container on wheels for larger areas. Fill au<strong>to</strong>scrubber<br />
with clean water only for rinsing and the required amount<br />
of Neutral Conditioner.<br />
6. Liberally apply stripping solution with mop. For problem floors (e.g.<br />
heavy-build-up) work in smaller sections.<br />
Heavy build-up<br />
Triple scrub, or reapply stripper and scrub again. Triple<br />
scrubbing will increase the time stripper remains in<br />
contact with the floor and the amount of agitation.<br />
Water temperature should be hot, unless label<br />
indicates otherwise.<br />
7. Leave stripping solution on floor for 7-10 minutes before scrubbing.<br />
Caution: Don’t allow stripper <strong>to</strong> dry on floor.<br />
8. For removing the finish close <strong>to</strong> baseboards and/or gondolas, use a<br />
doodlebug with a black pad and <strong>Next</strong> <strong>Step</strong> 1 Perimeter.<br />
9. Ensure that black stripping pads are attached <strong>to</strong> au<strong>to</strong>scrubber.<br />
Make a pass over the stripping solution using maximum brush<br />
pressure with vacuum off and squeegee up.<br />
10. Use hand-held floor squeegee <strong>to</strong> pull stripping solution away from<br />
corners and/or other hard-<strong>to</strong>-reach areas.<br />
11. With vacuum on, squeegee and brushes/pads down, make a<br />
second pass over floor. Note: If excessive build-up on floor, repeats<br />
<strong>Step</strong>s 7 through 12.<br />
12. Make a third pass with brushes/pads down, vacuum off, squeegee<br />
up and the solution valve wide open <strong>to</strong> apply rinse water <strong>to</strong> floor.<br />
13. Lower squeegee, turn on vacuum and pick up rinse water. If using<br />
au<strong>to</strong>scrubber <strong>to</strong> double rinse, repeat <strong>Step</strong>s 13 and 14 using clean<br />
pads. Note: If using mop and bucket method, ensure that rinse<br />
water remains clean.<br />
14. When using au<strong>to</strong>scrubber <strong>to</strong> rinse, use trail-mop <strong>to</strong> pick up any<br />
trails left by the au<strong>to</strong>scrubber.<br />
15. After floor has dried, check <strong>to</strong> ensure that all stripper residue has<br />
been removed by running your hand over the floor. Continue <strong>to</strong><br />
rinse until all residue is gone and no foam remains in rinse water or<br />
the pH paper indicates neutral. A white powder indicates alkali is<br />
still present. Do a final pH test by applying a few drops of water <strong>to</strong><br />
a tile, then wiping with a pH paper strip. Compare colour on strip<br />
<strong>to</strong> pH range on container.<br />
16. Clean all equipment and return <strong>to</strong> appropriate place. Note: The<br />
floor must now be sealed or finished before traffic is allowed on it.<br />
4
SEALING PROCEDURES<br />
MOP & BUCKET<br />
Replace base coat removed by stripping procedure.<br />
Chemicals<br />
<strong>Procedures</strong><br />
• <strong>Next</strong> <strong>Step</strong> 2 Base Coat<br />
Equipment<br />
• Wet floor signs<br />
• Mop bucket and wringer<br />
• Clean rayon mop head<br />
• Plastic trash liner<br />
1. Assemble your equipment<br />
2. Post wet floor signs indicating which are being sealed.<br />
3. Line mop bucket with a plastic trash liner <strong>to</strong> avoid contamination<br />
and facilitate clean-up. Pour sealer in<strong>to</strong> lined mop bucket.<br />
4. Dip rinsed rayon mop head in<strong>to</strong> the sealer and tamp in the wringer.<br />
Do Not wring out mop head. Mop should be saturated, but not<br />
dripping. A good base of sealer is approximately 7 litres / 1000<br />
sq. ft.<br />
5. Outline, or frame area <strong>to</strong> be finished. It is not necessary <strong>to</strong> go <strong>to</strong><br />
the baseboards on each coat 1st, 3rd and last is sufficient. This will<br />
make subsequent stripping procedures easier. Fill in the outlined<br />
area with an overlapping figure-eight mopping pattern.<br />
6. Allow coat <strong>to</strong> dry (normally takes 30-45 minutes). Note: The base<br />
coat should always be performed when dealing with new flooring.<br />
Apply enough base coats until there is an even sheen <strong>to</strong> the floor.<br />
The number of coats <strong>to</strong> achieve this will depend on the porosity of<br />
the floor.<br />
7. Thoroughly clean the mop head, bucket and wringer. Remove wet<br />
floor signs after the floor is completely dry<br />
FINISHING PROCEDURES<br />
MOP & BUCKET<br />
Replace floor finish removed by scrub &recoat or stripping procedure.<br />
Chemicals<br />
• <strong>Next</strong> <strong>Step</strong> 3 Endure 2000 Plus or<br />
• <strong>Next</strong> <strong>Step</strong> 3 UHS <strong>Floor</strong> Coating or<br />
• <strong>Next</strong> <strong>Step</strong> 3 <strong>Floor</strong> Coating L.M. or<br />
• <strong>Next</strong> <strong>Step</strong> 3 Zarathon<br />
Equipment<br />
• Wet floor signs<br />
• Mop bucket and wringer<br />
• Clean rayon mop head<br />
• Plastic trash liner<br />
<strong>Procedures</strong><br />
1. Assemble your equipment<br />
2. Post wet floor signs indicating which are being sealed.<br />
3. Line mop bucket with a plastic trash liner <strong>to</strong> avoid contamination<br />
and facilitate clean-up. Pour finish in<strong>to</strong> lined mop bucket.<br />
4. Dip rinsed rayon mop head in<strong>to</strong> the sealer and tamp in the wringer.<br />
Do Not wring out mop head. Mop should be saturated, but not<br />
dripping. A good base of finish is approximately 7 litres / 1000 sq. ft.<br />
5. Outline, or frame area <strong>to</strong> be finished. It is not necessary <strong>to</strong> go <strong>to</strong> the<br />
baseboards on each coat 1st, 3rd and last is sufficient. This will make<br />
subsequent stripping procedures easier. Fill in the outlined area with<br />
an overlapping figure-eight mopping pattern.<br />
6. Allow coat <strong>to</strong> dry (normally takes 30-45 minutes). Note: Do not<br />
recoat until finish is dry <strong>to</strong> the <strong>to</strong>uch - plus 15 minutes.<br />
7. Thoroughly clean the mop head, bucket and wringer. Remove wet<br />
floor signs after the floor is completely dry<br />
5
FLOOR CLEANING PROCEDURES<br />
DUST & DAMP MOPPING<br />
To remove loose surface debris using a Dry Mop: dust, dirt and other particles<br />
from the surface of a hard floor; <strong>to</strong> remove dirt and moisture from<br />
hard floors using a Damp Mop method. Damp Mopping is distinguished<br />
from Wet Mopping, by the amount of cleaning solution used during the<br />
mopping process. Damp mopping employs the use of a partially <strong>to</strong> fully<br />
wrung-out mop head.<br />
Chemicals<br />
• <strong>Next</strong> <strong>Step</strong> 4 Neutral Cleaner<br />
Equipment<br />
• Wet floor signs<br />
• Dust mop<br />
• Clean cot<strong>to</strong>n mop head and handle<br />
• Mop bucket with ringer<br />
• Broom and dustpan<br />
• Putty knife<br />
• Wet pick-up vacuum, if available<br />
Heavily soiled floors<br />
If floors are heavily soiled, increase time cleaning<br />
solution remains on floor. Agitating with a floor<br />
<strong>to</strong>ol will also aid in soil removal. Concentration and<br />
Temperature should follow label directions.<br />
<strong>Procedures</strong><br />
1. Assemble your equipment<br />
2. Remove any freestanding objects from the floor. Vacuum the walkoff<br />
mats and set aside.<br />
3. Dust mop the entire floor. Remove with putty knife any gum or other<br />
debris that may be stuck <strong>to</strong> floor. Caution: Be careful not <strong>to</strong> gouge<br />
floor.<br />
4. Post wet floor signs indicating wet area(s).<br />
5. If <strong>Next</strong> <strong>Step</strong> 4 Neutral Cleaner is not au<strong>to</strong>matically dispensed, mix<br />
according <strong>to</strong> label directions with cool water. Caution: Hot water<br />
will soften floor finish and may cause deterioration.<br />
6. Damp Mopping / Light Soils: Dip mop head in<strong>to</strong> cleaning solution<br />
and wring out. Apply in an overlapping figure-eight mopping<br />
pattern. Allow <strong>to</strong> dry. Proceed <strong>to</strong> <strong>Step</strong>s 10 and 11. Change cleaning<br />
solution often.<br />
7. Wet Mopping / Heavy Soils: Dip mop head in<strong>to</strong> cleaning solution<br />
and lightly tamp in wringer. Apply in an overlapping figure-eight<br />
mopping pattern. Be sure <strong>to</strong> get in<strong>to</strong> corners and along edges.<br />
8. Allow cleaning solution <strong>to</strong> remain on floor for 5 minutes, then, pick<br />
up with mop head or wet vacuum. Change cleaning solution before<br />
it becomes heavily soiled.<br />
9. Rinsing is necessary in heavily soiled areas, using clean mop head<br />
and clean water. Apply rinse water and pick up with mop or wet vacuum,<br />
changing rinse water as it becomes soiled. Allow floor <strong>to</strong> dry.<br />
10. Thoroughly rinse out mop heads, buckets and wringers, and return<br />
<strong>to</strong> their appropriate place.<br />
FLOOR CLEANING PROCEDURES<br />
DUST MOPPING and<br />
DAILY AUTOSCRUBBING<br />
Same purpose as outlined Dust & Damp Mopping above.<br />
6
Chemicals<br />
• <strong>Next</strong> <strong>Step</strong> 4 Neutral Cleaner<br />
Equipment<br />
• Wet floor signs<br />
• Dust mop<br />
• Clean cot<strong>to</strong>n mop head and handle<br />
• Broom and dustpan<br />
• Putty knife<br />
• Au<strong>to</strong>scrubber with appropriate floor pads<br />
• Bucket and Wringer<br />
Heavily soiled floors<br />
If floors are heavily soiled, increase time cleaning<br />
solution remains on floor. Increasing pad pressure<br />
will aid in soil removal. Concentration and Temperature<br />
should follow label directions.<br />
<strong>Procedures</strong><br />
1. Assemble your equipment<br />
2. Remove any freestanding objects from the floor. Vacuum the walkoff<br />
mats and set aside.<br />
3. Dust mop the entire floor. Remove with putty knife any gum or other<br />
debris that may be stuck <strong>to</strong> floor. Caution: Be careful not <strong>to</strong> gouge<br />
floor.<br />
4. Post wet floor signs indicating wet area(s).<br />
5. If <strong>Next</strong> <strong>Step</strong> 4 Neutral Cleaner is not au<strong>to</strong>matically dispensed, mix<br />
according <strong>to</strong> label directions with cool water. Caution: Hot water<br />
will soften floor finish and may cause deterioration.<br />
6. Au<strong>to</strong>scrub / Light Soils: Ensure white or red pads are attached <strong>to</strong><br />
the au<strong>to</strong>scrubber. Make one pass over the floor area with squeegee<br />
and pads down, solution on and vacuum on.<br />
7. Using a bucket and wringer with a solution of <strong>Next</strong> <strong>Step</strong> 4 Neutral<br />
Cleaner light damp mop edges. This will ensure an even appearance<br />
with no dirt build-up on the edges. Change cleaning solution often.<br />
8. Au<strong>to</strong>scrub / Heavy Soils: Ensure red pads are attached <strong>to</strong> the<br />
au<strong>to</strong>scrubber. Make one pass over floor with pads down, solution on,<br />
squeegee up and vacuum off. Allow cleaning solution <strong>to</strong> remain on<br />
floor for 5 minutes. Make a second pass with pads down, solution<br />
on, squeegee down and vacuum on <strong>to</strong> pick-up solution.<br />
9. Using a bucket and wringer with a solution of <strong>Next</strong> <strong>Step</strong> 4 Neutral<br />
Cleaner light damp mop edges. This will ensure an even appearance<br />
with no dirt build-up on the edges. Change cleaning solution often.<br />
10. Thoroughly rinse out mop heads, buckets and wringers, and return<br />
<strong>to</strong> their appropriate place.<br />
RESTORING PROCEDURES<br />
STANDARD or HIGH-SPEED<br />
SPRAY BUFFING<br />
Res<strong>to</strong>re the appearance of the base polish by spray buffing, the purpose of<br />
which is <strong>to</strong> polish but not necessarily <strong>to</strong> clean.<br />
Chemicals<br />
• <strong>Next</strong> <strong>Step</strong> 5 Spray Buff Reagent<br />
Equipment<br />
• Caution signs<br />
• Dust mop<br />
• Labeled spray bottles<br />
• Single disk rotary floor machine (175-375 rpm)<br />
• Red buffing pads<br />
7
RESTORING PROCEDURES (continued)<br />
STANDARD or HIGH-SPEED<br />
SPRAY BUFFING<br />
<strong>Procedures</strong><br />
Prior <strong>to</strong> spray buffing, perform routine maintenance procedures<br />
<strong>to</strong> ensure floor is free of soils before spray buffing. This ensures<br />
that dirt is not buffed in<strong>to</strong> the finish.<br />
1. Assemble your equipment<br />
2. Attach a red buffing pad <strong>to</strong> buffer.<br />
3. Spray <strong>Next</strong> <strong>Step</strong> 5 Spray Buff Reagent on<strong>to</strong> floor area with a correctly<br />
labeled spray bottle. Do not mist the product as it will result in coating<br />
the filter on the floor machine which may result in overheating<br />
the mo<strong>to</strong>r over time.<br />
4. Make three passes over spray buff solution or until a brilliant shine<br />
appears. Ensure <strong>to</strong> overlap as you go. Turn pad over often or switch<br />
<strong>to</strong> clean pad as pad begins <strong>to</strong> collect particles and dried spray buff<br />
solution.<br />
5. Clean equipment and return <strong>to</strong> its appropriate place.<br />
6. Dust mop floor <strong>to</strong> remove any powder residue and remove caution<br />
signs after task has been completed.<br />
RESTORING PROCEDURES<br />
BUCKET METHOD<br />
Res<strong>to</strong>re, improve and protect the appearance of the flooring by reducing<br />
wear and abrasion, thus increasing the service life of the flooring.<br />
<strong>Procedures</strong><br />
Chemicals<br />
• <strong>Next</strong> <strong>Step</strong> 5 Revitalizer<br />
Equipment<br />
• Burnisher with appropriate pad<br />
• Wet floor signs<br />
• Mop bucket with ringer<br />
• Clean rayon mop head<br />
• Plastic trash liner<br />
• Dust mop<br />
For heavily soiled floors; all dust, debris or other soils must be removed,<br />
failure <strong>to</strong> do so will increase the need <strong>to</strong> strip. For light <strong>to</strong> moderate soil<br />
there is no need <strong>to</strong> pre-clean.<br />
1. Assemble your equipment<br />
2. Post wet floor signs indicating which areas are <strong>to</strong> res<strong>to</strong>red.<br />
3. Line the mop bucket with a plastic trash liner <strong>to</strong> avoid contamination.<br />
Dilute <strong>Next</strong> <strong>Step</strong> Revitalizer <strong>to</strong> recommended dilutions in the line bucket.<br />
4. Dip pre-soaked rayon mop head in<strong>to</strong> bucket and tamp in the wringer.<br />
Clean floor with this solution, then on the second pass pick up excess<br />
solution, leaving a consistent film.<br />
5. It is not necessary <strong>to</strong> directly go <strong>to</strong> the baseboards or any area not able<br />
<strong>to</strong> be burnished.<br />
6. Allow coat <strong>to</strong> dry, normally taking 15-20 minutes.<br />
7. Immediately burnish the res<strong>to</strong>red area with a high-speed burnisher and<br />
the appropriate pad. Consult your Zep Rep for this selection.<br />
8. Dust mop entire floor area <strong>to</strong> pick-up any residue.<br />
9. Thoroughly clean mop head, bucket and wringer. Remove wet floor<br />
signs.<br />
8
RESTORING PROCEDURES<br />
AUTOSCRUB<br />
Res<strong>to</strong>re, improve and protect the appearance of the flooring by reducing<br />
wear and abrasion, thus increasing the service life of the flooring.<br />
Chemicals<br />
• <strong>Next</strong> <strong>Step</strong> 5 Revitalizer<br />
Equipment<br />
• Au<strong>to</strong>scrubber with red pads<br />
• Burnisher with appropriate pad<br />
• Wet floor signs<br />
• Dust mop<br />
<strong>Procedures</strong><br />
For heavily soiled floors; all dust, debris or other soils must be removed,<br />
failure <strong>to</strong> do so will increase the need <strong>to</strong> strip. For light <strong>to</strong> moderate soil<br />
there is no need <strong>to</strong> pre-clean.<br />
1. Assemble your equipment<br />
2. Post wet floor signs indicating which areas are <strong>to</strong> res<strong>to</strong>red.<br />
3. Fill au<strong>to</strong>scrubber with the recommended dilution of <strong>Next</strong> <strong>Step</strong> 5 Revitalizer<br />
and warm water.<br />
4. Clean floor area with au<strong>to</strong>scrubber and solution in one pass, which will<br />
leave a trace film of Revitalizer.<br />
5. Burnish immediately using an appropriate burnish pad. Consult your Zep<br />
Rep for this selection.<br />
6. Dust mop floor area after burnishing.<br />
7. Remove wet floor signs..<br />
SCRUB & RECOAT PROCEDURES<br />
SINGLE DISK ROTARY<br />
When floors lose their original high gloss look and appear dull, it’s time<br />
<strong>to</strong> recoat. Traffic areas will require more frequent recoating <strong>to</strong> maintain<br />
a clean, high shine appearance. A planned recoat schedule will provide<br />
optimum appearance and greatly reduce the need for stripping.<br />
Chemicals<br />
• <strong>Next</strong> <strong>Step</strong> 6 Scrub & Recoat<br />
• <strong>Next</strong> <strong>Step</strong> 3 Endure 2000 Plus or<br />
• <strong>Next</strong> <strong>Step</strong> 3 UHS <strong>Floor</strong> Coating or<br />
• <strong>Next</strong> <strong>Step</strong> 3 <strong>Floor</strong> Coating L.M. or<br />
• <strong>Next</strong> <strong>Step</strong> 3 Zarathon or<br />
• <strong>Next</strong> <strong>Step</strong> 3 Solitaire Rapid Response<br />
• Neutral Conditioner<br />
9
SCRUB & RECOAT PROCEDURES (continued)<br />
<strong>Procedures</strong><br />
Equipment<br />
• Personal Protection Equipment<br />
• Wet floor signs<br />
• Dust mop<br />
• Putty knife<br />
• 2 mop buckets with wringers<br />
• 2 cot<strong>to</strong>n mop heads with handles<br />
• 1 clean finish mop head<br />
• Rotary floor machine<br />
• Blue scrubbing pad<br />
• Dust pan<br />
• Broom<br />
• Wet pick-up vacuum<br />
• Wiping cloths<br />
• pH strips<br />
Scrub & Recoat<br />
If floor is heavily soiled or if intended <strong>to</strong> be re-coated,<br />
changing <strong>to</strong> a more aggressive pad (agitation)<br />
will aid in soil removal. Increasing amount of time<br />
cleaner is allowed <strong>to</strong> remain on floor provides more<br />
effective cleaning. Follow label instructions for water<br />
temperature and concentration of cleaner.<br />
7. Liberally apply Scrub & Recoat cleaning solution on floor.<br />
Under most conditions do not work an area larger than 10’<br />
x 10’. For difficult areas, e.g. grouted tile, work in smaller<br />
areas.<br />
8. For heavy-build-up, allow Scrub & Recoat solution <strong>to</strong><br />
remain on floor for 5 minutes.<br />
9. Ensure a blue pad is attached <strong>to</strong> the floor machine. Make<br />
two <strong>to</strong> three passes over each are with floor machine and<br />
overlapping as you go <strong>to</strong> avoid pass-lines.<br />
10. Pick-up slurry with wet pick-up vacuum or with mop.<br />
11. Rinse floor with clean water and Neutral Conditioner using<br />
a clean mop head. Apply liberal amount of water and pick<br />
up with vacuum or mop.<br />
12. After floor has dried, rub your hand over it <strong>to</strong> check for<br />
residue. If residue is found, rinse floor again. Check pH of<br />
floor using pH test strips and inspect floor carefully before<br />
recoating.<br />
13. Once floor is properly prepared using <strong>Step</strong>s 3-12, application<br />
of maintenance coats of finish is required. Rule<br />
of Thumb: Light scrub 1 coat; medium scrub 2 coats;<br />
heavy scrub 2-3 coats. Note: One coat along the edges is<br />
sufficient.<br />
14. Clean all equipment and return <strong>to</strong> its appropriate area.<br />
Note: Do not remove wet floor signs until floor is dry.<br />
1. Assemble your equipment<br />
2. Remove any freestanding objects from the floor. Vacuum walk-off<br />
mats and set aside.<br />
3. Dust mop entire floor making note of any potential problem areas.<br />
Remove any gum or debris that may be stuck <strong>to</strong> the floor. Caution:<br />
Be careful not <strong>to</strong> gouge floor with putty knife.<br />
4. Put on appropriate safety gear.<br />
5. <strong>Step</strong> 6 Scrub & Recoat is not au<strong>to</strong>matically dispensed, mix chemicals<br />
in accordance with label directions. Use tepid water because hot<br />
water may remove <strong>to</strong>o much finish. Note: Hot water may be used if<br />
coating is heavily damaged.<br />
6. Post wet floor signs <strong>to</strong> indicate <strong>to</strong> traffic which areas are being<br />
worked on.<br />
10
SCRUB & RECOAT PROCEDURES<br />
AUTOSCRUB<br />
Same purpose as outlined Scrub & Recoat - Single Disk Rotary.<br />
Chemicals<br />
<strong>Procedures</strong><br />
• Same chemicals as outlined in Scrub & Recoat -<br />
Single Disk Rotary.<br />
Equipment<br />
• Personal Protection Equipment<br />
• Wet floor signs<br />
• Putty knife<br />
• 2 mop buckets with wringers<br />
• 2 cot<strong>to</strong>n mop heads with handles<br />
• 1 clean finish mop head<br />
• <strong>Floor</strong> squeegee<br />
• Au<strong>to</strong>scrubber<br />
• Blue scrubbing pad<br />
• Dust pan<br />
• Broom<br />
• pH strips<br />
Scrub & Recoat<br />
If floors are heavily damaged, changing <strong>to</strong> a more<br />
aggressive pad (agitation) will aid in removing soil<br />
and damaged finish. Double scrubbing will increase<br />
time the cleaner remains in contact with floor and<br />
the amount of agitation. Follow label directions for<br />
water temperature and <strong>Next</strong> <strong>Step</strong> 6 Scrub & Recoat<br />
dilution.<br />
1. Assemble your equipment<br />
2. Remove any freestanding objects from the floor. Vacuum walk-off<br />
mats and set aside.<br />
3. Dust mop entire floor making note of any potential problem areas.<br />
Remove any gum or debris that may be stuck <strong>to</strong> the floor. Caution:<br />
Be careful not <strong>to</strong> gouge floor with putty knife.<br />
4. Put on appropriate safety gear.<br />
5. Fill the solution tank of the au<strong>to</strong>scrubber with <strong>Next</strong> <strong>Step</strong> 6 Scrub-nre-coat<br />
solution. If cleaners are not au<strong>to</strong>matically dispensed, follow<br />
label instructions. Use tepid water because hot water will soften<br />
finish and may cause excessive finish removal. Note: Hot water<br />
may be used if coating is heavily damaged.<br />
6. Post wet floor signs <strong>to</strong> indicate <strong>to</strong> traffic which areas are being<br />
scrubbed.<br />
7. Light Damage: make one pass over with solution valve<br />
open, pads (blue) down, squeegee down and vacuum on.<br />
Proceed <strong>to</strong> <strong>Step</strong>s 10 through 12.<br />
8. Heavy Damaged Finish - make one pass over area with<br />
solution valve open and pads (blue) down with squeegee<br />
up and vacuum off.<br />
9. Allow solution <strong>to</strong> remain on floor for several minutes then<br />
make a second pass with vacuum on, squeegee and pads<br />
lowered and solution valve open.<br />
10. After entire area is thoroughly scrubbed, fill au<strong>to</strong>scrubber<br />
with clean water and Neutral Conditioner according <strong>to</strong><br />
label.<br />
11. Make one pass over with solution valve open, pads down,<br />
squeegee up and vacuum off.<br />
12. Pick-up solution on second pass.<br />
13. Trail mop the area just scrubbed and test pH using pH test<br />
strips. Inspect floor carefully prior <strong>to</strong> recoating.<br />
14. Once floor is properly prepared using <strong>Step</strong>s 3-12, application<br />
of maintenance coats of finish is possible. Rule<br />
of Thumb: Light scrub 1 coat; medium scrub 2 coats;<br />
heavy scrub 2-3 coats. Note: One coat along the edges is<br />
sufficient.<br />
15. Clean your equipment and return <strong>to</strong> appropriate area. Do<br />
not remove wet floor signs until floor is dry.<br />
11
UHS BURNISHING PROCEDURES<br />
DRY<br />
High speed burnishing is used <strong>to</strong> maintain a high gloss shine on floors.<br />
Chemicals<br />
• None<br />
<strong>Procedures</strong><br />
Equipment<br />
• Caution signs<br />
• High speed burnisher (1500 rpm or more)<br />
• Burnishing pads<br />
• Dust mop<br />
Burnishing should be performed only after performing general cleaning<br />
procedures with an au<strong>to</strong>scrubber. Failure <strong>to</strong> au<strong>to</strong>scrub will result in<br />
discoloration and increase the need for stripping operations.<br />
1. Assemble your equipment<br />
2. Post caution signs indicating which areas are being burnished.<br />
3. Attach the appropriate burnishing pad <strong>to</strong> burnisher. Consult your<br />
Zep field service rep for the correct pad for your program. Additional<br />
burnishing pads must be on hand.<br />
4. Make a steady pass over floor at a rate that provides a high gloss<br />
on only one pass. Do not allow burnisher <strong>to</strong> stand idle while it’s<br />
running.<br />
5. Change pad on burnisher when it becomes necessary.<br />
6. After entire area has been burnished, floor must be dry mopped.<br />
7. Clean equipment and return <strong>to</strong> its appropriate location.<br />
8. Remove caution signs.<br />
9. Note: After several dry burnishings it may be required <strong>to</strong> use a<br />
revitalizer <strong>to</strong> repair the finish and regain a ultra high gloss shine.<br />
12
TROUBLE SHOOTING GUIDE<br />
The following troubleshooting guide is intended <strong>to</strong> highlight the most<br />
common causes of problems experienced in the field. The “most likely<br />
causes” shown for each problem are listed in rank order or likely occurrence.<br />
PROBLEM MOST LIKELY CAUSE SOLUTION<br />
Poor Gloss (Gloss Level Below Normal)<br />
Insufficient coats applied (recoat schedule off or area not<br />
properly identified as main vs secondary traffic)<br />
Thin coats of finish.<br />
Wrong scrubbing or buffing pads / brushes used (usually<br />
<strong>to</strong>o aggressive).<br />
Excessive amount of sand and grit is on floor.<br />
Scrub, rinse and apply additional coats (maintain 4-6<br />
coats)<br />
Apply in medium coats, with a tamped mop rather than a<br />
wrung-out mop.<br />
Use approve pads or brushes and follow recoat<br />
procedures. Contact your Zep Rep for proper pad use.<br />
Remove sand and grit from outside of doors.<br />
<strong>Floor</strong> not properly rinsed before recoat.<br />
Strip, properly rinse and apply new finish.<br />
Ammonia, bleach or stripping solution used in scrubber or<br />
mop bucket for routine cleaning.<br />
Dirty equipment used <strong>to</strong> apply finish (stripper mop used<br />
etc.).<br />
Tile becoming old or very porous.<br />
Additional coats applied before previous coats are dry.<br />
Improper cleaner dilutions.<br />
Use approved cleaners only.<br />
Strip properly rinse and apply new finish using clean<br />
equipment.<br />
Use sealer before finishing floor. Apply additional coats<br />
of finish.<br />
Allow next coat <strong>to</strong> dry sufficiently, if problem not solved,<br />
strip, rinse and re-apply.<br />
Always measure detergent (excess cleaner residue can<br />
cause dulling).<br />
Scuffing and Scratching of Finish Wrong scrubbing or buffing pads / brushes. Use approved pads and brushes. Consult your Zep Rep <strong>to</strong><br />
determine this requirement.<br />
Excessive dirt grit on floor.<br />
Thoroughly dust mop before cleaning.<br />
Not scrubbing or buffing enough.<br />
Some unauthorized floor finishes do not resist scuffs and<br />
scratches very well.<br />
Unequal pad pressures on twin pad scrubber / buffer.<br />
Verify areas are correctly classified as main and secondary<br />
traffic areas.<br />
Use approved floor finishes. Consult your Zep Rep <strong>to</strong><br />
determine this requirement.<br />
Make necessary adjustments <strong>to</strong> pads.<br />
S<strong>to</strong>ne and grit not picked up by au<strong>to</strong>scrubber (or mop).<br />
Grit buffed in<strong>to</strong> floor or dragged by squeegee.<br />
Dust mopping procedures not used often enough or as<br />
the initial step prior <strong>to</strong> any general daily duties.<br />
Check work area <strong>to</strong> avoid this problem. May need <strong>to</strong> dust<br />
mop again prior <strong>to</strong> buffing in problem areas (doorways<br />
etc.).
TROUBLE SHOOTING GUIDE (continued)<br />
PROBLEM MOST LIKELY CAUSE SOLUTION<br />
<strong>Floor</strong> Finish Discoloured (Yellow or Brown)<br />
New cot<strong>to</strong>n mops used <strong>to</strong> apply finish before being soaked<br />
and cleaned. Sizing solution in new mops can release and<br />
yellow floor.<br />
Not using au<strong>to</strong>matic scrubber for daily cleaning,<br />
particularly when on ultra high program prior <strong>to</strong> any<br />
buffing (grinding dirt in<strong>to</strong> finish).<br />
Damp mopping with dirty water.<br />
Excessive dirt, sand, and grit allowed <strong>to</strong> enter facility and<br />
being ground in<strong>to</strong> finish.<br />
Water trails left by scrubber.<br />
Dirty mops used <strong>to</strong> pick up water trails from scrubber<br />
leaving dirt, which can be buffed in<strong>to</strong> finish.<br />
Buffing pads contain dirt and finish accumulations.<br />
Deep scrub <strong>to</strong> remove dirt and colour. Clean mops<br />
thoroughly.<br />
Must use au<strong>to</strong>scrubber and proper pads / cleaner on daily<br />
basis; damp mopping is not sufficient.<br />
When using a mop, change water frequently and use a<br />
two pail system.<br />
Use approved mats and runners Consult your Zep Rep <strong>to</strong><br />
determine this requirement. Dust mop more often.<br />
Minimize trail with proper equipment maintenance and<br />
opera<strong>to</strong>r training.<br />
Implement proper training procedures for opera<strong>to</strong>rs. Use<br />
clean mops and change rinse water frequently.<br />
Always use clean pads; rotate or replace as necessary.<br />
Incorrect concentration of cleaner; <strong>to</strong>o much cleaner can<br />
soften finish and/or leave residue, which can hold dirt<br />
deposits. Too little cleaner will not permit adequate dirt<br />
removal.<br />
Over-treatment of oil on dust mop.<br />
Follow recommended floor care procedures.<br />
Use nylon dust mops that do not require treatment.<br />
Applying floor finish before floor has been properly<br />
scrubbed and rinsed (dirt coated in<strong>to</strong> floor finish).<br />
Getting build-up by applying finish <strong>to</strong> edges every time<br />
floor is coated (edges turning colour).<br />
Fans used <strong>to</strong> force dry floor finish resulting in dirt catching<br />
bubbles and pockets (dirt can then be buffed in<strong>to</strong> finish).<br />
Dirty mops.<br />
Contaminated floor finish. (Unused finish should never be<br />
returned <strong>to</strong> original container).<br />
Strip, rinse and re-apply floor finish.<br />
Do Not recoat outer 4-6 inches every time floor is finished.<br />
Never direct fans at floor finishes: If fans are used, aim<br />
upward for air circulation in area.<br />
Always clean mops; if dirty mops or equipment are used,<br />
strip, rinse and re-apply floor finish.<br />
Dispose of unused floor finish.<br />
Powdering of <strong>Floor</strong> Finish Applying coats <strong>to</strong>o thin. Utilize medium coats.<br />
Wrong buffing pads or brushes used (<strong>to</strong>o aggressive).<br />
<strong>Floor</strong> not rinsed before floor finish applied ; heavy cleaner<br />
residues can prevent good adhesion.<br />
Dirty buffing pads being used.<br />
Fans used <strong>to</strong> force dry floor finish: surface may dry <strong>to</strong>o<br />
quickly and not allow finish <strong>to</strong> form a good bond (good<br />
adhesion). (Also occurs with coats that are applied <strong>to</strong>o<br />
thin see above).<br />
Use recommended pads and brushes. Consult a Zep Rep<br />
for proper pads and brushes.<br />
<strong>Floor</strong> must be thoroughly rinsed before applying floor<br />
finish.<br />
Change or rotate pads during buffing and clean pads after<br />
each use.<br />
Never direct fans at floor finish; if fans are used, aim<br />
upward for air circulation in area.
TROUBLE SHOOTING GUIDE (continued)<br />
PROBLEM MOST LIKELY CAUSE SOLUTION<br />
* To test finish adhesion <strong>to</strong> floor, apply one medium coat <strong>to</strong> small area and let dry (30-40 min.) Apply good masking tape or scotch tape <strong>to</strong> finish and pull up with a quick jerk. If<br />
finish comes off with tape, you do not have good adhesion.<br />
Powdering of <strong>Floor</strong> Finish (continued)<br />
Hardeners surfacing from floor (composition floors such as<br />
Terrazzo preventing adhesion) *.<br />
Finish designed for low speed buffing is being burnished.<br />
If floor finish does not adhere, apply sealer before<br />
applying floor finish.<br />
Always match the chemicals <strong>to</strong> the buffing RPM.<br />
Finish applied before floor or previous coat dry (finish not<br />
sticking <strong>to</strong> floor) *.<br />
Stripper residue left on floor due <strong>to</strong> poor rinsing (finish<br />
not sticking <strong>to</strong> floor) *.<br />
Old floor finish not completely removed incompatibility<br />
of coatings).<br />
Fac<strong>to</strong>ry finish not stripped off new tile before finishing *.<br />
Strip, rinse, and allow floor <strong>to</strong> dry before applying floor<br />
finish.<br />
Strip, rinse, thoroughly, and re-apply floor finish.<br />
Only use approved finish. Consult your Zep Rep <strong>to</strong><br />
determine this requirement. Do Not apply hard finishes<br />
over soft buffed finishes.<br />
Strip, rinse and re-apply floor finish.<br />
Frozen floor finish (may bead up on floor during<br />
application).<br />
Do Not proceed with finish; replace with good product.<br />
Streaks in <strong>Floor</strong> Finish and / or <strong>Floor</strong> Finish<br />
Exhibiting an Alliga<strong>to</strong>r Effect<br />
<strong>Floor</strong> finish or seal not thoroughly dry before applying<br />
additional coats.<br />
Contaminated mops or pails used <strong>to</strong> apply finish (i.e. dirty<br />
strip mop used).<br />
<strong>Floor</strong> finish frozen or s<strong>to</strong>red in extreme heat.<br />
<strong>Floor</strong> finish applied over fac<strong>to</strong>ry finish on new tile *.<br />
Contaminated floor finish put back in<strong>to</strong> drum.<br />
Improperly rinsed floor before coating.<br />
Dirty mop or equipment used when applying floor finish.<br />
<strong>Floor</strong> not thoroughly scrubbed and rinsed before applying<br />
floor finish.<br />
Strip, rinse and re-apply finish. Do Not recoat if mop<br />
drags.<br />
Strip, rinse and re-apply floor finish using clean<br />
equipment.<br />
Replace damaged product. Strip, rinse and re-apply new<br />
finish.<br />
Strip, rinse and re-apply finish. Do Not use left over floor<br />
finish.<br />
Dispose of contaminated floor finish. Strip, rinse and<br />
re-apply floor finish.<br />
Rinse floor after scrubbing and stripping and before floor<br />
finish is applied.<br />
Ensure all equipment is clean before attempting <strong>to</strong> apply<br />
floor finish.<br />
Ensure that the floor is thoroughly scrubbed and rinsed<br />
before applying floor finish.<br />
<strong>Floor</strong>s Seem Slippery<br />
Silicone base products (furniture polishes, glass cleaners)<br />
getting on floor due <strong>to</strong> aerosol over-spray or accidental<br />
spills.<br />
If silicone based products are used near aisles, apply <strong>to</strong><br />
rag prior <strong>to</strong> use <strong>to</strong> reduce the chance of over-spray hitting<br />
floor. Scrub floor thoroughly <strong>to</strong> remove: if floor is still<br />
slippery after cleaning, apply a medium coat of finish over<br />
affected area.
TROUBLE SHOOTING GUIDE (continued)<br />
PROBLEM MOST LIKELY CAUSE SOLUTION<br />
<strong>Floor</strong>s Seem Slippery (continued) Ice melting compounds on floor. Clean contaminated floor (normally near entrances<br />
and at end of runners) thoroughly with clean water <strong>to</strong><br />
remove. Do Not use detergents or vinegar when spot<br />
cleaning. Control amount of ice melting chemicals used.<br />
Use approved mats and runners. Clean mats and runners<br />
occasionally with a wet-dry vacuum or wet extraction<br />
cleaner using plain water.<br />
Powder residue left on floor after burnishing.<br />
Ensure that the floor is thoroughly dust mopped.<br />
Dirt and grit on floor.<br />
Improperly treated dust mops being used, these are<br />
usually oil treated.<br />
Unauthorized floor finish on floor.<br />
Use approved floor mat and runners. Consult a Zep Rep <strong>to</strong><br />
determine this requirement.<br />
Use paraffin treated dust mops.<br />
Use approved floor finishes only.<br />
Improper detergent solution (will not remove foreign<br />
substances found on floor).<br />
Use of acids (vinegar) in cleaning water (acids will destroy<br />
the cleaning ability of detergents).<br />
Always measure the detergent and use recommended<br />
dilutions.<br />
Always measure the detergent and use recommended<br />
dilutions. Do Not add vinegar.<br />
1-877-I-Buy-Zep (428-9937)<br />
access <strong>to</strong> local branches across North America<br />
Zep Sales & Service, a unit of Zep Inc.<br />
11627 - 178 Street Edmon<strong>to</strong>n AB T5S 1N6<br />
780-453-8100 Main Switchboard<br />
1-800-313-8439 Technical Services<br />
www.zep.com