Eric lippert - Amazon Web Services
Eric lippert - Amazon Web Services
Eric lippert - Amazon Web Services

You also want an ePaper? Increase the reach of your titles
YUMPU automatically turns print PDFs into web optimized ePapers that Google loves.
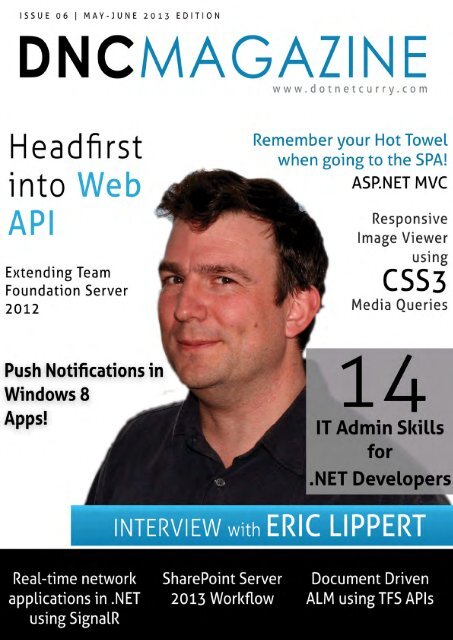
may-june 2013<br />
contents<br />
enterprise<br />
04 Essential IT Admin Skills<br />
IT Admin Skills Every .NET Developer<br />
Should Know<br />
58 Extending TFS 2012<br />
Customize process templates depending<br />
on your organization’s needs<br />
42 Sharepoint 2013 Workflow<br />
Design and deploy a workflow using Visio<br />
2013 and SharePoint Designer 2013<br />
30 Document Driven ALM<br />
Use TFS APIs with SharePoint<br />
WEB<br />
48 CSS 3 Media Queries<br />
Build a Responsive Image Viewer in<br />
ASP.NET MVC<br />
62 Head First Into ASP.NET <strong>Web</strong> API<br />
Introduction to ASP.NET <strong>Web</strong> API and<br />
building Media Formatters<br />
24 Hot Towel SPA in ASP.NET MVC 4<br />
A peek around Hot Towel - a Single<br />
Page Application template in MVC<br />
cutting edge<br />
72 Push Notifications in Windows<br />
Push Notificatons in Windows 8 Store<br />
Apps using Azure Mobile <strong>Services</strong><br />
14 Real-time network apps in .NET<br />
Real-time system using the SignalR<br />
48<br />
interview<br />
36 Interview with <strong>Eric</strong> Lippert<br />
Up, Close and Personal with the<br />
C# Legend and a great guy<br />
overall, <strong>Eric</strong> Lippert<br />
2 | DNCmagazine www.dotnetcurry.com
LETTER FROM<br />
tHE EDITOR<br />
Hello Technology lovers, welcome to the sixth edition of DNC Magazine. The tech world is alive with volatility, Apple’s stocks are<br />
suddenly down, Microsoft’s stocks are up and Google has turned wearable computing into reality with the limited launch of its<br />
ground breaking project ‘Glass’.<br />
Back at DNC Magazine, as always, we have new tech-topics, new authors and lots of exclusive content. This month we have Fanie<br />
Reynders joining our exclusive club of contributors, with his quickfire introduction to the Hot Towel SPA template for ASP.NET MVC.<br />
Welcome Fanie!<br />
We talk to C# legend <strong>Eric</strong> Lippert in our interview section and get deep into his journey at Watcom, Microsoft and as a member of<br />
the C# language team. Don’t miss out on the C# tricks he shares with us at the end of the interview! Omar Al Zabir shares some<br />
golden IT Administration rules for all who are serious about their production deployments. His insights come from years of hands<br />
on experience. This one is a must read! Then we have ALM MVP, Subodh Sohoni sharing with us various TFS Customization options.<br />
Author, MVP and C# lover, Filip Ekberg does a real deep dive into Real Time systems and shows us how build one in .NET using<br />
SignalR. We have Pravinkumar showing us what’s new and cool with Workflows in SharePoint 2013.<br />
We also have contributions from ASP.NET MVP, Suprotim Agarwal on Responsive Design and CSS and <strong>Web</strong> API Content formatters<br />
and one contribution from yours truly on Azure Mobile <strong>Services</strong> and Push notifications.<br />
Hope you enjoy the content and do keep the feedback coming!<br />
Sumit Maitra<br />
Editor in Chief<br />
dnc<br />
www.dotnetcurry.com<br />
mag<br />
Editor In Chief • Sumit Maitra<br />
sumitmaitra@a2zknowledgevisuals.com<br />
Editorial Director • Suprotim Agarwal<br />
suprotimagarwal@dotnetcurry.com<br />
Art Director • Minal Agarwal<br />
minalagarwal@a2zknowledgevisuals.com<br />
Contributing Writers • Fanie Reynders, Filip<br />
Ekberg, Omar Al Zabir, Pravinkumar Dabade,<br />
Subodh Sohoni, Sumit Maitra, Suprotim<br />
Agarwal<br />
Advertising Director • Suprotim Agarwal<br />
suprotimagarwal@dotnetcurry.com<br />
Interview Feature • <strong>Eric</strong> Lippert<br />
Twitter @eric<strong>lippert</strong><br />
Image Credits • Rob Gruhl, Bob Archer,<br />
Neersighted<br />
Next Edition• 1st July 2013<br />
www.dotnetcurry.com<br />
Windows, Visual Studio, ASP.NET, WinRT & other Microsoft products & technologies are trademarks of the Microsoft group of companies. ‘DNC Magazine’ is an independent publication and is not affiliated with,<br />
nor has it been authorized, sponsored, or otherwise approved by Microsoft Corporation<br />
DNcmagazine www.dotnetcurry.com | 3
it admin skills<br />
essential IT admin<br />
Skills for<br />
.net developers<br />
planning<br />
budgeting<br />
automation<br />
You have spent a great deal of time building an awesome .NET<br />
software. Now you need to deploy it on production hardware,<br />
but how Omar Al Zabir shares some essential IT Admin skills<br />
that every .NET developer should have before going live.<br />
You have built an awesome .NET application. Now you have to<br />
deploy it and scale it to millions of users. How do you choose the<br />
right production architecture for 99.99% availability How do you<br />
make sure your website is configured for optimum performance<br />
How do you regularly tune the database to keep it in top notch<br />
shape without downtime In this article, I will share some Admin<br />
skills that I have learnt while building my startup from hundreds<br />
to million of users and how I have overcome the most frequent<br />
production challenges, high volume .NET web apps face.<br />
01<br />
designing a reliable super cheap production architecture<br />
Say you are still a garage startup and<br />
money is your primary concern. You<br />
want to spend the least amount of<br />
money to buy hardware, yet you want<br />
to have a decent reliability around<br />
your setup. So even if one server goes<br />
down, your website should be able to<br />
recover within minutes.<br />
Let’s look at the cheapest possible<br />
production architecture money can<br />
buy, that offers some decent reliability<br />
and survives a complete server failure.<br />
See the diagram here:<br />
4 | DNCmagazine www.dotnetcurry.com
Highlights from this architecture:<br />
• Both servers are Windows 2008 R2 web/standard editions to<br />
save cost.<br />
• Both servers have SQL Server <strong>Web</strong> Edition installed provided<br />
by hosting company. If you want to buy your own servers, then<br />
you have to purchase Standard Edition.<br />
• One server is called Primary Database Server that has the<br />
databases on it.<br />
• The other standby server has standby copies of the databases<br />
configured through SQL Server’s Log Shipping feature.<br />
• Both servers have IIS and web app is running on both.<br />
• Both servers have Windows Network Load Balancing<br />
configured to load-balance the web traffic between both<br />
servers. NLB is configured on port 80 to distribute web traffic<br />
equally on both servers. Alternatively, you can ask your hosting<br />
provider to give you two load balanced ports on their firewall<br />
or load balancer.<br />
• Both servers have two disks and Windows Disk Mirroring is<br />
configured to provide a software RAID1 solution. This way, both<br />
disks have the exact same data. Even if one disk fails, there will<br />
be no disruption.<br />
This configuration gives you pretty decent reliability. If one<br />
server fails, the web traffic will be automatically diverted to the<br />
other server. But the SQL Server Standby databases have to be<br />
manually brought online and you need to change the<br />
web.config on the surviving server, to point to the surviving<br />
SQL Server.<br />
However, you should go with this super cheap<br />
configuration only if you are a garage Startup and you are<br />
funding from your own pocket. If you want decent reliability<br />
with high performance and availability too, you need to go for<br />
the next architecture.<br />
02<br />
Decent production architecture for 99% availability<br />
The first thing you need to do is<br />
separate out the databases into their<br />
own servers. Whenever you put SQL<br />
Server on a server, you will see all<br />
your RAM gets consumed too quickly.<br />
It is designed to allocate all available<br />
memory.<br />
So, IIS and SQL Server will be<br />
fighting for RAM unless you go to the<br />
SQL Server Management Studio and<br />
fix the maximum memory limit. But<br />
you shouldn’t do that unless you are<br />
desperate. You should put SQL Server<br />
on its own server with as much RAM as possible. The best thing would be to<br />
have the same amount of RAM as the size of data in your database. But RAM is<br />
expensive!<br />
DNcmagazine www.dotnetcurry.com | 5
03<br />
Super reliable hosting architecture for 99.99% availability<br />
This is where things gets really expensive but rock solid. If you<br />
have a business critical application that earns millions per year<br />
and has to be up and running 24x7, you need an<br />
architecture that looks like this:<br />
you calculate how many servers you need to serve the traffic<br />
as per the projected volume, always ensure you can serve that<br />
traffic even if two servers are down.<br />
There is enough redundancy at every level. First, there are<br />
redundant firewalls. Yes, that’s the last thing you think about<br />
– having a standby firewall. But once we had this nightmare<br />
where our one and only firewall was down and as a result, the<br />
entire website was down. We learnt the hard way to have a<br />
passive firewall since then. Then you have enough web server<br />
availability so that even if 2 of them are down, you will have no<br />
issues serving the traffic.<br />
A common mistake IT guys make while designing production<br />
architecture is – they do capacity analysis to find out how many<br />
servers they need and they add one server to it, and buy those<br />
many servers. But when you have one server down, you might<br />
have to release a critical patch on your web app. During that<br />
time, you will have to take one server out at a time and patch<br />
them one after another. At that moment, you will have to serve<br />
traffic while both the servers are down. That’s why whenever<br />
The other important addition in this architecture is SAN –<br />
Storage Area Network. Hosting providers have their SAN, which<br />
is like a monstrous collection of disks controlled by super<br />
awesome disk controllers. Servers connect to SAN via fibre<br />
channel for lightning fast Disk I/O. You purchase volumes from<br />
SAN. For e.g., you ask for 5x200 GB volumes from the SAN. Then<br />
you get those volumes available in your server and the server<br />
can read- write on those volumes. SAN is very expensive. Only<br />
databases and highly critical data are stored on SAN.<br />
SAN offers the maximum reliability and performance. They are<br />
faster than local disks. SAN can offer you complete disk fail<br />
protection. Moreover, SAN offers on-the-fly increase of disk<br />
volumes. If your database is growing faster than you can handle<br />
and you are about to run out of disk space, you can increase the<br />
size of the volume, on-the-fly.<br />
04<br />
Checklist for creating IIS websites<br />
Here are a couple of things we always do while creating a website<br />
on IIS:<br />
• Create each website in its own pool, using App Pool identity.<br />
This creates a new user for each app pool. This way, we can give<br />
granular permissions to certain App Pool users and do not have to<br />
meddle with the NETWORK_SERVICE account.<br />
• Create the App_Data folder and allow write access to<br />
6 | DNCmagazine www.dotnetcurry.com
NETWORK_SERVICE, IUSR and IIS APPPOOL\.<br />
• Enable Static and Dynamic Compression.<br />
• Turn on Content Expiration from IIS > <strong>Web</strong>site > HTTP headers<br />
> Common Headers. Set to 30 days. This makes all the static file<br />
cacheable on the browser. You will get significant reduction in web<br />
traffic when you turn this on.<br />
• From IIS > <strong>Web</strong>site > Bindings, we map both www.yourdomain.<br />
com and yourdomain.com. Alternatively we setup a redirector<br />
website to redirect traffic on yourdomain.com to www.yourdomain.<br />
com. The later is better because this way users are never<br />
browsing your website over yourdomain.com and they will always<br />
be on www.yourdomain.com. If your website is such that users<br />
copy and share links to pages frequently, you should go for such<br />
redirection.<br />
• From IIS Logging, turn on “Bytes Sent” and “Bytes Received” fields.<br />
Change creating log files to hourly ,if you have heavy traffic. This<br />
way each log file size will be within the manageable size and if<br />
you have to parse the log files, it won’t take too long. Whenever<br />
we have to diagnose slow pages, we first look into the IIS log<br />
and ensure if a page is taking a long time to execute, and it is not<br />
because of large “Bytes Sent”.<br />
• Map 404 to a well defined error page from IIS > <strong>Web</strong>site > Error<br />
Pages > 404. You can set it to redirect to your websites homepage.<br />
• Copy website code to each server and synchronize the files last<br />
modification date and time. This way, each file will have the exact<br />
same last modified date time on each server. That means, if a<br />
browser gets jquery.js file from webserver1, and it tries to hit<br />
webserver2 on another page visit and asks webserver2 about the<br />
last modified datetime of jquery.js, it will get the exact same date<br />
time and it won’t download the whole file again.<br />
• Create a static website hosted on a different domain. Eg.<br />
Staticyourdomain.com and have all static files served from this<br />
domain. It prevents large ASP.NET cookies from being sent over<br />
static files.<br />
These are some techniques we have learnt over the years to avoid<br />
common mistakes and tune websites to serve well cached traffic to<br />
the browser, delivering faster page load performance.<br />
05<br />
Removing unwanted HTTP headers<br />
There are some HTTP response headers that make hackers lives<br />
easier in order to detect what version of IIS you are running on<br />
and what .NET version you are on. You can remove most of these<br />
headers using web.config. But there are some that cannot be<br />
removed using the config file and you need to write a custom<br />
HttpModule to remove those from every response; especially the<br />
ETag header that IIS 7 has made it impossible to remove via any<br />
configuration.<br />
Removing ETag is one of the best ways to get better caching from<br />
browser for the static files on your website. Here’s a HTTP Module<br />
that can remove the headers that you don’t need:<br />
public class RemoveASPNETStuff : IHttpModule<br />
{<br />
public void Init(HttpApplication app)<br />
{<br />
app.PostReleaseRequestState += app_<br />
PostReleaseRequestState;<br />
}<br />
void app_PostReleaseRequestState(object sender, EventArgs<br />
e)<br />
{ var headers = HttpContext.Current.Response.Headers;<br />
headers.Remove(“Server”);<br />
headers.Remove(“X-AspNet-Version”);<br />
headers.Remove(“ETag”);<br />
}<br />
Before the HttpModule:<br />
Cache-Control:private<br />
Content-Length:445<br />
Content-Type:text/html; charset=utf-8<br />
Date:Sun, 31 Mar 2013 11:19:36 GMT<br />
Server:Microsoft-IIS/8.0<br />
Vary:Accept-Encoding<br />
X-AspNet-Version:4.0.30319<br />
After the HttpModule:<br />
Cache-Control:private<br />
Content-Length:445<br />
Content-Type:text/html; charset=utf-8<br />
Date:Sun, 31 Mar 2013 11:16:03 GMT<br />
Vary:Accept-Encoding<br />
DNcmagazine www.dotnetcurry.com | 7
06<br />
Synchronizing File Date Time across multiple servers<br />
When you deploy the same website on multiple webservers, you<br />
end up having each file getting different last modified date. As a<br />
result, each IIS (on different servers) produces different ETag for the<br />
static files. If a user is hitting different servers for the same file (due<br />
to load balancing), each IIS is responding with a different ETag and<br />
thus the browser downloading the same file over and over again. If<br />
you have 3 servers, the same user has most likely downloaded the<br />
same file thrice. This gives poor page load performance.<br />
Moreover, if you want to mirror two or more locations using one<br />
location as a base, not only do you need to copy the same files, but<br />
you also need to set the same Create Date and Last Modified Date<br />
on the files. Otherwise they aren’t true mirrors. There are various<br />
use cases where you need a complete mirror not only at file<br />
content level, but also at file date time level.<br />
Here’s a powershell script that will do the job for you:<br />
# Path of the base folder. File date times in this folder<br />
is used as the base.<br />
$SourceFolder = “.Folder1”<br />
# Put all the other locations here. These locations must<br />
have the same folder structure as the base<br />
$DestFolders = @(‘.Folder2’, ‘.Folder3’)<br />
function sync($sourcePath, $destinationPath)<br />
{<br />
$sourceFiles = [System.IO.Directory]::GetFiles(<br />
$sourcePath);<br />
foreach ($sourceFileName in $sourceFiles)<br />
{<br />
$sourceFile = Get-Item $sourceFileName<br />
$destFilePath = Join-Path -Path $destinationPath<br />
-ChildPath $sourceFile.Name<br />
$destFile = Get-Item $destFilePath<br />
if ($destFile.Length -eq $sourceFile.Length)<br />
{<br />
$destFile.LastWriteTime = $sourceFile.<br />
LastWriteTime;<br />
$destFile.CreationTime = $sourceFile.<br />
CreationTime;<br />
Write-Host (“SYNCED: “ + $sourceFileName + “<br />
-> “ + $destinationPath)<br />
}<br />
else<br />
{<br />
Write-Host (“SIZE DOES NOT MATCH: “ +<br />
$sourceFileName + “ -> “ + $destinationPath)<br />
}<br />
}<br />
$childFolders = [System.IO.Directory]::GetDirectories<br />
($sourcePath);<br />
foreach ($childFolderName in $childFolders)<br />
{<br />
$childFolder = Get-Item $childFolderName<br />
$destFolderPath = Join-Path -Path<br />
$destinationPath -ChildPath $childFolder.Name<br />
$destFolder = Get-Item $destFolderPath<br />
sync $childFolder.FullName $destFolder.FullName<br />
}<br />
}<br />
$Source = Get-Item $SourceFolder<br />
foreach ($destFolderName in $DestFolders)<br />
{<br />
$destFolder = Get-Item $destFolderName<br />
sync $Source.FullName $destFolder.FullName<br />
}<br />
07<br />
Automate Production deployment with scripts<br />
When you have multiple webservers running your website, it<br />
becomes difficult and time consuming to deploy code on each<br />
server manually. You have to take one server out of the load<br />
balancer at a time, deploy the new code, warm it up, and put it back<br />
in to the load balancer. Then take another server out and keep<br />
repeating the steps until all the webservers have the latest code.<br />
There are always chances of human errors screwing up one server,<br />
which becomes very difficult to figure out once the site is up and<br />
running and you hear users reporting random problems.<br />
8 | DNCmagazine www.dotnetcurry.com
Here’s a scripted approach we take to deploy code on production:<br />
assumes the website is up and running. But if it gets some other<br />
response, then it assumes the site is down and it takes the<br />
webserver out of the rotation. It stops sending any more traffic to<br />
it, until it gets the alive.txt response.<br />
Figure 4 Deploy code on production via script<br />
So during deployment, we rename this file to say dead.txt so that<br />
load balancer stops sending traffic to this webserver. Then we give<br />
it some time to drain out the existing traffic. When the server has<br />
finished running all the in-flight requests, we see Requests/Sec<br />
showing as 0 from the typeperf command. Then the code<br />
deployment starts. There are various ways to do it. You can have the<br />
production binaries stored in a network share and then do a xcopy<br />
from that share into the server. Or you can have network binaries<br />
stored in subversion and download the binaries from subversion.<br />
This is not a complete script for deploying sites on production, but<br />
a concept. I want to show you the ideas behind such automation.<br />
You need to add real code to deploy your website’s codebase, as it<br />
suits you.<br />
First, there’s a file on the website called alive.txt. We configure our<br />
load balancer to hit this file every second to make sure the<br />
webserver is alive. If Load Balancer gets a HTTP 200, then it<br />
Then the script looks for .sql files in a specific folder and it runs<br />
them in proper order. We name the .sql files as 001, 002, 003 so<br />
that the exact sequence is maintained. The script connects to SQL<br />
Server using osql and executes the sql scripts one by one. Once the<br />
deployment is over, it renames the dead.txt back to alive.txt. Then<br />
load balancer detects the file is available again and it puts the<br />
webserver back into rotation.<br />
08<br />
Create readonly copy of databases using SQL Server Log<br />
SQL Server Log shipping is a very easy to use technology to<br />
maintain a standby database server in order to survive a server<br />
failure. But you can use log shipping to create readonly copy of<br />
databases where you can divert readonly queries. This is a great<br />
way to scale out your database. You don’t have to rely on only one<br />
server to serve all database traffic. You can distribute traffic across<br />
multiple servers.<br />
servers via log shipping, where a readonly copy of the database is<br />
maintained. You can configure log shipping to ship changes made<br />
in the primary database every minute or every 15 mins.<br />
All the other servers have the database in readonly mode and it<br />
can serve SELECT queries. If you have an ecommerce website, then<br />
you have a product catalog that changes not so often. You can then<br />
divert all queries to the catalog tables to the log shipped servers<br />
and distribute the database load.<br />
You should never produce MIS reports or take batch extracts from<br />
the primary database where the INSERT, UPDATE, DELETE are<br />
happening. You should always do these on log shipped standby<br />
databases.<br />
Here you have a primary server where all the INSERT, UPDATE,<br />
DELETE happens. Then the database is copied to several other<br />
DNcmagazine www.dotnetcurry.com | 9
09<br />
Housekeeping databases<br />
If you have transactional tables where records get inserted very<br />
frequently and unless you remove older records from the table, you<br />
run out of space within weeks; then it is a challenge to periodically<br />
purge such tables, without bringing down the tables. If you have<br />
a 24x7 website, then it becomes very difficult to find a slot where<br />
you can take an outage and do a purge that takes on an average of<br />
15-30 mins to finish. During purge operations, the table gets locked<br />
and all other queries on that table times out. So, you need to find<br />
a way to purge records consuming the least amount of database<br />
resource.<br />
delete from @BatchIds<br />
Set @rowCount = @@rowCount;<br />
Print ‘Deleted ‘ + convert(varchar(10), @rowcount) + ‘<br />
rows...’<br />
waitfor delay ‘00:00:05’<br />
End;<br />
go<br />
Checkpoint 30; -- simple recovery, if full - put tlog<br />
backup here<br />
Go<br />
There are various ways to do this but we found the following<br />
approach having the least footprint on the database:<br />
Declare @batchsize int; Set @batchsize = 1000;<br />
set transaction isolation level read uncommitted; set<br />
nocount on;<br />
declare @temp_rows_to_delete table (ID int primary key)<br />
insert into @temp_rows_to_delete select ID FROM<br />
VeryLargeTable WHERE ID < 4000<br />
Declare @rowCount int; Set @rowCount = 1;<br />
declare @BatchIds table (id int primary key)<br />
While @rowCount > 0<br />
Begin<br />
-- Pick the IDs to delete and remove them from #temp_rows<br />
delete top(@batchsize) from @temp_rows_to_delete<br />
OUTPUT deleted.ID into @BatchIds<br />
delete from VeryLargeTable WHERE ID IN (SELECT ID FROM @<br />
BatchIds)<br />
The idea here is to do a steady small batch of delete at a time until<br />
all the records we want to purge are deleted. This query can go<br />
on for hours, not a problem. But during that time, there will be no<br />
significant stress on the database to cause other queries to timeout<br />
or degrade significantly.<br />
First we set the isolation level. This is absolutely a key thing to<br />
do. This isolation level tells SQL Server that the following query<br />
does not need locking. It can read dirty data, does not matter. So,<br />
there’s no reason for SQL Server to lock records in order to ensure<br />
the query gets properly committed data. Unless you are a bank, you<br />
should put this in all your stored procs and you will see 10 times<br />
better throughput sometimes from your database, for read queries.<br />
Next we read the row IDs from the source table and store in a table<br />
variable. This is the only time we are going to do a SELECT on the<br />
source table so that SQL Server does not have to scan the large<br />
table again and again.<br />
Then we keep picking 1000 row IDs at a time and delete the rows<br />
from the table. After each delete, we give SQL Server 5 seconds to<br />
rest and flush the logs.<br />
10<br />
Tuning database indexes<br />
Over the time, data in tables get fragmented as data gets inserted,<br />
updated and deleted. If you leave the tables alone, the indexes will<br />
get slower and slower resulting in slower queries. If you have<br />
millions of records on a table and you start having significant<br />
fragmentation on the tables, over the time, queries will get so slow<br />
that they will start timing out.<br />
In order to keep the tables fast and lean, you need to regularly<br />
rebuild the indexes. Here’s a SQL snippet that will run through<br />
all the indexes on the database and see if the indexes are heavily<br />
fragmented. If they are, then it will issue an index rebuild on them.<br />
Ref: http://www.mssqltips.com/sqlservertip/1165/managing-sqlserver-database-fragmentation/<br />
10 | DNCmagazine www.dotnetcurry.com
When you run the query, it looks like this:<br />
You should do this during weekends when your traffic is lowest.<br />
However, there’s a catch. SQL Server Standard Edition does not<br />
allow online index rebuild. This means during index rebuild, the<br />
index will be offline. So, most of your queries will timeout. If you<br />
want to have the index online during the rebuild, then you will<br />
need SQL Server Enterprise Edition, which is expensive if you are<br />
on a tight budget.<br />
11<br />
Monitoring SQL Server for performance issues<br />
Windows Performance Monitor is a great way to monitor<br />
performance of your databases. Just go to Start > Run, type<br />
“perfmon” and you will get the performance monitor. From there,<br />
click on the + sign and add the following counters:<br />
These are some key counters that can give you an indication about<br />
how well your database is performing and if there’s a performance<br />
problem, what is the bottleneck.<br />
For example, here you see very high Full Scans/Sec. This means you<br />
have queries that are not using index and scanning the entire table.<br />
So, you need to investigate which queries are causing high IO and<br />
see their execution plan to find out where they are missing index.<br />
You can run SQL Server Standard Reports by right clicking on the<br />
server on SQL Server Management Studio and selecting Reports<br />
and then the Top 10 IO and Top 10 CPU consuming queries. They<br />
will show you the worst performing queries. That’s your starting<br />
point to fine tune.<br />
The other most significant one is Lock Requests/Sec. It should<br />
ideally be zero. But if you have more than 100, then it is usually<br />
bad. It is an indication that you need to put SET TRANSACTION<br />
ISOLATION LEVEL READ UNCOMMITTED in your queries.<br />
12<br />
Sending mails from websites<br />
We usually use the SmtpClient to send emails via some SMTP<br />
server. Usually you have a common email server for your company<br />
and your websites connect to that email server to send mails. But<br />
if you configure SmtpClient to connect to the mail server, then it<br />
is going to open a connection to the email server every time you<br />
call the Send() function. Establishing a SMTP session, uploading the<br />
email message, then the attachments is a very chatty process. There<br />
are many back and forth communications that happens between<br />
the webserver and email server. It makes your pages to slow down<br />
when you try to synchronously send email. If your SMTP server<br />
goes down, your website throws error and the messages are lost.<br />
Instead of configuring SMTP server settings in web.config, you<br />
should configure to use the local IIS SMTP Service. On each<br />
webserver, install the IIS SMTP Service and configure it to relay<br />
the messages to the company’s email server. This way your website<br />
will connect to the local server and queue the messages into the<br />
IIS SMTP service. Since this process happens within the server, it<br />
will be a lot faster than connecting to a distant email server. IIS<br />
SMTP service will gradually pick the messages and send them to<br />
the company’s email server.<br />
An even better approach is to use the IIS SMTP service pickup<br />
DNcmagazine www.dotnetcurry.com | 11
folder. SmtpClient can just serialize the whole message in a pickup<br />
folder usually located at C:\INETPUB\MAILROOT\PICKUP. This way<br />
even if the IIT SMTP Service is down, it will still be able to write the<br />
message and complete the execution of the page. Then IIS SMTP<br />
service will pick up the messages from this folder and send them<br />
one by one.<br />
All you have to do is have this in your web.config:<br />
<br />
<br />
<br />
<br />
<br />
13<br />
Regular server restart<br />
Sometimes we have bad code on production that causes memory<br />
leaks, crashes the app pool randomly, allocates COM Objects but<br />
does not release them gracefully, opens TCP connections and does<br />
not close them properly. This causes things to go bad at operating<br />
system level and you end up with an unhealthy server. You start<br />
having weird problems and crashes. Sometimes IIS stops<br />
responding. Sometimes remote desktop does not work. At that<br />
point, you have no choice but to restart Windows.<br />
Especially if you outsource development to cheapest possible<br />
resource, you will have no choice but to regularly restart servers.<br />
We have seen such problems occurring so many times that<br />
nowadays we regularly restart windows servers at least once every<br />
quarter.<br />
14<br />
Diskcleanup<br />
Windows downloads gigantic windows updates, creates gigabytes<br />
of crash dump when app pool crashes, fills up temporary folders<br />
with gigabytes of garbage and so on. If you have limited storage<br />
on your webservers, for example if you are on those cheap virtual<br />
servers that comes with 20 GB space, then you need to schedule<br />
regular diskcleanup.<br />
Fortunately Windows comes with a pretty decent cleanup tool.<br />
First you run: Cleanmgr /sageset:###<br />
Then you schedule a task in Windows Task Scheduler to run the<br />
following command:<br />
Cleanmgr /sagerun:###<br />
Here you put the same number that you have used to record the<br />
settings. When you configure the task, ensure you have these<br />
settings turned on:<br />
Put some number there. It will run Disk Cleanup tool in a record<br />
mode where it will let you select what you want to clean. Then<br />
when you click OK and exit, it will remember those settings against<br />
that number.<br />
Figure: Diskcleanup in record mode<br />
This will give Cleanmgr the necessary privilege to delete files from<br />
protected folders.<br />
Omar is the Chief Architect of SaaS Platform<br />
at BT in London, UK. He is a Microsoft MVP,<br />
CodeProject MVP and author of an O’Reilly title<br />
-“Building <strong>Web</strong> 2.0 Portal with ASP.NET 3.5”.<br />
Omar has several popular Open Source projects<br />
including Dropthings, CodeUML, PlantUMLEditor. Omar’s<br />
specialization on Performance and Scalability techniques can<br />
be found in his blog – http://omaralzabir.com<br />
12 | DNCmagazine www.dotnetcurry.com
DNC Magazine<br />
www.dotnetcurry.com/magazine<br />
13
signalr<br />
real-time network<br />
applications in .net<br />
MS MVP, Filip Ekberg explains the difference between real-time and near real-time<br />
systems. He then shows us how to build a near real-time system using the .NET SignalR<br />
framework.<br />
In the real world, there are mentions of real-time systems all over<br />
the place. These systems are often defined as something that<br />
needs to respond in just a couple of milliseconds, irrespective of<br />
the load. Even a couple of milliseconds in some cases is not<br />
acceptable because real-time ideally is and should be, latency free.<br />
This is really hard to achieve depending on the type of system<br />
that you are working on. In most cases, real-time systems have<br />
operations that are more prioritized than others. For example<br />
think of a military fighter jet. If you’re in one of these and you<br />
really need to eject your seat, a latency of two seconds would<br />
really not be acceptable. These type of systems have certain<br />
exceptions or interrupts that override normal flow of operations.<br />
These interrupt requests thus go in front of anything else and are<br />
processed almost as soon as they occur.<br />
As you might have guessed, these type of real-time systems are<br />
not created using a managed language such as C# mostly because<br />
of memory management (garbage collection), that introduces an<br />
‘unpredictable’ latency. Though, intelligent buffering can mitigate<br />
some of the latency to achieve what is commonly referred to as<br />
“near real-time” responses in a system; C# still isn’t choice of<br />
language for mission-critical real-time systems.<br />
Distributed components and “near Real-Time”<br />
applications in .NET<br />
Now that we’ve gotten the definition of a real-time system out of<br />
the way, what type of near real-time applications can we create in<br />
.NET The perception from end users is that when something<br />
responds fast, it’s real-time. There’s another factor that matters<br />
here as well and that is how long does our data travel and how<br />
many places is it distributed to.<br />
“Near Real-Time” responses in <strong>Web</strong><br />
Applications<br />
Let’s say a web application is running in a geographically close<br />
vicinity (say same Network or even same City) and you ask it to<br />
process something. If it returns results in a few hundred<br />
milliseconds or thereabouts, it is considered near real-time. But if<br />
it takes more than a couple of hundred milliseconds, it loses the<br />
‘perception’ of near real-time. On the contrary, if the request was<br />
sent off to a server in Japan and you’re located in France where<br />
the result was returned in say five hundred milliseconds instead of<br />
two hundred, it would still be considered fast and near real-time.<br />
Now let’s add another parameter to this and introduce multiple<br />
interactions. This can be multiple users using and processing data<br />
at the same time, where all the data is presented to every<br />
interaction point. One example of such interaction is Google Docs<br />
feature where it lets you create and edit text documents<br />
simultaneously with your peers.<br />
As you might understand, these aren’t true real-time systems but<br />
the perception of instant updates makes it feel very much so.<br />
There are parameters that we cannot control such as network<br />
latency, disconnects from other clients and so forth.<br />
These end up in actual real-time systems as well, but in those<br />
applications, the components are usually much closer together.<br />
Real-time means different things to different people, but now that<br />
we have a common ground to stand on, let’s head on and look at<br />
how we did this prior to today in .NET.<br />
14 | DNCmagazine www.dotnetcurry.com
Real-time network<br />
applications in the past<br />
using .NET<br />
There are multiple ways to solve different scenarios regarding<br />
real-time systems using .NET. You might have found yourself<br />
using raw sockets to have full control over everything you do. The<br />
biggest problem is that if you are creating a real-time application<br />
using .NET and rely on sockets to help you, you most likely write a<br />
nice wrapper or library that you can use.<br />
As with anything else, this ends up in lots and lots of different<br />
libraries to solve real-time systems over sockets. There’s certainly<br />
nothing wrong with going down on the lowest possible layer,<br />
but sometimes abstractions can reduce complexity and speed up<br />
development.<br />
Next up, we need to connect to this server and to do this, we have<br />
the following code.<br />
var client = new Socket(SocketType.Stream, ProtocolType.<br />
Tcp);<br />
client.Connect(new IPEndPoint(IPAddress.<br />
Parse(“127.0.0.1”), 3425));<br />
var buffer = new byte[1024];<br />
while (true)<br />
{<br />
Console.WriteLine(“Connected to server!”);<br />
client.Receive(buffer);<br />
Console.WriteLine(Encoding.Default.GetString(buffer));<br />
}<br />
As you might have noticed, there are a couple of problems with<br />
the server and the client. First of all, the buffer is big and we don’t<br />
handle data sent which is more than 1024 bytes. This would need<br />
to be fixed if this was a real world application. Writing up all this<br />
boilerplate code for a real-time application, can be cumbersome<br />
and we tend to do the same thing over and over again. The next<br />
step when we have a client and a server, is to come up with a<br />
“protocol” to use and now I am not talking about the<br />
actually DTOs that are sent, but in what way they are sent.<br />
If you want to handle disconnects, reconnects and broadcasts,<br />
you’ll first and foremost need a basic list of all connected and<br />
possibly disconnected clients as you can see above. There’s<br />
absolutely nothing wrong with this, but so far we’ve just started<br />
to talk about the most basic things. Imagine what this adds up to<br />
once the real-time system grows.<br />
Next up, you need a unified language that all your clients and<br />
servers use, so that you can ensure that each entry point gets what<br />
they should.<br />
The following code shows how to create a basic server that listens<br />
on TCP for clients to connect and once they connect, it simply<br />
sends a message to the client greeting it.<br />
var socket = new Socket(SocketType.Stream, ProtocolType.<br />
Tcp);<br />
socket.Bind(new IPEndPoint(IPAddress.Parse(“127.0.0.1”),<br />
3425));<br />
socket.Listen(5000);<br />
while (true)<br />
{<br />
var client = socket.Accept();<br />
Console.WriteLine(“Client connected!”);<br />
client.Send(Encoding.Default.GetBytes(“Hello!”));<br />
}<br />
This all adds up and in the end you will end up with something<br />
that someone else has also written lots of times before. Therefore<br />
it is now time to present the solution of repetitive boilerplate for<br />
near real-time communication between Client and Server – a.k.a.<br />
SignalR.<br />
Creating real-time network<br />
applications with SignalR<br />
SignalR is a real-time network library that has an awesome and<br />
well-engineered abstraction over sockets. Instead of having to<br />
write all the socket code yourself, you use SignalR to fire up a<br />
server which is as simple as saying the port number out loud,<br />
a couple of times. Then you have very useful features that will<br />
let you direct messages to one client, multiple clients or to just<br />
broadcast the entire message.<br />
In SignalR, you have abstractions that will even help you to do<br />
things even more magically. This actually means that there is a<br />
“raw” way for working with SignalR and there’s a more easy way to<br />
work with clients and the server.<br />
SignalR has fall back mechanisms built in on different protocols<br />
and technologies. For instance, if you set up a server, and the<br />
client only has support for long polling; that is what is going to be<br />
used.<br />
DNcmagazine www.dotnetcurry.com | 15
What is Long polling<br />
This technique is the most basic low level one that will<br />
“always” work and the theory behind it, is as follows. When a<br />
client connects, it asks for a message from the server. If the<br />
server responds, then the client initiates the connection again<br />
until a response is received. But if there is no response sent<br />
from the server and the request times out, the client will then<br />
reconnect and continue asking for a response. This is called long<br />
polling because the client polls the server for answers all the<br />
time and the response timeout is long.<br />
There are other newer technologies that can be used, such as<br />
<strong>Web</strong>Sockets; this will however only be used when the host and<br />
the client has support for it. The host SignalR can be hosted in<br />
multiple ways. The most common way is to host SignalR in an<br />
ASP.NET application, but you can also self-host SignalR with OWIN.<br />
As you might have understood, SignalR can be used exactly as you<br />
would use sockets, but since the data is sent in a uniform way, the<br />
client and server will always understand each other. This makes it<br />
much easier to develop with.<br />
Basically what you can do is to set up different messages that the<br />
server understands and then once these messages are received<br />
from the clients, certain actions are invoked. Think of this as<br />
events that you trigger on the server from the client.<br />
and somehow identify each connection as an individual. This could<br />
be done by asking to authenticate when starting the<br />
communication; authentication such as using Twitter or Facebook.<br />
These authentications could then on multiple occasions be used<br />
to tie a connection id to an actual individual. We will look more at<br />
how the connection id and information regarding it is processed in<br />
the next sections.<br />
With an understanding of what SignalR is, we can go on and look<br />
at the different possibilities that we have to host servers and<br />
connect with clients.<br />
Raw (Persistent) connections<br />
The raw connections in SignalR is pretty much as working with<br />
sockets, but with a very nice abstraction on top of sockets. What<br />
it really means is that it is the lowest abstraction level inside<br />
SignalR that you can work with and it gives you as much power as<br />
if you were working directly with sockets.<br />
In order to get started, we need to fire up a new project and setup<br />
SignalR. First off, create a new ASP.NET Empty <strong>Web</strong> Application.<br />
Once this project is created, open up the package manager<br />
console (NuGet) to write the following:<br />
Install-Package Microsoft.AspNet.SignalR<br />
This will install whatever is needed to setup our project as a<br />
SignalR based server. To setup a class to use as a server, create a<br />
new file called MyServer and add the following to the file:<br />
using System;<br />
using System.Linq;<br />
using Microsoft.AspNet.SignalR;<br />
public class MyServer : PersistentConnection<br />
{<br />
}<br />
As visualized in the figure, a message is sent from a client to a<br />
server and then this message triggers an action, or an event per<br />
se, which in return sends a message to the client with a response.<br />
This response message could have been broadcasted to all the<br />
connected clients, one client or multiple clients.<br />
You might ask yourself, how can you distinguish between different<br />
clients and this is a very good question. With each connection, you<br />
get an ID that identifies the current connection. This identification<br />
number, which really is a Guid is used when you send a message<br />
to the client or a bunch of clients.<br />
It is good practice to save each connection id that is connected<br />
Inheriting from Persistent connection allows us to override some<br />
very useful methods. Before we do that though, we need to<br />
configure our application to know that this class is going to be our<br />
server. Create the file global.asax and add the following:<br />
public class Global : System.<strong>Web</strong>.HttpApplication<br />
{<br />
protected void Application_Start(object sender,<br />
EventArgs e)<br />
{<br />
RouteTable.Routes.MapConnection(“”, “/”);<br />
}<br />
}<br />
16 | DNCmagazine www.dotnetcurry.com
Now we can start adding things to the server. Open up MyServer<br />
again and override a method called OnConnected. This method<br />
will be invoked each time a client connects to the server. These<br />
methods will all return Task so you can work with this in an<br />
asynchronous manner.<br />
The first parameter gives us information about the current request<br />
such as the user, data posted and things like that. The second<br />
parameter identifies the connection based on a connection id<br />
(Guid). This id can be used to direct messages to the client.<br />
WriteLine(data); };<br />
myServer.Start();<br />
You might need to change the port for your SignalR server. Once<br />
you’ve done that, fire up a couple of instances of this application.<br />
As you can see, the first one will get as many greetings as the<br />
number of clients. This is because we are using broadcasting to<br />
send the message to all the clients, as you can see below<br />
There’s a property in PersistentConnection called Connection that<br />
we can use to either broadcast or send data to all or one client. If<br />
we want to broadcast to everyone except certain clients, we can<br />
do this as well because Broadcast takes a second parameter which<br />
tells us which clients to exclude.<br />
In order to broadcast a message to each client that connects, we<br />
do the following:<br />
protected override Task OnConnected(IRequest request,<br />
string<br />
connectionId)<br />
{<br />
return Connection.Broadcast(“Hello there!”);<br />
}<br />
The same goes for sending a message to a specific client except<br />
Send takes another parameter that defines what client is<br />
receiving the message. As you might understand, this is quite low<br />
level, and there’s no protocol defined for how the messages will<br />
look or anything like that. You’ll need to figure that out yourself<br />
when using persistent connections. So far, it’s still a lot nicer than<br />
working directly with sockets. It’s time to start the project, as you<br />
might see it will throw an error because your web browser does<br />
not speak the language the server understands, so just ignore this<br />
for now.<br />
Connection to the server<br />
To test if the message really is broadcasted to all clients, we need<br />
to setup a couple of clients. Create a new console application<br />
called MyClient and fire up the package management console<br />
again and write the following:<br />
Install-Package Microsoft.AspNet.SignalR.Client<br />
Now open up Program.cs and add the following to your main<br />
method:<br />
You’ll notice that each message is sent instantly to each client<br />
making it feel very close to real-time. Remember though that this<br />
is on a local system and that we do indeed have some overhead in<br />
a real-world scenario.<br />
Persistent connections give you great power but you’re not getting<br />
much more from the framework other than a nice abstraction on<br />
top of the underlying transportation. As mentioned previously,<br />
SignalR will detect which transportation is most suitable and use<br />
that.<br />
Hubs<br />
If you’re not too comfortable working with something raw as<br />
persistent connection, you really don’t have to worry. With SignalR<br />
comes another abstraction called Hubs. This is an abstraction on<br />
top of Persistent Connections which will make everything a lot<br />
easier. If it wasn’t already easy enough, right<br />
With Persistent Connections and larger applications, you might<br />
imagine that you’d have to create a message loop which<br />
translates the data sent to the server and calls the correct<br />
delegate for that event. With Hubs, this is completely done for you.<br />
You can simply create methods that you register to certain events<br />
and are raised by clients.<br />
To set it up, create a new empty web application project called<br />
HubsServer and install SignalR into it using the package<br />
management console as you saw before.<br />
var myServer = new Connection(“http://localhost:8082/”);<br />
myServer.Received += (string data) => { Console.<br />
Create a new class called MyHubServer and inherit from Hub. This<br />
will let you, pretty much like we saw with Persistent Connection,<br />
DNcmagazine www.dotnetcurry.com | 17
override methods such as OnConnect, OnDisconnect and<br />
OnReconnect. We will leave these out of the picture this time<br />
though. First let us define what the hub is going to do; in this case<br />
we want it to handle adding and retrieving information about<br />
customers. Therefore we will have three methods with the<br />
following signatures:<br />
• void Add(Customer customer)<br />
• IEnumerable All()<br />
• Customer Get(int id)<br />
As you can see, these look like they could be a part of any<br />
customer handling API out there. The customer entity is very<br />
simple, all it has is a name and an id which we store in an<br />
in-memory list. This should end up looking like the following:<br />
using Microsoft.AspNet.SignalR;<br />
using System;<br />
using System.Collections.Generic;<br />
using System.Linq;<br />
namespace HubsServer<br />
{<br />
public class MyHubServer : Hub<br />
{<br />
public static IList Customers { get; set; }<br />
public void Add(Customer customer)<br />
{<br />
if (Customers == null) { Customers = new<br />
List(); }<br />
Customers.Add(customer);<br />
}<br />
public IEnumerable All()<br />
{<br />
return Customers;<br />
}<br />
public Customer Get(int id)<br />
{<br />
if (Customers == null) return null;<br />
return Customers.FirstOrDefault(x => x.Id == id);<br />
}<br />
}<br />
public class Customer<br />
{<br />
public int Id { get; set; }<br />
public string Name { get; set; }<br />
}<br />
}<br />
Before we can test this out, we need to tell our application to<br />
register the SignalR hubs in the application. This is done by<br />
adding the following to Global.asax:<br />
using System;<br />
using System.Linq;<br />
using System.<strong>Web</strong>.Routing;<br />
namespace HubsServer<br />
{<br />
public class Global : System.<strong>Web</strong>.HttpApplication<br />
{<br />
protected void Application_Start(object sender,<br />
EventArgs e)<br />
{<br />
RouteTable.Routes.MapHubs();<br />
}<br />
}<br />
}<br />
If you run this by hitting F5 in Visual Studio, it will bring up a<br />
browser for you. Ignore the 403 Error that you get and append the<br />
following to the URL: /signalr/hubs<br />
This will show you a generated JavaScript that SignalR has<br />
prepared for us and if you scroll down to the bottom of the script,<br />
you’ll see something very interesting:<br />
proxies.myHubServer.server = {<br />
add: function (customer) {<br />
return proxies.myHubServer.invoke.apply(proxies.myHub-<br />
Server, $.merge([“Add”],<br />
$.makeArray(arguments)));<br />
},<br />
all: function () {<br />
return proxies.myHubServer.invoke.apply(proxies.myHub-<br />
Server, $.merge([“All”],<br />
$.makeArray(arguments)));<br />
},<br />
get: function (id) {<br />
return proxies.myHubServer.invoke.apply(proxies.myHub-<br />
Server, $.merge([“Get”],<br />
$.makeArray(arguments)));<br />
}<br />
};<br />
As you can see, there are three definitions for methods that<br />
exists on the server and the signatures corresponds with what<br />
we created in our C# class! Another very neat thing here is that it<br />
changed the method names to camel case to correspond with the<br />
JavaScript coding guidelines.<br />
18 | DNCmagazine www.dotnetcurry.com
Connecting to the Hub<br />
We can try this out in the same application as we have the server<br />
running, by adding a new HTML page for adding and displaying<br />
customers. Add a file called Client.html and add the following to<br />
the header section to include the SignalR generated JavaScript,<br />
jQuery and the SignalR common JavaScript:<br />
<br />
<br />
<br />
<br />
The actual form will look very simple, it will only have two fields<br />
and two buttons like you can see below in figure 5<br />
myHub.server.all().done(function (result) {<br />
var resultDiv = $(“#result”);<br />
resultDiv.html(“”);<br />
resultDiv.append(“”);<br />
$(result).each(function (index, item) {<br />
resultDiv.append(“(“+item.Id+”) “+ item.Name +<br />
””);<br />
});<br />
resultDiv.append(“”);<br />
})<br />
});<br />
This hooks up a click handler to the refresh button and if we have<br />
any elements in the customer array, it will be displayed nicely on<br />
the page. In order to test that, we need to add some elements. This<br />
can be done in an equal manner by running the add() method we<br />
created before and passing it a JSON object like this:<br />
The HTML itself is equally simple:<br />
<br />
Id:<br />
Name: <br />
<br />
<br />
<br />
<br />
<br />
$(“#add”).click(function () {<br />
myHub.server.add({ id: $(“#id”).val(), name: $(“#name”).<br />
val() });<br />
});<br />
Last but not least, we can initiate the connection to the server:<br />
$.connection.hub.start();<br />
Run this and ‘Add’ some names and click on Refresh. This will give<br />
us an archaic looking list as we can see in Figure 6.<br />
When the document has finished loading, we want to hook up<br />
SignalR and perform some magic. First we get a reference to<br />
myHubServer through the $.connection object like this:<br />
var myHub = $.connection.myHubServer;<br />
We can then use myHub to send and receive messages from the<br />
server. For instance, in order to call all() we simply do this:<br />
myHub.server.all();<br />
There’s a common pattern here so we can append the method<br />
done() after our calls, meaning that once all is finished, we can<br />
execute a method with the result data. To do this and then add a<br />
new list with the items returned from the server to the page, we<br />
can simply do the following:<br />
$(“#refresh”).click(function () {<br />
Notice what happens if you open up a new tab in your browser,<br />
navigate to the same html file and hit refresh, you’ll get a list of<br />
all the names! Aside from the network latency and other factors,<br />
this is so far a one-way-push-real-time network application!<br />
What about if we want to notify the clients once a new customer<br />
has been added and refresh automatically We could do this quite<br />
easily. Let’s start off by adding an event handler on the client side<br />
called refreshCustomers like this:<br />
myHub.client.refreshCustomers = function (result) {<br />
// Same code here as refresh click handler<br />
};<br />
DNcmagazine www.dotnetcurry.com | 19
Then on the server side, all we have to do is call this method<br />
using the dynamic property All on the Clients property. Clients lets<br />
us direct messages to one or many clients and in this case we will<br />
run the event on each client and pass the corresponding data to<br />
them:<br />
Clients.All.RefreshCustomers(Customers);<br />
asynchronous, we need to move this to a separate method, to keep<br />
it simple:<br />
using Microsoft.AspNet.SignalR.Client.Hubs;<br />
using System;<br />
using System.Linq;<br />
using System.Threading.Tasks;<br />
The property All is dynamic and we can run the methods that we<br />
think are on the client and if they are not present, there won’t be<br />
any invocation. We’re now as close to a real-time network<br />
application as we can be as we have the push to server and push<br />
to clients.<br />
It was previously mentioned that this could have been any<br />
customer handling system out there and as you’ve seen, it could<br />
as well have been the customer model in our application that we<br />
pass around. We wouldn’t really need to do any changes to those<br />
since SignalR supports complex DTOs.<br />
Connecting to the Hub in a .NET Console Application<br />
We’ve now seen how we can create a web-browser based client<br />
but what if we want to use this in our .NET Applications that do<br />
not run in the browser Let’s take a look at something similar to<br />
what we did with Persistent Connection.<br />
Create a new Console Application called MyHubClient and install<br />
the SignalR client using the package management console like<br />
this:<br />
Install-Package Microsoft.AspNet.SignalR.Client<br />
The code that follows is very similar to what we saw in JavaScript.<br />
We first create a connection to where the SignalR server is and<br />
then we create a proxy for the hub that we are going to use like<br />
this:<br />
var connection = new HubConnection(“http://localhost:3448/”);<br />
var myHub = connection.CreateHubProxy(“MyHubServer”);<br />
namespace MyHubClient<br />
{<br />
class Program<br />
{<br />
static void Main(string[] args)<br />
{<br />
RunHubClient();<br />
while (true) ;<br />
}<br />
static async Task RunHubClient()<br />
{<br />
var connection = new HubConnection(“<br />
http://localhost:3448/”);<br />
var myHub = connection.CreateHubProxy(“MyHubServer”);<br />
// Connect to the hub<br />
connection.Start();<br />
}<br />
}<br />
}<br />
The infinite while loop after the method call is just there so that<br />
the application won’t exit. Now in order to ask for a specific<br />
customer, we could use the generic Invoke method and tell it that<br />
we will receive a dynamic object like this:<br />
var customer = await myHub.Invoke(“Get”,<br />
customerId);<br />
This will invoke the method Get on the server passing the value of<br />
whatever customerId read from the console. When the<br />
invocation is done, it will return to the continuation block beneath<br />
it and execute whatever code is there.<br />
This is equivalent to doing $.connection.myHubServer in<br />
JavaScript.<br />
Next up we’re ready to invoke the methods. This client will ask for<br />
a specific customer id and list that id. In order to invoke a method<br />
on the server, there’s a method on the myHub object that is called<br />
Invoke. All these methods are asynchronous and await able,<br />
precisely as they are in JavaScript as well.<br />
As the entry point of the application cannot be marked as<br />
This method can end up looking like this:<br />
static async Task RunHubClient()<br />
{<br />
var connection = new HubConnection(“http://localhost:3448/”);<br />
var myHub = connection.CreateHubProxy(“MyHubServer”);<br />
connection.Start();<br />
string line = null;<br />
int customerId = 0;<br />
20 | DNCmagazine www.dotnetcurry.com
while ((line = Console.ReadLine()) != null)<br />
{<br />
if (int.TryParse(line, out customerId))<br />
{<br />
var customer = await myHub.Invoke(“Get”,<br />
customerId);<br />
if (customer == null) Console.WriteLine(“No customer<br />
found”);<br />
else Console.WriteLine(“Server found a customer with<br />
name {0}”, customer.Name);<br />
}<br />
}<br />
}<br />
the web interface, we see that the console application is notified<br />
when a new customer is added and then prints the amount of<br />
customers. The count is taken from the parameter that is sent to<br />
the action while the data is passed all the way from the SignalR<br />
hub.<br />
Because marking void methods asynchronous is a very bad<br />
practice, we’ve set it to return a task so that we can follow the<br />
operation if we’d like to. The method will read a line from the<br />
command line and try to parse it as an integer, then it will either<br />
tell us the customer name or tell us that there are no customers<br />
at all.<br />
Fire up both the console application and the website and first<br />
ask for a customer before you’ve added a customer, then add a<br />
customer in the web interface and ask again as you can see in the<br />
Figure below:<br />
Figure 8<br />
Connecting to the Hub in WinRT using HTML & JavaScript<br />
We’ve seen how to connect to hubs using a web based<br />
client as well as a normal .NET application running in Windows,<br />
but what about Windows 8, more specifically WinRT<br />
Unfortunately it’s not as simple as just including the JavaScript<br />
on the server in a WinRT application because WinRT Applications<br />
don’t allow loading external resources. But it’s not too difficult<br />
either.<br />
We’d also like the console application to subscribe to the event<br />
where the client is notified when a customer is added. This is<br />
easily done through the hub proxy just as we did with the<br />
invocation of a method, but this time we use the method called<br />
On instead. This method defines that we are listening for a certain<br />
message. The first parameter is the message that we are<br />
listening to and the second is the action to run when the message<br />
is received.<br />
This needs to be added before we start the connection and the<br />
code looks like this:<br />
myHub.On(“RefreshCustomers”, (customers) => {<br />
Console.WriteLine(“New customers added, total amount<br />
of customers {0}”, customers.Count);<br />
});<br />
If we run this as you see in Figure 8 and add some customers in<br />
First off create a new blank JavaScript<br />
Windows Store application, you can call this<br />
MyWinRTHubClient. We can’t simply install<br />
SignalR using NuGet this time, instead we<br />
need to manually add some necessary files.<br />
We need the following files for it to work,<br />
these can be copied from the server project<br />
we created earlier:<br />
• jquery.signalR-1.0.1.min.js<br />
• jquery-1.6.4.min.js<br />
Copy these files over to the js directory in the Windows Store<br />
project and reference them in the default HTML file created for<br />
the project. The JavaScript that we’re adding is really not that<br />
different from what we saw in the normal web-browser client; we<br />
can even use the same HTML!<br />
When the document has finished loading, we want to create a hub<br />
connection and create a proxy for the SignalR server. This looks<br />
similar to what we saw before, but notice that it’s not entirely the<br />
same:<br />
var connection = $.hubConnection(‘http://localhost:3448/’);<br />
DNcmagazine www.dotnetcurry.com | 21
connection.start();<br />
var myHub = connection.createHubProxy(“myHubServer”);<br />
The JavaScript to listen for events and to invoke methods look<br />
much more similar to what we saw in the normal console<br />
application rather than what we saw in the earlier web client.<br />
To invoke a method, we simply call myHub.invoke(methodName,<br />
value) and it will look like this:<br />
myHub.invoke(“add”, ({ id: $(“#id”).val(), name:<br />
$(“#name”).val() }));<br />
Compare this to what we saw earlier in the web-browser client:<br />
myHub.server.add({ id: $(“#id”).val(), name: $(“#name”).<br />
val() });<br />
Same goes for listening for events, we can simply use myHub.<br />
Conclusion<br />
While “real” real-time network applications goes much deeper<br />
than what we’ve explored now; you should now have a good<br />
feeling about how you could tackle something that should feel as<br />
near as real time as possible with as little hassle as possible.<br />
We’ve seen how we can use SignalR to create low level messaging<br />
channels using Persistent Connections and then move over to the<br />
abstraction on top of it using Hubs to create much nicer<br />
interactions between the servers and the clients.<br />
Using SignalR truly makes life easier when needing to receive,<br />
push or subscribe to data/messages on a remote server and if<br />
you’ve done network programming earlier, you certainly know that<br />
this comes as a blessing<br />
Download the entire source code from Github at<br />
bit.ly/dncm6-siglr<br />
on(methodName, action) like this:<br />
myHub.on(‘refreshCustomers’,function (result) {<br />
refreshCustomers(result);<br />
});<br />
This means that there were actually very few changes in the<br />
WinRT version in order to get this to work properly. Check the<br />
source code at the end of this article to see and compare the<br />
entire html file in the WinRT application.<br />
Filip is a Microsoft Visual C# MVP and a Senior<br />
Software Engineer with a big heart for<br />
programming in C#. Most recently, Filip is the<br />
author of the book C# Smorgasbord, which<br />
covers a vast variety of different technologies,<br />
patterns & practices. You can get a copy of the<br />
ebook for only €4.99 by following this link:<br />
http://shorturl.se/smorgasbord. Follow Filip on twitter @<br />
fekberg and read his articles on fekberg.com<br />
Running this code in the simulator is similar to what you can see<br />
in the figure below. Just as you might imagine, the refresh, add and<br />
event, works just as expected.<br />
22 | DNCmagazine www.dotnetcurry.com
DNC Magazine<br />
www.dotnetcurry.com/magazine<br />
23
aSP.NET MVC<br />
Remember your Hot Towel<br />
when going to the SPA<br />
Technology evangelist Fanie Reynders pokes around in<br />
Hot Towel - a Single Page Application template in ASP.NET<br />
MVC 4; and shows how easy it is to kick start your next<br />
project for the modern web.<br />
Single Page<br />
Applications<br />
(SPAs) allows us<br />
to have the fluid<br />
user experience<br />
of a desktop app,<br />
together with the<br />
scalability of a<br />
web app<br />
Ultimately, the goal of any app is to give the user the best<br />
experience possible. The way old-fashioned websites work,<br />
causes disruption in this user experience flow. Performing a<br />
simple task with traditional web apps causes the entire page to<br />
post-back to the server, have a cup of coffee and return back to<br />
the client with (hopefully) a different screen.<br />
Single Page Applications (SPAs) are one of the latest trends in<br />
web technology today. It allows us to have the fluid user<br />
experience of a desktop app together with the scalability of a<br />
web app<br />
Getting started<br />
new SPA template that allows developers to build rich<br />
interactive client-side web apps using HTML5, CSS3 and some<br />
JavaScript libraries. The ASP.NET team provided one template<br />
and the Community jumped in with five more.<br />
One of the community driven templates you can use is Hot<br />
Towel. It was built by John Papa. It comes power-packed with<br />
everything you need out of the box and provides you with<br />
modular code structure, powerful data management and easy<br />
elegant styling. The template gives you everything you need to<br />
get started with SPA so you can focus on your app and not the<br />
“other stuff”. Download the VSIX here: bit.ly/151Mk9o (direct<br />
download).<br />
Bundled with the ASP.NET and <strong>Web</strong> Tools 2012.2 Update is a<br />
24 | DNCmagazine www.dotnetcurry.com
Pre-requisites<br />
• Visual Studio 2012 or Visual Studio Express 2012 for <strong>Web</strong><br />
• ASP.NET <strong>Web</strong> Tools 2012.2 update<br />
Let’s do this, shall we<br />
In Microsoft Visual Studio 2012, select ‘File’ > ‘New’ > ‘Project…’<br />
and then pick the ‘ASP.NET MVC 4 <strong>Web</strong> Application’ template<br />
from the <strong>Web</strong> section. Name the project something interesting<br />
and click ‘OK’. You will be presented by the following New MVC 4<br />
Project dialog:<br />
This includes:<br />
• App_Start – Start-up server side logic<br />
• Content – Usually contains images and css<br />
• Controllers – Page & API Controllers<br />
• Models – Model & View Model classes<br />
• Scripts – JavaScript files<br />
• Views – All the pages for the application<br />
In addition, we notice that HotTowel SPA provides an ‘App’<br />
folder which contains a collection of modules that<br />
encapsulates functionality and declares dependencies on<br />
other modules. Here is where all the magic happens. Your<br />
entire application basically lives in this domain.<br />
The dialog above may be familiar to those of you that are well<br />
versed in ASP.NET MVC, but after installing the ASP.NET <strong>Web</strong><br />
Tools 2012.2 update, you will notice a new template has been<br />
added to the list: ‘HotTowel Single Page Application’. Pick it and<br />
click ‘OK’.<br />
The SPA HotTowel template is also available on NuGet:<br />
Durandal is a cross-device, cross-platform client framework<br />
and designed to make SPAs easy to create.<br />
You can find out more by heading here:<br />
http://nuget.org/packages/HotTowel/<br />
Poking around the structure<br />
After Visual Studio did its thing, you will notice that the project<br />
has a similar structure than the good old stock standard ASP.NET<br />
MVC 4 project.<br />
The presentation logic for the views resides in the<br />
‘viewmodels’ folder. This is a common MVVM pattern.<br />
In the ‘views’ folder, you will see pure HTML files for your<br />
application. This is mainly driven by templating functionality<br />
of Knockout (a JavaScript library for MVVM).<br />
View by feature<br />
The SPA HotTowel template comes power-packed with the<br />
following functionality:<br />
• ASP.NET MVC<br />
• ASP.NET <strong>Web</strong> API<br />
• ASP.NET <strong>Web</strong> Optimization for bundling and minification<br />
• Breeze.js for rich data management<br />
• Durandal.js for view composition, app life cycle and<br />
navigation<br />
• Knockout.js for data bindings<br />
DNcmagazine www.dotnetcurry.com | 25
• Require.js for modularity<br />
• Toastr.js for notifications (pop-up messages)<br />
• Twitter Bootstrap for styling<br />
Several of Durandal’s modules are defined in Main.js to help<br />
kick start the process, the ‘define’ statement helps resolve<br />
module dependencies so they are available within the context.<br />
4 Easy steps to get building on HotTowel<br />
1. Add your custom server-side code (preferably ASP.NET <strong>Web</strong><br />
API and/or Entity Framework)<br />
2. Create your viewmodels in the ‘App/viewmodels’ folder<br />
3. Create your screens (views) using HTML in the ‘App/views’<br />
folder and implement the Knockout data bindings in your<br />
views<br />
4. Update the navigation routes in ‘shell.js’<br />
Walkthrough<br />
Index.cshtml<br />
Looking in the ‘Views/HotTowel’ folder, we find a view called<br />
‘Index.cshtml’ that serves as the starting point for the MVC<br />
application. In a SPA (as the name implies), we are only using<br />
one page to host a collection of views for our application.<br />
The ‘Index.cshtml’ view contains all the meta-tags, style sheet<br />
and JavaScript references you would expect. Let’s examine the<br />
‘body’ tag:<br />
<br />
@Html.Partial(“_splash”)<br />
<br />
@Scripts.Render(“~/scripts/vendor”)<br />
<br />
The ‘applicationHost’ div is the host for the HTML views. Next<br />
it renders the ‘vendor’ bundle that contains all the external<br />
vendor JavaScript references.<br />
The entrance point for the application’s code is specified by<br />
referencing Require.js and assigning the ‘main’ data-attribute<br />
to find the start-up JavaScript logic.<br />
define([‘durandal/app’, ‘durandal/viewLocator’,<br />
‘durandal/system’, ‘durandal/plugins/router’,<br />
‘services/logger’],<br />
function (app, viewLocator, system, router, logger)<br />
{<br />
// Enable debug message to show in the console<br />
system.debug(true);<br />
app.start().then(function () {<br />
toastr.options.positionClass =<br />
‘toast-bottom-right’;<br />
toastr.options.backgroundpositionClass =<br />
‘toast-bottom-right’;<br />
router.handleInvalidRoute = function (route,<br />
params) {<br />
logger.logError(‘No Route Found’, route, ‘main’,<br />
true);<br />
};<br />
// When finding a viewmodel module, replace the<br />
// viewmodel string with view to find it partner<br />
// view.<br />
router.useConvention();<br />
viewLocator.useConvention();<br />
// Adapt to touch devices<br />
app.adaptToDevice();<br />
//Show the app by setting the root view model for<br />
// our application.<br />
app.setRoot(‘viewmodels/shell’, ‘entrance’);<br />
});<br />
});<br />
Views<br />
All the views are found in the ‘App/views’ folder and only<br />
contains pure HTML files. The ‘shell.html’ contains the master<br />
layout of our application (similar to the ‘_Layout.cshtml’) and<br />
all of the other views will be composed somewhere inside<br />
this.<br />
Main.js<br />
This the start-up code for your application and contains the<br />
navigation routes, the start-up view definition and any<br />
bootstrap logic you may want to implement when the<br />
application initially fires up.<br />
3 regions are used in the layout view: A header, content area<br />
(section) and footer. Each of these regions will be loaded with<br />
content from other views when requested.<br />
<br />
<br />
26 | DNCmagazine www.dotnetcurry.com
<br />
<br />
<br />
<br />
<br />
<br />
<br />
<br />
<br />
In ‘nav.html’ is an example of how Knockout.js is leveraged<br />
for rich model binding:<br />
<br />
<br />
<br />
Hot Towel SPA<br />
<br />
<br />
<br />
<br />
<br />
<br />
<br />
<br />
<br />
<br />
<br />
activate: activate,<br />
title: ‘Home View’<br />
};<br />
return vm;<br />
function activate() {<br />
logger.log(‘Home View Activated’, null, ‘home’, true);<br />
return true;<br />
}<br />
});<br />
<strong>Services</strong><br />
All the application specific services are found in the<br />
‘App/services’ folder. HotTowel comes standard with the<br />
‘logger.js’ service responsible for logging messages and also<br />
displaying it on the screen as toast notifications. The ‘services’<br />
folder is the ideal place to put logic like data-retrieval for<br />
instance.<br />
Running the template<br />
Out of the box, HotTowel is ready to run. Just hit F5 and you’ll<br />
get:<br />
ViewModels<br />
The application’s viewmodels are found in the ‘App/viewmodels’<br />
folder. Inside the ‘shell.js’, ‘home.js’ and ‘details.js’ are<br />
properties and functions bound to ‘shell.html’, ‘home.html’ and<br />
‘details.html’ respectively. For example, let’s explore ‘home.html’:<br />
<br />
<br />
<br />
And ‘home.js’:<br />
define([‘services/logger’], function (logger) {<br />
var vm = {<br />
Hands on example<br />
Let’s say you want to create a page called ‘Tweets’ that shows<br />
the latest tweets from DotNetCurry.<br />
Implement the service<br />
We will need some kind of service that will be responsible<br />
for retrieving tweets from Twitter, given a certain search term.<br />
Right-click the ‘App/services’ folder and add a new JavaScript file<br />
called ‘twitter.js’ with the following contents:<br />
DNcmagazine www.dotnetcurry.com | 27
define(function () {<br />
var tweetModel = function (user, image, tweet) {<br />
this.user = user;<br />
this.tweet = tweet;<br />
this.image = image;<br />
};<br />
var model = {<br />
loadTweets: load,<br />
};<br />
return model;<br />
function load(query, list) {<br />
return $.ajax({<br />
url: “http://search.twitter.com/search.jsonq=” +<br />
query,<br />
crossDomain: true,<br />
dataType: “jsonp”<br />
}).done(function (data) {<br />
$.each(data.results, function (i, d) {<br />
list.push(new tweetModel(d.from_user,<br />
d.profile_image_url, d.text));<br />
});<br />
});<br />
}<br />
});<br />
The service exposes a function called ‘loadTweets’ that expects<br />
a query and a list object. Given the parameters, it will<br />
asynchronously load tweets with the given search query and<br />
populate the list object which must be observable by Knockout.<br />
Create the ViewModel<br />
Now we need to consume our Twitter service. Right-click the<br />
‘App/viewmodels’ folder and add a new JavaScript called<br />
‘tweets.js’ with the following contents:<br />
define([‘services/logger’, ‘services/twitter’], function<br />
(logger, twitter) {<br />
var vm = {<br />
activate: activate,<br />
title: ‘Tweet results for “DotNetCurry”’,<br />
tweets: ko.observableArray([])<br />
};<br />
return vm;<br />
function activate() {<br />
twitter.loadTweets(“dotnetcurry”, vm.tweets);<br />
logger.log(‘Tweet page activated’, null, ‘tweets’,<br />
true);<br />
return true;<br />
}<br />
});<br />
Notice how we resolve dependencies using the ‘define’ function.<br />
In this case, I need to use the logger service and our twitter<br />
service situated in ‘services/logger’ and ‘services/twitter’<br />
respectively.<br />
One of the properties the model comprises of, is ‘tweets’. Notice<br />
that it is an observable array, which means Knockout will be<br />
handling the real-time change tracking.<br />
On the model activation, we use the Twitter service to load<br />
tweets with query “dotnetcurry” as well as passing in the<br />
observed tweet list object (from our model).<br />
Create the View<br />
Now for the Tweet page. Right click the ‘App/views’ folder and<br />
add a HTML page with the name ‘tweets.html’ containing the<br />
following HTML:<br />
<br />
<br />
<br />
<br />
<br />
<br />
<br />
<br />
<br />
<br />
<br />
<br />
<br />
<br />
For each tweet in the model, it will create a list item tag<br />
containing an image of the user including his/her name as well<br />
as the tweet that was posted.<br />
*Note that I am using Bootstrap’s styling to accomplish the nice<br />
effects as well as my own custom styles.<br />
28 | DNCmagazine www.dotnetcurry.com
Wire up the navigation<br />
Conclusion<br />
The last thing we must do is to tell the shell about the new<br />
page. In the ‘App/viewmodels/shell.js’ file add the map of the<br />
tweet page on the boot function:<br />
function boot() {<br />
router.mapNav(‘home’);<br />
router.mapNav(‘details’);<br />
router.mapNav(‘tweets’);<br />
log(‘Hot Towel SPA Loaded!’, null, true);<br />
return router.activate(‘home’);<br />
}<br />
Let it run!<br />
The power of SPAs are great and endless and the new HotTowel<br />
SPA template is a great way to get started. As application<br />
developers, we don’t want to worry about the boring plumbing<br />
but be able to quickly start working with the fun stuff. This<br />
template allows us to do just that!<br />
HotTowel really makes it easy to create fast, durable, modular,<br />
cross-browser and sexy Single Page Applications with rich<br />
navigation and data access functionality. This is definitely on<br />
the tech-stack for my next web app<br />
You can download the entire code from Github here<br />
bit.ly/dncm6-ht<br />
After hitting F5, you’ll notice a new menu item ‘tweets’. After<br />
clicking it, we are presented with the tweet page that we just<br />
created:<br />
Fanie Reynders is a Microsoft Certified<br />
Professional from South Africa. Being a web<br />
technology evangelist in his own right, he<br />
has been developing on the Microsoft stack<br />
for over 9 years. Follow him on Twitter<br />
@FanieReynders and read his blog on<br />
bit.ly/ZiKLT5<br />
DNcmagazine www.dotnetcurry.com | 29
Team Foundation Server<br />
document driven alM<br />
using tfs apis<br />
VS ALM MVP Subodh Sohoni explains how to use TFS APIs in collaboration with the<br />
SharePoint platform, so that documents drive the Application Lifecycle Management<br />
processes.<br />
tfs is<br />
awesome<br />
Microsoft Team Foundation Server is one of the best products<br />
for Application Lifecycle Management. It does an excellent<br />
job of planning, monitoring, tracking and controlling various<br />
artifacts that we come across, while managing the application<br />
development. It treats all those artifacts as work items that are<br />
records in SQL Server and stores the data and metadata of those<br />
artifacts. For example, it stores the User Story as<br />
descriptive narration of a scenario, which is the data part of that<br />
user story and it also stores the status of that user story, which is<br />
the metadata part of the same user story. This schema gives us<br />
a unified view of these artifacts like user stories, requirements,<br />
tasks, risks, issues, test cases, bugs and many more. It is common<br />
to find projects that are driven by these artifacts in the form of<br />
work items. Change of the metadata of an artifact like status of<br />
a work item from New – Active – Resolved – Closed moves the<br />
project forward in small steps.<br />
At this point now, we must accept that although work items<br />
conveniently provide unified view of the artifacts, it is also<br />
common practice in the industry to store the data in the form of<br />
document at some other repository and store only the metadata<br />
in TFS. For example, requirements in details may be stored in<br />
the “Requirements Document” whereas each requirement may<br />
have an associated work item of type Requirement or User Story<br />
or PBI to it. Traditionally, people find it easier to work with<br />
documents, edit them with the help of excellent tools like<br />
MS Office and store them in a repository like a file system or<br />
SharePoint Libraries. Many a times, I have seen projects in which<br />
the application development is not driven by work items, but are<br />
driven by the documents themselves stored outside TFS.<br />
30 | DNCmagazine www.dotnetcurry.com
Typically, a project starts when a Vision document is created and<br />
approved. That document may include a Vision Statement, overall<br />
scope of the project and the organization of the team. Once this<br />
document is approved, the project kick starts. The Team then<br />
collects the requirements and a requirement document is<br />
created. The raw requirements may come in the form of Minutes of<br />
the Meeting, Emails or a document created by the customer. This<br />
requirement document goes through a process of refinements and<br />
approvals. At the end of that process, it is finalized so that initial<br />
requirements / user stories / PBIs can be added in the TFS. A link<br />
back to the requirement document is inserted in each of these work<br />
items. A similar process is carried out for architecture of the<br />
solution where design documents and diagrams are the driving<br />
force. Approval of these architectural artifacts triggers the<br />
construction (development) phase of the project. We may assume<br />
that if the team follows one of the Agile methodologies, these<br />
architectural documents may not exist, but they do exist to a<br />
certain extent. Iteration zero of any project that follows Agile<br />
creates an overall architectural strategy for the solution and that<br />
is documented. Any phase change in the project is documented<br />
regardless of methodology that is being followed.<br />
it is approved.<br />
2. Link another list of documents to an approval workflow, so that a<br />
document like a requirement document (SRS) is created – reviewed<br />
– approved by the authorized team members.<br />
3. When a document is finalized, appropriate work items should get<br />
created with the required metadata in the appropriate team project<br />
in TFS.<br />
4. When a requirement is added in the team project, a set of tasks<br />
should get spawned to implement that requirement.<br />
In this case, we will first focus on the vision document and then a<br />
requirement document as the driver. Processing the requirement<br />
document creates an additional complexity that is, a requirement<br />
document may (and usually does) contain multiple requirements.<br />
We will need to read those requirements and create appropriate<br />
work items for each requirement. This will require that the structure<br />
of the requirement document should be predefined using a<br />
template. This type of template is a common practice.<br />
We will take a case where the documents are stored in SharePoint<br />
list that works as the document repository. TFS stores the metadata<br />
in the form of work items for the same documents. These work items<br />
can be used for creating hierarchies and for the purpose of<br />
reporting. What we would like to achieve, is a workflow like this:<br />
We begin by creating a library of documents in the portal that is at<br />
the team project collection level. This library will be used to host<br />
the ‘Vision document’. We name that document library as ‘Project<br />
Initiation Documents’ and keep a template of such documents in the<br />
library. Permissions to this library are set in such a way that only the<br />
people who are involved<br />
in the project creation<br />
can access it. We<br />
create two columns for<br />
this library using ‘Library<br />
Settings’ page. One of<br />
them is a simple one<br />
line text property named<br />
as ‘Team Project Name’.<br />
This property allows<br />
the initiator to assign<br />
a name to the team<br />
project. Second column<br />
represents status of the<br />
document which can be<br />
- Needs Approval<br />
- Approved<br />
- Needs Rework<br />
1. When a Vision document is approved in the SharePoint list,<br />
trigger the process to create a new team project in TFS. Name of the<br />
team project should be given as a property of the document when<br />
For this coulmn, we select the type as Choice and provide these<br />
values as available options.<br />
DNcmagazine www.dotnetcurry.com | 31
Now we will create a workflow in Visual Studio 2012. To do so, we<br />
select the project type ‘SharePoint 2010 Project’. We create this<br />
project to program a workflow that will give us a chance to run our<br />
code when the Vision document is approved by the authorized<br />
person. We will not go in too many details of how to create a<br />
workflow (You can find a detailed walkthrough of that http://msdn.<br />
microsoft.com/en-us/library/ee231573.aspx). We will focus on the<br />
code that accesses TFS to create a new team project. We will write<br />
that code in the event handler that handles the event of<br />
onWorkflowItemChanged. As the name suggests, the event is raised<br />
when any change in the item that is hosted on our target SharePoint<br />
server, is detected. In this event handler, we will start an external<br />
process that will call a command to create a Team Project, with the<br />
name that is provided as a property of the Vision document when<br />
it is approved. Such a command can be written using a tool that is<br />
provided in TFS 2012 Power Tools. The command line utility that is<br />
part of these power tools is TFPT.exe. We can run the<br />
command<br />
TFPT.exe createteamproject<br />
This command accepts the following parameters:<br />
/collection: URL of the Team Project Collection (e.g. http://<br />
TFSName:8080/tfs/CollectionName)<br />
/teamproject: Team Project Name<br />
/processtemplate: Name of the process template that is already<br />
uploaded to TFS (e.g. “MSF for Agile Software Development 6.0”)<br />
/sourcecontrol: New or None or branch:BranchPath<br />
/noreports: If reports are not desired in the team project<br />
/noportal: If the portal is not desired for the team project<br />
First three parameters are compulsory and the remaining are<br />
optional in nature. Example of a complete command may look like<br />
this:<br />
TFPT.exe createteamproject /collection:http://SSGS-TFS2012:8080/tfs/<br />
DefaultCollection /teamproject:”SSGS EMS Agile” /processteamplate: “MSF<br />
for Agile Software Development 6.0” /sourcecontrol:New /noreports / noportal<br />
/verbose /log:”C:\temp\logs”<br />
Code for that event handler will be:<br />
private void CreateTeamProject(string ProjectName)<br />
{<br />
string args = “tfpt.exe<br />
32 | DNCmagazine www.dotnetcurry.com
createteamproject /collection:http://ssgs-vs-tfs2012:8080/<br />
tfs/DefaultCollection /teamproject:\”” + ProjectName + “\”<br />
/processtemplate:\”MSF for CMMI Process Improvement 6.2<br />
\””;<br />
ProcessStartInfo psi =new ProcessStartInfo(“cmd.exe”);<br />
psi.UseShellExecute = false;<br />
psi.RedirectStandardOutput = true;<br />
psi.RedirectStandardInput = true;<br />
psi.RedirectStandardError = true;<br />
psi.WorkingDirectory = @”C:\”;<br />
psi.Verb = “runas”;<br />
//start the process<br />
Process p = Process.Start(psi);<br />
p.StandardInput.WriteLine(args);<br />
p.WaitForExit();<br />
p.StandardInput.WriteLine(“EXIT”);<br />
p.Close();<br />
}<br />
This workflow project is built and deployed to the SharePoint<br />
server. After deployment, it is associated with the document library<br />
that is hosting the Vision Document. It is configured to run when<br />
a Vision document is created and then changed having the state<br />
‘Approved’. This workflow will trigger the creation of a team<br />
project. The name of that team project is provided by the approver<br />
as property of the vision document in the SharePoint Library.<br />
Now we will focus on another driving document – Requirement<br />
Document. We create a document library in the team portal that<br />
will provide a repository for requirement document for the project.<br />
We will call that document library as ‘Requirement Documents’.<br />
The requirement document is a standardized document in every<br />
organization and its structure does not change much. We are going<br />
to assume that it is the MS Excel worksheet that contains multiple<br />
requirements, each individually on a row and the title of each<br />
requirement is in column B.<br />
For the document library, we will have a similar set of properties<br />
that we had created earlier for the library that we had created for<br />
Vision Document. We will have ‘Team Project Name’ and status as<br />
two properties.<br />
We will also create a SharePoint workflow that will have the event<br />
handling code. In this code, we will read the requirement<br />
document and create work items of the type Requirement. First we<br />
should add a few references to the TFS API class libraries and their<br />
related using statements. We are going to use OpenXML that is a<br />
standard used for editing MS Office files<br />
programmatically without installing MS Office, usually on the<br />
server. We can download V 2.0 (one that I used) of that from http://<br />
www.microsoft.com/en-in/download/details.aspxid=5124.<br />
using Microsoft.TeamFoundation.Client;<br />
using Microsoft.TeamFoundation.WorkItemTracking.Client;<br />
The boilerplate code for such a SharePoint workflow project is as<br />
follows:<br />
private void CreateRequirements()<br />
{<br />
prj = (string)workflowProperties.Item[“Team<br />
Project Name”];<br />
collection = new<br />
TfsTeamProjectCollection(new<br />
Uri(“http://ssgsvs-tfs2012:8080/tfs/<br />
DefaultCollection”));<br />
store = collection.<br />
GetService();<br />
SP<strong>Web</strong> web = workflowProperties.<br />
<strong>Web</strong>;<br />
SPFile file = web.<br />
GetFile(@”http://<br />
ssgs-vs-tfs2012/sites/<br />
DefaultCollection/SSGS%20CMMI/<br />
Requirements%20Documents/<br />
RequirementDocument.xlsx”);<br />
SPFileStream dataStream = (SPFileStream)file.<br />
OpenBinaryStream();<br />
SpreadsheetDocument document = SpreadsheetDocument.<br />
Open(dataStream, false);<br />
WorkbookPart workbookPart = document.WorkbookPart;<br />
IEnumerable sheets = document.WorkbookPart.<br />
Workbook.GetFirstChild().Elements();<br />
DNcmagazine www.dotnetcurry.com | 33
string relationshipId = sheets.First().Id.Value;<br />
WorksheetPart worksheetPart = (WorksheetPart)document.<br />
WorkbookPart.GetPartById(relationshipId);<br />
Worksheet workSheet = worksheetPart.Worksheet;<br />
SheetData sheetData = workSheet.<br />
GetFirstChild();<br />
private void isWorkflowPending(object sender,<br />
ConditionalEventArgs e)<br />
{<br />
e.Result = workflowPending;<br />
}<br />
IEnumerable rows = sheetData.Descendants();<br />
int i = rows.Count();<br />
foreach (Cell cell in rows.ElementAt(0))<br />
{<br />
string Title = GetCellValue(document, cell);<br />
WorkItem Requirement = new WorkItem(store.Projects[prj].<br />
WorkItemTypes[“Requirement”]);<br />
Requirement.Title = Title;<br />
Requirement.Save();<br />
}<br />
private void onWorkflowItemChanged(object sender,<br />
ExternalDataEventArgs e)<br />
{<br />
checkStatus();<br />
if ((string)workflowProperties.Item[“Status”] ==<br />
“Approved”)<br />
{<br />
CreateRequirements();<br />
}<br />
}<br />
}<br />
public static string GetCellValue(SpreadsheetDocument<br />
document, Cell cell)<br />
{<br />
SharedStringTablePart stringTablePart = document.<br />
WorkbookPart.SharedStringTablePart;<br />
string value = cell.CellValue.InnerXml;<br />
if (cell.DataType != null && cell.DataType.Value ==<br />
CellValues.SharedString)<br />
{<br />
return stringTablePart.SharedStringTable.<br />
ChildElements[Int32.Parse(value)].InnerText;<br />
}<br />
else<br />
{<br />
return value;<br />
}<br />
}<br />
private void checkStatus()<br />
{<br />
if ((string)workflowProperties.Item[“Status”] ==<br />
“Approved”)<br />
workflowPending = false;<br />
}<br />
private void onWorkflowActivated(object sender,<br />
ExternalDataEventArgs e)<br />
{<br />
checkStatus();<br />
}<br />
This workflow is associated with the Document Library for<br />
Requirement Documents. Whenever the requirement document is<br />
approved, it will create the requirement work items in the team<br />
project.<br />
Now we move our attention to the last part of the workflow. When<br />
a requirement is added in the team project, it should spawn some<br />
preconfigured tasks. These tasks should be linked to the same<br />
requirement as children. We can write an event handler for the<br />
event of ‘WorkItemChanged’ that is raised by TFS. It begins by<br />
creating a class library project. Add references to<br />
- Microsoft.TeamFoundation.Client.dll<br />
- Microsoft.TeamFoundation.Common.dll<br />
- Microsoft.TeamFoundation.Framework.Server.dll<br />
- Microsoft.TeamFoundaiton.WorkItemTracking.Client.dll<br />
- Microsoft.TeamFoundaiton.WorkItemTracking.Server.<br />
Dataaccesslayer.dll<br />
These references are located at<br />
C:\Program Files(x86)\Microsoft Visual Studio 11\Common7\IDE\<br />
ReferenceAssemblies\v2.0 and C:\Program Files\Microsoft Team<br />
Foundation Server 11.0\Application Tier\<strong>Web</strong> <strong>Services</strong>\bin folders<br />
Code for the entire class that has the event handler method is as<br />
follows:<br />
using System.Threading.Tasks;<br />
using Microsoft.TeamFoundation.Client;<br />
using Microsoft.TeamFoundation.WorkItemTracking.Client;<br />
using Microsoft.TeamFoundation.Framework.Server;<br />
34 | DNCmagazine www.dotnetcurry.com
using Microsoft.TeamFoundation.WorkItemTracking.Server;<br />
namespace SpawnTasks<br />
{<br />
public class SpawnTasks: ISubscriber<br />
{<br />
public string Name<br />
{<br />
get { return “WorkItemChangedEvent”; }<br />
}<br />
public SubscriberPriority Priority<br />
{<br />
get { return SubscriberPriority.Normal; }<br />
}<br />
public EventNotificationStatus ProcessEvent(TeamFoundatio<br />
nRequestContext requestContext, NotificationType<br />
notificationType, object notificationEventArgs, out int<br />
statusCode, out string statusMessage, out Microsoft.<br />
TeamFoundation.Common.ExceptionPropertyCollection<br />
properties)<br />
{<br />
statusCode = 0;<br />
statusMessage = string.Empty;<br />
properties = null;<br />
try<br />
{<br />
if (notificationType == NotificationType.<br />
Notification && notificationEventArgs is<br />
WorkItemChangedEvent)<br />
{<br />
string machineName = System.Environment.<br />
MachineName;<br />
TfsTeamProjectCollection tpc = new<br />
TfsTeamProjectCollection(new Uri(“http://”<br />
+ machineName + “:8080/tfs/DefaultCollection”));<br />
WorkItemChangedEvent ev =<br />
notificationEventArgs<br />
as WorkItemChangedEvent;<br />
WorkItemStore ws = tpc.<br />
GetService();<br />
Microsoft.TeamFoundation.WorkItemTracking.<br />
Client.WorkItem wi = ws.GetWorkItem(ev.<br />
CoreFields.IntegerFields[0].NewValue);<br />
Project project = ws.Projects[ev.<br />
PortfolioProject];<br />
if (wi.Type == project.WorkItemTypes[“User<br />
Story”] && wi.RelatedLinkCount == 0)<br />
{<br />
Microsoft.TeamFoundation.WorkItemTracking.<br />
Client.WorkItem NewTask = new Microsoft.TeamFoundation.<br />
WorkItemTracking.Client.WorkItem(project.<br />
WorkItemTypes[“Task”]);<br />
NewTask.Title = “Create architecture<br />
diagrams for user story “ + wi.Id;<br />
WorkItemLinkTypeEnd linkTypeEnd =<br />
ws.WorkItemLinkTypes.LinkTypeEnds[“Parent”];<br />
NewTask.Links.Add(new<br />
RelatedLink(linkTypeEnd,wi.Id));<br />
NewTask.Save();<br />
}<br />
}<br />
}<br />
catch<br />
{<br />
}<br />
return EventNotificationStatus.ActionApproved;<br />
}<br />
public Type[] SubscribedTypes()<br />
{<br />
return new Type[] {typeof(WorkItemChangedEvent)};<br />
}<br />
}<br />
}<br />
Similar to creating one task as shown, it is possible to create<br />
multiple tasks and link all of them to the same requirement as<br />
children. After compilation, this assembly should be copied at<br />
C:\Program Files\Microsoft Team Foundation Server 11.0\<br />
Application Tier\<strong>Web</strong> <strong>Services</strong>\bin\plugins folder for it to work as<br />
event handler of TFS event of ‘WorkItemChangedEvent’.<br />
We have achieved the goal of driving the part of the ALM process<br />
through documents. Creation and approval of the workflows trigger<br />
the activities in TFS to create and update artifacts. This POC can<br />
be further extended to many other parts of the ALM like Test Case<br />
Management, bugs management (where a bug is filed by customer<br />
by email), change request management etc.<br />
Subodh Sohoni, is a VS ALM MVP and a<br />
Microsoft Certified Trainer since 2004.<br />
Follow him on twitter<br />
@subodhsohoni and check out his articles<br />
on TFS and VS ALM at http://bit.ly/Ns9TNU<br />
DNcmagazine www.dotnetcurry.com | 35
Interview with C# Legend<br />
<strong>Eric</strong> Lippert<br />
Soluptas etur sum harum<br />
facia dolest, consequis<br />
vitaspe rspernatium<br />
satota turitation consequ<br />
asperna taspertior.Res,<br />
con Itatum,<br />
Dear Readers, we are very happy to have <strong>Eric</strong> Lippert to talk to<br />
in this episode of the DNC Magazine. <strong>Eric</strong> needs no introduction<br />
to the C# folks out there, but for others, <strong>Eric</strong> is well known for<br />
his work in the C# compiler team. He spent a significant part of<br />
his career at Microsoft in various roles. Prior to Microsoft, <strong>Eric</strong><br />
worked for Watcom. The ‘older’ ones among us might remember<br />
Watcom as a company who made very good C++ and Fortran<br />
compilers. Currently he is working for Coverity helping build<br />
static code analysis products.<br />
DNC: Welcome <strong>Eric</strong>, we are super excited to have you with us.<br />
EL: Thanks, I’m happy to be here!<br />
DNC: You worked at Microsoft for 16 long years. Describe your<br />
journey (if we may call it that) from internship to working on<br />
VBScript, JScript, VSTO and becoming a core member of the C#<br />
compiler team.<br />
EL: I grew up in Waterloo; having an interest in science and<br />
mathematics from an early age, it was very natural for me to go<br />
to the University of Waterloo. And besides, I had relatives on the<br />
staff, I already knew a number of the professors, and as you said,<br />
I’d worked at UW spin-off company Watcom as a high school<br />
student, so I knew exactly what I was getting into. UW has an<br />
excellent co-operative education program - one of the largest<br />
in the world - through which I managed to get three internships<br />
at Microsoft working on the Visual Basic team. They were good<br />
enough to extend me a job offer when I graduated, and I stayed<br />
in the developer tools division for my entire career at Microsoft.<br />
DNC: Since you started as an Intern at Microsoft, is it fair to<br />
assume you got a lot of good inputs from your seniors in the<br />
early days What is the best programming advice you ever got<br />
EL: I got a lot of good advice from more senior engineers<br />
throughout my career, not just at the beginning; Microsoft<br />
encourages both formal and informal mentoring. I’ve talked<br />
about the best career advice I got at Microsoft elsewhere
ecently: basically, it was to become a<br />
domain expert by answering as many<br />
user questions as I possibly could. But<br />
the best programming advice is a bit<br />
harder to put my finger on. I learned so<br />
much at Microsoft from world-class<br />
experts in programming language<br />
design, performance analysis and many<br />
other fields, that it is hard to name just<br />
one.<br />
Here’s one thing that has stuck with<br />
me from even before my Microsoft days<br />
though. One day many years ago Brian<br />
Kernighan gave a talk about<br />
programming at UW. At one point he put<br />
up a slide showing some code that was<br />
clearly wrong. You knew it was wrong<br />
because what the comment above the<br />
code said and what the code actually did<br />
were opposites. Kernighan said<br />
something to the effect of “pop<br />
quiz: what actually runs, the code<br />
or the comments” I still ask myself<br />
that same rhetorical question<br />
when I’m trying to understand a<br />
piece of buggy code; it is<br />
frequently the case that the<br />
comments are misleading,<br />
out-of-date or just plain wrong,<br />
and it is frequently the case that<br />
the comments are right and you<br />
don’t even bother to read the<br />
buggy code that follows them.<br />
Kernighan’s talk changed my<br />
attitude towards commenting<br />
completely. Since then I’ve tried<br />
to write comments that explain<br />
what the goal of a particular piece<br />
of code is, rather than trying to<br />
explain how it works.<br />
DNC: When your team started the development of C#, what were<br />
some key goals in your mind Are you happy the way C# has<br />
matured<br />
EL: To be clear: I started working on C# just as the final corner<br />
cases in the design of C# 3.0 were being hammered out and<br />
development was beginning in earnest. I have followed C#<br />
carefully since its creation over a decade ago, but I wasn’t actually<br />
a part of the C# 1.0 or 2.0 team.<br />
When thinking about goals, I try to distinguish the “business” goals<br />
from the “technical” goals; these goals are strongly aligned, but<br />
they are different perspectives. From a business perspective, the<br />
primary goal of the C# product was – and continues to be – to<br />
create rich, compelling language tools that enable developers to<br />
take advantage of the .NET platform specifically, and more<br />
generally to improve the state of the art for the whole Windows<br />
ecosystem. Better tools means more productive developers, more<br />
productive developers means better applications for their users,<br />
and better applications means the platform becomes more<br />
attractive, and everyone wins.<br />
From a language design perspective, there are a number of core<br />
principles that the design team goes back to over and over again.<br />
The language is intended to be a modern, relevant and pragmatic<br />
general-purpose programming language, used by professional<br />
programmers working in teams on line-of-business application<br />
software. It’s intended to be object-oriented, but not<br />
dogmatically so; the language design team happily takes ideas<br />
from other programming paradigms and incorporates them where<br />
they make sense.<br />
C# 1.0 started off as a pretty typical modern language. Obviously<br />
it was heavily influenced by C and C++; the design team sought to<br />
mitigate some of the shortcomings of C/C++ while still permitting<br />
access to the raw power of unsafe code. But in the decade since<br />
it has grown in leaps and bounds, adding a generic type system,<br />
sequence generators, functional closures, query comprehensions,<br />
dynamic language interoperability and lately, greatly improved<br />
support for writing asynchronous workflows. I am thrilled with<br />
how the language has evolved over the past twelve years, and it’s<br />
been a privilege to have been a part of it for some of the most<br />
exciting changes. I’m looking forward to continuing to work in the<br />
C# ecosystem.<br />
DNcmagazine www.dotnetcurry.com | 37
DNC: As a member of the C# team, what kind of back and forth did<br />
you have with Windows OS team In fact for any language<br />
development, at what point is the OS something you start<br />
considering Is that you can pretty much work in a silo and call<br />
people up when you hit a wall with respect to a feature, or is it a<br />
more collaborative endeavor<br />
EL: That has changed over time. In the distant past it was<br />
somewhat more “siloed”; for C# 5.0 though, the Windows team was<br />
very much involved. I personally had very little communication with<br />
the Windows team during the development of C# 5.0, but the C#<br />
program management team was in near-constant<br />
communication with their counterparts on the Windows team<br />
throughout the whole Windows RT effort. There were a number<br />
of technical issues that needed to be taken care of to ensure that<br />
there was as little “impedance mismatch” as possible between C#<br />
developers and the Windows RT programming model. In particular<br />
it was important that “async/await” met the needs of Windows RT<br />
developers using C#. My colleagues spent many long design<br />
sessions with the Windows team to make sure that the way<br />
Windows developers “do asynchrony” would make sense to C#<br />
developers and vice versa.<br />
However this phenomenon is relatively recent. C# historically has<br />
not had that level of direct engagement with the Windows team<br />
because of course C# typically runs in the managed environment<br />
of the CLR, and C# programmers historically have typically used<br />
the BCL classes to execute operating system functionality. Since<br />
Soluptas etur sum harum<br />
facia dolest, consequis<br />
vitaspe rspernatium<br />
the C# team knew that the CLR and BCL teams would essentially<br />
be “brokers” for the operating system services, the C# team could<br />
satota turitation consequ<br />
concentrate more on designing a language that showcased the<br />
power of the CLR and the BCL, and let those teams manage the<br />
asperna taspertior.Res,<br />
relationship with the operating system.<br />
con Itatum,<br />
DNC: We were listening to your Podcast with the StackExchange<br />
team and you mentioned about the thing that’s on top of your list<br />
of –“if I had a Genie to fix C#”... It was about unsafe array<br />
covariance. Could you explain the issue for our readers What<br />
would the fix be like, in the language<br />
EL: Sure. First let’s loosely define the somewhat highfalutin term<br />
“covariance”. A proper definition would involve a quick course in<br />
category theory, but we don’t have to go nearly that far to give<br />
the flavor of it. The idea of covariance is, as the name implies, that<br />
relationships “vary in the same direction” when some<br />
transformation is made.<br />
In C# we have the rule that if T and U are reference types, and T is<br />
convertible to U by a reference conversion, then T[] is convertible to<br />
U[] by a reference conversion as well. This is said to be a<br />
“covariant” rule because you can transform the statement “T is<br />
convertible to U” into the statement “T[] is convertible to U[]” and<br />
the truth of the statement is preserved. This isn’t the case in<br />
general; you can’t conclude, for instance, that List is convertible<br />
to List just because T is convertible to U.<br />
Unfortunately, array covariance weakens the type safety of the<br />
language. A language is said to be type safe when the compiler<br />
catches type errors – like assigning an int to a variable of type<br />
string, say – and prevents the program from compiling until all the<br />
type errors have been removed. Array covariance produces a<br />
situation where a type violation on an assignment cannot be<br />
caught until runtime:<br />
static void M(Animal[] animals)<br />
{<br />
animals[0] = new Turtle();<br />
}<br />
static void N(Giraffe[] giraffes)<br />
{<br />
M(giraffes);<br />
}<br />
Because array conversions are covariant, the array of giraffes may<br />
be converted into an array of animals. And because a turtle is an<br />
animal, you can put a turtle into an array of animals. But that array<br />
is actually an array of giraffes. Therefore this type error becomes<br />
an exception at runtime.<br />
This is egregious in two ways. First, it ought to be the case that<br />
assigning a value to a variable can always be type checked at<br />
compile time, but in this case it cannot. And second, this means<br />
that every time you assign a non-null reference to an array where<br />
the element type of the array is an unsealed reference type, the<br />
runtime has to interrogate the runtime type of the array and the<br />
runtime type of the reference assigned to verify that they are<br />
compatible. That check takes time! In order to make this bad<br />
feature work, correct programs have to be slowed down on every such<br />
array access.<br />
If I had a genie that could fix<br />
everyone’s code, I’d remove the<br />
unsafe covariant array<br />
conversion entirely...<br />
The C# team added typesafe covariance to C# 4.0. If you’re<br />
interested in the design of that feature, I wrote a long series of<br />
articles during the design process; you can read them here:<br />
http://blogs.msdn.com/b/eric<strong>lippert</strong>/archive/tags/<br />
covariance+and+contravariance/<br />
38 | DNCmagazine www.dotnetcurry.com
If I had a genie that could fix everyone’s code, I’d remove the unsafe<br />
covariant array conversion entirely, and fix up everyone’s code to<br />
use the typesafe covariance added to C# 4.0.<br />
DNC: Before we get to your current job at Coverity, tell us a little<br />
more about what is Static Code Analysis<br />
EL: Static analysis is analysis of a program given only its source<br />
code. It’s distinguished from dynamic analysis, which analyzes programs<br />
as they are actually running. Compilers do static analysis;<br />
profilers do dynamic analysis. Compilers use static analysis to do<br />
three things: first, to determine if the program is a legal program<br />
and give an appropriate error if it is not. Second, to translate legal<br />
programs into some other language – typically the language is<br />
some sort of bytecode or machine instructions, but it could be<br />
another high-level language. And third, to identify patterns that are<br />
legal but suspicious to produce warnings.<br />
The kind of static analysis we do at Coverity is mostly of the third<br />
kind; we presume that the code is already legal code that will be<br />
checked by a compiler, but we do a far deeper static analysis of the<br />
code than most compilers do to find suspicious patterns and bring<br />
them to your attention. As is always the case, the earlier you find a<br />
bug, the cheaper it is to fix.<br />
I spent about fifteen thousand<br />
hours carefully studying the<br />
design and implementation of<br />
C# compilers<br />
There are also other things you can do with static analysis; for<br />
instance, Coverity also makes a product which uses static analysis<br />
to try to find code changes that do not have an associated unit test.<br />
But the majority of what I do is in defect analysis.<br />
DNC: How does your in-depth knowledge on C# add value to a<br />
company like Coverity<br />
EL: In two main ways. First, C# is a huge language now; the<br />
specification runs to about eight hundred pages. Line-of-business<br />
developers certainly do not have to know the whole language<br />
inside-out in order to use it effectively, but compiler writers<br />
certainly do! I spent about fifteen thousand hours carefully<br />
studying the design and implementation of C# compilers and<br />
learning from language designers like Anders Hejsberg, Neal Gafter<br />
and Erik Meijer, so I’ve got a pretty solid grasp on what makes a<br />
good C# static analyzer.<br />
Second, I’ve seen thousands upon thousands of lines of buggy C#<br />
code. I know what sorts of errors C# developers make, which helps<br />
us figure out where to spend effort in static analysis. You want<br />
the biggest possible bang for the buck in static analysis; we don’t<br />
want Coverity’s automated checkers to find “theoretical” bugs or<br />
“style” bugs. We want to find thank-goodness-we-found-that-beforea-customer-did<br />
bugs.<br />
DNC: Since starting with Coverity did you come across situations<br />
where you thought – “umm, it would help C# was more statically<br />
provable with this”<br />
EL:There are definitely features of C# that make it harder to do<br />
static analysis, but those are the same features that add great<br />
power to the language. Virtual methods, for example, enormously<br />
complicate static analysis because of course the whole point of<br />
virtual methods is that the actual method that executes is chosen<br />
based on the runtime type of the receiver.<br />
As I said before, C# 1.0 was designed with the shortcomings of C/<br />
C++ in mind. The designers of C# 1.0 did a good job of that; it’s a<br />
lot harder to write a buffer overflow, or a memory leak, or to use a<br />
local before it is initialized, or to accidentally use the same name to<br />
mean two completely different things. But what has been<br />
somewhat eye-opening to me since starting at Coverity is just how<br />
many of the defect patterns that the Coverity products check for in<br />
C and C++ apply equally well to modern languages like Java and C#.<br />
DNC: We heard you developed one of the first ‘Lord of the Rings’ fan<br />
pages. Tell us more about how that came about and your<br />
interest in Books and Movies.<br />
EL: My father read The Hobbit to me when I was very young, which<br />
started a lifelong enjoyment of J.R.R. Tolkien’s writing; I’ve collected<br />
biographies of Tolkien as a hobby since I was a teenager. When I<br />
was studying mathematics at UW in the early 1990s the World Wide<br />
<strong>Web</strong> was a brand-new thing; one day I was “surfing the web” – a<br />
metaphor which makes not the slightest bit of sense, by the way –<br />
and I found an original-series “Star Trek” fan page. I thought that<br />
was an excellent idea, so I searched the entire internet – which did<br />
not take long in 1993 – and found all the FTP sites and newsgroups<br />
and whatnot about Tolkien, made a simple web page that was just a<br />
list of links, and put it up on the Computer Science Club’s GOPHER<br />
server. As the web grew, more and more people linked to it and sent<br />
me the addresses of their pages. I kept adding more and more links<br />
to it, until eventually it just got to be too much; the web was too<br />
big. I stopped maintaining it and eventually my membership lapsed<br />
and it went away. You can still find it on the internet archive I’m<br />
sure, though it is not much to look at.<br />
The thing is though, in that time companies like Open Text and<br />
Google started indexing the internet, and their search algorithms<br />
took into account things like how long a page had been up, how<br />
much it had changed over time, and how many inbound links there<br />
DNcmagazine www.dotnetcurry.com | 39
were. Even after I stopped actively maintaining it, my little page<br />
scored high on all those metrics. As a result, for many years my<br />
name was the first one you’d get when you did a web search for<br />
“Tolkien”. When the movies were announced a lot of people did<br />
exactly that. As a result I ended up being interviewed by several<br />
newspapers, I got email from one of Tolkien’s grandchildren, the<br />
Jeopardy fact checkers called me up once to make sure that “what<br />
are the Ents” was in fact the right question to whatever answer<br />
they had in mind, and so on. I had a lot of fun with it.<br />
That said, I read very little “genre fiction” – science fiction, fantasy,<br />
mystery, and so on – these days. Most of my reading in my free time<br />
is non-fiction, popular history books.<br />
One of the ways that you<br />
know a language is getting<br />
really large, is when users<br />
submit feature requests for<br />
features you already have.<br />
Here are three little features that not a lot of people know about:<br />
I love movies and have friends over to watch movies frequently; our<br />
movie night choices are completely eclectic. We’ll do recent Oscar<br />
winners one month and Hammer Horror the next.<br />
quick bytes<br />
Born November 30<br />
Lives in Seattle, Washington<br />
Hobbies<br />
Soluptas etur sum harum<br />
facia dolest, consequis<br />
vitaspe rspernatium<br />
Current<br />
Work<br />
Sailing small boats, playing<br />
the piano and editing books<br />
about C#<br />
Working on static analyzers<br />
for C# at Coverity<br />
satota turitation consequ<br />
asperna taspertior.Res,<br />
con Itatum,<br />
DNC: What’s a typical day like for <strong>Eric</strong> Lippert when he is not<br />
programming<br />
It is non-stop excitement. My wife and I have a hundred-yearold<br />
house that we work at keeping from falling down around us.<br />
I have an International 14 – a tiny little overpowered sailboat<br />
– that I sail in the summer. I play the piano and the ukulele. I<br />
recently started teaching myself how to work metal, though I’ve<br />
put that on the back burner while I learn my way around the<br />
Coverity codebase. And of course I write and edit books about C#,<br />
write a blog about the design of C# (now at<br />
http://eric<strong>lippert</strong>.com), and answer user questions on<br />
StackOverflow. I like to keep busy.<br />
You can put the prefix “global::” on a name to force the<br />
name resolution algorithm to start searching in the global<br />
namespace. This is useful if you are in the unfortunate position of<br />
having a name conflict between a global namespace and a local<br />
namespace or type. For example, if your code is in a badly-named<br />
namespace “Foo.Bar.System” then the name “System.String” will try<br />
to look up “String” in “Foo.Bar.System”. The name “global::System.<br />
String” looks up the global namespace System.<br />
C# prohibits “falling through” from one switch section to<br />
another. What a lot of people don’t know though is that you<br />
don’t have to end a switch section with a break statement. You can<br />
force fall-through by ending a switch section with “goto case” and<br />
give it a case label. You can also end a switch section with a regular<br />
goto, return, throw, yield break, continue or even an infinite loop.<br />
One last clever little feature that few people know about: you<br />
can combine uses of the null coalescing operator to give you<br />
the first non-null element in a sequence of expressions. If you have<br />
variables x, y and z, all nullable ints, then the expression xyz-1<br />
results in the first non-null integer of x, y and z, or -1 if they are<br />
all null.<br />
I often talk about odd features like this in my blog, so check it out<br />
if you want more examples.<br />
DNC: Finally, to wrap up, Surprise our audiences with a hidden<br />
feature of C# not many know about.<br />
C# is a big language and there are a lot of small features that<br />
people don’t know about.<br />
40 | DNCmagazine www.dotnetcurry.com
DNC Magazine<br />
www.dotnetcurry.com/magazine<br />
41
sharepoint<br />
Server 2013<br />
workflow<br />
Pravinkumar Dabade shows us how to install and configure Workflow Manager<br />
for SharePoint Server 2013. We will see how to design, import, implement and<br />
deploy a workflow using Visio 2013 and SharePoint Designer 2013<br />
E<br />
very iteration of SharePoint has made its Workflow<br />
capabilities richer and more powerful. For an Information<br />
Management system like SharePoint, data and<br />
document approvals are a common requirement. Today’s<br />
business requirements are often more complex than a<br />
simple Approve/Reject and contain multiple steps involving<br />
multiple people. So demands from SharePoint’s workflow system<br />
have increased manifold.<br />
SharePoint 2013 has revamped its Workflow engine that makes<br />
business process management much easier. Before we get into the<br />
details, let’s start with a quick look at what’s new.<br />
What’s new in SharePoint Server 2013<br />
Workflow<br />
- SharePoint Server 2013 workflows are now using Windows<br />
Workflows on SharePoint 2013 – Your Toolbox<br />
Microsoft has provided us with a palette of tools for developing SharePoint Workflows. We can use any of the following Products:<br />
SharePoint<br />
01 02<br />
Designer 2013<br />
Microsoft<br />
Visio 2013<br />
03 InfoPath<br />
2013<br />
04<br />
Visual Studio<br />
2012<br />
a. SharePoint Designer<br />
provides a rich set of<br />
functionalities to design<br />
and develop the workflows<br />
for SharePoint Server 2010<br />
as well as SharePoint Server<br />
2013 platform.<br />
b. SharePoint Designer is also<br />
considered the Primary Tool<br />
for designing Workflows.<br />
a. Visio 2013 is an Office<br />
application basically used<br />
for designing diagrams by<br />
using different Shapes and<br />
Connectors.<br />
b. You can design workflows<br />
based on SharePoint 2013<br />
workflow platform.<br />
c. You can import the design of<br />
Visio into SharePoint Designer<br />
2013 and vice versa.<br />
d. The Visio integration is<br />
aimed at the Power Business<br />
Users responsible for<br />
designing Business Workflows.<br />
a. You can use the InfoPath<br />
for designing the forms that<br />
can be used by the workflow<br />
users to input the data to the<br />
workflows.<br />
b. For example – you can<br />
create an initiation forms,<br />
feedback forms and others.<br />
c. Infopath’s Workflow<br />
integration is for simple<br />
workflows like single step<br />
approvals etc.<br />
a. Visual Studio 2012 is a<br />
product for developers used<br />
for developing different<br />
types of applications. We can<br />
use VS 2012 for designing,<br />
developing and deploying<br />
the Workflow for SharePoint<br />
Server 2013 as well.<br />
b. Visual Studio is also used<br />
for designing custom actions<br />
for SharePoint which can be<br />
later used in SharePoint 2013<br />
Designer tool in addition to<br />
designing Workflows for a<br />
specific task or a requirement.<br />
42 | DNCmagazine www.dotnetcurry.com
Workflow Foundation 4.0. It uses the Workflow 4 activities to<br />
implement SharePoint Business Processes. Workflow 4 activity<br />
classes are implemented declaratively using XAML.<br />
- In a SharePoint 2013 farm, Windows Workflow Foundation is<br />
hosted in Workflow Manager Client 1.0.<br />
Once all the above components have been installed, we’ll<br />
configure the Workflow Manager. Start the Workflow Manager and<br />
click on “Creating a New Farm”. It will start off the Configuration<br />
Wizard the first time around.<br />
In this wizard, you will be asked to set the following -<br />
- The new Workflow Manager Client is the workflow execution<br />
engine for SharePoint 2013.<br />
- SharePoint 2013 – provides the framework for SharePoint based<br />
workflows, which involve Documents, Lists, Users, tasks etc.<br />
- From a backward compatibility point of view, ‘SharePoint 2013<br />
Workflow Interop’ allows you to use SharePoint Server 2010<br />
workflows (which are built on top of Windows Workflow Foundation<br />
3.0) in SharePoint Server 2013 workflows (which are built on top<br />
of Windows Workflow Foundation 4.0).<br />
1. SQL Server Instance Name.<br />
2. Database Name.<br />
3. Service Account.<br />
4. Don’t forget to select the option – Allow workflow management<br />
over HTTP on this computer.<br />
Overall SharePoint Designer 2013 looks like a great tool for<br />
creating workflows and publishing them to SharePoint sites, let’s<br />
dig deeper and see what it offers.<br />
Setting up the Workflow Manager<br />
The first thing we will have to do is to configure the Workflow<br />
Manager 1.0. So, let’s open <strong>Web</strong> Platform Installer 4.5. In a search<br />
box, type workflow and press the Enter key. Now let’s choose the<br />
following –<br />
1. Workflow Manager 1.0 – is a Workflow host.<br />
2. Workflow Manager Tools 1.0 for Visual Studio 2012 – for<br />
workflow development in Visual Studio 2012.<br />
3. Windows Client 1.0 – Allows clients to communicate with the<br />
Workflow host.<br />
Once the configuration is done, it will show you a summary.<br />
Server Configuration<br />
Now let’s configure the workflow manager on the server to enable<br />
it to communicate over HTTP. Open SharePoint 2013 Management<br />
Shell and execute the following command –<br />
Register-SPWorkflowService –SPSite “http://contoso/<br />
sites/msbi” –WorkflowHostUri “http://localhost:12291” –<br />
AllowOAuthHttp<br />
(Replace Contoso and localhost with appropriate domain names)<br />
Developing a Workflow<br />
We are all set from an infrastructure point of view, let’s jot down<br />
the actual requirement or ‘business case’.<br />
The ‘Business Case’<br />
In our organization, when customer profiles are uploaded into<br />
Customer Profile Document Library, a manager will look at the<br />
customer profile and approve/reject the profile as per some<br />
pre-configured offline rules. So our Workflow has to route every<br />
Customer Profile to the manager for their approval.<br />
Designing the workflow<br />
For designing this workflow, we will use the following tools –<br />
1) Microsoft Visio 2013.<br />
2) SharePoint Designer 2013.<br />
DNcmagazine www.dotnetcurry.com | 43
Getting Started with Visio 2013<br />
In Visio 2013, when you create a new workflow instead of empty<br />
container, you get something called as the “Stage”. Simple<br />
Workflows can have a single stage and complex workflows can<br />
have many stages. Inside the stage, you can organize the actions.<br />
All actions must be defined inside one of the stages.<br />
must be defined inside the Stage.<br />
c. Loop with condition – loops until a specific condition is met.<br />
The Design<br />
Now let’s design a workflow diagram using Visio 2013 as per our<br />
scenario described above.<br />
When you create a SharePoint Workflow in Visio 2013, the default<br />
layout looks like below –<br />
Start Visio 2013 and select the – New “Microsoft SharePoint 2013<br />
Workflow” startup template.<br />
Visio provides us with a wide palette of ‘Workflow Actions’ out of<br />
the box. Some of the common ones are as follows –<br />
1) Action Shapes – the action shapes are used for performing<br />
specific actions during the execution of the workflow. Few<br />
examples are like –<br />
a. Add Comment – you can leave some comments in a<br />
workflow.<br />
b. Assign a Task – assigns a workflow task to the user of a<br />
workflow.<br />
c. Copy Document – copies document from the current list into<br />
a different document library.<br />
d. Create List Item – creates a new list item in the list specified<br />
at design time.<br />
e. Send an Email – when an event occurs in the workflow, you<br />
can send an email automatically with the predefined message<br />
to a particular user or group.<br />
Once you click on template, pick “US Unit” (or the appropriate Unit<br />
for your country) and click on “Create” button. It will now show you<br />
a default SharePoint Workflow diagram with Start, Stage and End.<br />
On the left hand side it will show you a Shape task pane with all<br />
the available stencils as shown below –<br />
2) Condition Shapes – the condition shapes are used for applying<br />
conditions in the workflow.<br />
a. If any value equals value – compares two values.<br />
b. Person is a Valid SharePoint User – checks whether user is a<br />
registered user or group member on SharePoint site.<br />
3) Terminator Shapes –<br />
a. Start – begins the workflow. There can be only one start<br />
shape in a workflow diagram.<br />
b. Stage – Contains any number of shapes and actions which<br />
44 | DNCmagazine www.dotnetcurry.com
Now let’s add some actions in our stage 1 as described below –<br />
1) Add an action “Add a comment” in ‘Stage 1’.<br />
2) Add an action “Assign a task”.<br />
3) Send an email.<br />
4) Copy document.<br />
At the end, your workflow diagram should look like below –<br />
You will now see the default workflows associated with your site.<br />
Now from the “Workflows” ribbon, select “Import from Visio” and<br />
pick “Import Visio 2013 Diagram”<br />
Let’s save the workflow diagram with the name<br />
“CustomerApprovalWF”. After saving the workflow diagram, we<br />
can validate the workflow using the ‘Check Diagram’ option to run<br />
rudimentary checks for default values etc. in our workflow.<br />
Click on “Process” tab and click on “Check Diagram” as shown<br />
below –<br />
Select “CustomerApprovalWF.vxds” file and click on “Open” button.<br />
It will ask for the following –<br />
1. The name of the Workflow.<br />
2. Description of the Workflow.<br />
3. Workflow type. [List or Site or Reusable workflow].<br />
4. SharePoint list name with which you want to associate a<br />
workflow.<br />
By this time, I assume, you have already created a SharePoint site,<br />
if not, go ahead and create one. Now it’s time to create two<br />
document libraries, we’ll give the following names for this<br />
example –<br />
Let’s write a name of the workflow as<br />
“CustomerProfileApprovalWorkflow”. Write description as “New<br />
Customer Profile Approval Workflow”. From the Workflow type<br />
dropdown list, choose “Reusable Workflow” and select the<br />
Document Library “CustomerProfiles” as shown below –<br />
1) Customer Profiles.<br />
2) Customer Profiles Status.<br />
Now let’s open SharePoint Designer 2013 and open the<br />
SharePoint site in which we have created the Document Libraries.<br />
On the left pane “Navigation”, click on “Workflows” as shown<br />
here –<br />
DNcmagazine www.dotnetcurry.com | 45
Click on the “OK” button to create the workflow. Once the<br />
workflow gets generated, it will show you the workflow in a<br />
Visual Designer inside the SharePoint Designer tool which<br />
allows you to modify the workflow using Visio shapes as per your<br />
process. In our case, we will not modify the workflow. We will now<br />
build the logic for this workflow using SharePoint Designer. To<br />
see the workflow in SharePoint Designer, click on the drop button<br />
“Views” from the “Workflow” tab and choose “Text-Based Designer”<br />
as shown below –<br />
field as “Login Name” as shown below –<br />
This will show you a workflow in SharePoint Designer in which<br />
now we can go and write the complete logic for Customer Profile<br />
approval.<br />
In Stage 1, the first option is to write a comment. Click on<br />
comment text link as shown below and write a comment as “This<br />
is a Customer Approval Workflow” –<br />
The second step is “Assigning a Task” to the user. In my SharePoint<br />
site, I have already configured one user who will act as a Manager<br />
for customer profile approval as a member of my site. I am going<br />
to assign a task to that user to approve/reject the customer profile.<br />
Click on “this user” link. It will now show you a “Assign a Task”<br />
window in which we will –<br />
Now it will show you the dialog box where we can write the text<br />
comments as well as we can embed the lookups in the message.<br />
Click on the button and write a comment as “This Customer Profile<br />
has been uploaded by –“and then click on “Add or Change the<br />
Lookup” button.<br />
1. Select the participant.<br />
2. Add the task title.<br />
3. Write the description about the task.<br />
4. If required, we can specify the due date.<br />
5. From the task options section, check the checkbox “Wait for task<br />
completion”.<br />
6. Keep the default setting of Email options.<br />
7. And choose “Default Outcome as Rejected” from the outcome<br />
options section as shown below –<br />
Note: You can setup your workflow to start off automatically on<br />
creating a List item as well (in this case it would be creation of<br />
Workflow as soon as the profile document is uploaded).<br />
Select “Current Item” from the Data Source dropdown list. Make<br />
a choice of “Created By” from the Field Source and specify return<br />
46 | DNCmagazine www.dotnetcurry.com
In the next step, we will assign ‘send an email’ to the creator of<br />
the document about the approval status of the workflow, with the<br />
comments from the approver. Click on “these users”. Now format<br />
your mail as described below –<br />
1. To – Current Item Created By (User who created current item).<br />
2. CC – Sam Robert (Manager/Approver).<br />
3. Add or Change Lookup with the message as shown below –<br />
You will see our workflow “CustomerProfileApprovalWorkflow”. To<br />
start the workflow, click on the<br />
“CustomerProfileApprovalWorkflow”. Now check your Workflow<br />
tasks list. You will see a task has been added in it. Complete the<br />
task by approving or rejecting the customer profile.<br />
Once the email formatting is done, click on “OK” button.<br />
Check your email box and check the Customer Profile Status<br />
Library, you will see a mail and document copy.<br />
Finally we will setup the Workflow Task to copy the document<br />
from “Customer Profile” into “Customer Profiles Status” document<br />
library with the status of the document as shown below –<br />
That is all. Your workflow is ready for the deployment.<br />
Save the workflow and click on Publish workflow button from the<br />
“Workflow” ribbon.<br />
The Workflow in Action<br />
Now let’s create a word document and upload it into Customer<br />
Profiles document library of our SharePoint site.<br />
Once the document is uploaded, click on the “Workflows” by<br />
selecting the document as shown here –<br />
Conclusion<br />
To summarize, we saw how to install and configure Workflow<br />
Manager for SharePoint Server 2013 and use Visio and Sharepoint<br />
Designer to design, import, implement and deploy the workflow.<br />
We only had a very brief look at Workflow Development in<br />
SharePoint 2013. It has come a long way now and has enough<br />
components out of the box to support complex business<br />
processes. As with most Microsoft Business Software, it comes with<br />
excellent Tooling Support to make things as easy as possible for<br />
the ‘non-coding’ end user<br />
Pravinkumar works as a freelance<br />
corporate trainer and consultant on<br />
Microsoft Technologies. He is also<br />
passionate about technologies like<br />
SharePoint, ASP.NET, WCF. Pravin enjoys<br />
reading and writing technical articles. You<br />
can follow Pravinkumar on Twitter @pravindotnet and read<br />
his articles at bit.ly/pravindnc<br />
DNcmagazine www.dotnetcurry.com | 47
CSS 3 Media Queries<br />
wallpaper by neersighted<br />
Responsive Image Viewer in ASP.NET MVC<br />
using CSS 3 Media Queries<br />
ASP.NET Architecture MVP, Suprotim Agarwal walks us through the CSS – Media<br />
Queries Level 3 spec and shows us how to use them for building Responsive UI in<br />
ASP.NET MVC apps<br />
HTML as we all know is the<br />
‘language’ of the web and it<br />
gives ‘structure’ to the web<br />
pages that we see in our<br />
browsers. CSS on the other hand helps<br />
with the visual layout to the HTML<br />
markup. If we use a house as an<br />
analogy of a webpage; HTML is the<br />
pillar, the beam, the roof, the walls and<br />
the floor; while CSS is the tile used, the<br />
carpeting done (color, thickness, etc), paint<br />
on the inside and the outside and so on!<br />
Essentially HTML is for providing<br />
structure and CSS is for managing<br />
content. Mixing the two up is like trying<br />
to build a house that uses colored<br />
drywalls (or colored plastering) and no<br />
paint work!!!<br />
Just like in Architecture and<br />
Engineering, HTML and CSS are guided<br />
by established specifications. HTML 5<br />
and CSS 3 therefore (loosely) imply the<br />
version of the specification. HTML v5 has<br />
been ‘long time in the making’ and has<br />
now reached ‘Candidate Recommendation’<br />
stage or in software engineering terms,<br />
Release Candidate as of December 17,<br />
2012.<br />
CSS in the meanwhile, instead of<br />
releasing one monolithic spec, has broken<br />
things up into smaller ‘Levels’. Today we<br />
will look at one such ‘Level’- that’s the<br />
‘Media Queries Level 3’. If you are<br />
getting the feeling this is all theory and<br />
no practice, hang in there, we’ll build a<br />
nice showcase too. Before that, let’s look<br />
into CSS and Media Queries in a little<br />
more detail.
CSS – Media Queries<br />
Level 3<br />
CSS Media Types<br />
CSS Media types have been around<br />
since CSS 2, however there was no<br />
built in support for ‘querying’ based<br />
on media type. One of the common<br />
examples of media type usage was<br />
to have different css for ‘print’ and<br />
‘screen’ media types. One could define<br />
different style-sheets for these two<br />
media types as follows.<br />
<br />
<br />
Apart from Media types, CSS expands<br />
Media support with addition of Media<br />
Features.<br />
Media features<br />
Features help with the actual<br />
‘Media Queries’. The 11 features<br />
currently in the draft spec are<br />
- width<br />
- height<br />
- device-width<br />
- device-height<br />
- orientation<br />
- aspect-ratio<br />
- device-aspect-ratio<br />
- color<br />
- color-index<br />
- monochrome<br />
- resolution<br />
- scan<br />
- grid<br />
Let’s see how Media Features are<br />
used in Media Queries to gain a<br />
better idea of why do we need<br />
Media Features in the first place!<br />
CSS Media Queries<br />
Level 3 draft proposal specifies ‘Media<br />
Queries’ as a syntax that contain a media<br />
type and one or more expressions that<br />
checks for conditions of a particular<br />
‘Media Feature’. For example<br />
<br />
The above has a ‘media’ query that uses<br />
the Media Features, screen as well as<br />
monochrome to imply that if the current<br />
output is going to the printer (as<br />
opposed to the screen etc.) and the<br />
printer is monochrome, one should use<br />
the classes in example-bw.css.<br />
Media Queries and<br />
Responsive UI<br />
As we saw above, we can pick and choose<br />
what CSS to apply based on media and<br />
condition of a media feature. If we go<br />
back to the list of features, we’ll see that<br />
we have width/height, device-width/<br />
device-height as features. These can be<br />
used in media queries to pick various<br />
CSS styles for various types of devices.<br />
Let’s see a few examples<br />
Example 1:<br />
<br />
The above query implies that if the<br />
current media is a screen and its width<br />
is between 701 pixels and 800 pixels, it<br />
should use the medium.css.<br />
Example 2:<br />
The above query can be used in-line as<br />
well and would look something like this<br />
@media only screen and (max-width:<br />
850px) and (max-width: 850px)<br />
{<br />
…<br />
}<br />
Media Features – width,<br />
device-width and what’s the<br />
viewport meta tag<br />
When we setup a MVC application in<br />
Visual Studio, any template other than<br />
the ‘basic’ template includes the _Layout.<br />
cshtml file. In this file, in the <br />
section, we’ll see there is a line similar to<br />
the line below<br />
<br />
ViewPort is actually CSS Level 2.1<br />
defined spec, which was originally meant<br />
for defining the window used by<br />
continuous media like Video streams.<br />
However, with the advent of<br />
smart-phones, viewport is increasingly<br />
used to determine scaling and rendering<br />
in Mobile web browsers.<br />
The above setting sets the ‘width’ media<br />
feature’s value to the ‘device-width’<br />
declared by the browser.<br />
To Quote W3C specs – The Width Media<br />
Feature describes the width of the<br />
targeted display area of the output<br />
device.<br />
Similarly ‘device-width’ media feature<br />
describes the width of the device’s<br />
entire screen irrespective of the browser<br />
window’s width. On a desktop with<br />
screen resolution 1280x768 for example,<br />
the device-width is always 1280. On an<br />
iPhone -including iPhone 4- the<br />
device-width is 320.<br />
We use the viewport meta-tag to set the<br />
width to the device-width like this:<br />
DNcmagazine www.dotnetcurry.com | 49
We are forcing the width of the browser to the device-width in<br />
the portrait mode. In landscape mode however, the width will<br />
change as per the browser’s current width. We will see all of this<br />
in action.<br />
Step 5: Once the view model is in place, we build the solution.<br />
Next we add a folder Views\Home and initiate the Add View<br />
Wizard. As shown below, we create a Strongly typed view called<br />
‘Index’ that uses the Razor syntax and uses our TweetViewModel<br />
class for data bind. We don’t want any scaffolding code because<br />
we’ll build our media browser from scratch.<br />
With that, we wrap up our theory section, let’s see how we can<br />
put what we learnt into action.<br />
Creating a Responsive Image Viewer<br />
using CSS 3 and Media Queries only<br />
Today we’ll build a very simple ASP.NET MVC application that<br />
will render the images posted by any user on Twitter. This of<br />
course requires us to log in to Twitter because twitter no longer<br />
supports un-authenticated queries. For authentication and<br />
querying we’ll use LinqToTwitter, an excellent Twitter API library<br />
by Joe Mayo.<br />
Getting Started<br />
Step 1: We start off with a new ASP.NET MVC 4 <strong>Web</strong> Application<br />
(called Css3MediaBrowser here).<br />
Step 2: In the next screen, we select the ‘Empty’ project template.<br />
This is because we want to see the CSS queries in action without<br />
the influence of any other styling or JavaScripts applied.<br />
Step 3: Once the project is setup, we add reference to<br />
LinqToTwitter via the following command in the Nuget Package<br />
Manager Console<br />
PM> install-package linqtotwitter<br />
Setting up the View<br />
Step 4: With LinqToTwitter in place, next we add our ViewModel<br />
class in the Models folder and call it TweetViewModel. It’s a<br />
POCO with four properties. The ImageUrl contains the avatar of<br />
the user who tweeted, the ScreenName is the Twitter handle of<br />
the user who sent out the Tweet, MediaUrl is the Url of the<br />
image that we are going to use in the Image Browser and Tweet<br />
is the text of the Tweet.<br />
public class TweetViewModel<br />
{<br />
public string ImageUrl { get; set; }<br />
public string ScreenName { get; set; }<br />
public string MediaUrl { get; set; }<br />
public string Tweet { get; set; }<br />
}<br />
Once we hit Add, Visual Studio generates the following<br />
boilerplate for us.<br />
@model Css3MediaBrowser.Models.TweetViewModel<br />
@{<br />
Layout = null;<br />
}<br />
<br />
<br />
<br />
Twitter Image Browser<br />
<br />
<br />
<br />
<br />
<br />
<br />
This is about as barebones as it gets!<br />
Step 6: We first update the @model of the view and instead<br />
of getting just one instance of the TweetViewModel, we get an<br />
IEnumerable of the TweetViewModel<br />
@model<br />
IEnumerable<br />
Step 7: Our View (Index.cshtml) is going to consist of the<br />
following<br />
- A label and Input for the screen name of the Twitter user<br />
50 | DNCmagazine www.dotnetcurry.com
whose timeline we’ll search for images<br />
- A Submit button to post the screen name to the server<br />
- A series of divs that will be laid out dynamically with the help<br />
of CSS.<br />
<br />
<br />
The markup to achieve this is quite simple and shown below:<br />
<br />
<br />
@using (Html.BeginForm(“Index”, “Home”, FormMethod.<br />
Post))<br />
{<br />
Get Recent Tweets by<br />
<br />
<br />
<br />
}<br />
<br />
@foreach (var item in Model)<br />
{<br />
if (!string.IsNullOrEmpty(item.MediaUrl))<br />
{<br />
<br />
<br />
<br />
}<br />
}<br />
<br />
<br />
<br />
The Controller and Hooking up with Twitter<br />
To keep the example simple, we will cut some corners here and<br />
instead of splitting our implementation up into the standard<br />
multiple layers, we’ll build a ‘fat controller’ instead.<br />
Step 8: Add a new Empty MVC Controller called HomeController<br />
OAuth Recap<br />
b. LinqToTwitter will check the SessionStateCredential store to<br />
see if it has a valid credential. If not, it will automatically redirect<br />
the user to Twitter’s website for Authentication. Once the user has<br />
authenticated and provided permissions for our App to access<br />
their Twitter account, we’ll get re-directed back to our application<br />
(all this is handled transparently by LinqToTwitter).<br />
c. We have not built ANY backend to store Twitter’s<br />
Authentication Token or the user’s id, so every time our session<br />
expires, we’ll have to Authenticate with Twitter again. This is just<br />
to keep things simple, in a real world application you should store<br />
the Authentication Token and reuse it till it gets revoked.<br />
The Controller Implementation<br />
The sole job for the Controller in our app is to return a list of<br />
TweetViewModel objects that is then used to render the View.<br />
Step 9: We start the Controller implementation by declaring the<br />
following fields<br />
private IOAuthCredentials credentials = new<br />
SessionStateCredentials();<br />
private MvcAuthorizer auth;<br />
private TwitterContext twitterCtx;<br />
All three types (or Interfaces) are defined in the LinqToTwitter<br />
namespace. The first one is a SessionStateCredentials() instance<br />
is the container for the Twitter provided authentication token. It’s<br />
valid once user has approved our app to connect to Twitter.<br />
The MvcAuthorizer takes care of the checking if the credentials<br />
from above are valid and if not, redirects to Twitter, intercepts the<br />
login success and stores the credentials in the Session.<br />
TwitterContext is like a DB Context, as in it’s the library used for<br />
querying Twitter just as if it were a database.<br />
Before we get into the Controller implementation, a quick recap of<br />
how we’ll use LinqToTwitter:<br />
a. LinqToTwitter will require a ConsumerKey and ConsumerSecret<br />
for our application. We have to get this from http://dev.twitter.com<br />
. You can refer to our previous editions to see how we can create<br />
an application for ourselves on Twitter. Once you have the keys,<br />
add them to the appSetting section in the web.config as follows:<br />
Step 10: With the field initialization done, we are ready to get<br />
data from Twitter and send it to the Index View. Core of the code is<br />
in the GetTweets method.<br />
private ActionResult GetTweets(string screenName)<br />
{<br />
if (credentials.ConsumerKey == null || credentials.<br />
ConsumerSecret == null)<br />
{<br />
DNcmagazine www.dotnetcurry.com | 51
credentials.ConsumerKey = ConfigurationManager.<br />
AppSettings[“twitterConsumerKey”];<br />
credentials.ConsumerSecret = ConfigurationManager.<br />
AppSettings[“twitterConsumerSecret”];<br />
}<br />
auth = new MvcAuthorizer<br />
{<br />
Credentials = credentials<br />
};<br />
auth.CompleteAuthorization(Request.Url);<br />
if (!auth.IsAuthorized)<br />
{<br />
Uri specialUri = new Uri(Request.Url.ToString());<br />
return auth.BeginAuthorization(specialUri);<br />
}<br />
IEnumerable friendTweets =<br />
new List();<br />
if (string.IsNullOrEmpty(screenName))<br />
{<br />
return View(friendTweets);<br />
}<br />
twitterCtx = new TwitterContext(auth);<br />
IEnumerable friendTweets =<br />
(from tweet in twitterCtx.Status<br />
where tweet.Type == StatusType.User &&<br />
tweet.ScreenName == screenName &&<br />
tweet.IncludeEntities == true<br />
select new TweetViewModel<br />
{<br />
ImageUrl = tweet.User.ProfileImageUrl,<br />
ScreenName = tweet.User.Identifier.ScreenName,<br />
MediaUrl = GetTweetMediaUrl(tweet),<br />
Tweet = tweet.Text<br />
})<br />
.ToList();<br />
return View(friendTweets);<br />
}<br />
{<br />
if (status.Entities != null &&<br />
status.Entities.MediaMentions.Count > 0)<br />
{<br />
return status.Entities.MediaMentions[0].MediaUrlHttps;<br />
}<br />
return “”;<br />
}<br />
This wraps up the Controller and now we can finally go and<br />
checkout all the magic that CSS Media Queries can do.<br />
Adding Content to the Structure<br />
Earlier we setup the Index.cshtml, now that we have the<br />
Controller in place, we can build and run the application.<br />
Basic Styling<br />
By default, it looks up my ‘timeline’ for images I may have posted,<br />
and it shows one image per line, something like the following:<br />
We add the consumerKey and consumerSecret and add it to the<br />
instance of SessionStateCredentials(). Next we initialize the auth<br />
object and try to CompleteAuthorization. If authorization fails<br />
(session expired or first attempt), it reinitiates the authorization<br />
process by calling BeginAuthorization.<br />
Once Authorization is done, we create an instance of<br />
TwitterContext(auth) and query it to get list of Tweets for the<br />
provided screenName. Our Linq query transforms the ‘Status’<br />
object returned by the LINQ query into a TweetViewModel<br />
object. The GetTweetMediaUrl(…) extracts the URL of the Image<br />
if the Tweet has any images associated with it.<br />
private string GetTweetMediaUrl(Status status)<br />
Image provided by Sumit Maitra<br />
52 | DNCmagazine www.dotnetcurry.com
This as we can see is not pretty at all, so we go ahead and apply<br />
the following CSS styling<br />
But now let’s reduce the size of the browser and see how this looks<br />
.imageColumns {<br />
margin: 10px;<br />
}<br />
.mediaImage {<br />
max-width: 85%;<br />
max-height: 200px;<br />
}<br />
.mediaDiv {<br />
float: left;<br />
width: 16%;<br />
margin: 2px;<br />
height: 200px;<br />
border: 1px solid #7ba9ca;<br />
display: table-cell;<br />
vertical-align: middle;<br />
text-align: center;<br />
}<br />
h3 {<br />
font-family: ‘Segoe UI’;<br />
font-size: 0.8em;<br />
}<br />
As we can see, the images shrunk due to the width specified in<br />
% but the image divs are beginning to look odd with their fixed<br />
height.<br />
Finally if we look at the results in a Mobile browser (simulated), it<br />
looks totally wacky.<br />
This sets up four CSS classes.<br />
The ‘mediaDiv’ class arranges the image divs so that they float left<br />
instead of going one under the other. Once all horizontal spacing<br />
is occupied, it wraps the next div into the next line. They have been<br />
given a height of 200 pixels and a width of 16% which will roughly<br />
accommodate 6 images per line.<br />
The ‘mediaImage’ class sets the max-width of the image to 85% so<br />
that there is some spacing between two horizontal images, and a<br />
max-height is set to the same as the height specified in the<br />
‘mediaDiv’. This ensures that the aspect ratio for the images are<br />
maintained when we change the browser width. Let’s run this and<br />
see how it looks in various browser sizes. This time we ‘Get’ images<br />
for a Twitter handle called ‘FascinatingPics’. As we can see below,<br />
we have a nice collage of the 20 latest images posted by this<br />
account.<br />
So our one-size-fits all CSS style quickly breaks down as we view<br />
the page in different form-factors. We need to do something better.<br />
Getting Media Queries into Play<br />
As we can see from above, the Mobile view looks the most out of<br />
place. So let’s fix that first using a Media Query to declare a new<br />
set of styles. But before we do that, let’s do some house-cleaning<br />
first.<br />
DNcmagazine www.dotnetcurry.com | 53
- We take our basic css from above (and probably defined in<br />
Index.cshtml) and put it in a style sheet in the Styles folder.<br />
We call it media-browser-hd.css.<br />
- Next we add a reference to it in our cshtml’s section<br />
<br />
The imageColumns no longer has a margin as its set to 0 as<br />
opposed to 10 for the desktop style sheet.<br />
.mediaImage {<br />
max-width: 85%;<br />
max-height: 100px;<br />
}<br />
As we can see, the media attribute is providing a query that<br />
implies when the width of the browser is 1025 pixels or more,<br />
use the media-browser-hd.css style sheet.<br />
So if we were to reduce the size of our browser to less than<br />
1025 pixels, there would be no CSS applied again (because there<br />
are no other style sheets defined for other resolutions).<br />
For the Image itself, we’ve reduced the max-height to match the<br />
height from the mediaDiv style.<br />
h3 {<br />
font-family: ‘Segoe UI’;<br />
font-size: 0.6em;<br />
}<br />
Styling for Mobile Devices<br />
Well let’s fix that for the Mobile browser first. We add another<br />
style sheet in the Styles folder and call it<br />
media-browser-mobile.css. We keep the names of the classes<br />
same but slightly tweak the width and height of the mediaDiv<br />
.mediaDiv {<br />
float: left;<br />
width: 156px;<br />
margin: 1px;<br />
height: 100px;<br />
border: 1px solid #7ba9ca;<br />
display: table-cell;<br />
vertical-align: middle;<br />
text-align: center;<br />
}<br />
Finally the heading size is reduced from 0.8em to 0.6em to<br />
reduce the text size for the input box and button on top of the<br />
page. The CSS is now all setup. We hook it up in the Index.cshtml<br />
as follows:<br />
<br />
Let’s refresh our mobile browser and check<br />
As we can see above, we’ve reduced the height to 100px and<br />
fixed the width to 156px. The exact number 156px comes from<br />
the math (320/2) - 2 x (1 + 1)!<br />
Now what’s that formula Well, width of a ‘popular smartphone’<br />
is declared as 320 pixels (portrait). We want two images to fit in<br />
those pixels. So we divide by 2 to get (320 /2 =) 160 pixels. We<br />
have a margin of 1px and a border of 1 px. Left and right border<br />
for two images = 2 x (1 + 1) = 4 pixels. 160 – 4 = 156px.<br />
Okay, I went overboard there, but the fact you can target your<br />
CSS for well-known sizes, is what I am implying here. Now let’s<br />
look at the changes in each style for mobile.<br />
.imageColumns {<br />
margin: 0px;<br />
}<br />
Sweet! As we can see the image above, width is working and the<br />
browser is adapting itself beautifully.<br />
Handling a third form factor and embedding media<br />
queries in existing CSS<br />
So far we’ve seen two form-factors. But remember between 481<br />
pixels and 1024 pixels of screen-width, we have no CSS styling<br />
applied. So let’s fix that.<br />
This screen size is now very common with Tablets and handheld<br />
54 | DNCmagazine www.dotnetcurry.com
computers, so we’ll call this the Tablet settings. But instead of<br />
creating a third settings file, we’ll simply put the styles in the<br />
media-browser-hd.css file. You may choose to do this if there are<br />
common styles between the two form-factors, or you can go the<br />
separate file per form-factor route. I am doing it for academic<br />
reasons here.<br />
Open the media-browser-hd.css and put in the following<br />
@media only screen and (max-width: 1024px) {<br />
}<br />
This implies that the enclosing styles will be applicable to<br />
browsers up to the width of 1024 pixels.<br />
We adjust our style accordingly and the final set of styles are as<br />
follows:<br />
.imageColumns {<br />
margin: 5px;<br />
}<br />
Set Margin to 5px instead of 10 in the desktop style.<br />
.mediaImage {<br />
max-width: 85%;<br />
max-height: 150px;<br />
}<br />
Set max-height to 150 to match the height of the mediaDiv<br />
.mediaDiv {<br />
float: left;<br />
width: 24%;<br />
margin: 1px;<br />
height: 150px;<br />
border: 1px solid #7ba9ca;<br />
display: table-cell;<br />
vertical-align: middle;<br />
text-align: center;<br />
}<br />
Set the Width to 24% giving us about 4 images per line and the<br />
height to 150px so that landscaped images don’t look too odd.<br />
h3 {<br />
font-family: ‘Segoe UI’;<br />
font-size: 0.7em;<br />
}<br />
Finally we update the font-site to be 0.7em<br />
Updating the Media query for the<br />
media-browser-hd.css<br />
Now that we’ve two types of styles defined in one CSS file, we have<br />
to ensure that the file is actually included for both types. We revisit<br />
the Index.cshtml and update the condition to include<br />
media-browser-hd.css as follows<br />
<br />
Essentially instead of declaring a minimum width of 1025px, we’ve<br />
reduced it to 481px so that the desktop style sheet (*-hd.css) is<br />
included for any screen 481 pixels and above. Thanks to the<br />
inner media query that has a max-width set to 1024, screen width<br />
between 481 and 1024 are handled by the tablet styles, inside the<br />
inner query.<br />
We are all set, let’s run the application and search for images<br />
posted by the Twitter user ‘fascinatingpics’. I have composited the<br />
images from each form factor but we can see our media queries<br />
are in action and each form-factor shows a layout that looks nice<br />
and appropriate for the screen size.<br />
DNcmagazine www.dotnetcurry.com | 55
Things to note – Caveats, ifs and buts<br />
Well, that neatly sums up this example where we highlighted<br />
one way to leverage capabilities of CSS media queries. We only<br />
used the device width feature, but there are 11 other features<br />
for us to explore if we need them. Idea was to introduce you to<br />
them so that you can utilize them when the need arises.<br />
Key takeaways<br />
1. We have NO JavaScript references in our project whatsoever.<br />
2. CSS Media Queries are well supported in IE9+, Firefox 3.5+<br />
and most versions of Chrome. This app was built using IE10 and<br />
verified on Firefox 20.0.1 on Windows 8.<br />
3. We did not investigate any techniques to adapt to different<br />
image sizes based on form factor so this implementation has a<br />
disadvantage where it’s pulling the same amount of data on all<br />
screens which might be a problem for high latency networks like<br />
some mobile broadband. This can however be mitigated with<br />
some help from the Image source. Twitter supports multiple<br />
image sizes and we could use that to fetch different ‘versions’ of<br />
the same image.<br />
4. Older browser support: This is a thorny issue and often we<br />
simply cannot leave behind folks that are behind on the<br />
adoption curve. In such cases, there are JavaScript shims<br />
available. One of the popular ones is Respond.js. You can check it<br />
out at http://wordpress.org/extend/plugins/respondjs/<br />
5. The code for Twitter Authentication is not vetted from a<br />
security air-tightness point of view. So for a more ‘secure’ way,<br />
use ASP.NET’s Twitter Authentication using DotNetOpenAuth and<br />
then use LinqToTwitter to query if you want.<br />
Conclusion<br />
Responsive UI design for the web has got a huge boost with CSS<br />
Media Queries Level 3. This article is aimed to serve as a primer<br />
to Media queries. Feel free to explore various features that are<br />
available and adapt them to serve up the best possible Views for<br />
the maximum percentage of your users<br />
The source code can be downloaded from our<br />
GitHub repository at bit.ly/dncm6-cssmq<br />
Suprotim Agarwal, ASP.NET Architecture MVP,<br />
is an author and the founder of popular .NET<br />
websites like dotnetcurry.com, devcurry.com<br />
and the DNC Magazine. You can follow him on<br />
twitter @suprotimagarwal<br />
56 | DNCmagazine www.dotnetcurry.com
DNC Magazine<br />
www.dotnetcurry.com/magazine<br />
57
Team foundation server<br />
Team Foundation Server<br />
Extending Team Foundation<br />
Server 2012<br />
ALM MVP Subodh Sohoni shows us the various extensibility points available<br />
in TFS and how to leverage them to align TFS to (existing) processes instead<br />
of the other way round!<br />
S<br />
ervices of Team Foundation<br />
Server 2012 (TFS 2012) have<br />
a rich set of features to<br />
support generic application<br />
lifecycle management out of box. These<br />
services are to provide support of version<br />
control, build management and project<br />
management through work item tracking.<br />
In addition to these core services, TFS<br />
2012 also offers reporting of data<br />
generated during development activities<br />
and a collaboration portal for each<br />
software project undertaken by the team.<br />
It supports the process models based<br />
upon CMMI, Agile and Scrum.<br />
All these features are provided with<br />
certain default settings. These settings of<br />
the features make TFS behave in a certain<br />
way. It is the way these features are<br />
commonly used. But, it is also true that<br />
the way each feature is designed, cannot<br />
satisfy everyone’s requirement. In fact,<br />
more the generic nature of these features,<br />
more are the chances that it may not<br />
satisfy anyone. The way organizations<br />
behave are, as per the set processes that<br />
they have implemented over the years<br />
and those processes may not be<br />
supported by the default behaviour of<br />
TFS. It is possible that those processes<br />
have evolved over the lifetime of the<br />
organization and embodies the decisions<br />
made during each unique situation that<br />
the organizations passed through. It is<br />
very difficult to say if processes<br />
followed by an organization are wrong,<br />
although those may not be exactly as<br />
implemented in TFS. Processes often<br />
gives a unique identity to the<br />
organization and those should not be<br />
changed if those processes are working<br />
for that organization. Tools like TFS may<br />
provide efficient ways to implement the<br />
same processes and flexibility of the tool<br />
to accommodate various processes of the<br />
organization, becomes its strength. TFS<br />
2012 does provide many different<br />
opportunities to us to extend its services,<br />
so that we may implement specific and<br />
not just standard processes with it.<br />
Start of the implementation of a process<br />
is with the Process Template which is a<br />
set of configurations that are applied to a<br />
team project when it is created. It<br />
provides configuration of TFS 2012 that<br />
has pre-built process templates and<br />
supports implementation of CMMI, Agile<br />
and Scrum. Organizations can pick any<br />
one of them as a starting point but need<br />
not be satisfied with settings that are out<br />
of box.<br />
The strongest point of these process<br />
templates is that they are customizable. It<br />
is possible to:<br />
58 | DNCmagazine www.dotnetcurry.com
Many more such customizations are possible. A Team Foundation<br />
Server Power Tool (http://www.microsoft.com/en-in/download/<br />
details.aspxid=35775) makes it easy to customize processes as<br />
you need.<br />
TFS 2012 is a set of WCF services. These services are exposed for<br />
extension by a well published object model. This object model is<br />
encapsulated in components i.e. TFS APIs. The structure of these<br />
APIs is:<br />
One of the most popular use of this object model is to write an<br />
event handler that executes when a certain event is raised by<br />
TFS. For example, when someone creates a new work item, we<br />
may want to check if the work item type of that newly created<br />
work item is a ‘User Story’ and spawns a set of work items of the<br />
type ‘Task’ to implement that user story. In this case, we can<br />
create an event handler for the event of ‘WorkItemChanged’.<br />
For this, we can write a class that implements Microsoft.<br />
TeamFoundation.Framework.Server.ISubscriber interface. In the<br />
ProcessEvent method, we can write the code that will execute<br />
when the event happens. Snippet of boilerplate code is as<br />
follows:<br />
WorkItemChangedEvent)<br />
{<br />
string machineName = System.Environment.MachineName;<br />
TfsTeamProjectCollection tpc = new<br />
TfsTeamProjectCollection(new Uri(“http://” +<br />
machineName + “:8080/tfs/DefaultCollection”));<br />
WorkItemChangedEvent ev = notificationEventArgs as<br />
WorkItemChangedEvent;<br />
WorkItemStore ws = tpc.GetService();<br />
Microsoft.TeamFoundation.WorkItemTracking.<br />
Client.WorkItem wi = ws.GetWorkItem(ev.<br />
CoreFields.IntegerFields[0].NewValue);<br />
Project project = ws.Projects[ev.PortfolioProject];<br />
if (wi.Type == project.WorkItemTypes[“User Story”]<br />
&& wi.RelatedLinkCount == 0)<br />
{<br />
Microsoft.TeamFoundation.WorkItemTracking.<br />
Client.WorkItem NewTask = new Microsoft.<br />
TeamFoundation.WorkItemTracking.Client.<br />
WorkItem(project.WorkItemTypes[“Task”]);<br />
NewTask.Title = “Create architecture diagrams<br />
for user story “ + wi.Id;<br />
WorkItemLinkTypeEnd linkTypeEnd =<br />
ws.WorkItemLinkTypes.<br />
LinkTypeEnds[“Parent”];<br />
NewTask.Links.Add(new<br />
RelatedLink(linkTypeEnd,wi.Id));<br />
NewTask.Save();<br />
}<br />
}<br />
return EventNotificationStatus.ActionApproved;<br />
}<br />
Similar to ‘WorkItemChanged’ event, TFS raises following events<br />
for which we can write various event handlers:<br />
public EventNotificationStatus ProcessEvent(TeamFound<br />
ationRequestContext requestContext, NotificationType<br />
notificationType, object notificationEventArgs, out int<br />
statusCode, out string statusMessage, out Microsoft.<br />
TeamFoundation.Common.ExceptionPropertyCollection properties)<br />
{<br />
statusCode = 0;<br />
statusMessage = string.Empty;<br />
properties = null;<br />
if (notificationType == NotificationType.<br />
Notification && notificationEventArgs is<br />
DNcmagazine www.dotnetcurry.com | 59
Since these event handlers execute on TFS itself (in fact,<br />
within the process of TFS), these can be written using any of the<br />
Microsoft .NET languages. It does not matter which client<br />
performed the activity that triggered the event, which means<br />
that even if your project is a Java project, the event handler will<br />
still have to be written in .NET.<br />
The same Team Foundation Object Model can also be used to<br />
access Team Foundation <strong>Services</strong> from standalone applications.<br />
For example, we can create new Requirement type work items<br />
when a requirement document is approved in SharePoint. For<br />
this purpose, we can write a SharePoint workflow application<br />
in which we can refer to the TFS APIs, use those to create new<br />
Requirement type work items as desired and then associate that<br />
workflow with the appropriate library on the SharePoint portal.<br />
Following code shows how to do that (Some of the methods to<br />
handle worksheet data are not shown as they are secondary to<br />
the purpose)<br />
private void CreateRequirements()<br />
{<br />
prj = (string)workflowProperties.Item[“Team Project<br />
Name”];<br />
collection = new TfsTeamProjectCollection(new<br />
Uri(“http://ssgs-vs-tfs2012:8080/tfs/<br />
DefaultCollection”));<br />
store = collection.GetService();<br />
SP<strong>Web</strong> web = workflowProperties.<strong>Web</strong>;<br />
SPFile file = web.GetFile(@”http://ssgs-vs-tfs2012/<br />
sites/DefaultCollection/SSGS%20CMMI/Requirements%20<br />
Documents/RequirementDocument.xlsx”);<br />
SPFileStream dataStream = (SPFileStream)file.<br />
OpenBinaryStream();<br />
SpreadsheetDocument document = SpreadsheetDocument.<br />
Open(dataStream, false);<br />
WorkbookPart workbookPart = document.WorkbookPart;<br />
IEnumerable sheets = document.WorkbookPart.<br />
Workbook.GetFirstChild().<br />
Elements();<br />
string relationshipId = sheets.First().Id.Value;<br />
WorksheetPart worksheetPart =<br />
(WorksheetPart)document.WorkbookPart.<br />
GetPartById(relationshipId);<br />
Worksheet workSheet = worksheetPart.Worksheet;<br />
SheetData sheetData = workSheet.<br />
GetFirstChild();<br />
IEnumerable rows = sheetData.<br />
Descendants();<br />
int i = rows.Count();<br />
foreach (Cell cell in rows.ElementAt(0))<br />
{<br />
string Title = GetCellValue(document, cell);<br />
WorkItem Requirement = new WorkItem(store.<br />
Projects[prj].WorkItemTypes[“Requirement”]);<br />
Requirement.Title = Title;<br />
Requirement.Save();<br />
}<br />
}<br />
public static string GetCellValue(SpreadsheetDocument<br />
document, Cell cell)<br />
{<br />
SharedStringTablePart stringTablePart = document.<br />
WorkbookPart.SharedStringTablePart;<br />
string value = cell.CellValue.InnerXml;<br />
if (cell.DataType != null && cell.DataType.Value ==<br />
CellValues.SharedString)<br />
{<br />
return stringTablePart.SharedStringTable.<br />
ChildElements[Int32.Parse(value)].InnerText;<br />
}<br />
else<br />
{<br />
return value;<br />
}<br />
}<br />
Another use of this object model is to create custom check-in<br />
policies. Such a custom check-in policy will exclusively use client<br />
side objects of Team Foundation Server. Checks on the code or<br />
associated work items can be done by using those. For example,<br />
we can check if the code being checked in has an associated<br />
work item of a specific type like a ‘Code Review’ and make<br />
further check on it to ensure that it is having the state as<br />
‘Approved’, for allowing the check-in to succeed. Since check-in<br />
policy is enabled on TFS but executes on the client side, it has to<br />
be developed using a language that is appropriate for the<br />
client environment. To develop check-in policies for Visual<br />
Studio, we can use Microsoft .NET languages, but for Team<br />
Explorer Everywhere 2012, that is a plug-in to Eclipse, we can<br />
use TFS SDK 2012 (For Java). It can be downloaded from http://<br />
www.microsoft.com/en-us/download/details.aspxid=22616.<br />
Many of the applications that use the Team Foundation Object<br />
Model are rich client applications so that they can reference the<br />
assemblies that encapsulate these objects. Size of such<br />
applications along with the TFS API assemblies is not optimized<br />
for lean environments like Windows Phone, Android Apps and<br />
Windows Store Apps (for Surface). For such environments, we<br />
need a broker that will consume TFS data using heavy TFS API<br />
assemblies and then in turn publish that same data as a lean<br />
HTTP service.<br />
60 | DNCmagazine www.dotnetcurry.com
A sample implementation of TFS OData Service and its clients<br />
can be downloaded from http://www.microsoft.com/en-in/download/details.aspxid=36230.<br />
OData service can be published on<br />
a local IIS server to make on-premise TFS accessible to tablets<br />
and also been published on Microsoft Azure to make it accessible<br />
from anywhere in the Internet. TFS Service (in the cloud<br />
https://tfs.visualstudio.com) also supports access through OData<br />
service.<br />
team members, teams,<br />
groups, iterations and<br />
many more. Whenever<br />
any event occurs like<br />
check-in, creation of<br />
work item, completion<br />
of build etc. at that<br />
time data is generated<br />
by TFS. This data is<br />
stored in the<br />
transaction data<br />
tables that are highly<br />
normalized, hence not<br />
suitable to be used for<br />
reporting. That data<br />
is then processed in<br />
the non-normalized<br />
form that is called TFS<br />
Datawarehouse and<br />
then aggregated in a<br />
data cube. Whenever the definition of work items is customized,<br />
the structure of the datawarehouse and the cube is also updated<br />
as appropriate. Data Cube or DataWarehouse forms the basis for<br />
reports. Although various process templates define appropriate<br />
reports out of box, those are just the beginning of reporting. We<br />
can create as many custom reports as the organization needs<br />
for management of projects using the same data cubes and<br />
warehouse. These reports can be ad-hoc reports created as Excel<br />
Pivot Tables or Pivot Charts or they can be predefined reports to<br />
be hosted in SQL Server Reporting <strong>Services</strong> or any other<br />
reporting client that can use SQL Server Analsysis <strong>Services</strong>.<br />
This multitude of options to extend TFS makes it one of the most<br />
flexible set of services for Application Lifecycle Management.<br />
While being flexible, it also is the most powerful and integrated<br />
solution for ALM<br />
Subodh Sohoni, is a VS ALM MVP and a<br />
Microsoft Certified Trainer since 2004.<br />
Follow him on twitter<br />
@subodhsohoni and check out his articles<br />
on TFS and VS ALM at http://bit.ly/Ns9TNU<br />
TFS 2012 provides an infrastructure for publishing reports<br />
related to status and health of the development projects. It<br />
stores the data of each artefact created during the development<br />
process. Those artefacts can be the code, work items, builds,<br />
DNcmagazine www.dotnetcurry.com | 61
ASP.NET WEB API<br />
Head First Into ASP.NET<br />
<strong>Web</strong> API - Media Formatters<br />
Suprotim Agarwal introduces ASP.NET <strong>Web</strong> API briefly before walking us through<br />
what are Media Formatters in <strong>Web</strong> API and how to build one for ourselves<br />
ASP.NET <strong>Web</strong> API<br />
is a framework<br />
that makes it easy<br />
to build HTTP<br />
services on top of<br />
the .NET<br />
framework<br />
Microsoft introduced ASP.NET <strong>Web</strong> API as<br />
a lightweight HTTP based web services<br />
framework with the launch of Visual<br />
Studio 2012 and .NET Framework 4.5.<br />
Prior to <strong>Web</strong> API, communicating over<br />
HTTP in Microsoft’s dev stack was a<br />
colorful mess comprising of WS-* stack.<br />
There were other third party libraries<br />
that were built ground up on .NET, like<br />
ServiceStack.<br />
With <strong>Web</strong> API, Microsoft took a clean<br />
break and built a framework that stuck to<br />
the basics of HTTP without introducing<br />
any complicated stubbing or end<br />
point proxies.<br />
After a long period of incubation in<br />
the WCF team, the <strong>Web</strong> API team was<br />
merged with the ASP.NET MVC team.<br />
A lot of the final <strong>Web</strong> API’s end point<br />
implementations thus mimic MVC.<br />
If all this HTTP service talk sounds<br />
confusing, let’s see if this diagram<br />
helps.<br />
62 | DNCmagazine www.dotnetcurry.com
• In the diagram we just saw, a user is sitting at the computer and types in a URL in the browser.<br />
Notice that apart from the URL he also types in /suprotimagarwal which tells the server<br />
‘something’.<br />
• The browser sends this request over HTTP to (GET) the actual site. The discovery process of<br />
www.twitter.com leverages the routing mechanism of the internet and it happens over port 80<br />
using HTTP.<br />
• The request is eventually sent to the Twitter server where it is processed by a web application<br />
running a service on top of HTTP at port 80.<br />
• This service then interprets ‘suprotimagarwal’ in the URL as a request to GET (as in the HTTP<br />
request keyword) the profile of suprotimagarwal. Thus it makes appropriate backend calls to<br />
retrieve the user profile data and sends it back to the requestor. In this case the user’s<br />
browser renders the data that came in. Note, sometimes, the raw data may not be sent back,<br />
instead the data is used to build the respective view and the complete view (in html) may be<br />
returned, but in context of <strong>Web</strong> API, it’s not a view, only the data. Keep the term ‘Content Type<br />
Negotiation’ in mind, we will circle back to it in the next section.<br />
Overall the idea of <strong>Web</strong> API is to offer services that work seamlessly over HTTP as we saw<br />
above. This is a great way to build public APIs for multiple client platforms.<br />
Http and Content Types<br />
Whenever we think of HTTP URLs and web browsers, we picture<br />
HTML being received by the browser and then rendered.<br />
However, there are instances when our browser renders an<br />
image by itself, or plays music or shows a PDF document in<br />
the browser itself. These are instances where data/content<br />
other than html was sent over and the browser ‘understood’ the<br />
‘Content Type’ and acted appropriately. For example, if we have<br />
link to a PDF and the browser has a plugin for it, it can directly<br />
display the PDF (in browser).<br />
When you build <strong>Web</strong> API based services, you can return data<br />
as JSON by default. However you can send out other types of<br />
content as well. For example, if you are sending out Calendar<br />
information, you can send it out as an iCal, when sending out<br />
graphs data you can send out the rendered image and so on.<br />
What type of data is acceptable to the client and what can the<br />
server provide is a ‘negotiation’ that happens between the client<br />
and the server before either a content type is agreed upon or a<br />
406 (Not Acceptable) error is sent by the server implying, it<br />
cannot provide data in any of the requested Content Types.<br />
Media Formatters and Content<br />
Types<br />
As I mentioned briefly above, <strong>Web</strong> API services return data in<br />
JSON or XML. This is because the data returned by the<br />
Controller is converted into JSON or XML by a component<br />
referred to as Media Formatter. <strong>Web</strong> API has two of these out<br />
of the box, no points for guessing they are for JSON and XML<br />
formats.<br />
DNcmagazine www.dotnetcurry.com | 63
Media Formatters are the extension points that allow us to plug<br />
in our own Formatter and thus help our Service support more<br />
Content Types.<br />
Defining the Premise<br />
Today we will see how we can build a <strong>Web</strong> Service that returns<br />
Appointments in a rudimentary Timekeeping application that<br />
maintains ‘Timecards’.<br />
On top of the Service, we will have a Single Page application<br />
that uses Knockout JS to render basic CRUD screens for<br />
Timecards. We will also create a Media Formatter that formats<br />
these ‘Timecards’ into the VCalendar format so that they can be<br />
downloaded and imported into our Calendaring tools like<br />
Outlook etc.<br />
Building a ‘Time Card’<br />
Service<br />
We will start off by creating a new MVC 4 project in Visual Studio<br />
and call it TimeKeepr. From the templates list, we select the<br />
‘<strong>Web</strong> API’ template to get started.<br />
First up, let’s build the model and the controller.<br />
The Model and (<strong>Web</strong>) API<br />
Controller<br />
Our Model is very simple. It has the following properties. As we<br />
can see, it’s a bare-bones definition of a Task, it simply maintains<br />
Summary, Description, StartDate and EndDate.<br />
public class TimeCard<br />
{<br />
public int Id { get; set; }<br />
public string Summary { get; set; }<br />
public string Description { get; set; }<br />
public DateTime StartDate { get; set; }<br />
public DateTime EndDate { get; set; }<br />
public string Status { get; set; }<br />
}<br />
Once the model is added, we build the app, and then add a<br />
TimeCardController with the following settings. As you can see,<br />
we are creating API controllers as opposed to MVC Controllers so<br />
no views are going to be generated.<br />
The DBContext that is created by the scaffold pretty much takes<br />
care of the database persistence. Today we will cut some ‘pattern’<br />
corners and leave the DBContext instantiation in the controller<br />
itself. For a production system, it should be a part of the<br />
Repository and we should be injecting repository instances into<br />
the controller.<br />
The View using<br />
Knockout JS<br />
We will build a single page View with Add and Edit functionality.<br />
The view will use the Knockout JS library to implement two way<br />
data-binding. This will give us a nice and responsive UI. We will<br />
post data back to the server using Ajax. We will also use a plugin<br />
by Ryan Niemeyer that will help us control Knockout’s two way<br />
data-binding by giving us options to either commit or roll-back<br />
any changes.<br />
Setting up Dependencies<br />
We’ll update our jQuery and KO dependencies from the Nuget<br />
Package Manager using the following commands<br />
PM> update-package jquery –version 1.9.1<br />
PM> update-package knockoutjs<br />
Next we’ll add a JS called knockout.protectedObservable.js and<br />
add the following script by Ryan Niemeyer.<br />
// Source-Ryan Niemeyer’s JS Fiddle at http://jsfiddle.<br />
net/rniemeyer/X9rRa/<br />
64 | DNCmagazine www.dotnetcurry.com
wrapper for an observable that protects value until<br />
committed<br />
ko.protectedObservable = function (initialValue)<br />
{<br />
//private variables<br />
var _temp = initialValue;<br />
var _actual = ko.observable(initialValue);<br />
var result = ko.dependentObservable({<br />
read: _actual,<br />
write: function (newValue)<br />
{<br />
_temp = newValue;<br />
}<br />
});<br />
//commit the temporary value to our observable, if it<br />
is different<br />
result.commit = function ()<br />
{<br />
if (_temp !== _actual())<br />
{<br />
_actual(_temp);<br />
}<br />
};<br />
//notify subscribers to update their value with the<br />
original<br />
result.reset = function ()<br />
{<br />
_actual.valueHasMutated();<br />
_temp = _actual();<br />
};<br />
return result;<br />
};<br />
The above script prevents Updates to the ViewModel unless<br />
we call an explicit commit() method. Once this script is in, our<br />
dependencies are set. Let’s build a View Model.<br />
The View Model<br />
We’ll add a new JavaScript file to the Scripts folder called<br />
timekeepr-vm.js<br />
In the ViewModel, we have a collection called timecards that<br />
essentially lists all the time cards in the database.<br />
The selectedTimeCard property is set when the user clicks on<br />
the ‘Select’ link on any of the Time Card rows OR when a new<br />
TimeCard is added.<br />
The addNewTimeCard method is called when user clicks on the<br />
“Add New TimeCard” button. It adds an empty TimeCard object<br />
into the timecards collection. This method is also called when<br />
we are loading data from server into our ViewModel. In that<br />
case, it maps the JSON objects into KO Observable objects.<br />
The commitAll function is a helper function that commits each<br />
property in the selectedTimeCard. It has to be called before we<br />
save any changes to the database.<br />
var viewModel = {<br />
timecards: ko.observableArray([]),<br />
selectedTimeCard: ko.observable(),<br />
addTimeCard: function ()<br />
{<br />
viewModel.timecards.push(addNewTimeCard());<br />
},<br />
selectTimeCard: function ()<br />
{<br />
viewModel.selectedTimeCard(this);<br />
},<br />
commitAll: function ()<br />
{<br />
viewModel.selectedTimeCard().Summary.commit();<br />
viewModel.selectedTimeCard().Description.commit();<br />
viewModel.selectedTimeCard().StartDate.commit();<br />
viewModel.selectedTimeCard().EndDate.commit();<br />
viewModel.selectedTimeCard().Status.commit();<br />
}<br />
};<br />
function addNewTimeCard(timeCard)<br />
{<br />
if (timeCard == null)<br />
{<br />
return {<br />
Id: ko.protectedObservable(0),<br />
Summary: ko.protectedObservable(“[Summary]”),<br />
Description: ko.protectedObservable(“[Description]”),<br />
StartDate: ko.protectedObservable((<br />
new Date()).toJSON()),<br />
EndDate: ko.protectedObservable((<br />
new Date()).toJSON()),<br />
Status: ko.protectedObservable(“Tentative”)<br />
};<br />
}<br />
else<br />
{<br />
return {<br />
DNcmagazine www.dotnetcurry.com | 65
Id: ko.protectedObservable(timeCard.Id),<br />
Summary: ko.protectedObservable(timeCard.Summary),<br />
Description: ko.protectedObservable(timeCard.<br />
Description),<br />
StartDate: ko.protectedObservable((new Date(timeCard.<br />
StartDate)).toJSON()),<br />
EndDate: ko.protectedObservable((new Date(timeCard.<br />
EndDate)).toJSON()),<br />
Status: ko.protectedObservable(timeCard.Status)<br />
};<br />
}<br />
}<br />
The View<br />
Once the view model is in place, we setup our view by updating<br />
the Index.cshtml. This page is served up by the HomeController,<br />
but we don’t have any Controller side code for it. We’ll make<br />
AJAX calls to the API controller to manipulate data.<br />
<br />
<br />
<br />
<br />
Add New TimeCard<br />
<br />
<br />
<br />
<br />
Summary<br />
Start Date<br />
End Date<br />
<br />
<br />
<br />
<br />
<br />
<br />
<br />
<br />
Select<br />
Demo<br />
VCalendar<br />
<br />
<br />
<br />
<br />
<br />
Summary<br />
<br />
<br />
Description<br />
<br />
<br />
Start Date<br />
<br />
<br />
End Date<br />
<br />
<br />
Status<br />
<br />
<br />
Save<br />
Cancel<br />
<br />
<br />
<br />
@section Scripts{<br />
<br />
<br />
<br />
<br />
<br />
<br />
<br />
<br />
}<br />
We have split the view into two using the ‘left-section’ and<br />
‘right-section’ CSS classes. The ‘left-section’ has the List of all<br />
the TimeCards whereas the ‘right-section’ shows the currently<br />
selected card if any.<br />
To edit a card, we ‘Select’ it first. This populates the<br />
selectedTimeCard property in the view model which is bound to<br />
the ‘right-section’ and thus it comes up automatically. Once we<br />
do the changes and save, the data is posted back to the server<br />
and the selectedTimeCard is cleared out.<br />
The implementation for adding new, selecting and saving data is<br />
in the timekeeper-client.js.<br />
66 | DNCmagazine www.dotnetcurry.com
$(document).ready(function ()<br />
{<br />
$.ajax({<br />
url: “/api/TimeCard”,<br />
method: “GET”,<br />
contentType: “text/json”,<br />
success: function (data)<br />
{<br />
viewModel.timecards.removeAll();<br />
$.each(data, function (index)<br />
{<br />
viewModel.timecards.push(addNewTimeCard(<br />
data[index]));<br />
});<br />
ko.applyBindings(viewModel);<br />
}<br />
});<br />
Once the document loads, we call the server to get all the time<br />
cards available. When the server returns the data, we add each<br />
TimeCard to the view model. Since the ‘timecards’ property is a<br />
KO Observable, Knockout will automatically update the view as<br />
each timecard is added.<br />
$(document).delegate(“#submitButton”, “click”, function<br />
()<br />
{<br />
viewModel.commitAll();<br />
var vm = viewModel.selectedTimeCard;<br />
var current = ko.utils.unwrapObservable(vm);<br />
var stringyF = JSON.stringify(ko.mapping.<br />
toJS(current));<br />
var action = “PUT”;<br />
var vUrl = “/api/TimeCardId=” + current.Id();<br />
if (current.Id()==0)<br />
{<br />
action = “POST”;<br />
vUrl = “/api/TimeCard”;<br />
}<br />
$.ajax(<br />
{<br />
url: vUrl,<br />
contentType: “application/json;charset=utf-8”,<br />
type: action,<br />
data: stringyF,<br />
success: function (response)<br />
{<br />
alert(“Saved Successfully”);<br />
viewModel.selectedTimeCard(null);<br />
},<br />
failure: function (response)<br />
{<br />
alert(“Save Failed”);<br />
}<br />
});<br />
});<br />
The Submit button click handler has the implementation for<br />
sending the currently selected TimeCard’s information to be<br />
saved in the Server.<br />
To do this, the ‘selectedTimeCard’ object is converted into a JSON<br />
string and put in the payload of the Ajax POST.<br />
$(document).delegate(“#cancelButton”, “click”, function<br />
()<br />
{<br />
viewModel.selectedTimeCard(null);<br />
});<br />
Cancelling the Edit process simply resets the selectedTimeCard<br />
property to null. This hides the Edit Panel on the UI.<br />
Running the App to Get and Put/<br />
Post data to <strong>Web</strong> API<br />
Now that we have our <strong>Web</strong> API Controller and Index.cshtml with<br />
its client side dependencies setup, let’s run the app. On first run,<br />
we are greeted with a near empty screen with only the ‘Add New<br />
TimeCard’ button and the list headers for the TimeCards<br />
Clicking on ‘Add New TimeCard’ adds a default time card<br />
DNcmagazine www.dotnetcurry.com | 67
We can edit this by clicking on the ‘Select’ link<br />
We update the Summary and Description before hitting ‘Save’, the<br />
data gets updated in the DB<br />
The next POST request pushes JSON Data to the Server.<br />
Behind the Scenes<br />
On the next load, we again do a GET request and we see an array<br />
of JSON objects is returned, it has the newly created object in it.<br />
Now that we’ve seen what’s happening in the UI, let’s see what’s<br />
happening behind the scenes. To look at the HTTP Traffic, I had<br />
kept Fiddler running and the first request in Fiddler is a GET<br />
request which as we can see below, gets an empty JSON in return.<br />
In each of the cases, if you see the ‘Content-Type’ header<br />
parameter, it’s set to Content-Type: text/json because we are<br />
requesting for the JSON data or posting JSON data. The <strong>Web</strong> API<br />
service can serve JSON and XML, it sees a request for JSON and<br />
uses the JSON formatter to convert the Entity or Entity List into<br />
JSON. It’s worth noting that in our API Controller, we return<br />
Domain entities or their lists directly. Note the GetTimeCards and<br />
the GetTimeCard methods below.<br />
namespace TimeKeepr.Models<br />
{<br />
public class TimeCardController : ApiController<br />
68 | DNCmagazine www.dotnetcurry.com
{<br />
private TimeKeeprContext db = new TimeKeeprContext();<br />
// GET api/TimeCard<br />
public IEnumerable GetTimeCards()<br />
{<br />
return db.TimeCards.AsEnumerable();<br />
}<br />
// GET api/TimeCard/5<br />
public TimeCard GetTimeCard(int id)<br />
{<br />
TimeCard timecard = db.TimeCards.Find(id);<br />
if (timecard == null)<br />
{<br />
throw new HttpResponseException(Request.<br />
CreateResponse(HttpStatusCode.NotFound));<br />
}<br />
return timecard;<br />
}<br />
…<br />
}<br />
}<br />
Custom Media Type<br />
Formatters and<br />
Content Types<br />
Thus, we’ve seen how the out of the box media formatters work,<br />
let’s see what options we have for formatting data with a custom<br />
media formatter.<br />
Use Case<br />
The information we have can be easily saved as Calendar items.<br />
So it would be nice if our service could serve up VCalendar items<br />
too. VCalendar is a data format that most calendaring tools<br />
support. If our <strong>Web</strong> API could serve up VCalendar items for each<br />
TimeCard, then they could be easily integrated with calendaring<br />
tools like Outlook.<br />
With this use case in mind, let’s create a<br />
VCalendarMediaTypeFormatter.<br />
Our Custom Media Type<br />
Formatter<br />
Custom Media Type Formatters subclass the<br />
MediaTypeFormatter abstract class or one of its<br />
implementations. We will subclass the<br />
BufferedMediaTypeFormatter.<br />
public class VCalendarMediaTypeFormatter :<br />
BufferedMediaTypeFormatter<br />
{<br />
…<br />
}<br />
First thing we do in the constructor is to clear out all Supported<br />
media types and only keep “text/calendar”, which is the standard<br />
header type for requesting calendar items.<br />
public VCalendarMediaTypeFormatter()<br />
{<br />
SupportedMediaTypes.Clear();<br />
SupportedMediaTypes.Add(new MediaTypeHeaderValue(“text/<br />
calendar”));<br />
}<br />
Next we override the SetDefaultContentHeaders and set<br />
content-disposition as an attachment with a generic file name<br />
(myFile.ics).<br />
public override void SetDefaultContentHeaders(Type type,<br />
HttpContentHeaders headers, MediaTypeHeaderValue<br />
mediaType)<br />
{<br />
headers.Add(“content-disposition”, (new<br />
ContentDispositionHeaderValue(“attachment”) {<br />
FileName = “myfile.ics” }).ToString());<br />
base.SetDefaultContentHeaders(type, headers,<br />
mediaType);<br />
}<br />
Since our formatter will not be accepting ICS files in posts, we’ll<br />
override the CanReadType method and return false directly.<br />
public override bool CanReadType(Type type)<br />
{<br />
return false;<br />
}<br />
Our Formatter should only try to format requests of type<br />
TimeCard and not any other type. So we limit this in the<br />
CanWriteType method by checking if the incoming type is of type<br />
TimeCard only.<br />
DNcmagazine www.dotnetcurry.com | 69
public override bool CanWriteType(Type type)<br />
{<br />
if (type == typeof(TimeCard))<br />
{<br />
return true;<br />
}<br />
}<br />
Next comes the crux of the formatter - the WriteToStream method.<br />
We cast the incoming object into a TimeCard and call the<br />
WriteVCalendar method that writes to the stream buffer.<br />
public override void WriteToStream(Type type, object<br />
value, Stream stream, System.Net.Http.HttpContent<br />
content) {<br />
using (var writer = new StreamWriter(stream))<br />
{<br />
var timeCard = value as TimeCard;<br />
if (timeCard == null)<br />
{<br />
throw new InvalidOperationException(“Cannot serialize<br />
type”);<br />
}<br />
WriteVCalendar(timeCard, writer);<br />
}<br />
stream.Close();<br />
}<br />
As we can see below, VCalendar items are simply formatted text<br />
and we use the data in our TimeCard to create the appropriate<br />
string for the VCalendar.<br />
private void WriteVCalendar(TimeCard contactModel,<br />
StreamWriter writer) {<br />
var buffer = new StringBuilder();<br />
buffer.AppendLine(“BEGIN:VCALENDAR”);<br />
buffer.AppendLine(“VERSION:2.0”);<br />
buffer.AppendLine(“PRODID:-//DNC/DEMOCAL//NONSGML v1.0//<br />
EN”);<br />
buffer.AppendLine(“BEGIN:VEVENT”);<br />
buffer.AppendLine(“UID:suprotimagarwal@example.com”);<br />
buffer.AppendFormat(“STATUS:{0}\r\n”, contactModel.<br />
Status);<br />
buffer.AppendFormat(“DTSTART:{0}Z\r\n”, (contactModel.<br />
StartDate.ToFileTimeUtc().ToString()));<br />
buffer.AppendFormat(“DTEND:{0}Z\r\n”, (contactModel.<br />
EndDate.ToFileTime().ToString()));<br />
buffer.AppendFormat(“SUMMARY:{0}\r\n”, contactModel.<br />
Summary);<br />
buffer.AppendFormat(“DESCRIPTION:{0}\r\n”, contactModel.<br />
Description);<br />
buffer.AppendLine(“END:VEVENT”);<br />
buffer.AppendLine(“END:VCALENDAR”);<br />
writer.Write(buffer);<br />
}<br />
Associating Custom Formatter<br />
in our <strong>Web</strong>API Application<br />
This is a single line of configuration in code. In the<br />
App_Start\<strong>Web</strong>ApiConfig.cs, we add the following in the last line<br />
of the Register method<br />
config.Formatters.Add(new VCalendarMediaTypeFormatter());<br />
If you don’t have the <strong>Web</strong>ApiConfig.cs, you can use<br />
GlobalConfiguration.Configuration.Formatters.Add(new<br />
VCalendarMediaTypeFormatter());<br />
That’s it we are done.<br />
Testing the Custom Formatter<br />
Out<br />
Our Formatter is all set, how can we test this Well we can test<br />
it using Fiddler by creating a new Request as follows. In the<br />
Composer Tab, we set the Request Type to a GET put the following<br />
headers<br />
Host: localhost:54882<br />
User-Agent: Fiddler<br />
Accept: text/calendar<br />
Accept-Encoding: text<br />
Content-Type: text/calendar<br />
Connection: keep-alive<br />
We post it to the URL<br />
http://localhost:54882/api/TimeCardId=1<br />
70 | DNCmagazine www.dotnetcurry.com
Once the post completes, we switch to the Inspectors and select<br />
‘TextView’. We can see the Text returned by our <strong>Web</strong> API service.<br />
It detected the Content-Type request and sent us back a ‘text/<br />
calendar’. To get the actual file, click on the ellipsis button to the<br />
right of ‘View in Notepad’ button, at the bottom of the screen.<br />
our TimeCard data into a VCalendar that can be downloaded and<br />
imported into Outlook!<br />
To Wrap up<br />
Well, with the Media Type Formatter demo, we bring this article<br />
to a close. Today we saw how to build web services using<br />
ASP.NET <strong>Web</strong>API and access them over HTTP using AJAX. We sent<br />
our service request via browser as well as via a HTTP tool called<br />
Fiddler. We got back response as JSON and we built a custom<br />
formatter to get data as a VCalendar.<br />
On clicking the ellipsis, we get the following (on Windows 8).<br />
You will see all apps that are registered to deal with ICS files in<br />
that list<br />
Now that we have our service in place, we can very easily build<br />
clients on any platform that can communicate over HTTP (which<br />
is essentially all platforms). So we could have Windows 8 App<br />
or a Windows Phone App or an iOS app talk to the same service<br />
and get back this same data.<br />
We covered two key areas of <strong>Web</strong> API. We have not looked at<br />
Authentication and Authorization among other things. Those we<br />
leave for another day<br />
Download the entire source code from Github at<br />
bit.ly/dncm6-wapicf<br />
On selecting Outlook, I get the Calendar item imported into my<br />
calendar. Check the screenshot below!<br />
Isn’t that awesomesauce<br />
Suprotim Agarwal, ASP.NET Architecture MVP,<br />
is an author and the founder of popular .NET<br />
websites like dotnetcurry.com, devcurry.com<br />
and the DNC Magazine. You can follow him on<br />
twitter @suprotimagarwal<br />
We just built a Custom Media Type Formatter that can format<br />
DNcmagazine www.dotnetcurry.com | 71
azure mobile services<br />
Push Notifications in<br />
Windows 8 Apps<br />
Sumit Maitra introduces the Windows Push Notification Service and how to<br />
implement it for Windows 8 Store Apps using Azure Mobile <strong>Services</strong><br />
With the popularity of Smart Phones and<br />
always connected (to internet) devices,<br />
‘push notifications’ have gained immense<br />
popularity. Though push notifications are<br />
not new and Exchange had implemented<br />
Active Sync quite some time back,<br />
smartphones have made them<br />
ubiquitous and brought them out of the<br />
Enterprise-y setups. So today, we often<br />
receive updates instead of looking<br />
(polling) for updates. This can be a more<br />
efficient process depending on the<br />
implementation.<br />
Common examples of Push<br />
notification usage are, mail clients that<br />
receive new mail notifications as they<br />
come to their server’s Inbox. E.g. Social<br />
Media apps that push updates to all<br />
subscribed as soon as someone makes<br />
an update to their status or games that<br />
can push leaderboard updates of your<br />
position changes and so on.<br />
Given the popularity and utility of Push<br />
Notifications, it’s a desired feature to<br />
have in mobile applications. However,<br />
setting up the infrastructure to do so<br />
is non-trivial on any client (Windows<br />
Phone, iOS, Android or Windows 8)<br />
platform. This is where the Windows<br />
Azure Team has stepped in with the<br />
Windows Azure Mobile <strong>Services</strong> that<br />
among other things, aim to ease the<br />
burden of building Push Notification<br />
infrastructure for connected apps.<br />
Today, we will see how to build a<br />
Windows 8 Store App that is capable<br />
of receiving push notifications. For the<br />
backend infrastructure we will use<br />
Windows Azure Mobile <strong>Services</strong>.<br />
Windows (Push)<br />
Notification Service<br />
The underlying infrastructure that enables Push notifications is<br />
referred to as Windows Push Notification Service or WNS for short.<br />
The typical process is as follows:<br />
1. You first get an App SID and Client Secret for your Windows 8<br />
Store App and store it in your <strong>Web</strong> Service.<br />
2. Next your App requests Windows for a ‘Channel’ and sends it to<br />
your <strong>Web</strong>Service so that it can track the channels.<br />
3. When one of the clients submit some data to your web service<br />
that needs to send out push notifications, the web service provides<br />
WNS with the SID and Client secret along with the channel details for<br />
the notification to propagate.<br />
Figure: Relationship between the various components that your app must communicate with, for WNS to work<br />
4. All clients that the data was intended for, then receive the push notification. The clients could be direct recipients or subscribed for by the client<br />
5. Notifications in Windows 8 can be<br />
a. Tile notifications (primary/secondary)<br />
b. Toast notifications (for toast popup)<br />
c. Raw notifications (to download data)<br />
72 | DNCmagazine www.dotnetcurry.com
Azure Mobile <strong>Services</strong> and Push<br />
Notifications<br />
Building ‘ZumoFakeTweet’<br />
Azure mobile services step in and help developers by simplifying<br />
the <strong>Web</strong> Service/Notification Server logic. Azure Mobile <strong>Services</strong><br />
provide the following for us:<br />
1. An Entity Store for easy data access and storage. It uses Azure<br />
SQL DB as its backing store.<br />
2. A client side communication library so you don’t have to deal<br />
with Raw HTTP Requests.<br />
3. Secure Storage for App SID and Client Secret (these should<br />
not be distributed with the clients).<br />
4. Communication with WNS.<br />
Configuring Windows 8 App, Azure Mobile Service<br />
and WNS<br />
1. We start off by Logging into our Developer Dashboard and<br />
creating a new Application. To do so, you have to click on the<br />
‘Submit an app’ menu item on the left hand menu bar.<br />
This significantly eases our task of building and managing Push<br />
notification service for our Mobile Apps.<br />
The Use Case<br />
Ideally we would like to build a Twitter client with push<br />
notifications, but that is a non-trivial example that can nearly<br />
span a book much less an article. So today, we’ll build a fake<br />
Twitter application. Something, that is distantly similar to<br />
Twitter, only if you look at it with a very obtuse angle. We’ll call<br />
this app ZumoFakeTweet!<br />
Application Design<br />
It will be a simple app that accepts a User Name identifying the<br />
user of the App. The premise of the App is to send out FTs (fake<br />
tweets) and FDMs (fake Direct Messages).<br />
FTs are pushed to everyone whereas FDMs are pushed to the<br />
user whom we intend to send it.<br />
2. Click on the App name and provide the name of your App.<br />
If you already have an App that you want to add notification<br />
capabilities to, select ‘Advanced Features’. We provide the name<br />
‘ZumoFakeTweet’ and move on to the ‘Advanced Features’.<br />
3. In ‘Advanced Features’ page, click on the ‘Push Notifications<br />
and Live Connect Info Service’. This pops up a new browser (you<br />
may have to re-login with your Windows Store developer<br />
account credentials). The First Step here is to ‘Identify the<br />
Application’. As you can see below, you can either do it via Visual<br />
Studio or do some manifest file hacking later. We will create our<br />
Windows 8 Store App at this point.<br />
But First a set of Pre-Requisites<br />
1. You’ll need an active Azure Account and even though Mobile<br />
<strong>Services</strong> are in Preview and the first 10 are free, you’ll still need<br />
an Azure SQL Database that may cost you depending on your<br />
plan.<br />
2. You will need a Windows 8 Developer account to follow<br />
through with the Push Notification Setup and implementation.<br />
3. Access to a Windows 8 machine with Visual Studio (Express<br />
will do).<br />
With the basic premise set, let’s look at the pre-requisites and go<br />
ahead and build the Windows 8 Application.<br />
4. To get started with the ZumoFakeTweet project, start Visual<br />
Studio, select new Windows 8 Project and pick a Blank Template<br />
DNcmagazine www.dotnetcurry.com | 73
5. Once Visual Studio is done setting up the boilerplate, build the<br />
project. After build succeeds, go to the ‘Store’ > Associate App With<br />
Store’ menu item<br />
be secret and not shared with anyone. Make a note of these two<br />
strings before we move on.<br />
8. Time to get Azure into the mix. Log on to the Azure<br />
Management Portal with your Microsoft Account.<br />
9. Click on Mobile <strong>Services</strong> and create a New Mobile Service. You<br />
have to pick a ServiceUrl. Whatever name you specify, the service<br />
will be available at http://[yourname].azure-mobile.net/<br />
If you have SQL Databases in Azure already, you’ll get to pick one<br />
or create a new one. I didn’t have any, so in the next steps, I’ll<br />
create a new one.<br />
6. You will have to authenticate with your ‘Windows 8 Store<br />
Developer Dashboard’ credentials. Once logged in, you’ll see a list<br />
of Apps that you have registered. It will include the<br />
‘ZumoFakeTweet’ app. Select it and click Next. It will show you the<br />
association details. Click Finish to complete the process<br />
10. Click next to fill in the DB Details<br />
7. Now we’ll jump back to the Authentication process in the<br />
browser and click on the ‘Authenticating Your Service’ link. This will<br />
give us the Package Security Identifier (SID) and Client Secret as<br />
shown below. As you can see, these two strings are supposed to<br />
74 | DNCmagazine www.dotnetcurry.com
Provide a Database Name, an Admin User and Password. Select<br />
a Region that is closest to where you anticipate most traffic will<br />
come from. Click on the ‘Complete’ button to finish the Wizard.<br />
Azure will initiate the Service creation process.<br />
selectively or via a broadcast.<br />
Setting up the UI<br />
The UI is very simple and won’t be winning any App Design<br />
contests. All it has is three labels, three text boxes and a Send<br />
Message Button.<br />
11. Once the service is ready, click on it to navigate to the<br />
Dashboard. In the dashboard, select the ‘PUSH’ tab to configure<br />
push notifications. For Windows Application Credentials, provide<br />
the Client Secret and Package SID we noted down earlier. Click on<br />
‘Save’ at the bottom of the screen to save the changes<br />
immediately.<br />
Sending and Saving Data to Azure Mobile Service<br />
Now that we have the UI setup, let’s work on saving data. To do<br />
this, we have to switch back to the Mobile Service Dashboard.<br />
Your App as well as Mobile Service is now set to work with WNS.<br />
Building the Messaging Functionality<br />
Now that we are all set, quick recap of what needs to be done<br />
from here on<br />
1. Setup our App to have three fields,<br />
a. MyId – Current User’s Id<br />
b. TweetText – Text of the FT or the FDM<br />
c. ToID – An optional ID to send FDMs to.<br />
1. Add the FakeTweetsMessage Table and click OK. The columns<br />
will get created automatically once we post our Entity to it.<br />
2. Save the above data in Azure Database. We’ll use Azure Mobile<br />
<strong>Services</strong> for the same.<br />
3. Write Code to retrieve Channel IDs<br />
4. Utilize Channel IDs to send Push Notifications to others either<br />
DNcmagazine www.dotnetcurry.com | 75
2. Before we can save the data, we need to add reference to<br />
‘Windows Azure Mobile <strong>Services</strong> Managed Client’. This is a simple<br />
wrapper to make HTTP calls easy for you. We already had it<br />
specified as a pre-requisite, so if you didn’t have it installed yet, go<br />
grab either from Nuget now and add reference to it in the project.<br />
You can get it from Nuget as follows<br />
Note the Mobile Service URL before clicking on the ‘Manage Keys’<br />
button<br />
5. Clicking on Manage Keys will give us a popup that shows us the<br />
Application Key and Master Key. We need only the Application Key<br />
for now.<br />
PM> Install-Package WindowsAzure.Mobile<strong>Services</strong> -Version 0.2.0<br />
Or if you install the VSIX, you can add a reference as follows<br />
3. To save data into the above table, we create a<br />
FakeTweetMessage class<br />
6. Posting Data to Azure Mobile Service<br />
a. In the App.xaml.cs insert the following code<br />
class FakeTweetMessage<br />
{<br />
public int Id { get; set; }<br />
[DataMember(Name = “myId”)]<br />
public string MyId { get; set; }<br />
[DataMember(Name = “fakeTweetText”)]<br />
public int FakeTweetText { get; set; }<br />
[DataMember(Name = “toId”)]<br />
public string ToId { get; set; }<br />
}<br />
4. Next we setup the Azure Client to talk to our Mobile Service.<br />
To do this, we first get the URL and the Application key from the<br />
Service Dashboard.<br />
public static MobileServiceClient MobileService = new<br />
MobileServiceClient(<br />
“https://zumofaketweetservice.azure-mobile.net/”,<br />
“Replace with the Application Key from Above”<br />
);<br />
b. In the MainPage.xaml.cs, we will introduce the following:<br />
private IMobileServiceTable<br />
fakeTweetMessages = App.MobileService.<br />
GetTable();<br />
c. Add a Button Click handler for the Send Message button as<br />
follows<br />
private async void SendMessageButton_Click(object sender,<br />
RoutedEventArgs e)<br />
{<br />
await fakeTweetMessages.InsertAsync(new FakeTweetMessage<br />
{<br />
MyId = MyIdText.Text,<br />
FakeTweetText = FakeTweetTextBox.Text,<br />
ToId = ToIdTextBox.Text,<br />
});<br />
}<br />
d. At this point, if we run the Application and provide some data<br />
in the Text Boxes and hit Send Message button, we’ll end up with<br />
data in our Azure Table as follows.<br />
76 | DNCmagazine www.dotnetcurry.com
So our app has now made a Channel request<br />
to WNS and has a new channel ready. Next<br />
step, is to let the server know.<br />
2. To pass channel information to the server,<br />
we need to expand our Entity by adding a<br />
Channel property to it.<br />
[DataMember(Name = “channel”)]<br />
public string Channel { get; set; }<br />
3. We populate this field on the Button Click<br />
event<br />
So we have Data persistence in Azure Mobile Service working. But<br />
this is not triggering in any push notifications. We’ve some more<br />
work to do for that.<br />
Sending Push Notifications to one User<br />
1. Setting up a Channel Request - In App.xaml.cs, we add the<br />
following using statement<br />
private async void SendMessageButton_<br />
Click(object sender, RoutedEventArgs e)<br />
{<br />
await fakeTweetMessages.InsertAsync(new<br />
FakeTweetMessage<br />
{<br />
MyId = MyIdTextBox.Text,<br />
FakeTweetText = FakeTweetTextBox.Text,<br />
ToId = ToIdTextBox.Text,<br />
Channel = App.CurrentChannel.Uri<br />
});<br />
}<br />
using Windows.UI.Xaml.Navigation;<br />
Next we add the following code to it<br />
public static PushNotificationChannel CurrentChannel {<br />
get; private set; }<br />
//WARNING: This should ideally be done once every<br />
// 30 days when the channel expires.<br />
private async void AcquirePushChannel()<br />
{<br />
CurrentChannel =<br />
await PushNotificationChannelManager.<br />
CreatePushNotificationChannelForApplicationAsync();<br />
}<br />
4. Finally let’s enable Toast Notifications for our app. Open the<br />
Package.appxmanifest file and update the Badge Logo setting<br />
to set Toast Capable = Yes. This completes the client setup. Now<br />
we setup our Mobile service to intercept DB inputs and fire off<br />
notifications.<br />
Finally we invoke it in the OnLaunched event<br />
protected override void OnLaunched(LaunchActivatedEventAr<br />
gs args)<br />
{<br />
AcquirePushChannel();<br />
…<br />
}<br />
DNcmagazine www.dotnetcurry.com | 77
Intercepting DB Inputs and sending Notifications<br />
1. We open our ‘FakeTweetMessage’ database and select ‘Script’. For<br />
the INSERT Script, we update the default code with the following<br />
function insert(item, user, request) {<br />
request.execute({<br />
success: function() {<br />
request.respond();<br />
push.wns.sendToastText04(item.channel, {<br />
text1: item.fakeTweetText<br />
}, {<br />
success: function(pushResponse) {<br />
console.log(“Sent push:”,<br />
pushResponse);<br />
}<br />
});<br />
}<br />
});<br />
}<br />
This is (if you haven’t guessed already) JavaScript! On the Server,<br />
we define our post-Insert DB Logic in JavaScript.<br />
On Success, the script uses the push.wns object to send a type<br />
of Toast (In this case Text 04). It uses the item.channel to set the<br />
target user to whom the notification is going to be sent. And text1<br />
is the message to be sent.<br />
Save this function and run the application. On hitting Send<br />
Message, you should receive a Toast Notification with the message<br />
you sent.<br />
where we have multiple users signed up to receive push<br />
notifications. When a Message goes out with their Name in the To<br />
ID field, they should receive the message. Similarly if they<br />
subscribe for broadcasted messages, they should receive any<br />
message that does not have a To ID. Let’s see what it takes to<br />
implement this simple scenario.<br />
Adding Meta information to Channel Subscription<br />
So far we’ve stuck Channel Subscription in our faketweetmessage<br />
table. Now we’ll separate it out into a dedicated channel table<br />
with two more values<br />
a. MyID – ID of the channel subscriber<br />
b. AcceptBroadcast – A Boolean indicating if we want to subscribe<br />
to broadcasted messages.<br />
The new Channel entity is as follows:<br />
public class ChannelSub {<br />
public int Id { get; set; }<br />
[DataMember(Name = “channel”)]<br />
public string Channel { get; set; }<br />
[DataMember(Name = “myId”)]<br />
public string MyId { get; set; }<br />
[DataMember(Name = “acceptBroadcast”)]<br />
public bool AcceptBroadcast { get; set; }<br />
}<br />
The Updated FakeTweetMessage is setup as follows<br />
class FakeTweetMessage{<br />
public int Id { get; set; }<br />
[DataMember(Name = “myId”)]<br />
public string MyId { get; set; }<br />
[DataMember(Name = “fakeTweetText”)]<br />
public string FakeTweetText { get; set; }<br />
Congratulations, you just sent out the first Push Notification!<br />
Sending Notifications Selectively<br />
Now that we have seen how to lob back notifications to where it<br />
came from, let’s look at a more practical scenario. This would be<br />
[DataMember(Name = “toId”)]<br />
public string ToId { get; set; }<br />
}<br />
Updating the UI for Explicit Subscription<br />
Now we’ll update the UI by adding a ‘Subscribe’ button and a<br />
78 | DNCmagazine www.dotnetcurry.com
Check Box for the AcceptBroadcast field. Our new UI will be as<br />
follows<br />
Subscribing Channels<br />
We’ll put in a Clicked handler for the Subscribe button and update<br />
the client side code as follows:<br />
- In MainPage.xaml, we add the following statement to be able to<br />
access the new ChannelSub table<br />
As we can see, we have added a new table called ChannelSub and<br />
added the following Insert Script.<br />
function insert(item, user,<br />
request) {<br />
var channelTable = tables.<br />
getTable(‘ChannelSub’);<br />
channelTable<br />
.where({ channel:<br />
item.channel })<br />
.read({ success:<br />
insertChannelIfNotFound });<br />
function insertChannelIfNotFound<br />
(existingChannels) {<br />
if (existingChannels.length ><br />
0) {<br />
request.respond(200, existingChannels[0]);<br />
} else {<br />
request.execute();<br />
}<br />
}<br />
}<br />
private IMobileServiceTable channelSubs =<br />
App.MobileService.GetTable();<br />
- The Subscription button click handler is as follows<br />
private async void SubscribeButton_Click(object sender,<br />
RoutedEventArgs e) {<br />
await channelSubs.InsertAsync(new ChannelSub<br />
{<br />
MyId = MyIdTextBox.Text,<br />
AcceptBroadcast = AcceptBroadcastCheckBox.IsChecked.<br />
Value,<br />
Channel = App.CurrentChannel.Uri<br />
});<br />
}<br />
The script checks the table to see if the requested Item’s Channel<br />
URI already exists, if not, it inserts the new Channel Subscription<br />
requests.<br />
Sending out Push Notifications based on Type of<br />
Subscription<br />
Now that we have subscription information with us, let’s modify<br />
the notification logic so that:<br />
a. Users not subscribed to Broadcasts do not receive notifications<br />
without a To ID and the ones who are subscribed, get all requests<br />
b. Instead of lobbing the Notification back to where it came from,<br />
if it has a To ID, send to that subscription ONLY.<br />
On the server, we’ll have to setup the Insert script such that it<br />
doesn’t allow duplicate subscription requests.<br />
To achieve the above two, we update the code with the Insert<br />
script of the FakeTweetMessage as follows:<br />
function insert(item, user, request) {<br />
request.execute({<br />
success: function() {<br />
request.respond();<br />
sendNotifications();<br />
}<br />
});<br />
function sendNotifications() {<br />
DNcmagazine www.dotnetcurry.com | 79
var channelTable = tables.getTable(‘ChannelSub’);<br />
channelTable.read({<br />
success: function(channels) {<br />
channels.forEach(function(channel) {<br />
if((channel.acceptBroadcast && channel.myId != item.<br />
myId) ||<br />
(channel.myId==item.toId)){<br />
push.wns.sendToastText04(channel.channel, {<br />
text1: item.myId + ‘: ‘ + item.fakeTweetText +<br />
(item.toId === ‘’ ‘ BROADCAST’: ‘’)<br />
}, {<br />
success: function(pushResponse) {<br />
console.log(“Sent push:”, pushResponse);<br />
}<br />
});<br />
} });<br />
} }); }}<br />
Notification 2: KirkyBoy sees the ‘BROADCAST’ tag and is irked at<br />
‘DVader’ for broadcasting a message and retorts back to DVader<br />
directly.<br />
Here in the sendNotifications method, we are looping through all<br />
the subscribers and sending them a message if the Incoming<br />
request’s ‘toId’ matches (and it’s not the same as the sender) or if<br />
the channel subscribers are subscribed to receive broadcast<br />
messages.<br />
Demo<br />
With the scripts in place, we load this application up on two<br />
machine, a Desktop and a Surface RT. On Desktop we have a user<br />
called DVader and on the Surface we have a user called KirkyBoy.<br />
Both are subscribed to receive broadcast messages.<br />
Notification 1: DVader sends out a Broadcast message asking if<br />
KirkyBoy is around. KirkyBoy receives a toast notification for this<br />
as follows<br />
Nice eh!<br />
Wrapping it up<br />
With that little squabble between our fictitious characters, we<br />
have seen Azure Mobile Service Notifications in full swing. It is<br />
quite amazing how the complex task of co-ordination between<br />
AppServer and WNS as well as registration and security ID were all<br />
handled by Azure Mobile services.<br />
Going forth, be it social media apps or business apps,<br />
implementing Push notifications are really going to be a breeze<br />
and with the cost of one shared SQL Server DB instance, the<br />
amount of plumbing work saved, definitely offsets the expenditure<br />
of developing and maintaining a stable notification system from<br />
ground up<br />
The complete code sample can be downloaded from<br />
bit.ly/dncm6-zutw but you do need to put in our Azure<br />
Mobile Service Application ID.<br />
Sumit is a .NET consultant and has been<br />
working on Microsoft Technologies for the<br />
past 12 years. He edits, he codes and he<br />
manages content when at work. C# is his<br />
first love, but he is often seen flirting with<br />
Java and Objective C. You can Follow him on<br />
twitter @sumitkm and read his articles at bit.ly/KZ8Zxb<br />
80 | DNCmagazine www.dotnetcurry.com
DNC Magazine<br />
www.dotnetcurry.com/magazine<br />
81