

Manual UK Gloria b4.10Y - 7cars.ca
Manual UK Gloria b4.10Y - 7cars.ca
Manual UK Gloria b4.10Y - 7cars.ca

You also want an ePaper? Increase the reach of your titles
YUMPU automatically turns print PDFs into web optimized ePapers that Google loves.
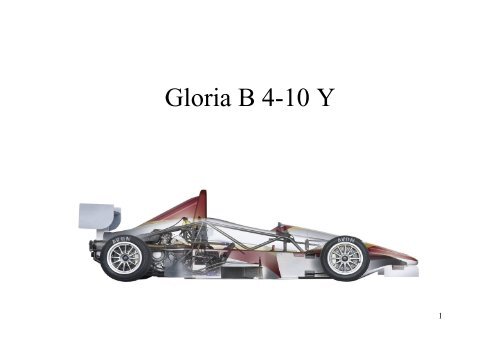
<strong>Gloria</strong> B 4-10 Y<br />
1
<strong>Gloria</strong> s.r.l.<br />
Via Cavaglià, 3a<br />
10020 Cambiano (TO)<br />
Italy<br />
tel. +39-011-9442404<br />
fax. +39-011-9441575<br />
www.gloria<strong>ca</strong>rs.com<br />
2
Congratulations for choosing <strong>Gloria</strong> B 4-10 Y! This model is all techni<strong>ca</strong>l content requested<br />
by a <strong>ca</strong>r competition at a cost of purchase and maintenance affordable. This manual is<br />
directed both to those who have just started their adventure in the world of competitions,<br />
both to those who for a long time know the tricks of the trade. We have written this book in<br />
order to obtain a satisfied customer always competent and that translates into a competitive<br />
score. We re<strong>ca</strong>ll also that a vehicle periodi<strong>ca</strong>lly checked in order ensures the maximum of<br />
its performance. Team development <strong>Gloria</strong> s.r.l. Hopes that B 4-10Y is the ideal companion<br />
for your moments of fun on the track. Team<br />
3
INDEX MANUAL<br />
• Section 01 - General Information<br />
Number of chassis and engine<br />
Measurements and Weights<br />
Bodywork<br />
Engine<br />
Assetto base<br />
General information for maintenance<br />
Section 02 - Specifi<strong>ca</strong>tion<br />
Type and quantity liquids<br />
Serraggi<br />
Section 03 - Financial and periodic changes<br />
Chassis / suspensions brakes<br />
Engine / exchange / clutch<br />
Electri<strong>ca</strong>l system<br />
Bodywork<br />
Section 04 - Adjustments<br />
Wheels<br />
Suspension: <strong>ca</strong>mber, <strong>ca</strong>ster, toe, height from the earth, etc., etc.<br />
Frame: pedal, steering wheel, brakes, etc. etc.<br />
Engine<br />
Transmission: exchange relations, regulatory clutch<br />
Body: Ali, mirrors<br />
Section 05 - Cockpit<br />
Distribution commands and a warning,<br />
Digital Dashboard<br />
Index<br />
4
This handbook contains at least one error. You could wait to see what is<br />
necessary to read the entire volume. But we know already. In fact, if there are<br />
errors, there are. And if there are, there is one that says: "This book contains at<br />
least one error." So we know that this book is a mistake, even if we do not yet<br />
know what is. For the avoidance of any doubt, the error is not to read it.<br />
5
General information<br />
Informazioni generali B 4-10 Y<br />
6
Index<br />
• Number of chassis and engine<br />
• Ext. Dimensions and weight<br />
• Dimensions scheme<br />
• bodywork<br />
• engine<br />
• Power curve – Torque engine<br />
• Base Set Up<br />
• Typology and quantity of liquids<br />
• General information of maintenance<br />
Informazioni generali B 4-10 Y<br />
7
Chassis nr. And engine ones<br />
The number of chassis is the official<br />
identifi<strong>ca</strong>tion of your <strong>ca</strong>r. Serve for<br />
techni<strong>ca</strong>l inspections during the races<br />
and will be communi<strong>ca</strong>ted to <strong>Gloria</strong><br />
Inc. In the <strong>ca</strong>se of requests for<br />
information. Lo<strong>ca</strong>ted roll bar on the<br />
left side of the <strong>ca</strong>r. The label indi<strong>ca</strong>tes<br />
the year of production and the number<br />
of the frame.<br />
The number of motor uniquely<br />
identifies the drive installed on your B<br />
4-10 Y. Lo<strong>ca</strong>ted on the basement / cup<br />
of the right side of the <strong>ca</strong>r next<br />
inspection of the engine oil<br />
Informazioni generali B 4-10 Y<br />
8
Dimensions and weights<br />
• Total lenght: 3350 mm<br />
• Larger total: 1560 mm<br />
• weight: 2260 mm<br />
• Carreggiata ant/post: 1380 mm/1360 mm<br />
• Height at roll-bar: 1100 mm around<br />
• Weight with liquids , without fuel: 390 Kg<br />
• Weight with driver (70 kg): 460 Kg (42% front, 58%<br />
rear)<br />
Informazioni generali B 4-10 Y<br />
9
Scheme dimensions<br />
In this book right and left are defined as if we were sitting at the driving seat. The<br />
shifter, for example, is right.<br />
"Front" and "back" refers to the direction of travel. Musetto is "front" for the<br />
passenger Informazioni compartment.<br />
generali B 4-10 Y<br />
10
Rear wing<br />
Pod side<br />
BODYWORK<br />
Engine cover<br />
Cockpit<br />
Pedal cover<br />
Musettonose<br />
Front wing<br />
Informazioni generali B 4-10 Y<br />
11
Engine<br />
The engine mounted on the B 4-10 <strong>Gloria</strong> Y is the<br />
Yamaha FSZ1000 (N).<br />
WARNING: engines installed on <strong>ca</strong>rs are identi<strong>ca</strong>l and<br />
distributed by Yamaha. All engines are tested at the<br />
bench before being installed on the vehicle to ensure<br />
substantive equality in the performance of engines.<br />
Informazioni generali B 4-10 Y<br />
12
Potenza (cv)<br />
150,0<br />
140,0<br />
130,0<br />
120,0<br />
110,0<br />
100,0<br />
90,0<br />
80,0<br />
70,0<br />
60,0<br />
50,0<br />
40,0<br />
30,0<br />
20,0<br />
10,0<br />
3000<br />
4000<br />
5000<br />
6000<br />
7000<br />
7500<br />
8000<br />
8500<br />
Caratteristi<strong>ca</strong> Potenza-Coppia<br />
9000<br />
rpm<br />
9250<br />
9500<br />
Informazioni generali B 4-10 Y<br />
13<br />
9750<br />
10000<br />
10250<br />
10500<br />
10750<br />
11000<br />
11500<br />
120<br />
100<br />
80<br />
60<br />
40<br />
20<br />
0<br />
Coppia (Nm)<br />
Potenza (cv)<br />
Coppia (Nm)
WARNING: The data<br />
reported are purely an<br />
example. For specific<br />
structures, with particular<br />
types of rubbers, contact the<br />
manufacturer / distributor of<br />
pneumatic or <strong>Gloria</strong> srl...<br />
SET UPS BASE<br />
Camber<br />
Informazioni generali B 4-10 Y<br />
14<br />
Toe<br />
Height from ground<br />
Caster<br />
springs<br />
Schock absorbers<br />
Tire pressure<br />
wings<br />
Front<br />
Rear<br />
Front<br />
Rear<br />
Front<br />
Rear<br />
Front<br />
Rear<br />
Front<br />
Rear<br />
Front<br />
Rear<br />
Front<br />
Rear<br />
Radials<br />
-2°<br />
-2,5°<br />
0,5 mm (OUT)<br />
0 mm<br />
0°<br />
50 N<br />
70 N<br />
Posizion A<br />
Posizion A<br />
1,1 bar<br />
1,2 bar<br />
0°<br />
0°<br />
Depend of championship<br />
0°<br />
Not possible change<br />
50 N<br />
70 N<br />
Posizion A<br />
Posizion A<br />
0,9 bar<br />
1 bar<br />
0°<br />
0°<br />
Conventionals<br />
-0,3°<br />
-0,7°<br />
0,5 mm (OUT)<br />
0 mm
engine<br />
colling<br />
Freni<br />
Carburante<br />
Tipology & liquids qty<br />
Tipo<br />
Look at. sections “check<br />
periodi<strong>ca</strong>l and changes,<br />
information of engine oil<br />
Distilled water and<br />
antifreeze specific<br />
Silkolene<br />
DOT 5.1<br />
Unleaded 98/100 octane<br />
Quantità<br />
5,5 liters included radiators<br />
5,3 liters total<br />
(of which 1 antefreeze)<br />
0,5 liters around<br />
24-26 liters<br />
Informazioni generali B 4-10 Y 15
General info for maintenance<br />
• -Before removing the pieces clean from any residual<br />
dirt, dust or foreign bodies.<br />
-Each component has its need for cleaning, use only<br />
products suitable.<br />
-Keep all parties away from sources of heat, dust and<br />
dirt.<br />
-Use only genuine <strong>Gloria</strong> s.r.l.<br />
• -Use only the types of oils and fats recommended by<br />
<strong>Gloria</strong> Inc. For all operations lubri<strong>ca</strong>tion.<br />
Informazioni generali B 4-10 Y<br />
16
Controlli periodici e<br />
<strong>ca</strong>mbi<br />
Peridi<strong>ca</strong>l check and spares<br />
B 4-10 Y 17
• bodywork<br />
Controlli periodici e<br />
<strong>ca</strong>mbi<br />
Index<br />
• Chassis/suspensions/brakes<br />
• Engine/gearbox/clutch<br />
• electric<br />
B 4-10 Y 18
Controlli periodici e<br />
<strong>ca</strong>mbi<br />
BODYWORK<br />
Check to be done periodi<strong>ca</strong>lly are the following:<br />
• Fixment of mirros and wings<br />
• Fixment of bodywork.<br />
B 4-10 Y 19
Controlli periodici e<br />
<strong>ca</strong>mbi<br />
Mirros and wings<br />
The front wing is set at the main body of the <strong>ca</strong>r body through two links:<br />
Musotto-support<br />
Support-wing (earlier used for fixing the rear for the regulation)<br />
The link between wing and Musetto is to be checked before and after each session<br />
as may be damaged as a result of shock or off the track.<br />
If there are cracks immediately stop the <strong>ca</strong>r and provide a replacement part route.<br />
The rear wing is secured to the main body of the <strong>ca</strong>r body through two links:<br />
Mount-frame<br />
Mount-wing (the screws earlier used for fixing the rear for the regulation)<br />
Always <strong>ca</strong>refully these connections.<br />
Periodi<strong>ca</strong>lly, we recommend that you check the fastening of mirrors is adjustable.<br />
Check the onset of cracks at the holes. In the <strong>ca</strong>se of broken proceed as<br />
recommended in the next slide.<br />
B 4-10 Y 20
Controlli periodici e<br />
<strong>ca</strong>mbi<br />
BODYWORK (2004)<br />
All body parts are set to head<br />
with brugole Keystone 6x1 mm.<br />
Do not tighten the screws too<br />
much damage inserts.<br />
In the <strong>ca</strong>se of breaking of the<br />
insert we have to remove the<br />
broken part, apply one (or<br />
more) layers of fiberglass in the<br />
area damaged, leaving harden<br />
the composite and then drilled<br />
with a touch of 9 mm diameter.<br />
Then insert the new insert with<br />
pliers suitable.<br />
B 4-10 Y 21
Controlli periodici e<br />
<strong>ca</strong>mbi<br />
Chassis / suspensions/brakes<br />
Perdiodi<strong>ca</strong>l check are the following:<br />
• Fitment of spheri<strong>ca</strong>l rod end,<br />
• Delrin bushes,<br />
• Abrasion of the <strong>ca</strong>r chassis and bodywork.<br />
B 4-10 Y 22
Fixing of spheri<strong>ca</strong>l rod end to the lower<br />
After the couple tight set (45<br />
Nm for the nut that is grafted on<br />
upright, and 20 Nm for the nut<br />
which stops the terminal<br />
spheri<strong>ca</strong>l”rod end”) and<br />
blocked with Loctite 242 pins<br />
below the uprights must use<br />
wire bonding.<br />
This feature prevents slippage<br />
of the nut that interfere with the<br />
circle.<br />
Instead of wire to use copiglia<br />
as shown in the figure.<br />
Controlli periodici e<br />
<strong>ca</strong>mbi<br />
upright<br />
B 4-10 Y 23
Controlli periodici e<br />
<strong>ca</strong>mbi<br />
Coulping Delrin bushings<br />
Each 2000 km (or less in the <strong>ca</strong>se of frequent use in wet<br />
conditions) is recommended to dismantle all Delrin bushings to<br />
ensure proper functioning.<br />
Dry <strong>ca</strong>refully parties (blowing with compressed air) and<br />
lubri<strong>ca</strong>te (with a thin layer of fat hydrophobic).<br />
In particular, we recommend that you check:<br />
•Bushings to fixment supension wishbones<br />
•Bushings Rocker<br />
•Bushigs pedal kit<br />
•Bushings steering column<br />
B 4-10 Y 24
Abrasions chassis and bodywork<br />
Some points of the frame and body are subject to abrasion and contacts with<br />
agents that could ruin the paint. As the frame ferrous material could create risk<br />
areas rust.<br />
The parties to be monitored more closely so:<br />
1. suspensions wishbones and shafts (from stones meet at track),<br />
2. fitment of front nose to chassis,<br />
3. fitment of engine cover to rear wing,<br />
4. fitment of engine cover to cockpit,<br />
5. fitment side pod to bottom.<br />
Controlli periodici e<br />
<strong>ca</strong>mbi<br />
B 4-10 Y 25
ENGINE/GEARBOX/CLUTCH/TRANSMI<br />
• Engine oil<br />
• Colling sistem<br />
• Air filter<br />
• clutch<br />
• Trasmission chain<br />
• brakes<br />
Controlli periodici e<br />
<strong>ca</strong>mbi<br />
SSION<br />
B 4-10 Y 26
Controlli periodici e<br />
<strong>ca</strong>mbi<br />
Engine oil<br />
WARNING: motor oil lubri<strong>ca</strong>tes also change and friction. To<br />
avoid slipping clutch types wrong not to use oil or additives.<br />
Do not use engine oils CD with a degree or higher.<br />
Do not use engine oils like "Energy conserving".<br />
We recommend the use of engine oil SAE20W40SE or<br />
SAE10W30SE. Below is the table of oils..<br />
-10°C -5°C 0°C 5°C<br />
10°C<br />
15°C 20°C 25°C 30°C 35°C 40°C 45°C<br />
10W /30<br />
10W /40<br />
20W /40<br />
20W /50<br />
B 4-10 Y 27<br />
50°C
Check level at hot engine.<br />
(MINIMUM<br />
TEMEPERATURE 80°C).<br />
Correct level must to be ¾ of<br />
the window runing engine at<br />
3000 rpm.<br />
Controlli periodici e<br />
<strong>ca</strong>mbi<br />
Level oil<br />
B 4-10 Y 28
Controlli periodici e<br />
<strong>ca</strong>mbi<br />
Chnge filter oil<br />
The oil filter change is a very important to maintain engine<br />
performance and avoid breakage or seizure.<br />
It must be done every 500 km and after the engine had some<br />
problems.<br />
-Remove the <strong>ca</strong>rtridge filter with the appropriate tool (PUT<br />
code).<br />
-Apply a thin layer of oil on the seal <strong>ca</strong>rtridge new oil and make<br />
sure it is in place when you comeback.<br />
-Screw hand.<br />
-Before using the <strong>ca</strong>r to run the engine idling to detect any loss.<br />
B 4-10 Y 29
Controlli periodici e<br />
<strong>ca</strong>mbi<br />
Procedure changing oil<br />
Before you change the engine oil to run the engine for a few minutes and let it<br />
heat. Turn off the engine and proceed with the exchange hot motor oil (this<br />
allows drainage of the whole oil).<br />
Always discharge of the radiator with the following procedure).<br />
-Disconnect the connectors of pressure sensors and temperature oil (and if<br />
necessary clean of dirt and residues),<br />
-Unscrew the big nut terminating the ciabatta for pipelines to and from the oil<br />
radiator,<br />
-Pull off the ciabatta,<br />
-Unscrew the connector tube ergal oil with special keys ergal,<br />
-Empty pipelines and oil radiator,<br />
-Rinse everything with solvent and blow any deposits with compressed air,<br />
-Put all paying attention to the seals,<br />
-Close to 35 Nm of the dadone ciabatta..<br />
B 4-10 Y 30
sparks<br />
The sparks provided originally by <strong>Gloria</strong> s.r.l. Yamaha is the original.<br />
Their acronym is U27ESRN Denso (equivalent NGK: CR9E).<br />
A condition to maintain the same degree heat, the use of sparks from other manufacturers.<br />
Periodi<strong>ca</strong>lly check the air gap between the electrodes. The nominal value is 0,7-0,8 mm. If it is lower, change the<br />
sparks.<br />
Use <strong>ca</strong>ndles same for the four cylinders.<br />
If the electrodes are clean dirty paper with a brush or abrasive lightweight metal.<br />
CAUTION: Before you extract from the sparks tested, after removing the ignition pipettes, blow away dirt with a<br />
jet of compressed air.<br />
Regarding the ignition coils:<br />
Check <strong>ca</strong>refully any steps near hot components or live edge<br />
If necessary to use tape fabric-finish to avoid mechani<strong>ca</strong>l abrasion<br />
Keeping clean the contacts of ignition coils (placed on the roll bar behind the pilot).<br />
The ignition coils are divided as follows (watching the <strong>ca</strong>r from behind):<br />
Coil left cylinders 2-3,<br />
Coil right cylinders 1-4.<br />
Change sparks if they are falls, ruined or damaged somewhere.<br />
Controlli periodici e<br />
<strong>ca</strong>mbi<br />
B 4-10 Y 31
Controlli periodici e<br />
<strong>ca</strong>mbi<br />
Cooling sistems<br />
Before every sessions please dublle check:<br />
• Radiators,<br />
• Tube water in,<br />
• Tube water out,<br />
• Tube oil in ,<br />
• Tube oil out,<br />
• Connection water to pump IN,<br />
• Connection water to pump OUT.<br />
B 4-10 Y 32
Controlli periodici e<br />
<strong>ca</strong>mbi<br />
LEVERL WATER LIQUID<br />
The engine cooling system consists of a pump and two radiators<br />
series.<br />
The system requires 4.5 liters of which 0.5 litres of antifreeze.<br />
The antifreeze must be of high quality (ethylene-glycol) and<br />
containing specific preparations for aluminium engines.<br />
There are no openings inspection or indi<strong>ca</strong>tors. You need to<br />
open the <strong>ca</strong>p and look directly into the tank positioned behind<br />
the roll bar.<br />
Check the water level motor cold. The level is correct ¾ tank.<br />
After changing any engine or the cooling system, make sure that<br />
it was properly executed a purge.<br />
CAUTION: Open the <strong>ca</strong>p and check the level only motor cold!<br />
B 4-10 Y 33
Controlli periodici e<br />
<strong>ca</strong>mbi<br />
Procedure heating ening<br />
The engine mounted on the B 4-10 <strong>Gloria</strong> Y needs to follow a <strong>ca</strong>reful process heating.<br />
We should not sink the accelerator until the red light on the multifunction display is<br />
turned on and it is advisable to leave it to a minimum speed for a few minutes to<br />
lo<strong>ca</strong>te the first session of any leakage.<br />
Operation Spy is as follows:<br />
T oil less than 80 ° C spy ON,<br />
T oil between 80 ° C and 130 ° C LED OFF (functioning properly)<br />
T oil above 130 ° C spy ON (overheating).<br />
It <strong>ca</strong>n happen that when using the temperature is not the optimum range. In the <strong>ca</strong>se<br />
proceed as follows:<br />
T functioning too low: decrease (with adhesive tape applied to the grid) the surface of<br />
fresh air input to left radiator,<br />
T functioning too high: remove the nastrature eventually made earlier, operate the fan<br />
or the session. If the problem persists check for the presence of air bubbles in the<br />
cooling circuit.<br />
B 4-10 Y 34
•Although installed a grid to<br />
avoid debris that <strong>ca</strong>n damage<br />
the honeycomb, it is good to<br />
check often the integrity of the<br />
walls of steel. With the help of<br />
a small screwdriver straighten<br />
sides folded as shown in the<br />
diagram to the side.<br />
Check if there are obstructions<br />
in cells, in the <strong>ca</strong>se blow<br />
compressed air from the back<br />
toward the front of the <strong>ca</strong>r.<br />
Controlli periodici e<br />
<strong>ca</strong>mbi<br />
Radiators<br />
B 4-10 Y 35
Controlli periodici e<br />
<strong>ca</strong>mbi<br />
Procedure change of water liquid<br />
Periodi<strong>ca</strong>lly (but at least once a year) it is necessary to change the coolant of the<br />
vehicle. A plant not at peak performance is likely to overheat the engine with<br />
negative consequences on the performance and durability.<br />
Do this only motor cold<br />
Download the central nut fluid from the engine and the right sleeve,<br />
When the circuit is filled sure to open sleeves upper left and right to release<br />
air from radiators and pipes (to avoid the presence of air bubbles in the<br />
circuit).<br />
During operation check the temperature of the two radiators. If they are very<br />
different is necessary to operate a new purge of the liquid be<strong>ca</strong>use there are<br />
air bubbles inside.<br />
B 4-10 Y 36
The air filter is a key component of the engine.<br />
Do not make cleaning operations in the vicinity<br />
of the <strong>ca</strong>r without air filter installed as<br />
unfiltered air quickly and <strong>ca</strong>n irreparably<br />
damage the engine.<br />
Remove the air filter only for periodic cleaning<br />
operations. MAI not use the <strong>ca</strong>r without air<br />
filter.<br />
When you install the air filter make sure it is<br />
well-positioned in its home since its perimeter<br />
also acts as a seal. The filter mounted on your<br />
<strong>ca</strong>r is a panel dry.<br />
It is not necessary to use (as well as<br />
unproductive) oil filters for air.<br />
We recommend cleaning by compressed air<br />
against the direction intake (not to further clog<br />
the filter).<br />
CAUTION: Use only genuine.<br />
Controlli periodici e<br />
<strong>ca</strong>mbi<br />
Filter air<br />
B 4-10 Y 37
Controlli periodici e<br />
<strong>ca</strong>mbi<br />
Clutch <strong>ca</strong>ble<br />
The sheath of the <strong>ca</strong>ble has a clutch internal Teflon slider for a better clutch<br />
<strong>ca</strong>ble. If this sheath is too close to heat sources is possible that the Teflon <strong>ca</strong>n<br />
dissolve within pasting the clutch <strong>ca</strong>ble to lock.<br />
Recommend shoehorning a thermal sleeve (600 mm) (Goodridge) on the <strong>ca</strong>ble<br />
sheath friction in the area of waste and keep it away from heat sources.<br />
To avoid unexpected breaks, we recommend replacing the clutch <strong>ca</strong>ble every<br />
500 km.<br />
B 4-10 Y 38
Controlli periodici e<br />
<strong>ca</strong>mbi<br />
Procedure clutch check<br />
The clutch mounted on the B 4-10 Y differs from the original<br />
Yamaha for the presence of copper washers 6 at the bottom of the<br />
premises of the screws tightening. Periodi<strong>ca</strong>lly check the thickness<br />
of the clutch pack.<br />
Thickness nominal ≥ 43.6 mm<br />
The first element to the engine that often must be 3.5 mm. All<br />
others are 3 mm thick.<br />
Unscrew the screws clutch basket with a procedure to "X".<br />
WARNING: on the plate spingidisco and clutch disc are two<br />
bolinature. In mounting pay attention to mount at one another.<br />
B 4-10 Y 39
Controlli periodici e<br />
<strong>ca</strong>mbi<br />
Chain transmission-installing and<br />
Before installing the chain is advisable to lubri<strong>ca</strong>te it<br />
with oil chains that will not damage the O-ring rubber.<br />
Bring the axle exactly perpendicular to the direction of<br />
travel through the tie rods adjustment.<br />
The pinion must be close to 85 Nm.<br />
Pay attention to the disposal of several screws that are<br />
closed on additional <strong>ca</strong>rterino be<strong>ca</strong>use their length is<br />
different and not interchangeable.<br />
The nut that tightens the pinion must be screwed with<br />
the flat part to the outside of the <strong>ca</strong>r.<br />
Caution: a chain stretched too overloaded the engine<br />
and other structural parts of the transmission. A chain<br />
too las<strong>ca</strong> instead <strong>ca</strong>n skip damaging parts it comes into<br />
contact. Check often tension in the chain and stick to<br />
the specifi<strong>ca</strong>tions.<br />
Verify that the game with chain fit the relationship is<br />
approximately 10-15 mm per side on the top of the<br />
chain (red arrows).<br />
To verify the correct tension, turn the axle until you<br />
find the point of maximum tension<br />
maintenance<br />
+/- 10-15<br />
mm<br />
B 4-10 Y 40
Controlli periodici e<br />
<strong>ca</strong>mbi<br />
Chain trasmission - lubrifi<strong>ca</strong>tion<br />
Before installing the chain is advisable to lubri<strong>ca</strong>te it with oil<br />
chains that will not damage the O-ring rubber.<br />
Bring the axle exactly perpendicular to the direction of travel<br />
through the tie rods adjustment.<br />
The pinion must be close to 85 Nm.<br />
Pay attention to the disposal of several screws that are closed on<br />
additional <strong>ca</strong>rterino be<strong>ca</strong>use their length is different and not<br />
interchangeable.<br />
The nut that tightens the pinion must be screwed with the flat<br />
part to the outside of the <strong>ca</strong>r.<br />
Caution: a chain stretched too overloaded the engine and other<br />
structural parts of the transmission. A chain too las<strong>ca</strong> instead<br />
<strong>ca</strong>n skip damaging parts it comes into contact. Check often<br />
tension in the chain and stick to the specifi<strong>ca</strong>tions.<br />
Verify that the game with chain fit the relationship is<br />
approximately 10-15 mm per side on the top of the chain (red<br />
arrows).<br />
To verify the correct tension, turn the axle until you find the<br />
point of maximum tension.<br />
B 4-10 Y 41
Check periodi<strong>ca</strong>lly spocket and Pinin .<br />
Controlli periodici e<br />
<strong>ca</strong>mbi<br />
Trasmission consumption<br />
If consumpiotn over ¼ of thickness of teeth (measure a)<br />
need to be changed.<br />
Refer to pictures behind.<br />
1) chain,<br />
2) Pinion or sporcket<br />
b) Optimum e<br />
Line wen Consumption too high.<br />
All must to be changed together asd new pinion could<br />
not work well with used sprocket or viceversa<br />
B 4-10 Y 42
Controlli periodici e<br />
<strong>ca</strong>mbi<br />
BRAKES<br />
The purge brake is a key to the safety of the pilot.<br />
Make purge in the following <strong>ca</strong>ses:<br />
-Pedal spongy plant or not performing (braking elusive, boiling phenomena,<br />
etc.)<br />
-Every weekend contests<br />
-After long-use of the <strong>ca</strong>r,<br />
-Every 150 km at the most.<br />
-Use only oil brakes type DOT 5.1.<br />
B 4-10 Y 43
Controlli periodici e<br />
<strong>ca</strong>mbi<br />
Discs & pads<br />
Minimum tickness of discs is of è 7 mm.<br />
The maximum deflection planing is 0.1 mm.<br />
If you use had vitrified should proceed to a correction<br />
back to the original condition.<br />
It is advisable to replace the brake pads when the friction<br />
material is often less than 3 mm.<br />
Simultaneously the replacement of brake discs is also<br />
recommended to replace the pads.<br />
B 4-10 Y 44
Controlli periodici e<br />
<strong>ca</strong>mbi<br />
Pads (1)<br />
Instructions for running it new pads (to be stricktly followed):<br />
• Makes 25-30 brakes of 4 seconds around, using 50% of power<br />
pressure useed in race conditions. Can be brake also for<br />
minimaze the running time,<br />
• Back in the pits and make a thorough inspection of the level of<br />
the running surface of the pads (especially on wheels support).<br />
If the entire surface of the pill has worked without showing<br />
signs of vitrifi<strong>ca</strong>tion of friction material pad are ready for use in<br />
the race.During running is necessary to grove temeprature in a<br />
gradual way to optimize the effect and lifetime of discs and pads<br />
.<br />
B 4-10 Y 45
Always check if the tablets are<br />
consumed in the same way.<br />
If dismantled and reused name<br />
them in order to ensure the<br />
same order of assembly.<br />
An example might be shown to<br />
the side.<br />
Controlli periodici e<br />
<strong>ca</strong>mbi<br />
Pads (2)<br />
1 2 3<br />
4<br />
5 6 7 8<br />
B 4-10 Y 46
To check the oil level Musetto<br />
disassemble the vehicle.<br />
The level of brakes is at the<br />
junction tank.<br />
This with new brake pads<br />
(brought to the package) and the<br />
purging done.<br />
Controlli periodici e<br />
<strong>ca</strong>mbi<br />
Level Oil brake<br />
B 4-10 Y 47
Controlli periodici e<br />
<strong>ca</strong>mbi<br />
Regulation of brake balance<br />
The braking arm by setting screw.<br />
Being placed in a dirty place is generally<br />
recommended periodi<strong>ca</strong>lly to disassemble the total and<br />
make a thorough cleaning (the vine circled in red and<br />
highlighted by the arrow).<br />
Clean the area of the thread with solvent to remove all<br />
traces of dirt. Clean also puntalini pumps.<br />
Grease with grease and reassemble the Teflon with<br />
<strong>ca</strong>re.<br />
Proceed in the same way for the spring command<br />
(flexible), which leaves from green manettino place in<br />
the cockpit and reach the threaded bar.<br />
Also check bearing swivel that allows the operation of<br />
the adjustment.<br />
Before you reassemble the spring, ingrassarla <strong>ca</strong>refully<br />
with grease to Teflon<br />
B 4-10 Y 48
Controlli periodici e<br />
<strong>ca</strong>mbi<br />
Other on brakes<br />
WARNING: The brakes rarely need to be dismantled. But if it is necessary to follow these simple<br />
rules:<br />
-Not ever disassemble components of the braking unless needed<br />
-If any of the components be dismantled, it is necessary to clear the system, fill it with new<br />
brake fluid and make a purge<br />
-When the brake <strong>ca</strong>liper is disassembled ALWAYS change of piston seals.<br />
-Do not use solvents or MAI liquids other than fluid in the brake system,<br />
-Use only new brake fluid to clean the components,<br />
-The liquid <strong>ca</strong>n damage brakes sides painted or plastic,<br />
-Avoid contact with the brake fluid with skin.<br />
Seals pistons<br />
Tube brakes<br />
Scheme, timing for brake maintenance<br />
Every 2 years or at any rebuild<br />
Every 2 years<br />
B 4-10 Y 49
Controlli periodici e<br />
<strong>ca</strong>mbi<br />
Electric scheme<br />
Annex 002 illustrates the general schematic of the <strong>ca</strong>r.<br />
Placing particular emphasis on the maintenance of the electricity system of<br />
the <strong>ca</strong>r be<strong>ca</strong>use a malfunction could lead to the principles of fire.<br />
You must check the following components:<br />
Battery<br />
-Contacts under board<br />
-Contact ignition engine control unit<br />
-Contact <strong>ca</strong>ndles<br />
-Relays start<br />
-Operation reversing<br />
-Contact wheel phonic<br />
-Contact petrol pump<br />
-Contact radiator fan<br />
Rain Lamp<br />
B 4-10 Y 50
1. Fuses,<br />
2. Relays,<br />
3. Inertial switch,<br />
4. Engine ecu,<br />
5. Stabilizer.<br />
Controlli periodici e<br />
<strong>ca</strong>mbi<br />
Electric scheme<br />
1 2<br />
5<br />
B 4-10 Y 51<br />
4<br />
3
To ensure the operation be<br />
assayed with a continuity<br />
tester for electronics.<br />
WARNING: never use fuses<br />
with amperage different from<br />
the original. Using fuses<br />
inappropriate or wrong<br />
amperage <strong>ca</strong>n lead to<br />
malfunction of the system,<br />
serious damage to the<br />
electri<strong>ca</strong>l system, the<br />
principles of fire.<br />
Controlli periodici e<br />
<strong>ca</strong>mbi<br />
electric - fuses<br />
Rain light<br />
10 A<br />
Vent<br />
radiator<br />
10 A<br />
Fronte marcia<br />
Electric<br />
ignition<br />
20 A<br />
B 4-10 Y 52<br />
General<br />
30 A
To ensure the operation be<br />
assayed with a continuity tester<br />
for electronics.<br />
WARNING: never use relays<br />
with amperage different from<br />
the original. Using relays<br />
inappropriate or wrong<br />
amperage <strong>ca</strong>n lead to<br />
malfunction of the system,<br />
serious damage to the electri<strong>ca</strong>l<br />
system, the principles of fire.<br />
From the left side of the <strong>ca</strong>r is<br />
installed relay goodwill<br />
Controlli periodici e<br />
<strong>ca</strong>mbi<br />
electric - relays<br />
Lampada<br />
rain<br />
Pompa<br />
benzina<br />
Fronte marcia<br />
Accensione<br />
B 4-10 Y 53<br />
Generale
Controlli periodici e<br />
<strong>ca</strong>mbi<br />
electric – inertial switch<br />
The inertial switch is a passive safety<br />
device.<br />
When the <strong>ca</strong>r is upside down<br />
following an accident this device cuts<br />
the power to pump fuel greatly<br />
reducing the risk of fire.<br />
You do not need to replace it as a<br />
result of an accident in fact, once the<br />
<strong>ca</strong>r is put back with the wheels on the<br />
ground, the device <strong>ca</strong>n be reset and<br />
start over.<br />
B 4-10 Y 54
Controlli periodici e<br />
<strong>ca</strong>mbi<br />
electric – Engine ECU<br />
The controller acts on engine ignition.<br />
The engine control unit regulates only the ignition advance. It<br />
piombata and <strong>ca</strong>n not in any way be changed by the Team.<br />
Make sure it is well fixed to the plate on the left side of the <strong>ca</strong>r.<br />
Before shoehorning connector white, <strong>ca</strong>refully blow by<br />
compressed air to remove any residual contacts.<br />
Calzare connectors of the controller be<strong>ca</strong>use it may force them<br />
without <strong>ca</strong>using damages contacts leading to internal power losses<br />
and sudden dips in performance.<br />
WARNING: deposits of dirt may hinder the passage of current<br />
and <strong>ca</strong>use a malfunction of the engine.<br />
B 4-10 Y 55
Controlli periodici e<br />
<strong>ca</strong>mbi<br />
Battery<br />
The battery is positioned on the left side belly, contacts must be very tight and<br />
well insulated.<br />
Periodi<strong>ca</strong>lly check the mounting and make sure that the connection to ground<br />
(negative terminal) is well fixed to the frame,<br />
Periodi<strong>ca</strong>lly clean the jack of additional battery lo<strong>ca</strong>ted under the battery <strong>ca</strong>r<br />
After each session, of transporting the <strong>ca</strong>r, disconnect the negative (black) and<br />
isolate <strong>ca</strong>refully with tape,<br />
To prevent the oxidation of contacts cover the battery terminals with dielectric<br />
grease,<br />
Connect always the first positive terminal and the negative terminal,<br />
The open circuit voltage of the battery should be slightly above 12V. The<br />
charging voltage must be at 14 V to 5000 rpm (the tester attack on drums to<br />
perform this control).<br />
B 4-10 Y 56
It regulates through two tie rods that<br />
allow scrolling of the longitudinal<br />
electric motor. For its regulation<br />
should use tool specifi<strong>ca</strong>lly Glory<br />
For the operation it is recommended to<br />
keep the engine at least 3000 rpm in<br />
order to facilitate the work the<br />
alternator.<br />
The reversing only works when the<br />
exchange is lo<strong>ca</strong>ted N (neutral).<br />
Controlli periodici e<br />
<strong>ca</strong>mbi<br />
Reverse gear<br />
B 4-10 Y 57
• The wheel is installed on<br />
phonic amount of the right<br />
front wheel, is used to detect<br />
the speed of the <strong>ca</strong>r.<br />
-Although type magnetic it is<br />
good to provide a periodic<br />
cleaning by compressed air.<br />
-After each use, check the<br />
distance between the wheel<br />
and sensor phonic:<br />
correct value: 0,8 – 1 mm<br />
Controlli periodici e<br />
<strong>ca</strong>mbi<br />
Fonic wheel<br />
B 4-10 Y 58<br />
0,8-1 mm
The fuel pump is lo<strong>ca</strong>ted right behind<br />
the radiator and under the electri<strong>ca</strong>l<br />
system.<br />
-Keep the tube sent gasoline is in<br />
direct contact with the cooling<br />
tubes. Check every race the state of<br />
wear.<br />
-Check <strong>ca</strong>refully any steps near hot<br />
components or live edge<br />
If you need to use the tape fabricfinish<br />
to avoid mechani<strong>ca</strong>l<br />
abrasion<br />
Controlli periodici e<br />
<strong>ca</strong>mbi<br />
Fuel pump<br />
B 4-10 Y 59
-Remove any deposits by the<br />
blades,<br />
-Check that the blades turn freely<br />
without touching the radiator. If<br />
touched away by inserting shims<br />
between the <strong>ca</strong>stle of blades and<br />
radiator (inwards <strong>ca</strong>r) and washers<br />
between the fins <strong>ca</strong>stle and radiator<br />
supports (<strong>ca</strong>r outwards)<br />
-Check if the wire leading power is<br />
spelato. If replace or cover with<br />
tape.<br />
Controlli periodici e<br />
<strong>ca</strong>mbi<br />
Radiator Vent<br />
B 4-10 Y 60
-Check before every race its<br />
operation,<br />
-Check cleaning diode LED,<br />
If necessary to use tape<br />
fabric-finish to avoid<br />
mechani<strong>ca</strong>l abrasion of the<br />
<strong>ca</strong>ble outlet,<br />
-Check the tightening of the<br />
screws indi<strong>ca</strong>ted by the<br />
yellow arrows.<br />
Controlli periodici e<br />
<strong>ca</strong>mbi<br />
Rain Light<br />
B 4-10 Y 61
-In the multifunction display AIM<br />
arrive power <strong>ca</strong>bles is that signal.<br />
-Make sure the connection to<br />
ground is well fixed to the frame,<br />
-The signals coming through the<br />
dashboard bundle ended with the<br />
connector brown: Check the<br />
tightening of screws and cleaning.<br />
-Where values appear "strange" (or<br />
in the presence of intermittent<br />
signals) connectors with clean air<br />
and revive contacts through spray<br />
designed for cleaning electri<strong>ca</strong>l /<br />
electronic equipment.<br />
Controlli periodici e<br />
<strong>ca</strong>mbi<br />
Dashboard<br />
B 4-10 Y 62
-Periodi<strong>ca</strong>lly check the absence of<br />
losses,<br />
-Check <strong>ca</strong>refully tightening of the ties<br />
that forge metal pipes petrol.<br />
-Never that the petrol pipes pass near<br />
or accuminati hot objects.<br />
-To facilitate inspection operations<br />
keep clean the window control<br />
techni<strong>ca</strong>l data placed on top of the tank<br />
to the left of the <strong>ca</strong>r under the roll bar.<br />
NB: Please note that the tank installed<br />
in the B 4-10 Y comply with the rules<br />
FIA FT3, so you must change every 5<br />
years.<br />
Controlli periodici e<br />
<strong>ca</strong>mbi<br />
Fuel tank<br />
B 4-10 Y 63
The extinguisher Kit is an important<br />
component for safety. Check each<br />
session all pipes and connectors.<br />
For transporting graft plug security to<br />
block accidental operations of the<br />
component. Remember to remove it<br />
when the <strong>ca</strong>r is used.<br />
Check the charging indi<strong>ca</strong>tor of the<br />
cylinder. The hand must be in the part<br />
of the green.<br />
Provide to cover if it is outside these<br />
values.<br />
Controlli periodici e<br />
<strong>ca</strong>mbi<br />
Extinguisher<br />
Spina di<br />
sicurezza<br />
B 4-10 Y 64
Regulations<br />
Regolazioni B 4-10 Y 65
• wheels<br />
Index<br />
• Suspensions: <strong>ca</strong>mber, <strong>ca</strong>ster, toe, height of the <strong>ca</strong>r, ecc<br />
ecc<br />
• Chassis : pedalkit, steering, brakes, ecc ecc<br />
• Cockpit;<br />
• Engine<br />
• Transmission: Gear ratio, regulation of the clutch<br />
• Bodywork: wings, mirros<br />
Regolazioni B 4-10 Y 66
Wheels<br />
The B 4-10 Y wheels are developped and build on exlusive design.<br />
Is VOID the use of any other type of wheels, that <strong>ca</strong>n compromise<br />
the safety of the <strong>ca</strong>r.<br />
front<br />
rear<br />
Dimensions<br />
(diameter x with)<br />
13x6<br />
13x8<br />
Weig<br />
ht<br />
(kg)<br />
11,6<br />
AlSi7Mg<br />
Regolazioni B 4-10 Y 67<br />
4,3<br />
5,3<br />
ET (mm)<br />
7<br />
Material<br />
AlSi7Mg
Sospensions<br />
The regulation on the front side are for the following parts<br />
• <strong>ca</strong>mber,<br />
• <strong>ca</strong>ster,<br />
• toe,<br />
• Height of the <strong>ca</strong>r,<br />
• Shock-absorbers.<br />
On the rear ones are:<br />
• <strong>ca</strong>mber,<br />
• toe,<br />
• Height of the <strong>ca</strong>r,<br />
• Schock-absorber.<br />
.<br />
Regolazioni B 4-10 Y 68
Carefully note:<br />
regulations regaridng set up (Camber, Toe, height) <strong>ca</strong>n be easyly done with<br />
the help of SET UP WHEELS (on <strong>Gloria</strong> <strong>ca</strong>talogue)<br />
<strong>Gloria</strong> SET UP WHEELS<br />
(instructions: annex 005)<br />
Regolazioni B 4-10 Y 69
BASE VALUE ppf the suspensions<br />
The following table summarizes the basic values of suspensions of Glory B 4-<br />
10 Y.<br />
It will be re<strong>ca</strong>lled that, for statisti<strong>ca</strong>l reasons, the <strong>ca</strong>rs are slightly different<br />
from each other. It should not therefore surprising the difference between the<br />
values placed here and measurements made with different <strong>ca</strong>rs from what we<br />
use as the master.<br />
The values of the arms on the ground are reported to rubber not loaded.<br />
front<br />
rear<br />
King<br />
pin<br />
(degrees<br />
)<br />
9,77<br />
9,77<br />
Arms to ground trasversal<br />
(mm)<br />
58,35<br />
63,89<br />
Longitudinal (mm)<br />
Caster 0°<br />
Caster 3,6°<br />
Regolazioni B 4-10 Y 70<br />
0<br />
0<br />
7,59<br />
-
Values of the suspensions<br />
The automobile suspensions consist of rigid connections rotating around a point in space.<br />
For this reason, the values of <strong>ca</strong>mber and toe vary with the excursion.<br />
For complete information, as annex 003 are given developments suspension of your B 4-<br />
10 Y.<br />
For a truly comprehensive optimization of assets should be taken into account this data.<br />
Regolazioni B 4-10 Y 71
Camber (1)<br />
The <strong>ca</strong>mber is the inclination of the wheel with respect to verti<strong>ca</strong>l.<br />
Assume the positive value if the wheel is tilted towards the outside of the <strong>ca</strong>r.<br />
An excessively high value (less than-N degrees) produces a rapid wear of the inside of<br />
the rubber. By contrast value too low does not allow a good job of rubber-distance curve.<br />
WARNING: The <strong>ca</strong>mber must be configured in a different way if we mount a<br />
conventional rubber or rubber radial. In the second <strong>ca</strong>se, you <strong>ca</strong>n increase the value of<br />
much <strong>ca</strong>mber.<br />
For information about, refer to "trim sheet basis" in the "General Information".<br />
For more information, contact <strong>Gloria</strong> srl.<br />
Regolazioni B 4-10 Y 72
Camber (2)<br />
NB: in the middle of the red wheel, the black verti<strong>ca</strong>l to the ground through the point<br />
grounding of tyre.<br />
Regolazioni B 4-10 Y 73
-The <strong>ca</strong>mber is adjusted on a<br />
continuous unscrewing the<br />
terminal spheri<strong>ca</strong>l upper<br />
handwheel.<br />
-More is screwed (clockwise)<br />
terminal will result in a more value<br />
negative <strong>ca</strong>mber.<br />
-Refer to Annex 004<br />
correspondence between the<br />
number of laps to the terminal and<br />
change <strong>ca</strong>mber angles of the wheel<br />
Camber (3)<br />
Regolazioni B 4-10 Y 74
Caster (1)<br />
The <strong>ca</strong>ster (or longitudinal impact) is the inclination of the steering compared to the verti<strong>ca</strong>l,<br />
watching the <strong>ca</strong>r side.<br />
Assume positive when the wheel is driven, or lower terminal is in front of the terminal in view of<br />
the rear side.<br />
An excessively high value produces a more rapid and substantial return steering outgoing curve.<br />
If it opts for a low value is favored manoeuvrability, a rather high value makes it more stable<br />
speed in the <strong>ca</strong>r.<br />
The <strong>ca</strong>ster determines the longitudinal arm on the ground<br />
NB: red steering axis, the black verti<strong>ca</strong>l to the ground through the point grounding of<br />
tyre.<br />
Regolazioni B 4-10 Y 75
The <strong>ca</strong>ster will rule reversing<br />
the position of the mounting<br />
bushings.<br />
Caster”0” °<br />
Bush long to the front of <strong>ca</strong>r<br />
Caster”3.6” °<br />
Bush to the short front <strong>ca</strong>r<br />
Caster (2)<br />
Front direction<br />
Regolazioni B 4-10 Y 76<br />
0°<br />
3,6°
Warning: mount always beat<br />
the bushes on the side of the<br />
upright.<br />
In the photo behind is<br />
highlighted mounting correct<br />
and incorrect assembly.<br />
Caster (3)<br />
Regolazioni B 4-10 Y 77
Values shown in mm.<br />
Toe<br />
Assume positive when the distance is less front and more behind.<br />
Regolazioni B 4-10 Y 78
-The convergence front rule<br />
acting on the length of the<br />
arms Steering<br />
-More increases the length of<br />
arm, open wheel<br />
(convergence worst)<br />
-In order to adjust unscrew<br />
the nuts terminals, adjust the<br />
length and reseal.<br />
Front Toe (2)<br />
Regolazioni B 4-10 Y 79
Rear Toe (3)<br />
The convergence back rule acting on the length of the arms of false steering<br />
More increases the length of arm, the wheel ends (more positive convergence)<br />
In order to adjust unscrew the nuts terminals, adjust the length and reseal<br />
Regolazioni B 4-10 Y 80
Height from ground (1)<br />
It should set the height from the ground depending on the type of road which<br />
crosses.<br />
We recommend heights from the ground reduced in the <strong>ca</strong>se of asphalt smooth<br />
and regular.<br />
In the <strong>ca</strong>se of asphalt circuits with very irregular and marked the height should<br />
be increased to reduce the risk of collision with chassis ground and increase the<br />
fund drive avoiding race.<br />
Regolazioni B 4-10 Y 81
Hieght form the ground (2)<br />
-The height from ground rule is continuously through a double spheri<strong>ca</strong>l terminal on the<br />
push-rod of the shock.<br />
-Generally for the setting from the ground indi<strong>ca</strong>tes a value in "sides" of the strut<br />
suspension. A complete rotation (360 °) corresponds to a rotation of 6 sides (being strut with<br />
controdado welded to 6 sides) and an extension / shortening of the strut of 3 mm.<br />
-The relationship between ant and leverage post is different. In the following table the<br />
values you must use:<br />
front<br />
rear<br />
Rotation of one<br />
surface is …(mm) of<br />
variation<br />
0,5<br />
0,5<br />
Rotation of one<br />
surface is …(mm) of<br />
ehight form the ground<br />
The variation in height from the ground by the rotation full strut applies to the<br />
front and 5.52 mm for the rear 6.3 mm.<br />
Regolazioni B 4-10 Y 82<br />
0,92<br />
1,05
-The anti-roll bar limits the roll<br />
(transverse inclination) of the vehicle<br />
in relation to the ground-distance<br />
curve.<br />
-It is a rigid link between the two<br />
wheels of the axle through aluminium<br />
rods. The bar is constructed from steel<br />
25CrMo4.<br />
-A value excessive anti <strong>ca</strong>uses<br />
increased stiffness of the suspension<br />
on the ground. A value too high at anti<br />
sottosterzo <strong>ca</strong>uses.<br />
-A value too high at the rear <strong>ca</strong>uses<br />
sovrasterzo, especially in output in<br />
acceleration curve<br />
Antiroll bar (1)<br />
Regolazioni B 4-10 Y 83
The spheri<strong>ca</strong>l terminal (rod ends) that<br />
connects the bar suspensions may take<br />
three lo<strong>ca</strong>tions: P1, P2, P3.<br />
The more we are away from the center<br />
of rotation is obtained more cedevole<br />
a bar. Conversely avvicinandoci the<br />
center of rotation bar will be more<br />
rigid.<br />
005 Attached you will find the<br />
strength to the trend of change of the<br />
wheel.<br />
Antiroll bar (2)<br />
Regolazioni B 4-10 Y 84<br />
P1<br />
P2<br />
P3
The shock absorbers are installed on<br />
<strong>Gloria</strong> type gas monotubo high pressure<br />
with a regulation 4 rotary positions that<br />
affect that is on the compression stroke.<br />
The shock loads of nitrogen with a<br />
pressure range is from 18 to 20 bar.<br />
The reference red equals <strong>ca</strong>libration softer<br />
(position A), turning the knob clockwise to<br />
the next position will result in a hardening<br />
of <strong>ca</strong>libration (position B), until the C<br />
position, then continuing to return to<br />
position A.<br />
On the following page is the chartfrequency<br />
load.<br />
If interested in figures, contact <strong>Gloria</strong> srl.<br />
Shock-asborbers<br />
Regolazioni B 4-10 Y 85
There are 3 different suspension springs<br />
with different elastic constant.<br />
Cambiandole is to take account of the<br />
variation in height chassis from the ground<br />
be<strong>ca</strong>use of the difference in pre-up.<br />
Costante<br />
elasti<strong>ca</strong><br />
50 N/mm<br />
70 N/mm<br />
90 N/mm<br />
Springs<br />
Diameter<br />
9 mm<br />
10 mm<br />
10,5 mm<br />
Regolazioni B 4-10 Y 86
Chassis<br />
Here shown the mostr important component with regualtion:<br />
•Pedalkit,<br />
•steering,<br />
•brakes.<br />
Regolazioni B 4-10 Y 87
• There are 3 discrete settings of their<br />
depth<br />
To facilitate operations disassemble<br />
the Musetto and cover pedal,<br />
Adjust the pedal with the brake pedal<br />
tilted toward the pilot of about 5<br />
degrees.<br />
You <strong>ca</strong>n also choose the thickness<br />
pedals depending on their tastes or<br />
needs in three different configurations<br />
• There is a lso possibility of having 3 different sole<br />
thickness-<br />
� Standard (spare code B4 07 120)<br />
� +10 mm (spare code B4 07 130)<br />
� +20 mm (spare code B4 07 130)<br />
PedalKit (1)<br />
Regolazioni B 4-10 Y 88
PedalKit (2)– regulation of pedal return<br />
To prevent the pedals move backwards<br />
<strong>ca</strong>using unnatural and uncomfortable<br />
position of the foot <strong>ca</strong>n also adjust the<br />
degrees of the pedal <strong>ca</strong>n return to the<br />
cockpit.<br />
We must act on adjusting the basis of<br />
special pedal passenger side.<br />
Regolazioni B 4-10 Y 89
Pedalkit (3) – regulation of the end run<br />
To avoid stress the clutch and<br />
accelerator <strong>ca</strong>bles should accurately<br />
<strong>ca</strong>librate the bottom of the pedal<br />
stroke.<br />
It must unscrew the nut for a certain<br />
self-stretch and then screw on the end<br />
plate of the desired distance.<br />
Whether friction that the accelerator is<br />
necessary to proceed hand in hand<br />
with the regulation of the <strong>ca</strong>ble side<br />
engine<br />
of pedals<br />
Regolazioni B 4-10 Y 90
Steering (1)<br />
The steering wheel adjusts both verti<strong>ca</strong>lly and in depth.<br />
Do this with particular qualms be<strong>ca</strong>use this is a component for<br />
safety<br />
As a regulatory impact on you to handle at the same time.<br />
If you have any questions please contact <strong>Gloria</strong> srl.<br />
Regolazioni B 4-10 Y 91
Verti<strong>ca</strong>l regulation of the steering (2)<br />
To adjust the steering wheel verti<strong>ca</strong>lly<br />
is necessary to sit the rider dressed as<br />
a guide in the race and gradually enter<br />
thicknesses between spenjalnim and<br />
chassis.<br />
<strong>Gloria</strong> s.r.l. Produce a required<br />
thickness to be used and insert where<br />
indi<strong>ca</strong>ted by the red arrow in the<br />
picture on the side.<br />
The change has this report:<br />
1 mm thickness = 1.6 mm lower wheel<br />
If you need these details are invited to<br />
contact <strong>Gloria</strong> srl.<br />
Regolazioni B 4-10 Y 92
Longitudinal regulation of the steering<br />
(3)<br />
To adjust the steering wheel<br />
longitudinally is necessary:<br />
1-Far sit the pilot dressed as lead in<br />
the race,<br />
2-Unscrew the brugole "X" these first<br />
few mm round of the joints (red circle<br />
in the photo)<br />
3-Moving forward and rewind through<br />
the seat tube as desired,<br />
Cut a 4-by measuring tool (?????),<br />
5-Forare at points indi<strong>ca</strong>ted<br />
dall'attrezzo (?????),<br />
6-Replace brugole only with the<br />
supplied <strong>ca</strong>r. Fronte<br />
direction<br />
Regolazioni B 4-10 Y 93
The braking system is a very<br />
important part of the <strong>ca</strong>r be<strong>ca</strong>use it is<br />
one of the main components to the<br />
active safety.<br />
A proper adjustment is also essential<br />
to get the maximum out of the <strong>ca</strong>r.<br />
The basic concept is that the weight of<br />
the braking <strong>ca</strong>r to the front door. You<br />
must then minimize the pressure of the<br />
rear to avoid jamming that lead to<br />
almost inevitable spinning<br />
Brakes (1)<br />
Regolazioni B 4-10 Y 94
You change the distribution of<br />
braking directly from acting on<br />
manettino green to the right of<br />
the cockpit.<br />
Turning clockwise brings<br />
braking to the front, turning<br />
counterclockwise in moves<br />
towards the rear<br />
Brakes (2)<br />
Regolazioni B 4-10 Y 95
The Tilton knob acts on the<br />
distance from the center of the<br />
pedal pushing puntalini two<br />
pumps brake.<br />
The distribution base is 20 mm-<br />
20 mm.<br />
We re<strong>ca</strong>ll that the two brake<br />
pumps are not the same then<br />
with the same division on the<br />
right and left not get the same<br />
pressure on the conduits.<br />
brakes (3)<br />
20 mm 20 mm<br />
Regolazioni B 4-10 Y 96
Brakes (4)<br />
Following our scheme conversion in millimeters of the movement<br />
pressure of hte brake balancer.<br />
Every complete turn (360 gradi) of the knob , correspond to 1<br />
millimeters of ripartition.<br />
20 mm / 20 mm<br />
14 mm / 26 mm<br />
26 mm / 14 mm<br />
front<br />
10 bar<br />
10 bar<br />
10 bar<br />
rear<br />
6 bar<br />
4 bar<br />
10 bar<br />
Regolazioni B 4-10 Y 97
Engine<br />
On the engine <strong>ca</strong>n be done the following modify:<br />
• Carburetor e position sensor,<br />
• Jets and pins,<br />
• clutch,<br />
• Accelerator,<br />
• Transmission,<br />
Regolazioni B 4-10 Y 98
Engine – Carburetor position sensor<br />
Before you assemble the <strong>ca</strong>rburetor clean all parties with a specific<br />
product.<br />
Always use new seals.<br />
To check the operation of the <strong>ca</strong>rburetor potentiometer use a tester<br />
for electronics. Turning slowly the butterfly the tester must indi<strong>ca</strong>te<br />
the range between 0.4 and 5.4 KOhm to 20 ° C.<br />
If a range is different, you must change the potentiometer.<br />
Regolazioni B 4-10 Y 99
Engine – jets & pins<br />
<strong>Gloria</strong> s.r.l. put on orginal fitment jets of 0,155 mm of diameter.<br />
Can be asked different jets of different diameter as following <strong>Gloria</strong> codes:<br />
• 140: B4 12 140,<br />
• 145: B4 12 145,<br />
• 150: B4 12 150,<br />
• 155: B4 12 155,<br />
• 160: B4 12 160,<br />
• 165: B4 12 165.<br />
The pin <strong>ca</strong>n be adjusted in five different positions.<br />
Once the pins are lo<strong>ca</strong>ted on the third notch (central notch). For put lower air<br />
fuel ratio the firm moves upward, downward weight.<br />
NB: the cylinder internal pins are different from those outside.<br />
Regolazioni B 4-10 Y 100
Use only genuine <strong>Gloria</strong> (as non-standard), lubri<strong>ca</strong>te<br />
the <strong>ca</strong>ble with fat grafite and install following the<br />
steps below.<br />
- put the <strong>ca</strong>ble clutch into the hole rate and close<br />
the safety <strong>ca</strong>tch,<br />
- Insert the <strong>ca</strong>ble sheath without friction and tight<br />
it.<br />
- Insert the <strong>ca</strong>ble into the hole and pedal prepared<br />
in close clamp.<br />
The free space that should have the lever are as<br />
follows:<br />
Clutch <strong>ca</strong>ble-side engine: 3 mm,<br />
free space pedal: 10 mm (measured at the end of<br />
the pedal).<br />
The free space changes with the pedal register<br />
within the frame, the game leverage one hand<br />
clutch setting register on the spot above the base<br />
on the engine.<br />
In order to adjust side engine proceed as follows:<br />
- Unscrew the nut.<br />
Turn-nut Registry CCW to decrease the free space<br />
clockwise to increase.<br />
- Tighten the nut.<br />
In order to adjust pedals side:<br />
- Screw (direction) 4 nut to increase the free<br />
space, nut.<br />
Clutch regulation<br />
Regolazioni B 4-10 Y 101
Accelerator regulation<br />
Use only genuine <strong>Gloria</strong> (as non-standard). Grease<br />
with grease grafitato periodi<strong>ca</strong>lly.<br />
The games that should have the lever are as<br />
follows:<br />
free soace -side engine accelerator <strong>ca</strong>ble: 2 mm to<br />
pedal down completely,<br />
free space -pedal: 2 mm (measured at the end of<br />
the pedal).<br />
The free space changes with the pedal register<br />
within the frame, the free space of the accelerator<br />
hand motor rule on the register above battery<br />
<strong>ca</strong>rburettors.<br />
In order to adjust side engine proceed as follows:<br />
- Screw (direction) 4 nut to increase the free<br />
space, unscrew (b direction) to decrease,<br />
- Tighten the nuto.<br />
In order to adjust pedals side:<br />
- Screw (direction) 4 nut to increase the free<br />
space, unscrew-(b direction) to decrease,<br />
Tighten the nut.<br />
Regolazioni B 4-10 Y 102
Transmission (1)<br />
To change the relationship of exchange we act on the final report<br />
by the replacement of pinion and crown.<br />
The pinions are available: 13, 14, 15 teeth.<br />
The crowns are available: 40, 41, 42 teeth.<br />
Regolazioni B 4-10 Y 103
Changing of the sprocket:<br />
- Remove the chain tension by<br />
moving the rear axle to the front<br />
through two tensioning the sides of<br />
the frame,<br />
Detach the crown-od,<br />
- Replace the new crown and<br />
retrace the path the reverse.<br />
NB: semi-store crowns always<br />
together<br />
Transmission (2)<br />
Regolazioni B 4-10 Y 104<br />
Tightener<br />
sprocket<br />
Axle
Transmission (3)<br />
Changing Engine pinion :<br />
-Remove the cover additional <strong>ca</strong>rter chain,<br />
-Unscrew and remove the pinion from the exchange,<br />
-Remove the chain tension by moving the rear axle to the<br />
front through two tensioning the sides of the frame,<br />
-Slide the new pinion and retrace the path the reverse.<br />
Regolazioni B 4-10 Y 105
In Annex 005 are reported graphics<br />
speeds achievable with a final report.<br />
After each change of ratio is necessary<br />
retension chain.<br />
Refer to the table on hand for the<br />
necessary lengths with different ratios.<br />
NB: the number of meshes means<br />
counting the gold plates.<br />
Transmission (4)<br />
Using a special tool gouging to close<br />
41 30<br />
the chain. 42 31<br />
Regolazioni B 4-10 Y 106<br />
13<br />
14<br />
15<br />
Ratio<br />
40<br />
41<br />
42<br />
40<br />
41<br />
42<br />
40<br />
N° of parts of<br />
the chain<br />
30<br />
30<br />
30<br />
30<br />
30<br />
31<br />
30
Bodywork – Wings<br />
-The front wing rule unscrewing the<br />
screws rear support,<br />
-More-wing is tilted upward more<br />
aerodynamic load is achieved at the<br />
expense of speed<br />
WARNING: This is one of the most<br />
requested in shock. Check <strong>ca</strong>refully<br />
locked.<br />
The wing <strong>ca</strong>n tilts from 0 ° to 9 °<br />
continuously.<br />
- the rear wing setting as the front<br />
wing,<br />
-More-wing is tilted upward more<br />
aerodynamic load is achieved at the<br />
expense of speed<br />
The wing <strong>ca</strong>n tilts from 0 ° to 12 ° on a<br />
continual basis.<br />
Regolazioni B 4-10 Y 107
The sides of the front and rear wings<br />
are placed flap of regulating the air<br />
flow.<br />
Regolate always so that they are<br />
perpendicular to the ground.<br />
Their adjustment does not alter the<br />
aerodynamic load.<br />
WARNING: This is one of the most<br />
requested in shock. check closely<br />
locked.<br />
In the given example, the front wing.<br />
Side wings<br />
Regolazioni B 4-10 Y 108
Cockpit<br />
Cruscotto digitale B 4-10 Y<br />
109
Shown the various light and signals<br />
Vent switch – on -<br />
off<br />
General switch<br />
Engine switch starter<br />
Display multifuntion<br />
Rain light switch<br />
Neutral indi<strong>ca</strong>tor<br />
light<br />
Brake balancer<br />
Reverse electric<br />
gear switch<br />
Cruscotto digitale B 4-10 Y<br />
110
WARNING: In this section we present only the main screen of the display<br />
board. For more detailed information, please consult the manual dashboard<br />
attachment with this book of Use and Maintenance…OR GO TO<br />
http://www.aim-sportline.it/pagine/download/sezione_firmware.htm<br />
Cruscotto digitale B 4-10 Y<br />
111
Display multifuntion<br />
1)Engine rpm (0-12000 rpm) (i led higher ignite<br />
sequentially to signal approaching the maximum<br />
speed allowed)<br />
2)speed <strong>ca</strong>r (km/h)<br />
3) water temperature leaving the engine (rated<br />
60-110 ° C)<br />
4)Temperature oil output by the engine (rated<br />
80-130 ° C)<br />
5 Pressure oil output by the engine (rated 3-8<br />
bar)<br />
6)Battery voltage (about 12.5 V)<br />
7)timelap<br />
8)gear-indi<strong>ca</strong>tor<br />
The alarms are as follows:<br />
AL1: water temperature (under 60 and over 110<br />
° C)<br />
AL2: oil temperature (below 80 and above 130 °<br />
C)<br />
AL3: Pressure oil (under 3 and over 8 bar).<br />
WARNING: If you switch to an alarm<br />
immediately stop and check the <strong>ca</strong>r <strong>ca</strong>refully.<br />
4<br />
3<br />
Cruscotto digitale B 4-10 Y<br />
112<br />
1<br />
2<br />
7<br />
8