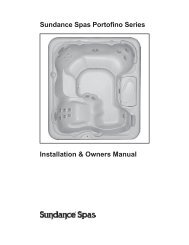
2002 Portofino Series Owners Manual - Sundance Spas
2002 Portofino Series Owners Manual - Sundance Spas
2002 Portofino Series Owners Manual - Sundance Spas

Create successful ePaper yourself
Turn your PDF publications into a flip-book with our unique Google optimized e-Paper software.
<strong>Portofino</strong> <strong>Series</strong><br />
Installation & Owner’s <strong>Manual</strong>
ADDENDUM - IMPORTANT OPERATING INSTRUCTION CORRECTION!<br />
<strong>Sundance</strong> <strong>Portofino</strong> <strong>Series</strong> Owner’s <strong>Manual</strong><br />
#6530-374, Revision-A & B<br />
Several sections in the owner’s manual contains revisions for models manufactured between January and<br />
April <strong>2002</strong>. Please refer to the changes outlined below when operating your new spa.<br />
Section 9.0 Changes (Underlined)<br />
9.0 Operating Instructions<br />
The spa control system has automatic functions that operate upon start-up and normal operation<br />
to protect the system. Upon power up, the readout displays the following information:<br />
Startup<br />
Sequence<br />
1. Control panel displays current software release (e.g. 3.50 or 6.17), then;<br />
Important Note: If your system displays 3.50 upon strartup, disregard<br />
this addendum sheet and refer solely to the owner’s manual. If your<br />
system displays 6.17 upon startup, refer to revised section 9.7 below<br />
for proper filter cycle programming instructions.<br />
1.<br />
2.<br />
3.<br />
OR<br />
Revised Sections 9.7<br />
9.7 Programming the Filter Cycle<br />
Tango, Caprio, and Caprio ST Models Only<br />
Proper filtration is an important key to maintaining the clarity of your hot tub’s water. The hot tubs filtration<br />
system is designed for unsurpassed effectiveness at removing debris and suspended particles from the water<br />
anytime the water is circulated by the pump.<br />
To select a pre-programmed filter cycle or lockout mode, press and hold both control panel WARMER and<br />
COOLER arrow keys at the same time, then release. Then press either WARMER or COOLER arrow<br />
keys to select filter mode F1 through L2 below:<br />
F1<br />
F2<br />
F3<br />
F4<br />
F5<br />
F6<br />
L1<br />
L2<br />
No filter cycle - power-up default (recommended for Solo models only)<br />
1 hour of filtration a day two minutes after initial power-up<br />
2 hours of filtration a day (1 hour cycle every 12 hours)<br />
3 hours of filtration a day (1 hour cycle every 8 hours)<br />
4 hours of filtration a day (1 hour cycle every 6 hours)<br />
6 hours of filtration a day (1 hour cycle every 4 hours)<br />
Lock Out (disables all hot tub functions to permit filter cleaning)<br />
Lock Mode (disables the jets and light buttons to prevent unauthorized use of the<br />
hot tub) - filter cycles and heater will continue to operate as programmed in this<br />
mode. The temperature display flashes when this function is enabled. Example: the<br />
“F3” filter cycle was enabled prior to choosing lock mode. The hot tub continues to<br />
perform filter cycle “F3” until lock mode is canceled, allowing another filter cycle to<br />
be selected.<br />
To set a time for the first filter cycle, simply turn power on to the spa two minutes prior to the desired filter<br />
time. EXAMPLE: If you desire your first filter cycle to begin at 10:00 AM turn off power to the spa and turn it<br />
back on again at 9:58 AM. Note: start time is approximate and may vary slightly from day to day.<br />
6530-174, Rev. A © <strong>2002</strong> <strong>Sundance</strong> <strong>Spas</strong>, Inc. Printed in U.S.A.
Table of Contents<br />
1.0 Important Spa Owner’s Information................................... 1<br />
2.0 FCC Notice............................................................................ 1<br />
3.0 Important Safety Instructions ............................................. 2<br />
3.1 General Electrical Safety Instructions .................................... 4<br />
4.0 Choosing a Location ........................................................... 5<br />
4.1 Outdoor Location ................................................................... 5<br />
4.2 Indoor Location ...................................................................... 6<br />
5.0 Power Supply Requirements .............................................. 7<br />
6.0 Electrical Wiring Instructions ............................................. 8<br />
7.0 Start-Up Instructions ........................................................... 9<br />
7.1 Filling the Spa ........................................................................ 9<br />
7.2 Safety Check........................................................................ 10<br />
7.3 Initiating Water Circulation ................................................... 10<br />
7.4 Adding Start-Up Chemicals ................................................. 10<br />
8.0 Control Panel Functions ................................................... 11<br />
9.0 Operating Instructions ...................................................... 12<br />
9.1 Setting Water Temperature .................................................. 12<br />
9.2 Pump Button ........................................................................ 12<br />
9.3 Light Button .......................................................................... 12<br />
9.4 Solo Diverter Valve / Air Control Operation .......................... 13<br />
9.5 Tango Diverter Valve / Air Control Operation ....................... 13<br />
9.6 Caprio / Caprio ST Diverter / Air Control Valve Operation ... 14<br />
9.7 Filtration Options .................................................................. 15<br />
9.8 Select the Filtration Mode .................................................... 15<br />
10.0 Care And Maintenance ...................................................... 16<br />
10.1 Cleaning The Filter ............................................................... 16<br />
10.2 Draining And Refilling ........................................................... 18<br />
10.3 Cleaning The Spa Interior .................................................... 19<br />
10.4 Cleaning The Pillows............................................................ 19<br />
10.5 Maintaining The Cover ......................................................... 20<br />
10.6 Maintaining The Wood Cabinet ............................................ 20
10.7 Winterizing The Spa ............................................................ 21<br />
10.8 Maintaining Water Quality ................................................... 21<br />
10.9 Controlling pH ..................................................................... 21<br />
10.10 Sanitizing / Using Additives ................................................. 22<br />
11.0 Error Conditions / Error Messages ................................. 22<br />
11.1 Summer Logic ..................................................................... 22<br />
11.2 Overheat Condition OH ....................................................... 23<br />
11.3 Panel displays SN1 ............................................................. 23<br />
11.4 Panel displays SN2 ............................................................. 23<br />
11.5 Panel displays FL1 or FL2 .................................................. 24<br />
11.6 Panel displays COL ............................................................ 24<br />
11.7 Panel displays ICE .............................................................. 24<br />
11.8 Panel displays - - - - ........................................................... 25<br />
12.0 Troubleshooting Procedures ........................................... 25<br />
12.1 No Components Operate (e.g. Pump, Light) ...................... 25<br />
12.2 Pump Does Not Operate But Light Does ............................ 25<br />
12.3 Poor Jet Action .................................................................... 26<br />
12.4 Water is Too Hot .................................................................. 26<br />
12.5 No Heat ............................................................................... 26<br />
13.0 Spa Equipment Packs ...................................................... 27<br />
13.1 Solo Equipment Pack ......................................................... 27<br />
13.2 Tango Equipment Pack ....................................................... 27<br />
13.3 Caprio / Caprio ST Equipment Pack ................................... 28<br />
14.0 Spa Overhead Views......................................................... 28<br />
14.1 Solo Overhead View ........................................................... 28<br />
14.2 Tango Overhead View......................................................... 29<br />
14.3 Caprio / Caprio ST Overhead View .................................... 29<br />
15.0 120/240 VAC Convertible Circuit Diagram ...................... 30<br />
16.0 230-240 VAC Dedicated Circuit Diagram ........................ 31<br />
17.0 Specifications.................................................................... 32<br />
17.1 Solo Specifications ............................................................. 32<br />
17.2 Tango Specifications ........................................................... 34<br />
17.3 Caprio / Caprio ST Specifications ....................................... 36
1.0 Important Spa Owner’s Information<br />
Your <strong>Portofino</strong> spa is constructed of the highest standards and is<br />
capable of providing many years of trouble-free use. However,<br />
because heat retentive materials are utilized to insulate the spa for<br />
efficient operation, an uncovered spa surface directly exposed to<br />
sunlight and high temperatures for an extended period of time is<br />
subject to permanent damage. Damage caused by exposing the<br />
spa to this abuse is not covered by warranty. We recommend that<br />
you always keep the spa full of water when it is exposed to direct<br />
sunlight and that you keep the <strong>Sundance</strong> insulating cover in place at<br />
all times when the spa is not in use. Read and carefully follow the<br />
requirements for your spa’s support base. Refer to section 4.0-4.2<br />
(page 5-6).<br />
<strong>Sundance</strong> <strong>Spas</strong> Inc. constantly strives to offer the finest spas available,<br />
therefore modifications and enhancements may be made<br />
which affect the specifications, illustrations and/or instructions<br />
contained herein.<br />
2.0 FCC Notice<br />
This equipment has been tested and found to comply with<br />
the limits for a Class B Digital Device, pursuant to Part 15 of<br />
the FCC Rules. These limits are designed to provide<br />
reasonable protection against harmful interference in a residential<br />
installation. This equipment generates, uses and can radiate radio<br />
frequency energy and, if not installed and used in accordance with<br />
the instructions, may cause harmful interference to radio communications.<br />
However, there is no guarantee that interference will not<br />
occur in a particular installation. If this equipment does cause<br />
harmful interference to radio or television reception, which can be<br />
determined by turning the equipment off and on, the user is encouraged<br />
to try to correct the interference by one or more of the following<br />
measures:<br />
1. Rearrange or relocate the receiving antenna;<br />
2. Increase the separation between the equipment and receiver;<br />
3. Connect the equipment into an outlet on a circuit different from<br />
the circuit connected;<br />
4. Consult the dealer or an experienced radio/TV technician for<br />
help.<br />
1
Changes or modifications not expressly approved by the party<br />
responsible for FCC compliance could void the user’s authority to<br />
operate this equipment.<br />
3.0 Important Safety Instructions<br />
When installing and using this equipment, basic safety<br />
precautions should always be followed, including the<br />
following:<br />
1. READ AND FOLLOW ALL INSTRUCTIONS BEFORE OPERAT-<br />
ING THE SPA!<br />
2. DANGER - RISK OF ELECTRICAL SHOCK. Install spa at least<br />
5 feet (1.5 m) from all metal surfaces. (A spa may be installed<br />
within 5 feet (1.5 m) of metal surfaces, if in accordance with the<br />
country electrical code).<br />
3. DANGER - RISK OF ELECTRICAL SHOCK. Do not permit any<br />
electric appliance such as a light, telephone, radio, or television<br />
within 5 feet (1.5 m) of the spa.<br />
4. INSTALLATION - The spa must be installed in such a manner<br />
as to provide drainage of the compartment for electrical components.<br />
5. CAUTION, 240 VAC POWERED SPAS - These spas must be<br />
hard wired to your household electrical service box only. Do not<br />
use an extension cord or any other disconnectable power cord.<br />
The use of an extension cord or a disconnectable power cord is<br />
highly dangerous and will void all warranties!<br />
6. A wire connector marked ground “GRN” is provided within the<br />
power box. Refer to section 6.0 (page 8). To reduce the risk of<br />
electric shock, connect this terminal or connector to the grounding<br />
terminal of your electrical service or supply panel with a<br />
continuous green insulating copper wire equivalent in size to the<br />
circuit conductors supplying this equipment, but no smaller than<br />
#8 AWG (8.4 mm 2 ). In addition, a second wire connector is<br />
provided for bonding to local ground points. To reduce the risk<br />
of electrical shock, this connector should be bonded with a #8<br />
AWG (8.4 mm 2 ) copper wire to any metal ladders, water pipes,<br />
or other metal within 5 feet (1.5 m) of the spa.<br />
7. The electrical supply for this product must include a suitably<br />
2
ated switch or circuit breaker to open all ungrounded supply<br />
conductors to comply with the country electrical code.<br />
8. Before entering a spa or hot tub the user should measure the<br />
water temperature with an accurate thermometer since the<br />
tolerance of the water temperature regulating device may vary<br />
as much as ±5 °F (±3 °C).<br />
9. Always enter and exit the spa slowly and cautiously. Wet<br />
surfaces are slippery.<br />
10. Do not use the spa alone.<br />
11. WARNING - RISK OF CHILD DROWNING. Extreme caution<br />
must be exercised to prevent unauthorized access by children.<br />
To avoid accidents, ensure that children cannot use a spa or hot<br />
tub unless they are supervised at all times.<br />
12. DANGER - To reduce the risk of injury, do not remove any drain<br />
suction gate or cover.<br />
13. Never use the weir gate for sitting or resting your feet. It is<br />
designed to float freely.<br />
14. The water in the spa or hot tub should never exceed 104 °F (40<br />
°C). Water temperatures between 100 °F (38 °C) and 104 °F<br />
(40 °C) are considered safe for a healthy adult. Lower water<br />
temperatures are recommended for extended use (exceeding<br />
10-15 minutes) and for young children.<br />
15. Since excessive water temperatures have potential for causing<br />
fetal damage during the early months of pregnancy, pregnant or<br />
potentially pregnant women should limit spa or hot tub water<br />
temperatures to 100 °F (38 °C).<br />
16. The use of alcohol, drugs, or medication before or during spa or<br />
hot tub use may lead to unconsciousness with the possibility of<br />
drowning.<br />
17. Persons suffering from obesity or with a medical history of heart<br />
disease, low or high blood pressure, circulatory system problems,<br />
or diabetes should consult a physician before using a spa<br />
or hot tub.<br />
18. Persons using medication should consult a physician before<br />
using a spa or hot tub since some medications may induce<br />
drowsiness while other medications may affect heart rate, blood<br />
pressure, and circulation.<br />
19. Long exposures in the spa may result in nausea, dizziness, or<br />
fainting. Observe a reasonable time limit, leave the spa, then<br />
shower, cool down, and if you wish, return for another brief stay.<br />
3
20. Excessive temperatures may cause hyperthermia. Symptoms<br />
and first aid information are as follows:<br />
• HEAT STROKE: The most susceptible people are the very<br />
young and elderly, alcoholics, and most people under the influence<br />
of drugs, medication and alcohol.<br />
• SYMPTOMS: Hyperthermia causes loss of salt, sweating,<br />
dizziness, headache, dryness of mouth and nausea, faintness<br />
and/or unconsciousness, convulsions, flushed appearance of<br />
skin, and rapid pulse and/or weak, shallow breathing.<br />
• TREATMENT: Place the victim on his back, head slightly elevated.<br />
Apply wet cloths or ice packs to the head, wrap the body<br />
in a sheet, pouring on a small amount of water. Follow with a<br />
cool shower or bath. Get medical attention as soon as possible.<br />
21. It is recommended that the following emergency telephone<br />
numbers be listed at the nearest telephone: physician, hospital,<br />
ambulance and police.<br />
22. Save these instructions!<br />
3.1 General Electrical Safety Instructions<br />
Your new <strong>Portofino</strong> spa is equipped with the “state-of-the-art” LX-10<br />
equipment system. It contains the most advanced safety and<br />
self-protective equipment in the industry. Nonetheless, this spa<br />
must be installed properly to insure dependable usage. Please<br />
contact your dealer if you have any questions regarding your installation.<br />
In the event they are unable to answer your questions, direct<br />
your inquiries to <strong>Sundance</strong> <strong>Spas</strong> Inc. Please refer to the back of this<br />
manual for our address.<br />
Proper grounding is extremely important. <strong>Portofino</strong> spas are<br />
equipped with a current collector system. A pressure-type wire<br />
connector is provided outside the control box, located behind the<br />
equipment door to permit connection of a bonding wire between this<br />
point and any ground metal equipment, metal water pipe or conduit<br />
within 5 feet (1.5 m) of the spa, or copper clad grounding rod buried<br />
within 5 feet (1.5 m) of the spa. The bonding wire must be at least<br />
#8 AWG (8.4 mm 2 ) solid copper wire. This is a very important safety<br />
assurance feature. Before installing this spa, check with the local<br />
electrical authority to insure the installation conforms to local country/area<br />
state codes.<br />
4
4.0 Choosing a Location<br />
IMPORTANT: Because of the combined weight of the spa,<br />
water, and users, it is extremely important that the base<br />
upon which the spa rests be smooth, flat, level and capable<br />
of uniformly supporting this weight without shifting or settling for the<br />
entire time the spa is in place. If the spa is placed on a surface<br />
which does not meet these requirements, damage to the skirt and/or<br />
the spa shell may result. Damage caused by improper support is<br />
not covered under the manufacturer’s warranty. It is the responsibility<br />
of the spa owner to assure the integrity of the support at all times.<br />
We recommend a poured, reinforced concrete slab with a minimum<br />
thickness of 4 inches (10 cm). Wood decking is also acceptable,<br />
provided it is constructed so that it meets the requirements outlined<br />
above. The spa must be installed in such a manner as to provide<br />
drainage away from the spa. Placing the spa in a depression<br />
without provisions for proper drainage could allow rain, overflow and<br />
other casual water to flood the equipment and create a wet condition<br />
in which it would sit.<br />
For spas which will be recessed into a floor or deck, install so as to<br />
permit access to the equipment, either from above or below, for<br />
servicing. Make certain that there are no obstructions that would<br />
prevent removal of the cabinet side panels, especially on the side<br />
with the equipment pack. Make sure provisions are made for draining<br />
the spa.<br />
4.1 Outdoor Location<br />
In selecting the ideal outdoor location for your spa, we suggest that<br />
you take into consideration:<br />
1. The proximity to changing area and shelter around spa (especially<br />
in colder weather).<br />
2. The pathway to and from your spa (this should be free of debris<br />
so that dirt and leaves are not easily tracked into the spa).<br />
3. Closeness to trees and shrubbery (remember that leaves and<br />
birds could create extra work in keeping the spa clean).<br />
4. A sheltered environment (less wind and weather exposure can<br />
result in lowered operation and maintenance costs).<br />
5
5. The overall enhancement of your environment.<br />
6. It is preferable not to place the spa under a gutter-less roof<br />
overhang since runoff water will shorten the life expectancy of<br />
the spa cover.<br />
4.2 Indoor Location<br />
For indoor installations, be certain to make provisions for proper<br />
ventilation. When the spa is in use, considerable amounts of moisture<br />
will escape. This can damage various surfaces over time. A<br />
dehumidifier can help control the moisture in the room. If you have<br />
any questions regarding the placement or installation of your spa,<br />
consult your authorized <strong>Portofino</strong> dealer.<br />
120/240 Volt Convertible Models<br />
A spa connected to a 120 VAC electrical service must be located<br />
close enough to a grounded, grounding-type electrical outlet so that<br />
the included power cord can be plugged directly into it. DO NOT<br />
USE AN EXTENSION CORD as this could cause damage to the hot<br />
tub’s equipment due to insufficient voltage. The power supplied to<br />
this hot tub must be a dedicated circuit with no other appliances or<br />
lights sharing the power provided by the circuit.<br />
6
5.0 Power Supply Requirements<br />
US/Canada 120/240 VAC Convertible Models (60 Hz)<br />
120 VAC/ 240 VAC/ 240 VAC/<br />
15 A* 25 A* 40 A**<br />
Voltage: 120 VAC 240 VAC 240 VAC<br />
Frequency: 60 Hz 60 Hz 60 Hz<br />
Current Draw: 12 A 18 A 30 A<br />
# of Wires 3 (15 A cord/GFCI) 4 4<br />
Circuit Breaker 15 A, 1-Pole 25 A, 2-Pole 40 A, 2-Pole<br />
For 240 VAC Heater Operation: Move the red wire on the main terminal<br />
strip (TB1) from position #1 to position #3. Make certain wires are<br />
connected exactly as shown in figure-H (page 8) before applying power.<br />
Failure to do so will result in damage to the circuit board and/or related<br />
components and void the manufacturer’s warranty.<br />
* In the 15 A / 25 A configuration, the heater will not operate at the<br />
same time as the main pump. The factory setting is 120 VAC/15 A.<br />
**If the spa is to be operated on 40 A service, remove the jumper JP1<br />
#1&2 on the circuit board to allow the heater to operate at the same<br />
time as the main pump (see page 30).<br />
US/Canada 240 VAC Caprio ST Models (60 Hz)<br />
Voltage: 240 VAC *Note: in the 25 A configuration,<br />
Frequency: 60 Hz the heater will not operate at the<br />
Current Draw: 18 A / 29 A same time as the main pump.<br />
Breaker: 25 A* / 40 A The factory setting is 240 VAC/<br />
40 A.<br />
All Export 230-240 VAC Models (50 / 60 Hz)<br />
Voltage:<br />
Frequency:<br />
Current Draw:<br />
Breaker:<br />
230-240 VAC<br />
50 / 60 Hz<br />
13 A / 19 A<br />
20 A / 30 A<br />
Important Information: The <strong>Portofino</strong> series spa can be adapted to use<br />
higher amperage circuits when available. Please contact your dealer for<br />
details. The electrical supply for this product must comply with local<br />
electrical regulations. The factory setting is 230 VAC/20 A.<br />
7
6.0 Electrical Wiring Instructions<br />
Important Notice: The electrical supply to this product<br />
must be installed by a qualified, licensed electrician to<br />
comply with all regulations and standards specified by the<br />
electrical authority in your state or country.<br />
1. A 240 VAC powered spa must be permanently connected (hardwired)<br />
to the power supply. No plug-in connections or extension<br />
cords are to be used in conjunction with the operation of this spa.<br />
Supplying power to the spa which is not in accordance with these<br />
instructions will void both the independent listing and the<br />
manufacturer’s warranty.<br />
2. The power supplied to this spa must be a dedicated circuit with<br />
no other appliances or lights sharing the power provided by the<br />
circuit.<br />
3. To gain access to the spa’s power terminal strip, remove the<br />
spa’s cabinet panel on the light side of the spa. Then remove the<br />
faceplate from the load box. Refer to sections 13.1-13.3 (page<br />
27-28) for your specific spas load box location.<br />
4. Locate the hole in the cabinet (above the pan) and feed the wires<br />
through (Solo spa only).<br />
5. Connect the wires to main terminal block TB1. Refer to figures<br />
G-J for your specific spas terminal block configuration. Tighten<br />
securely! All wires must be hooked up or damage could result.<br />
6. The electrical supply for this product must include an electrical<br />
installation and circuit breaker that complies with local electrical<br />
regulations.<br />
7. A suitably rated GFCI or RCD must be installed at the power<br />
supply in the house electrical box.<br />
8. Reinstall the face plate and the cabinet panel.<br />
fig. G<br />
Power In<br />
WHT<br />
1<br />
BLK<br />
2<br />
3<br />
GRN<br />
TB1<br />
WHT<br />
RED<br />
BLK<br />
BLK<br />
to Circuit<br />
Board<br />
All US/Canada Convertible Models:<br />
120 VAC, 3-Wire Connection (60 Hz)<br />
fig. H<br />
Power In<br />
WHT<br />
1<br />
BLK<br />
2<br />
RED<br />
3<br />
GRN<br />
TB1<br />
WHT<br />
BLK<br />
BLK<br />
RED<br />
to Circuit<br />
Board<br />
All US/Canada Convertible Models:<br />
120/240 VAC, 4-Wire Connection (60 Hz)<br />
8
fig. I<br />
Power In<br />
TB1<br />
RED<br />
1<br />
BLK<br />
2<br />
GRN<br />
RED<br />
RED<br />
BLK<br />
BLK<br />
to Circuit<br />
Board<br />
fig. J<br />
Power In<br />
TB1<br />
1<br />
2<br />
GRN<br />
BLUE<br />
BLUE<br />
BROWN<br />
BROWN<br />
to Circuit<br />
Board<br />
US/Canada 240 VAC Caprio ST Models:<br />
240 VAC, 3-Wire Connection (60 Hz)<br />
All Export Models:<br />
230-240 VAC, 3-Wire (50/60 Hz)<br />
7.0 Start-Up Instructions<br />
Congratulations! You are now all set to get your new spa ready to<br />
use. Simply follow this step-by-step procedure and, before long, you<br />
will be enjoying your first glorious experience in your <strong>Portofino</strong> spa.<br />
For best results, read each step in its entirety before proceeding<br />
with that step. During power-up, the control panel will display a<br />
series of start-up displays. Refer to section 9.0 (page 12) for additional<br />
information.<br />
7.1 Filling the Spa<br />
Clear all debris from the spa. Although the spa shell has been<br />
polished at the factory, you may want to treat it with a specially<br />
formulated spa cleaner and wax available from your dealer prior to<br />
filling it.<br />
Only spas with a smooth acrylic surface require waxing. It is not<br />
necessary to wax spas with the textured Quarite surface. For<br />
Solo models only - fill the spa with water from a garden hose until<br />
the water level is just below the neck jets. Refer to section 14.1<br />
(page 28). For Tango and Caprio models, fill until water level is<br />
halfway up the filter skimmer. Refer to sections 14.2-14.3 (page 29).<br />
9
Never fill with water from a water softener. If your water is extremely<br />
“hard”, it is preferable to fill halfway with hard water and the rest of<br />
the way with softened water. Make sure the filter is installed properly<br />
before continuing. Refer to section 10.1 (Page 16) “Cleaning<br />
The Filter” for specific cleaning and installation instructions.<br />
Solo Models Only - For installations that do not incorporate permanent<br />
drain plumbing, we recommend that you seal off the overflow<br />
plumbing by removing the s/s overflow fitting and install the provided<br />
plug and O-ring. Refer to section 13.1 (page 27). This option stops<br />
the water from entering the overflow pipe, and prevents it from<br />
stagnating between draining periods.<br />
7.2 Safety Check<br />
Open the cabinet access panel and check the pump unions to make<br />
sure they are hand tight. Refer to sections 13.1-13.3 (page 27-28).<br />
Loosening can occur during shipping and handling. Solo models<br />
only - turn the drain valve off. Refer to section 13.1 (page 27).<br />
7.3 Initiating Water Circulation<br />
Depress the JETS button on the control panel. This<br />
causes the pump to activate water flow to the jets. If<br />
the pump is properly primed, you should be able to feel<br />
a steady flow of water through at least some of the jets.<br />
After draining and refilling the spa, it is possible that the pump does<br />
not prime adequately. Trapped air in the plumbing system can be<br />
the reason for loss of prime. In this case, turn off power to the spa<br />
and loosen the cap of the Massage Selector and carefully let<br />
trapped air escape from the plumbing. Refer to section 14.1-14.3<br />
(page 28-29). Screw the massage selector cap shut and make sure<br />
it is tight before turning power on and starting the pump.<br />
7.4 Adding Start-Up Chemicals<br />
Add the spa water chemicals as recommended by your <strong>Portofino</strong><br />
dealer. Refer to section 10.8 (page 21) “Maintaining the Water<br />
Quality” for general guidance.<br />
10
8.0 Control Panel Functions<br />
Panel Functions:<br />
A. Heat Indicator: lit when<br />
heater is on.<br />
B. Warmer Button:<br />
increases water<br />
temperature setpoint.<br />
C. Cooler Button:<br />
decreases water<br />
temperature setpoint.<br />
A<br />
B<br />
C<br />
*Display shown for example purposes only,<br />
actual water temperature display will vary.<br />
D<br />
E<br />
F<br />
D. LED Display: can display current water temperature (default<br />
display*), water temperature setpoint, selected filtration mode,<br />
and error messages.<br />
E. Light Button: turns underwater light on and off.<br />
F. Jets Button: turns jets on and off. Press once for low speed;<br />
press a second time for high speed; press a third time to turn<br />
off.<br />
Operation Details:<br />
• Temperature Adjustment: 65 to 104 °F (18 to 40 °C). Software<br />
default setting is 100 °F (38 °C).<br />
• Underwater Light Operation: light runs for 1 hour then shuts off for<br />
increased bulb life.<br />
• JETS button Operation: jets run for 20 minutes after activated<br />
then turn off automatically to conserve energy. Simply press<br />
JETS button to continue operation for an additional 20 minutes.<br />
11
9.0 Operating Instructions<br />
The spa control system has automatic functions that operate upon<br />
start-up and normal operation to protect the system. Upon power<br />
up, the readout displays the following information:<br />
1. Control displays current software release<br />
(e.g. 3.50), then;<br />
2. Control panel displays “888” and all indicator LEDs<br />
are lit, permitting visual inspection of all display<br />
segments and indicator lights for proper operation.<br />
3. After the initial start-up sequence ends actual water<br />
temperature is displayed. If water temperature at<br />
this time is less then the factory default temperature setting of<br />
100 °F (38 °C), the circulation pump and heater will turn on and<br />
run until the water temperature rises to the factory default temperature<br />
setting. Then the heater turns off and the circulation<br />
pump remains on for 24-hour operation. Note: it is common for<br />
the heater to turn on after the spa is first filled because tap water<br />
is often very cold.<br />
1.<br />
2.<br />
3.<br />
Startup<br />
Sequence<br />
9.1 Setting Water Temperature<br />
The spa’s thermostat provides optimum control of water<br />
temperature. The temperature setpoint (set temperature)<br />
can be adjusted from 65 °F to 104 °F (18 °C to 40 °C).<br />
To raise the set temperature, press the WARMER<br />
arrow button. To lower the set temperature, press the<br />
COOLER arrow button. Note: The first press of either WARMER<br />
or COOLER button displays the set temperature.<br />
9.2 Pump Button<br />
The JETS button activates the functions of the pump.<br />
The first press activates low speed, the second press<br />
activates high speed, and the third press shuts the pump<br />
off. The pump has a twenty-minute default when<br />
manually activated.<br />
9.3 Light Button<br />
The LIGHT button activates the spa light when pressed.<br />
The light has a one-hour default.<br />
12
9.4 Solo Diverter Valve / Air Control Operation<br />
Air Controls<br />
Functions:<br />
A<br />
Air Controls A-C<br />
Open An Air<br />
Venturi to<br />
Specified Jets:<br />
A<br />
A<br />
A = Jets A<br />
B = Jets B<br />
B B<br />
C = Jet Group C<br />
A<br />
C<br />
Massage Selector<br />
Functions:<br />
Z Diverts Water<br />
Flow Between Jet<br />
Group C and Jets<br />
A&B<br />
Z<br />
B<br />
C<br />
B<br />
9.5 Tango Diverter Valve / Air Control Operation<br />
Air Controls<br />
Functions:<br />
Air Controls A&B<br />
Open An Air<br />
Venturi to<br />
Specified Jets:<br />
Z<br />
B<br />
A<br />
B<br />
= Jets A<br />
= Jets B<br />
A<br />
B<br />
B<br />
Massage Selector<br />
Functions:<br />
Z Diverts Water<br />
Flow Between<br />
Jet Group A and<br />
Jets B<br />
A<br />
B<br />
B<br />
13
9.6 Caprio / Caprio ST Diverter / Air Control Valve<br />
Operation<br />
Air Controls Functions:<br />
Air Controls A-C Open An<br />
Air Venturi to Specified<br />
Jets:<br />
A<br />
B<br />
C<br />
= Jet Group A<br />
= Jet Group B<br />
= Jet Group C<br />
A<br />
Massage Selector Functions:<br />
Z Diverts Water Flow Between Jet Group<br />
A and Jets D.<br />
Jet Groups B & C Are Always On. However,<br />
The Jet Faces of These Jets Can be<br />
Adjusted to Personal Preference Levels.<br />
B<br />
A<br />
D<br />
B<br />
Z<br />
D<br />
C<br />
D<br />
C<br />
14
9.7 Filtration Options<br />
Tango, Caprio, and Caprio ST Models Only<br />
Proper filtration is an important key to maintaining the clarity of your<br />
hot tub’s water. The hot tubs filtration system is designed for unsurpassed<br />
effectiveness at removing debris and suspended particles<br />
from the water anytime the water is circulated by pump #1. The<br />
circulation pump also provides 24-hour filtration of smaller particles.<br />
Standard Modes (F0 - F3): Heating in these modes is automatically<br />
controlled by the loss of water temperature. If water temperature<br />
drops 2 °F (1.2 °C) below the “set temperature”, the heater automatically<br />
activates and remains on until the programmed “set temperature”<br />
is reached, then turns off.<br />
Economy Modes (F4 - F6): Heating in these modes only occurs<br />
during a filter cycle or when either JETS button is pressed. At this<br />
time, the heater remains on until the “set temperature” is reached,<br />
then turns off.<br />
Lock Modes (L1 - L2): These modes are designed for use during<br />
spa service or to prevent unauthorized use.<br />
9.8 Select the Filtration Mode<br />
Press and hold both control panel WARMER and COOLER<br />
buttons at the same time, then release. Then press either<br />
WARMER or COOLER button to select filter mode F0 through<br />
L2 below:<br />
Standard Filtration Modes<br />
F0 No filter cycles<br />
F1 4 hours filtration per day (2 hour cycle every<br />
12 hours). This is the factory default setting.<br />
F2 6 hours filtration per day (2 hour cycle every 8 hours)<br />
F3 8 hours filtration per day (2 hour cycle every 6 hours)<br />
Economy Filtration Modes<br />
F4 4 hours of filtration per day (2 hour cycle every<br />
12 hours)<br />
F5 6 hours of filtration per day (2 hour cycle every<br />
8 hours)<br />
F6 8 hours of filtration per day (2 hour cycle every<br />
6 hours)<br />
15
Lock Modes<br />
L1 Lock Out (disables all hot tub functions to permit<br />
filter cleaning)<br />
L2<br />
Lock Mode (disables the jets and light buttons to<br />
prevent unauthorized use of the hot tub) - filter cycles and<br />
heater will continue to operate as programmed in this mode.<br />
The temperature display flashes when this function is enabled.<br />
Example: the “F3” filter cycle was enabled prior to choosing lock<br />
mode. The hot tub continues to perform filter cycle “F3” until<br />
lock mode is canceled, allowing another filter cycle to be<br />
selected.<br />
To set a time for the first filter cycle, simply turn power on to the spa<br />
two minutes prior to the desired filter time. EXAMPLE: If you desire<br />
your first filter cycle to begin at 10:00 AM turn off power to the spa<br />
and turn it back on again at 9:58 AM. Note: start time is approximate<br />
and may vary slightly from day to day.<br />
10.0 Care And Maintenance<br />
Proper and regular maintenance of your spa will help it retain its<br />
beauty and performance. Your authorized <strong>Portofino</strong> dealer can<br />
supply you with all the information, supplies and accessory products<br />
you will need to accomplish this.<br />
10.1 Cleaning The Filter<br />
Solo Models - These models are equipped with a double-ended<br />
polyester mesh (pleated) filter cartridge under the filter lid (section<br />
14.1, page 28). Debris are filtered 24-hours by the circulation pump<br />
drawing water through the smaller side of the cartridge. Larger<br />
debris are filtered by the main 2-speed pump drawing water through<br />
the larger side of the cartridge during normal operation and during<br />
each filter cycle. Combined, both halves work together to give you<br />
clean water by trapping suspended particles on their outer surface.<br />
Note: To ensure optimum performance, clean and reuse the filter<br />
cartridge once a month.<br />
Tango, Caprio, and Caprio ST Models - These models are<br />
equipped with an exclusive MicroClean TM 2-stage filter cartridge<br />
located under the filter lid (section 14.2-14.3, page 29). Fine debris<br />
16
are filtered 24-hours by the circulation pump drawing water through<br />
the ultra-fine (stage 2) cartridge. Larger debris are filtered by the<br />
main 2-speed pump drawing water through the (stage 1) polyester<br />
mesh (pleated) cartridge during normal operation and during each<br />
filter cycle. Combined, both filter halves work together to give you<br />
unsurpassed water quality by trapping suspended particles on their<br />
outer surface. Note: To ensure optimum performance, clean and<br />
reuse the stage 1 cartridge once a month and replace the stage 2<br />
cartridge every 3 months, or as needed.<br />
ALWAYS TURN POWER TO HOT TUB OFF BEFORE CLEANING<br />
THE FILTER CARTRIDGE! Refer to the filter cleaning/replacement<br />
procedure below.<br />
A<br />
TURN POWER TO HOT TUB OFF!<br />
B<br />
All Models<br />
Filter<br />
Nut<br />
C<br />
Tango, Caprio, and Caprio ST Models Only<br />
1.<br />
2.<br />
Stage 2<br />
filter<br />
Stage 1<br />
filter<br />
Loosen filter nut to provide clearance, then<br />
remove filter assembly.<br />
D<br />
All Models<br />
1. Rotate stage 2 retainer counterclockwise<br />
to release, then separate filter assembly.<br />
2. Replace stage 2 filter after 3 months use or as<br />
needed.<br />
E<br />
Tango, Caprio, and Caprio ST Models Only<br />
Top<br />
Solo<br />
Filter<br />
2.<br />
1.<br />
Stage 2<br />
filter<br />
Stage 1<br />
filter<br />
Top<br />
Tango, Caprio,<br />
Caprio ST<br />
(Stage 1)<br />
Filter<br />
Rinse debris from all filter pleats using a<br />
garden hose and high-pressure nozzle. Start<br />
at top and work downward to face. Repeat<br />
process until all filter pleats are clean.<br />
1. Install stage 2 filter onto clean stage 1 filter.<br />
2. Insert retainer into stage 2 filter and rotate<br />
clockwise to assembly. DO NOT overtighten<br />
retainer (finger tight only).<br />
17
F<br />
All Models<br />
Trapped<br />
Air<br />
Bubbles<br />
G<br />
All Models<br />
Filter<br />
Nut<br />
Submerge assembled filter in spa and tilt each<br />
end upward to remove trapped air bubbles<br />
from inside each filter cavity.<br />
1. Install filter assembly, then tighten filter nut so it<br />
just touches filter face. DO NOT OVERTIGHTEN!<br />
2. Turn power to hot tub back on.<br />
Periodically, the polyester mesh (pleated) filter will need a more<br />
thorough cleaning to remove imbedded oils and minerals. For this,<br />
we suggest cleaning as illustrated above (step D), followed by<br />
soaking the filter overnight in a plastic container filled with a solution<br />
of water and a specially formulated filter cleanser available from<br />
your <strong>Portofino</strong> dealer.<br />
CAUTION! Never scrub the polyester mesh filter cartridge<br />
with a brush as this will cause the polyester mesh to wear<br />
out and come apart. Never let the spa pump run or have<br />
a filter cycle come on without a filter cartridge in the skimmer<br />
compartment. Running the spa without a filter cartridge<br />
may permit debris to enter the spa plumbing and<br />
void the warranty!<br />
The average life expectancy of the polyester mesh filter cartridge is<br />
approximately two years with proper care and water quality maintenance.<br />
The smaller stage 2 cartridge in Tango, Caprio, and Caprio<br />
ST models cannot be cleaned and must be replaced every 3-<br />
months, or as needed. Replacement cartridges may be purchased<br />
from your authorized <strong>Portofino</strong> dealer.<br />
10.2 Draining And Refilling<br />
18<br />
WARNING: Read This Before Draining<br />
To prevent damage to the spa’s components, turn off<br />
power to the spa at the circuit breaker before draining it.<br />
Do not turn power back on until your spa has been<br />
refilled.
CAUTION: There are certain precautions to keep in mind<br />
when draining your spa. If it is extremely cold, and the<br />
spa is outdoors, freezing could occur in the plumbing or<br />
the equipment. On the other hand, if it is hot outdoors, do<br />
not leave the spa’s surface exposed to direct sunlight for<br />
long periods.<br />
To drain Solo model, first, shut off the power to the spa. Next, remove<br />
the drain cap, then open the equipment access panel and<br />
locate the drain valve and turn. Refer to section 13.1 (page 27). To<br />
drain Tango, Caprio, and Caprio ST, models, first, shut off the power<br />
to the spa. Pull the external drain cap from the wood skirt (attached<br />
to it is a drain hose) and continue pulling upward until it is above the<br />
water line. Connect garden hose and drain.<br />
10.3 Cleaning The Spa Interior<br />
To preserve the sheen of your spa’s surface, it is crucial that you<br />
avoid using abrasive cleaners or cleaners which have adverse<br />
chemical effects on the surface. If you are not certain about the<br />
suitability of a particular cleaner, please consult your authorized<br />
<strong>Portofino</strong> dealer. Regardless of the cleanser used, use extreme<br />
care to assure that no soap residue is left on the surface. This could<br />
cause foaming when the spa is refilled.<br />
10.4 Cleaning The Pillows<br />
Remove and clean the pillows as needed with a soapy water solution<br />
using a clean cloth or soft-bristle brush. To maintain water<br />
resistance or luster, apply a quality vinyl conditioner once a month.<br />
IMPORTANT INFORMATION<br />
Always remove the pillows when adding chemical shock<br />
treatment to the hot tub water. The pillows can be<br />
returned to the hot tub when the sanitizer reading drops<br />
below 5 PPM.<br />
19
Your hot tub is equipped with 2-part,<br />
bolt-on style pillows. Follow the instructions<br />
below for proper removal/installation<br />
techniques.<br />
Removal Instructions:<br />
1. Grasp center pillow insert (A) with<br />
finger tips and gently pry outward<br />
from pillow base (C).<br />
2. Use a standard screwdriver to loosen and remove mounting<br />
bolts (B) from pillow base, then remove pillow base from shell<br />
cavity (D).<br />
Installation Instructions:<br />
1. Place pillow base (C) over hot tub shell cavity (D).<br />
2. Install each mounting bolt (B) into the threaded mounting boss<br />
located in the shell pillow cavity (D). Tighten each mounting bolt<br />
using a standard screwdriver. Do not overtighten!<br />
3. Install center pillow insert (A) into pillow base cavity (C) by gently<br />
pressing it into place. The insert is slightly larger for a compression<br />
fit. Pillow installation is complete.<br />
10.5 Maintaining The Cover<br />
Using the <strong>Portofino</strong> insulating spa cover anytime the spa is not in<br />
use will significantly reduce your operating costs, heat-up time and<br />
maintenance requirements. To prolong the life of the cover, handle it<br />
with care and clean it regularly using mild soap and water. Periodic<br />
treatments with a special conditioner developed for <strong>Sundance</strong> spa<br />
covers will help protect against deterioration caused by UV rays from<br />
the sun. Never allow anyone to stand or sit on the cover, and avoid<br />
dragging it across rough surfaces.<br />
10.6 Maintaining The Wood Cabinet<br />
With time and exposure to the elements, the wood on your spa will<br />
tend to lose its new appearance. Protecting or reviving the wood<br />
surface is a fairly simple process. Light sanding with fine-grit sandpaper<br />
will help smooth any roughness. Regular applications of a<br />
penetrating wood preservative will enhance and protect the richness<br />
20
of the wood. A specially formulated wood stain available from your<br />
<strong>Sundance</strong> dealer is ideal for this job. Note: Do not apply varnish,<br />
shellac or other surface sealant to the wood. These tend to react<br />
with the chemicals in the wood and the UV rays of the sun, causing<br />
yellowing, flaking and peeling.<br />
10.7 Winterizing The Spa<br />
Your <strong>Portofino</strong> spa is designed to automatically protect itself against<br />
freezing when operating properly. During periods of severe freezing<br />
temperatures, you should check periodically to be certain that the<br />
electrical supply to the spa has not been interrupted.<br />
If you do not intend to use your spa, or if there is a prolonged power<br />
outage during periods of severe freezing temperatures, it is important<br />
that all water be removed from the spa and equipment to<br />
protect against damage from freezing. For expert winterization of<br />
your spa, contact your authorized <strong>Portofino</strong> dealer.<br />
10.8 Maintaining Water Quality<br />
Maintaining the quality of the water within specified limits will serve<br />
to enhance your enjoyment and prolong the life of the spa’s equipment.<br />
It is a fairly simple task, but it requires regular attention<br />
because the water chemistry involved is a balance of several<br />
factors. A careless attitude in regard to water maintenance will<br />
result in poor and potentially unhealthy conditions for soaking and<br />
even damage to your spa investment. For specific guidance on<br />
maintaining water quality, consult your authorized <strong>Portofino</strong> dealer<br />
who can recommend appropriate chemical products for sanitizing<br />
and balancing your spa water.<br />
CAUTION: Never store spa chemicals inside the spa’s<br />
equipment bay.<br />
10.9 Controlling pH<br />
pH is a measure of relative acidity or alkalinity of water and is<br />
measured on a scale of 0 to 14. The midpoint of 7 is neutral, above<br />
7 is alkaline, and below 7 is acidic.<br />
21
In spa water, it is very important to maintain a slightly alkaline<br />
condition of 7.2 to 7.8. Problems become proportionally severe<br />
when this range is exceeded or diminished. A low pH will be corrosive<br />
to metals in the spa equipment. A high pH will cause minerals<br />
to deposit on the interior surface of the spa and equipment (scaling).<br />
In addition, the ability of the sanitation agents to keep the spa clean<br />
is severely affected as the pH moves beyond the ideal range. Your<br />
<strong>Portofino</strong> dealer can provide you with any chemicals and instructions<br />
you may need to adjust the pH of your spa water.<br />
10.10 Sanitizing / Using Additives<br />
To destroy bacteria and organic compounds in the spa water, a<br />
sanitizing agent must be used regularly. Consult your <strong>Sundance</strong><br />
dealer for specific sanitizing instructions.<br />
IMPORTANT: Do not use Trichlor in your spa. This<br />
chemical can have an extremely corrosive effect on<br />
certain materials in the spa. Damage caused by use of<br />
this chemical, or improper use of any chemicals, is not<br />
covered under the manufacturer’s warranty.<br />
Many other additives are available for your spa. Some<br />
are necessary to compensate for out-of-balance water,<br />
some aid in cosmetic water treatment, and others simply<br />
alter the feel or smell of the water. Your authorized<br />
<strong>Portofino</strong> dealer can advise you on the use of these<br />
additives.<br />
11.0 Error Conditions / Error Messages<br />
11.1 Summer Logic<br />
When the actual spa water temperature reaches up to<br />
2 °F (1 °C) above the set temperature, the spa goes<br />
into “summer logic.” The circulation pump will turn off<br />
automatically to avoid adding additional heat to the<br />
water, eventually creating an overheat condition. This setting<br />
is not user-programmable. Note: The summer logic does not take<br />
effect until the spa water temperature reaches 95 °F (35 °C).<br />
22
11.2 Overheat Condition OH<br />
WARNING! DO NOT ENTER HOT TUB WATER!<br />
Water is too hot. Overheat protection. Heater is<br />
deactivated. Spa water temperature is above<br />
acceptable limits.<br />
When the actual water temperature is approximately 2 °F (1 °C)<br />
above the set temperature, the circulation pump will stop operating<br />
to reduce (frictional) heating. If the spa water temperature continues<br />
to rise and gets above 110 °F (43 °C), the spa will go into an “OH”<br />
overheat condition.<br />
To Correct Condition:<br />
1. Remove the spa’s cover and allow your spa to cool down.<br />
2. Reduce the temperature setting.<br />
3. When the water temperature drops below 108 °F (42 °C), the<br />
spa will resume normal operation.<br />
4. If the water does not drop below 108 °F (42 °C), contact your<br />
authorized dealer.<br />
There are a number of unique functions designed into your<br />
<strong>Sundance</strong> spa to protect it from damage and/or aid in troubleshooting.<br />
Refer to sections 11.3-11.8 below for a listing of all possible<br />
error messages and their meanings.<br />
11.3 Panel displays SN1<br />
Open sensor (heater is disabled) or shorted sensor<br />
(spa is deactivated). The high-limit temperature<br />
sensor is not functioning. Your authorized dealer<br />
must repair this.<br />
11.4 Panel displays SN2<br />
Open or shorted sensor (heater disabled). The<br />
temperature sensor is not functioning. Your authorized<br />
dealer must repair this.<br />
23
11.5 Panel displays FL1 or FL2<br />
A flashing “FL1” display means the flow switch is<br />
malfunctioning open; a flashing “FL2” display<br />
means the flow switch is malfunctioning closed.<br />
• Flow switch has malfunctioned.<br />
• Heater is deactivated. Pump may also be deactivated.<br />
• Proper flow of water is inhibited, or the flow switch has<br />
malfunctioned.<br />
To Correct Condition:<br />
1. Remove filter and allow air to bleed out of cartridge.<br />
2. Check for proper water level.<br />
3. Check for clogged/excessively dirty filter cartridge.<br />
4. Check secondary screen filter (Solo models only).<br />
5. Check for sticking or damaged weir gate.<br />
6. If problem persists, contact your authorized dealer.<br />
Note: This message can also appear if the pump has not regained<br />
prime after the spa has been drained and refilled. If you suspect this<br />
is the case, refer to section 7.3, page 10.<br />
11.6 Panel displays COL<br />
Cool Condition - Temperature has dropped 20 °F<br />
(11 °C) below the current set temperature. The pump<br />
and heater have been activated to bring the temperature<br />
to within 15 °F (8 °C) of the set temperature. No corrective<br />
action is required.<br />
11.7 Panel displays ICE<br />
Freeze Protection - A potential freeze condition has<br />
been detected. No action is required. Main pump<br />
will operate to circulate warm water through the<br />
plumbing until the spa is out of danger.<br />
24
11.8 Panel Displays - - -<br />
The safety “Watchdog” software has been triggered<br />
and the spa is deactivated. A problem has been<br />
detected which could cause damage to the spa or its<br />
components. Contact your authorized dealer.<br />
12.0 Troubleshooting Procedures<br />
In the event your <strong>Portofino</strong> spa is not working the way it should,<br />
please first review all the installation and operating instructions in<br />
this manual and check the message on the panel display. If you are<br />
still not satisfied it is working properly, please follow the appropriate<br />
troubleshooting instructions. Note: If any of the supply cords to the<br />
accessories are damaged, they must be replaced by authorized<br />
service personal.<br />
12.1 No Components Operate (e.g. Pump, Light)<br />
Check the following:<br />
1. Is there power to the spa<br />
2. Is the household circuit breaker tripped<br />
3. Call your authorized dealer.<br />
12.2 Pump Does Not Operate But Light Does<br />
Press the JETS button:<br />
1. If no water movement is detected, make sure power is going to<br />
the spa and check the water level. If it does not solve the problem,<br />
contact your authorized <strong>Portofino</strong> dealer.<br />
2. The main pump operates but no water flows to jets. Pump may<br />
not be properly primed. This can happen after the spa is drained<br />
and refilled. Press the JETS Button several times, never leaving<br />
the motor on for more than 5 to 10 seconds at-a-time. Turn<br />
power off and let the air out by loosening the cap on the diverter<br />
and/or remove the filter. Refer to section 7.3 (page 10). Make<br />
certain you tighten the diverter cap and/or reinstall the filter<br />
before turning on spa power and restarting the pump.<br />
25
12.3 Poor Jet Action<br />
1. Press the JETS button to make certain the pump is on.<br />
2. Rotate the air control to the “on” position.<br />
3. Solo Models Only - make certain that the water level is to just<br />
below the neck jets.<br />
4. Check for dirty filter. Clean, if necessary.<br />
5. Make sure jets are all the way open.<br />
12.4 Water is Too Hot<br />
Reduce thermostat setting so the circulation pump turns off.<br />
12.5 No Heat<br />
1. Check thermostat setting.<br />
2. Keep the spa cover in place while heating.<br />
Your authorized dealer is a trained service repair center. Should<br />
checking the above steps fail to correct the problem, please call your<br />
dealer so that they may arrange service.<br />
We build the best spas in the industry. Nonetheless, we are always<br />
striving to improve the quality and features of our products. Your<br />
input as a <strong>Sundance</strong> <strong>Portofino</strong> spa owner is a cherished part of this<br />
process. If you have any comments or suggestions, or if you wish to<br />
be informed on any new products for your spa, please write to us.<br />
CONGRATULATIONS on your good taste and welcome to the<br />
happiest and most relaxed family in the world!<br />
26
13.0 Spa Equipment Packs<br />
13.1 Solo Equipment Pack<br />
1. Overflow Fitting<br />
2. Drain Cap<br />
3. Auxiliary Pan Drain<br />
Location<br />
4. Load Box<br />
5. Safety Screen<br />
and Heater Intake<br />
6. Drain Valve<br />
7. Heater<br />
8. Circulation Pump<br />
9. Main Pump<br />
10. Filter<br />
11. Pan<br />
12. Wood Frame<br />
13. Pump Unions<br />
5<br />
3<br />
2 8<br />
10<br />
1<br />
11<br />
12<br />
13<br />
6<br />
7<br />
9<br />
4<br />
13.2 Tango Equipment Pack<br />
1. Load Box<br />
2. Heater<br />
3. Circulation Pump<br />
4. Main Pump<br />
5. Pump Unions<br />
3<br />
1<br />
4<br />
5<br />
2<br />
27
13.3 Caprio / Caprio ST Equipment Pack<br />
1. Load Box<br />
2. Heater<br />
3. Circulation Pump<br />
4. Main Pump<br />
5. Pump Unions<br />
1<br />
5<br />
4<br />
3<br />
2<br />
14.0 Spa Overhead Views<br />
14.1 Solo Overhead View<br />
1. Overflow<br />
2. Control Panel<br />
3. Air Controls<br />
4. Massage Selector<br />
5. Skimmer Weir<br />
6. Filter<br />
7. Neck Jets<br />
8. Filter Nut<br />
9. Safety Screen<br />
(Located Inside<br />
Filter Wall Fitting)<br />
121.92 cm<br />
(48")<br />
9<br />
5<br />
6<br />
180.34 cm (71")<br />
3<br />
1<br />
4<br />
8 3<br />
2<br />
7<br />
Equipment Access Side - Do Not Obstruct<br />
28
14.2 Tango Overhead View<br />
201.30 cm (79.25")<br />
1. Control Panel<br />
2. Air Controls<br />
3. Massage<br />
Selector<br />
4. Filter<br />
5. Neck Jets<br />
6. Skimmer Weir<br />
7. Filter Nut<br />
8. Safety Screen<br />
(Located Inside<br />
Filter Wall Fitting)<br />
153.04 cm<br />
(60.25")<br />
2<br />
5<br />
6<br />
4<br />
3<br />
2<br />
1<br />
7 8 Equipment Access Door<br />
Do Not Obstruct<br />
14.3 Caprio / Caprio ST Overhead View<br />
Equipment Access<br />
Side - Do Not<br />
Obstruct<br />
3<br />
3<br />
6<br />
1. Filter Nut<br />
2. Control Panel<br />
3. Air Control<br />
4. Massage<br />
Selector<br />
5. Filter<br />
6. Neck Jets<br />
7. Filter Pipe<br />
223.52 cm<br />
(88")<br />
4<br />
1<br />
5<br />
7<br />
3<br />
2<br />
200.66 cm (79")<br />
29
15.0 120/240 VAC Convertible Circuit Diagram<br />
This wiring diagram is used for all US/Canada 120/240 VAC (60 Hz)<br />
convertible models.<br />
Control<br />
Panel<br />
J1<br />
Temperature Sensor<br />
J2<br />
Hi-limit/Freeze<br />
Sensor<br />
J3<br />
Flow Switch<br />
Temperature<br />
Display Jumper:<br />
JP1 7-8 ON =<br />
°C Temp Display<br />
JP1 7-8 OFF =<br />
°F Temp Display*<br />
*Factory Setting<br />
BLK<br />
Heater<br />
1.0 kW @ 120 VAC<br />
4.0 kW @ 240 VAC<br />
6530-289, Rev-A<br />
Spa<br />
Light<br />
Transformer<br />
120 VAC<br />
JP1<br />
8 7<br />
6 5<br />
4 2 3<br />
1<br />
BLK<br />
BLK<br />
Circ.<br />
Pump<br />
WHT<br />
J4<br />
WHT<br />
BLK<br />
WHT<br />
F1<br />
20A<br />
250V<br />
SC-20<br />
RED<br />
BLK<br />
BLK<br />
WHT<br />
LO<br />
Main<br />
Pump<br />
HI<br />
RED<br />
RED BLK<br />
RED<br />
1<br />
WHT<br />
2<br />
BLK<br />
3<br />
TB1<br />
Standard 120 VAC 3-Wire Connection<br />
(60 Hz, 1 Phase, 15 A Service)<br />
Use copper conductors ONLY. Wire size must be<br />
appropriate per NEC and/or local codes.<br />
Ozonator<br />
O3<br />
GRN<br />
Optional 120/240 VAC<br />
4-Wire Convertible<br />
Heater Connection<br />
1. Remove and discard the<br />
factory installed GFCI Cord.<br />
2. Move RED* wire from<br />
position #1 to position #3<br />
on terminal block TB1 as<br />
shown below.<br />
3. Permanently connect to<br />
the power supply. Use<br />
copper conductors ONLY.<br />
Wire size must be<br />
appropriate per NEC and/or<br />
local codes.<br />
4. If hot tub is to be operated<br />
on 25 A service, make sure<br />
the jumper provided at<br />
location JP1 #1&2 on the<br />
circuit board is installed. If<br />
hot tub is to be operated on<br />
40 A service, remove the<br />
jumper JP1 #1&2 on the<br />
circuit board.<br />
RED*<br />
BLK<br />
1 2 3<br />
TB1<br />
GRN<br />
WHT BLK RED<br />
30
16.0 230-240 VAC Dedicated Circuit Diagram<br />
This wiring diagram is used for the following dedicated power<br />
models:<br />
• US/Canada 240 VAC (60 Hz) Caprio ST models<br />
• All Export 230-240 VAC (50/60 Hz) models<br />
Temperature Sensor<br />
Hi-limit/Freeze Sensor<br />
Flow Switch<br />
Logic Jumper Settings<br />
Caprio ST Model:<br />
JP1 1-2 ON = 25A Logic<br />
JP1 1-2 OFF = 40A Logic*<br />
All Export 50 Hz Models:<br />
JP1 1-2 ON = 20A Logic*<br />
JP1 1-2 OFF = 30A Logic<br />
*Factory Jumper Setting<br />
Temp. Jumper Settings (All Models):<br />
JP1 7-8 ON = °C Temp Display<br />
JP1 7-8 OFF = °F Temp Display<br />
Heater Specifications<br />
• US/Canada 60 Hz Model:<br />
4 kW @ 240 VAC<br />
• Export 50 Hz Model:<br />
2.7 kW @ 230 VAC<br />
6530-290, Rev-A<br />
Control<br />
Panel<br />
J1<br />
J2<br />
J3<br />
L<br />
JP1<br />
8 7<br />
6 5<br />
4 3<br />
2 1<br />
N<br />
Transformer<br />
230-240 VAC<br />
Spa<br />
Light<br />
L<br />
Ozonator<br />
O3<br />
L<br />
Circ.<br />
Pump<br />
L(BRN)<br />
N<br />
J4<br />
N<br />
N<br />
L<br />
F1<br />
20A<br />
250V<br />
SC-20<br />
N<br />
LO<br />
Main<br />
Pump<br />
L(BLK)<br />
HI<br />
N L<br />
1<br />
2<br />
TB1<br />
230-240 VAC, 50/60 Hz, 1 Phase;<br />
USE COPPER CONDUCTORS ONLY<br />
WIRE SIZE MUST BE APPROPRIATE<br />
PER NEC AND/OR LOCAL CODES<br />
GRN L1 L2 US / Canada / Export<br />
240 VAC / 60 Hz Power Connections<br />
GRN N L<br />
Export 230 VAC 50 Hz<br />
Power Connections<br />
31
17.0 Specifications<br />
17.1 Solo Specifications<br />
• Dimensions: 48” x 71” x 29”<br />
(122 cm x 180 cm x 74 cm)<br />
• Seating Capacity: 1 Adult<br />
• Dry Weight: 401 lbs / 182 kg<br />
• Filled Weight: 1,238 lbs / 562 kg<br />
• Water Capacity (Avg. Fill): 100 US Gal / 380 Liters<br />
• Controls: Solid-State Electronic Controls with LED Readout,<br />
Programmable Temperature, Filtration, and Heat Cycles<br />
• Water Delivery: 1 TheraFlo TM High-Flow Pump<br />
• Pump 1 Rating:<br />
- US/Canada Convertible Model (60 Hz): 2-Speed /1.5 hp Continuous,<br />
13.6 A Max.<br />
- Export Models (50/60Hz): 2-Speed/2.0 hp Continuous,<br />
8.7 A Max.<br />
• Pump 2: Circulation Pump<br />
• Total Hydrojets: 24<br />
• Therapy Jets: 4 Pro-Touch II TM<br />
• Vertical Jets: 6 Pulsator TM , 2 Accu-Pressure TM<br />
• Accu-Ssage Therapy Seat Jets: 12 Accu-Pressure TM<br />
• Air Controls / Massage Selectors: 3 / 1<br />
32
• Filter: Double-End Cartridge, 20” Slipstream TM Weir with<br />
Automatic Brominator TM<br />
• Water Treatment: Brominator TM Chemical Feeder<br />
• Lighting: Underwater with Two Colored Lenses; Optional<br />
SunGlow TM Multi-Color LED Light Kit<br />
• Cabinet: Redwood with Coastal, Sierra, or No Stain; Optional<br />
Synthetic Wood Skirt<br />
• Colors: Textured - Bluegrass, Jade, Marine, Onyx, Sahara, or<br />
Sand; Marbled Emerald, Platinum, Sapphire, or Topaz<br />
• Handrails: 2 High Quality Stainless Steel<br />
• Pillows: 2-Part/2-Tone Gray, Bolt-on; Optional Blue or Camel<br />
Insert<br />
• Heater:<br />
- US/Canada Convertible Model (60 Hz): Low Flow, 1 kW @ 120<br />
VAC or 4 kW @ 240 VAC<br />
- Export Models (50/60 Hz): Low Flow, 2.7 kW<br />
• Electrical Requirements:<br />
- USA/Canada Convertible Model (60 Hz): 120 VAC @ 15 A or 240<br />
VAC @ 25 A or 40 A<br />
- Export Models (50/60 Hz): 230 - 240 VAC @ 20 A or 30 A; or<br />
suitably rated circuit breaker to comply with local electrical<br />
regulations. Certain countries may require dual power<br />
inputs; two 16 A and breakers are required for this configuration.<br />
33
17.2 Tango Specifications<br />
• Dimensions:<br />
- With Wood Cabinet:<br />
60.25” x 79.25” x 30.5”<br />
(153 cm x 201 cm x 78 cm)<br />
- With Synthetic Cabinet:<br />
58.25” x 77.25” x 30.5”<br />
(148 cm x 196 cm x 78 cm)<br />
• Seating Capacity: 2 Adults<br />
• Dry Weight: 483 lbs / 219 kg<br />
• Filled Weight: 2,026 lbs / 919 kg<br />
• Water Capacity (Avg. Fill):<br />
185 US Gal / 700 Liters<br />
• Controls: Solid-State Electronic Controls with LED Readout,<br />
Programmable Temperature, Filtration, and Heat Cycles<br />
• Water Delivery: 1 TheraFlo TM High-Flow Pump<br />
• Pump 1 Rating:<br />
- US/Canada Convertible Model (60 Hz): 2-Speed/1.5 hp Continuous,<br />
13.6 A Max.<br />
- Export Models (50/60 Hz): 2-Speed/2.0 hp Continuous,<br />
8.7 A Max.<br />
• Pump 2: Circulation Pump<br />
• Total Hydrojets: 19<br />
• Therapy Jets: 5 Pro-Touch II TM<br />
• Vertical Jets: 4 Pulsator TM , 1 Pro-Touch II TM<br />
• Therapy Seat Jets: 2 Mini-Intelli-Jet TM , 6 Pro-Touch II TM<br />
34
• Ozone Jets: 1<br />
• Air Controls / Massage Selectors: 2 / 1<br />
• Filter: 2-Stage MicroClean TM Cartridge, 20” Slipstream TM Weir<br />
with Automatic Brominator TM<br />
• Water Treatment: Brominator TM Chemical Feeder; Ready for<br />
PermaClear TM or SunZone TM CD Installation<br />
• Lighting: Underwater, with Two Colored Lenses; Optional<br />
SunGlow TM Multi-Color LED Light Kit<br />
• Cabinet: Redwood with Coastal, Sierra, or No Stain; Optional<br />
Synthetic Wood Skirt<br />
• Colors: Textured Bluegrass, Jade, Marine, Marble, Onyx, Sahara,<br />
or Sand; Marbled Emerald, Platinum, Sapphire, or Topaz<br />
• Handrails: Integral<br />
• Pillows: 2-Part/2-Tone Gray, Bolt-on; Optional Blue or Camel<br />
Insert<br />
• Heater:<br />
- US/Canada Convertible Model (60 Hz): Low Flow, 1 kW @ 120<br />
VAC or 4 kW @ 240 VAC<br />
- Export Models (50/60 Hz): Low Flow , 2.7 kW<br />
• Electrical Requirements:<br />
- US/Canada Convertible Model (60 Hz): 120 VAC @ 15 A or 240<br />
VAC @ 25 A or 40 A<br />
- Export Models (50/60 Hz): 230 - 240 VAC @ 20 A or 30 A; or<br />
suitably rated circuit breaker to comply with local electrical<br />
regulations. Certain countries may require dual power inputs;<br />
two 16 A breakers are required for this configuration.<br />
35
17.3 Caprio / Caprio ST Specifications<br />
• Dimensions:<br />
- With Wood Cabinet: 79” x 88” x 33”<br />
(201 cm x 224 cm x 84 cm)<br />
- With Synthetic Cabinet:<br />
77” x 86” x 33”<br />
(196 cm x 218 cm x 84 cm)<br />
• Seating Capacity: 3-4 Adults<br />
• Dry Weight: 638 lbs / 289 kg<br />
• Filled Weight: 3,543 lbs / 1,607 kg<br />
• Water Capacity (Avg. Fill):<br />
350 US Gal / 1,325 Liters<br />
• Controls: Solid-State Electronic Controls with LED Readout,<br />
Programmable Temperature, Filtration, and Heat Cycles<br />
• Water Delivery: 1 TheraFlo TM High Flow Pump<br />
• Pump 1 Rating by Model:<br />
- US/Canada Convertible Caprio Model (60 Hz): 2-Speed/1.5 hp<br />
Continuous, 13.6 A Max.<br />
- US/Canada Caprio ST Model (60 Hz): 2-Speed 2.5 hp Continuous,<br />
12 A Max.<br />
- Export Caprio Model (50 Hz/60 Hz): 2-Speed / 2.0 hp Continuous,<br />
8.7 A Max.<br />
• Pump 2: Circulating Pump<br />
• Total Hydrojets: 24<br />
• Therapy Jets: 3 Pro-Touch II TM , 1 Duo-Path TM<br />
• Vertical Jets: 3 Pro-Touch II TM<br />
• Therapy Lounge Jets: 6 Mini-Intelli-Jet TM<br />
• Accu-Ssage Therapy Seat Jets: 10 Accu-Pressure TM<br />
36
• Ozone Jet: 1<br />
• Air Controls/Massage Selectors: 3/1<br />
• Filter: 2-Stage MicroClean TM Cartridge, 20” Slipstream TM Weir<br />
with Automatic Brominator TM<br />
• Water Treatment: Brominator TM Chemical Feeder; Ready for<br />
PermaClear TM or SunZone TM CD Installation<br />
• Lighting: Underwater, with Two Colored Lenses; Optional<br />
SunGlow TM Multi-Color LED Light Kit<br />
• Cabinet: Redwood, Coastal, Sierra, or No Stain; Optional<br />
Synthetic Wood Skirt<br />
• Colors: Textured Bluegrass, Jade, Marine, Onyx, Sahara, or<br />
Sand; Marbled Emerald, Platinum, Sapphire, or Topaz<br />
• Handrail: 1 High Quality Stainless Steel, 1 Integral<br />
• Pillows: 2-Part/2-Tone Gray, Bolt-on; Optional Blue or Camel<br />
Insert<br />
• Heater:<br />
- US/Canada Convertible Caprio Model (60 Hz): Low Flow, 1 kW @<br />
120 VAC or 4 kW @ 240 VAC<br />
- US/Canada 240 VAC Caprio ST Model (60 Hz): Low Flow, 4 kW<br />
@ 240 VAC<br />
- Export Caprio Model (50 Hz/60 Hz): Low Flow, 2.7 kW @<br />
230-240 VAC<br />
• Electrical Requirements:<br />
- US/Canada Convertible Model (60 Hz): 120 VAC @ 15 A or 240<br />
VAC @ 25 A or 40 A<br />
- US/Canada 240 VAC Caprio ST Model (60 Hz): 240 VAC @<br />
25 A or 40 A<br />
- Export Model (50 Hz / 60 Hz): 230 - 240 VAC @ 20 A or 30 A; or<br />
suitably rated circuit breaker to comply with local electrical<br />
regulations. Certain countries may require dual power inputs;<br />
two 16 A breakers are required for this configuration.<br />
37
Notes:<br />
D.A.L./06.12.02
<strong>Sundance</strong> <strong>Spas</strong>, Inc.<br />
14525 Monte Vista Ave, Chino, CA 91710/U.S.A.,<br />
Phone: (909) 606-7733, Fax: (909) 606-0195<br />
Website: http://www.sundancespas.com<br />
6530-374, Rev. B © <strong>2002</strong> <strong>Sundance</strong> <strong>Spas</strong>, Inc. Printed in U.S.A.