Bicycle Owners Manual - Felt Bicycles
Bicycle Owners Manual - Felt Bicycles
Bicycle Owners Manual - Felt Bicycles

Create successful ePaper yourself
Turn your PDF publications into a flip-book with our unique Google optimized e-Paper software.
Note: If your bicycle is equipped with a suspension seat post, the<br />
suspension mechanism may require periodic service or maintenance. Ask<br />
your dealer for recommended service intervals for your suspension seat<br />
post.<br />
Small changes in saddle position can have a substantial effect on<br />
performance and comfort. To find your best saddle position, make only one<br />
adjustment at a time.<br />
WARNING: After any saddle adjustment, be sure that the saddle<br />
adjusting mechanism is properly seated and tightened before riding.<br />
A loose saddle clamp or seat post clamp can cause damage to the<br />
seat post, or can cause you to lose control and fall. A correctly tightened<br />
saddle adjusting mechanism will allow no saddle movement in any<br />
direction. Periodically check to make sure that the saddle adjusting<br />
mechanism is properly tightened.<br />
If, in spite of carefully adjusting the saddle height, tilt and fore-and-aft position,<br />
your saddle is still uncomfortable, you may need a different saddle design.<br />
Saddles, like people, come in many different shapes, sizes and resilience. Your<br />
dealer can help you select a saddle which, when correctly adjusted for your body<br />
and riding style, will be comfortable.<br />
WARNING: Some people have claimed that extended riding with a<br />
saddle which is incorrectly adjusted or which does not support your<br />
pelvic area correctly can cause short-term or long-term injury to<br />
nerves and blood vessels, or even impotence. If your saddle causes you<br />
pain, numbness or other discomfort, listen to your body and stop riding<br />
until you see your dealer about saddle adjustment or a different saddle.<br />
<strong>Felt</strong> Dual Position Seatposts: <strong>Felt</strong>’s most aerodynamic road frames<br />
(including the DA, B2 and AR) use a special dual-position seatpost. It<br />
requires its own method of adjustment unlike most other seatposts. To<br />
learn more please refer to the instruction manual included in the box with<br />
your bicycle or visit: http://www.feltbicycles.com.<br />
C. Handlebar height and angle<br />
Your bike is equipped either with a “threadless”<br />
stem, which clamps on to the outside of the steerer<br />
tube, or with a “quill” stem, which clamps inside the<br />
steerer tube by way of an expanding binder bolt. If<br />
you aren’t absolutely sure which type of stem your<br />
bike has, ask your dealer.<br />
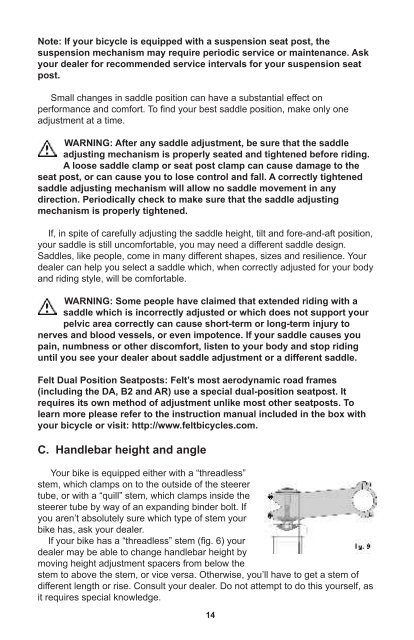
If your bike has a “threadless” stem (fig. 6) your<br />
dealer may be able to change handlebar height by<br />
moving height adjustment spacers from below the<br />
stem to above the stem, or vice versa. Otherwise, you’ll have to get a stem of<br />
different length or rise. Consult your dealer. Do not attempt to do this yourself, as<br />
it requires special knowledge.<br />
If your bike has a “quill” stem (fig. 7) you can ask your dealer to adjust the<br />
handlebar height a bit by adjusting stem height.<br />
A quill stem has an etched or stamped mark on<br />
its shaft which designates the stem’s “Minimum<br />
Insertion” or “Maximum Extension”. This mark must<br />
not be visible above the headset.<br />
WARNING: A quill stem’s Minimum<br />
Insertion Mark must not be visible above<br />
the top of the headset. If the stem is<br />
extended beyond the Minimum Insertion Mark<br />
the stem may break or damage the fork’s steerer tube, which could cause<br />
you to lose control and fall.<br />
WARNING: On some bicycles, changing the stem or stem height can<br />
affect the tension of the front brake cable, locking the front brake or<br />
creating excess cable slack which can make the front brake<br />
inoperable. If the front brake pads move in towards the wheel rim or out<br />
away from the wheel rim when the stem or stem height is changed, the<br />
brakes must be correctly adjusted before you ride the bicycle.<br />
Some bicycles are equipped with an adjustable angle stem. If your bicycle<br />
has an adjustable angle stem, ask your dealer to show you how to adjust if. Do<br />
not attempt to make the adjustment yourself, as changing stem angle may also<br />
require adjustments to the bicycle’s controls.<br />
WARNING: Always tighten fasteners to the correct torque. Bolts that<br />
are too tight can stretch and deform. Bolts that are too loose can<br />
move and fatigue. Either mistake can lead to a sudden failure of the<br />
bolt, causing you to lose control and fall.<br />
Your dealer can also change the angle of the handlebar or bar end extensions.<br />
WARNING: An insufficiently tightened stem clamp bolt, handlebar<br />
clamp bolt or bar end extension clamping bolt may compromise<br />
steering action, which could cause you to lose control and fall. Place<br />
the front wheel of the bicycle between your legs and attempt to twist the<br />
handlebar/stem assembly. If you can twist the stem in relation to the front<br />
wheel, turn the handlebars in relation to the stem, or turn the bar end<br />
extensions in relation to the handlebar, the bolts are insufficiently<br />
tightened.<br />
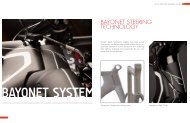
<strong>Felt</strong> Bayonet Steering System: The Bayonet Steering System is a<br />
proprietary steering system that requires its own method of adjustment<br />
unlike most other bicycles. To learn more please refer to the instruction<br />
manual included in the box with your bicycle or visit: http://www.<br />
feltbicycles.com.<br />
14 15