Spa-N-A-Box Owner's Manual - ActiveForever
Spa-N-A-Box Owner's Manual - ActiveForever
Spa-N-A-Box Owner's Manual - ActiveForever

Create successful ePaper yourself
Turn your PDF publications into a flip-book with our unique Google optimized e-Paper software.
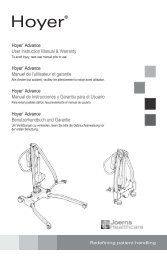
User’s Guide<br />
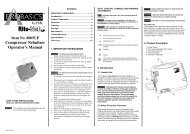
SPA ASSEMBLY<br />
1. Take all parts out of the box. Compare items with package contents<br />
diagram on previous page<br />
2. Start with the panel that has 3 large<br />
holes - hold with arrow pointing up<br />
and arrow on the inside spa wall.<br />
Locate this panel so you have enough<br />
room to attach power pack to spa<br />
liner.<br />
Pick up a plastic extrusion corner<br />
piece and slide it onto panel. The<br />
snap and lock should be towards<br />
the top, as shown in the diagram at<br />
right.<br />
Take another panel and slide it into<br />
the receiving plastic extrusion you<br />
placed on the first panel.<br />
Take another plastic extrusion corner<br />
piece and slide it into the grooves of<br />
the second panel.<br />
Continue panel assembly by<br />
alternating plastic corner extrusions<br />
and panels until spa structure is<br />
complete.<br />
HINT: If panels don’t slide easily into<br />
extrusions, you may wipe common<br />
cooking oil on grooves to allow them<br />
to slide easier.<br />
Slide the<br />
corner piece<br />
down onto the<br />
first panel.<br />
Snap<br />
Lock<br />
12