LiveNote LEFMaker - West
LiveNote LEFMaker - West
LiveNote LEFMaker - West

Create successful ePaper yourself
Turn your PDF publications into a flip-book with our unique Google optimized e-Paper software.
<strong>LiveNote</strong> <strong>LEFMaker</strong><br />
<strong>LiveNote</strong> Central Version<br />
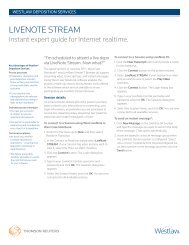
WEST CASE NOTEBOOK TM<br />
/WEST LIVENOTE TM<br />
QUICK REFERENCE GUIDE<br />
You can use <strong>LEFMaker</strong> TM<br />
to create <strong>LiveNote</strong> Evidence Format TM<br />
(LEF TM<br />
) files, which can contain transcripts,<br />
exhibits, exhibit links, and synchronized video. To access <strong>LEFMaker</strong> in <strong>LiveNote</strong> Central, complete these<br />
steps:<br />
1. Go to www.livenotecentral.com. The <strong>LiveNote</strong> Central sign-on page is displayed.<br />
2. Type your user ID and password in the text boxes and click Login. The <strong>LiveNote</strong> Central Welcome page is<br />
displayed.<br />
Note If you do not have a <strong>LiveNote</strong> Central account, call <strong>West</strong> <strong>LiveNote</strong> Technical Support at<br />
1-800-290-9378.<br />
3. Click LEF Maker Online in the left frame.<br />
4. Click Create LEF under LEF Maker Online. The Create LEF page is displayed in the right frame (Figure 1).<br />
Figure 1. Create LEF page<br />
For assistance using<br />
<strong>West</strong> Case Notebook or<br />
<strong>West</strong> <strong>LiveNote</strong>, call<br />
1-800-290-9378 or<br />
e-mail west.livenote<br />
@thomson.com.<br />
For free reference<br />
materials, visit<br />
west.thomson.com<br />
/support/user-guide<br />
/livenote-case-note<br />
book.aspx.
2 <strong>LiveNote</strong> <strong>LEFMaker</strong>: <strong>LiveNote</strong> Central Version<br />
ADDING A TRANSCRIPT<br />
The first step in creating a LEF file is to add the transcript you want to include in the LEF file.<br />
Transcript files can be ASCII (text only), PTF (Portable Transcript Format), or MDB (synchronized file<br />
format of CT Summation) files. If you add a MDB file to <strong>LEFMaker</strong>, it will convert the file into a PTF file.<br />
To add a transcript<br />
1. Click the Add Transcript button on the toolbar. The Select the Transcript dialog box is displayed.<br />
2. Select the transcript file and click Open. The Transcript Properties dialog box is displayed.<br />
3. Type a name for the transcript in the Name text box.<br />
4. If necessary, type a new date and time in the Date/Time text boxes.<br />
5. Click OK. The transcript is listed in the upper-left corner of the window.<br />
ADDING EXHIBIT FILES<br />
Once you have added a transcript to <strong>LEFMaker</strong>, you can add exhibits to it.<br />
To add exhibit files<br />
1. Click the Add Exhibits button on the toolbar. The Select the Exhibit Files dialog box is displayed.<br />
2. Select the exhibit file format from the Files of type drop-down list.<br />
3. Select the exhibit files and click Open. The exhibits are listed under the transcript in the upperleft<br />
corner.<br />
LOCATING AND VERIFYING EXHIBIT NAMES<br />
Use the Word Wheel to find alternate names used for exhibits.<br />
To search for other exhibit names or references<br />
1. Type the alternate exhibit name in the Word Wheel text box, e.g., exh. 1 or ex. 1. The exhibit will be<br />
listed below the Word Wheel text box with its page and line references.<br />
2. See “Adding and Editing Exhibit Names” below to associate alternate exhibit names with the<br />
appropriate exhibits.
ADDING AND EDITING EXHIBIT NAMES<br />
WEST CASE NOTEBOOK TM<br />
/WEST LIVENOTE TM<br />
QUICK REFERENCE GUIDE<br />
You can change the primary name of the exhibit or add alternate names when the transcript refers to<br />
it different ways.<br />
To change an exhibit’s primary name<br />
1. Select the exhibit to be edited.<br />
2. Click the Edit Exhibit button on the toolbar. The Exhibit Properties dialog box is displayed.<br />
3. Type the new name in the Primary name text box.<br />
4. Click OK.<br />
To add alternate exhibit names to an exhibit<br />
1. Select the exhibit to be edited.<br />
2. Click the Edit Exhibit button on the toolbar. The Exhibit Properties dialog box is displayed.<br />
3. Type the new name in the Add new name text box and click Add.<br />
4. To add more alternate names, repeat step 3.<br />
5. Click OK.<br />
VIEWING EXHIBIT LINKS<br />
Each exhibit added to the transcript is listed in its own folder. The transcript is displayed in the<br />
Transcript preview box exactly as it will appear in <strong>West</strong> Case Notebook or <strong>West</strong> <strong>LiveNote</strong>.<br />
To verify and test exhibit links<br />
1. Double-click an exhibit folder to open it.<br />
2. Click an exhibit link in the folder to view the exhibit reference in the transcript.<br />
3. Click the exhibit link in the transcript to view the exhibit.<br />
4. Repeat steps 1 through 3 to test other links.<br />
SORTING EXHIBIT FILES<br />
The order in which exhibit files are listed in <strong>LEFMaker</strong> is the order in which they will be listed in <strong>West</strong><br />
Case Notebook or <strong>West</strong> <strong>LiveNote</strong> (in the case window) when you import the LEF file.<br />
You can change this order by changing the position of an exhibit file in the list.<br />
To automatically sort exhibit files<br />
1. Click the Sort Exhibits button on the toolbar. Exhibit files are sorted alphanumerically.<br />
To manually change the order of exhibit files<br />
1. Drag the exhibit file to where you want it to be located in the list.<br />
<strong>LiveNote</strong> <strong>LEFMaker</strong>: <strong>LiveNote</strong> Central Version 3
Published 4/10. L-359249. Replaces Material #40654784.<br />
© 2010 Thomson Reuters RM166195<br />
The trademarks used herein are the trademarks of their respective owners.<br />
<strong>West</strong> trademarks are owned by <strong>West</strong> Publishing Corporation.<br />
CREATING THE LEF FILE<br />
Once you have added the transcript and added, edited, and sorted the exhibit files, you can create the<br />
LEF file.<br />
To create the LEF file<br />
1. Type the appropriate information in the Client/Matter # and Contact text boxes at the bottom of<br />
the page, if desired.<br />
2. Click Create LEF. The Save LEF File As dialog box is displayed.<br />
3. Select the location where you want to save the file.<br />
4. Type the name of the file in the File name text box.<br />
5. Click Save. A message confirming the LEF creation has been successful is displayed.<br />
6. Click OK. The Create LEF page is displayed.<br />
7. Click Send Via A2B to send an e-mail with the attached LEF file or click Continue to create another<br />
LEF file.<br />
EDITING A LEF FILE<br />
You can edit LEF files that have been created in <strong>LEFMaker</strong>.<br />
To edit a LEF file<br />
1. Click the Edit LEF button on the toolbar. The Select the LEF dialog box is displayed.<br />
2. Select the file you want to edit and click Open.<br />
3. Edit the contents of the LEF file.<br />
4. Click the Create LEF button to save the file.