
Create successful ePaper yourself
Turn your PDF publications into a flip-book with our unique Google optimized e-Paper software.
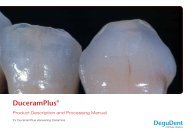
Cercon ®<br />
<strong>ceram</strong> <strong>press</strong><br />
Product description<br />
and instructions for<br />
Cercon ® <strong>ceram</strong> <strong>press</strong><br />
– Press-on porcelain –
2 Indications<br />
General instructions<br />
Published: September, 2006<br />
Market launch: September, 2006<br />
Cercon ® <strong>ceram</strong> <strong>press</strong><br />
0124<br />
Indications<br />
Cercon ® <strong>ceram</strong> <strong>press</strong> is a <strong>press</strong>-on porcelain developed specifically<br />
and solely for <strong>press</strong>ing onto zirconia frameworks (Y-TZP)<br />
with a CTE of 10.5 µm/m·K (25–500°C), preferably made of<br />
Cercon ® base.<br />
Cercon ® <strong>ceram</strong> <strong>press</strong> is indicated for <strong>press</strong>ing onto anterior<br />
and posterior zirconia crowns and bridges as well as inlay<br />
bridgework.<br />
Cercon ® <strong>ceram</strong> <strong>press</strong> must only be veneered with Cercon ®<br />
<strong>ceram</strong> kiss porcelain.<br />
For dental use only.<br />
Contraindications<br />
Solely indicated for the range of indications listed above.<br />
Cercon ® <strong>ceram</strong> <strong>press</strong> is contraindicated for cases with bruxism<br />
or other parafunctions.<br />
Cercon ® <strong>ceram</strong> <strong>press</strong> is also contraindicated for cases with<br />
compromised periodontal tissues or clinical crowns of inadequate<br />
height or which are severely damaged.<br />
Should the patient be hypersensitive to Cercon ® <strong>ceram</strong> <strong>press</strong> or<br />
one of its constituents, either do not use this medical product or<br />
only use it under the strict supervision of the doctor/dentist in<br />
attendance. Known cross-reactions or interactions of this medical<br />
product with other medical products/materials already in the<br />
mouth must be taken into account by the doctor/dentist when<br />
using this product.<br />
Please provide the attending doctor/dentist with all the above<br />
mentioned information if you are using this medical product for<br />
fabricating a custom restoration.<br />
Do not inhale dust from grinding.<br />
The pastes and paste liquids are hazardous to health if<br />
swallowed (R 22).<br />
Precautions<br />
When using this product, please heed the instructions and safety<br />
data sheets.<br />
Side-effects/Interactions<br />
We know of no risks and/or side-effects concerning Cercon ®<br />
<strong>ceram</strong> <strong>press</strong>.<br />
Technical data<br />
CTE: 10.5 µm/m·K (25–500°C)<br />
Dental <strong>ceram</strong>ic, type 2 according to DIN EN ISO 6872<br />
Please note the following symbols on the product labels:<br />
REF Product number<br />
LOT Batch number<br />
Use-by date<br />
Read the instructions<br />
2 Do not re-use<br />
Liquids for combining<br />
Opaquer powder:<br />
Opaquer paste/Liner:<br />
Shoulder porcelains:<br />
Dentines/Enamels etc.:<br />
Stains/Glazes:<br />
Separating:<br />
Ducera ® Liquid B<br />
Ducera ® Liquid O<br />
Ducera ® Liquid OCL universal<br />
Ducera ® Liquid OL<br />
Fluid paste opaque<br />
Ducera ® Liquid Quick<br />
Ducera ® Liquid SD<br />
Ducera ® Liquid Form<br />
Ducera ® Liquid Stain<br />
Ducera ® Sep Isolating Fluid<br />
Furnace<br />
For best results, make sure that the required <strong>press</strong>ing / firing<br />
temperatures and times are observed strictly.<br />
If necessary, please adjust the furnace settings.<br />
Warnings for medical products<br />
It is expected that undesired side-effects caused by these medical<br />
products will be extremely rare if they are processed and used<br />
correctly. However, immune reactions (e.g. allergies) and/or local<br />
paralgesia (e.g. taste irritation or irritations of the mucosa) cannot<br />
be ruled out completely. Should you become aware of undesired<br />
side-effects – even where doubts exist – please let us know.<br />
Transport and storage<br />
Protect pellets against dampness during storage.<br />
Keep dry.
Contents 3<br />
Contents<br />
2 General instructions<br />
3 Contents<br />
4–5 Objective<br />
6 Cercon ® base versus Cercon ® base colored<br />
7 Pellet selection for Cercon ® base colored<br />
8 Coping fabrication<br />
9 Wax-up and sprue attaching<br />
10 Cercon ® PressMaster<br />
11 Pellet selection<br />
12 Pressing<br />
13 Trimming<br />
14 Shading<br />
15 Shade combination chart<br />
16–17 <strong>press</strong> & stain step-by-step<br />
18–21 <strong>press</strong> & veneer step-by-step<br />
22–23 Clinical information<br />
24 Porcelain shoulders<br />
25 Troubleshooting<br />
26–27 <strong>press</strong> & esthetics – Finished restorations<br />
28 Tips & tricks/Service<br />
29 Pressing and firing settings
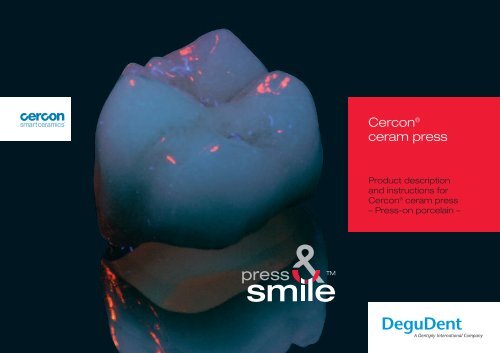
4 <strong>press</strong>&smile<br />
Objective<br />
When starting in dental technology, an understanding of the use of wax in dental technology accompanies us right from<br />
day one.<br />
Much more than just a material!<br />
Cercon ® <strong>press</strong>&smile combines mechanised perfection and customised<br />
dental technical manual work with previously unheard of options. This<br />
material concept provides you with the necessary flexibility during your<br />
everyday work – ranging from efficient to aesthetic applications.<br />
Carsten Fischer
<strong>press</strong>&smile 5<br />
<strong>press</strong>&smile enables you to create a detailed reproduction of your wax pattern for the fascinating world of<br />
all-<strong>ceram</strong>ics.
6 Instructions<br />
Cercon ® base versus Cercon ® base colored<br />
Cercon ® <strong>ceram</strong> <strong>press</strong> is a special <strong>press</strong>able porcelain for <strong>press</strong>ing onto zirconia frameworks (Y-TZP) with a<br />
CTE of 10.5 µm/m·K (25–500°C) and preferably made of Cercon ® base. Cercon ® <strong>ceram</strong> <strong>press</strong> is then<br />
completed using either the <strong>press</strong>&stain or <strong>press</strong>&veneer techniques.<br />
Selecting the correct blank is essential for both techniques. When using the <strong>press</strong>&smile concept, the<br />
<strong>press</strong>&stain technique requires an ivory framework using Cercon ® base colored. When creating light tooth<br />
shades with the <strong>press</strong>&veneer technique, classic, white Cercon ® base blanks may be used.<br />
No liner is required when using <strong>press</strong>&smile pellets. The porcelain can be <strong>press</strong>ed directly onto the zirconia<br />
framework, yet another stage is eliminated from this efficient technique. In case of discoloured preparations or<br />
similar indications, the framework may be coated with liner. In such cases, please use the same shade of liner<br />
as the basic shade of the Cercon ® <strong>ceram</strong> kiss veneering porcelain. Please refer to the Cercon ® <strong>ceram</strong> kiss<br />
instructions for the processing details and furnace settings.
Instructions 7<br />
Pellet selection for Cercon ® base colored<br />
Since the framework shade is standardised, the specific pellet is very important for the shade of the<br />
restoration. Therefore, the mixture of the pellet has a very decisive influence. It must meet the<br />
requirements for light-optical phenomena and provide the user with the multiplicity of natural tooth<br />
shades.
8 Instructions<br />
Coping fabrication<br />
The coping is either fabricated/designed after scanning the die with a Cercon ® eye CAD module or classically via a wax pattern which is then scanned<br />
and milled in a Cercon ® brain milling unit.<br />
Any adjustments and thinning of the cervical margin are carried out with a water-cooled turbine to prevent localised overheating. The zirconia coping<br />
must be at least 0.4 mm thick. Principally, all copings must be designed with the anatomical form of the tooth but with smaller overall dimensions – this<br />
ensures that the <strong>press</strong>able and veneering porcelains are supported uniformly.
Instructions 9<br />
Wax-up and sprue attaching<br />
Wax-up:<br />
A fully anatomical or cut-back wax pattern is applied to the Cercon ® base coping. You may<br />
use your all-<strong>ceram</strong>ic waxes for this as usual. The sides of the wax pattern must be at least<br />
0.4 mm thick.<br />
Sprue attaching:<br />
Normal 3.5 mm diameter wax sprues may be attached to the pattern. All junctures must be<br />
smoothed. The material must always flow from thick to thin areas. The sprue must be attached<br />
to the thickest section of the wax pattern and the joint smoothed. Never apply wetting agent of<br />
any kind to the wax patterns. A very thin coating of Vaseline should be smeared onto the<br />
casting ring. Allow to harden without exerting <strong>press</strong>ure. Speed investment materials are an<br />
advantage but their instructions must be strictly adhered to.
10 Instructions<br />
Cercon ® PressMaster<br />
The Cercon ® PressMaster enables large volume patterns to be injected and different shades of<br />
pellet to be used for the same <strong>press</strong>ing cycle.<br />
The pattern is placed on the foil. The wax must be at least 0.4 mm thick and the weight of the wax<br />
must not exceed 6.4g (17.6g pellet). The pellets may be joined with Fixpaste to simplify placing<br />
them in the hot ring. The segment shape reduces the devesting times and enables the different<br />
shades of pellet to be allotted easily.
Instructions 11<br />
Pellet selection<br />
The full <strong>press</strong>&smile assortment was kept to a minimum on purpose.<br />
Most natural tooth shades can be reproduced with only 4 enamel and 2 dentine shades.<br />
White (W) Light shades, medium opacity, B1, A1,<br />
bleaching shades or shades with light incisal areas<br />
and minimal translucency.<br />
Universal (U)<br />
Red (R)<br />
Yellow (Y)<br />
Highly translucent, for universal use.<br />
Particularly with C- and D-shades.<br />
A2–A4<br />
B2–B4<br />
Dentin<br />
High Value (HV)<br />
Dentin<br />
Low Value (LV)<br />
Dentine base material for light base tones, high opacity<br />
(<strong>press</strong>&veneer technique using Cercon ® <strong>ceram</strong> kiss).<br />
Dentine base material for dark base tones, high opacity<br />
(<strong>press</strong>&veneer technique using Cercon ® <strong>ceram</strong> kiss).
12 Instructions<br />
Pressing<br />
1<br />
We recommend the following preparatory measures:<br />
<br />
<br />
<br />
<br />
<br />
Run a full <strong>press</strong>ing cycle to preheat the furnace.<br />
Use disposable investment plungers.<br />
Do not preheat the investment plungers or pellets.<br />
Several pellets may be fixed together with Fixpaste (<strong>DeguDent</strong>) to simplify placing<br />
them in the insert.<br />
If speed investment is used, the instructions must be strictly adhered.<br />
(Preheating temperature of Cergo ® fit speed – 850°C)<br />
1–4: Devesting<br />
2 3 4
Instructions 13<br />
Trimming<br />
Cercon ® <strong>ceram</strong> <strong>press</strong> all-<strong>ceram</strong>ic copings are trimmed with a water-cooled turbine and suitable rotary instruments, which prevent damage to the<br />
material. A micromotor may only be used for trimming the surfaces and minimal adjustments to the occlusion.<br />
Trimming after glazing – Please note that if Cercon ® <strong>ceram</strong> kiss veneering porcelain has to be adjusted after firing the glaze (grinding in the occlusion/<br />
contact areas), the entire restoration must be glazed again and refired.<br />
If a cemented restoration is adjusted intraorally, it is essential to polish those areas with a rubber<br />
polisher suitable for use on porcelain.
14 Instructions<br />
Shading<br />
If required, the surface of the crown can be sandblasted with 50 µm aluminium oxide to<br />
enhance shade application. Localised areas can be polished with a rubber polisher. <strong>press</strong>&smile<br />
absorbs the stain like a sponge. Amazing results can be achieved with just a minimal amount of<br />
Cercon ® body stains.<br />
Crown after firing the first layer<br />
of stain and glazing<br />
Crown glazed but without stain<br />
Crown ready for staining
Instructions 15<br />
Shade combination chart<br />
Shade combination chart – <strong>press</strong>&stain<br />
Body stain Dentine shade Pellet Number of<br />
orders<br />
Body 3 A1 U(W) 1x<br />
A2 R 1x<br />
A3 R 2x<br />
A3,5 R 3x<br />
A4 R 4x<br />
Body 5 B1 U(W) 1x<br />
B2 U 1–2x<br />
B3 U(Y) 2x<br />
B4 Y 4x<br />
Body 6 C1 U 1x<br />
Body 7 C2 U 1x<br />
C3 U 2x<br />
C4 U 3x<br />
Body 8 D2 U 1x<br />
D3 U 2x<br />
Body 9 D4 U 2x
16 Instructions<br />
<strong>press</strong> & stain<br />
The framework is provided with the anatomical shape of a tooth, but with smaller overall dimensions. The junctures must be smooth and rounded. The<br />
framework should be sandblasted with 110–125 µm aluminium oxide at a <strong>press</strong>ure of 3–3.5 bars before being steam-cleaned. The surface must be free<br />
of grease and clean.<br />
Prefabricated occlusal patterns are positioned according to the functional criteria and the functional details added. The pattern is then waxed-up fully<br />
anatomical.
Instructions 17<br />
1: This <strong>press</strong>&smile bridge has been prepared for staining and steam-cleaned.<br />
2/3: The stain fixation firing simply fixes the stain which is matt after firing.<br />
The shade can be checked by wetting with Stain Liquid to make it visible.<br />
4/5: The glaze firing completes the case. Adjustments are easily carried out with Final kiss.<br />
1 2<br />
3 4 5
18 Instructions<br />
<strong>press</strong> & veneer<br />
All pellets in the assortment can be coated with Cercon ® <strong>ceram</strong> kiss. First, produce a full wax-up (Fig. 2) on the Cercon ® base/Cercon ® base colored<br />
framework (Fig. 1).<br />
1 2
Instructions 19<br />
<strong>press</strong> & veneer<br />
A silicone overcast can be used to reduce the incisal and occlusal areas in a controlled manner (Fig. 1). When using the <strong>press</strong>&veneer technique,<br />
shading or custom adjustments can be achieved with two methods. Using the HV and LV pellets, the body shade can be modified with body stains as<br />
in the <strong>press</strong>&stain technique. When using this method, only the incisal region is cut back. Finally, the stains are fired to fix them in place and then coated<br />
with incisal and occlusal porcelain.<br />
Alternatively, the porcelain can be cut back to<br />
the body region of the crown to allow the shade<br />
to be customised with dentine and enamel<br />
porcelains (Fig 2). Using this technique, highly<br />
aesthetic all-<strong>ceram</strong>ic restorations can be created<br />
easily and quickly (Figs. 3&4). In addition,<br />
“V”-shade porcelains can be <strong>press</strong>ed over the<br />
zirconia framework. In this case, only a minimum<br />
amount has to be cut back and rebuilt with<br />
enamel and opal porcelains.<br />
2 4<br />
1<br />
3
20 Instructions<br />
<strong>press</strong> & veneer<br />
Aesthetically sophisticated prosthetic restorations can be fabricated reliably, accurately and efficiently:<br />
1: Initial status<br />
2–5: Wax-up<br />
1<br />
2<br />
3<br />
4 5
Instructions 21<br />
1: Fully anatomical restoration, <strong>press</strong>ed to reproduce<br />
the wax-up.<br />
4 5<br />
2: The visible area is reduced in a controlled manner<br />
with a water-cooled turbine, as when preparing for a<br />
laminate veneer.<br />
The shade can be applied with Cercon ® <strong>ceram</strong> kiss<br />
body stains or dentine porcelains. The palatal<br />
and interdental zones remain untouched and only<br />
need glazing.<br />
3/4/5: Advanced aesthetics can be achieved in the visible<br />
region with Cercon ® <strong>ceram</strong> kiss.<br />
1 2 3
22 Clinical procedures<br />
Clinical information<br />
Predictable prosthetics can only be achieved with a clearly defined, clinical treatment concept.<br />
1: Conventional luting is feasible with<br />
phosphate cement or glass ionomer cement.<br />
Resin-blonding is also possible.<br />
2: Excess cement must be cleaned<br />
off carefully.<br />
3: Temporary cementation is possible,<br />
but not without risk.<br />
1 2 3
Clinical procedures 23<br />
Cementation: Cercon ® <strong>ceram</strong> <strong>press</strong> restorations must be luted as described in the guidelines for Cercon ® smart <strong>ceram</strong>ics technology.<br />
1: Initial status.<br />
1 2<br />
2: The temporary phase is over.<br />
3: A “prep guide”, produced from the wax-up, is used<br />
for guidance during preparation.<br />
4: All clinically risky areas have been stabilised and the<br />
gingiva is sufficiently mature.<br />
5: The double cord technique has been employed in<br />
readiness for taking an optimum im<strong>press</strong>ion of the<br />
preparations.<br />
3 4 5
24 Clinical procedures<br />
Porcelain shoulders<br />
Creating a porcelain shoulder always weakens the framework. The following hints must always be<br />
followed when fabricating a porcelain shoulder:<br />
1/2: Prepare an adequate shoulder or<br />
deep chamfer.<br />
1<br />
2: Resin-bonding is a must.<br />
3: Trim the cervical areas of the copings<br />
minimally (0.5–0.8 mm).<br />
4: Only the visible area is reduced.<br />
<br />
Do not cement temporarily<br />
2 3 4
Troubleshooting 25<br />
Troubleshooting<br />
It is essential to support the side of the mould fully<br />
(avoids defective <strong>press</strong>ing).<br />
Ensure that the supporting surface is clean<br />
and smooth.<br />
Excessive <strong>press</strong>ure.<br />
Investment processed incorrectly.<br />
Incorrect setting time.<br />
The plunger wedged.<br />
Incorrect temperature cycle.<br />
Coping not fixed firmly in investment.<br />
Mould cooled excessively before <strong>press</strong>ing.<br />
Mould too cold.<br />
Sprues attached incorrectly.<br />
Inadequate <strong>press</strong>ing time.<br />
Inadequate pellet material.<br />
Inadequate <strong>press</strong>ure.<br />
The coping was thinner than the minimum thickness.<br />
Trimmed before cooling.<br />
Excessive <strong>press</strong>ure.<br />
Already fractured before firing.<br />
Incorrect investment.<br />
Neither the pellets nor the single-use plunger should<br />
be preheated.
26 Finished restorations<br />
<strong>press</strong> & esthetics<br />
Views of finished Cercon ® <strong>ceram</strong> <strong>press</strong> restorations. Teeth 15–17: <strong>press</strong>&stain. Teeth 14, 13–23, 24–26: <strong>press</strong>&veneer.<br />
1: Initial status.<br />
2: Cercon ® base colored copings.<br />
3/4: Show the finished restoration on the model and in situ.<br />
2 3<br />
1 4
Finished restorations 27<br />
This product manual was produced in<br />
cooperation with Carsten Fischer.<br />
Special thanks go to Dr. Rafaela<br />
Jenatschke/Frankfurt for the clinical<br />
support.<br />
1/2: Show the finished restoration on the model and in situ<br />
Carsten Fischer<br />
Patient<br />
1 2
28 Service<br />
Tips & tricks<br />
Preparation/Wax-up<br />
Only waxes and materials suitable for use with<br />
<strong>press</strong>ing systems may be used.<br />
Do not apply wetting agents.<br />
Contaminated wax instruments and pattern resins<br />
are not suitable.<br />
The framework must be absolutely clean and free<br />
of grease.<br />
It should be sandblasted with 110–120 µm grit at<br />
3–3.5 bars <strong>press</strong>ure.<br />
The framework must be steam-cleaned.<br />
Trimming/Staining<br />
The coping should be shaped like a tooth, but with<br />
reduced overall dimensions, to provide the required<br />
dependability to withstand the shearing forces<br />
experienced in the mouth.<br />
Trimming is carried out with a Cercon ® turbine.<br />
Only special diamond burs may be used.<br />
Porcelain shoulders must only be of minimal<br />
dimensions and must be resin-bonded.<br />
The framework must be at least 0.5–0.6 mm thick.<br />
Veneering<br />
All pellets can be veneered with Cercon ® <strong>ceram</strong> kiss.<br />
The surface must be clean.<br />
A stain fixation firing may be run to create the shade.<br />
The surface of the framework must shine after firing to<br />
ensure that the pellet and porcelain bond properly.<br />
The Cercon ® <strong>ceram</strong> kiss instructions must be<br />
adhered to.
Service 29<br />
Pressing and firing settings<br />
Pressing settings in a Cergo ® Press Furnace:<br />
Initial temp. Final temp. Heat-rate Hold-time Press time Pressure Vacuum<br />
100 g ring 700 940 60 20 10 5 cont<br />
200 g ring 700 940 60 20 10 5 cont<br />
Cercon ® Press<br />
Master<br />
700 940 60 40 20 5 cont<br />
Pressing settings in a Multimat ® Touch&Press Furnace:<br />
Initial temp. Final temp. Heat-rate Hold-time Press time Pressure Vacuum<br />
100 g ring 700 940 60 20 10 2,7 50 hPa<br />
200 g ring 700 940 60 20 10 2,7 50 hPa<br />
Cercon ® Press<br />
Master<br />
700 940 60 40 20 3,0 50 hPa<br />
Firing settings in Cergo ® Press and Multimat Touch&Press Furnaces:<br />
Predrying Predrying Closing Preheating Preheating Heat-rate Vacuum Vacuum Vacuum Final temp. Hold Hold<br />
°C min min °C min °C/min On °C Off °C °C V min min<br />
Staining technique<br />
Stain fixation firing* 135 2:00 2:00 450 0:00 55 Cont 450 700 700 – 1:00<br />
Glaze firing* 135 2:00 2:00 450 0:00 55 Off – – 800 – 1:00<br />
Veneering technique<br />
Dentine/Enamel* 135 2:00 3:00 450 3:00 55 Cont 450 830 830 – 1:30<br />
Glaze firing* 135 0:00 3:00 450 2:00 55 Off – – 800 – 1:00<br />
Add-on firing* 135 2:00 3:00 450 3:00 55 Cont 450 680 680 – 1:00<br />
* When firing bridgework with more than 5 units, the final temperature should be raised 5°C and for bridges with more than 10 units it should be raised 10°C.<br />
Shade combination table for <strong>press</strong>&smile pellets (stain and veneer techniques):<br />
A1 A2 A3 A3,5 A4 B1 B2 B3 B4 C1 C2 C3 C4 D2 D3 D4<br />
Blank (1) C C C C C C C C C C C C C C C C<br />
<strong>press</strong>&stain (2) U(W) R R R R U(W) U U(Y) Y U U U U U U U<br />
Body stain (3) 3 3 3 3 3 5 5 5 5 6 7 7 7 8 8 9<br />
Number orders 1 1 2 3 4 1 1–2 2 4 1 1 2 3 1 2 2<br />
<strong>press</strong>&veneer (2)* HV LV LV LV LV HV HV LV HV HV LV LV LV HV LV LV<br />
Body stain (3) 3 – 3 3 3 – 5 5 5 6 7 7 7 8 8 9<br />
Number orders 1 – 1 2 4 – 1 2 4 1 1 2 3 1 2 2<br />
These values are only approximate and are intended as guidelines only. The fired<br />
restorations may vary. The firing results depend on the performance of the<br />
particular furnace, its manufacturer and age. Therefore, the settings must be<br />
adjusted for every firing. We recommend running a test firing to check the<br />
furnace. Although we have written and checked all details carefully, we cannot<br />
guarantee them.<br />
(1) Blank: <strong>press</strong>&smile pellets must only be <strong>press</strong>ed onto Cercon ® base colored (C) blanks.<br />
(2) <strong>press</strong>&smile pellets (PS): W = White, U = Universal, R = Red, Y = Yellow, HV = High Value, LV = Low Value<br />
(3) These values are guidelines only. Body stains can always be used as required.<br />
* Further special shade effects can be created with body stains or porcelains.<br />
Shade combination table for <strong>press</strong>&smile V classic (veneering technique):<br />
A1 A2 A3 A3,5 A4 B1 B2 B3 B4 C1 C2 C3 C4 D2 D3 D4<br />
Blank* B B/C C C C B B/C C C B C C C C C C<br />
Veneering technique**(Dentine<br />
blank)<br />
A1 A2 A3 A3,5 A4 B1 B2 B3 B4 C1 C2 C3 C4 D2 D3 D4<br />
* Blank: B = Cercon ® base, C = Cercon ® base colored<br />
** Further special shade effects can be created with body stains or porcelains.
28151/0611/DB<br />
Stand/Last revision: 11/06<br />
For further information or to place an order, please visit:<br />
www.degudent.com<br />
www.cercon-smart-<strong>ceram</strong>ics.com<br />
Inhalt 30