Summit® WMScanner Summit® WMScanner ... - Extreme Networks
Summit® WMScanner Summit® WMScanner ... - Extreme Networks
Summit® WMScanner Summit® WMScanner ... - Extreme Networks
Create successful ePaper yourself
Turn your PDF publications into a flip-book with our unique Google optimized e-Paper software.
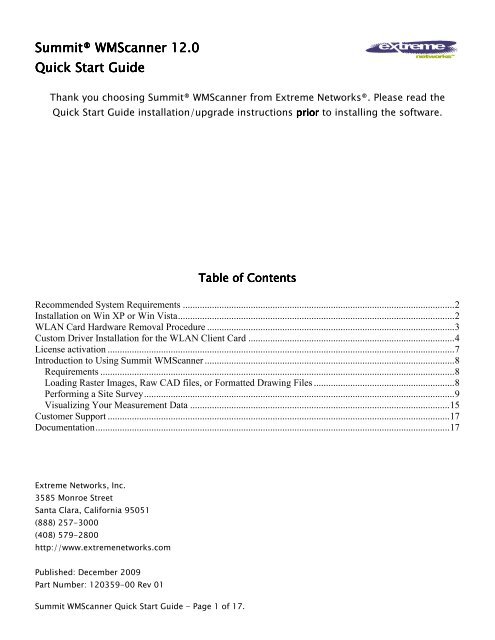
<strong>Summit®</strong> <strong>Summit®</strong> <strong>WMScanner</strong> <strong>WMScanner</strong> 12.0 2.0<br />
Quick Quick Start Start Guide<br />
Guide<br />
Thank you choosing <strong>Summit®</strong> <strong>WMScanner</strong> from <strong>Extreme</strong> <strong>Networks</strong>®. Please read the<br />
Quick Start Guide installation/upgrade instructions prior prior prior to installing the software.<br />
Summit <strong>WMScanner</strong> Quick Start Guide - Page 1 of 17.<br />
Table Table Table of of of Contents<br />
Contents<br />
Recommended System Requirements ................................................................................................................2<br />
Installation on Win XP or Win Vista..................................................................................................................2<br />
WLAN Card Hardware Removal Procedure ......................................................................................................3<br />
Custom Driver Installation for the WLAN Client Card .....................................................................................4<br />
License activation ...............................................................................................................................................7<br />
Introduction to Using Summit <strong>WMScanner</strong> .......................................................................................................8<br />
Requirements ..................................................................................................................................................8<br />
Loading Raster Images, Raw CAD files, or Formatted Drawing Files ..........................................................8<br />
Performing a Site Survey................................................................................................................................9<br />
Visualizing Your Measurement Data ...........................................................................................................15<br />
Customer Support .............................................................................................................................................17<br />
Documentation..................................................................................................................................................17<br />
<strong>Extreme</strong> <strong>Networks</strong>, Inc.<br />
3585 Monroe Street<br />
Santa Clara, California 95051<br />
(888) 257-3000<br />
(408) 579-2800<br />
http://www.extremenetworks.com<br />
Published: December 2009<br />
Part Number: 120359-00 Rev 01
Recommended System Requirements<br />
To effectively use this application, the following computer platform is recommended:<br />
• Intel® Pentium® 4 1.5 GHz or better (or equivalent)<br />
• Microsoft® Windows® XP (Professional, Home Edition and Tablet PC Edition) or Windows Vista<br />
• Microsoft Word® XP (Word 2002) or later (required for generating Reports)<br />
• 1 GB RAM (minimum)<br />
• 500 MB free disk space for installation<br />
• 1024x768 VGA with true color<br />
• Mouse, trackball or compatible pointing device with scroll wheel<br />
• Microsoft Internet Explorer 6.0 or later<br />
• CD-ROM drive<br />
Support Support for for Wireless Wireless Meas Measurement Meas urement via via RF RF Monitoring Monitoring Mode<br />
In order to enable data collection via RF Monitoring mode, you will need one of the WLAN client cards listed<br />
below with Summit <strong>WMScanner</strong>’s custom driver installed. The supported cards are:<br />
• Netgear RangeMax Dual Band Wireless-N USB a/b/g/n Adapter WNDA3100 v1<br />
• Ubiquity SR71 USB a/b/g/n Adapter<br />
• Netgear® ProSafe Dual Band a/b/g Wireless PC Card, Model WAG511 v2<br />
• Ubiquiti <strong>Networks</strong> SuperRange a/b/g Cardbus<br />
• Cisco® a/b/g Cardbus Adapter, Model AIR-CB21AG-A-K9<br />
• D-Link® RangeBooster N 650 b/g/n Notebook Adapter, Model DWA645<br />
• CACE Technologies AirPcap N a/b/g/n Cardbus<br />
• AirMagnet® C1060 a/b/g/n Cardbus Adapter<br />
Summit <strong>WMScanner</strong> Quick Start Guide - Page 2 of 17.<br />
Installation on Win XP or Win Vista<br />
Installing Summit <strong>WMScanner</strong> is much like installing any other Microsoft Windows software. However,<br />
Summit <strong>WMScanner</strong> uses electronic license control, so an extra activation step will be required.<br />
Note: Note: Note: You will need to uninstall any previous versions of Summit <strong>WMScanner</strong> prior to installing the<br />
new Summit <strong>WMScanner</strong>. As for your user data, they will be backed up to a directory called UserBackup UserBackup in<br />
the directory of the new installation of Summit <strong>WMScanner</strong> (the default location is C: C:\Program<br />
C: Program<br />
Files Files\Summit<strong>WMScanner</strong><br />
Files Summit<strong>WMScanner</strong><br />
Summit<strong>WMScanner</strong>\UserBackup<br />
Summit<strong>WMScanner</strong> UserBackup<br />
UserBackup).<br />
UserBackup
Preparation<br />
Preparation<br />
It is very important to perform the following preparatory steps to ensure your installation goes smoothly:<br />
• Administrative Administrative Privileges Privileges Are Are Required Required for for Install: Install: a user with local administrative privileges must<br />
install Summit <strong>WMScanner</strong>. Non-administrative users may use the software once it has been<br />
installed.<br />
• In Internet In ternet Explorer 6.0 .0 or or better better better is required to properly run Summit <strong>WMScanner</strong>.<br />
• Windows Windows Windows Service Service Packs: Packs: Your software will work best running with the most recent updates of<br />
Windows XP or Windows Vista. These upgrades are available through the Microsoft Windows Update<br />
web site.<br />
Installation Installation procedure<br />
procedure<br />
To install Summit <strong>WMScanner</strong>, please follow these steps in the order presented:<br />
1. Close any programs running within Windows before starting the installation process.<br />
2. Log on as ‘Administrator’ or as a user with administrative or power user privileges.<br />
3. Double-click the Summit <strong>WMScanner</strong> installation executable and choose a location for storing the<br />
temporary installation files. These files can be removed at a later date or kept for product repairs or<br />
reinstallations.<br />
4. Read the warnings and the license agreement. You must accept the license agreement to continue.<br />
5. To choose the destination folder where the program files will be stored on the hard drive, click the<br />
Configure button next to the product selection. We recommend you accept the default folder name.<br />
If you choose a hard drive other than the default C: drive, be sure to also type in a directory name;<br />
e.g. click on your D: drive and then type in \Program Files\Summit<strong>WMScanner</strong>\.<br />
6. Click Next to begin the installation process.<br />
7. When setup is complete, you are ready to run the software by going to the Windows Start Menu and<br />
selecting Programs > Summit <strong>WMScanner</strong>> Summit <strong>WMScanner</strong>.<br />
WLAN Card Hardware Removal Procedure<br />
IMPORTANT IMPORTANT NOTE NOTE: NOTE : You should only remove your WLAN card adapter from your computer using the<br />
following hardware removal process. Failure to follow this process could cause your computer to crash and<br />
loss of data.<br />
Step 1: First, close down or ensure that Summit <strong>WMScanner</strong> is not running<br />
Step 2: Double click the Safe Hardware Removal icon in your system tray:<br />
Step 3: Select your Wireless LAN Adapter from the Safely Remove Hardware dialog and choose Stop<br />
Step 4: Again select your adapter and select Ok to confirm you wish to remove the hardware (Note, this will<br />
not uninstall the driver. This process simply allows you to safely unplug the adapter from your computer)<br />
Summit <strong>WMScanner</strong> Quick Start Guide - Page 3 of 17.
Step 5: You may now remove the WLAN Adapter from your computer.<br />
Custom Driver Installation for the WLAN Client Card<br />
In order to enable data collection via RF Monitoring mode, you will need one of the WLAN client cards listed<br />
in the recommended system requirements with Summit <strong>WMScanner</strong>’s custom driver installed.<br />
IMPORANT IMPORANT NOTE: NOTE: NOTE: Do not install the card manufacturer’s driver. The installation of the custom WLAN driver<br />
may not work correctly if the manufacturer’s driver has been previously installed on your computer. If the<br />
manufacturer’s driver or other suitable driver has been previously installed on your computer, please<br />
uninstall the client card before proceeding.<br />
Step 1: Insert the network adapter into your computer’s PCMCIA slot or USB port.<br />
Step 2: If the Hardware Hardware Update Update Wizard Wizard dialog window appears, choose Cancel Cancel. Cancel<br />
Step 3: Run the DriverSetup.exe installer located in “Help\WLAN Drivers” located within your installation<br />
directory.<br />
Summit <strong>WMScanner</strong> Quick Start Guide - Page 4 of 17.
Step 4. Click Next Next to begin the driver installation process.<br />
Step 5. You must accept the license agreement before installing the driver. If you accept the agreement,<br />
check the radio button I I accept accept thi this thi s agreement agreement and click Next Next.<br />
Next<br />
Summit <strong>WMScanner</strong> Quick Start Guide - Page 5 of 17
Step 6. The wizard will begin searching for your new hardware.<br />
If you receive a warning message saying that the software you are installing has not passed Windows Logo<br />
testing, click Continue Continue Anyway<br />
Anyway<br />
Summit <strong>WMScanner</strong> Quick Start Guide - Page 6 of 17
Step 7. If the dialog indicates your hardware is ready to use, the installation was successful and the card is<br />
now ready for use with RF Monitoring mode measurements.<br />
If you encounter an error please contact <strong>Extreme</strong> <strong>Networks</strong> wireless software support team at<br />
support@extremenetworks.com.<br />
Summit <strong>WMScanner</strong> Quick Start Guide - Page 7 of 17<br />
License activation<br />
To obtain the Summit <strong>WMScanner</strong> software license key:<br />
1. Note the Summit <strong>WMScanner</strong> Serial/Voucher Number for the software. Summit <strong>WMScanner</strong> software<br />
is part of <strong>Extreme</strong> <strong>Networks</strong> Wireless Management Suite (WMS) software. It uses the same<br />
Serial/Voucher Number as the WMS. The WMS Serial/Voucher Number can be found on the product<br />
label located on the outside flap of the WMS CD sleeve.<br />
2. Note the MAC address of the PC on which this software would be installed.<br />
3. Navigate to the <strong>Extreme</strong> <strong>Networks</strong> License Server website at:<br />
www.extremenetworks.com/extreme/upgrade.htm<br />
4. Select the license for Summit <strong>WMScanner</strong>.<br />
5. Follow the instructions provided to generate and activate the license key.<br />
Note: If you have not already registered this product with <strong>Extreme</strong> <strong>Networks</strong>, you can register on the<br />
<strong>Extreme</strong> <strong>Networks</strong> website at: http://www.extremenetworks.com/go/productregistration.
Introduction to Using Summit <strong>WMScanner</strong><br />
Now that you have installed the software, you can begin measuring and visualizing your WiFi network’s<br />
performance. This Quick Start Guide provides a brief tutorial on using the software to perform a site survey<br />
of your facility and then analyze your WiFi network through various visualization modes. The following<br />
instructions provide a recommended workflow for doing site surveys and analysis using Summit<br />
<strong>WMScanner</strong>. For additional information about how to use Summit <strong>WMScanner</strong>, please refer to the online<br />
User Manual (Help Help menu menu > > User User Manual Manual). Manual<br />
Requirements<br />
Before proceeding with the site survey, you must first acquire a floor plan of the facility. In order to import<br />
the floor plan into Summit <strong>WMScanner</strong>, the floor plan needs to be in the following formats:<br />
• Raster images ( *.BMP, *.JPG, *.TIFF formats)<br />
• Raw facility CAD files (*.DWG and *.DXF formats)<br />
• Formatted facility drawing files (files that were created in Motorola EnterprisePlanner or LANPlanner®)<br />
Loading Raster Images, Raw CAD files, or Formatted Drawing Files<br />
Step 1: Select the File File menu > Open Open Project Project / / / Floor Floor Plan… Plan… command to access the Open Open Open Drawing Drawing dialog.<br />
Step 2: When the Open Open Drawin Drawing Drawin g dialog dialog opens, browse to your floor plan’s file and click Open Open. Open You will be<br />
asked whether you wish to save changes for the current drawing file. Click No No. No<br />
Step 3: A Warning Warning Warning dialog will pop up asking you whether the file you have opened is scaled or not. If you<br />
opened a raster image or a raw CAD drawing file, you will need to scale the drawing file. When performing<br />
a site survey, it is extremely important to use a scaled drawing file. Click Scale Scale Drawing Drawing and follow the<br />
onscreen instructions. You will be asked to select two points on the floor plan for which you know the<br />
distance and then enter the distance. If you opened a formatted drawing file created in EnterprisePlanner<br />
or LANPlanner, most likely it has already been scaled. If this is the case, check the box next to the This This file<br />
file<br />
Summit <strong>WMScanner</strong> Quick Start Guide - Page 8 of 17
has has already already been been scaled scaled option and then click Do Do Not Not Scale Scale. Scale<br />
Note Note: Note You can still choose to scale the<br />
formatted drawing file in order to ensure that it is scaled properly.<br />
Step 4: You should now see your facility in the main drawing window. You are now ready to perform a site<br />
survey.<br />
Performing a Site Survey<br />
Step 1: Select the Measurement Measurement Survey Survey menu > Record New Data command to begin taking measurements.<br />
Summit <strong>WMScanner</strong> Quick Start Guide - Page 9 of 17
Step 2: In the Configure Configure Real Real Time Time Measurement Measurement Run Run In Information<br />
In<br />
formation window, there are several options<br />
available. You can change the Measurement Run name, the location where the measurement run log file is<br />
saved, mobile receiver height, and marker color. Ensure that the WLAN WLAN Device Device option is selected from the<br />
Se Select Se lect Measurement Mode drop down menu before clicking Next Next. Next<br />
Step 3: Select RF RF Monitoring Monitoring in the Measurement Measurement Options Options window and click Next Next.<br />
Next<br />
Summit <strong>WMScanner</strong> Quick Start Guide - Page 10 of 17
Step 4: In the Configure Configure Real Real Time Time Measurement Measurement Run Run Information window, there are several options<br />
available. You can change the Measurement Run name, the location where the measurement run log file is<br />
saved, and what standards and channels to scan for.<br />
Step 5: The default survey option is to scan channels 1-11 on the 2.4 GHz band and channels 34-64, 149-<br />
165 on the 5 GHz band. If you need to change the default scan settings, click the Configure Configure Configure Scan Scan Settings<br />
Settings<br />
button. In the Configure Configure Scan Scan Scan Settings Settings Settings window, select the channels you wish to scan and make any desired<br />
changes to dwell times. Click OK OK and then click Next Next Next on the Configure Configure Real Real Real Time Time Measurement Measurement Run<br />
Run<br />
Information<br />
Information.<br />
Information<br />
Note: Note: We suggest that users select a dwell time of at least 150 ms for all channels scanned.<br />
Summit <strong>WMScanner</strong> Quick Start Guide - Page 11 of 17
Step 6: Select the desired WLAN adapter to perform the site survey. If no adapter is listed ensure you have<br />
installed the custom driver or contact <strong>Extreme</strong> <strong>Networks</strong> wireless software support team at<br />
support@extremenetworks.com.<br />
Step 7: A panel should now appear towards the bottom of the drawing window. If there are any APs in the<br />
vicinity, the list under the Visible Visible Access Access Points Points Points section will start populating. It is recommended that you let<br />
the Visible Visible Access Access Points Points list refresh at least 5 times before proceeding (this can be seen by periodic<br />
updates to the Visible Visible Access Access Points Points list).<br />
Note: Note: Note: If the Visible Visible Access Access Points Points list does not populate and you are certain that there are active APs nearby,<br />
click the Exit Exit button. You need to ensure that you are not associated to an AP under the Windows Wireless<br />
Network Connections. Also, if the laptop used to perform the site survey has an active internal wireless<br />
card, try disabling the internal card and then proceed with using Summit <strong>WMScanner</strong>.<br />
Summit <strong>WMScanner</strong> Quick Start Guide - Page 12 of 17
Step 8: After the list has been populated, you now have the option to specify which APs are authorized,<br />
unauthorized, or rogues. Authorized APs are APs that are part of your network. Unauthorized APs are APs<br />
that you are aware of but are not part of your network (i.e. APs that are part of a neighboring office<br />
network). APs classified as rogues are those APs that do not belong in the environment and should not be<br />
present. Now click on the Configure Configure Authorized Authorized List List button. In the Configure Configure Configure Authorized Authorized List List List dialog<br />
window, you will see that all the MAC addresses for visible APs will initially be under the Rogue Rogue MAC<br />
MAC<br />
Address Address section. Select the authorized MAC addresses that are part of your network and click the ‘
Step 9: You can begin taking measurements by clicking on points on the map that correspond to your<br />
current location. There are two options for recording data under the Mode Mode section. Single Single Marker Marker mode<br />
records a single measurement point on the drawing file when you left click a point on the map. Track Track Run<br />
mode records multiple points along a straight line which are collected and plotted between your start and<br />
end point clicks. Track runs are continuously drawn unless you switch back to Single Single Marker Marker Marker mode. If you<br />
wish to delete a measurement, click on the Undo Undo button. For further explanations of these two modes,<br />
please refer to Taking Taking Measurements Measurements in Chapter Chapter 3 3 – Measurement Measurement Surveys Surveys in the Summit Summit <strong>WMScanner</strong><br />
<strong>WMScanner</strong> <strong>WMScanner</strong> User<br />
Manual Manual. Manual<br />
Step 10: If you find that you are zoomed too far in or out, click on the icon. Left click and hold the<br />
mouse button while the cursor is in the drawing window and move the mouse up or down in order to zoom<br />
in or out. When you are done, right click in the drawing window and go to Exit Exit. Exit To pan the drawing file so<br />
that you can take a measurement in a certain location of the map, click on the icon. Left click and hold<br />
the mouse button with the cursor in the drawing window. Move the mouse in the direction you wish to pan<br />
to. To exit Pan Pan mode, right click in the drawing window and choose Exit Exit. Exit<br />
Step 8: When you are done taking measurements, click the Exit Exit button.<br />
Summit <strong>WMScanner</strong> Quick Start Guide - Page 14 of 17
Visualizing Your Measurement Data<br />
Step 1: Select the Measurement Measurement Survey menu > Visualize Visualize Survey Survey Data Data to bring up the heat map<br />
visualizations. If a Warning Warning Warning dialog box pops up, click OK OK and proceed. The Display Display Options Options window pane<br />
will appear to the left of the drawing window.<br />
Step 2: You should now see a heat map being displayed in the drawing window. To change the type of heat<br />
map being displayed, click on the pull down menu next to Map Map Map and choose from the list. For an<br />
explanation of what the different heat map visualizations mean, please refer to Visualizing Visualizing Survey Survey Data Data in<br />
Chapter Chapter 3 3 – Measurement Measurement Surveys Surveys in the Summit Summit WMSc <strong>WMScanner</strong><br />
WMSc anner User Manual Manual. Manual<br />
Note: Note: Note: If the Heat maps do not appear, the two possible reasons are 1) you are trying to visualize for the<br />
wrong Standard (a/n or b/g/n) or 2) no APs were found on the Standard Standard you were scanning for.<br />
Summit <strong>WMScanner</strong> Quick Start Guide - Page 15 of 17
Step 3: If you took measurements on the 802.11a/n standard in addition to 802.11b/g/n, click on the pull<br />
down tab next to Standard Standard and select 802.11a 802.11a/n<br />
802.11a 802.11a/n<br />
/n. /n The Heat map visualizations for the 802.11a/n standard<br />
should now appear.<br />
Step 4: Click Exit Exit to close the Display Display Options Options window pane.<br />
Summit <strong>WMScanner</strong> Quick Start Guide - Page 16 of 17
NOTE<br />
NOTE<br />
Customer Support<br />
Services can be purchased from <strong>Extreme</strong> <strong>Networks</strong> or through one of its channel partners. If you are an<br />
end-user who has purchased service through an <strong>Extreme</strong> <strong>Networks</strong> channel partner, please contact your<br />
partner first for support.<br />
<strong>Extreme</strong> <strong>Networks</strong> Technical Assistance Centers (TAC) provide 24x7x365 worldwide coverage. These<br />
centers are the focal point of contact for post-sales technical and network-related questions or issues.<br />
TAC will create a Service Request (SR) number and manage all aspects of the SR until it is resolved. For<br />
a complete guide to customer support, see the Technical Assistance Center User Guide at:<br />
http://www.extremenetworks.com/go/TACUserGuide<br />
The <strong>Extreme</strong> <strong>Networks</strong> eSupport website provides the latest information on <strong>Extreme</strong> <strong>Networks</strong><br />
products, including the latest Release Notes, troubleshooting, downloadable updates or patches as<br />
appropriate, and other useful information and resources. Directions for contacting the <strong>Extreme</strong><br />
<strong>Networks</strong> Technical Assistance Centers are also available from the eSupport website at:<br />
https://esupport.extremenetworks.com<br />
Documentation<br />
Check for the latest versions of documentation on the <strong>Extreme</strong> <strong>Networks</strong> documentation website at:<br />
http://www.extremenetworks.com/go/documentation<br />
©2009 <strong>Extreme</strong> <strong>Networks</strong>, Inc. All rights reserved.<br />
<strong>Extreme</strong> <strong>Networks</strong>, the <strong>Extreme</strong> <strong>Networks</strong> logo, Altitude and Summit are either trademarks or registered<br />
trademarks of <strong>Extreme</strong> <strong>Networks</strong>, Inc. in the United States and/or other countries.<br />
All other trademarks are property of their respective owners.<br />
Summit <strong>WMScanner</strong> Quick Start Guide - Page 17 of 17.


