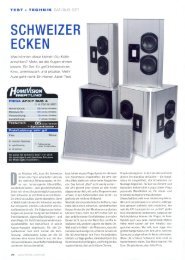
User Manual PIEGA AP 3, AS 3 - Piega SA
User Manual PIEGA AP 3, AS 3 - Piega SA
User Manual PIEGA AP 3, AS 3 - Piega SA

Create successful ePaper yourself
Turn your PDF publications into a flip-book with our unique Google optimized e-Paper software.
<strong>User</strong> <strong>Manual</strong><br />
<strong>PIEGA</strong> <strong>AP</strong> 3, <strong>AS</strong> 3<br />
Version 1.0
“Music. That‘s really the only important issue<br />
when it comes to loudspeakers....“<br />
In our view, the superior loudspeaker is the<br />
one that does not interfere. One that adds<br />
no sound of its own. That accurately and<br />
naturally conveys what was played in the<br />
concert or recording studio. Since 1986 we<br />
have been working to perfect this ideal – with<br />
a pioneering spirit, inventiveness and exacting<br />
craftsmanship. You will now be able to hear for<br />
yourself how far we have succeeded.<br />
By purchasing a loudspeaker from <strong>PIEGA</strong> you<br />
have expressed your trust in our company, for<br />
which we thank you very much. At the same<br />
2<br />
time we assure you that you have purchased a<br />
product that is based on twenty years of R & D,<br />
and which in terms of its design represents the<br />
state of the art. We are sure that you will gain<br />
much listening enjoyment from your new <strong>Piega</strong><br />
loudspeaker products.<br />
Although using the loudspeakers is very<br />
straightforward, we recommend that you read<br />
the contents of this user manual carefully. It<br />
will explain how to properly connect up your<br />
new <strong>PIEGA</strong> loudspeaker products and install<br />
them for optimum results. It also provides you<br />
with some useful information that will increase<br />
your understanding of loudspeakers. But don’t<br />
worry. Even apparently complicated details<br />
are explained very simply. On the last page<br />
of these instructions you will find our warranty<br />
conditions. Please also read these carefully just<br />
in case.<br />
We wish you an enjoyable read and above all<br />
much listening enjoyment with your new <strong>PIEGA</strong><br />
loudspeakers...!
Contents<br />
<strong>PIEGA</strong> <strong>AP</strong> 3, <strong>AS</strong> 3 <strong>User</strong> <strong>Manual</strong><br />
This user manual describes how to install and connect the <strong>PIEGA</strong> <strong>AP</strong> 3, <strong>AS</strong> 3 loudspeakers for a wide range of uses, and contains<br />
some useful information on operating, caring for and maintaining your loudspeakers. It also contains instructions for unpacking and<br />
setting up the loudspeakers.<br />
4 Precautions<br />
Before unpacking...<br />
5 Unpacking the Loudspeakers<br />
Instructions for unpacking...<br />
6 Uses<br />
Application and positioning options......<br />
7 On-Wall Installation<br />
Positioning and mounting instructions...<br />
8 In-Wall Installation<br />
Positioning and mounting instructions...<br />
9 Connecting the Loudspeakers<br />
Instructions for connecting the loudspeakers...<br />
10 Running in the Loudspeakers<br />
Tips for optimum results...<br />
11 Daily Use<br />
Care and maintenance...<br />
12 Warranty Conditions<br />
Service and warranty conditions...<br />
13 Mounting Aid<br />
Dimension drawings and pull-out drilling template<br />
Further information can be obtained from www.piega.ch<br />
<strong>PIEGA</strong> does not accept liability for any damage arising from installations based on the<br />
instructions of this user manual<br />
3
4<br />
Precautions<br />
<strong>PIEGA</strong> <strong>AP</strong> 3, <strong>AS</strong> 3 Before unpacking...<br />
Please read this user manual carefully and pay special attention to the following precautions and warnings. In your own interest, we<br />
advise you to strictly observe the following procedure for installing and operating your new <strong>PIEGA</strong> <strong>AP</strong> 3, <strong>AS</strong> 3 loudspeakers.<br />
0CONFORMS TO<br />
UL STD. 6500<br />
CERTIFIED TO<br />
CAN/C<strong>SA</strong> STD. E60065<br />
Warning:<br />
Warning:<br />
>Ensure without fail that your new <strong>PIEGA</strong> loudspeakers are<br />
mounted, positioned and connected exactly according to these<br />
instructions<br />
>The <strong>AP</strong> 3, <strong>AS</strong> 3 loudspeakers were only designed for use in dry<br />
residential environments within a temperature range of 10...40°C<br />
>The high quality loudspeaker chassis of <strong>PIEGA</strong> loudspeakers contain<br />
exceptionally strong magnets with magnetic fi elds that may impair the<br />
operation of other devices if the loudspeakers are not handled properly<br />
>Ensure that watches or other metallic objects do not get close to<br />
the loudspeakers. The strong magnetic fi elds may pull these into the<br />
diaphragms and destroy them<br />
>Keep items such as credit cards, electronic data storage media and<br />
similar objects away from the loudspeakers. The magnetic fi eld may<br />
cause irrecoverable loss of data<br />
The tweeter systems of <strong>PIEGA</strong> loudspeakers have extremely powerful magnets<br />
>Keep watches and metallic objects away from these tweeters without fail...!
Unpacking the loudspeakers<br />
<strong>PIEGA</strong> <strong>AP</strong> 3, <strong>AS</strong> 3 Instructions for unpacking...<br />
Special care was taken in the packaging of your new <strong>PIEGA</strong> quality products in order to ensure that your <strong>AP</strong> 3, <strong>AS</strong> 3 loudspeakers<br />
reach your living room safely and undamaged. In order to avoid any damage when unpacking the loudspeaker, follow closely the<br />
instructions below without fail.<br />
Attention:<br />
Procedure:<br />
>Work in pairs in order to avoid scratches during unpacking<br />
and mounting<br />
>Before unpacking, remove any jewelry such as watches, rings,<br />
bracelets etc. in order to avoid scratching the aluminum surface<br />
>Open the carton as shown in the fi gure and lift out the loudspeakers<br />
and protective cushions<br />
>Carefully remove the protective cushions and protective wrapping by<br />
carefully pulling it up over the loudspeakers<br />
>Check without fail that the delivery is complete, that the loudspeaker<br />
version supplied corresponds to your order and that the loudspeakers<br />
have not been damaged in transit<br />
>If this is the case, follow the instructions on the remaining pages or<br />
contact the dealer where you purchased the loudspeakers<br />
<strong>PIEGA</strong> loudspeakers have cabinets made from polished aluminum<br />
>When unpacking, handle carefully at all times...!<br />
5
Uses<br />
<strong>PIEGA</strong> <strong>AP</strong> 3, <strong>AS</strong> 3 Application and positioning options...<br />
Primarily developed for use as a wall loudspeaker for high quality stereo and home cinema applications in combination with a flat<br />
screen television, the <strong>PIEGA</strong> <strong>AP</strong> 3, <strong>AS</strong> 3 loudspeakers are also suitable for universal use such as ceiling loudspeakers in bars and<br />
restaurants, fitness studios etc.<br />
>Application examples of wall-mounted <strong>AP</strong> 3, <strong>AS</strong> 3 loudspeakers for stereo<br />
systems, as front and center channel loudspeakers, and on the ceiling as a<br />
room sound system<br />
Multi-channel system with on-wall<br />
mounting (e.g. Dolby 5.1)<br />
6<br />
Aligning the loudspeakers see page 16...!<br />
Stereo operation with in-wall<br />
mounting (stereo triangle)<br />
Room sound system with<br />
ceiling installations
On-Wall Installation<br />
<strong>PIEGA</strong> <strong>AP</strong> 3, <strong>AS</strong> 3 Positioning and mounting instructions...<br />
Thanks to their asymmetric design and well thought-out fixing concept, the <strong>AP</strong> 3, <strong>AS</strong> 3 loudspeakers can be used easily as wall,<br />
center or ceiling loudspeakers. Refer to the alignment instructions on page 16 and use the pull-out drilling template provided at the<br />
center of this user manual for mounting the wall and ceiling brackets.<br />
Mounting the wall bracket:<br />
>Depending on the application, mark the holes for the wall bracket<br />
horizontally or vertically, taking into account the optimum distances<br />
required (stereo triangle)<br />
>With concrete or brick walls, drill the holes with a 6 mm diameter and<br />
use the screw anchors and screws supplied<br />
>Only use suitable screws and screw anchors with wooden or<br />
plasterboard walls (not supplied with the delivery)<br />
Mounting the loudspeaker:<br />
>Ensure without fail that the plastic washers are fitted inside the two<br />
arms before inserting the loudspeakers<br />
>Remove the two fixing screws on the upper and lower side<br />
of the loudspeakers<br />
>Position the loudspeaker carefully between to two arms of<br />
the wall bracket<br />
>Use the previously removed fixing screws supplied and insert<br />
them from the outside<br />
>Align the loudspeakers as required and tighten the screws evenly<br />
>Connect the loudspeaker cables using the loudspeaker terminals<br />
provided (see page 9)<br />
7
The <strong>AP</strong> 3, <strong>AS</strong> 3 loudspeakers can be flush mounted in a wall using a special mounting bracket so that only the loudspeaker front and<br />
bracket frame are visible after mounting. This space saving mounting method allows you to enjoy the benefits of both quality sound<br />
and a discrete design (refer to the alignment instructions on page 16).<br />
8<br />
In-Wall Installation<br />
<strong>PIEGA</strong> <strong>AP</strong> 3, <strong>AS</strong> 3 Positioning and mounting instructions...<br />
Note:<br />
Mounting the flush-mounting frame:<br />
>With concrete walls, the flush-mounting bracket must be mounted in<br />
the recess at the required position without the loudspeaker (!) before<br />
the wall is completed, i.e. when the wall is being built<br />
>Bear in mind that empty conduits for the loudspeaker cables and<br />
power supply cables (only for the active versions) must also be<br />
provided in the recess - The holes required for this must be provided by<br />
the customer...!<br />
>The loudspeakers and the flush-mounting frame have an asymmetric<br />
design, and so left/right alignment must be ensured<br />
(Alignment instructions see page 16)<br />
Fitting the loudspeakers in the flush-mounting frames:<br />
>The loudspeaker should only be mounted and connected once the<br />
building work is fully completed<br />
>First of all, connect the loudspeaker cables to the terminals provided<br />
(see the next page) and then mount the loudspeakers using the two<br />
screws (see drawing)<br />
> Do not mount the front panel until the end when the loudspeakers are<br />
completely installed and connected<br />
Consult a specialist, i.e. the person responsible<br />
from the building company with regard to the mounting without fail...!
Connecting the Loudspeakers<br />
<strong>PIEGA</strong> <strong>AP</strong> 3, <strong>AS</strong> 3 Instructions for connecting the loudspeakers...<br />
The loudspeaker is provided with the terminal for single wiring applications. This is used for connecting standard loudspeaker cables<br />
with banana plugs. Ideally however, <strong>PIEGA</strong> <strong>AP</strong>3, <strong>AS</strong> 3 loudspeakers are connected with the OPUS 3 loudspeaker cable which was<br />
specially developed for <strong>PIEGA</strong> loudspeakers with ribbon tweeters, and is available as an accessory from specialist dealers.<br />
Hinweis:<br />
Connection:<br />
>Ensure that the electronic components are switched off before making<br />
the connection<br />
>The <strong>AP</strong> 3, <strong>AS</strong> 3 loudspeakers must only be connected to electronic<br />
components with the amplifier outputs recommended by <strong>PIEGA</strong><br />
>Ensure without fail the recommended amplifier output of 20 - 200 W<br />
(4 Ohm) - If you are not sure that the connection is correct, contact<br />
your specialist dealer<br />
>The loudspeakers have an impedance of 4 Ohms and can therefore<br />
be connected to any standard amplifier - Contact your specialist dealer<br />
concerning this<br />
>Connect the <strong>PIEGA</strong> <strong>AP</strong> 3, <strong>AS</strong> 3 cables to your amplifier or receiver<br />
as shown in the figure. Ideally, use the OPUS 3 loudspeaker cable<br />
(optional) with banana plugs or standard loudspeaker cables with a lead<br />
Active variant:<br />
>For <strong>AP</strong> 3, <strong>AS</strong> 3 loudspeakers with the active module option, refer to the<br />
separate user manual<br />
8 or 16 Ohm amplifiers supply at 4 Ohms twice or four times<br />
the output, which considerably improves the output characteristics...!<br />
9
Running in the Loudspeakers<br />
10<br />
<strong>PIEGA</strong> <strong>AP</strong> 3, <strong>AS</strong> 3 Tips for optimum results...<br />
As a loudspeaker is basically a mechanical transducer consisting of several different components, the individual elements must be<br />
run in during the initial weeks. This will ensure that the sound quality potential of your loudspeakers is fully utilized. You will definitely<br />
notice the resulting improvement in sound.<br />
Note:<br />
Recommendations:<br />
>In the first days and weeks listen only at normal volume<br />
>Avoid very high volume levels during initial phase<br />
>Listen to a wide range of programme material<br />
Limit range:<br />
>The recommended amplifier output is 20-200 Watt. It must be ensured<br />
that the volume must only be turned up far enough for the ear to register<br />
an overload<br />
>If the loudspeaker chassis become damaged after a long period of<br />
overload this can be detected beyond any doubt by <strong>PIEGA</strong> service<br />
technicians - In these cases, <strong>PIEGA</strong> is not liable for any warranty claims<br />
Excessively loud music can damage your health<br />
>Listen to music at an acceptable volume level for the sake of your health...!
Daily Use<br />
<strong>PIEGA</strong> <strong>AP</strong> 3, <strong>AS</strong> 3 Care and maintenance...<br />
From development to production, right down to quality testing, <strong>PIEGA</strong> only uses materials and components of the highest quality.<br />
Your new <strong>PIEGA</strong> loudspeakers are provided with a polished aluminum surface. Although this material is not very sensitive, it should<br />
be treated with due care.<br />
Warnung:<br />
Care instructions:<br />
>Clean the surfaces of the <strong>AP</strong> 3, <strong>AS</strong> 3 loudspeakers<br />
with a soft, fl uff-free cloth<br />
>If necessary use a soft cloth sprayed with a<br />
little mild window cleaner<br />
>Never use alcohol or other solvents to clean<br />
your <strong>PIEGA</strong> loudspeakers<br />
>Never use abrasive detergents or any agents<br />
with abrasive ingredients<br />
Warnings:<br />
><strong>PIEGA</strong> LDR-ribbon tweeters are provided with extremely thin foil<br />
membranes that should not be touched or cleaned<br />
>Do not remove the front cover and keep the loudspeakers away from<br />
children in particular<br />
Do not touch the ribbon tweeters under any circumstances<br />
>Touching the ribbon tweeters will unavoidably damage the membrane foil...!<br />
11
<strong>PIEGA</strong> <strong>SA</strong><br />
Bahnhofstrasse 29<br />
CH-8810 Horgen, Switzerland<br />
Warranty Conditions<br />
The warranty is limited to six years on our loudspeakers and three years on our electronics in accordance with the conditions stated<br />
below. Read through the service and warranty conditions carefully, especially the warnings concerning the purchase of <strong>PIEGA</strong><br />
loudspeakers from unauthorized dealers.<br />
12<br />
12<br />
<strong>PIEGA</strong> <strong>AP</strong> 3, <strong>AS</strong> 3 Service- and warranty conditions<br />
Warranty conditions<br />
Tel.: +41 44 725 90 42<br />
Fax: +41 44 725 91 92<br />
www.piega.ch mail@piega.ch<br />
1. Every <strong>Piega</strong> device leaves the factory in perfect condition. If any manufacturing and/or material defects are<br />
found during normal use of the device, we warrant to repair the device with free parts and labor during the first<br />
six years from the date of purchase.<br />
2. The registration card for the device must be sent to <strong>Piega</strong> within six weeks of purchase.<br />
3. The product must have been purchased at an authorized <strong>Piega</strong> dealer.<br />
4. The warranty will not be applicable if any repair is carried out by a person or a workshop that is not authorized<br />
to do this by <strong>Piega</strong>.<br />
5. If it is necessary for a device or part of it to be sent to <strong>Piega</strong> or an approved <strong>Piega</strong> workshop, the sender is<br />
responsible for paying all transport costs in advance. The original packaging must be used for sending the<br />
complete device.<br />
6. The warranty will not be applicable if the serial number of the device has been modified, removed or made<br />
illegible. It will also not apply if the device is not connected properly or not treated with due care. The warranty<br />
will also not be applicable if the device was modified or repaired in any way that in our view has altered the<br />
correct functioning of the device.<br />
7. <strong>Piega</strong> shall not be liable for the consequences of any damage.<br />
<strong>PIEGA</strong> Loudspeaker products from unauthorized dealers<br />
Subject to modification, in particular technical modifications<br />
All specifications without guarantee - All rights reserved<br />
The official <strong>PIEGA</strong> warranty becomes invalid if a <strong>PIEGA</strong> loudspeaker product was purchased from an unauthorized dealer<br />
and is therefore a gray market product, or if the original serial number has been intentionally removed, replaced or<br />
made illegible. Should you have any doubt that the dealer you have selected is an officially authorized <strong>PIEGA</strong> dealer, we<br />
recommend that you contact us or the <strong>PIEGA</strong> sales organization in your country without fail. Please note the <strong>PIEGA</strong> sales<br />
policy statement at www.piega.ch<br />
© Copyright 2005 by <strong>PIEGA</strong> <strong>SA</strong>, Switzerland<br />
Design by <strong>Piega</strong> - All rights reserved<br />
v1.0 540718
Mounting Aid<br />
<strong>PIEGA</strong> <strong>AP</strong> 3, <strong>AS</strong> 3 On-Wall, In-Wall<br />
Links - Left<br />
Flachbildschirm - Flatscreen<br />
Center - Centerchannel<br />
Rechts - Right<br />
13
Aufputz<br />
On-Wall<br />
Unterputz<br />
In-Wall<br />
14<br />
302 mm<br />
ø 6 mm<br />
460 mm<br />
ø 180 mm<br />
460 mm<br />
302 mm<br />
L R<br />
!
114 mm<br />
ø 180 mm<br />
ø 6 mm ø 6 mm<br />
Zu beachten:<br />
>Die Einbauhalterungen werden ohne Löcher für die<br />
Lautsprecherkabel und Stromanschlüsse (nur bei Aktiv-<br />
Versionen erforderlich), bzw. deren Leerrohre ausgeliefert - Die<br />
dafür notwendigen Bohrungen müssen bauseits vorgenommen<br />
werden...!<br />
Please note:<br />
!<br />
>The In-Wall mounting brackets come without the holes for the<br />
loudspeaker cables and power supply cables (required for active<br />
versions only), resp. its tubes - The holes required for this must<br />
be provided by the customer...!<br />
15
Frontlautsprecher<br />
Front speakers<br />
Hochtöner<br />
Tweeter<br />
Centerlautsprecher<br />
Centerchannel speakers<br />
16<br />
Flachbildschirm<br />
Flatscreen<br />
Hochtöner<br />
Tweeter<br />
Flachbildschirm<br />
Flatscreen<br />
Hochtöner<br />
Tweeter<br />
Deckenlautsprecher<br />
Ceiling speakers<br />
Hochtöner<br />
Tweeter<br />
Hochtöner<br />
Tweeter
Notes<br />
<strong>PIEGA</strong> <strong>AP</strong> 3, <strong>AS</strong> 3
<strong>PIEGA</strong> <strong>SA</strong><br />
Bahnhofstrasse 29<br />
CH-8810 Horgen, Switzerland<br />
0CONFORMS TO<br />
UL STD. 6500<br />
CERTIFIED TO<br />
CAN/C<strong>SA</strong> STD. E60065<br />
Tel.: +41 44 725 90 42<br />
Fax: +41 44 725 91 92<br />
www.piega.ch mail@piega.ch<br />
Subject to modification, in particular technical modifications<br />
All specifications without guarantee - All rights reserved