Vol 66, No. 4 - International Technology and Engineering Educators ...
Vol 66, No. 4 - International Technology and Engineering Educators ...
Vol 66, No. 4 - International Technology and Engineering Educators ...

Create successful ePaper yourself
Turn your PDF publications into a flip-book with our unique Google optimized e-Paper software.
creativity towards underst<strong>and</strong>ing the interactions between<br />
the bond strengths, the coiling of the DNA, <strong>and</strong> the different<br />
base pair matchups of the DNA. Students will have to<br />
utilize their creativity, critical thinking, problem solving,<br />
<strong>and</strong> analytical skills when designing <strong>and</strong> constructing their<br />
own DNA. It is recommended that students do this activity<br />
individually.<br />
Materials<br />
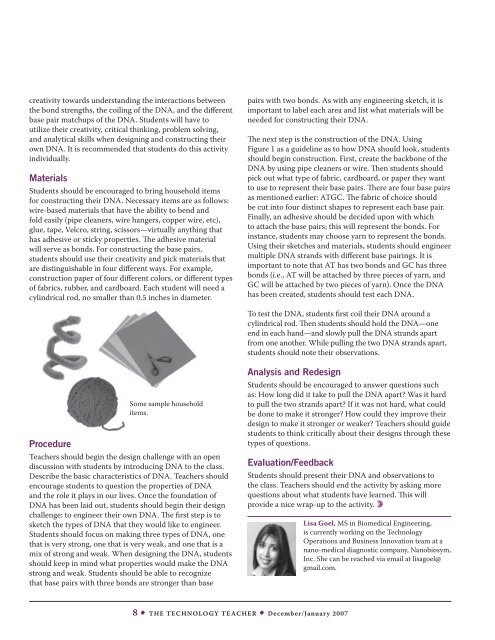
Students should be encouraged to bring household items<br />
for constructing their DNA. Necessary items are as follows:<br />
wire-based materials that have the ability to bend <strong>and</strong><br />
fold easily (pipe cleaners, wire hangers, copper wire, etc),<br />
glue, tape, Velcro, string, scissors—virtually anything that<br />
has adhesive or sticky properties. The adhesive material<br />
will serve as bonds. For constructing the base pairs,<br />
students should use their creativity <strong>and</strong> pick materials that<br />
are distinguishable in four different ways. For example,<br />
construction paper of four different colors, or different types<br />
of fabrics, rubber, <strong>and</strong> cardboard. Each student will need a<br />
cylindrical rod, no smaller than 0.5 inches in diameter.<br />
pairs with two bonds. As with any engineering sketch, it is<br />
important to label each area <strong>and</strong> list what materials will be<br />
needed for constructing their DNA.<br />
The next step is the construction of the DNA. Using<br />
Figure 1 as a guideline as to how DNA should look, students<br />
should begin construction. First, create the backbone of the<br />
DNA by using pipe cleaners or wire. Then students should<br />
pick out what type of fabric, cardboard, or paper they want<br />
to use to represent their base pairs. There are four base pairs<br />
as mentioned earlier: ATGC. The fabric of choice should<br />
be cut into four distinct shapes to represent each base pair.<br />
Finally, an adhesive should be decided upon with which<br />
to attach the base pairs; this will represent the bonds. For<br />
instance, students may choose yarn to represent the bonds.<br />
Using their sketches <strong>and</strong> materials, students should engineer<br />
multiple DNA str<strong>and</strong>s with different base pairings. It is<br />
important to note that AT has two bonds <strong>and</strong> GC has three<br />
bonds (i.e., AT will be attached by three pieces of yarn, <strong>and</strong><br />
GC will be attached by two pieces of yarn). Once the DNA<br />
has been created, students should test each DNA.<br />
To test the DNA, students first coil their DNA around a<br />
cylindrical rod. Then students should hold the DNA—one<br />
end in each h<strong>and</strong>—<strong>and</strong> slowly pull the DNA str<strong>and</strong>s apart<br />
from one another. While pulling the two DNA str<strong>and</strong>s apart,<br />
students should note their observations.<br />
Procedure<br />
Some sample household<br />
items.<br />
Teachers should begin the design challenge with an open<br />
discussion with students by introducing DNA to the class.<br />
Describe the basic characteristics of DNA. Teachers should<br />
encourage students to question the properties of DNA<br />
<strong>and</strong> the role it plays in our lives. Once the foundation of<br />
DNA has been laid out, students should begin their design<br />
challenge: to engineer their own DNA. The first step is to<br />
sketch the types of DNA that they would like to engineer.<br />
Students should focus on making three types of DNA, one<br />
that is very strong, one that is very weak, <strong>and</strong> one that is a<br />
mix of strong <strong>and</strong> weak. When designing the DNA, students<br />
should keep in mind what properties would make the DNA<br />
strong <strong>and</strong> weak. Students should be able to recognize<br />
that base pairs with three bonds are stronger than base<br />
Analysis <strong>and</strong> Redesign<br />
Students should be encouraged to answer questions such<br />
as: How long did it take to pull the DNA apart Was it hard<br />
to pull the two str<strong>and</strong>s apart If it was not hard, what could<br />
be done to make it stronger How could they improve their<br />
design to make it stronger or weaker Teachers should guide<br />
students to think critically about their designs through these<br />
types of questions.<br />
Evaluation/Feedback<br />
Students should present their DNA <strong>and</strong> observations to<br />
the class. Teachers should end the activity by asking more<br />
questions about what students have learned. This will<br />
provide a nice wrap-up to the activity.<br />
Lisa Goel, MS in Biomedical <strong>Engineering</strong>,<br />
is currently working on the <strong>Technology</strong><br />
Operations <strong>and</strong> Business Innovation team at a<br />
nano-medical diagnostic company, Nanobiosym,<br />
Inc. She can be reached via email at lisagoel@<br />
gmail.com.<br />
• The <strong>Technology</strong> Teacher • December/January 2007