
Create successful ePaper yourself
Turn your PDF publications into a flip-book with our unique Google optimized e-Paper software.
General Info<br />
MIXING<br />
The following tips are designed to facilitate the process of<br />
working with <strong>Loctite</strong> ® repair compounds under a variety<br />
of conditions.<br />
Mixing. Thorough mixing of epoxies, in<br />
proper ratio, is critical to the performance<br />
of the material. Whenever possible, the<br />
complete container should be mixed at<br />
one time. If the material is to be mixed in<br />
separate batches, the user must be<br />
careful to adhere to the mix ratios which<br />
appear on the product label.<br />
The material is mixed by adding hardener<br />
to resin. The mixing process is complete<br />
when the product is free from streaks or<br />
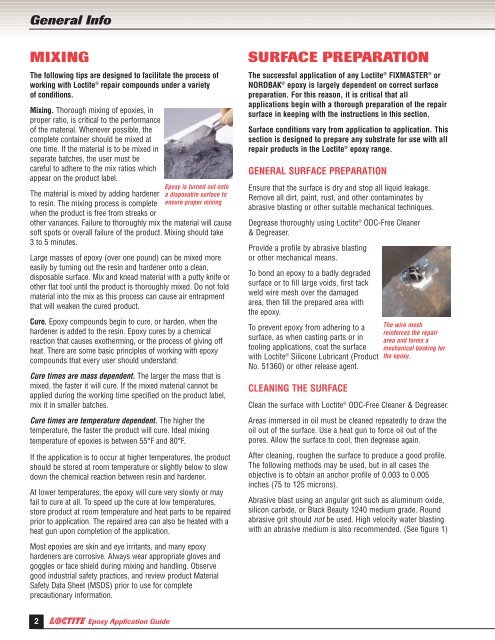
<strong>Epoxy</strong> is turned out onto<br />
a disposable surface to<br />
ensure proper mixing<br />
other variances. Failure to thoroughly mix the material will cause<br />
soft spots or overall failure of the product. Mixing should take<br />
3 to 5 minutes.<br />
Large masses of epoxy (over one pound) can be mixed more<br />
easily by turning out the resin and hardener onto a clean,<br />
disposable surface. Mix and knead material with a putty knife or<br />
other flat tool until the product is thoroughly mixed. Do not fold<br />
material into the mix as this process can cause air entrapment<br />
that will weaken the cured product.<br />
Cure. <strong>Epoxy</strong> compounds begin to cure, or harden, when the<br />
hardener is added to the resin. <strong>Epoxy</strong> cures by a chemical<br />
reaction that causes exotherming, or the process of giving off<br />
heat. There are some basic principles of working with epoxy<br />
compounds that every user should understand:<br />
Cure times are mass dependent. The larger the mass that is<br />
mixed, the faster it will cure. If the mixed material cannot be<br />
applied during the working time specified on the product label,<br />
mix it in smaller batches.<br />
Cure times are temperature dependent. The higher the<br />
temperature, the faster the product will cure. Ideal mixing<br />
temperature of epoxies is between 55°F and 80°F.<br />
If the application is to occur at higher temperatures, the product<br />
should be stored at room temperature or slightly below to slow<br />
down the chemical reaction between resin and hardener.<br />
At lower temperatures, the epoxy will cure very slowly or may<br />
fail to cure at all. To speed up the cure at low temperatures,<br />
store product at room temperature and heat parts to be repaired<br />
prior to application. The repaired area can also be heated with a<br />
heat gun upon completion of the application.<br />
Most epoxies are skin and eye irritants, and many epoxy<br />
hardeners are corrosive. Always wear appropriate gloves and<br />
goggles or face shield during mixing and handling. Observe<br />
good industrial safety practices, and review product Material<br />
Safety Data Sheet (MSDS) prior to use for complete<br />
precautionary information.<br />
SURFACE PREPARATION<br />
The successful application of any <strong>Loctite</strong> ® FIXMASTER ® or<br />
NORDBAK ® epoxy is largely dependent on correct surface<br />
preparation. For this reason, it is critical that all<br />
applications begin with a thorough preparation of the repair<br />
surface in keeping with the instructions in this section.<br />
Surface conditions vary from application to application. This<br />
section is designed to prepare any substrate for use with all<br />
repair products in the <strong>Loctite</strong> ® epoxy range.<br />
GENERAL SURFACE PREPARATION<br />
Ensure that the surface is dry and stop all liquid leakage.<br />
Remove all dirt, paint, rust, and other contaminates by<br />
abrasive blasting or other suitable mechanical techniques.<br />
Degrease thoroughly using <strong>Loctite</strong> ® ODC-Free Cleaner<br />
& Degreaser.<br />
Provide a profile by abrasive blasting<br />
or other mechanical means.<br />
To bond an epoxy to a badly degraded<br />
surface or to fill large voids, first tack<br />
weld wire mesh over the damaged<br />
area, then fill the prepared area with<br />
the epoxy.<br />
To prevent epoxy from adhering to a<br />
surface, as when casting parts or in<br />
tooling applications, coat the surface<br />
with <strong>Loctite</strong> ® Silicone Lubricant (Product<br />
No. 51360) or other release agent.<br />
CLEANING THE SURFACE<br />
The wire mesh<br />
reinforces the repair<br />
area and forms a<br />
mechanical backing for<br />
the epoxy.<br />
Clean the surface with <strong>Loctite</strong> ® ODC-Free Cleaner & Degreaser.<br />
Areas immersed in oil must be cleaned repeatedly to draw the<br />
oil out of the surface. Use a heat gun to force oil out of the<br />
pores. Allow the surface to cool, then degrease again.<br />
After cleaning, roughen the surface to produce a good profile.<br />
The following methods may be used, but in all cases the<br />
objective is to obtain an anchor profile of 0.003 to 0.005<br />
inches (75 to 125 microns).<br />
Abrasive blast using an angular grit such as aluminum oxide,<br />
silicon carbide, or Black Beauty 1240 medium grade. Round<br />
abrasive grit should not be used. High velocity water blasting<br />
with an abrasive medium is also recommended. (See figure 1)<br />
2 <strong>Epoxy</strong> <strong>Application</strong> <strong>Guide</strong>