Create successful ePaper yourself
Turn your PDF publications into a flip-book with our unique Google optimized e-Paper software.
General Info<br />
Stop all leakage or seepage by:<br />
¥ Turning off the water flow.<br />
¥ Fitting a wooden peg or sheet metal screw.<br />
¥ Stuffing with cork, wax, rags, or any other suitable<br />
material. (See figure 3)<br />
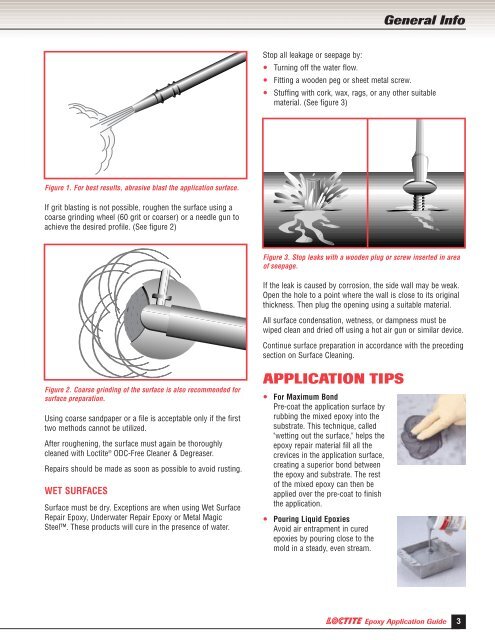
Figure 1. For best results, abrasive blast the application surface.<br />
If grit blasting is not possible, roughen the surface using a<br />
coarse grinding wheel (60 grit or coarser) or a needle gun to<br />
achieve the desired profile. (See figure 2)<br />
Figure 3. Stop leaks with a wooden plug or screw inserted in area<br />
of seepage.<br />
If the leak is caused by corrosion, the side wall may be weak.<br />
Open the hole to a point where the wall is close to its original<br />
thickness. Then plug the opening using a suitable material.<br />
All surface condensation, wetness, or dampness must be<br />
wiped clean and dried off using a hot air gun or similar device.<br />
Continue surface preparation in accordance with the preceding<br />
section on Surface Cleaning.<br />
Figure 2. Coarse grinding of the surface is also recommended for<br />
surface preparation.<br />
Using coarse sandpaper or a file is acceptable only if the first<br />
two methods cannot be utilized.<br />
After roughening, the surface must again be thoroughly<br />
cleaned with <strong>Loctite</strong> ® ODC-Free Cleaner & Degreaser.<br />
Repairs should be made as soon as possible to avoid rusting.<br />
WET SURFACES<br />
Surface must be dry. Exceptions are when using Wet Surface<br />
Repair <strong>Epoxy</strong>, Underwater Repair <strong>Epoxy</strong> or Metal Magic<br />
Steel. These products will cure in the presence of water.<br />
APPLICATION TIPS<br />
¥ For Maximum Bond<br />
Pre-coat the application surface by<br />
rubbing the mixed epoxy into the<br />
substrate. This technique, called<br />
"wetting out the surface," helps the<br />
epoxy repair material fill all the<br />
crevices in the application surface,<br />
creating a superior bond between<br />
the epoxy and substrate. The rest<br />
of the mixed epoxy can then be<br />
applied over the pre-coat to finish<br />
the application.<br />
¥ Pouring Liquid Epoxies<br />
Avoid air entrapment in cured<br />
epoxies by pouring close to the<br />
mold in a steady, even stream.<br />
<strong>Epoxy</strong> <strong>Application</strong> <strong>Guide</strong><br />
3


