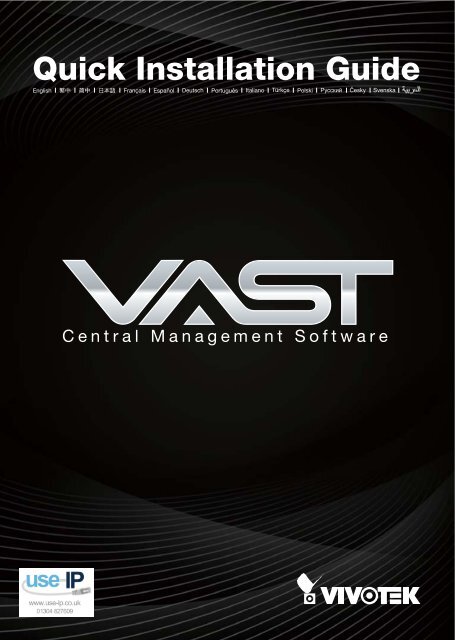
Vivotek VAST Quick Installation Guide - Use-IP
Vivotek VAST Quick Installation Guide - Use-IP
Vivotek VAST Quick Installation Guide - Use-IP

Create successful ePaper yourself
Turn your PDF publications into a flip-book with our unique Google optimized e-Paper software.
<strong>Quick</strong> <strong>Installation</strong> <strong>Guide</strong><br />
English Français Español Deutsch Português Italiano Türkçe Polski Русский Česky Svenska<br />
Central Management Software
Package Contents<br />
English<br />
Software CD <strong>Quick</strong> <strong>Installation</strong> <strong>Guide</strong> Key Dongle<br />
Table of Contents<br />
Getting Started 2<br />
Minimum System Requirements 2<br />
<strong>VAST</strong> <strong>Installation</strong> 3<br />
Installing the <strong>VAST</strong> Software 3<br />
<strong>VAST</strong> LiveClient Configuration 5<br />
Activating <strong>VAST</strong> LiveClient 5<br />
<strong>VAST</strong> LiveClient <strong>Use</strong>r Interface 5<br />
How to Add Devices 6<br />
How to Add Sub-stations 7<br />
How to Add <strong>Use</strong>r Accounts 9<br />
<strong>VAST</strong> Playback Configuration 10<br />
Activating <strong>VAST</strong> Playback 10<br />
<strong>VAST</strong> Playback <strong>Use</strong>r Interface 10<br />
How to View Recorded Video 11<br />
EN - 1
This quick installation guide briefly explains the installation procedure as well as<br />
some basic configurations of VIVOTEK <strong>VAST</strong> central management software. For<br />
further setup and detailed feature descriptions, please refer to the user's manual on<br />
the software CD.<br />
Getting Started<br />
Minimum System Requirements<br />
Before installing the <strong>VAST</strong> software, make sure your system meets the following<br />
recommended minimum hardware requirements<br />
Server<br />
Operating System<br />
Windows Server 2000, 2003, 2008 / Windows XP Professional (32<br />
and 64 bit), Windows Vista Business (32 and 64 bit), Windows 7<br />
Channels Below 32 channels Above 32 channels<br />
CPU<br />
Intel Core 2 Duo E6400<br />
Core 2 Quad Q6600<br />
213GHz or above<br />
24GHz or above<br />
RAM 2 GB or above 3GB or above<br />
Network Interface Card Ethernet, 1 Gbit recommended<br />
Graphics Adapter AGP or PCI-Express, minimum 1024×768, 16 bit colors<br />
Hard Disk Type<br />
ATA-100, SATA, SCSI, SAS (7200 rpm or faster) in NTFS format<br />
Hard Disk Space 750 GB free<br />
Server, LiveClient, and Playback<br />
Windows Server 2000, 2003, 2008 / Windows XP Professional (32 and 64<br />
Operating System<br />
bit), Windows Vista Business (32 and 64 bit), Windows 7<br />
Channels Below 16 channels 16 ~ 32 channels 32 ~ 40 channels Above 40 channels<br />
CPU<br />
Core 2 Duo E6400<br />
213GHz or above<br />
Core 2 Duo E8600<br />
333GHz or above<br />
Core 2 Quad Q6600<br />
24GHz or above<br />
Core i7<br />
RAM 2 GB or above 3GB or above 4GB or above<br />
Network Interface<br />
Ethernet, 1Gbit recommended<br />
Card<br />
Graphics Adapter<br />
AGP or PCI-Express, minimum 1024×768, 16 bit colors<br />
Minimum 128MB Video RAM, 512MB recommended<br />
Hard Disk Type ATA-100, SATA, SCSI, SAS (7200 rpm or faster) in NTFS format<br />
Hard Disk Space 750 GB free<br />
The required hard disk space will depend on the number of network cameras and recording group<br />
settings Please add more hard disks if you want to extend the system<br />
EN - 2
<strong>VAST</strong> <strong>Installation</strong><br />
Installing the <strong>VAST</strong> Software<br />
1 Run <strong>VAST</strong>_Setup.exe on your computer, and specify a location to install the program<br />
English<br />
2 Select the items you want to install, then click Next to continue<br />
Server application<br />
Client applications<br />
3 Assign a username and password for the <strong>VAST</strong> Server<br />
4 Install a database on your server There are two options--PostgreSQL (82 version or<br />
above) or SQL server (2005 express version or above). In order to avoid conflicts among<br />
different databases, we suggest you remove the original database from your host Then<br />
follow the instruction below to install PostgreSQL or SQL server<br />
EN - 3
a Select PostgreSQL or SQL Server from the drop-down list and assign a password<br />
<strong>VAST</strong> server will by default store the recorded media file under c:\Recording. Click<br />
Browse to change the path if you plan to store the data under another path Then<br />
click Next to continue<br />
PostgreSQL<br />
b If you do not have PostgreSQL, select<br />
the first option to begin the installation.<br />
If you already have PostgreSQL<br />
installed on your host, select the<br />
second option to enter the related<br />
information<br />
SQL Server<br />
b If you do not have SQL server,<br />
select the first option to begin the<br />
installation If you already have SQL<br />
server installed on your host, select<br />
Windows authentification or SQL Server<br />
authentification.<br />
c Wait for the installation process to complete, then click Close to exit the installation<br />
program<br />
EN - 4
<strong>VAST</strong> LiveClient Configuration<br />
Activating <strong>VAST</strong> LiveClient<br />
1 After installation, run the <strong>VAST</strong> LiveClient program<br />
2 Enter the <strong>IP</strong> Address, <strong>Use</strong>r Name, Password and Communication Port of the <strong>VAST</strong><br />
Server<br />
3 Click Login, the monitoring window will be displayed<br />
English<br />
<strong>VAST</strong> LiveClient <strong>Use</strong>r Interface<br />
C B<br />
A<br />
E<br />
F<br />
D<br />
G<br />
A Menu bar B <strong>Quick</strong> access bar C Hierarchical management tree<br />
D Camera control panel (PTZ control panel / Two way audio / Instant Playback control panel)<br />
E Status panel F Live video monitoring window G Event window<br />
EN - 5
How to Add Devices<br />
Select a station from the hierarchical management tree; click Configuration > Camera<br />
Management on the menu bar (or right-click the target station, then select Camera<br />
Management) The Camera Management window will pop up<br />
f<br />
a<br />
b<br />
d<br />
e<br />
c<br />
f<br />
h<br />
a Enter the Camera Name, <strong>IP</strong> address (<strong>Use</strong>r Name and Password if necessary)<br />
b Click Detect Model to detect the device, then its model name and MAC address will<br />
show up in the blanks if the connection is successful Specify the channel index for<br />
multi-channel video server; specify the recommended monitoring and recording stream<br />
for the device<br />
c You can also click Search Camera to search for all VIVOTEK network cameras/video<br />
servers on the LAN<br />
d Click Connection Test to preview the live video<br />
e The device will automatically be assigned to the default recording group Uncheck the<br />
item if you want to cancel this setting<br />
f Click Insert to add the device to the station, and it will show up under the hierarchical<br />
management tree<br />
g To add more devices to the system, repeat the above steps<br />
EN - 6
h Click Exit to close the camera management window and return to the monitoring<br />
window<br />
i. Back to the main window, you will find the newly-inserted devices displayed under the<br />
station and the live video in the video cell<br />
English<br />
How to Add Sub-stations<br />
The <strong>VAST</strong> server allows you to construct a hierarchical management system by adding<br />
more sub-stations to the root station<br />
Relay Settings<br />
Before adding a sub-station, please follow the instruction below to enable the Relay<br />
Settings on the sub-station first.<br />
Login to the sub-station; select the station from the hierarchical management tree; click<br />
Configuration > Station Settings > Relay Settings on the menu bar (or right-click<br />
the station on the hierarchical management tree and select Station Settings > Relay<br />
Settings)<br />
The Relay Settings window will pop up Check Allow Relay Connection and enter a<br />
Password Then click OK to enable the settings<br />
EN - 7
Insert Sub-stations<br />
Select the station from the hierarchical management tree; click Configuration > Station<br />
Management on the menu bar (or right-click the target station, then select Station<br />
Management) The station management window will pop up<br />
a<br />
d<br />
c<br />
d<br />
b<br />
f<br />
a. Enter the <strong>IP</strong> Address and Password (defined in Relay Settings)<br />
b You can also click Search Station to detect all <strong>VAST</strong> and ST7501 servers on the LAN<br />
c Click List Sub-station Hierarchial button to know if there is any sub-station under it<br />
d Click Insert to add the sub-station to the target station The sub-station will be displayed<br />
under the hierarchical management tree<br />
e To insert additional sub-stations to the target station, repeat the above steps<br />
f When completed, click Close to exit the Station Management window and return to the<br />
main window<br />
g. Back to the main window, you will find the newly-inserted stations displayed under the<br />
hierarchical management tree<br />
EN - 8
How to Add <strong>Use</strong>r Accounts<br />
The <strong>VAST</strong> server allows users to add user accounts to a station with five levels of user<br />
roles<br />
Select the station from the hierarchical management tree; click Configuration > <strong>Use</strong>r<br />
Management on the menu bar (or right-click the station, then select <strong>Use</strong>r Management)<br />
The <strong>Use</strong>r Management window will pop up<br />
English<br />
a Enter the <strong>Use</strong>r Name, Password and specify the <strong>Use</strong>r Role<br />
b Uncheck the privileges if you want to limit the access right<br />
c Click Add to add the user account to the server and it will be displayed under the <strong>Use</strong>r<br />
List<br />
c<br />
a<br />
b<br />
c<br />
EN - 9
<strong>VAST</strong> Playback Configuration<br />
Activating <strong>VAST</strong> Playback<br />
1 After installation, run the <strong>VAST</strong> Playback program<br />
2 Enter the <strong>IP</strong> Address, <strong>Use</strong>r Name, Password and Communication Port of the <strong>VAST</strong><br />
Server<br />
3 Click Login, the playback window will be displayed<br />
<strong>VAST</strong> Playback <strong>Use</strong>r Interface<br />
A<br />
B<br />
C<br />
D<br />
E<br />
A Menu bar B <strong>Quick</strong> access bar C Query panel (Browsing/ Time search/ Event search/ Log<br />
viewer) D Status panel E Recorded video playback window F Playback control panel<br />
G Video clips list<br />
F<br />
G<br />
EN - 10
How to View Recorded Video<br />
1 On the Browsing page, right-click a station, device, or date item and click Refresh to<br />
display the recorded video clips<br />
English<br />
2 Click a date item on the hierarchical management tree The corresponding recorded<br />
video clips will be listed on the video clip list Double-click a video clip or drag-anddrop<br />
it to one of the video cells<br />
EN - 11
3 If you want to review all clips recorded on the same date, select a date then drag-anddrop<br />
it to one of the video cells<br />
EN - 12
P/N: 625010700G Ver.1.0<br />
Copyright c 2010 VIVOTEK INC. All rights reserved.