
You also want an ePaper? Increase the reach of your titles
YUMPU automatically turns print PDFs into web optimized ePapers that Google loves.
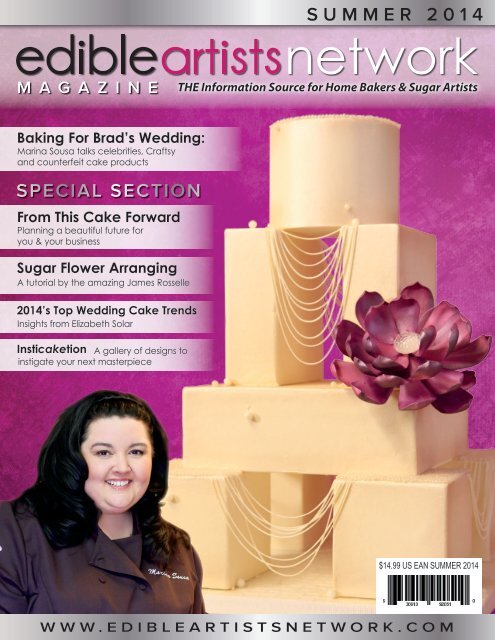
<strong>SUMMER</strong> <strong>2014</strong><br />
MAGAZINE<br />
THE Information Source for Home Bakers & Sugar Artists<br />
Baking For Brad’s Wedding:<br />
Marina Sousa talks celebrities, Craftsy<br />
and counterfeit cake products<br />
<strong>SPECIAL</strong> <strong>SECTION</strong><br />
From This Cake Forward<br />
Planning a beautiful future for<br />
you & your business<br />
Sugar Flower Arranging<br />
A tutorial by the amazing James Rosselle<br />
<strong>2014</strong>’s Top Wedding Cake Trends<br />
Insights from Elizabeth Solar<br />
Insticaketion<br />
A gallery of designs to<br />
instigate your next masterpiece<br />
$14.99 US EAN <strong>SUMMER</strong> <strong>2014</strong><br />
WWW.EDIBLEARTISTSNETWORK.COM
Table of Contents<br />
FEATURES<br />
22 Competing on the Rachel Ray Show<br />
by Dana Herbert<br />
Dana shares his experience and tips.<br />
28 Blessed by Nuns, Approved by Oprah<br />
by Michele Howard<br />
The unique and continuing journey of Marina Sousa<br />
and “Just Cake”<br />
26 The Chef Coat<br />
by Amelia Carbine<br />
Should you buy a chef’s coat<br />
Check out what Amelia has to say.<br />
35 From This Cake Forward...<br />
Tips, tutorials, and articles to help make your business<br />
thrive happily ever after!<br />
36 Top Wedding Cake Trends for <strong>2014</strong><br />
by Elizabeth Solaru<br />
Find out what’s hot for <strong>2014</strong>.<br />
70 Insticaketion Gallery<br />
Feel free to ooh, ahh, and use these delectable designs as a<br />
launching pad for your own works of art.<br />
82 Grow Your Customer Base Online<br />
by Theresa Happe<br />
Learn how to boost your website to the top of Google.<br />
88 Michigan Sugar Art Showcase<br />
by Gary Silverthorn<br />
Entrants of all skill levels competed for over<br />
$20,000 in cash and prizes<br />
On The Cover<br />
She’s designed cakes for Brad Pitt,<br />
Cher and a slew of others, but<br />
celebrity baker Marina Sousa is as<br />
friendly and down-to-earth as they<br />
come. Read about her “blessed”<br />
beginnings, breaking news and<br />
exciting plans for the future in this<br />
enlightening, in-depth interview.<br />
www.EdibleArtistsNetwork.com<br />
3
Summer www.edibleartistsnetwork.com Issue <strong>2014</strong><br />
Editorial<br />
Joanne Prainito<br />
Creative Director & Founder<br />
joanne@edibleartistsnetwork.com<br />
Cheryl Naughton<br />
Publisher & Founder<br />
cheryl@edibleartistsnetwork.com<br />
Michelle Burden<br />
Editor<br />
info@edibleartistsnetwork.com<br />
Columns<br />
Amelia Carbine Chef Charity<br />
Ken Fehner Theresa Happe<br />
Dana Herbert<br />
Ruth Rickey<br />
James Roselle Gary Silverthorn<br />
Elizabeth Solaru<br />
Contributors<br />
Maria Genna<br />
Louise Scofield<br />
Joshua Simpson<br />
Sarah Myers<br />
Mari Senga<br />
Shaile Socher<br />
Table of Contents<br />
DEPARTMENTS<br />
12 Ruth’s Truths by Ruth Rickey<br />
14 Facebook Tips from Ken<br />
34 Free Baked with Chef Charity<br />
85 What’s New, What’s Hot<br />
92 Incredible Edible Art From Around The Web<br />
TUTORIALS<br />
6 Wonder Woman Tutorial<br />
by Maria Genna<br />
16 Chinese Tree Peony<br />
by Shaile Socher<br />
44 Couture Mini Bridal Cakes<br />
by Louise Scofield<br />
50 Sugar Flower Arranging<br />
by James Rosselle<br />
56 Simply Gold<br />
by Chef Joshua Simpson<br />
60 Baroque In Chocolate<br />
by Mari Senga<br />
64 Victorian Steampunk Wedding Cake<br />
by Sarah Meyers<br />
Editorial Offices<br />
P.O. Box 870614<br />
Stone Mountain, GA 30087<br />
Advertising<br />
Cheryl Naughton<br />
404/838-8375<br />
cheryl@edibleartistsnetwork.com<br />
Production<br />
Samantha Laskowski<br />
Graphic Designer<br />
sam@samldesign.com<br />
Subscription Services<br />
To subscribe to the magazine please<br />
visit www.EdibleArtistsNetwork.com<br />
Edible Artists Network Magazine is published<br />
4 times per year by Edible Artists Network, LLC.,<br />
P. O. Box 870614, Stone Mountain, GA, 30087.<br />
Copyright <strong>2014</strong> by Edible Artists Network, LLC. All<br />
rights reserved. Materials may not be reproduced<br />
in whole or in part without written permission. For<br />
reprints of any article please contact the editor.<br />
4 www.EdibleArtistsNetwork.com
Wonder Woman<br />
Tutorial<br />
By Maria Genna<br />
Materials<br />
Needed:<br />
• Blue sugar paste<br />
• Skin colored sugar<br />
paste<br />
• Red sugar paste<br />
• Yellow sugar paste<br />
• Blue, black, red &<br />
white food powder<br />
• Edible alcohol<br />
• 28cm base of cake<br />
made of polystyrene<br />
• Polystyrene pellet<br />
3cm<br />
• Toothpicks<br />
• Sticks of 25cm<br />
• Rolling pin<br />
• Small brush<br />
• Scalpel<br />
• Silicone brush<br />
• Dresden tool<br />
• Ball tool<br />
Maria Genna of MG SugarCake is an award-winning Italian cake designer who has<br />
gained international recognition for her amazing character sculptures. She is<br />
perhaps best known for her endearing sculptured cakes of Disney® princesses, but<br />
took home silver from the 2013 Cake International show in Birmingham,<br />
England for her stunning cake inspired by her love of classical art and the famous<br />
painting by William Bouguereau, “Cupid and Psyche as<br />
Children.” Today, Maria continues to design, and<br />
teaches classes in sugar sculpting and color to<br />
students throughout the world.<br />
The necessary colors.<br />
DOWNLOAD<br />
THE PDF<br />
6 www.EdibleArtistsNetwork.com
face<br />
1. Start with an oval shaped portion of the flesh gumpaste and create indents for the eyeballs.<br />
2. Continue shaping the chin and cheeks.<br />
3. With the help of the shaper form the outline of the nose.<br />
4. It is better to redraw the eyebrows with a spatula & after define the base and sides of the nose.<br />
5. Draw the mouth using a tool with a silicon tip, redrawing the lips, then make small side holes to make<br />
a smile and to create the central protrusion of the lips.<br />
6. Make holes to create nostrils and from the base of the nose flatten the entire contour of the mouth in<br />
order to highlight the lips.<br />
7. Draw the outline of the eyes with a spatula.<br />
8. Finish shaping the imperfections. Tighten the temples and contour the lips.<br />
9. Crop the excess paste to define the jaw. Use the tip of a tool to spread her lips and create a space<br />
that will contain the teeth. Insert some white gumpaste to create the teeth.<br />
10. Cut the eye area with a scalpel and remove a piece of the paste and replace it with white color<br />
paste to create the eyeballs.<br />
Background Image © freshidea - Fotolia.com<br />
www.EdibleArtistsNetwork.com<br />
7
11. Use the blue food powder diluted with edible alcohol and draw the eyes directly on the white<br />
paste, making first a circle and then fill it in. With the black color design the center of the pupil and<br />
the outline of the eyes (blurring the powder on the eyelid to emphasize makeup) and the eyebrows.<br />
12. Now dilute the red food powder with edible alcohol and create the lips.<br />
13. For the lashes add a touch of black sugar paste.<br />
Legs<br />
1. Roll out a long and narrow cylinder using flesh gumpaste and cut it in half to create the legs.<br />
2. Shape each cylinder to look like legs and bend them to create the knees.<br />
3. Roll out a long and narrow cylinder using red gumpaste and cut it in half diagonally for the feet.<br />
4. Continue shaping and cutting the gumpaste to create the ankle and toes and to define<br />
the shape of the foot.<br />
5. Attach the boots to the legs using a bit of water to adhere the surfaces.<br />
8 www.EdibleArtistsNetwork.com
Bodice<br />
1. To create the shorts, start with a blue ball of gumpaste and press on one side with the palm of the<br />
hand thinning one part and continue applying gentle pressure at the base to create the holes where<br />
the legs will attach.<br />
2. Attach the legs.<br />
3. Use the polystyrene ball to create an indent in the top of the shorts. We will attach the torso here later.<br />
4. Using a skin color ball of gumpaste shape the torso and neck.<br />
5. Now define the shoulders, collarbones, and the breasts. You can use a spatula to better delineate<br />
the details of collarbones and the breast.<br />
6. At the base of the bust use the ball tool to create a cavity for the polystyrene ball.<br />
7. Insert the ball.<br />
8. Place the bust on the previously formed shorts.<br />
9. Secure the bust to the base using a wooden stick inserted diagonally.<br />
www.EdibleArtistsNetwork.com<br />
9
10. To create the dress roll out a thin piece of red fondant and drape it over the figure. Trim the edges<br />
around the neckline, and the shorts and remove the excess of the paste.<br />
Arms / Hands<br />
1. Roll out the arms and cut into two. The diagonal surfaces will form the hands. Proceed in thinning the<br />
wrists with your fingers a little above the edge of the hand.<br />
2. Using your Dresden tool shape the hands and fingers.<br />
3. Create the elbows and shape the arms as shown.<br />
Dress Details<br />
1. Using yellow gumpaste create the crown, the edge of the bodice, belt and finish of the boots.<br />
2. Paint the stars on the shorts using white color powder diluted with edible alcohol.<br />
10 www.EdibleArtistsNetwork.com
Hair<br />
1. Use the black gumpaste to create the hair. For the tufts on the forehead make cylinders, flatten<br />
them, cut them out and paste them from the center of the forehead, causing them to fall to the sides<br />
of the face. Shape as you like with a spatula & create waves to create an effect of hair in the wind.<br />
2. Create and place the crown.<br />
1. Form a disk of white sugar paste, cut it out with a<br />
pastry cutter and place it over the cake.<br />
2. Finish covering the whole cake with whipped<br />
cream to create strokes the clouds and leaving<br />
a space at the top area for placing Wonder<br />
Woman.<br />
Finish The Cake<br />
Chocolate Cake with Chantilly Cream and Strawberries<br />
Ingredients<br />
Paste:<br />
125g of raising flour<br />
130gr of flour<br />
50g of dark chocolate<br />
400g of sugar<br />
200g of margarine<br />
200g of milk<br />
100g of dark chocolate<br />
80g of white chocolate<br />
120g eggs (2 eggs)<br />
Filling:<br />
30gr of flour 00<br />
1 sachet of vanilla<br />
200ml of whipping cream<br />
200g of strawberries<br />
250ml of milk<br />
50g of powdered sugar<br />
1 egg<br />
Cover:<br />
400gr of sour cream<br />
60gr of powdered sugar<br />
1 sachet of vanilla<br />
100gr of white sugar paste<br />
1 baking pan of 15 cm<br />
Preparation:<br />
Warm up in a small pan over low heat,<br />
the milk, the butter and sugar. Then add<br />
the white chocolate and dark chocolate<br />
chopped into small pieces, turn gently<br />
with a spatula until the chocolate is<br />
completely melted to keep it from<br />
sticking to the bottom of the pan. Pour<br />
the mixture in a bowl, add the flour, cocoa<br />
and previously sifted baking powder<br />
and mix everything until the mixture is<br />
homogeneous.<br />
Then incorporate one egg at a time and<br />
then let the mixture to rest for 15 minutes.<br />
Pour the mixture on a baking pan greased<br />
with butter and dusted with flour and<br />
bake at 180 degrees for about 20 minutes.<br />
Check the baking of the cake by inserting a<br />
toothpick in the center and if pulling it out<br />
it remains dry with no residue of the paste<br />
then the cake is cooked, let it cool and<br />
then churn out and then cut to form three<br />
discs of the same height (1cm).<br />
Filling:<br />
In a saucepan combine the milk, butter,<br />
sugar, eggs and flour and cook over low<br />
heat stirring with a whisk for the entire<br />
cooking time to prevent it from sticking to<br />
the bottom of the pan and to avoid lumps, until the cream is not solidify<br />
in the desired consistency.<br />
When ready pour into a bowl and let it cool completely.<br />
Whip the cream with the powdered sugar and then incorporate it to<br />
the pastry cream and mix vigorously with a whisk. Let it rest in the<br />
refrigerator for 30 minutes.<br />
www.EdibleArtistsNetwork.com<br />
11
Ruth’s Truths<br />
Branded<br />
by Ruth Rickey<br />
Once you decide that you want to do<br />
cakes for profit, what do you do next<br />
You select a name. Sometimes you<br />
have a logo created. You decide what<br />
types of orders you want to take. You<br />
set up a web page or Facebook page<br />
for advertising. Is that all there is to<br />
it Not really. To run a successful<br />
business, you need to establish a<br />
business identity. The very same goes<br />
for those of us who teach for a living.<br />
Several years ago, my friend Becky<br />
Rink told me that I was good at the<br />
Art of Shameless Self Promotion.<br />
She clarified that she meant it as a<br />
compliment. I started thinking about<br />
what she meant and I realized that<br />
it was because I had branded myself<br />
and my classes well. When you come<br />
in my class, my name is on the silpats.<br />
My logo is on the instructions. My<br />
instructions are in a glossy folder<br />
with my logo on both sides, so that<br />
when students walk out with it, they<br />
are advertising me and my classes. I<br />
always wear stylized chef coats, which<br />
have become my uniform. I stick to<br />
the things that work for me. It makes<br />
me more identifiable personally and<br />
it helps as I promote my classes.<br />
Similarly, I had a logo for my bakery.<br />
I used distinct colors in all my<br />
promotions. I printed stickers for<br />
my cake boxes. I printed brochures<br />
that kept up that look. And my shop<br />
had an identity for certain types of<br />
cakes and sweets. I made sure that<br />
it was easy to know what we made,<br />
so people knew if we were the right<br />
shop for them.<br />
How do you start promoting your<br />
business Facebook seems to be the<br />
easiest for most of us. You can set<br />
up the business page and ask your<br />
friends to like it. That gets you a<br />
start. You can have a promotion that<br />
when customers come in to shop<br />
and “check in”, they receive a gift or<br />
discount. If you are a home baker or<br />
run an appointment only business,<br />
the check in won’t work for you. At<br />
my bakery, we would upload a month<br />
of cake photos at a time. While<br />
people enjoyed looking at those, no<br />
one ever shared a single photo. It did<br />
not help us reach new customers.<br />
Lately, I’ve watched what others<br />
do. Pink Cake Box will write a blog<br />
about one cake and share it. Several<br />
of my bakery friends will post a<br />
single picture with a story about the<br />
cake or they will tag the reception<br />
location. Moves like this DO reach<br />
new customers. It makes it easier for<br />
people to feel connected with you<br />
and they can more easily share a<br />
single photo.<br />
If you google the information, you<br />
can find out the best times to post on<br />
Facebook and what has the greatest<br />
reach. You can also link your Twitter<br />
and Instagram accounts to Facebook.<br />
I personally do not like the complete<br />
linking like that. If I follow someone<br />
on one format, I usually follow them<br />
on all. If I see the exact same wording<br />
in every post, I tune it out and become<br />
less likely to even read their posts. I<br />
strive to use different words for each<br />
post on any social media site, even if<br />
the picture is the same.<br />
As much as many of us hate hashtags,<br />
they make a huge difference when<br />
people are searching for cake bakers.<br />
Think about the key words that<br />
people might search and add those<br />
into your posts.<br />
Social media can be your friend<br />
when used properly. Keep your posts<br />
short and positive. Keep your brand<br />
identity in the forefront of your mind<br />
as you promote your business. You<br />
determine what others think of you<br />
and your bakery.<br />
Ruth Rickey is a Certified Master Sugar Artist, Instructor, Judge and author of the<br />
SugarZen blog. The former attorney closed her successful bakery to teach<br />
around the globe. www.RuthRickey.com • www.SugarZen.wordpress.com<br />
12 www.EdibleArtistsNetwork.com
Ken is the owner of The Social<br />
Gloo, a new media marketing<br />
company specializing in<br />
social media management for<br />
business. Visit Ken online at<br />
www.thesocialgloo.com,<br />
www.facebook.com/TheSocialGloo<br />
or on Twitter @LordSocialMedia<br />
Are You Frustrated<br />
By Ken Fehner<br />
With Facebook<br />
Have you noticed you are getting<br />
less and less response to posts<br />
you make on your Facebook<br />
business page Well, I just<br />
want you to know that it’s<br />
not you…it’s Facebook.<br />
I’m hearing reports<br />
that Facebook is only<br />
showing posts to one<br />
or two percent of<br />
pages fans. (I can’t<br />
verify this myself<br />
but, I have read it in<br />
several blogs.)<br />
I know this can be<br />
discouraging since<br />
you’ve invested your<br />
time, or as I like to call<br />
it your “social currency,”<br />
doing all the right things like<br />
posting several times a week,<br />
making sure you have a good mix<br />
of topics and asking your fans plenty of<br />
questions. But, let’s be fair, Facebook employs<br />
over 6,000 and those people need to get paid.<br />
Think of it this way, when your local TV or radio<br />
station first went on the air, did they offer free<br />
advertising to their clients for four years I don’t<br />
think so!<br />
Enough of the negative…let’s think positive. This<br />
is going to clear out a bunch of businesses that<br />
were just on Facebook because someone told<br />
them it would be good for their business and it’s<br />
free. These are the same businesses that make<br />
every post all about them and never really<br />
bothered to engage their fans. That properly<br />
describes about half of the small businesses on<br />
Facebook. That’s great news! And, they won’t<br />
be missed.<br />
So, what do the rest of us do Well,<br />
for the past two and a half<br />
years, I’ve been buying ads<br />
on Facebook. Many of<br />
the accounts I work with<br />
hadn’t gotten a new<br />
like in months. Shortly<br />
after I started an ad<br />
campaign for them,<br />
the likes started<br />
flowing in. Facebook<br />
ads really work! And<br />
Facebook lets you<br />
track everything,<br />
so that you can<br />
quickly fine tune<br />
your ad campaign. I<br />
recommend checking<br />
Facebook Insights often<br />
and checking the quality of<br />
the people liking your page.<br />
This may take a little time, but<br />
you can fine tune your results to hit<br />
your target audience. Remember, like<br />
everything on social media, it’s about the quality<br />
and not the quantity.<br />
You can run your campaigns right from your<br />
page using “Promote Page” or “Boost Post.”<br />
But, I prefer to use the Ad Manager because you<br />
have more features and more control over who<br />
sees your ad or boosted post. The best news is<br />
that it is all very affordable. Big companies will<br />
continue to pay large amounts to reach their<br />
national or world market while small businesses<br />
can also participate on a local level. When you<br />
try it I would love to hear about your results.<br />
You can reach me via email at<br />
Ken@TheSocialGloo.com.<br />
Good luck everyone!<br />
14 www.EdibleArtistsNetwork.com
A Tutorial<br />
by Shaile Socher<br />
DOWNLOAD<br />
THE PDF<br />
Chinese Tree Peony<br />
Supplies & Tools<br />
• Wire 20g, 24g 26g,<br />
• Gumpaste pale Lemon<br />
Yellow (Americolor)<br />
• Tear drop cutters (Ateco)<br />
• Egg white, Crisco,<br />
cornstarch<br />
• Silk Veining tool (Jem)<br />
• Dusting Colors Cosmos,<br />
Pink, Magenta<br />
(CK Products)<br />
• Yellow Cornmeal<br />
• Yellow Cotton Thread<br />
• Flat angled paint brushes<br />
(Michaels craft store)<br />
• Green floral tape<br />
• Celboard<br />
• Celpad<br />
• Rolling Pins<br />
• Plastic flap<br />
• Pallet knife<br />
• Steamer<br />
• Apple or avocado trays<br />
Stigma<br />
Step 1<br />
Roll a small pea size ball of<br />
gumpaste into a pointed<br />
tear drop. Insert a hooked<br />
26g wire dipped in egg white<br />
into round end molding<br />
around the base to thin out<br />
slightly. (You will need 3)<br />
Step 2<br />
Shape the tip into a point<br />
inching one side flat from the<br />
tip to about half way. Curve<br />
that flat piece over slightly.<br />
Stand in Styrofoam to dry<br />
completely.<br />
16 www.EdibleArtistsNetwork.com<br />
Background Image © setory - Fotolia.com
Stamen<br />
Step 3<br />
Wrap yellow cotton<br />
thread around 1<br />
finger about 25-30<br />
times. Put a hooked<br />
26g wire around<br />
one end pinching it<br />
together. (you will<br />
need 3 groups or<br />
you can purchase<br />
ready made<br />
stamens)<br />
Petals<br />
5 petals for the first 2 layers<br />
& 7 for the last layer<br />
Step 4<br />
Wrap ¼ width white<br />
floral tape from the<br />
top over the hooked<br />
wire down a way.<br />
Cut the thread in half.<br />
Dip the ends into egg<br />
white then into yellow<br />
cornmeal gently<br />
shaking off excess.<br />
(Note: leave some in<br />
clusters stuck together).<br />
Allow to dry.<br />
Step 5<br />
Roll out gumpaste on grooved celboard fairly thin.<br />
Cut the petals out and place under plastic sheet<br />
while working on them. Insert a 26g wire dipped in<br />
egg white.<br />
Step 6<br />
Work on the celpad using the thinner end of<br />
a Dresden tool to pull the edges out fringing<br />
the tips. Add texture to the entire petal with<br />
Silk Veining Tool by rolling it back and forth.<br />
Do not widen the petal<br />
www.EdibleArtistsNetwork.com<br />
17
Step 7<br />
Place the petal along the edge of the celpad to work on the<br />
frilled edges with the Silk Veining Tool. Roll it back and forth in<br />
small sections working along the edge of the petal to frill. This<br />
will smooth out the roughness of the fringed edges.<br />
Step 8<br />
Lay the petal on an<br />
apple or avocado<br />
tray shaping each<br />
petal to show<br />
movement. Allow to<br />
dry overnight.<br />
Petal Dusting<br />
Step 9<br />
Dust the tip of the Stigma with Daffodil yellow, dusting<br />
the rest of the stigma with prairie green.<br />
Add Daffodil petal dust to the base of the petals<br />
about half way up on the first layer only. You can add<br />
petal dust to the remaining layers if you choose, but<br />
don’t add it to the ends. They should be lighter<br />
in color.<br />
18 www.EdibleArtistsNetwork.com
Assembly<br />
Step 10<br />
Tape the 3 stigmas together with the points facing<br />
out to a 20g wire.<br />
Tape the 3 groups of stamens around the stigmas<br />
Step 11<br />
Tape the petals from small to large in groups of<br />
5 per layer with half width floral tape.<br />
I have always been artistic creating things with a lot of<br />
detail. By chance I ended up in cake decorating taking a<br />
class for fun. It was at an ICES convention I first saw sugar<br />
flowers which began my love of this sugar art. It took just<br />
one class to get me hooked then after a series of classes<br />
with Nicholas Lodge I continued practicing and learning<br />
what became my passion. I teach sugar flowers.<br />
You can reach Shaile at www.shailesedbileart.com,<br />
www.shailesedibleart.blogspot.com or<br />
www.facebook.com/ShailesEdibleArt.<br />
www.EdibleArtistsNetwork.com<br />
19
Did You Know...<br />
you can print the tutorials from this issue<br />
NETWORK MAGAZINE<br />
www.edibleartistsnetwork.com<br />
Printable versions are available in an easy-to-follow format<br />
in our digital version of the magazine.<br />
Take a moment to download or print these NETWORK items and MAGAZI<br />
create your own tutorial library today! THE Information Source for Ho<br />
Bakers & Sugar Artists<br />
Subscribe to the digital version today ($14.99 per year)<br />
or<br />
subscribe to the print edition ($48 per year) and<br />
you will receive the digital version FREE of charge.<br />
Subscribe today!<br />
www.eanmagazine.com/subscribe<br />
If you have a tutorial you would like to share simply create and account on<br />
our website and upload it today! Visit www.EdibleArtistsNetwork.com.
Simi Cakes & Confections, LLC<br />
Sidney Galpern, Owner<br />
• Ready-To-Use Isomalt Tiles<br />
• Unique Silicon Molds<br />
• Sugar Tools<br />
• Classes for Beginners<br />
& Professionals<br />
Isomalt Tiles<br />
Available in<br />
Assorted Colors.<br />
Just Melt & Go!<br />
Shop, Browse<br />
Tutorials & Find<br />
Our Class<br />
Schedule online!<br />
Proud Sponsor of:<br />
Special Isomalt Award<br />
That Takes The<br />
Cake Sugar<br />
Art Show &<br />
Competition<br />
Showpiece Award<br />
National<br />
Capital<br />
Area Cake<br />
Show<br />
www.simicakes.com 321-543-3492
Competing on<br />
by Dana Herbert<br />
The Rachael Ray Show<br />
What better way to start off spring than with a cake<br />
competition on The Rachel Ray Show!! I had never<br />
been on the show before, and it was such a thrill to be<br />
invited to compete alongside two great bakers – Kate<br />
Sullivan and Michelle Doll – and to meet Rachael.<br />
The challenge Create a wedding cake for a celebrity<br />
client whose own design work I admire. The pressure<br />
was on, but it was a blast!<br />
The Client<br />
The celebrity was designer Nate Berkus, who definitely<br />
knows the difference between style and trying to get by,<br />
so I didn’t want to “just get by.” I knew it was important<br />
to do my research on his style and try to reflect that in the<br />
design. Since he often adds vintage pieces to his modern<br />
design work, I decided to create a modern-looking cake<br />
accented with vintage-inspired elements. I believe that<br />
vintage pieces always tell a story, so I made sure the<br />
elements I used would do this same.<br />
The Construction/Build<br />
As usual with TV challenges, there were only days, not<br />
weeks, to prepare. There was no time to order any special<br />
things, so it was up to us to build everything.<br />
I began with the base, creating a honeycomb and white<br />
oak design. Honeycomb and white oak are symbols of the<br />
heart, love and purity. I used them as a reference to Nate’s<br />
union with his partner, and to the foundation of his work.<br />
Nate, I felt, was a real fan of these and the textures they<br />
lent to his design and style as an artist. But honestly, I<br />
didn’t think this was enough. I needed something more,<br />
and then I found it.<br />
There was an article I found on Nate and his partner<br />
Jeremiah, with a glimpse into their beautiful home. You<br />
always want the person you are designing for to feel as<br />
if your design is theirs. You want them to be able to see<br />
themselves in the design, so I wanted to put something<br />
from their own home into the cake. The archways were<br />
added to the base for that purpose – they emulate<br />
some of the woodwork in their house.<br />
22 www.EdibleArtistsNetwork.com<br />
Background Image © blankstock - Fotolia.com
The key and lock elements served multiple purposes. They<br />
added to the cake’s vintage feel while also symbolizing the<br />
beginning of a union, and creating a home together. The<br />
key and keyhole can allude to so much when you think of<br />
relationships, so I thought they were a great touch.<br />
On the next tier, I replicated the pattern on some of<br />
Nate’s wonderful tapestries. From his seat on the show, I<br />
don’t think he could really see it, but when he came over<br />
to take a closer look, he said, “Hey, that’s my pattern!” He<br />
just looked at me and smiled, like, “You really channeled<br />
me!” It felt great that he recognized the thought that went<br />
into the design.<br />
Finally, I added some quilted elements that came from<br />
researching Jeremiah’s interior design work, to remind<br />
Nate of Jeremiah, and I finished it with a simple black<br />
band. Again, with Nate’s style being so modern, I thought<br />
he would like the cleanness of the black band.<br />
The Tasting<br />
I had a strong feeling Nate was an all-American guy,<br />
so I thought my famous Southern Lemon Cake should<br />
be right up his alley. This was a cake I had developed<br />
on Cake Boss: Next Great Baker. Buddy said it was<br />
probably the best cake of the season, and it took me to the<br />
www.EdibleArtistsNetwork.com<br />
23
finals. It features rich lemon layers, cream cheese icing, fresh<br />
strawberries and lemon curd. It’s serious. I figured if Buddy<br />
loved it, Rachael and Nate would too.<br />
I was also going to make Nate a surprise treat, and tell him<br />
it could be used for his wedding favors. I knew he loved Rice<br />
Krispies Treats®, and I was going to do a bacon-inspired one.<br />
Unfortunately, as it happens with TV projects, I just ran out<br />
of time.<br />
Although my surprise for Nate did not work out,<br />
my competitors and I were handed a surprise of our<br />
own when we got to the show. We found out that in<br />
addition to Rachael and Nate judging our work, it<br />
would also be judged by acclaimed pasty chef Gale<br />
Gand and Mr. Chocolate himself, Jacques Torres.<br />
Jacques Torres has been around forever (in a good<br />
way!). He is extremely talented and very critical on<br />
good cake and bad cake. It was pretty cool to put<br />
my cake before such a tough judge.<br />
I held my breath as all four judges tasted my cake.<br />
One by one, they gave it great reviews. Jacques<br />
commented that after a wedding and a big meal,<br />
a cake like mine was a good idea because of<br />
the acidity of the lemon and fresh strawberries,<br />
combined with the creaminess of the cake. He<br />
said it was the perfect “grand finale” after the<br />
meal.<br />
The audience also sampled and weighed in<br />
on our cakes. It was a close race. When Nate<br />
polled them, there was a group for each of us.<br />
This let you know everyone was baking from<br />
the heart. Kate had her signature vanilla<br />
bean buttercream and mango buttercream<br />
cake with the sugar crust. Michelle’s cake<br />
had a wonderful cassis buttercream. There<br />
were three totally different ideas, all baked<br />
beautifully.<br />
Dana Herbert, owner of Desserts by Dana, resides<br />
in Bear, Delaware. His client list has included Oprah<br />
Winfrey and Jill Biden. He has appeared on many<br />
television shows, including multiple episodes of<br />
Cake Boss following his win on TLC’s Cake Boss:<br />
Next Great Baker. Dana and his recipes also have<br />
been featured in publications including Celebrity<br />
Cooking, Essence, Fitness Magazine, Catering<br />
Magazine, Huffington Post and dozens more. In<br />
2013, he was named one of the Top Ten Cake<br />
Artists by Dessert Professional Magazine. He<br />
also has authored his own book, The Sweet and<br />
Savory Union.<br />
Currently, Dana is teaming up with celebrity<br />
chefs and bakers from around the country to<br />
construct a world record-breaking, 20-foot<br />
high, 20,000-pound, pink wedding<br />
cake at Caesars Palace in Las<br />
Vegas. The attempt to break the<br />
record will raise funds for Susan<br />
G. Komen for the Cure,<br />
Southern Nevada Affiliate.<br />
I was grateful Nate selected my<br />
cake as the winner. He even said<br />
that if “the cake thing” didn’t<br />
work out, I could go to work for<br />
him as a designer. Now THAT<br />
was a compliment!<br />
24 www.EdibleArtistsNetwork.com
Cheetah Drape Cake<br />
By<br />
Peggy<br />
Tucker<br />
• 1 Fondant covered cake<br />
• 2 sheets of an Icing Images® iDesign<br />
(iDesigns is a program from Icing Images that allows you to select patterns<br />
that are licensed for edible printing. If you do not have a printer, Icing Im<br />
ages has made iDesigns available to everyone on a pay-per-print basis)<br />
• Icing Images Premium luster sheet<br />
• Clear DECOgel<br />
• Piping gel<br />
• Ruler<br />
• Paintbrush<br />
• Exacto knife or pizza cutter<br />
Products<br />
Needed<br />
Create A Simple Border:<br />
Welcome to the world of DECOgel.<br />
DECOgel is a new medium that I am very excited about.<br />
It is a gelatin-based cake decorating medium that can<br />
be melted and poured into molds or on surfaces to create<br />
flexible cake designs. While DECOgel has a glass-like<br />
appearance similar to Isomalt, it can go in or out of the<br />
refrigerator and freezer where Isomalt can’t. I have been<br />
asked if DECOgel would replace Isomalt. No, it will not,<br />
it simply goes where Isomalt can’t and Isomalt goes places<br />
DECOgel cannot. They are similar in appearance but fulfill<br />
different needs.<br />
One of the many things DECOgel does is makes beautiful<br />
drapes with ease unlike any other product. In this tutorial,<br />
I will show you how to do a DECOgel image transfer and<br />
create a simple drape.<br />
1. Cut Black Pearl Luster<br />
Sheet to the desired height.<br />
Paint back of sheet with<br />
piping gel (you can also use<br />
shortening or water). Place<br />
on bottom part of cake.<br />
2. Cut complimentary piece<br />
a little shorter in height from<br />
the iDesign pattern. I chose<br />
Pattern 66 which is also<br />
found in the Peggy Tucker<br />
file on iDesigns. Place on<br />
bottom border.<br />
Visit us online to get the<br />
rest of this tutorial<br />
and to learn more<br />
about DEC0gel!<br />
www.icingimages.com/decogel<br />
www.EdibleArtistsNetwork.com<br />
25
y Amelia<br />
Carbine<br />
I remember when I purchased my first chef ’s coat. I was<br />
very hesitant to buy one. To me, a chef ’s coat was a symbol<br />
of someone with a degree, someone who had gone to<br />
culinary school to become a certified chef.<br />
To me, the status of a chef is above that of a cook or a<br />
baker. Yes a baker can’t be as talented as a chef, it’s just the<br />
right to the title. I stick to that belief and I will never call<br />
myself a chef until I have proper certification to back it up.<br />
I used to hold the symbol of the chef ’s coat to that same<br />
standard. But then I realized that isn’t the case at all. There<br />
are many line cooks and bakers out there that have not<br />
attended culinary school that wear chef coats every day. It<br />
is a uniform. A chef ’s coat is for cake decorators as well<br />
and in my opinion, there should be a chef ’s coat in every<br />
cake decorator’s closet.<br />
Let’s face it, most of the time we are so focused on<br />
finishing the cake that we don’t have the time or the desire<br />
to get all dressed up for deliveries. Most of the time we<br />
are dusting powdered sugar and frosting from our faces as<br />
we run out the door. Call it underestimating how much<br />
work is involved, call it procrastination, call it ensuring the<br />
freshness of the cake…whatever you call it, we have all<br />
had to run out the door at the last minute on at least one<br />
occasion.<br />
For this reason, being able to grab and throw on a chef ’s<br />
coat as you run out the door is extremely convenient. You<br />
don’t have to go through your closet to decide what to wear,<br />
your decision is already made. You can grab a nice clean<br />
chef ’s coat, throw it on over your powder covered shirt,<br />
and suddenly you at least appear to have it all together. Just<br />
make sure check your hair and makeup. I have a small kit<br />
that I keep handy for a 5 minute freshen-up.<br />
We are being watched. Our clients and their friends are<br />
watching and paying attention. If we act and appear<br />
professional, we are more likely to gain the trust and respect<br />
of the people who are likely to be our future customers.<br />
Even if you make sure that you always dress nicely, a<br />
uniform will always stand above and look more professional<br />
than anything you could wear.<br />
Imagine putting two household repair companies side by<br />
side. One handyman shows up in a uniform and one in a<br />
dusty t-shirt. If given only a few minutes to make a choice,<br />
which of these two handymen would you choose to fix<br />
your dishwasher Whether we want to admit it or not, we<br />
all make decisions based on appearance. The same goes for<br />
cake decorators.<br />
A chef ’s coat can be an investment. Especially if you<br />
choose to purchase a custom made coat to match your logo<br />
and fit you properly, which I highly recommend. Is it worth<br />
the purchase Absolutely! It will pay for itself whether you<br />
believe it or not. If a client comes to a consultation and sees<br />
that you are dressed in a nice chef ’s coat and you present<br />
well, you are very likely to close an order. And not only<br />
will you close an order, your client will likely have more<br />
confidence in the professionalism that you portray and you<br />
will have an easier time<br />
charging what you are worth.<br />
In this industry, that is a<br />
big deal!<br />
A chef ’s coat really<br />
does make a big<br />
impact. If we<br />
want to be taken<br />
seriously as cake<br />
decorators and<br />
to be seen as the<br />
professionals that<br />
we are, we should<br />
be dressing the<br />
part. Let’s get a<br />
chef ’s coat in every<br />
cake decorator’s<br />
closet.<br />
Amelia Carbine is the face of CakeFu and the host of the popular CakeFu Masters<br />
Trainings. Amelia started making cakes as a hobby as moast do. The demand for her<br />
work quickly grew to the point where she decided to start a small business.<br />
Amelia’s passion for cake decorating includes a love for teaching. She has taught<br />
cake decorating classes for 10 years and loves to see the excitement of her students<br />
when they learn new tips and techniques. Her mission with CakeFu is to bring new<br />
techniques, tools, and information to all cake decorators.<br />
26 www.EdibleArtistsNetwork.com
Sugar Art School<br />
Online Cake Decorating Classes<br />
Explore an abundant library of HD videos,<br />
professional photo tutorials, exclusive recipes,<br />
chat forums, photo galleries and more.<br />
24/7 access from any device<br />
New content added weekly<br />
Interactive Community - Share & Learn<br />
www.sugaredproductions.com<br />
www.EdibleArtistsNetwork.com<br />
27
Blessed By Nuns,<br />
Approved By Oprah<br />
The unique and continuing journey of<br />
Marina Sousa and “Just Cake.”<br />
by Michelle Howard<br />
When Marina Sousa was tasked with creating an erupting<br />
volcano for her fifth grade science class, she opted for different<br />
materials over the traditional papier-mâché. Having just<br />
completed a Wilton class (the one and only cake decorating class<br />
she’d ever take), Marina used a doll dress pan and the Wilton star<br />
tip to make a chocolate volcano cake. Her classmates and teacher<br />
were impressed with her creativity and delighted to enjoy an<br />
unexpected treat. Perhaps even more unexpected, however, was the<br />
fact that they were the first in a long list of Marina’s cake clients<br />
that someday would include Brad Pitt and Oprah Winfrey.<br />
Born in Fremont, California and raised on the state’s beautiful<br />
Central Coast, Marina enjoyed a childhood filled with inspiration<br />
and support from two creative mentors. “My mom was extremely<br />
creative and sewed and cooked and baked all the time,” she recalls.<br />
“I was sewing doll clothes at age 6, and baking right along with<br />
my mom and grandma.”<br />
Baking, though, was neither her first nor second career. At<br />
just 16, Marina was accepted via early admissions to the Fashion<br />
Institute of Design & Merchandising, and began taking classes on<br />
the San Francisco campus only two weeks after graduating high<br />
school. She studied Visual Merchandising & Space Design, and<br />
after earning her degree, started an internship at the city’s FAO<br />
Schwartz doing window displays. “It was totally fun working with<br />
toys and building these over-the-top displays,” she recalls. After a<br />
while, however, she began looking for her next adventure.<br />
“I’d been doing a bit of display work for Macy’s in San<br />
Francisco, too, and I decided to transfer with them to Los<br />
Angeles,” she says. “I’d always wanted to live in L.A., but I<br />
didn’t know a soul there and I was only working part time, so<br />
I decided to take a couple of classes at a junior college, mainly<br />
to meet people and get to know the area. I happened to take an<br />
introduction to theater class and fell in love with theater.”<br />
This new passion spurred Marina to return to school fulltime,<br />
and she enrolled at the California Institute of the Arts in Valencia.<br />
There, she earned her graduate degree in theatrical production<br />
management.<br />
Following graduation, Marina began an internship with<br />
Universal Studios Hollywood. “My job was producing special<br />
events – grand openings, movie premiers, that kind of thing,” she<br />
explains. “I loved it, but after a couple of years, it was kind of like<br />
corporate anything – the higher up you go, the farther away from<br />
the fun part of it you get.”<br />
As the shine was wearing off her Universal Studios job, Marina<br />
was approached by a company called MediaWorks. “They were in<br />
entertainment advertising, and recruited me to be their director<br />
of production operations,” she recalls. “I was excited to have the<br />
opportunity to learn the post-production side of the business, so<br />
I made the leap. What I learned, however, was that I really didn’t<br />
like it very much. “<br />
Having been at Universal, Marina was accustomed to working<br />
more than 60 hours a week, but the experience was entirely<br />
different. “Because I was always at an event then, I had the illusion<br />
that I had a social life,” she explains. “At MediaWorks, it required<br />
the same amount of time, but I spent the days solving everyone’s<br />
problems in the office and then after 6:00 when they all left, I<br />
28 www.EdibleArtistsNetwork.com
stayed and did what was actually supposed to be my job. It was<br />
a lot of unnecessary chaos, and it made me realize that the<br />
entertainment industry as a whole had this self-important<br />
myth about it that in the grander scheme of life didn’t<br />
really matter much to me.”<br />
Ready for a break, Marina quit. “I literally left there<br />
without a clue what my next step was going to be,”<br />
she remembers. “I just decided to take some time off<br />
because I hadn’t not worked since high school.” It was<br />
in the midst of what she calls her “self-imposed timeoff<br />
timeline” that her cake career began.<br />
“I was meeting a friend for lunch in the Beverly<br />
Hills area, and I parked in front of a shop called<br />
Rosebud Cakes,” she explains. “I was fascinated by their<br />
windows, and I went in to check it out.” For the next<br />
hour, Marina and her friend examined the shop’s books,<br />
sampled cakes and chatted with the staff.<br />
“It was more than 15 years ago, so it was definitely before<br />
the cake explosion and what cakes are now,” she recalls. “The<br />
owner was Elin Katz, and she was truly a pioneer in the cake<br />
world. She did amazing likenesses of people sculpted out of<br />
buttercream. It was pretty extraordinary – nobody back then was<br />
doing anything close to what she was doing. Given my frame of<br />
reference at that point, these cakes looked like theater sets to me,<br />
and it was completely fascinating and eye-opening.”<br />
With her head spinning from this mesmerizing discovery,<br />
Marina and her friend finally left the shop to continue to their<br />
lunch destination. They were only a few steps down the sidewalk,<br />
however, when Marina saw a “Help Wanted” sign posted in one<br />
of the shop’s end windows. “I don’t know what got into me, but I<br />
spun around and went back in,” she recounts. “They told me they<br />
were just looking for somebody to work up front and coordinate<br />
events and logistics with clients, and I figured I could do that with<br />
my eyes closed.”<br />
Bored not working, Marina thought it would give her<br />
something to do while she looked for a “real job.” She walked<br />
out of the shop that day newly employed and within a couple of<br />
weeks, she was using slow periods at the front counter to learn<br />
decorating in the back. Two months later, she was a full time cake<br />
artist.<br />
Over the next two-and-a-half years, Marina became one of<br />
Rosebud Cakes’ top designers, serving Hollywood clientele that<br />
included Raquel Welch, Cher, Goldie Hawn, Will Smith and Jada<br />
Pinkett Smith, plus a host of others. She even designed the<br />
wedding cake for Brad Pitt and Jennifer Aniston.<br />
Eventually, though, the enterprising artist set her sights on<br />
opening her own cake business. “I knew it was something I<br />
wanted to do, but because of the way I kind of back-ended into<br />
the business, I also knew I didn’t know anything about baking,”<br />
she says. “At Rosebud, I was strictly a designer. Somebody else<br />
was baking the cakes and putting them together, and I was just<br />
decorating them.”<br />
With respect for the “science” of baking and understanding<br />
that her cakes needed to taste as good as they looked, Marina<br />
enrolled in the Baking & Pastry Arts program at the Culinary<br />
Institute of America in Napa. After graduating top of her class,<br />
she returned to the beach community where she grew up, just<br />
south of San Francisco, to contemplate her next move.<br />
“I’d intended on going back to L.A. to open my business there,<br />
but after being in the wine country for a year, I found it pretty<br />
hard to do that,” she explains. Still, while friends and family tried<br />
to convince her to launch her business in her<br />
hometown, she wasn’t confident it would work.<br />
“In L.A., parents used to drop a thousand<br />
dollars on their kids’ first birthday cakes six times<br />
a day, but in the rest of the world, people don’t<br />
do that,” she explains. “I wanted to do higher end<br />
wedding cakes, but this was before cake TV and<br />
before cake was what it is today. I was afraid there<br />
just wasn’t enough of a market here to sustain a<br />
business like that.”<br />
To counter the urgings of her friends and<br />
family, Marina says, “I put up every excuse I could<br />
think of, and one of my first ones was that I didn’t<br />
have a commercial kitchen to work out of.” Call<br />
it divine intervention, the power of networking or<br />
just plain luck, but the issue of having no kitchen<br />
was quickly resolved.<br />
“A former classmate was teaching at my old<br />
Catholic elementary school, Salesian Sisters,<br />
and got permission for me to use their kitchen,”<br />
www.EdibleArtistsNetwork.com<br />
29
Marina explains. “It was kind<br />
of funny, because the nun who<br />
was my principal back in the day<br />
was living there in retirement,<br />
and she used to come into the<br />
kitchen and pray the rosary while<br />
I was baking. The nuns were<br />
amazing taste testers too!”<br />
With a place to bake and<br />
prayer on her side, Marina’s<br />
client list grew rapidly. “Friends<br />
and family convinced me to do<br />
a local bridal show. I made eight<br />
display cakes, set up a booth<br />
and the very next day, I had 32<br />
phone calls,” she says. “I think it<br />
was the right place, right time.<br />
There was no one else in the area<br />
then doing anything other than<br />
typical bakery cake, so I was very<br />
well received.”<br />
Marina’s mother, however,<br />
thought it was more than just<br />
timing. “My mother always<br />
credited my business taking off<br />
in the manner that it did to the<br />
fact that it started at the school<br />
and that the nuns put my first<br />
business card under St. Joseph’s<br />
statue,” she says with a smile.<br />
“That kind of sealed the deal for<br />
her. “<br />
Though she was feeling<br />
fortunate and grateful for the<br />
warm welcome, Marina knew her<br />
place in the school’s kitchen was<br />
temporary. “The school was going<br />
to be transitioning into a summer camp in June, so I was worried<br />
I’d have no place to work when wedding season hit,” she says.<br />
Once again, though, things fell into place. “A caterer I’d met at<br />
a bridal show just randomly contacted me and asked if I needed<br />
kitchen space,” she explains. “Then the same thing happened with<br />
studio space – a florist I’d met had some extra room in their studio.<br />
Everything just kind of came together.”<br />
The next major move for Marina was right around the corner.<br />
After being in business for less than five months, she got her<br />
first call from Food Network. “They’d just filmed an annual cake<br />
competition in Beaver Creek, Oregon, and though they hadn’t<br />
planned it at the time, it turned out to be the pilot episode for<br />
Food Network Challenge,” she explains. “When they called me,<br />
they were casting for the very first thing to be officially produced<br />
as Challenge. Since it hadn’t aired yet, I had no idea what they<br />
were talking about, and the whole thing just sounded crazy to me.<br />
Yet while what the caller was talking about seemed ludicrous,<br />
two names were said that captured Marina’s attention: Mike<br />
McCarey and Collette Peters. “Even in that day, before cake<br />
people became pseudo celebrities, those were two very well<br />
recognized, established names,” she says. “So when I was told that<br />
they were going to do the challenge, I continued to listen, and<br />
agreed to do it as well.”<br />
For this event, timing wasn’t completely on Marina’s side. The<br />
pilot that was filmed in Beaver Creek aired the week before she<br />
was leaving for Vegas to film her<br />
Challenge, and what she saw in<br />
that first episode terrified her.<br />
“Mike and Collette were both<br />
competitors in the pilot and so<br />
was Michelle Bommarito who,<br />
at the time, was a complete<br />
unknown, like me,” she explains.<br />
“They constantly referred to her<br />
during the competition as the<br />
underdog, and she made a couple<br />
mistakes, which, of course, they<br />
highlighted, so they really cast<br />
her in that light. After seeing<br />
that, I was completely convinced<br />
that’s the only reason why they<br />
had invited me. And so I went<br />
into it with that mentality 100<br />
percent.”<br />
Though she says she was<br />
petrified at the time, Marina now<br />
looks back on the experience<br />
with levity. “My whole goal was<br />
just to not make an ass of myself<br />
on national TV,” she laughs.<br />
“That was really all that mattered<br />
to me, so when I came out on<br />
top, it was more of a surprise to<br />
me than anyone else.”<br />
Following that, Marina<br />
made six more appearances on<br />
Challenge, and then filmed Last<br />
Cake Standing. Perhaps most<br />
notable for personal reasons,<br />
however, was her appearance<br />
on The Oprah Winfrey<br />
Show. What began as a “random<br />
phone call” on a Friday afternoon ended with her fulfilling one of<br />
her mother’s prophecies five days later.<br />
“It was a week where we had 10 wedding cakes and I was<br />
going in 10 different directions at once,” Marina recalls, “so the last<br />
thing I expected was to pick up the phone and hear, ‘Hi, this is a<br />
producer from Harpo Studios.’”<br />
The producer explained that they were planning a show about<br />
reality television, and asked if Marina could be in Chicago that<br />
Wednesday with the “biggest and best cake” she’d ever made in her<br />
life. “Just something that would make Oprah’s jaw drop – that was<br />
pretty much all the direction we were given,” she says.<br />
In addition to the short turnaround time and the 10 wedding<br />
cakes being produced, it was a holiday weekend, and everything<br />
was closed that Monday. “It was pure chaos,” Marina says. “But<br />
how do you say no to Oprah”<br />
More importantly, Marina wanted to do it for her mother.<br />
“Before she passed, she was definitely my biggest cheerleader,”<br />
she says fondly. “And there was just a couple of things she always<br />
believed I would do in my career. One was to write a book, and<br />
the second was to be on Oprah. She used to start sentences with,<br />
‘Someday, when you’re on Oprah . . .’ so no matter how busy I was,<br />
there was no possibility of turning that opportunity down.”<br />
To make it happen, Marina called on friends, including the<br />
very talented James Roselle. “I certainly wouldn’t have been able<br />
to do it without his help,” she says. “He happened to be driving to<br />
30 www.EdibleArtistsNetwork.com<br />
Background Image © naddya - Fotolia.com
Napa that weekend for a wedding, and we had planned to meet<br />
for lunch on his way back, so I said, ‘How about you just come<br />
here instead’ He did, and we basically worked together for about<br />
24 hours, mapping things out and figuring out what flowers he<br />
was going to make. Then he went to LA and got to work. I think<br />
he ended up putting together about 800 flowers while I stayed<br />
and built the structure and got everything else together that we<br />
needed.”<br />
Getting things together on a holiday weekend, while<br />
challenging, proved to be possible when Marina put what she calls<br />
“the power of Oprah” to work. “I cannot tell you how it opens<br />
doors,” she laughs. “I would first hear, ‘No, we can’t do that –<br />
Monday is a holiday,’ and then I would say, ‘Well, here’s the deal: I<br />
have been invited to be on the Oprah Winfrey show,’ and I would<br />
have that specially cut acrylic or whatever it was I needed in two<br />
hours. It was craziness, but that was the only way everything came<br />
together.”<br />
After sleepless nights and lots of legwork, Marina and her<br />
friends shipped 17 boxes to Chicago and took more with them<br />
on flights there. What resulted was an incredible 11-foot tall cake<br />
that wowed everyone, including Oprah herself.<br />
Creating the masterpiece from concept to completion within<br />
a matter of days kept Marina so focused, she didn’t have time<br />
to contemplate the amazing fact that she was about to see her<br />
mother’s prediction come to fruition. That moment of reflection<br />
came just as she was about to walk out on stage, and it was one she<br />
will treasure forever.<br />
“They had built these swinging bakery doors and said they<br />
wanted us to ‘bust’ out of them, and I was just kind of laughing<br />
because I wasn’t even sure what that meant,” she recalls. “Oprah<br />
had just done the intro to the show, so she was on stage, on the<br />
other side of the doors. They brought in the announcer for the<br />
Chicago Bulls to introduce all of us, and as he was doing my big<br />
lead-up announcement, getting ready to say my name, a light from<br />
above me backstage slowly came on.<br />
“It took everything for me not to burst out in tears,” Marina<br />
says, “but I had to go burst out those doors instead.” When she<br />
did, Oprah was there to greet her, and her mom, she knows, was<br />
cheering her on from “the best seat in the house.”<br />
Though some would think that brides-to-be would be<br />
knocking down her door after being on The Oprah Winfrey Show,<br />
Marina says that’s not the case. “If anything, in my local market, it<br />
kind of worked against me. I was already the person who had been<br />
on Food Network, but when you add Oprah to that, there just<br />
becomes a perceived unattainability about you, I think. I listened<br />
to people walk by my booth at bridal shows after that, tasting my<br />
samples and saying how amazing they were, but then whispering<br />
to each other, ‘That’s the really expensive cake place,’ when in<br />
reality, I’m priced for my market.”<br />
Of course, she doesn’t regret the television appearances. “It’s<br />
definitely been a fun ride,” she says. And though some might<br />
assume her cakes are beyond their budgets, plenty of others have<br />
learned that while the tastes and designs are exceptional, her prices<br />
are competitive for her market. Her monthly cake orders range<br />
from just a few during slow periods, to well over a dozen during<br />
wedding season.<br />
“My goal from the beginning was to do more intricate work<br />
and charge higher prices, as opposed to doing a greater number<br />
of simpler cakes,” she says. “When I was starting off and it was<br />
literally just me, I had to keep things manageable and find a way to<br />
meet that goal quickly. I did that by establishing a minimum dollar<br />
order, and that has served me well over the years.”<br />
Marina has also added staff, which has allowed her to do more<br />
cakes, while teaching and working on new business ventures. “The<br />
first couple of years I was teaching, I was on the road about once<br />
a month, and it was a little overwhelming,” she says. “The past<br />
year to year-and-a-half, I’ve tried to reign it in a bit so my travel<br />
schedule isn’t quite as crazy.”<br />
But her limited travel doesn’t mean there still aren’t great<br />
opportunities to learn from Marina. This October, she’ll be one<br />
of 17 instructors teaching at the first-ever Cake Camp UK in<br />
Nottingham, England. For those who prefer to stay closer to<br />
home, she’ll be teaching at the French Pastry School in Chicago in<br />
June, and she also offers four courses on Craftsy.com.<br />
“My teaching experiences with Craftsy have been really good,<br />
and have given me an opportunity to connect with students all<br />
over the world and still get that teaching high without having<br />
to travel so much,” she comments. “Some people blame the<br />
online class phenomenon for the fact that it’s now harder to fill<br />
classes and for instructors to charge what they used to for classes,<br />
www.EdibleArtistsNetwork.com<br />
31
ut I don’t really think that’s fair. It’s like blaming Amazon for<br />
closing down bookstores. While there may be some truth to it,<br />
complaining about it won’t change the reality.” Online classes, she<br />
adds, are “just the direction the world is going.”<br />
In addition to pointing out the popularity of ecommerce in<br />
general, Marina says the industry itself is shifting. “I think the<br />
whole cake industry has changed pretty significantly, even in<br />
the last six to 12 months,” she says. “The TV shows have kind<br />
of run their run. The proverbial cake bubble has burst. When it<br />
was at its peak, so many people entered the cake market. With<br />
many states having cottage food laws, the barrier to entry was<br />
low and suddenly, everyone was a cake designer. Soon it seemed<br />
like anyone who could make a decent cake and get a few hundred<br />
likes on Facebook figured they could be a teacher. The inundation<br />
of custom cake decorators and those joining the teaching market<br />
dramatically altered things in our industry.”<br />
Still, Marina continues to enjoy teaching, and sharing<br />
her knowledge and passion for the art of cake design. She<br />
especially loves teaching a variety of technique-based classes,<br />
and encouraging her students to take those techniques and apply<br />
them to their own designs. “I’m not so much a fan of cookie cutter<br />
designs where everyone in the class is expected to produce the<br />
exact same thing,” she says. “I think my role as a designer and<br />
instructor is to encourage people to tap into their own creativity<br />
and find inspiration in their own surroundings, events and<br />
experiences.”<br />
Inspiration, she says, is everywhere. “Back in the day when I<br />
was getting started, the only real visual references we had for cakes<br />
were bridal magazines. And the big ones only came out once or<br />
twice a year.” (When one of her cakes was published in Modern<br />
Bride, between the pages of Sylvia Weinstock and Collette Peters,<br />
she adds, “It was my biggest moment ever!”)<br />
These days, she says, “We live in such a visual world, with<br />
Facebook and Pinterest and everything, there’s constant<br />
inspiration.” She encourages her students, though, to not limit<br />
their inspiration just to cake images. “I try to get them to see that<br />
they don’t just have to copy a cake because they see it and like<br />
it – they’re capable of putting together something based on other<br />
things outside of Pinterest.”<br />
Fashion, architecture and stationery are among Marina’s<br />
inspirations. “One of the things I love<br />
about working with clients is they’re always<br />
bringing me inspiration with their events,”<br />
she says. “I love sitting down with them<br />
and learning about their events as a whole.<br />
I like hearing about the venue, and seeing<br />
the dress, linens and stationery, and I enjoy<br />
the challenge of picking key design elements<br />
out of those things and finding a way to turn<br />
them into confections.”<br />
Her inspiration isn’t limited to details<br />
divulged during client consultations, though.<br />
“I take a lot of pictures while I’m traveling,”<br />
she says, “and most of my pictures are of<br />
windows, doors or some sort of ironwork or<br />
that kind of thing.” Little details on these<br />
architectural elements can find their way<br />
into her cake designs.<br />
“I love texture, and it’s one of the first<br />
things I consider when designing a cake,”<br />
she says. “Some of my favorite cakes are just<br />
white on white. I think the biggest challenge<br />
is to create texture with a monochromatic<br />
color scheme, and that could be through embossing, hand painting,<br />
sculpting or applique-type designs.<br />
“When I was in Lisbon, Portugal, I was doing a double-decker<br />
bus tour of the city, and there was one wall I saw that had the most<br />
interesting texture. All of my pictures of it were blurred because<br />
I took them as we passed by, so I couldn’t figure out what that<br />
texture was. It was really bugging me, so I sat through the entire<br />
bus tour again just to go back by that wall and get decent pictures,”<br />
she laughs. “I still have yet to make a cake with that texture, but it’s<br />
in my ‘to do’ file. Maybe it will make it into a book one day.”<br />
Like appearing on The Oprah Winfrey Show, Marina is<br />
determined to write a book, just as her mother said she would.<br />
“I’ve been exploring this, and it’s just really a matter of carving out<br />
the time to do it,” she says. “I know from several friends who’ve<br />
gone through the process that it’s certainly not something that<br />
happens overnight – it’s typically a couple of years in the making.”<br />
Opening her retail website, she says, is part of “that master<br />
plan.” By creating an additional revenue stream with the website,<br />
she hopes to free up the time needed to work on the book.<br />
“I thought of the retail website after my very first Food<br />
Network competition, so it’s been in my head for a very long<br />
time,” she says. “The idea came about because I was getting so<br />
many emails and questions about what I was using during the<br />
competition and why I was using that over another product.”<br />
She gets the same types of questions, she adds, in relation to<br />
her Craftsy classes. “At least with Craftsy, we’re able to provide<br />
links for products,” she says. “But being able to explain the ‘why’<br />
and put my own spin on it is something I’ve wanted to do for a<br />
long time.”<br />
Justcakeshop.com opened in early May, and offers visitors a<br />
more streamlined approach to shopping online for cake supplies. “I<br />
don’t try to carry every product out there,” Marina says. “I think I<br />
have less than 100 products on the site, but they’re all things I use,<br />
and I share information about why I use them.”<br />
Marina also guarantees that every product she carries is<br />
completely authentic. “Counterfeit products are rampant in our<br />
industry,” she says. “Inferior quality products posing as original<br />
items hurt manufacturers immensely. It’s disheartening, and it<br />
discourages innovation, but as long as people buy the counterfeit<br />
32 www.EdibleArtistsNetwork.com
products, they’ll continue to be made.”<br />
Among the genuine, quality products featured on her new site are her designs from<br />
Marvelous Molds. “Those were the result of a wonderful collaboration with Dominic<br />
Palazzolo from Marvelous Molds,” she says.<br />
The collaboration was born out of Marina’s participation in the Miley Cyrus<br />
Sweet 16 cake competition on Food Network Challenge in 2009. “My team and I<br />
used Marvelous Molds’ Silicone Plastique® to make our own molds for the sugar<br />
beads, which we used for the chandelier effect on the cake,” she explains. “We told<br />
people what we used, and Dominic approached me afterwards because he was getting<br />
a lot of inquiries. He asked if I’d be willing to collaborate with him to perfect those<br />
molds. I did and quite frankly, he’s a genius in that regard. He turned those molds into<br />
something extraordinary. They’re so complex, they can’t even be copied and in this day<br />
and age, that’s kind of unheard of.”<br />
In addition to nine sugar bead molds, Marvelous Molds offers seven button<br />
molds and 15 jewel molds in Marina’s collection. More is being added to the line this<br />
November. .<br />
“I think molds are a great way to increase consistency and productivity,” she<br />
comments. “Back in the early days, especially with Challenge, people thought that<br />
using molds was an easy way out. They’re more accepted now than they used to be,<br />
though.<br />
“I think a lot of times because people are so passionate about the art, they forget<br />
about the money part of it,” she adds. “And a lot of us kind of give ourselves away. I’m<br />
a fierce advocate for being paid for your time, your work and your creativity. Any molds<br />
or other tools I find that can help speed up the process and increase productivity and<br />
my bottom line, I’m a huge fan of.”<br />
So in addition to using tools to your advantage, what other advice would Marina<br />
give to aspiring cake artists “If you want to make a business out of it, my one question<br />
would be, ‘Are you sure’” she says. “I think people get into it because they’re passionate<br />
about what they do and they don’t really realize everything that’s entailed in making a<br />
successful business.<br />
“When I was just starting out, I wasn’t surprised by all that was involved, but the<br />
reality was definitely a little starker than I’d hoped. You’re the person who bakes the<br />
cakes, washes the dishes, mops the floor, does the deliveries, goes shopping . . . it’s<br />
all-encompassing,” she says. “My biggest piece of advice would be to go and work<br />
for someone else first to make sure it’s something you’re passionate enough about to<br />
withstand everything that goes with it.”<br />
From an artistic standpoint, Marina recommends expanding your education beyond<br />
cake classes. “Take photography, painting, drawing and other art classes,” she says.<br />
“These skills are transferrable to an edible medium, and really will help you to think<br />
outside of the box and be able to create things people haven’t seen before.”<br />
And those in her fifth grade science class who delighted in her chocolate<br />
volcano cake would certainly agree that unique design, when executed well, is<br />
a goal worth striving for.<br />
For more advice, instruction and inspiration from Marina, look<br />
for her on Craftsy.com and visit www.justcakeshop.com.<br />
Coming This<br />
Summer<br />
A new line of cutters and<br />
texture mats developed<br />
by Marina in conjunction<br />
with Autumn Carpenter for<br />
Autumn’s new “Sweet Elite”<br />
collection. The collection<br />
will feature signature tools<br />
and equipment created in<br />
collaboration with various<br />
designers throughout<br />
the cake industry. It will be<br />
unveiled at the ICES show,<br />
happening July 31 –<br />
August 3 in Albuquerque.<br />
www.EdibleArtistsNetwork.com<br />
33
Making<br />
Vegan Cakes<br />
by Chef Charity<br />
Chef Charity is a Celebrity Pastry Chef and Cake<br />
Artist based in San Diego, CA. She specializes in<br />
chocolate and sugar art, with particular regard for<br />
wedding cakes, as well as specialty and extreme cakes.<br />
(Though sometimes wedding cake and extreme cake is<br />
redundant…) She also specializes in baking and cooking<br />
for those with food allergies and sensitivities.<br />
Please visit her at www.chefcharity.com<br />
It was about 1995, the first time I heard the<br />
word VEGAN. I heard it from a fellow<br />
cancer survivor, as we were discussing<br />
various dietary changes we could/should<br />
make in order to keep our various cancers<br />
from recurring. VEGAN WTH<br />
What does it actually mean<br />
A vegan is someone who refrains from<br />
eating not only meat products, but<br />
anything that COMES from an animal,<br />
or animal by-products. Let’s list some<br />
of those, shall we Dairy (butter, cheese,<br />
milk, cream, ice cream, sour cream, cottage<br />
cheese, yogurt, even Devonshire cream &<br />
gelato) eggs (of any kind from any bird),<br />
goats milk and cheese, and gelatin. It’s a<br />
fairly extreme dietary lifestyle, but people<br />
choose to eat this way for different reasons,<br />
from allergies or health to personal beliefs.<br />
Nevertheless, when someone needs a<br />
cake that is vegan . . . WOW! What are<br />
a baker’s three main ingredients Butter,<br />
eggs, sugar. That’s two out of three you<br />
have to cross off. Now a vegan that’s also<br />
diabetic and gluten free Ok, let’s not get<br />
carried away. (Although I’ve actually had<br />
a couple of orders for cakes like that.)<br />
Back to basic veganism . . . So what on<br />
earth do you do if you need to bake for<br />
a vegan Well, thankfully, these days we<br />
have lots of products within our reach to<br />
use for alternative baking. Cakes are not<br />
that tough to do vegan. I’m providing you<br />
with two basic vegan cake recipes here:<br />
one chocolate, and one white. The white<br />
one can be flavored in many different<br />
ways. Both use oil instead of butter, and<br />
NO eggs. They even taste GOOD!<br />
Vegan buttercream is a bit of a trick. The<br />
word buttercream is made up of two<br />
words that a vegan can’t have! The good<br />
news is, there are these wonderful things<br />
called vegan butter sticks that are a butter<br />
alternative and have no animal products in<br />
them. My favorite one is by Earth’s Best.<br />
I’m providing you with a basic vegan<br />
buttercream and a quick chocolate<br />
buttercream. One snag with using vegan<br />
butter sticks is that within a buttercream,<br />
they don’t get super hard, so it’s more like<br />
using an American buttercream that’s<br />
softer than you might be used to.<br />
And what about fondant Well, when<br />
I need to cover a cake with fondant, I<br />
warn my customers that fondant does<br />
have either dairy or gelatin in it, so they<br />
just need to peel it off of the buttercream<br />
before eating.<br />
I wish you the best in your vegan<br />
adventures in baking. File these recipes<br />
away, and you’ll be prepared for when<br />
YOU get a request for a cake that’s vegan.<br />
Chocolate Vinegar Cake by Chef Charity<br />
Dry Ingredients<br />
• 1 1/2 c. flour<br />
• 1 c. sugar<br />
• 3 T. cocoa<br />
• 1/2 tsp. salt<br />
• 1 tsp. soda<br />
Wet Ingredients<br />
• 6 T. extra virgin<br />
coconut oil, melted<br />
• 1 tsp. vanilla<br />
• 1 T. vinegar<br />
• 1 c. water<br />
(room temperature)<br />
Sift dry ingredients into a bowl.<br />
Make an indentation in the dry ingredients for each of<br />
the wet ingredients.<br />
Mix all together very well and pour into an 8x8 pan.<br />
Bake at 350 degrees for 30-35 minutes or until a cake<br />
tester comes out clean.<br />
Quick Chocolate Frosting<br />
Melt half a package of semisweet chocolate chips and<br />
2 T. vegan butter sticks together in microwave (approx.<br />
1 minute). Add 1 to 1 1/4 c. sifted powdered sugar,<br />
alternating with 1/4 c. coconut milk until desired<br />
consistency is reached.<br />
White Vegan Cake by Chef Charity<br />
Dry Ingredients<br />
• 1 1/2 c. flour<br />
• 1 c. sugar<br />
• 3 T. almond meal<br />
• 1/2 tsp. salt<br />
• 1 tsp. soda<br />
Vegan buttercream<br />
Wet Ingredients<br />
• 6 T. extra virgin<br />
coconut oil, melted<br />
• 1 tsp. vanilla (or<br />
other flavoring)<br />
• 1 T. vinegar<br />
• 1 c. water<br />
(room temperature)<br />
Sift dry ingredients into a bowl.<br />
Make an indentation in the dry ingredients for each of<br />
the wet ingredients.<br />
Mix all together very well and pour into an 8x8 pan.<br />
Bake at 350 degrees for 30-35 minutes or until a cake<br />
tester comes out clean.<br />
1 c. Earth’s Best Vegan Butter, 1-2 lbs. powdered sugar<br />
(depending on the consistency you need), 1 tsp. vanilla,<br />
1-2 T. coconut milk (based on consistency you need)<br />
Tip: to emulate a cream cheese frosting, add a few<br />
pinches of citric acid to get that “tang.”<br />
34 www.EdibleArtistsNetwork.com<br />
Background Image © iadams - Fotolia.com
Background Image © Alexandr Vasilyev - Fotolia.com<br />
Edible<br />
Artists<br />
Network<br />
requests the honor<br />
of your presence...<br />
From This<br />
Cake Forward<br />
Welcome to our special<br />
wedding section. The following<br />
pages featurE step-by-step<br />
tutorials, enlightening articles,<br />
product ainformation,<br />
and more...<br />
www.EdibleArtistsNetwork.com<br />
35
Top Wedding Cake<br />
Trends for <strong>2014</strong><br />
By Elizabeth Solaru<br />
The past few years has seen lots of exciting developments in the cake world with new<br />
techniques and tools making many designs a possibility.<br />
According to trend reports, weddings are getting softer, lusher and more personalised<br />
with pale pinks (think dusky, neutrals and antique pinks) being back in vogue. Wedding<br />
cakes have become an expressive medium for any couple and represents the artistic<br />
centrepiece of many wedding receptions. Traditional cake flavours such as Vanilla,<br />
Chocolate and Lemon will still be popular but these flavours will be enhanced with<br />
liquers, sophisticated buttercreams, ganaches, unusual conserves, purees, mousses, and<br />
gelees. Also, you will see hidden designs and more colour inside the wedding cake.<br />
Here’s a look at what we think might be the top wedding cake trends for <strong>2014</strong>:<br />
36 www.EdibleArtistsNetwork.com<br />
Background Image © Ildogesto - Fotolia.com
Photographed at<br />
The Royal Exchange<br />
City of London<br />
Statement Cakes<br />
From tall statuesque edifices to<br />
upside down, gravity defying<br />
pieces, brides are looking for<br />
ways to make their wedding<br />
cake an unforgettable one.<br />
We also predict that unusual<br />
or non traditional cake<br />
shapes will also be on the<br />
increase and a key wedding<br />
cake trend for <strong>2014</strong>.<br />
www.EdibleArtistsNetwork.com<br />
37
Frills, Thrills & Spills<br />
Frilly, soft cakes that mimic the exquisite folds, rosettes and ruffles of<br />
wedding dresses by designers such as Vera Wang have been all the rage<br />
for a while now. This is set to continue throughout <strong>2014</strong> and beyond.<br />
Metallics: Golds, Silvers & Bronzes<br />
Metallic touches and accents on cakes were one of the hot trends of 2013.<br />
Brides, you can now add a touch of one of these precious metals to the<br />
centre piece of your reception and continue this top wedding cake trend!<br />
38 www.EdibleArtistsNetwork.com<br />
Photographed by<br />
FO Photograohy<br />
www.fophotography.com
Photographed by<br />
Cristina Rossi Photography<br />
www.cristinarossi.co.uk<br />
Bold Colours<br />
The pantone colour for <strong>2014</strong> is the<br />
pinky purple Radiant Orchid. Blending<br />
both cool and warm undertones, this<br />
colour has an appealing hue and can<br />
work brilliantly on a cake. A wonderful<br />
choice for any bride that adores the<br />
regal opulence of purple and<br />
wants her cake to pop in <strong>2014</strong>.<br />
www.EdibleArtistsNetwork.com<br />
39
Dessert Tables<br />
Also called sweet tables and dessert bars,<br />
desert takes are a very imaginative way for<br />
brides to incorporate some of their favourite<br />
edible delights into their wedding. The dessert<br />
tables usually reflect the style and colours of the<br />
wedding and can be formal or informal.<br />
40 www.EdibleArtistsNetwork.com<br />
Photographed by Kristyn Harder Photography
Vintage Wedding Cakes<br />
Some may be over the trend for anything<br />
vintage but for true romantics like me, lace,<br />
roses and pearl vintage wedding cakes are just<br />
too pretty to do away with. In fact one of our<br />
most pinned cake on Pinterest is our gorgeous<br />
white and blush lace cake pictured here.<br />
www.EdibleArtistsNetwork.com 41<br />
Photographed by Claire Graham Photography
Naked Cakes<br />
Ideal for rustic weddings, these gorgeous cakes are uncovered and feature<br />
generous layers of buttercream, jams, conserves, fruit purees or curds. In<br />
keeping with the natural look, they can be decorated with fresh flowers or fruit.<br />
42 www.EdibleArtistsNetwork.com<br />
Photographed by Celine Chaplin Photography
Cupcakes<br />
Reports of the demise of the cupcake may be a little premature.<br />
Whilst there has been many challengers to the cupcake throne<br />
and these little delights may have lost their shine a little, they<br />
are still being requested by many brides. The fight back for<br />
cupcakes may be in the way they are adorned with the most<br />
realistic edible jewellery, sugar flowers. They can even be tiered<br />
so take that cronuts, donuts and macaroons!<br />
Geometric Cakes<br />
Geometric patterns on cakes has been a growing<br />
phenomenon. They appeal to the sensibilities of modern brides<br />
with their structured patterns and elegant clean lines.<br />
Photographed by Cristina Rossi Photography<br />
Photographed by<br />
Celine Chaplin<br />
Photography<br />
Elizabeth’s Cake Emporium is an<br />
internationally renowned cake<br />
company with a reputation for<br />
creating beautifully handcrafted<br />
cakes that are adorned with the<br />
most realistic edible jewellery,<br />
sugar flowers, lace, pearls and<br />
gems. Their creations have been<br />
featured in numerous blogs and<br />
national and international publications,<br />
and on TV and Radio.<br />
www.elizabethscakeemporium.com
Couture<br />
Mini<br />
Designed to gift each guest at your Wedding with their own<br />
beautiful cake, individually created and decorated specially for them.<br />
The colours and lace trimming can be tailored to match in with theme<br />
of the Wedding. These Couture Mini Cakes can be presented on<br />
delicate vintage china plates for the small intimate wedding or on<br />
a large tiered cake stand for a grander affair…either way these little<br />
cakes with bring great joy to the wedding guest!<br />
Bridal<br />
Cakes<br />
Designed and created<br />
by Louise Scofield<br />
• Sugar Paste<br />
• Flower Paste<br />
• Iced 2inch Round cake<br />
• Garret Frill Cutter<br />
• Cocktail sticks<br />
• Non Stick Rolling Pin<br />
• Edible Pearl White<br />
Lustre Powder<br />
• Brooch/Button Moulds<br />
• Lace Ribbon<br />
• Edible Glue<br />
• Palette Knife<br />
• Paste Colours of your<br />
choice<br />
• Large Soft Dusting<br />
Brush<br />
• Royal Icing<br />
DOWNLOAD<br />
THE PDF<br />
44 www.EdibleArtistsNetwork.com
1. Marzipan and sugar-paste your 2inch Round cake.<br />
Allow to fully dry before starting work on the frills.<br />
2. Turn your<br />
iced cake<br />
upside<br />
down.<br />
3. To create the frills, mix a little flower paste into the<br />
sugar-paste. Roll this out to 1 – 2 mm thickness.<br />
4. Use a Garret frill cutter to cut out the shape.<br />
5. Using a cocktail stick roll across each<br />
small scallop to frill the icing.<br />
www.EdibleArtistsNetwork.com<br />
45
6. Attach the frill to the iced cake, with a tiny amount of<br />
edible glue. Once the frill is secure the frills can be gently<br />
lifted with a cocktail stick, to enhance the frilled effect. If<br />
the frilled piece of sugar paste does not fit the complete<br />
circumference of the cake, then simply add another small<br />
section of frilled paste. Gently rub the join to blend the<br />
paste and create a smooth finish. The amount of frilled<br />
layers you add to the cake is personal choice, depending<br />
on the finished look you require.<br />
7. Once the frills are dry, turn the cake the correct<br />
way up and attach your chosen ribbon.<br />
8. Using a large soft brush and gentle circular motions<br />
dust your cake and frill with edible Pearl white lustre<br />
powder. It is best not to use your brush loaded with ‘dust<br />
powder’, as this will create a blotchy effect on the cake.<br />
Swirl your brush on a piece of kitchen paper before<br />
dusting the cake and this will ensure you only have a<br />
very tiny amount of dust in the brush.<br />
9. Use your favourite moulds to create<br />
a sugar brooch for the top of the cake<br />
and a sugar button for the side detailing.<br />
To create a two-tone brooch, add<br />
the sugar paste to the mould in two<br />
stages, as shown in the photos.<br />
46 www.EdibleArtistsNetwork.com
10. Dust the buttons and brooches in edible white lustre powder.<br />
11. Create edible sugar<br />
paste pearls by rolling<br />
small amounts of sugar<br />
paste into crease free<br />
balls of paste. Dust with<br />
Edible white lustre<br />
powder to create a<br />
pearlised finish.<br />
12. Secure the sugar brooch and pearls to the cake<br />
with a small amount of royal icing<br />
13. To complete<br />
the Couture<br />
Cake Design,<br />
add a little sugar<br />
button to the<br />
side of cake.<br />
Louise Scofield is an inspirational Sugar Craft<br />
teacher and Cake Decorating Artist, with many<br />
years of experience in teaching all areas of cake<br />
decoration, wedding cakes and sugar flower making.<br />
Based in Ludlow Shropshire Louise teaches<br />
from her private home studio, where she has created<br />
a beautiful environment for students to learn.<br />
Please visit Louise at www.louisescofield.co.uk<br />
www.EdibleArtistsNetwork.com<br />
47
Inspiration...<br />
Education...<br />
Motivation...<br />
Join us...<br />
www.edibleartistsnetwork.com<br />
www.facebook.com/EdibleArtistsNetwork<br />
www.twitter.com/edibleartistsNW<br />
NETWORK MAGAZINE<br />
www.pinterest.com/edibleartists<br />
www.edibleartistsnetwork.com<br />
NETWORK MAGAZINE<br />
THE Information Source for Home<br />
Bakers & Sugar Artists
Let CakeSafe save you time and money<br />
with no more on-site assembly!<br />
Drive your cakes fully assembled to the venue!<br />
The original and best method for<br />
transporting any tiered cake, safely,<br />
securely, and without stress!<br />
Only CakeSafe provides you<br />
with this much confidence in<br />
each cake delivery.<br />
“Zane and I just love the Spray Booth from CakeSafe”.<br />
— Norm R. Davis & Zane Beg - The Sweet Life<br />
We now offer a modular spray booth for<br />
air brush artists. No more overspray mess!<br />
401-533-3636 www.CakeSafe.com<br />
GET THE SCOOP TODAY!<br />
Amazing tutorials, special events and<br />
promotions, great articles, and more...<br />
Subscribe to our FREE<br />
newsletter today!<br />
www.EdibleArtistsNetwork.com<br />
NETWORK MAGAZINE<br />
www.edibleartistsnetwork.com<br />
Exclusive deals for subscribers only!<br />
NETWORK MAGAZINE<br />
THE Information Source for Home<br />
Bakers & Sugar Artists<br />
www.EdibleArtistsNetwork.com<br />
49
Sugar Flower<br />
Arranging<br />
by James Rosselle<br />
Have you admired the work of cake designers and also wondered how they<br />
do floral work Well, there is an art to arranging flowers on a cake.<br />
Arranging sugar flowers may not be simple. It can be intimidating, in fact<br />
terrifying! As we all know, sugar flowers are a labor of love. They are made<br />
petal by petal and are very fragile items. The sound of shattering sugar<br />
flowers breaks my heart. Don’t let that thought scare you. My advice, show<br />
those flowers who is boss. Here are some guidelines I like to follow in<br />
arranging sugar flowers on a cake.<br />
Know your materials. I like to categorize flowers. In a flower arrangement,<br />
you most commonly find foliage, filler flowers and larger dominant flowers.<br />
Foliage includes leaves, berries, and twigs. These items are used to<br />
compliment and accent the arrangement. Foliage can also be used as “fillers”<br />
and are typically added in an arrangement after the larger flowers.<br />
Filler flowers generally consist of smaller flowers like hydrangeas, hyacinth,<br />
and jasmine. These are used to fill the spaces in the arrangement. Filler<br />
flowers are typically the last item placed in an arrangement.<br />
Chef James Rosselle is a<br />
graduate of the California<br />
School of Culinary Arts in<br />
Pasadena and is passionate<br />
about where life has taken<br />
him. He has won all four of the<br />
Food Network Challenges in<br />
which he has competed. In<br />
2011, James was named to the<br />
“Top Ten Cake Artists” by Desert<br />
Professional Magazine.<br />
Please visit James at<br />
www.ellecakes.com or<br />
www.jamesrosselle.com.<br />
Larger flowers of the bunch can be peonies, roses, tulips, orchids, etc. The<br />
larger flowers should be the first items placed in the arrangement. I like<br />
to sporadically arrange and place the large flowers to set the tone for the<br />
arrangement. Large flowers can be arranged in bunches or close together for<br />
contrast or systematically placed to create harmony.<br />
The next idea to consider is harmony and contrast. Both are used in flower<br />
arranging to create balance. Harmony is when the cake design and flower<br />
arrangement compliment the venue and it’s surroundings. I will try and<br />
incorporate some of the elements of the venue in the cake design to create<br />
harmony. Contract on the other hand, can be achieved when the design of<br />
the cake and flowers are different. The contrast of the design should be done<br />
in a way that the flowers and cake stand out in a tasteful way.<br />
If you follow these simple guidelines you are sure to have a stunning design<br />
for every occasion.<br />
50 www.EdibleArtistsNetwork.com<br />
Background Image © artspace - Fotolia.com
52 www.EdibleArtistsNetwork.com<br />
Cake Created by<br />
Chef James Rosselle
Cake Created by<br />
Chef James Rosselle www.EdibleArtistsNetwork.com 53
54 www.EdibleArtistsNetwork.com<br />
Cake Created by<br />
Chef James Rosselle
Are you hosting an<br />
event, show or class<br />
Launching a<br />
new product<br />
Do you have news you’d<br />
like to share<br />
We would like to share it<br />
with our community!<br />
Please tell us about<br />
your event or<br />
other special happening!<br />
NETWORK MAGAZINE<br />
Send your www.edibleartistsnetwork.com<br />
information and photos to<br />
cheryl@edibleartistsnetwork.com<br />
NETWORK MAGAZINE<br />
THE Information Source for Home<br />
Bakers & Sugar Artists<br />
www.EdibleArtistsNetwork.com<br />
when you make<br />
Cakes<br />
TM<br />
Flour Confections<br />
Wholesale Cake<br />
Decorating Supplies<br />
Shop 24/7 online at:<br />
www.f lourconfections.com<br />
Find all your favourite<br />
brands including:<br />
Satin Ice, Enjay, Culpitt,<br />
Confectioners Choice<br />
Fondarific, SugarFlair,<br />
Fondx, Americolor, JEM,<br />
Patchwork, SugarVeil,<br />
Crown Cookware,<br />
Designer Stencils, FMM,<br />
PME, and much more...<br />
Flour Confections<br />
1084 Brock Road<br />
(Salk Road) Unit 5<br />
Pickering, ON<br />
888 443-CAKE (2253)<br />
www.f lourconfections.com<br />
sales@f lourconfections.com<br />
www.EdibleArtistsNetwork.com<br />
55
Simply<br />
Gold<br />
by Chef Joshua Simpson<br />
Supply List<br />
• 5 Tier fondant (Fondarific)<br />
covered cake<br />
• Gum paste<br />
• Lemon Oil<br />
• Glass container with lid<br />
• Sugar Art gold dust<br />
• Cornstarch<br />
• Confectioners Glaze<br />
• Ball tool<br />
• Needle tool<br />
• Paint brushes<br />
(flat, Rigger, soft mop)<br />
• Rolling pin<br />
• Lace molds<br />
• Broach mold<br />
• Piping gel<br />
Accomplished, professional chef and<br />
event designer, Joshua Simpson has<br />
experience working with a variety of<br />
customers – from international<br />
performing artists to hotels to<br />
convention centers. In early 2013,<br />
Simpson started Twisted Fig, Inc.<br />
to expand his creativity and services<br />
into new territories. Providing high<br />
quality products that are “stupid<br />
easy,” his gourmet line allows people<br />
with limited to advanced cooking<br />
skills to take basic ingredients and<br />
blend them with rich, full bodies<br />
flavors that take all the guess<br />
work out of meal creation.<br />
Visit www.twistedfiginc.com<br />
for additional information or<br />
email chef@twsitedfiginc.com<br />
DOWNLOAD<br />
THE PDF<br />
56 www.EdibleArtistsNetwork.com
Step One<br />
Dust a nonstick work area with cornstarch. (I find<br />
it most useful to use a stocking and tie a knot in<br />
the top. This will give you a much finer dusting).<br />
Kneed a small amount of gum paste in your hands<br />
until flexible and smooth.<br />
(Keep covered when not in use.)<br />
Step Two<br />
Using your rolling pin, roll out the gum past paper<br />
thin, about the thickness of a dime.<br />
Step Three<br />
Dust your lace mold with the corn starch, and tap<br />
out the extra. Lay the rolled out gum paste over the<br />
mold and lightly press to make an indention. Using<br />
your needle tool cut out the shape and remove the<br />
excess. Place the paste back into the mold and firmly<br />
press into the mold to insure proper molding. Turn<br />
over and carefully remove your molded lace. Use the<br />
needle tool to help remove the lace from the mold so<br />
that the lace is not stretched.<br />
www.EdibleArtistsNetwork.com<br />
57
Step Four<br />
In the glass jar, mix the gold dust with lemon oil.<br />
(A little oil goes a long way). You’re looking for<br />
the consistency of a thin paint or heavy cream<br />
(keep covered to prevent the oil from evaporating).<br />
Step Five<br />
Using a flat brush carefully paint the lace. Taking<br />
care to constantly stir the gold “paint” to keep it<br />
consistent. Allowing drying for a few seconds<br />
before a second coat is applied if needed<br />
Step Six<br />
Using a soft brush, apply a thin coat of the<br />
confectioners glaze to seal the “paint” onto the lace.<br />
58 www.EdibleArtistsNetwork.com
Step Seven<br />
In the glass jar, mix the gold dust with lemon oil.<br />
(A little oil goes a long way). You’re looking for<br />
the consistency of a thin paint or heavy cream<br />
(keep covered to prevent the oil from evaporating).<br />
Step Eight<br />
Using a flat brush carefully paint the lace. Taking<br />
care to constantly stir the gold “paint” to keep it<br />
consistent. Allowing drying for a few seconds<br />
before a second coat is applied if needed<br />
Notes: using you Rigger brush (fine point) touch up any areas that<br />
were missed with the gold paint. If you want more detail using #<br />
one or 00 tip, over pipe with royal frosting to add depth. After the<br />
royal frosting dries you can paint it gold.<br />
www.EdibleArtistsNetwork.com<br />
59
Baroque In<br />
Chocolate<br />
DOWNLOAD<br />
THE PDF<br />
By Mari Senga<br />
Start by making a multi-level cake board, 18 inches in diameter,<br />
with a 14 inch riser. Cover it in white modeling chocolate, and add a<br />
twisted rope border, with antique copper painted accents. Add 2 layers<br />
of ribbon, a lacy antique copper over a burgundy ribbon at bottom<br />
edge of the board, to continue the opulence.<br />
Bottom Layer<br />
Step 1 Cover a 12 inch round cake in burgundy<br />
modeling chocolate for the bottom tier. Then cut out a<br />
12-3/8 inch circle of the modeling chocolate from the center<br />
of the cake board, this way the cake could be sunk down in<br />
to the board for a cleaner look along the bottom edge.<br />
Step 2 Roll out white modeling chocolate<br />
and emboss it with a texture pin (Sweet Arts’,<br />
Elegance). Cut it into a 2 inch height, with<br />
mitered ends, so the ends would blend seamlessly<br />
when put together. Wrap it around the bottom<br />
tier, securing the ribbon to the cake with corn<br />
syrup, joining the seams as cleanly as possible.<br />
60 www.EdibleArtistsNetwork.com
Step 3 Next, create a molded border using 2 molds<br />
of your choice. Repeat around the cake 3 times, securing with<br />
corn syrup. There were small spaces between the moldings, so I<br />
piped some small tip #3 royal icing shells between.<br />
Step 4 The antique copper details are painted with a<br />
mixture of orange oil (you can use lemon too), and equal parts<br />
Copper Penny, and Bronze dust colors. This mixture will be<br />
referred to as the antique copper mixture. Using citrus oil helps<br />
keep the luster and shine of the metallic color.<br />
Step 5 Add a molded white rope border to the base<br />
of the cake to finish.<br />
Middle Layer<br />
Cover your 9 inch round layer with white modeling chocolate.<br />
Using the same mold as you did for the first layer and create<br />
3 more impressions and place them around the cake. Fill the<br />
gaps with short sections of molded rope and paint the molded<br />
details the antique copper colored mixture.<br />
Small hand painted details can be added to simulate an allover<br />
pattern.<br />
A wreath of flowers was added to the top of this tier. (Directions<br />
for the flowers will be explained later in this tutorial).<br />
Add a 1.5 inch small 4 inch round separator between layers 2<br />
and 3 to create more space for the flowers and to create a more<br />
balanced silhouette.<br />
www.EdibleArtistsNetwork.com<br />
61
Top Layer<br />
Step 1 Roll out burgundy modeling chocolate and cut<br />
it into 6 - 2.5” wide by 6” long ribbons. Emboss each ribbon with<br />
a stencil of a leafy acanthus vine (I cut this stencil myself ) and<br />
then dust with bronze and copper penny dusts to give the same<br />
antique copper color.<br />
Step 2 Using a small ball tool create imprints just<br />
inside the edge of the ribbon and paint them with the antique<br />
copper mixture.<br />
Topper (Flower Bowl)<br />
Step 1 Make a 4 inch half ball cake, and cut off the<br />
rounded top 1/2 inch. Replace with Styrofoam. Cover the flat<br />
side with pale green 4 inch disc of modeling chocolate that is 1/8<br />
of an inch thick. Roll out your pale copper modeling chocolate,<br />
and cover the ball with modeling chocolate, overlapping the edge<br />
a ¼ inch. Then continue smoothing the ball to get the shape.<br />
I use a piece of modeling chocolate and shape to my fit the grasp<br />
I use, and flatten the base, then add a bit of powdered sugar,<br />
and rub my cake, in a circular motion. This gives me a porcelain<br />
smooth finish, and gets the modeling chocolate to mold to the<br />
cake no matter the details.<br />
Step 2 The foot of the bowl is made by starting with<br />
a 5 inch disc of modeling chocolate that is 1 inch thick and<br />
place it on a 5 inch round cake board.<br />
62 www.EdibleArtistsNetwork.com<br />
Step 3 Using a fondant smoother, bevel the edge<br />
of the 5 inch disc. Dust the smoother with powdered sugar<br />
to keep it from sticking to the modeling chocolate. Lift the<br />
smoother up 3/8 of an inch, keeping it vertical, press in on the<br />
edge, as you rotate the disc, and indent a 1/2 inch in to the<br />
edge, to create a second ledge.
Step 4 Bring your smoother in about an inch on the<br />
top of the disc, pressing down with your smoother, create a ¼<br />
inch edge. This is where your bowl will sit. Use a small amount<br />
of melted chocolate to adhere the bowl to the foot, tipping the<br />
bowl forward slightly.<br />
Step 5 Roll out a 15 inch sausage of the pale copper<br />
colored modeling chocolate, to a 1/8 inch diameter. Cut one<br />
end at an angle.<br />
Step 6 Paint a trail of corn syrup around the<br />
overlapped edge of the bowl. Place the cut end of the sausage<br />
at the front of the bowl were it has been tipped forward.<br />
Attach the sausage all the way around the top of the bowl.<br />
When the sausage meets the cut end, use your spatula or a<br />
small knife to cut the remainder of the sausage off at the same<br />
angle. You can smooth the cut edges together with a fingertip<br />
dusted with powdered sugar. Let the modeling chocolate set<br />
up before the next step.<br />
Step 7 Roll out a 15 inch sausage of the pale copper<br />
colored modeling chocolate, to a 1/8 inch diameter. Cut one<br />
end at an angle.<br />
To learn how to make the flowers for this cake please follow this link:<br />
www.edibleartistsnetwork.com/tutorials-2/baroque-in-chocolate<br />
Or if you are a subscriber you can download the entire tutorial from the digital issue.<br />
Mari is best known for her modeling chocolate flowers and designs. She loves sharing her<br />
talents, knowledge, and enthusiasm of sugar arts at cake events, and in her classes.<br />
MSSugararts.webs.com<br />
https://www.facebook.com/pages/M-S-Sugararts<br />
www.EdibleArtistsNetwork.com<br />
63
64 www.EdibleArtistsNetwork.com<br />
Cake photo by<br />
Heath Blackburn Photography
Victorian Steampunk<br />
A Tutorial by:<br />
Sarah Myers of High Five Cakes Wedding Cake<br />
Step 1<br />
Cover the two hexagon tiers and<br />
the bottom petal tier<br />
with white fondant.<br />
Apply a texture to all sides of the<br />
large round and hexagon shaped<br />
tiers.<br />
I used impression mats<br />
from Marvelous Molds<br />
(www.marvelousmolds.com) to<br />
give these tiers texture.<br />
DOWNLOAD<br />
THE PDF<br />
Supply List<br />
• 2 – Hexagon shaped tiers<br />
• 2 – Graduated round tiers<br />
• 1 – Petal tier<br />
• Texture or impression mats<br />
• Gear print pattern printed<br />
on edible paper<br />
• 6 – Romantic silhouettes<br />
printed on edible paper<br />
• Assorted molds including<br />
gears, lace, keys, locks, etc.<br />
• Exacto knife<br />
• Paint brush<br />
• Assorted sized circle,<br />
square, diamond, petal, star<br />
shaped cutters.<br />
• Stitching tool<br />
• Toothpicks<br />
• Gumpaste<br />
• Isomalt<br />
• Edible glue<br />
• Sterling colors<br />
Step 2<br />
Airbrush the textured tiers and the petal tier.<br />
I started with a deep harvest brown at an<br />
angle to accent the details of the impression. I<br />
then went all over with a golden brown<br />
to warm it up.<br />
Step 3<br />
Allow the tiers to dry and then dust them with<br />
copper dust. I use Copper Penny Sterling dust<br />
from The Sugar Art (www.thesugarart.com).<br />
This color can be found in the High Five Cakes<br />
Steampunk Color Collection.<br />
www.EdibleArtistsNetwork.com<br />
65
Step 4<br />
Apply the gear print pattern. Cut your gear<br />
printed edible paper and place it directly onto<br />
the round tiers with buttercream as shown.<br />
I used a gear pattern from Icing<br />
Images’ iDesigns (www.icingimages.com.)<br />
Step 5<br />
Cover the tiers with white fondant. You<br />
should be able to see a faint outline of the<br />
edible image under the fondant which will help<br />
guide you in cutting the fondant later.<br />
Apply black 3/4 inch stripes of fondant and<br />
use the stitching tool to create detail<br />
along the sides.<br />
Step 6<br />
Using an Exacto knife carefully cut a “T” shape<br />
in the white fondant where you see the faint<br />
gear image underneath the fondant.<br />
Step 7<br />
Peel the sides down and secure with<br />
toothpicks until dry.<br />
66 www.EdibleArtistsNetwork.com
Step 9<br />
Print 6 random romantic silhouettes on edible<br />
icing paper. I use Icing Images Premium<br />
Icing Sheets (www.icingimages.com). You can<br />
group the images together on one page. Each<br />
image should be approximately 2 inches wide.<br />
Step 8<br />
Stack all tiers and finish cutting the white fondant<br />
to expose the images.<br />
Next, adhere the icing sheet to a thin piece<br />
of white fondant.<br />
Then use the larger circle cutter to cut the<br />
images into 2 inch circles.<br />
Once all cuts are peeled back, lightly<br />
airbrush the tiers to create an antiquing<br />
effect. I used Harvest Brown. You can<br />
use a darker color on the edges to<br />
create an aged look.<br />
Step 10<br />
Using two circle cutters, one slightly larger than<br />
the other, cut frames for the “portholes”.<br />
To get a more perfect circle position the<br />
larger cutter first & then position the smaller<br />
cutter inside of the larger cutter and cut.<br />
www.EdibleArtistsNetwork.com<br />
67
Step 11<br />
Use a small round piping tip to add<br />
detail. Set to the side to dry.<br />
Step 12<br />
Melt clear isomalt and mix in some black color. I use isomalt<br />
from Simi Cakes (www.simicaakes.com) and Turkish Black<br />
Elite color dust from The Sugar Art (www.thesugarart.com).<br />
Pour the isomalt into the molds of your choosing. I used<br />
molds from Simi Cakes, Marvelous Molds, & Jade Eye.<br />
Step 13<br />
Roll out some gumpaste about 1/8 inch thick<br />
and begin making cutting out the gears. Rather<br />
than creating a specific pattern I use assorted<br />
circle, diamond, star, tips, and petal cutters to<br />
make my shapes. Use your imagination to<br />
create different shapes.<br />
Step 14<br />
To create the lace effect along the bottom of the<br />
cake use some black and white fondant and<br />
some lace molds. For the small chain molds I<br />
used black fondant and Elisa’s Fashion<br />
Accessories Mold Line (Collette and Kathy).<br />
For the lace I used white fondant and Earlene<br />
Moore’s Enhanced Lace collection from<br />
Marvelous Molds (www.marvelousmolds.com).<br />
Step 15<br />
Next, you will need to paint the<br />
gears and portholes. I use High<br />
Five Cakes Steampunk color collection from<br />
The Sugar Art (www.thesugarart.com). Paint<br />
the portholes and adhere the cut pictures to the<br />
back of the porthole using edible glue made of<br />
tylose and water. Paint all other accents (gears,<br />
accent molds, chain trim, etc.) and allow to dry.
Step 16<br />
Apply the lace fondant to each petal of the<br />
base cake. Using a tooth pick, prop the<br />
bottom to dry. Once set, remove the tooth<br />
picks. Antique the lace using brown airbrush.<br />
Step 17<br />
Create a clear lens for the portholes.<br />
I use DECOgel from Icing Images<br />
(www.icingimages.com) Allow to dry.<br />
Step 19<br />
Apply the portholes to the center of each<br />
panel of the lower hexagon tier.<br />
Step 18<br />
Once all accessories and isomalt<br />
shapes are dry, use your<br />
imagination and place them all over your cake.<br />
You can cut the sides off of some of the gears to<br />
look as though they are bursting out of the cake.<br />
The hardened gears will stick to the cake.<br />
Sarah Myers, a self-taught cake artist<br />
and the owner of High Five Cakes in<br />
Waverly, Ohio. I jumped into the cake<br />
biz with both feet back in 2010 so that<br />
I could pursue my love of art while<br />
getting paid to create masterpieces with<br />
food. Although I’m a relative ‘new kid<br />
on the block’ in the cake world, I am<br />
known for my work with fondant,<br />
Isomalt, and modeling chocolate<br />
where my passion for sculpting can<br />
sated. One of the things I enjoy most<br />
about my job is traveling to compete and<br />
teach at various cake events.<br />
www.facebook.com/highfivecakeco<br />
www.EdibleArtistsNetwork.com<br />
69
Insticaketion<br />
Because we know you can never have too much<br />
cake (well, at least in visual terms), we’ve gathered<br />
some of the most amazing cakes of late and are<br />
presenting them here in one scrumptious collection.<br />
Feel free to ooh, ahh and use these delectable<br />
designs as instigation for your own works of art.<br />
Then, be sure to share your creations with us at<br />
edibleartistsnetwork.com and on our Facebook page!<br />
www.facebook.com/EdibleArtistsNetwork<br />
70 www.EdibleArtistsNetwork.com
Andrea “Andi” Brown<br />
The Yellow Rose Cakery, LLC<br />
www.theyellowrosecakery.com<br />
www.EdibleArtistsNetwork.com<br />
71
Helenna Mannila<br />
Clearly Cake<br />
www.facebook.com/ClearlyCake<br />
72 www.EdibleArtistsNetwork.com
Alla Levin<br />
The Cake Zone<br />
www.TheCakeZone.com<br />
www.EdibleArtistsNetwork.com<br />
73
Chef Mitchie<br />
Mitchies Munchies<br />
www.mitchiesmunchies.com<br />
74 www.EdibleArtistsNetwork.com
Joanne Prainito<br />
Edible Artists Network<br />
www.EdibleArtistsNetwork.com<br />
75
Krishanthi Armitt<br />
Cakes by Kristhianthi<br />
Photography by Eddie Judd<br />
76 www.EdibleArtistsNetwork.com
Louise Scofield Sugarcraft<br />
www.louisescofield.co.uk<br />
www.EdibleArtistsNetwork.com<br />
77
78 www.EdibleArtistsNetwork.com<br />
Rosalind Miller<br />
Rosalind Miller Cakes Ltd<br />
www.rosalindmillercakes.com
Maggie Austin<br />
Maggie Austin Cake<br />
maggieaustincake.com<br />
www.EdibleArtistsNetwork.com<br />
79
Anna Elizabeth<br />
Anna Elizabeth Cakes<br />
www.annaelizabethcakes.com<br />
80 www.EdibleArtistsNetwork.com
Julie Tenlen<br />
The Sweet Life by Julie<br />
www.facebook.com/thesweetlifebyjulie<br />
www.EdibleArtistsNetwork.com<br />
81
How To<br />
Grow Your<br />
Customer<br />
Base Online<br />
by Theresa Happe<br />
Over the years, I’ve read forum post after forum post<br />
from frustrated cake decorators stuck in the rut of<br />
providing cakes to low paying customers consisting of<br />
family, friends and their referrals. After they’ve made<br />
dozens of cakes for pennies in profit, they’re desperate to<br />
attract new customers outside the circle of their current<br />
customer base. Helpful forum members may tell these<br />
cake decorators to network at their child’s school, church<br />
and on Facebook, which certainly can prove fruitful;<br />
however, there’s a better way to go about drawing in<br />
fresh faces.<br />
Wouldn’t you love it if your website could serve as a<br />
referral machine so you could focus on your business<br />
These new customers will have no idea you were<br />
creating cakes with ornate gum paste flowers for $1 an<br />
hour nor will they know Aunt Betty’s cake was only $25<br />
because you made it for the cost of the materials.<br />
Whether you own a shop or a home based business, the steps are the same for improving your website’s visibility in local<br />
search results. Attaining high ranking in local search is very different than achieving national rankings, but there really is<br />
no need to rank nationally unless you’re going to earn thousands of dollars for flying across country to make a cake on<br />
site. In the event you do achieve that level of recognition, potential customers would be searching for you by your name.<br />
When I first entered the world of online search, search<br />
Welcome to the World of Search<br />
results were listed in alphabetical order. So, if your<br />
website’s page title began with the letter “A”, your<br />
website was on page 1 in Google for the particular search term that page targeted. Search has evolved tremendously<br />
over the past decade and the rules have changed. Luckily, attaining a high ranking locally is relatively easy in comparison<br />
to achieving national rankings. There are 100 billion local searches performed each month in Google. Your piece of the<br />
action is there for the taking when you position yourself to rank locally.<br />
Assess the Competition<br />
If you perform a search for “cake decorator” in Google, do you see local<br />
search results If not, your job will be much easier. How close is your<br />
nearest competitor If he/she is not in your neighborhood, you’re bound<br />
to take the top position in the local search results once you take the steps to do so. But, even if you do have nearby<br />
competition, you can draw in new customers and here’s how to go about it:<br />
Here, we will focus on getting your website found in local<br />
search results for keywords people type into search. There<br />
are steps to take both on your website and off. Note that<br />
there are many different attributes that come into play<br />
both on and off your website. This outline represents a<br />
simplified explanation that be broken down further into<br />
more detail.<br />
On-Page Ranking Factors<br />
1. Have a contact page with your company name, address<br />
and phone number. The URL should contain the name of<br />
your city.<br />
Example: www.mycakebusiness.com/orlando-florida.html<br />
2. Use keywords in your page titles, but don’t go<br />
overboard. The keyword should only appear once. If<br />
you right click on any page of your website and select<br />
“view source,” look for the words between the title tags<br />
located just below the tag on the page: Example:<br />
Orlando Wedding Cake Decorator<br />
These are the words the search<br />
engines use to list each page<br />
of a website in the search<br />
results. Be sure the title of<br />
each page is different and<br />
relevant to the specific<br />
keyword that page targets.<br />
82 www.EdibleArtistsNetwork.com
3. Don’t rely on pictures alone.<br />
Yes, people love pictures of beautiful cakes. The problem<br />
is that the search engines can’t appreciate them nearly<br />
as much as we do. The only information a search engine<br />
can derive from a photo on your website is the file name<br />
and alt text. Written words are what get websites found in<br />
search for keywords and the higher the quality of the page,<br />
the better the page will perform. In addition to a photo<br />
gallery, your pages could have text that incorporates the<br />
keywords you want to rank for and your location. A high<br />
quality page should be a minimum of 300 words. In every<br />
niche, what is necessary to rank well varies depending on<br />
what the competition is doing. Take a peek at what type of<br />
content your competitor to get an idea. (But, please don’t<br />
copy the wording. This is called duplicate content and will<br />
hurt your website).<br />
Off-Page Local Ranking Factors in Order<br />
of Importance:<br />
1. Reviews – reviews by real customers where your website<br />
is listed online; i.e. Yelp.<br />
2. Citations – Your business name, address and phone<br />
number on important local business listing websites.<br />
3. Links from high quality, related and local websites.<br />
Citations<br />
Before you can take advantage of<br />
customer reviews, you need to have your<br />
citations in place. The most important<br />
thing to get right is consistency of your business listings.<br />
Your business name, address and phone number must be<br />
exactly the same on your website as it is all across the web.<br />
That means if your address is 5 Main Street on one site, it<br />
should not be 5 Main St. on another. If you abbreviate a word,<br />
do it everywhere. Every little character matters down to the<br />
comma, period and dashes between the digits in your phone<br />
number.<br />
A good tool for creating consistent listings, correcting incorrect listings and managing duplicates is Moz Local. There are<br />
other tools available online but most do not handle duplicate listings and cost more than the $49 fee for this service. The<br />
tool provides a downloadable spreadsheet with instructions for filling in all the relevant information for your listings on<br />
the 7 major listing services that provide business listings across the web. Moz.com/local<br />
Another important attribute of your business listing is the category. Be sure to choose the correct categories for your<br />
business. Once you are logged into moz.com/local, you can search by main category or keyword to find the most<br />
appropriate main category for your business. You may select up to 5 different categories.<br />
In the event you do have a lot of local competition, you can take your citation strength a bit further with some research.<br />
Whitespark.ca offers a tool that allows you to enter local keywords and find out where your competition is getting their<br />
citations. For instance, if you perform a search for “Orlando cake decorator”, you will get back a list of urls where your<br />
competitors for that term derive their listings in order to pursue a listing of your own on the same website.<br />
Co-citations are also helpful in local rankings and they are not links. Google is<br />
smart enough to pick up on where your business name is listed in conjunction<br />
with a part of your address, whether it is together with your street, the town or<br />
your phone number.
Once all of your business listings are in place, the<br />
Reviews number and frequency of reviews play a role in<br />
how well you rank. Here’s where those low paying<br />
customers can prove quite valuable. Invite them by<br />
email or through Facebook to leave you a review.<br />
Please don’t ask people who are not your customers to leave you reviews.<br />
Yelp has language filters in place to detect fake reviews. These websites are<br />
designed to be savvy enough to detect that the most likely people to review<br />
your service are in close proximity to your business location.<br />
One way you can encourage reviews is by offering a discount off the<br />
customer’s next cake order. If you don’t ask your satisfied customers to leave<br />
a review, the only reviews you may end up with are those from disgruntled<br />
customers. When people have a bone to pick, they are more likely to look for<br />
a way to get the word out.<br />
Links from Relevant & Local Websites<br />
Theresa Happe is an Internet<br />
Marketing Specialist and author of<br />
two websites dedicated to cake<br />
decorating, CakesWeBake.com and<br />
Cake-Decorating-Corner.com<br />
This is where most people get confused, make huge mistakes and can actually harm their websites. There is so much<br />
to cover on this topic that I implore you to do some reading before you embark on link building on your own. One of<br />
the more daunting outcomes of link building improperly is the fact that Google will now penalize your website for links<br />
it considers spammy or unnatural. You can end up tossing your website right out of the search results if you build too<br />
many links in a short period of time, too many links using keywords or attain links from low quality websites.<br />
Related websites: Your safest bet is to find popular cake and baking websites, provide quality content to them (perhaps<br />
a tutorial or tips) and let the website owners link however they choose to.<br />
Local websites: Perhaps your customer owns a business nearby and links to you. The geographical proximity of her<br />
business makes it a good local link. If you belong to the local chamber of commerce or an industrial association, those<br />
are good sources for links.<br />
One of the biggest mistakes I’ve seen repeatedly by<br />
owners of all different types of websites is copying the<br />
competition. Yes, you can learn from observing what<br />
your competition is doing, but keep one thing in mind:<br />
when you copy your competition, you copy what your<br />
competitor is doing right, but you also copy what your<br />
competitor is doing wrong. Your competitor may be doing<br />
well today doing those wrong things and then get hurt<br />
down the line when Google catches on or updates its<br />
algorithm. I highly recommend you familiarize yourself<br />
with Google’s Webmaster Tools guidelines to be aware of<br />
what types of behavior can get you into trouble before you<br />
do the damage.<br />
A few of the many things to avoid that I commonly see:<br />
• Submitting content that is already on your website or<br />
submitting the same content to multiple websites. Doing<br />
so creates duplicate content which is bad both for your<br />
website and the website that hosts it.<br />
• Creating tons of blog comments using keywords to link<br />
to your website.<br />
Caution<br />
• Keywords in signature links from forums.<br />
• “Do follow” links from paid ads. (“Do follow” links are links<br />
that pass page rank).<br />
There’s a very long list of things you should avoid doing.<br />
When in doubt, consult with an expert.<br />
If the process seems overwhelming or you feel you just<br />
don’t have the time, you can implement the above steps<br />
a little at a time or hire someone to help you get found<br />
in local search. The lesson I hope you take away from<br />
this article is that you don’t need to feel helpless about<br />
the condition of your customer base. And once you do<br />
something about it, there just may be someone living a<br />
mile away from you who will be very excited to find you in<br />
the search results the next time she needs a cake.<br />
84 www.EdibleArtistsNetwork.com
What’s New<br />
and<br />
DECOgel<br />
Icing Images<br />
www.icingimages.com<br />
DECOgel is a gelatin-based product<br />
created for bakers, cake decorators, and<br />
sugar artists to melt and pour in to<br />
molds or use as a freehand decoration to<br />
decorate cakes and other sugar pieces.<br />
Although DECOgel cannot create sugar<br />
pieces such as sculptures or decorations<br />
that stand away from the cake, it is a<br />
very flexible decoration that is very easy<br />
to use.<br />
Marshmallow Fondant<br />
Oakleaf Cakes<br />
www.oakleafcakes.com<br />
Since the dawn of cake decorating, marshmallow<br />
fondant has been one of the best kept secrets of<br />
the pros, but few ever chose to make it in their<br />
bakeries because of the massive amounts of time<br />
and labor it entails. At the same time, large<br />
commercial fondant manufacturers have also shied<br />
away from this fondant’s marshmallowy goodness<br />
in favor of fondants that are less prone to set or<br />
dry when exposed to air, to maximize their shelf<br />
life while minimizing their packaging expenses.<br />
At Oakleaf Cakes, we’ve taken on the problem with the same degree of raw<br />
creativity and determination that is demonstrated in every one of our amazing<br />
cake sculptures. We’ve developed a new way to make and package our fondant<br />
that allows us to create and distribute marshmallow fondant on a large scale,<br />
right out of our bakery in Boston, MA.<br />
Grex Genesis XGi and XSi<br />
Grex Airbrush<br />
www.grexairbrush.com<br />
Grex® continues to infuse innovation into<br />
their airbrushes; focused on ergonomics<br />
and adaptability to user applications and<br />
preferences. The defining design<br />
element is the ergonomic hand<br />
grip set that provides improved<br />
comfort and handling. They<br />
have been specifically<br />
engineered for<br />
maximum adaptability<br />
by leveraging the<br />
already wide selection<br />
of accessories.<br />
Yummy Yogi Love Collection<br />
Yummi Yogi<br />
www.yummyyogi.com<br />
A series of cookies in the shape of yoga<br />
poses designed with a love theme!<br />
www.EdibleArtistsNetwork.com<br />
85
ComposiMold-FC<br />
ComposiMold<br />
www.ComposiMold.com<br />
Use ComposiMold-FC to make unique molds of objects YOU choose.<br />
Then re-melt the mold to re-use the material for over 35 different mold<br />
making projects. Works beautifully with chocolate, fondant, gumpaste, and<br />
more. Perfect for custom cake decorating or personalized wedding favors too!<br />
Pristine Powders<br />
Cake Connection<br />
www.cakeconnection.com<br />
Completely EDIBLE petal and luster dust<br />
made in the USA... allows you to safely add<br />
some pizazz to your sugar art decorations.<br />
Over 75 vibrant colors available!<br />
SugarEd Productions Online School<br />
SugarEd Productions<br />
www.sugaredproductions.com<br />
Learn everything you need to create amazing wedding, novelty and<br />
sculpted cakes. From basic to advanced skills, there’s something<br />
for everyone. Video and photo tutorials, recipes, information<br />
on running a business and photography, photo galleries, and a<br />
message forum where you can interact with other cake enthusiasts.<br />
SugarEd Productions online school provides all the cake decorating<br />
instruction you need in one place.<br />
Vintage Poetry Mesh Stencils<br />
Evil Cake Genius<br />
www.evilcakegenius.com<br />
Set of four Mesh<br />
Stencils for use with<br />
Royal Icing. Creates<br />
classic poetry<br />
from Elizabeth<br />
Barrett Browning,<br />
E.E. Cummings,<br />
and Shakespeare<br />
perfectly in seconds.<br />
86 www.EdibleArtistsNetwork.com
Let your creativity flow<br />
with the ease of stencils!<br />
over 700 designs for<br />
cakes • cookies • cupcakes<br />
custom design services<br />
DesignerStencils.com • 800-822-7836<br />
Surprise Them With<br />
The finest powdered<br />
flavors for fondant,<br />
buttercreams<br />
and more.<br />
Edible Petals<br />
powdered floral<br />
scents for gum<br />
paste flowers.<br />
Flavor!<br />
More Than Cake, Inc.<br />
(757) 508-8961<br />
www.morethancakeonline.com<br />
www.EdibleArtistsNetwork.com<br />
87
Michigan<br />
Sugar Art<br />
Showcase<br />
By Gary Silverthorn<br />
Amazing skill and techniques abound at the<br />
Michigan Sugar Art Showcase, held in April<br />
<strong>2014</strong> in Detroit, Michigan. This event was<br />
sponsored by the Michigan chapter of ICES,<br />
and is held in conjunction with the Great Lakes<br />
Mini Classes. Entries came in from all over the<br />
United States and Canada, as entrants from<br />
all skill levels competed for over $20,000 in<br />
cash and prizes. This is a bi-annual event,<br />
with the next show scheduled for 2016.<br />
For more information please visit<br />
www.MichiganICES.org.<br />
Following are some of my favorites.<br />
88 www.EdibleArtistsNetwork.com<br />
Cake created by<br />
Kristina Boroff
Cake created by<br />
Nancy Collard<br />
Background Image © pashabo - Fotolia.com<br />
www.EdibleArtistsNetwork.com<br />
89
Cake created by<br />
Dawn Parrott<br />
Jelly Bean Art<br />
created by<br />
Joan Link<br />
90 www.EdibleArtistsNetwork.com
Cake created by<br />
Annette Yu<br />
Cake created by<br />
Deborah Moroni<br />
Cake created by<br />
Sheila Miller<br />
www.EdibleArtistsNetwork.com<br />
91
Incredible Edible Art<br />
Roseann Filosa Atkins<br />
The Decorated Dessert<br />
www.TheDecoratedDessert.com<br />
Barbara Regini<br />
www.facebook.com/pages/<br />
Barbie-e-i-suoi-Pasticci/<br />
233577960026543ref=br_rs<br />
Cathy Simpson<br />
Sister’s Sweet Creations<br />
www.facebook.com/<br />
SistersSweetCreations<br />
Katie Mills<br />
Sweeties Cakery<br />
www.facebook.com/SweetiesCakery<br />
92 www.EdibleArtistsNetwork.com<br />
Background Image © n_eri - Fotolia.com
from around the web...<br />
Paula -Jane Bourke<br />
Scrumptious Cakes by Paula-Jane<br />
www.facebook.com/<br />
ScrumptiousCakesbyPaulaJane<br />
Cassandra Rice<br />
Elaborate Cakes<br />
www.facebook.com/<br />
ElaborateCakesTilton<br />
Myriam Perez<br />
Bizcocho Pastries<br />
www.facebook.com/pages/<br />
Bizcocho-Pastries/<br />
203897119744356<br />
Rumana Jaseel<br />
IncrEDIBLEart<br />
www.facebook.com/INCREDIBLEART<br />
www.EdibleArtistsNetwork.com<br />
93
Advertiser Index<br />
Cake Connection.................................... 2<br />
www.cakeconnection.com<br />
CakeSafe®..............................................49<br />
www.cakesafe.com<br />
Cake Cruise...........................................55<br />
www.cakecruise.com<br />
Choco-Pan.............................................95<br />
www.choco-pan.com<br />
CK Products..........................................87<br />
www.ckproducts.com<br />
Designer Stencils.................................87<br />
www.designerstencils.com<br />
Desirable Cake.....................................55<br />
www.desirablecake.com<br />
Enjay Converters LLC..........................55<br />
www.enjay.com<br />
Flour Confections................................55<br />
www.flourconfections.com<br />
Grex Airbrush.......................................27<br />
www.grexairbrush.com<br />
Icing Images.........................................15<br />
www.icingimages.com<br />
Icing Inspriations.................................87<br />
www.icinginspirations.com<br />
Icing Smiles...........................................51<br />
www.icingsmiles.org<br />
Marvelous Molds................................... 5<br />
www.marvelousmolds.com<br />
More Than Cake, Inc............................87<br />
www.morethancakeonline.com<br />
Petal Crafts............................................13<br />
www.petalcrafts.com<br />
Simi Cakes.............................................21<br />
www.simicakes.com<br />
Social Gloo............................................87<br />
www.thesocialgloo.com<br />
SugarEd Productions..........................27<br />
www.sugaredproductions.com<br />
Sugar Petals..........................................87<br />
www.sugarpetals-usa.com<br />
Inspiration, Education & Motivation<br />
Awesome projects & recipes, insightful<br />
business advice, intriguing interviews<br />
with industry stars and more are<br />
available in every issue of<br />
Edible Artists Network Magazine<br />
NETWORK MAGAZINE<br />
View the www.edibleartistsnetwork.com<br />
magazine online —<br />
no need to download!<br />
NETWORK MAGAZINE<br />
THE Information Source for Home<br />
Bakers & Sugar Artists<br />
When you subscribe to the<br />
digital issue you receive<br />
access to all back issues<br />
FREE of charge!<br />
Subscribe today!<br />
www.eanmagazine.com/subscribe<br />
94 www.EdibleArtistsNetwork.com
Royal Icing Pansies<br />
Foil Wrap Rolls<br />
Cutter Sets<br />
Royal Icing Dainty Bess<br />
Edible Color Sprays<br />
PRICE<br />
SERVICE<br />
Gumpaste<br />
Peony<br />
QUALITY<br />
SELECTION<br />
Cakedeco.com<br />
All your Cake Decorating Needs... From One Great Source!<br />
Tier Cake Stands<br />
Unique Wedding Toppers<br />
Cake Platforms<br />
Gumpaste<br />
Hibiscus<br />
Hablamos Espanol<br />
Email: info@cakedeco.com<br />
718-545-4600 www.cakedeco.com