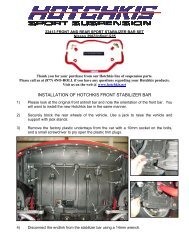
Installation Instructions - Hotchkis Sport Suspension
Installation Instructions - Hotchkis Sport Suspension
Installation Instructions - Hotchkis Sport Suspension

Create successful ePaper yourself
Turn your PDF publications into a flip-book with our unique Google optimized e-Paper software.
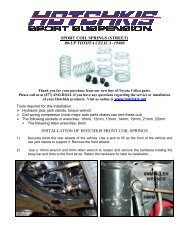
2281R 1978-1988 GM A Body<br />
Lube the polyurethane bushing surface on both dogbone end links. Look at your<br />
dogbone and notice that the bushing sleeves on each end have different inner<br />
diameters. The trailing arm bolt will use the small sleeve and the sway bar bolt will use<br />
the large hole. Use the 7/16” x 4” bolt to attach the end link to the trailing arm. The bolt<br />
should be pointing inboard. Use the 7/16” SAE washer (small) on the bolt head side<br />
and the 7/16” USS washer (larger) on the nut side. Do not fully tighten at this time.<br />
3. Attach Sway Bar to the End Links<br />
Orient the sway bar so that the <strong>Hotchkis</strong> sticker is right side up. At this time you can<br />
choose the stiffness setting by using the hole at the end for a softer setting or the 2 nd<br />
hole from the end for a harder setting. Use the ½” x 3” bolt to attach the sway bar to the<br />
end link. The bolt should be pointing inboard. Use the ½” SAE washer (small) on the<br />
bolt head side and the ½” USS washer (larger) on the nut side. Do not fully tighten at<br />
this time.<br />
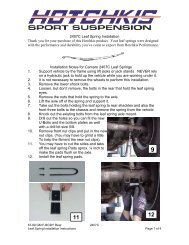
4. Install Axle Brackets<br />
First step is to install the provided stainless steel U-bolts. Each U-bolt will install a little<br />
inboard of the spring mount. You will have to unclip the brake line from the axle tab and<br />
<strong>Hotchkis</strong> <strong>Sport</strong> <strong>Suspension</strong> LLC. 2