SPORT COIL SPRINGS 2004+ Scion xA & xB Part #19412 ...
SPORT COIL SPRINGS 2004+ Scion xA & xB Part #19412 ...
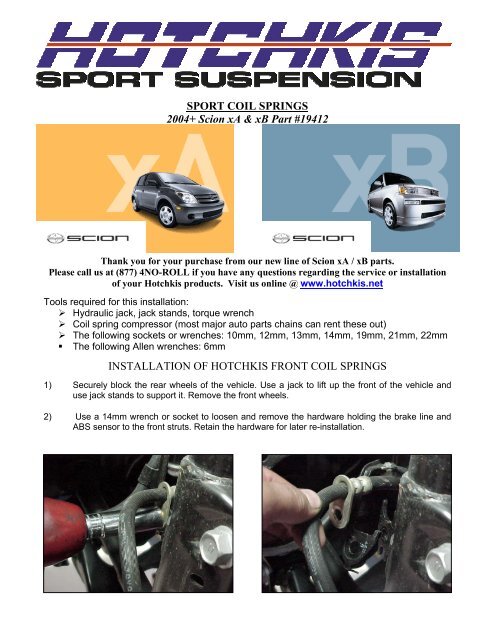
SPORT COIL SPRINGS 2004+ Scion xA & xB Part #19412 ...

Create successful ePaper yourself
Turn your PDF publications into a flip-book with our unique Google optimized e-Paper software.
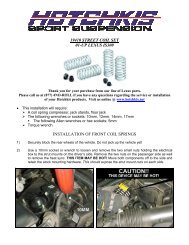
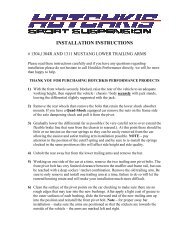
5) Place one of the struts into the coil spring compressor and collapse the spring until the upperstrut plate is no longer under tension. Using a marking device mark the upper and lower springseat. Remove the rubber dust cover on the top of the strut. Use a 17mm socket to remove theretaining nut at the top of the strut. Retain the hardware for later Re-installation.6) Remove the upper strut plate, upper spring seat, rubber dust shield / spring isolator, and thestock bump stop from the end of the strut. This should leave the stock spring completelyexposed. Slowly release the compression on the spring and remove the stock spring.
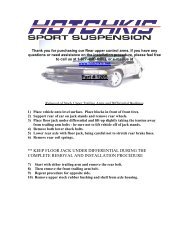
7) Slide the new bump stop over the end of the strut with the narrow end facing towards thebottom. It should rest just below the “shelf” on the end of the strut shaft. Place the new Hotchkisspring over the strut. Make certain to line up the bottom of the coil, or tail, with the perch in thelower spring seat and isolator pad.8) Replace the rubber spring isolator / dust cover on the spring. Place the upper spring seaton top of the coil and align the coil assembly by using your markings. The upper seatdoes have a key way so make sure that lines up before you begin to tighten.
9) Once you placed in the key way go ahead and clock it to your markings, place the spacerand strut top on the strut. Now tighten the upper strut nut.
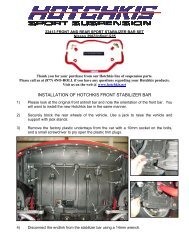
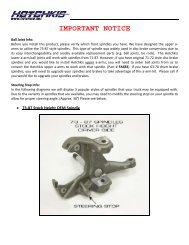
2) Securely block the front wheels of the vehicle. Use a jack to raise the rear end until thewheels are off the ground and use jack stands to support the vehicle. Now your ready topull the stock spring out.3) Now your ready to remove the shock for the bump stop exchange. Cut the bump stopright at the edge of the plastic boot. Remove the gold metal cap. Insert the new HT bumpstop into the plastic boot. Place the metal cap onto the new bump stop. Place theassembly onto the shock.
4) Place the shock back into the shock tower and reinstall.5) Now you are ready to install the rear coils. *Note the rear of the car is still raised of theground* As you lower the vehicle line up the shock eye with the stud and tighten the nutusing a 17mm socket.Congratulations, you’re now finished installing your set ofHotchkis coil springs!Don’t forget your strut tower brace!
THERE ARE NO WARRANTIES, EXPRESSED OR IMPLIED, INCLUDING ANY IMPLIED WARRANTIESOF MERCHANTABILITY OR FITNESS FOR A PARTICULAR PURPOSE, WHICH EXTEND BEYONDTHE DESCRIPTION ON THE FACE HEREOF. ANY IMPLIED WARRANTIES ARE DISCLAIMED TO THEFULLEST EXTENT PERMITTED BY LAW. THIS WARRANTY DOES NOT COVER CONSEQUENTIALDAMAGES, LOSS OF TIME OR REVENUES, INCONVENIENCE, LOSS OF USE OF THE VEHICLE,DAMAGE TO THE VEHICLE OR COMPONENTS OF THE VEHICLE, ANY OTHER TYPE OFCONSEQUENTIAL DAMAGES, OR OTHER INCIDENTAL OR INDIRECT DAMAGES. HOTCHKIS’MAXIMUM LIABILITY UNDER THIS WARRANTY SHALL IN NO EVENT EXCEED THE PURCHASEPRICE OF THE PRODUCT. Some states do not allow limitations on how long an implied warranty lasts orthe exclusion or limitation of incidental or consequential damages and in such states the above limitations orexclusions may not apply. This limited warranty gives the purchaser specific legal rights and the purchasermay have other rights that may vary from state to state.Technical InformationHotchkis Performance makes every effort to ensure that you are provided with the most accurateand up-to-date technical information. However, all technical information is approximate and mayvary upon application. Additional suspension components may be needed in some applications,depending upon the make, model, engine and chassis of the vehicle. Hotchkis Performance is notresponsible for any consequences resulting from manufacturer’s technical mid-year changes.Hotchkis Performance products should only be installed by a qualified, licensed auto mechanicexperienced in the installation of such products.Warranty Claim Procedure:The answer to ALL the following questions should be YES before making a warranty claim:• Is the product appropriate to your application?• Did you carefully and thoroughly read the instructions provided along with theproduct?• Do you have the original invoice or sales receipt?• Is the return date within 36 months from the purchase date?• Are you the original purchaser?• Was the product properly installed by a qualified, licensed auto mechanic?• Has the product been installed on the original vehicle on which it was installed at alltimes?• Is the product unmodified and clean?• Is the reason for return a legitimate product defect?If the answer to all these questions is YES, please contact our Customer Service Department at(562) 907-7757. You will be given a Returned Goods Authorization Number (RGA) valid for 60days. You will also be asked to ship the product prepaid to our facility. All shipments MUST be (i)prepaid, (ii) include the original invoice or sales receipt, (iii) show the RGA on the outside of thepackage and (iv) include your name, address, make and model of the vehicle, and a briefdescription of the claimed defect, including the circumstances under which the defect occurred.Warranty related inquires should be sent to the following address:HOTCHKIS PERFORMANCE, LLCC/O CUSTOMER SERVICE12035 BURKE ST. SUITE 13SANTA FE <strong>SPRINGS</strong>, CA 90670Hotchkis Performance will not accept product returns without the RGA number, receipt and theinformation described above. C.O.D. or collect shipments will be refused. Once the returns arereceived at Hotchkis Performance, we will evaluate the products, verify the sales receipt, andinvestigate the warranty claim.