MagLev Train Lesson Plan - MTU Mind Trekkers
MagLev Train Lesson Plan - MTU Mind Trekkers
MagLev Train Lesson Plan - MTU Mind Trekkers

You also want an ePaper? Increase the reach of your titles
YUMPU automatically turns print PDFs into web optimized ePapers that Google loves.
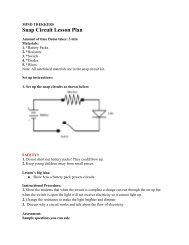
MIND TREKKERS<br />
<strong>MagLev</strong> <strong>Train</strong> <strong>Lesson</strong> <strong>Plan</strong><br />
Amount of time Demo takes: Approximately 5 minutes<br />
Materials:<br />
1. <strong>MagLev</strong> demonstration unit<br />
2. (2) 9-volt batteries<br />
3. Small Phillips-head screwdriver<br />
4. Legos<br />
5. Lego bases with magnets<br />
6. Foam stoppers or beanbag<br />
7. Clorox Wipes<br />
8. Battery Powered Lights<br />
9. Whiteboard/Dry erase marker<br />
Note: Some items are stored in a separate plastic bin.<br />
Set up instructions:<br />
1. Set demonstration unit on a sturdy table directly underneath a constant light source.<br />
2. Carefully lift the center tracks by holding onto the black support located between the tracks at the<br />
instrument end of the unit. (Lifting with one track may cause excessive torsion on the system)<br />
While lifting with one hand guide the support leg over the top of the LEGO brick tubs with your<br />
other hand. Check that the center support leg is vertically aligned.<br />
3. Slide the plastic cover off the instrument panel and set aside.<br />
4. Connect the two 9-volt batteries (located in a LEGO tub) you will hear clicking as the relay<br />
powers up.<br />
5. The two LEDs located next to the relay (black box on the circuit board) should be off. If they are<br />
lit there is not enough light on the photo resistors located at the ends of the track. Increase the<br />
light source or carefully adjust the variable resistor (lower left corner of the circuit board) with a<br />
small Phillips screwdriver. The variable resistor has 180 degrees of movement, do not force the<br />
adjustment, it will move very easily.<br />
6. Turn on the stopwatch. The stopwatch will start and stop when the photo resistors sense a<br />
shadow.<br />
7. Place a beanbag/foam at the bottom of each track to prevent damage to the cars.<br />
8. Attach battery powered lights to track using velcro. Ensure that these are directed at photosensors<br />
yet provide enough clearance for cars to travel down the track.<br />
9. Wipe down entire <strong>MagLev</strong> with Clorox Wipes, the <strong>MagLev</strong> gets dusty in transit.<br />
SAFETY!<br />
• Be careful of pinch points<br />
• Only lift center race tracks into position from the end support located between the two tracks.<br />
• Place a foam piece at the end of each track to prevent damage<br />
<strong>Lesson</strong>’s big idea<br />
High school level:<br />
● Magnetic fields can be used to create levitation and therefore eliminate sliding friction between<br />
two surfaces.<br />
● Air resistance must be dealt with through an aerodynamic car design<br />
● Electronic sensors used to measure the race time remove error due to human interpretation of the<br />
location of the car and reaction time in starting and stopping a stopwatch.
●<br />
The bean bag or foam at the end of the track slows and absorbs the impact from the car resulting<br />
in little to no damage to the car.<br />
Elementary school level:<br />
● Two magnets located with their north poles facing each other will repel one another – this causes<br />
the car to float in the air.<br />
Background information<br />
Vocabulary and definitions<br />
● <strong>MagLev</strong> – magnetic levitation<br />
● Relay – a switch controlled with an electric magnet, used to start and stop the stopwatch<br />
Instructional Procedure<br />
Timing a race:<br />
1. Zero-out the stopwatch (will not zero if a car is located at the bottom of the track)<br />
2. Place a car at the top of the track, release.<br />
3. The photo resistors will trip the relay and initiate the start and stop sequence on the stopwatch.<br />
4. The whiteboard can be used to record track records.<br />
5. Clear track and repeat.<br />
Assessment, Sample questions you can ask:<br />
1. Why is the method of using light to measure the race time better than using a student with a stop<br />
watch or a mechanical switch tripped by the car<br />
2. What would happen if the track was magnetized with North facing up and the bottom of the car<br />
was magnetized with South downward<br />
3. Which would be fastest down the track a Maglev or a wheeled car<br />
Clean Up<br />
• Place all loose objects into the Lego tubs, latch down.<br />
• Wipe down entire track with clorox wipes<br />
• Carefully follow the setup instructions in reverse to lower the center race tracks.<br />
References<br />
National K-12 Science Standards<br />
•