English Installation Guide - Power Commander
English Installation Guide - Power Commander
English Installation Guide - Power Commander
Create successful ePaper yourself
Turn your PDF publications into a flip-book with our unique Google optimized e-Paper software.
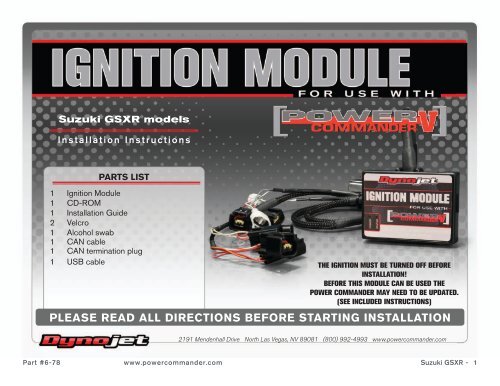
Suzuki GSXR models<br />
I n s t a l l a t i o n I n s t r u c t i o n s<br />
PARTS LIST<br />
1 Ignition Module<br />
1 CD-ROM<br />
1 <strong>Installation</strong> <strong>Guide</strong><br />
2 Velcro<br />
1 Alcohol swab<br />
1 CAN cable<br />
1 CAN termination plug<br />
1 USB cable<br />
THE IGNITION MUST BE TURNED OFF BEFORE<br />
INSTALLATION!<br />
BEFORE THIS MODULE CAN BE USED THE<br />
POWER COMMANDER MAY NEED TO BE UPDATED.<br />
(SEE INCLUDED INSTRUCTIONS)<br />
PLEASE READ ALL DIRECTIONS BEFORE STARTING INSTALLATION<br />
2191 Mendenhall Drive North Las Vegas, NV 89081 (800) 992-4993 www.powercommander.com<br />
Part #6-78 www.powercommander.com Suzuki GSXR - 1
IGNITION MODULE V<br />
INPUT ACCESSORY GUIDE<br />
ACCESSORY INPUTS<br />
USB CONNECTION<br />
Speed<br />
This input has the ability to activate a limiter<br />
based on speed. This is intended to be used<br />
as a pit lane speed limiter. You can use any<br />
OPEN / CLOSED type switch to activate this<br />
feature.<br />
CRANK<br />
ANALOG<br />
(not used)<br />
Launch<br />
Ground<br />
This input is intended to be used as a launch<br />
control. You can set a target RPM to limit<br />
the bike to when the clutch lever is activated.<br />
Once the clutch lever is released full RPM<br />
can be achieved. This requires a wire be<br />
connected to the grounding side of the clutch<br />
switch and the other end into this input.<br />
This is a digital ground. You can connect the<br />
BLACK/WHITE crank wire of the SFM to this<br />
location if necessary.<br />
EXPANSION PORTS 1 & 2<br />
GROUND<br />
Analog-<br />
Not currently used - updates to follow<br />
Connect to PCV and SFM<br />
LAUNCH CONTROL<br />
SPEED LIMITER<br />
SPEED LIMITER<br />
Crank-<br />
Connect the WHITE crank wire from the SFM<br />
(if installed) to this input. This is only needed<br />
if you are going to use the Rev Xtend feature.<br />
Wire connections:<br />
To input wires into the PCV first remove the rubber<br />
plug on the backside of the unit and loosen the<br />
screw for the corresponding input. Using a 22-24<br />
gauge wire strip about 10mm from its end. Push the<br />
wire into the hole of the PCV until is stops and then<br />
tighten the screw. Make sure to reinstall the rubber<br />
plug.<br />
NOTE: If you tin the wires with solder it will make<br />
inserting them easier.<br />
Part #6-78 www.powercommander.com Suzuki GSXR - 2
FIG.A<br />
The following pictures were taken on a GSXR600 and may look different from<br />
your actual model.<br />
1 Remove the main seat.<br />
2 Lift the front of the fuel tank up.<br />
3 Remove the air box.<br />
4 Place the Ignition Module next to the PCV and route the harness down the left<br />
hand side and go towards the front of the bike.<br />
5 Route the PCV to the left side of the throttle bodies making sure it does not<br />
interfere with the throttle linkage (Fig. A).<br />
FIG.B<br />
6 Disconnect the stock wiring harness from the coil sticks (Fig. B).<br />
FIG.C<br />
7 Plug the Ignition Module connectors in-line of the stock wiring harness and coil<br />
sticks (Fig. C).<br />
Ignition module colors:<br />
ORANGE - Cylinder #1<br />
YELLOW - Cylinder #2<br />
GREEN - Cylinder #3<br />
BLUE - Cylinder #4<br />
Part #6-78 www.powercommander.com Suzuki GSXR - 3
FIG.D<br />
8 Locate the crank pickup coil connector (Fig. D).<br />
This connector is a WHITE 2 pin connector with a BLACK and a GREEN wire<br />
located under the fuel tank near the right side of the engine.<br />
9 Connect the WHITE connectors from the Ignition Module in-line of the stock<br />
crank pickup sensor connectors.<br />
FIG.E<br />
10 Attach the ground wire of the PCV to the same location as the stock ground<br />
location on the back of the engine.<br />
This is where the negative battery cable is connected to.<br />
FIG.F<br />
Ground<br />
11 Install the Ignition Module in the tail section next to the PCV (Fig. F).<br />
12 Plug the CAN cable into one of the ports of the Ignition Module and the other<br />
end into one of the ports of the PCV.<br />
13 Plug the CAN termination plug (plastic) into any one of the remaining open<br />
ports of the Ignition Module or PCV.<br />
Part #6-78 www.powercommander.com Suzuki GSXR - 4
PCV<br />
Ignition Module<br />
From SFM<br />
Speed limiter use<br />
inputs 6 & 7<br />
Lauch control input 5<br />
Connecting the Ignition Module to the PCV:<br />
• The WHITE and the BLK/WHT wires from the Ignition Module are used ONLY if you want to use the Rev Xtend feature of the PCV. If you do NOT<br />
plan on using this feature then just tape the wires out of the way.<br />
• If you do plan on using the Rev Xtend feature then connect the WHITE wire from the Ignition Module to the #1 input position of the PCV. Connect the<br />
BLK/WHT wire to the #4 input position of the PCV. The BLK/WHT wire can also be connected to the #6 input position of the PCV if necessary.<br />
• If you are also using the SFM (Secondary Fuel Module) then you will need to connect the WHITE and BLK/WHT wires from the SFM into the Ignition<br />
Module. Connect the WHITE wire from the SFM to the #1 input position of the Ignition Module. Connect the BLK/WHT wire to the #4 input position<br />
of the Ignition Module. The BLK/WHT wire can also be connected to the #6 input position of the Ignition Module if necessary.<br />
Adding the Ignition Module to the PCV network:<br />
• First download the latest version of Control Center software which is 1.0.5.8.<br />
• To use the Ignition Module you may need to update your firmware in the PCV (and SFM if being used). Make sure the units are updated to firmware<br />
version 1.6.10 or newer. Go to VIEW - Device Information to see the current version. If you need to update the firmware go to <strong>Power</strong> <strong>Commander</strong><br />
Tools - Update firmware. The latest version of firmware and software can be found on the downloads page of www.powercommander.com or on the<br />
included CD.<br />
• Connect a USB cable to the PCV and another USB cable to the Ignition Module. The software will ask you to add the Ignition Module to the network.<br />
Click OK. Go to <strong>Power</strong> <strong>Commander</strong> Tools - Manage Network and click on Sync Devices Utility. Follow the on screen instructions.<br />
Part #6-78 www.powercommander.com Suzuki GSXR - 5


