

warning - Whirlpool
warning - Whirlpool
warning - Whirlpool

Create successful ePaper yourself
Turn your PDF publications into a flip-book with our unique Google optimized e-Paper software.
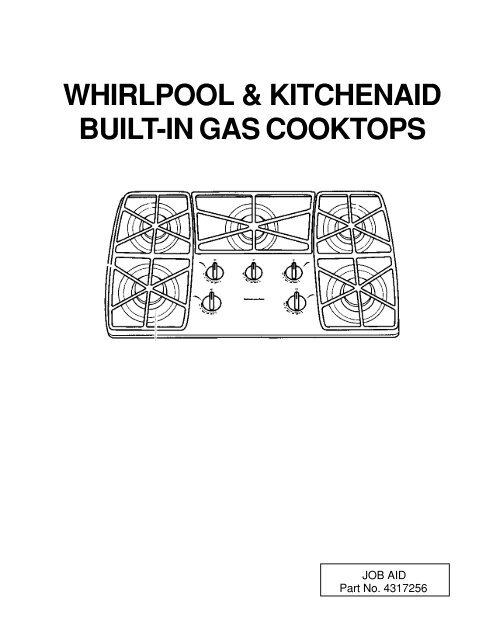
WHIRLPOOL & KITCHENAID<br />
BUILT-IN GAS COOKTOPS<br />
JOB AID<br />
Part No. 4317256
FORWARD<br />
This Job Aid, “Built-In Gas Cooktops,” (Part No. 4317256), provides the technician with information<br />
on the installation, operation, and service of KitchenAid & <strong>Whirlpool</strong> Built-In Gas Cooktops. It<br />
is to be used as a training Job Aid and Service Manual. For specific information on the model<br />
being serviced, refer to the “Use and Care Guide,” or “Tech Sheet” provided with the cooktop.<br />
The Wiring Diagrams and Strip Circuits used in this Job Aid are typical and should be used for<br />
training purposes only. Always use the Wiring Diagram supplied with the product when servicing<br />
the unit.<br />
GOALS AND OBJECTIVES<br />
The goal of this Job Aid is to provide detailed information that will enable the service technician to<br />
properly diagnose malfunctions and repair Built-In Gas Cooktops.<br />
The objectives of this Job Aid are to:<br />
• Understand and follow proper safety precautions.<br />
• Successfully troubleshoot and diagnose malfunctions.<br />
• Successfully perform necessary repairs.<br />
• Successfully return the cooktop to proper operational status.<br />
WHIRLPOOL CORPORATION assumes no responsibility for any repair<br />
made on our products by anyone other than Authorized Factory Service<br />
Technicians.<br />
Copyright 1999, <strong>Whirlpool</strong> Corporation, Benton Harbor, MI 49022<br />
- ii -
Table of Contents<br />
SPECIFICATIONS .................................................................................................................. 1-1<br />
INSTALLATION HIGHLIGHTS................................................................................................ 2-1<br />
Gas Supply Requirements ................................................................................................. 2-1<br />
Electrical Requirements ..................................................................................................... 2-3<br />
Installation.......................................................................................................................... 2-4<br />
Converting The Cooktop For Use With L.P. Gas ............................................................... 2-6<br />
PRODUCT OPERATION ........................................................................................................ 3-1<br />
Electronic Ignition System ................................................................................................. 3-1<br />
COMPONENT ACCESS ......................................................................................................... 4-1<br />
Component Locations ........................................................................................................ 4-1<br />
Removing The Maintop...................................................................................................... 4-2<br />
Removing A Venturi & Spark Ignitor .................................................................................. 4-3<br />
Removing A Spark Module & Power Cord......................................................................... 4-4<br />
Removing An Ignitor Switch & A Gas Valve ...................................................................... 4-5<br />
Removing The Gas Manifold ............................................................................................. 4-6<br />
COMPONENT TESTING ........................................................................................................ 5-1<br />
The Ignitor Switches .......................................................................................................... 5-1<br />
DIAGNOSIS & TROUBLESHOOTING.................................................................................... 6-1<br />
WIRING DIAGRAMS & STRIP CIRCUITS.............................................................................. 7-1<br />
TECH TIPS ............................................................................................................................. 8-1<br />
Surface Burners & Grates.................................................................................................. 8-1<br />
Cleaning The Surface Burners .......................................................................................... 8-2<br />
Requesting Assistance Or Service .................................................................................... 8-3<br />
KitchenAid Gas Cooktop Warranty .................................................................................... 8-4<br />
<strong>Whirlpool</strong> Gas Cooktop Warranty ...................................................................................... 8-5<br />
- iii -<br />
PAGE
KITCHENAID MODEL & SERIAL NUMBER DESIGNATIONS<br />
MODEL NUMBER<br />
MODEL NUMBER<br />
INTERNATIONAL SALES IND.<br />
OR MARKETING CHANNEL<br />
IF PRESENT<br />
K=KITCHENAID BRAND<br />
PRODUCT IDENTIFICATION:<br />
EC=ELECTRIC COOKTOPS<br />
GC=GAS COOKTOPS<br />
MERCHANDISING SCHEME<br />
C=CERAMIC GLASS<br />
D=DOWNDRAFT VENT<br />
G=GRILL/GRIDDLE<br />
M=MODULAR DOWNDRAFT<br />
N=INTERNATIONAL COLLECTION<br />
P=PROFESSIONAL/COMMERCIAL<br />
S=STANDARD/PORCELAIN METAL<br />
T=TEMPERED GLASS<br />
X=208 VOLT<br />
E=ELECTRONICS<br />
CAPACITY/SIZE /SERIES/CONFIG<br />
1ST POSITION 2ND POSITION<br />
1=STANDARD 0=30" WIDE<br />
2=GRILL GRIDDLE 3=33" WIDE<br />
3=TEMPERED GLASS 6=36" WIDE<br />
4=COMMERCIAL 2=42" OR 12" WIDE<br />
5=CERAMIC GLASS 5=15" WIDE<br />
8=MODULAR/DOWNDRAFT<br />
0=2 BURNER/ELEMENT SYSTEM<br />
FEATURES<br />
0=STANDARD ELEMENTS/BURNERS<br />
1=RADIANT ELEMENTS<br />
2=DUAL ELEMENTS<br />
3=<br />
4=<br />
5=SEALED BURNERS/CAST ELEMENTS<br />
6=5 BURNERS/ELEMENTS<br />
7=HALOGEN ELEMENTS/6 BURNERS<br />
8=TOUCH CONTROLS<br />
9=INDUCTION<br />
YEAR OF INTRODUCTION<br />
G=1998 H=1999 J=2000<br />
COLOR CODE<br />
AL = Almond SS = Stainless<br />
BL = Black WH = White<br />
BT = Biscuit<br />
ENGINEERING CHANGE (NUMERIC)<br />
SERIAL NUMBER<br />
SERIAL NUMBER X H 07 1 2 3 4 5<br />
OXFORD<br />
YEAR OF INTRODUCTION:<br />
H = 1998, J = 1999, K = 2000<br />
WEEK OF PRODUCTION<br />
(7th WEEK)<br />
PRODUCT SEQUENCE NUMBER<br />
K G C S 12 7 G BL 0<br />
- iv -
WHIRLPOOL MODEL & SERIAL NUMBER DESIGNATIONS<br />
MODEL NUMBER<br />
S C S 30 0 4 G Q ----<br />
MODEL NUMBER<br />
INTERNATIONAL SALES IND.<br />
OR MARKETING CHANNEL<br />
IF PRESENT<br />
PRODUCT GROUP:<br />
R = ELECTRIC COOKING PRODUCTS<br />
S = GAS COOKING PRODUCTS<br />
G = WHIRLPOOL GOLD RANGE<br />
PRODUCT IDENTIFICATION:<br />
C = BUILT-IN COOKTOP<br />
J = GOLD ELECTRIC COOKTOP<br />
G = GOLD GAS COOKTOP<br />
CONFIGURATION:<br />
S = PORCELAIN / STEEL TOP<br />
T = TEMPERED GLASS TOP<br />
C = CERAMIC GLASS TOP<br />
M = MODULAR DOWNDRAFT<br />
MODEL SIZE:<br />
20 = 20"<br />
30 = 30"<br />
36 = 36"<br />
FEATURE VARIATIONS:<br />
0 = LOW SPEED COIL ELECTRIC / OPEN-LOW END<br />
BURNER GAS / OPEN BAYS<br />
1 = HIGH SPEED COIL ELECTRIC / SEALED BURNERS<br />
2 = CERAMIC RADIANT ELECTRIC<br />
3 = CERAMIC RADIANT / DUAL<br />
4 = MODULAR<br />
- - - - - - - - - - - - - - - - - - - - - - - - - - - - - - - - - - - - - - - - - - - -<br />
0 = NO ELEMENTS / BURNERS<br />
2 = TWO ELEMENT / BURNER<br />
4 = FOUR ELEMENT / BURNER<br />
5 = FIVE ELEMENT / BURNER<br />
YEAR OF INTRODUCTION<br />
G = 1998 H = 1999 J = 2000<br />
COLOR CODE<br />
B = Black S = Stainless Steel<br />
N = Almond Z = Almond on Almond<br />
Q = White on White W = White<br />
ENGINEERING CHANGE (NUMERIC)<br />
SERIAL NUMBER<br />
SERIAL NUMBER X H 07 1 2 3 4 5<br />
OXFORD<br />
YEAR OF INTRODUCTION:<br />
H = 1998, J = 1999, K = 2000<br />
WEEK OF PRODUCTION<br />
(7th WEEK)<br />
PRODUCT SEQUENCE NUMBER<br />
- v -
MODEL & SERIAL NUMBER LOCATION<br />
The Model/Serial Number label is located on the underside of the cooktop burner box at the<br />
location shown below.<br />
- vi -<br />
Model & Serial Number
IMPORTANT SAFETY INFORMATION<br />
Your safety and the safety of others is very important.<br />
Important safety messages have been provided in this Job Aid. Always read and obey all safety<br />
messages.<br />
This is the safety alert symbol.<br />
This symbol alerts you to hazards that can kill or hurt you and others.<br />
All safety messages will be preceded by the safety alert symbol and the word<br />
“WARNING.”<br />
All safety messages will identify the hazard, tell you how to reduce the chance of injury, and tell<br />
you what can happen if the instructions are not followed.<br />
WARNING: If the information in this Job Aid is not followed exactly, a fire or explosion may<br />
result causing property damage, personal injury, or death.<br />
Do not store or use gasoline or other flammable vapors and liquids in the vicinity of this or any<br />
other appliance.<br />
WHAT TO DO IF YOU SMELL GAS<br />
• Do not try to light any appliance.<br />
• Do not touch any electrical switch.<br />
• Do not use any phone in your building.<br />
• Immediately call your gas supplier from a neighbor’s phone. Follow the gas supplier’s<br />
instructions.<br />
• If you cannot reach your gas supplier, call the fire department.<br />
Installation and service must be performed by a qualified installer, service agency or the gas<br />
supplier.<br />
- vii -
— NOTES —<br />
- viii -
SPECIFICATIONS<br />
KITCHENAID MODEL GAS COOKTOPS<br />
KGCT055 & KGCR055G<br />
KGCS127G<br />
1-1<br />
KGCT365G<br />
KGCS105G, KGCT305G & YKGCT305G KGCS166G, KGCT366G & YKGCT366G
WHIRLPOOL MODEL GAS COOKTOPS<br />
SCS3004G, SCS3014G, SCS3614G,<br />
GLT3014G, & GLT3614G<br />
1-2
30", 36", & 42" GAS PORCELAIN & METAL COOKTOPS<br />
KITCHENAID WHIRLPOOL<br />
SIZE 30" 36" 42" 30" 30" 36"<br />
MODEL NUMBER KGCS105G KGCS166G KGCS127G SCS3004G SCS3014G SCS3614G<br />
Colors Available BL/WH/AL/SS/BT BL/WH/AL/SS/BT BL/WH/AL/SS/BT W/N/S B/Q/Z/S B/Q/Z/S<br />
Controls<br />
Push-To-Turn Yes -4 Yes -5 Yes -6 Yes -4 Yes -4 Yes -4<br />
Infinite Yes - 4 Yes - 5 Yes -6 Yes - 4 Yes - 4 Yes - 4<br />
Ignition System Lite Position Lite Position Lite Position Lite Position Lite Position Lite Position<br />
Burners<br />
Sealed Yes-4 Yes-5 Yes-6 Yes - 4 Yes Yes<br />
Right Front 6,000 Btu Nat 6,000 Btu Nat 6,000 Btu Nat 6,000 Btu Nat 6,000 Btu Nat 6,000 Btu Nat<br />
6,000 Btu LP 6,000 Btu LP 6,000 Btu LP 6,000 Btu LP 6,000 Btu LP 6,000 Btu LP<br />
Left Front 14,000 Btu Nat 14,000 Btu Nat 14,000 Btu Nat 9,000 Btu Nat 12,500 Btu Nat 12,500 Btu Nat<br />
13,000 Btu LP 13,000 Btu LP 13,000 Btu LP 9,000btu LP 11,000 Btu LP 11,000 Btu LP<br />
Right Rear 12,500 Btu Nat 12,500 Btu Nat 12,500 Btu Nat 9,000 Btu Nat 9,000 Btu Nat 9,000 Btu Nat<br />
11, 000 Btu LP 11, 000 Btu LP 11, 000 Btu LP 9,000btu LP 9,000btu LP 9,000btu LP<br />
Center Right Rear NA NA 9,000 Btu Nat NA NA NA<br />
NA NA 9,000 Btu LP NA NA NA<br />
Center Rear NA 9,000 Btu nat NA NA NA NA<br />
NA 9,000 Btu LP NA NA NA NA<br />
Center Left Rear NA NA 6,000 Btu nat NA NA NA<br />
NA NA 6,000 Btu LP NA NA NA<br />
Left Rear 9,000 Btu nat 6,000 Btu nat 9,000 Btu nat 9,000 Btu nat 9,000 Btu nat 9,000 Btu Nat<br />
9,000 Btu LP 6,000 Btu LP 9,000 Btu LP 9,000btu LP 9,000btu LP 9,000btu LP<br />
Grates Cast Iron Cast Iron Cast Iron Square-Stamped Square-Cast Iron Square-Cast Iron<br />
Bezel No No No No Yes Yes<br />
a<br />
Surface<br />
Porcelain/Metal Yes Yes Yes Yes Yes Yes<br />
Lift -up Top No No No No No No<br />
Dimensions<br />
Overall<br />
Width (Side to Side)<br />
Front 30" 36" 42" 30" 30" 36"<br />
Middle 31 3/8" 37 1/2" 43 1/2" 31 3/8" 31 3/8" 37 1/2"<br />
Depth (Front to Back) 21" 21" 21" 21" 21" 21"<br />
Height (Top to Bottom) 3 3/8" 3 3/8" 3 3/8" 3 3/8" 3 3/8" 3 3/8"<br />
Cutout<br />
Width (Side to Side) 29" 35 1/4" 40 1/2" 29" 29" 35 1/4"<br />
Depth (Front to Back) 19" 19" 19" 19" 19" 19"<br />
Height (Top to Bottom) 2 7/8" 2 7/8" 2 7/8" 2 7/8" 2 7/8" 2 7/8"<br />
Mounting Hardware Yes Yes Yes Yes Yes Yes<br />
Other Specifications<br />
Electrical 120 Volts, 120 Volts, 120 Volts, 120 Volts, 120 Volts, 120 Volts,<br />
Single Phase, Single Phase, Single Phase, Single Phase, Single Phase, Single Phase,<br />
60 Hz 60 Hz 60 Hz 60 Hz 60 Hz 60 Hz<br />
Circuit 15 Amp 15 Amp 15 Amp 15 Amp 15 Amp 15 Amp<br />
Total Conected Load NA NA NA NA NA NA<br />
Power Cord/Conduit 3 1/2 Foot, 3 1/2 Foot, 3 1/2 Foot, 3 1/2 Foot, 3 1/2 Foot, 3 1/2 Foot,<br />
3 Wire 3 Wire 3 Wire 3 Wire 3 Wire 3 Wire<br />
Agency Approvals AGA/CGA AGA/CGA AGA/CGA AGA AGA/CGA AGA<br />
Approximate Net Weight 38 lbs. 42 lbs. 45 lbs. 35 lbs. 35 lbs. 39 lbs.<br />
Approval Over Built-in Ovens Yes Yes Yes Yes Yes Yes<br />
Approval With Downdraft Yes Yes Yes Yes Yes Yes<br />
Warranty In Use & Care In Use & Care In Use & Care In Use & Care In Use & Care In Use & Care<br />
1 Year Full Yes Yes Yes Yes Yes Yes<br />
5 Year Limited Burners Burners Burners No No No<br />
Accessories<br />
LP Gas Conversion Kit Included Included Included Included Included Included<br />
Literature<br />
Use & Care Guide 3191828 3191828 3191828 3191829 3191829 3191829<br />
Installation Instructions 3191827 3191827 3191827 3191827 3191827 3191827<br />
1-3
15", 30", & 36" GAS GLASS COOKTOPS<br />
1-4
INSTALLATION HIGHLIGHTS<br />
Explosion Hazard<br />
Use a new AGA approved gas supply<br />
line.<br />
Install a shutoff valve.<br />
Securely tighten all gas connections.<br />
If connected to LP gas, have a qualified<br />
person make sure gas pressure does<br />
not exceed 14" water column.<br />
Examples of a qualified person includes<br />
licensed heating personnel, authorized<br />
gas company personnel, and<br />
authorized service personnel.<br />
Failure to do so can result in death, explosion,<br />
or fire.<br />
GAS SUPPLY REQUIREMENTS<br />
WARNING<br />
Observe all governing codes and ordinances.<br />
Important: The cooktop must be connected<br />
to a regulated gas supply.<br />
1. This installation must conform with local<br />
codes and ordinances. In the absence of<br />
local codes, installations must conform<br />
with American National Standard, National<br />
Fuel Gas Code ANSI Z223.1— latest edition***<br />
or CANI — B149.1 or 2**.<br />
**Canadian Standard Association<br />
178 Rexdale Boulevard<br />
Etobicoke, Ontario M9W 1R3<br />
***American Gas Association<br />
1515 Wilson Boulevard<br />
Arlington, Virginia 22209<br />
2-1<br />
2. Input ratings shown on the model/serial<br />
rating plate are for elevations up to 2,000<br />
feet (610 m). For elevations above 2,000<br />
feet (610 m), ratings are reduced at a rate<br />
of 4% for each 1,000 feet (305 m) above<br />
sea level.<br />
3. The cooktop is equipped for use with<br />
NATURAL gas. It is design-certified by the<br />
American Gas Association for NATURAL<br />
and L.P. gases with the appropriate conversion.<br />
The model/serial rating plate, located<br />
on the underside of the burner box,<br />
has information on the type of gas that can<br />
be used. If this information does not agree<br />
with the type of gas available, check with<br />
the local gas supplier. See Page 2-6 for<br />
L.P. gas conversion instructions.<br />
4. Provide a gas supply line of 3/4" rigid pipe<br />
to the cooktop location. A smaller size pipe<br />
on long runs may result in insufficient gas<br />
supply. Pipe-joint compounds, suitable for<br />
use with L.P. gas, must be used. With L.P<br />
gas, piping or tubing size can be a minimum<br />
of 1/2". L.P. gas suppliers usually<br />
determine the size and materials used on<br />
the system.<br />
5. If local codes permit, a new A.G.A. designcertified,<br />
4-5 foot (1.2-1.5 m) long, 1/2" or<br />
3/4" I.D., flexible metal appliance connector<br />
is recommended for connecting this<br />
cooktop to the gas supply line. Do not kink<br />
or damage the flexible connector when<br />
moving the cooktop. The pressure regulator<br />
has 3/8" female pipe threads. You will<br />
need to determine the fittings required,<br />
depending on the size of your gas supply<br />
line, flexible metal connector and shutoff<br />
valve.<br />
Flexible Gas Supply Line
6. The supply line shall be equipped with an<br />
approved shutoff valve. This valve should<br />
be located in the same room as the cooktop<br />
and should be in a location that allows<br />
ease of opening and closing. Do not block<br />
access to the shutoff valve. The valve is<br />
for turning on or shutting off gas to the<br />
appliance.<br />
To Cooktop<br />
Shutoff Valve<br />
(open)<br />
Gas Supply<br />
Line<br />
7. If rigid pipe is used as a gas supply line, a<br />
combination of pipe fittings must be used<br />
to obtain an in-line connection to the<br />
cooktop. All strains must be removed from<br />
the supply and fuel lines so cooktop will be<br />
level and in line.<br />
Rigid Pipe<br />
2-2<br />
8. The regulator must be checked at a minimum<br />
1-inch (2.5 cm) water column above<br />
the set pressure. The inlet pressure to the<br />
regulator should be as follows for operation<br />
and checking the regulator setting:<br />
NATURAL GAS<br />
Set pressure: 4 inches (10.2 cm).<br />
Supply pressure: 7-14 inches (17.8 cm to 35.5<br />
cm) maximum.<br />
L.P. GAS<br />
Minimum pressure: 10 inches (25.4 cm).<br />
Supply pressure: 14 inches (35.5 cm).<br />
9. Line Pressure Testing:<br />
Testing Above 1/2 psi (3.5 kPa)<br />
(14 inches (35.6 cm)) W.C. (gauge)<br />
The cooktop and its individual shutoff valve<br />
must be disconnected from the gas supply<br />
piping system during any pressure testing<br />
of that system at test pressures greater<br />
than 1/2 psig (3.5kPa).<br />
Testing Below 1/2 psi (3.5 kPa) (14<br />
inches (35.6 cm)) W.C. (gauge), Or<br />
Lower<br />
The cooktop must be isolated from the gas<br />
supply piping system by closing its individual<br />
manual shutoff valve during any<br />
pressure testing of the gas supply piping<br />
system at test pressures equal to or less<br />
than 1/2 psig (3 5 kPa).
WARNING<br />
Electrical Shock Hazard<br />
Plug into a grounded 3-prong outlet.<br />
Do not remove ground prong.<br />
Do not use an adapter.<br />
Failure to follow these instructions can<br />
result in death, fire, or electrical shock.<br />
If codes permit and a separate ground wire<br />
is used, it is recommended that a qualified<br />
electrician determine that the ground path<br />
is adequate.<br />
Check with a qualified electrician if you are<br />
not sure whether the cooktop is properly<br />
grounded.<br />
Do not ground to a gas pipe.<br />
A 120-volt, 60-Hz, AC-only, 15-ampere, fused<br />
electrical supply is required. A time-delay fuse<br />
or circuit breaker is recommended. It is recommended<br />
that a separate circuit serving only<br />
this appliance be provided.<br />
Electronic ignition systems operate within wide<br />
voltage limits, but proper ground and polarity<br />
are necessary. In addition to checking that the<br />
outlet provides 120-volt power, and is correctly<br />
grounded, the outlet must be checked by a<br />
qualified electrician to see if it is wired with the<br />
correct polarity. Wiring diagrams are provided<br />
in Section 7 of this Job Aid.<br />
This appliance, when installed, must be electrically<br />
grounded in accordance with local<br />
codes, or, in the absence of local codes, with<br />
the current CSA standard C22.1. Canadian<br />
Electrical Code Part 1.<br />
ELECTRICAL REQUIREMENTS<br />
2-3<br />
Recommended Ground Method<br />
For your personal safety, this cooktop must be<br />
grounded. This cooktop is equipped with a 3prong<br />
ground plug. To minimize possible shock<br />
hazard, the cord must be plugged into a mating<br />
3-prong ground-type outlet, grounded in<br />
accordance with the National Electrical Code<br />
ANSI/NFPA 70 latest edition*, or Canadian<br />
Electrical Code (CSA) A**, and local codes and<br />
ordinances. If a mating outlet is not available,<br />
it is the personal responsibility, and the obligation<br />
of the customer, to have a properly<br />
grounded, 3-prong outlet installed by a qualified<br />
electrician.<br />
3-Prong<br />
Ground Plug<br />
Ground<br />
Prong<br />
3-Prong<br />
Ground-Type<br />
Outlet<br />
Copies of the standards listed above may be<br />
obtained from:<br />
*National Fire Protection Association<br />
Batterymarch Park<br />
Quincy, Massachusetts 02269<br />
**Canadian Standard Association<br />
178 Rexdale Boulevard<br />
Etobicoke, Ontario M9W 1R3
1. Glass Cooktops Only: Remove the foam<br />
strip from the literature package and apply<br />
the strip around the bottom edge of the<br />
glass maintop so it is flush with the edges.<br />
Burner Box<br />
Foam Strip<br />
Glass Maintop<br />
2. Remove the two screws from the left and<br />
right bottom edges of the burner box, then<br />
place the brackets on top of the box.<br />
Position the brackets as shown and handtighten<br />
one screw into each bracket.<br />
Front of<br />
Cooktop<br />
Bracket<br />
3. Install the cooktop into the countertop<br />
opening so that the front edge of the<br />
cooktop glass is parallel with the front<br />
edge of the countertop. NOTE: To prevent<br />
scratching the countertop, lift the entire<br />
cooktop to make any position adjustments.<br />
4. Rotate the brackets away from the burner<br />
box and install a second screw into each<br />
bracket, then securely tighten the bracket<br />
screws to the burner box (see the illustration<br />
in step 5).<br />
INSTALLATION<br />
2-4<br />
5. Install the 2-1/2" (6.4 cm) clamping screws<br />
into the brackets and tighten them so that<br />
they are firmly against the underside of the<br />
countertop. DO NOT overtighten the<br />
screws.<br />
Burner Box<br />
6. Install the pressure regulator with the arrow<br />
on the regulator pointing up toward<br />
the burner box so you can reach the access<br />
cap.<br />
Pressure<br />
Regulator<br />
Access<br />
Cap<br />
Glass Maintop<br />
Bracket<br />
Screws<br />
Bracket<br />
Countertop<br />
2-1/2" (6.4 cm)<br />
Clamping Screw<br />
Rear of<br />
Cooktop<br />
Gas Flow Arrow<br />
Pointing Up
IMPORTANT: In the next step, you will need<br />
to:<br />
• Determine the fittings that are required<br />
to hook up the gas supply to the pressure<br />
regulator.<br />
• Make sure that all of the connections<br />
are wrench-tightened and are not overtightened<br />
(you could crack the regulator<br />
and cause a gas leak). Do not allow<br />
the regulator to turn on the pipe when<br />
you tighten the fittings.<br />
• Use pipe-joint compound that is made<br />
for use with Natural and L.P. gas.<br />
2-5<br />
7. Assemble the flexible metal connector from<br />
the gas supply pipe to the pressure regulator.<br />
NOTE: Make sure that you do not<br />
kink the flexible metal connector.<br />
Adapter<br />
Flexible Metal<br />
Nipple Connector<br />
Manual Shutoff<br />
Valve<br />
3/8" Adapter<br />
Use Pipe-Joint<br />
Compound<br />
3/8" Nipple<br />
Pressure<br />
Regulator<br />
8. Open the manual gas shutoff valve and<br />
wait a few minutes for the gas to flow<br />
through the lines.<br />
To Cooktop<br />
Shutoff Valve<br />
(open)<br />
Gas Supply<br />
Line
CONVERTING THE COOKTOP FOR USE WITH L.P. GAS<br />
NOTE: Refer to Conversion Kit #3192261 for<br />
SCS, GLT, KGCT, KGCS Model Series L.P. Gas<br />
Conversion Instructions.<br />
Parts provided with this Conversion Kit:<br />
• Orifice/Spud Package - #3192198<br />
• Conversion Instructions - #3192260<br />
• Conversion Label - #3192259<br />
Gas conversions from Natural gas to L.P.<br />
gas must be done by a qualified installer.<br />
Caution; Before proceeding with conversion,<br />
shut off the gas supply to the appliance<br />
prior to disconnecting the electrical<br />
power.<br />
WARNING<br />
This Conversion Kit shall be installed<br />
by a qualified service agency in accordance<br />
with the manufacturer’s instructions<br />
and all applicable codes and requirements<br />
of the authority having jurisdiction.<br />
If the information in these<br />
instructions is not followed exactly, a<br />
fire, explosion or production of carbon<br />
monoxide may result causing property<br />
damage, personal injury or loss of life.<br />
The qualified service agency is responsible<br />
for the proper installation of this<br />
kit. The installation is not proper and<br />
complete until the operation of the converted<br />
appliance is checked as specified<br />
in the manufacturer’s instructions<br />
supplied with this kit.<br />
1. Check that main gas supply line to the<br />
cooktop has been shut off and the power<br />
supply cord is disconnected.<br />
To Cooktop<br />
Shutoff Valve<br />
(closed)<br />
Gas Supply<br />
Line<br />
2-6<br />
2. Remove access cap by using a screwdriver<br />
or quarter, turning the access cap<br />
counterclockwise.<br />
Pressure<br />
Regulator<br />
Access<br />
Cap<br />
The gas pressure regulator has two settings<br />
which are stamped on either side of<br />
the cap. Turn the cap over and reinstall it<br />
into the regulator with the stamp “LP”<br />
visible from the outside of the regulator.<br />
LP<br />
Rear of<br />
Cooktop<br />
Gas Flow Arrow<br />
Pointing Up<br />
Position of cap for a<br />
correctly converted<br />
regulator<br />
The regulator must be checked at a minimum<br />
of 1-inch (2.5 cm) water column<br />
above the set pressure. The inlet pressure<br />
to the regulator should be as shown on the<br />
next page for operation and checking the<br />
regulator setting.
L.P. GAS<br />
Minimum pressure: 10 inches (25.4 cm).<br />
Supply pressure: 14 inches (35.5 cm).<br />
Testing below 1/2 psi (3.5 kPa) 14 inches<br />
(35.6 cm) W.C. (gauge) or lower<br />
The cooktop must be isolated from the gas<br />
supply piping system by closing its individual<br />
manual shutoff valve during any pressure testing<br />
of the gas supply piping system at test pressures<br />
equal to or less than l/2 psig (3.5 kPa).<br />
Models<br />
Right<br />
Front<br />
Right<br />
Rear<br />
Left<br />
Front<br />
2-7<br />
Left<br />
Rear<br />
SCS3004 Black Brass Brass Brass<br />
SCS3014, SCS3614<br />
GLT3014, GLT3614<br />
KGCTDSS Blue Black<br />
KGCT305, KGCS105,<br />
KGCT365<br />
Rating Color Size<br />
6,000 BTU Black 78<br />
9,000 BTU Brass 95<br />
11,000 BTU Blue 110<br />
13,000 BTU Green 115<br />
ORIFICE CHART<br />
Black Brass Blue Brass<br />
Black Blue Green Brass<br />
Center<br />
KGCT366, KGCS166 Black Blue Green Black Brass<br />
Orifice Size Stamp<br />
Center<br />
Left<br />
Center<br />
Right<br />
KGCS127 Black Blue Green Brass Black Brass<br />
Left<br />
Rear<br />
Center<br />
Left<br />
Left<br />
Front<br />
Center<br />
Right<br />
Right<br />
Rear<br />
Right<br />
Front<br />
3. Remove burner cap. Remove two screws<br />
in the burner base and remove burner<br />
base. IMPORTANT: REMOVE ONE<br />
BURNER BASE AT A TIME, THEN CON-<br />
VERT AND REPLACE IT. DO NOT DIS-<br />
ASSEMBLE THE ENTIRE COOKTOP.<br />
4. Refer to the following Orifice Chart and<br />
match the correct color orifice with the<br />
burner location and model that is being<br />
converted.<br />
Left<br />
Rear<br />
Center<br />
Left<br />
Front<br />
Right<br />
Rear<br />
Right<br />
Front
5. Use a nut driver (7 mm) to remove the<br />
existing orifice and replace it with an LP<br />
orifice. Note: A small amount of tape inside<br />
the nut driver will help hold the orifice<br />
in the nut driver.<br />
6. Replace burner base and tighten the two<br />
screws.<br />
IMPORTANT: The ignitor electrode is ceramic<br />
and could break during conversion.<br />
Be sure that the electrode comes through<br />
the hole in the burner base while you tighten<br />
the screws.<br />
Cap<br />
Ignitor Electrode<br />
Burner Base<br />
7. Complete steps 4, 5, and 6 for each burner<br />
on the cooktop.<br />
8. Use the following procedure and leak test<br />
the cooktop:<br />
WARNING: NEVER TEST FOR GAS<br />
LEAKS WITH A MATCH OR OTHER<br />
FLAME.<br />
Use a brush and apply liquid detergent to<br />
all of the gas connections and check them<br />
for leaks. Bubbles around connections will<br />
indicate a leak. If a leak appears, shut off<br />
gas valve controls, tighten the connection,<br />
and recheck the connection again. Clean<br />
all of the detergent solution from the<br />
cooktop.<br />
2-8<br />
Electronic Ignition System—<br />
Initial Lighting<br />
Cooktop burners use electronic ignitors in place<br />
of standing pilots. When the cooktop control<br />
knob is pushed in and turned to the "LITE" position,<br />
the system creates a spark to light the<br />
burner. This sparking continues until the control<br />
knob is turned to the desired setting.<br />
9. Check the operation of the cooktop burners.<br />
Push in and turn each control knob to<br />
the “LITE” position. The flame should light<br />
within 4-seconds. Do not leave the knob<br />
in the “LITE” position after burner lights.<br />
If the burners do not light properly, turn the<br />
control knob to the “OFF” position. Check<br />
that the burner cap is in the proper position.<br />
Check that the power supply cord is<br />
plugged in and that the circuit breaker, or<br />
house fuse, has not blown. Check that the<br />
gas shutoff valve is in the “ON” position.<br />
Check the operation again. If a burner still<br />
does not light, refer to “Diagnosis &<br />
Troubleshooting” in Section 6.
10. Push in and turn each control knob from<br />
the “LITE” to the “LO” setting. The low<br />
flame should be at a minimum steady blue<br />
flame.<br />
If flame needs to be adjusted, turn the<br />
control to the “LO” setting, and remove the<br />
control knob. Insert a small flat-blade<br />
screwdriver into the valve stem. Turn the<br />
adjustment screw to obtain the smallest<br />
flame that will not go out when the control<br />
of a cold burner is quickly turned from “Hl”<br />
to “LO.” Turn the adjustment screw clockwise<br />
to decrease the flame, and counterclockwise<br />
to increase it. Repeat for other<br />
cooktop burners, as needed.<br />
Valve Stem<br />
Adjustment Screw<br />
11 . Push in and turn each control knob to the<br />
“LO” (or simmer) setting. This setting has<br />
been factory-set for each control and is the<br />
lowest setting available that will provide<br />
reliable reignition of the burner. If it does<br />
not stay lit on the “LO” setting, check the<br />
setting as follows:<br />
a)Turn control to "LITE" until burner ignites.<br />
b)Quickly turn the knob down to its lowest<br />
position.<br />
c) If the burner goes out, readjust the valve<br />
as follows:<br />
Remove the surface burner control knob.<br />
Insert a flat-blade screwdriver into the<br />
hollow valve stem and engage the slotted<br />
screw. Flame size can be increased or<br />
2-9<br />
decreased by turning the screw. Adjust<br />
the flame until you can quickly turn the<br />
knob from “LITE” to the lowest position<br />
without extinguishing the flame. The flame<br />
should be as small as possible without<br />
going out.<br />
12. Check the flame at the “Hl” setting for a<br />
blue color, and a clean, soft shape. There<br />
should be no yellow tips on the flames, or<br />
any blowing or lifting off the burner head.<br />
An occasional orange flash is normal, and<br />
reflects different elements in the air or gas.<br />
Typical Burner<br />
Flame At Highest<br />
Setting<br />
Ports<br />
13. Completely fill out the Conversion Label (#<br />
3192259), and attach the label to the bottom<br />
of the cooktop beside the rating tag.<br />
Do not cover the rating tag with the label.<br />
THIS APPLIANCE HAS BEEN CONVERTED FOR USE WITH L.P.<br />
THE OPERATING MANIFOLD PRESSURE IS 10 INCHES W.C.<br />
THE INPUT RAGING FOR EACH MAIN BURNER FOR EACH MODEL<br />
IS LISTED ON THE RATING LABEL.<br />
THIS APPLIANCE WAS CONVERTED ON DAY-MONTH-YEAR<br />
TO LP GAS WITH KIT NO. 3192261<br />
BY ORGANIZATION:<br />
ADDRESS: , WHICH ACCEPTS THE<br />
RESPONSIBILITY THAT THIS CONVERSION HAS BEEN PROPERLY MADE.<br />
14. For higher altitudes, no further adjustments<br />
are necessary. Derating the burners<br />
is also unnecessary.<br />
15. Save the orifices removed from the<br />
cooktop, along with the instructions, for<br />
possible future use.<br />
NOTE: To convert the cooktop back to use with<br />
Natural gas, start on Page 2-6, and convert<br />
the regulator, and replace the orifices in the<br />
order in which they were removed.<br />
3192259 REV. A
— NOTES —<br />
2-10
PRODUCT OPERATION<br />
GAS INLET<br />
PRESSURE<br />
REGULATOR<br />
ELECTRONIC IGNITION SYSTEM<br />
Refer to Figure 3-1 for the following sequence.<br />
SEALED BURNER<br />
When a main burner control knob q is turned to the “lite” position, the gas valve r opens, and<br />
gas flows through the pressure regulator s into the manifold t through the open valve. As gas<br />
passes through the valve and its orifice, it is directed into the venturi u, where it mixes with<br />
primary air to create the proper mixture necessary for combustion.<br />
At the same time, line voltage is applied through the ignitor switch v, to the spark module w,<br />
which produces high-voltage, low amperage pulses to all of the spark ignitors x. The pulses<br />
cause a spark y to occur between the spark ignitor electrode, and the grounded burner cap z.<br />
The gas and air mixture at the burner is ignited by the spark, and a flame is produced at each<br />
of the top burner ports.<br />
3<br />
GAS FLOW<br />
IGNITOR SWITCH<br />
GAS<br />
MANIFOLD<br />
120 VAC<br />
LINE VOLTAGE<br />
4<br />
OFF<br />
6<br />
LITE<br />
1<br />
3-1<br />
2<br />
GAS VALVE<br />
TO SPARK<br />
IGNITOR<br />
AIR SHUTTER<br />
BURNER<br />
CONTROL<br />
KNOB<br />
5<br />
SPARK<br />
MODULE 7<br />
GAS FLOW<br />
VENTURI<br />
HIGH VOLTAGE<br />
LOW AMPERAGE<br />
PULSES<br />
10<br />
BURNER CAP<br />
9<br />
SPARK<br />
SPARK<br />
IGNITOR<br />
8<br />
BURNER<br />
BURNER FLAME<br />
Figure 3-1
— NOTES —<br />
3-2
COMPONENT ACCESS<br />
This section instructs you on how to service<br />
each component inside the built-in cooktops.<br />
The components and their locations are shown<br />
below.<br />
Left Rear<br />
Venturi &<br />
Spark Ignitor<br />
Left Front<br />
Venturi &<br />
Spark Ignitor<br />
COMPONENT LOCATIONS<br />
Spark Module<br />
Left Front<br />
Gas Control<br />
& Ignitor Switch<br />
Left Rear<br />
Gas Control<br />
& Ignitor Switch<br />
Burner Screw (2)<br />
Burner Base<br />
Drip Pan<br />
Control Knob<br />
Bezel<br />
Center<br />
Gas Control<br />
& Ignitor Switch<br />
4-1<br />
NOTE: The KitchenAid Model KGCS166G/<br />
KGCT366G cooktop is shown below, however,<br />
the other built-in cooktop components are identical,<br />
and are serviced in the same manner.<br />
Center<br />
Venturi &<br />
Spark Ignitor<br />
Maintop<br />
Manifold<br />
Right Rear<br />
Gas Control<br />
& Ignitor Switch<br />
Right Rear<br />
Venturi &<br />
Spark Ignitor<br />
Right Rear<br />
Gas Control<br />
& Ignitor Switch<br />
Right Front<br />
Venturi &<br />
Spark Ignitor
WARNING<br />
Electrical Shock Hazard<br />
Disconnect from electrical and gas supplies<br />
before servicing unit.<br />
Failure to do so could result in death, electrical<br />
shock, or explosion.<br />
CAUTION: When you work on the cooktop, be<br />
careful when handling the sheet metal parts.<br />
Sharp edges may be present, and you can cut<br />
yourself if you are not careful.<br />
REMOVING THE MAINTOP<br />
Burner Screw (2)<br />
Burner Base<br />
Drip Pan<br />
Control Knob<br />
Bezel<br />
Figure 4-1<br />
4-2<br />
1. Turn off the gas supply and electrical<br />
power to the cooktop.<br />
2. Remove the grates and burner caps.<br />
Refer to Figure 4-1 for the following steps.<br />
3. Remove the knobs from the controls.<br />
4. Remove all of the burner bases. To remove<br />
a burner base, remove the two<br />
screws, and lift it off the drip pan.<br />
5. Lift the maintop off the countertop. NOTE:<br />
If you are replacing the maintop, unclip the<br />
control bezels from the mounting holes,<br />
otherwise leave them installed.<br />
Maintop
REMOVING A VENTURI & SPARK IGNITOR<br />
WARNING<br />
Electrical Shock Hazard<br />
Disconnect from electrical and gas supplies<br />
before servicing unit.<br />
Failure to do so could result in death, electrical<br />
shock, or explosion.<br />
CAUTION: When you work on the cooktop, be<br />
careful when handling the sheet metal parts.<br />
Sharp edges may be present, and you can cut<br />
yourself if you are not careful.<br />
1. Turn off the gas supply and electrical<br />
power to the cooktop.<br />
2. Remove the maintop from the burner box<br />
(refer to page 4-2 for the procedure).<br />
Lift Bracket<br />
Unhook At Back<br />
Of Burner Box<br />
Burner Box<br />
Bracket<br />
INSET<br />
Gas Line<br />
Tubing<br />
Spark Ignitor<br />
Bracket<br />
Ignitor Wire<br />
Figure 4-2<br />
4-3<br />
Refer to Figure 4-2 for the following steps.<br />
3. Remove the mounting screw from the<br />
front of the bracket that contains the venturi<br />
or spark ignitor you wish to service.<br />
4. Remove the tubing and ignitor wires from<br />
each venturi and spark ignitor on the<br />
bracket.<br />
5. Lift the front of the mounting bracket, remove<br />
the mounting screw from the venturi,<br />
and remove the venturi. NOTE: You<br />
may have to completely remove the bracket<br />
to remove the venturi. If so, lift it at the<br />
front, and unhook the back tab from the<br />
burner box (see the inset).<br />
6. To service the spark ignitor, first note the<br />
hole location for the ignitor before you<br />
remove it. Then, remove the mounting<br />
screw, and remove the ignitor from the<br />
venturi.<br />
Venturi<br />
Ignitor Screw<br />
Insert Venturi<br />
Pin Here<br />
Venturi<br />
Mounting Screw<br />
See Inset<br />
Bracket Screw<br />
Front Of<br />
Burner Box<br />
Maintop
REMOVING A SPARK MODULE & POWER CORD<br />
WARNING<br />
Electrical Shock Hazard<br />
Disconnect from electrical and gas supplies<br />
before servicing unit.<br />
Failure to do so could result in death, electrical<br />
shock, or explosion.<br />
CAUTION: When you work on the cooktop, be<br />
careful when handling the sheet metal parts.<br />
Sharp edges may be present, and you can cut<br />
yourself if you are not careful.<br />
1. Turn off the gas supply and electrical<br />
power to the cooktop.<br />
2. Remove the maintop from the mounting<br />
box (refer to page 4-2 for the procedure).<br />
Refer to Figure 4-3 for the following steps.<br />
3. To remove the spark module, disconnect<br />
the wires from the terminals and<br />
remove the mountng screw(s). NOTE: Both<br />
types of spark module are shown in the<br />
illustration. Use whichever one matches<br />
the cooktop you are servicing.<br />
Spark Module<br />
For 36" & 45"<br />
Model Cooktops<br />
Hex-Head<br />
Screw (3)<br />
Brown Wires<br />
(to Spark Ignitors)<br />
Power<br />
Cord<br />
White Wire<br />
(from Ignitor Switch)<br />
Figure 4-3<br />
4-4<br />
4. To remove the power cord:<br />
a)Disconnect the lead from the spark<br />
module terminal, and from the ignitor<br />
switch wire connector.<br />
b)Remove the screw from the ground wire<br />
eyelet.<br />
c) Use a pair of pliers and squeeze the<br />
strain relief sections together while<br />
pressing down, and remove the strain<br />
relief and power cord from the burner<br />
box.<br />
Yellow Wires<br />
(to Spark Ignitors)<br />
Green<br />
Ground Wire<br />
Brown Wires<br />
(to Spark Ignitors)<br />
Spark Module<br />
For 30" Model<br />
Cooktops<br />
White Wire<br />
(from Ignitor Switch)<br />
Hex-Head Screw<br />
Yellow Wires<br />
(to Spark Ignitors)<br />
Strain<br />
Relief<br />
Ignitor Switch<br />
Wire Connector<br />
Black Wire<br />
(from Ignitor Switch)<br />
Ground Wire
REMOVING AN IGNITOR SWITCH & A GAS VALVE<br />
WARNING<br />
Electrical Shock Hazard<br />
Disconnect from electrical and gas supplies<br />
before servicing unit.<br />
Failure to do so could result in death, electrical<br />
shock, or explosion.<br />
CAUTION: When you work on the cooktop, be<br />
careful when handling the sheet metal parts.<br />
Sharp edges may be present, and you can cut<br />
yourself if you are not careful.<br />
1. Turn off the gas supply and electrical<br />
power to the cooktop.<br />
2. Remove the maintop from the mounting<br />
box (refer to page 4-2 for the procedure).<br />
Refer to Figure 4-4 for the following steps.<br />
3. Remove the rubber shields from the gas<br />
valves.<br />
Gas Line<br />
Tubing<br />
Figure 4-4<br />
Gas Valve<br />
Rubber Shield<br />
Ignitor Switch<br />
Rubber Grommet<br />
Rubber Grommet<br />
Screw<br />
4-5<br />
NOTE: If one ignitor switch is defective, all of<br />
the switches must be replaced as an assembly.<br />
4. To remove an ignitor switch:<br />
a)Pull up firmly on the switch body, unsnap<br />
it from the mounting screw heads<br />
of the gas valve, and slide it off the stem.<br />
b)When all of the switches are removed,<br />
disconnect the black wire connector<br />
from the line cord lead, and the white<br />
wire from the terminal of the spark module<br />
(see Figure 4-3 on page 4-4).<br />
5. To remove a gas valve:<br />
a)Remove the ignitor switch (see step 4).<br />
b)Remove the gas line tubing, and the<br />
mounting screw and rubber grommet<br />
from the gas valve you wish to service,<br />
and remove the valve from the manifold.<br />
6. Install the new ignitor switch or gas valve.<br />
REASSEMBLY NOTE: If you are replacing<br />
a gas valve, make sure that you reinstall<br />
the rubber grommets on both the gas<br />
valve and the mounting screw, (see the<br />
illustration below), otherwise the valve will<br />
leak gas.<br />
Manifold
Tubing<br />
REMOVING THE GAS MANIFOLD<br />
WARNING<br />
Electrical Shock Hazard<br />
Disconnect from electrical and gas supplies<br />
before servicing unit.<br />
Failure to do so could result in death, electrical<br />
shock, or explosion.<br />
CAUTION: When you work on the cooktop, be<br />
careful when handling the sheet metal parts.<br />
Sharp edges may be present, and you can cut<br />
yourself if you are not careful.<br />
1. Turn off the gas supply and electrical<br />
power to the cooktop.<br />
2. Remove the pressure regulator from the<br />
manifold (see inset 1).<br />
3. Remove the maintop from the mounting<br />
box (refer to page 4-2 for the procedure).<br />
Refer to Figure 4-5 for the following steps.<br />
Gas Valve<br />
Rubber<br />
Grommet<br />
Lift rail to<br />
remove manifold<br />
INSET 2<br />
Manifold<br />
Rubber<br />
Grommet<br />
Screw<br />
Rails<br />
4-6<br />
4. Remove the rubber shields from the gas<br />
valves.<br />
5. Remove the gas valves from the manifold<br />
(refer to steps 4 & 5 on page 4-5).<br />
6. Remove the front screws from each rail.<br />
7. Remove the mounting screws from the<br />
manifold and remove it from the burner<br />
box. NOTE: Lift the front of the rails high<br />
enough to slide the manifold out.<br />
8. Install the new manifold.<br />
9. Mount the gas valves to the manifold.<br />
Make sure that you reinstall the rubber<br />
grommets on both the gas valves and the<br />
mounting screws, (see inset 2), otherwise<br />
the valves will leak gas.<br />
Screws<br />
Manifold<br />
Screws Screws<br />
Remove 4 Screws To Loosen Rails<br />
Lift rail to<br />
remove manifold<br />
Burner Box<br />
Manifold<br />
Unscrew Regulator<br />
From Manifold<br />
Pressure Regulator<br />
INSET 1<br />
Figure 4-5
COMPONENT TESTING<br />
WARNING<br />
Electrical Shock Hazard<br />
Disconnect from electrical and gas supplies<br />
before servicing unit.<br />
Failure to do so could result in death, electrical<br />
shock, or explosion.<br />
NOTE: The ignitor switches are connected to<br />
each other in a parallel configuration so that if<br />
one switch fails, the others will still operate. To<br />
check each of the ignitor switches for proper<br />
operation, perform the following steps.<br />
1. Remove the maintop from the cooktop<br />
(see page 4-2).<br />
2. Reinstall the knobs back on the valve<br />
stems.<br />
THE IGNITOR SWITCHES<br />
5-1<br />
Refer to Figure 5-1 on the next page.<br />
3. Disconnect the black ignitor switch wire<br />
from the line cord connector and the white<br />
wire from the spark module terminal.<br />
4. Connect the leads of an ohmmeter to the<br />
ends of the spark module wires.<br />
5. Set the ohmmeter to the R x 1 scale.<br />
6. Press and turn one of the gas valve knobs<br />
to the LITE position. At that point, the<br />
switch should close, and the meter should<br />
indicate continuity.<br />
7. Continue to turn the knob away from the<br />
LITE position. The switch should open,<br />
and the meter should indicate an open<br />
(infinite ∞) circuit.<br />
8. Repeat steps 6 & 7 for all of the other<br />
ignitor switches. If the readings are not as<br />
stated, replace the entire ignitor switch<br />
assembly (they are supplied as an assembly<br />
and cannot be changed individually).
LITE<br />
OFF<br />
Ignitor Switch On<br />
(Closed 0 Ω)<br />
CONTINUITY<br />
0 Ω<br />
Rx10 Rx100<br />
Rx1<br />
Rx1k<br />
White Ignitor<br />
Switch Wire<br />
Black Ignitor<br />
Switch Wire<br />
Spark Module<br />
Left Rear<br />
Ignitor Switch<br />
OFF<br />
Left Front<br />
Ignitor Switch<br />
Power Cord Lead<br />
5-2<br />
OFF<br />
Ignitor Switch Off<br />
(Open ∞)<br />
OPEN<br />
INFINITY ∞<br />
Rx10 Rx100<br />
Rx1<br />
Rx1k<br />
Center<br />
Ignitor Switch<br />
Figure 5-1<br />
Right Front<br />
Ignitor Switch<br />
Right Rear<br />
Ignitor Switch
DIAGNOSIS & TROUBLESHOOTING<br />
PROBLEM POSSIBLE CAUSE SOLUTION<br />
Nothing will operate. • The cooktop is not wired<br />
to a live circuit with the<br />
proper voltage supply.<br />
• The cooktop is not properly<br />
connected to the gas<br />
supply.<br />
• A household fuse has<br />
blown, or a circuit breaker<br />
has opened.<br />
• A control knob is not set<br />
correctly.<br />
A burner fails to light. • A household fuse has<br />
blown, or a circuit breaker<br />
has opened.<br />
• The burner is wet from<br />
being washed.<br />
• The burner ports are<br />
clogged.<br />
The burner flames are uneven.<br />
The burner flames lift off the<br />
burner ports, are yellowtipped,<br />
or are noisy when<br />
turned off.<br />
Cooking does not have the<br />
desired results.<br />
• The burner ports are<br />
clogged.<br />
• The burner needs to be<br />
cleaned.<br />
• The air/gas mixture is incorrect.<br />
• The cooktop is not level.<br />
• The pan used is not the<br />
correct type or size.<br />
• The flame size does not fit<br />
the cookware being used.<br />
• The flow of combustion<br />
air and/or ventilation air to<br />
the cooktop is blocked.<br />
6-1<br />
• Wire the cooktop into a<br />
live circuit with the proper<br />
voltage.<br />
• Properly connect the gas<br />
supply to the cooktop.<br />
• Replace the household<br />
fuse or reset the circuit<br />
breaker.<br />
• Push in on the control<br />
knobs before turning<br />
them.<br />
• Replace the household<br />
fuse or reset the circuit<br />
breaker.<br />
• Allow the burner to dry.<br />
• Clean the burner ports<br />
with a straight pin (see<br />
Section 8).<br />
• Clean the burner ports<br />
with a straight pin (see<br />
Section 8).<br />
• Clean the burner (see<br />
Section 8).<br />
• Check the air/gas mixture<br />
(see “Electronic Ignition<br />
System—Initial Lighting”<br />
on page 2-8).<br />
• Level the cooktop.<br />
• Refer to a reliable cookbook<br />
for the recommended<br />
pan type and<br />
size.<br />
• The pan should be the<br />
same size, or slightly<br />
larger, than the cooking<br />
area being used.<br />
• Remove any obstructions<br />
around the knobs or burners.
— NOTES —<br />
6-2
WIRING DIAGRAMS & STRIP CIRCUITS<br />
WIRING DIAGRAMS<br />
KitchenAid Models KGCR055G & KGCT055G<br />
Line<br />
1/4" Blade<br />
BLK<br />
Connect<br />
.250 Terminals<br />
BLK<br />
(NOT USED)<br />
(NOT USED)<br />
PLUG<br />
WHT<br />
IGNITOR SWITCHES<br />
(ON VALVES)<br />
Electric circuit closed<br />
when knob is rotated<br />
55 to 95 degrees<br />
counterclockwise from OFF<br />
Neutral<br />
5/16" Blade<br />
Ground<br />
Round Pin<br />
GRN or GRN/YEL<br />
WHT<br />
7-1<br />
120 VAC, 60 Hz<br />
1 Phase<br />
15 or 20 Ampere<br />
Ground<br />
SPARK<br />
MODULE<br />
YEL<br />
or<br />
BRN<br />
SPARK<br />
IGNITORS
KitchenAid Models KGCS105G, KGCT305G,<br />
YKGCT305G, & KGCT365G<br />
<strong>Whirlpool</strong> Models GLT3014G, GLT3614G, SCS3004G,<br />
SCS3014G, & SCS3614G<br />
BLK<br />
Line<br />
1/4" Blade<br />
BLK<br />
Connect<br />
.250 Terminals<br />
PLUG<br />
WHT<br />
IGNITOR SWITCHES<br />
(ON VALVES)<br />
Electric circuit closed<br />
when knob is rotated<br />
55 to 95 degrees<br />
counterclockwise from OFF<br />
Neutral<br />
5/16" Blade<br />
Ground<br />
Round Pin<br />
GRN or GRN/YEL<br />
WHT<br />
7-2<br />
120 VAC, 60 Hz<br />
1 Phase<br />
15 or 20 Ampere<br />
Ground<br />
SPARK<br />
MODULE<br />
YEL<br />
or<br />
BRN<br />
SPARK<br />
IGNITORS
KitchenAid Models KGCS166G, KGCT366G, & YKGCT366G<br />
BLK<br />
Line<br />
1/4" Blade<br />
BLK<br />
Connect<br />
.250 Terminals<br />
PLUG<br />
Neutral<br />
5/16" Blade<br />
Ground<br />
Round Pin<br />
WHT<br />
WHT<br />
IGNITOR SWITCHES<br />
(ON VALVES)<br />
Electric circuit closed<br />
when knob is rotated<br />
55 to 95 degrees<br />
counterclockwise from OFF<br />
YEL or<br />
BRN<br />
(5)<br />
7-3<br />
120 VAC, 60 Hz<br />
1 Phase<br />
15 or 20 Ampere<br />
GRN or GRN/YEL<br />
GRN or GRN/YEL<br />
N<br />
L1<br />
GND<br />
5<br />
SPARK<br />
IGNITORS<br />
1<br />
2<br />
3<br />
4<br />
Ground<br />
Ground<br />
SPARK<br />
MODULE
Line<br />
1/4" Blade<br />
BLK<br />
Connect<br />
.250 Terminals<br />
BLK<br />
PLUG<br />
IGNITOR SWITCH (CLOSED)<br />
KitchenAid Model KGCS127G<br />
Neutral<br />
5/16" Blade<br />
Ground<br />
Round Pin<br />
WHT<br />
IGNITOR SWITCHES<br />
(ON VALVES)<br />
Electric circuit closed<br />
when knob is rotated<br />
55 to 95 degrees<br />
counterclockwise from OFF<br />
STRIP CIRCUIT<br />
L1 L2<br />
IGNITOR<br />
SWITCH<br />
120 VAC, 60 Hz<br />
1 Phase<br />
15 or 20 Ampere<br />
GRN or GRN/YEL<br />
Ground<br />
WHT WHT<br />
SPARK<br />
IGNITOR<br />
SPARK<br />
MODULE<br />
7-4<br />
YEL or<br />
BRN<br />
(6)<br />
SPARK<br />
MODULE 1<br />
N<br />
BLK<br />
SPARK<br />
MODULE 2<br />
SPARK<br />
IGNITORS
TECH TIPS<br />
SURFACE BURNERS & GRATES<br />
IMPORTANT: The cooktop has been factoryset<br />
for use with Natural gas. An L.P. Conversion<br />
Kit is supplied for converting the cooktop<br />
for use with L.P. gas.<br />
The sealed gas burners spread the heat evenly<br />
across the bottom of the cookware and provide<br />
infinite heat control.<br />
Burner Cap<br />
Locator Pin<br />
Figure 8-1<br />
Left Grate Middle Grate<br />
Groove Tab<br />
Figure 8-2<br />
8-1<br />
The locator pin on the grates must be positioned<br />
in the burner cap hole to hold the grate<br />
in place (see Figure 8-1).<br />
The left and right grates contain grooves. The<br />
grooves must always face inward toward the<br />
control knobs to hold the grates in place. The<br />
middle grate must be placed in position first<br />
followed by the left and right grates (see Figure<br />
8-2).
CLEANING THE SURFACE BURNERS<br />
Refer to Figure 8-3.<br />
The burner caps should be routinely removed<br />
and cleaned. Keeping the burner caps clean<br />
prevents improper ignition and an uneven<br />
flame.<br />
For the proper flow of gas and ignition of the<br />
burner, DO NOT ALLOW SPILLS, FOOD,<br />
CLEANING AGENTS, OR ANY OTHER MA-<br />
TERIAL TO ENTER THE GAS TUBE (VEN-<br />
TURI) OPENING.<br />
Gas must flow freely through the gas tube<br />
opening for the burner to light properly. You<br />
must keep this area free of any soil and protect<br />
it from boilovers or spillovers. Always keep<br />
the burner cap in place whenever a surface<br />
burner is in use.<br />
Cast-Iron<br />
Burner Cap<br />
Alignment Pins<br />
Figure 8-3<br />
Spark<br />
Ignitor<br />
Burner<br />
Base<br />
Gas Tube (Venturi)<br />
Opening<br />
Allow the cooktop to cool before cleaning it.<br />
Do not use oven cleaners, bleach, or rust removers,<br />
or obstruct the flow of combustion and<br />
ventilation air to the burners.<br />
8-2<br />
If the knobs are removed while cleaning, be<br />
careful not to spill liquids through the holes in<br />
the control area. Moisture can cause the ignitor<br />
switches to fail.<br />
Occasionally check the burner flames for<br />
proper size and shape, as shown in Figure<br />
8-4. A good flame is blue in color. If the flames<br />
are uneven, you may need to clean the burners.<br />
Flame<br />
Figure 8-4<br />
To clean the burners:<br />
1. Lift the burner caps off the burner base.<br />
2. Clean the burner caps with warm, soapy<br />
water and a sponge. You can also clean the<br />
caps with a mildly abrasive plastic scrubbing<br />
pad and powdered cleanser. Do not<br />
clean the burner caps in a dishwasher or<br />
self-cleaning oven.<br />
3. If the gas tube opening has become soiled<br />
or clogged, use a cotton swab or a soft cloth<br />
to clean the area.<br />
4. If the ports are clogged, clean them with a<br />
straight pin (see Figure 8-5). Do not enlarge,<br />
or distort the port. Do not use a<br />
wooden toothpick. If the burner needs to be<br />
adjusted, call a qualified technician for service.<br />
Figure 8-5<br />
Straight Pin<br />
5. After cleaning the gas tube opening and<br />
ports, replace the burner caps. To replace<br />
the burner caps, make sure the alignment<br />
pins on the burner base are properly aligned<br />
with the cap.<br />
6. Turn on the burner to see if it will light. If the<br />
burner does not light after you have cleaned<br />
it, contact an authorized KitchenAid or<br />
<strong>Whirlpool</strong> service technician. Do not service<br />
the sealed burner yourself.
REQUESTING ASSISTANCE OR SERVICE<br />
Before calling for assistance or service, please<br />
check the “Diagnosis &Troubleshooting” in<br />
Section 6. It may save the cost of a service<br />
call. For further help, follow these instructions.<br />
If you need assistance or service in the<br />
U.S. A.:<br />
Call the KitchenAid Consumer Assistance<br />
Center toll free, at<br />
1-800-422-1230, OR<br />
Call the <strong>Whirlpool</strong> Consumer Assistance<br />
Center,toll free at:<br />
1-800-253-1301.<br />
If you need assistance or service in Canada:<br />
Call the Inglis Limited Consumer Assistance<br />
Center telephone number toll-free, 8:30 a.m.<br />
to 6:00 p.m. (EST) at:<br />
1-800-461-5681.<br />
Our consultants are available to assist you.<br />
When calling, please have the purchase date,<br />
and the complete model and serial number of<br />
your appliance handy. This information will help<br />
with your request.<br />
Our consultants provide assistance with:<br />
• Features and specifications on our full<br />
line of appliances.<br />
• Installation information.<br />
• Use and maintenance procedures.<br />
• Accessory and repair parts sales.<br />
• Specialized customer assistance<br />
(Spanish & French (Canada) speaking,<br />
hearing impaired, limited vision, etc.).<br />
• Referrals to local dealers, service companies,<br />
and repair parts distributors.<br />
8-3<br />
KitchenAid and <strong>Whirlpool</strong> service technicians<br />
are trained to fulfill the product warranty and<br />
provide after-warranty service, anywhere in the<br />
United States. To locate the authorized<br />
KitchenAid or <strong>Whirlpool</strong> service company in<br />
your area, you can also look in your telephone<br />
directory Yellow Pages.<br />
If you need to order replacement parts, we<br />
recommend that you only use factory authorized<br />
parts. These parts will fit right and work<br />
right, because they are made with the same<br />
precision used to build every new KitchenAid<br />
and <strong>Whirlpool</strong> appliance.<br />
To locate factory authorized replacement parts<br />
in your area, call our Consumer Assistance<br />
Center telephone number or your nearest authorized<br />
service center.<br />
If you need further assistance, you can write<br />
to KitchenAid, or <strong>Whirlpool</strong>, with any questions<br />
or concerns at:<br />
KitchenAid/<strong>Whirlpool</strong> Brand Home Appliances<br />
Consumer Assistance Center<br />
c/o Correspondence Dept.<br />
2000 North M-63<br />
Benton Harbor, Ml 49022-2692<br />
In Canada, contact:<br />
Consumer Relations Department<br />
Inglis Limited<br />
1901 Minnesota Court<br />
Mississauga, Ontario L5N 3A7<br />
Please include a daytime phone number in your<br />
correspondence.
LENGTH OF<br />
WARRANTY:<br />
ONE-YEAR FULL<br />
WARRANTY<br />
FROM DATE OF<br />
PURCHASE.<br />
SECOND-<br />
THROUGH FIFTH-<br />
YEAR LIMITED<br />
WARRANTY<br />
FROM DATE OF<br />
PURCHASE.<br />
KITCHENAID GAS COOKTOP WARRANTY<br />
KITCHENAID<br />
WILL PAY FOR:<br />
Replacement parts<br />
and repair labor<br />
costs to correct<br />
defects in materials<br />
or workmanship.<br />
Service must<br />
be provided by an<br />
authorized<br />
KitchenAid servicing<br />
outlet.<br />
Replacement parts<br />
for any gas burner<br />
to correct defects in<br />
materials or workmanship.<br />
KITCHENAID<br />
WILL NOT PAY FOR:<br />
A. Service calls to:<br />
1. Correct the installation of the cooktop.<br />
2. Instruct you how to use the cooktop.<br />
3. Replace house fuses or correct house<br />
wiring.<br />
4. Correct house plumbing.<br />
B. Repairs when cooktop is used in other than<br />
normal home use.<br />
C. Damage resulting from accident, alteration,<br />
misuse, abuse, fire, flood, acts of God, improper<br />
installation, or installation not in accordance<br />
with local electrical or plumbing codes.<br />
D. Any labor costs during the limited warranties.<br />
E. Replacement parts or repair labor costs for<br />
units operated outside the United States and<br />
Canada.<br />
F. Pickup and delivery. This product is designed<br />
to be repaired in the home.<br />
G. Repairs to parts or systems resulting from unauthorized<br />
modifications made to the appliance.<br />
H. In Canada, travel or transportation expenses<br />
for customers who reside in remote areas.<br />
KITCHENAID AND KITCHENAID CANADA DO NOT ASSUME ANY RESPONSIBILITY FOR<br />
INCIDENTAL OR CONSEQUENTIAL DAMAGES. Some states or provinces do not allow the<br />
exclusion or limitation of incidental or consequential damages, so this exclusion or limitation may<br />
not apply to you. This warranty gives specific legal rights and you may also have other rights<br />
which vary from state to state or province to province.<br />
Outside the United States and Canada, a different warranty may apply. For details, please<br />
contact your authorized KitchenAid dealer.<br />
If you need assistance or service, first see the "Troubleshooting" section in this book. After checking<br />
"Troubleshooting," additional help can be found by checking the "Requesting Assistance or<br />
Service" section. In the U.S.A., call our Consumer Assistance Center at 1-800-422-1230. In Canada,<br />
call our KitchenAid Consumer Assistance Center at 1-800-461-5681.<br />
8-4
LENGTH OF<br />
WARRANTY:<br />
ONE-YEAR FULL<br />
WARRANTY<br />
FROM DATE OF<br />
PURCHASE.<br />
WHIRLPOOL GAS COOKTOP WARRANTY<br />
WHIRLPOOL<br />
WILL PAY FOR:<br />
FSP ® replacement<br />
parts and repair<br />
labor costs to<br />
correct defects in<br />
materials or workmanship.<br />
Service<br />
must be provided<br />
by an authorized<br />
<strong>Whirlpool</strong> service<br />
company.<br />
WHIRLPOOL<br />
WILL NOT PAY FOR:<br />
A. Service calls to:<br />
1. Correct the installation of the cooktop.<br />
2. Instruct you how to use the cooktop.<br />
3. Replace house fuses or correct house<br />
wiring or plumbing.<br />
B. Repairs when the cooktop is used in other<br />
than normal, single-family household use.<br />
C. Pickup and delivery. The cooktop is designed<br />
to be repaired in the home.<br />
D. Damage to the cooktop caused by accident,<br />
alteration, misuse, abuse, fire, flood, acts of<br />
God, or use of products not approved by<br />
<strong>Whirlpool</strong>.<br />
E. Repairs to parts or systems resulting from unauthorized<br />
modifications made to the appliance.<br />
F. In Canada, travel or transportation expenses<br />
for customers who reside in remote areas.<br />
WHIRLPOOL CORPORATION AND INGLIS LIMITED SHALL NOT BE LIABLE FOR INCI-<br />
DENTAL OR CONSEQUENTIAL DAMAGES. Some states or provinces do not allow the exclusion<br />
or limitation of incidental or consequential damages, so this exclusion or limitation may not<br />
apply to you. This warranty gives specific legal rights and you may also have other rights which<br />
vary from state to state or province to province.<br />
Outside the United States and Canada, a different warranty may apply. For details, please<br />
contact your authorized <strong>Whirlpool</strong> dealer.<br />
If you need service, refer to the “Requesting Assistance or Service” section on page 8-3. After<br />
checking “Requesting Assistance or Service,” additional help can be found by calling the <strong>Whirlpool</strong><br />
Consumer Assistance Center telephone number, 1-800-253-1301, from anywhere in the<br />
U.S.A. In Canada, contact your authorized Inglis Limited Appliance Service company.<br />
8-5
— NOTES —<br />
8-6


