SAC4-2 - Opticstar
SAC4-2 - Opticstar
SAC4-2 - Opticstar

You also want an ePaper? Increase the reach of your titles
YUMPU automatically turns print PDFs into web optimized ePapers that Google loves.
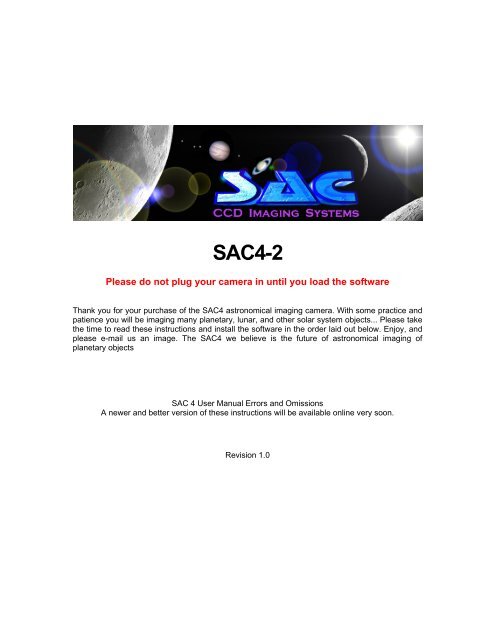
<strong>SAC4</strong>-2<br />
Please do not plug your camera in until you load the software<br />
Thank you for your purchase of the <strong>SAC4</strong> astronomical imaging camera. With some practice and<br />
patience you will be imaging many planetary, lunar, and other solar system objects... Please take<br />
the time to read these instructions and install the software in the order laid out below. Enjoy, and<br />
please e-mail us an image. The <strong>SAC4</strong> we believe is the future of astronomical imaging of<br />
planetary objects<br />
SAC 4 User Manual Errors and Omissions<br />
A newer and better version of these instructions will be available online very soon.<br />
Revision 1.0
<strong>SAC4</strong> User Manual<br />
Table of Content<br />
Page<br />
SAC8 1<br />
1. Parts list 3<br />
2. Software installation 3<br />
3. Overview 3<br />
4. Introduction 3<br />
5 Getting started<br />
6. Integration 4<br />
7. Frames, Images and Stacking 4<br />
8. Dark frames 5<br />
9. Autoguiding 5<br />
10. Drift imaging 6<br />
11. Configuring AstroVideo 6<br />
11.1. File..Save as 16-bit FITS file 7<br />
11.2 File..Save as BMP image file 7<br />
11.3. File..Save as JPG image file 7<br />
11.4. Toolbar command (View menu) 8<br />
11.5. Status Bar command (View menu) 8<br />
11.6. Status Bar command (View menu) 8<br />
11.7. View..Video Preview 8<br />
11.8. View..Contrast Adjust 8<br />
12. Cleaning and Maintenance 12<br />
13. Support and Warranty 12<br />
13.13. SAC 4 Limited Warranty 12<br />
13.14. RGA Number Required 12<br />
13.15. Contacting Technical Support 12<br />
Page 2 of 14 Rev. 1.0
<strong>SAC4</strong> User Manual<br />
1. Parts list<br />
1. Camera with T ring and removable T to 1.25 adapter<br />
2. CDROM<br />
2. Software installation<br />
Please “DRIVER” folder and click on “SETUP. EXE”. This will install the driver.<br />
Please note where driver is installed.<br />
Then click on “SAC AV244 and self install this program.<br />
Then plug your camera into a USB2.0 socket and when the wizard wants the driver<br />
either let it do it automatically or if it fails to find the driver then point the wizard to the<br />
driver previously loaded.<br />
3. Overview<br />
For using the <strong>SAC4</strong>, Astrovideo will be used. This program will control all the<br />
cameras functions and output as a Fits, bitmap or Jpeg image. Also slow frame rate<br />
AVI’s may be captured.<br />
Picture Window is a 30-day trial version as is Photo Impact 5. The reason for this is<br />
to keep cost down. Most people have a program or two already on their computer for<br />
mulnipulation images. If you feel conformable with the program(s) you have by all<br />
means use them. But we encourage you to try Picture Window, as it is a very<br />
powerful program capable of mulnipualating your images down to the pixel level. It is<br />
an involved program so we also inclose Photo Impact 5 trail. This program is very<br />
simple and will get you used to image processing before moving on to Picture<br />
Window. Picture Window can be purchased by its creators who are listed in the<br />
support section. It is reasonably priced at $49.00. We do not recommend buying<br />
PhotoImact5 as it is not a really powerful image processor.<br />
Image process is an important part of your imaging process. Your raw images from<br />
the camera may not look as good as you expect but with a little practice you can turn<br />
them in to a great image. Don’t get discouraged, the complete image process<br />
involves taking the image, dark frame, dark frame subtraction, flat fields, and<br />
processing. The Astrovideo program that you will use to image with can do a lot of<br />
this automatically. To familiar yourself with the controls and the camera it is best to<br />
image in the daytime. Image an object that does not move in the wind, as this will<br />
bring the image in and out of focus. Speaking of focusing this will be the hardest<br />
thing to get down pat. Focus must be exact with a CCD chip, unlike the eye, which<br />
can have a slightly off focus and still give you a sharp look.<br />
It is best to focus an object in a 10mm eyepiece, and then exchange the eyepiece for<br />
the camera. The camera at prime focus images and focuses very close to what a 6-<br />
10-mm eyepiece does.<br />
4. Introduction<br />
Astrovideo is a video image capture program with a number of revolutionary<br />
features.<br />
Page 3 of 14 Rev. 1.0
<strong>SAC4</strong> User Manual<br />
It runs on a PC with a USB 2.0 port and extends the utility of video imaging into new<br />
areas, which were previously thought to be impossible for video. Add to this that the<br />
<strong>SAC4</strong>’s sensitivity and large format, a whole new field of video imaging is now open.<br />
There are a number of aspects in which astronomical imaging is more demanding<br />
than conventional imaging. Frequently, the objects are very faint and even those<br />
that are bright (planets, the Moon) are constantly moving. Even with quality<br />
telescope mounts, the objects may not keep perfectly still in the field of view.<br />
Astrovideo addresses all of these problems and solves them.<br />
A user forum is available online at the SAC yahoo group at<br />
http://groups.yahoo.com/group/SACimaging/yguid=100851834<br />
5. Getting started<br />
This is assuming drivers and Astrovideo has been installed correctly. First select<br />
camera type under file as <strong>SAC4</strong>-2 or <strong>SAC4</strong> new. Then under driver the <strong>SAC4</strong> will be<br />
the only driver. As soon as you select the driver a video window will open. It is<br />
defaulted at 640x480. This will save computer processing power. The bigger the<br />
image the more demand on your processor it will be. Image size can be controlled<br />
under “video, video format”. Exposure time, red-green and blue gain, and sensitivity<br />
can be found under “video, video source”.<br />
It will be best to try during the daytime first. Exposure will be needed to be knocked<br />
down a lot because of the light but this will give you practice on the hardest thing<br />
with CCD cameras and that is FOCUSING. It is very easy to miss focus. At F-10 and<br />
above it can be a challenge but with a little practice it will come easy. You will find<br />
that once you are close to focus very little movement of the focus knob of your scope<br />
will make big changes in focus. An electronic motor on focus and the large focus<br />
wheels available on the market help make this easier.<br />
Once you have mastered daytime imaging then it times to move to nighttime. It may<br />
help to try a distant light source before moving to objects in the sky. Once you are<br />
ready use a 4-6 mm eyepiece to center and bring to focus the moon (this should be<br />
your 1 st object because of it’s ease.) Replace the eyepiece with the camera and<br />
slowly focus again. You will need to reduce the exposure time if you only get white<br />
light. Try 1-10 MS (milliseconds, 1/1000 of a second) and you may need to bring<br />
down each colors gain controls too. Use low sensitivity only. The more sensitive you<br />
set the camera at the more noise you end up with.<br />
You will have to experiment with color setting, exposure time, gain, etc. Each set up<br />
is different. Once you start getting the hang of things you may want to boost your F<br />
ratio up with a Barlow lens. If you are using a Schmidt-Cassegrain scope it will be at<br />
F-10. With a 2x Barlow you will be at F-20 and have larger images but light level will<br />
be less. You should be able to go to F-30 (a 3x Barlow) under ideal conditions. Many<br />
things affect your imaging. Clarity of sky, tubluance in the atmosphere, heat rising<br />
from the house you are pointed over, proper focus. Imaging is not an exact since but<br />
an art form at times.<br />
6. Integration<br />
For more information on this feature please refer to Astrovideo’s help files.<br />
7. Frames, Images and Stacking<br />
Page 4 of 14 Rev. 1.0
<strong>SAC4</strong> User Manual<br />
Astrovideo can make very long integration’s if necessary. However, telescope<br />
mounts are seldom sufficiently precise to keep the subject perfectly stable over long<br />
exposure times. To cope with this situation, Astrovideo can be configured to capture<br />
a large number of separate images, each one the integration of many video frames.<br />
The number of frames in each image is limited by the performance of the telescope<br />
mount. If it tracks very well, then there can be many frames in each image. If the<br />
tracking is less precise, then it is better to capture fewer frames in each image and to<br />
save a larger number of images. The number of frames in each image should be set<br />
to the largest number that does not cause the stars to trail.<br />
Once a set of images is obtained, AstroVideo helps you to add them together to<br />
achieve a final result equivalent to a much longer exposure. Since the telescope<br />
mount is imperfect, each image, although essentially of the same scene, will be<br />
centered on a slightly different point. AstroVideo offers a number of methods of<br />
registering the images to coincide in order to achieve a crisp result. Manual<br />
alignment involves identifying a common feature in each image so that AstroVideo<br />
can bring them all into alignment. Automatic alignment is performed by the program<br />
searching the images for best match. It works best with images containing plenty of<br />
detail and in which the misalignment is not too severe. Otherwise the search times<br />
become very long and the manual method is quicker. AstroVideo also offers an inbetween<br />
method in which the reference stars are identified manually but the precise<br />
centering of the star is automatically refined before stacking. Image combining tools<br />
If automatic combining works well, try the option to add images automatically at<br />
capture time. Each successive image in a capture set is brought into registration<br />
with the first image and added to a composite image. This can be used to produce a<br />
single image over an effective exposure time that is greater than the mount stability<br />
would otherwise allow.<br />
Again more information is available in Astrovideos help files.<br />
8. Dark frames<br />
Images obtained from video cameras under very low signal conditions are usually<br />
replete with instrumental artifacts. These include brighter areas, stripes and bright or<br />
dark individual pixels. Much of this distraction can be removed by numerical<br />
subtraction of a dark image from each light image. The dark image is taken under<br />
the same conditions as the light image (exposure time, temperature, etc.) except that<br />
the camera is covered to prevent the light entering. AstroVideo allow you to<br />
designate any image as a dark frame and can automatically subtract the dark frame<br />
from each image either before displaying or before saving it to file. Even if neither of<br />
these options is employed, AstroVideo has an off-line dark subtraction tool allowing<br />
dark images to be subtracted from light images after the event. Dark menu options<br />
9. Autoguiding<br />
Unlike an astronomical video camera, AstroVideo sees images from the <strong>SAC4</strong> in<br />
near real-time. It can therefore check for mis-tracking of the telescope mount and<br />
can determine what guiding adjustments need to be made. If the system is used<br />
with a mount which recognizes the proprietary Meade LX-200 protocol, AstroVideo<br />
can send guiding instructions to the mount in order to improve the tracking. This can<br />
be done as part of a video image capture process or it can be done as an auxiliary<br />
Page 5 of 14 Rev. 1.0
<strong>SAC4</strong> User Manual<br />
function to separate CCD imaging. In this way, a low cost video camera becomes<br />
an effective autoguider. Autoguiding menu options. Astrovideo will now track most<br />
mounts. Please see Astrovideo’s help files for more details.<br />
Again more information is available in Astrovideos help files.<br />
10. Drift imaging<br />
A revolutionary feature of AstroVideo is its ability to capture astronomical images<br />
even without a driven telescope mount. Using a telescope or a conventional lens<br />
with the <strong>SAC4</strong> on a fixed mounting normally produces a trailed image. During the<br />
exposure time, the rotation of the Earth causes the stars to move across the field of<br />
view and to trail the image. Although such star trails can be visually pleasing, they<br />
are not a substitute for sharp images.<br />
AstroVideo can be configured to perform the image integration with progressive<br />
displacement so keep in step with the sidereal motion. Used in this way, there is no<br />
question of tracking errors, provided the camera/telescope is stable. Indeed the<br />
movement of the sky is perfect in its smooth progress which AstroVideo follows.<br />
The exposure time with this method is effectively unlimited but the exposure which<br />
any individual star or other object receives is simply the total transit time across the<br />
field of view.<br />
The effective exposure time, regardless of the actual imaging time, using drift<br />
imaging is therefore dependant on the size of the field of view of the system. This in<br />
turn depends on the size of the chip and the focal length of the optical system (lens<br />
or telescope). The following table shows the maximum effective exposure time on<br />
the celestial equator, using a typical 5mm video camera chip for a range of camera<br />
and telescope focal lengths.<br />
fl (mm) minutes<br />
28 40,82<br />
50 22,90<br />
58 19,74<br />
125 9,17<br />
200 5,73<br />
350 3,27<br />
882 1,30<br />
906 1,26<br />
1500 0,76<br />
2260 0,51<br />
It is clear that for focal lengths greater than those of a telephoto camera lens, the<br />
effective exposure time becomes too short for deep sky imaging at least close to the<br />
celestial equator. Imaging closer to the poles gives a 1/Cosine (declination) increase<br />
in the effective exposure time which may be exploited.<br />
Again more information is available in Astrovideos help files.<br />
11. Configuring AstroVideo<br />
Page 6 of 14 Rev. 1.0
<strong>SAC4</strong> User Manual<br />
AstroVideo provides a number of advanced features, some of which need correct<br />
configuration in order to achieve the desired result.<br />
General setting up of the capturing process is done by selecting Capture...Setup.<br />
Choices include how many frames are integrated into each image and how many<br />
images are to be captured, the image file names and the image file directory, display<br />
of images as they are captured, and display contrast options.<br />
To set up the use of dark frames select one or more of the pull-down options under<br />
the Dark menu bar option.<br />
To set up autoguiding click on Autoguiding...Setup. Options include the port number<br />
for serial commands, the image orientation and selection of the impulse time for<br />
guiding adjustments.<br />
To set up the parameters for drift imaging select Drift...Setup. You can either enter<br />
the parameters by hand or you can let AstroVideo determine the parameters from a<br />
pair of time spaced images.<br />
Again more information is available in Astrovideos help files.<br />
11.1. File..Save as 16-bit FITS file<br />
This option saves the current image as a 16-bit FITS file. AstroVideo saves<br />
captured images in the 32-bit FITS format. Not all FITS viewing programs can<br />
handle this format. Accordingly, this option allows you to export the current image<br />
(the last one captured or the result of the last image combination) in 16-bit format<br />
which is more generally supported.<br />
If the brightest pixel in the image can be fitted directly into 16-bits, then a file dialog<br />
appears to allow the destination file to be specified.<br />
If the image contains pixel values that are too large to fit into 16 bits, a dialog<br />
appears. AstroVideo offers you the choice of saturating the overloaded pixels (the<br />
better option if there are just a few pixels affected) or of scaling the whole image to fit<br />
into 16 bits. In the latter case, the scale factor offered is that necessary to fit within<br />
16 bits. If you want to preserve relative pixel magnitudes between several images,<br />
you will need to settle on a fixed scale factor which is used for all the members of the<br />
set and which accommodates the brightest pixels in all the images.<br />
11.2. File..Save as BMP image file<br />
This option saves the current image as a BMP format image file.<br />
A file dialog appears inviting you to specify the file name to be used.<br />
The file will be a monochrome or colour BMP file depending on the settings in the<br />
Capture...Setup dialog.<br />
Note that the dynamic range of a BMP file is only 8 bits (256 levels) in each colour<br />
which is considerably inferior to the dynamic range of the FITS format files used by<br />
AstroVideo by default.<br />
11.3. File..Save as JPG image file<br />
This option saves the current image as a JPG format image file.<br />
Page 7 of 14 Rev. 1.0
<strong>SAC4</strong> User Manual<br />
A file dialog appears inviting you to specify the file name to be used.<br />
The file will be a monochrome.<br />
Note that the dynamic range of a JPG file is only 8 bits (256 levels) in each colour<br />
which is considerably inferior to the dynamic range of the FITS format files used by<br />
AstroVideo by default. The JPG compression is also not conservative which means<br />
that there is some loss of detail in the compressed image. The attraction of this<br />
format is that the file size is very muToolbar command (View menu)<br />
Use this command to display and hide the Toolbar, which includes buttons for some<br />
of the most common commands in AstroVideo, such as File Open. A check mark<br />
appears next to the menu item when the Toolbar is displayed.<br />
11.4. Toolbar command (View menu)<br />
Use this command to display and hide the Toolbar, which includes buttons for some<br />
of the most common commands in AstroVideo, such as File Open. A check mark<br />
appears next to the menu item when the Toolbar is displayed.<br />
11.5. Status Bar command (View menu)<br />
Use this command to display and hide the Status Bar, which describes the action to<br />
be executed by the selected menu item or depressed toolbar button, and keyboard<br />
latch state. A check mark appears next to the menu item when the Status Bar is<br />
displayed.<br />
11.6. Status Bar command (View menu)<br />
Use this command to display and hide the Status Bar, which describes the action to<br />
be executed by the selected menu item or depressed toolbar button, and keyboard<br />
latch state. A check mark appears next to the menu item when the Status Bar is<br />
displayed.<br />
11.7. View..Video Preview<br />
This option displays the current video signal in Preview mode in the left half of the<br />
window.<br />
Preview mode is processor intensive; for this reason, AstroVideo uses preview mode<br />
at 4Hz refresh rate.<br />
If no driver is connected, the option is disabled.<br />
11.8. View...Contrast Adjust<br />
This option displays a dialog in which the displayed image contrast can be adjusted.<br />
This is especially useful if you plan to export an image in BMP or JPG format without<br />
further image processing.<br />
Page 8 of 14 Rev. 1.0
<strong>SAC4</strong> User Manual<br />
11.9. Troubleshooting<br />
If you do not see any change of image characteristics when experimenting with<br />
extended exposure operation, then you may have selected the wrong parallel port.<br />
Some PCs use different port addresses for the parallel ports so it may be worth<br />
trying the other options.<br />
If, after an extended exposure image, you see only a blank frame, when there is<br />
reason to suppose that there should be something showing, then one of two things is<br />
happening. Either AstroVideo is capturing a black frame because the video driver<br />
has not yet delivered the new integrated frame. Or AstroVideo has missed the new<br />
integrated frame and has captured a following normal (non-integrated) frame. The<br />
latter is dim but not completely black, depending on the conditions of the experiment.<br />
If your processor is heavily loaded or under-researched, the driver may be slower<br />
than normal in preparing the integrated frame for delivery. In that case, try<br />
increasing the post-exposure time in steps of 10mS to see if the integrated frame<br />
can be reliably delivered<br />
If the integrated image is still black, you may not have remembered to set the<br />
contrast to maximum in the Video source dialog. Of course, you may have the lens<br />
cap on.<br />
If the integrated image is showing signs of saturation, you may be integrating for too<br />
long or you may have the brightness setting too high (mid point is usually suitable).<br />
11.10. Dark frames<br />
Dark frames can be used with extended exposure operation in the usual way.<br />
You can use a single image (monochrome or colour) as the dark frame for<br />
integration by capturing it and then defining it as the dark frame using the menu item<br />
Dark...Current image image.<br />
If necessary, you can capture many dark images and add them together<br />
(Tools...Combine...Fixed) and then define the resulting file(s) to be the dark frame<br />
using Dark...Use from file. You will have to combine the colour separations<br />
separately if you have specified colour images. Remember to scale the dark frame<br />
(Dark...Scale darkframe) if the resulting summed dark image corresponds to an<br />
exposure time different from that of the frames to be captured. If you have defined<br />
colour images in Capture...Setup, you will be prompted for the file names of all three<br />
colour separations of the dark frame.<br />
Remember to select dark subtraction for both image display and image saving if this<br />
is what you intend.<br />
11.11. Dynamic range<br />
Page 9 of 14 Rev. 1.0
<strong>SAC4</strong> User Manual<br />
The dynamic range of any one frame captured with extended exposure times, is still<br />
just 256 levels. This is rather inadequate for astronomical imaging where the subject<br />
dynamic range may be much greater than this. If dark subtraction is in use, the<br />
dynamic range is even more restricted. Accordingly, to get the best possible image<br />
results, it is usually better to use AstroVideo to add a number of shorter exposure<br />
time images into a single final image, than to make just one frame equal to one<br />
image with the total exposure time desired. This approach also means that<br />
saturation of bright areas is more readily avoided.<br />
With the option to use extended exposure times, there are two ways to produce a<br />
final image which represents the desired total exposure time. One is to make the<br />
required number of frames integrate into a single image. The other is to make the<br />
required number of single frame images into a final composite image using either<br />
post capture combining or using the add-during-capture option. This latter option<br />
allows you automatically to register successive images and add them into the final<br />
composite image, which can be of almost unlimited exposure time.<br />
As you get more skilled at making images with the <strong>SAC4</strong> you may have questions<br />
about how the CCD performs with your system or how much sky you can cover with<br />
one image. This chapter is designed to answer some of these questions and lead<br />
you to resources to discover your own solutions to your unique issues related to<br />
CCD imaging.<br />
11.12. Using Focal Reducers and Barlows<br />
If you’re new to CCD imaging but experienced at visual observing you might be<br />
wondering how you can change the “magnification” of images taken with the <strong>SAC4</strong>.<br />
Obviously for visual observation changing the image size is as simple as changing<br />
the eyepiece used, but since the SAC is most often used for prime focus<br />
photography with no eyepiece you may feel you are at the mercy of your optical focal<br />
length. The solution then is to change the focal length of your telescope optics using<br />
a device called a focal reducer.<br />
Many telescope manufacturers sell optional focal reducers that allow owners to alter<br />
the focal length of their optical system. For example, Meade sells two focal<br />
reducers, an f/6.3 and f/3.3 that can be used with their Schmidt-Cassegrain<br />
telescopes.<br />
To calculate what effect focal reducers have on the amount of sky covered we use<br />
the same formula as in the previous section, but plugging in the different focal length<br />
of the optical system using the focal reducer. For example, the following table<br />
shows the difference for a hypothetical 8-inch telescope used at f10 and f/6.3 with<br />
the SAC 7B:<br />
Focal Ratio Focal Length (mm) Horizontal Vertical Coverage<br />
coverage<br />
f/10 2032 6.06’ 4.54’<br />
f/6.3 1280 9.62’ 7.21’<br />
It is worth mentioning however that longer focal lengths result in dimmer images<br />
(due to the spreading out of light) than shorter focal lengths. Because of this,<br />
choosing the correct optical focal length then becomes a question of the size versus<br />
Page 10 of 14 Rev. 1.0
<strong>SAC4</strong> User Manual<br />
the brightness of the object you want to image. For smaller, brighter objects such as<br />
planets you’ll probably want to use the longest focal length possible, but for larger<br />
objects such as nebulae you’ll probably wish to select a shorter focal length.<br />
Experimentation is the best way to get a feel for the properties of your optics and the<br />
<strong>SAC4</strong> camera.<br />
The exact opposite happens with barlows. A 2x Barlow will give F-20 with the same<br />
setup. As a 2.5 will give F-25, a 1.5 will give F-15 and so on.<br />
Page 11 of 14 Rev. 1.0
<strong>SAC4</strong> User Manual<br />
12. Cleaning and Maintenance<br />
The <strong>SAC4</strong> requires little user maintenance and should be treated like you would<br />
treat any optical instrument. To clean the CCD chip on the <strong>SAC4</strong> use the same<br />
method you use for cleaning your telescope optics.<br />
For objects that do not blow off, the use of a “lens pen” (also available at camera<br />
shops) is ideal. If you do not have a lens pen, you can use a small amount of lens<br />
cleaning solution on a Q-Tip to gently remove the object.<br />
Remember to unplug your camera from the computer when not in use since the fan<br />
will still be operating as long as it’s plugged in. For the <strong>SAC4</strong> be sure to disconnect<br />
the power supply since leaving the thermo-electric cooling running will lead to<br />
premature failure.<br />
13. Support and Warranty<br />
13.13. <strong>SAC4</strong> Limited Warranty<br />
The <strong>SAC4</strong> is warranted by SAC Imaging (“SAC”) to be free of defects in materials<br />
and workmanship for a period of ONE YEAR from the date of original purchase.<br />
SAC will repair or replace a product, or part thereof, found by SAC to be defective,<br />
provided that the defective part is returned to SAC, pre-paid, with proof of purchase.<br />
This warranty applies to the original purchaser only and is non-transferable.<br />
13.14. RGA Number Required<br />
Prior to the return of any product or part, a Return Goods Authorization (RGA)<br />
number must be obtained by writing or calling (321) 259-6498. Each part returned<br />
should contain a written statement detailing the nature of the claimed defect, as well<br />
as the owner’s name, address and telephone number.<br />
This warranty is not valid in cases where the product has been abused or<br />
mishandled, where unauthorized repairs have been attempted or performed, or<br />
where depreciation of the product is due to normal wear and tear. SAC specifically<br />
disclaims special, indirect, or consequential damages or lost profit which may result<br />
from breach of this warranty. Any implied warranties which cannot be disclaimed are<br />
hereby limited to a term of one year from the date of original purchase.<br />
This warranty gives you specific rights. You may have other rights which vary from<br />
state to state.<br />
SAC reserves the right to change product specifications or to discontinue products<br />
without notice.<br />
13.15. Contacting Technical Support<br />
Page 12 of 14 Rev. 1.0
<strong>SAC4</strong> User Manual<br />
For technical support for the SAC 4 cameras, drivers or AstroVideo software:<br />
SAC Imaging<br />
P.O. Box 360982<br />
Melbourne, Fl. 32936<br />
(321) 259-6498<br />
Email: wsnyder@sac-imaging.com<br />
Picture Window<br />
For Picture Window support, visit the Picture Window web site at www.dl-c.com<br />
Page 13 of 14 Rev. 1.0
<strong>SAC4</strong> User Manual<br />
NOTES<br />
Page 14 of 14 Rev. 1.0