Blazer User Manual - Mustek
Blazer User Manual - Mustek
Blazer User Manual - Mustek
You also want an ePaper? Increase the reach of your titles
YUMPU automatically turns print PDFs into web optimized ePapers that Google loves.
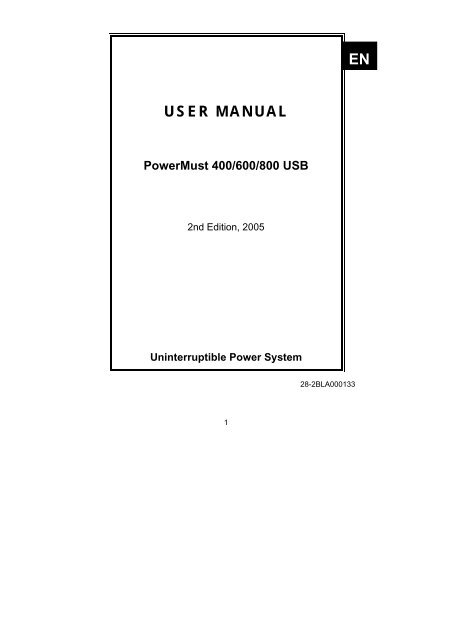
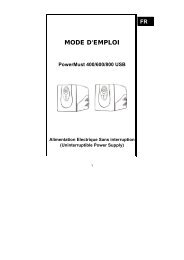
EN<br />
USER MANUAL<br />
PowerMust 400/600/800 USB<br />
2nd Edition, 2005<br />
Uninterruptible Power System<br />
28-2BLA000133<br />
1
IMPORTANT SAFETY INSTRUCTIONS<br />
SAVE THESE INSTRUCTIONS – This manual contains<br />
important instructions for PowerMust 400/600/800 USB<br />
Series that should be followed during installation and<br />
maintenance of the UPS and batteries.<br />
2
CONTENTS<br />
1. Introduction 1<br />
2. Safety – CAUTION! 1-2<br />
3. System Description 3<br />
4. Installation and Operation 4-6<br />
5. Trouble Shooting 6<br />
6. Specification 7<br />
614-05790-04<br />
3
PowerMust 400/600/800 USB <strong>User</strong> <strong>Manual</strong><br />
1. Introduction<br />
This UPS is specially designed for Personal Computer with multi-functions.<br />
Its light weight, compact design perfect fits to the limited working<br />
environment. The line of UPS is equipped with boost and buck AVR to<br />
stabilize input voltage range. It is also built-in with DC start function.<br />
This function enables the UPS to be started up without AC power supplied.<br />
Although it’s a small UPS, it’s equipped with Smart RS-232<br />
Communication Port to offer users more benefits. The download software<br />
helps users monitor UPS inside status. The main features of PowerMust<br />
400/600/800 USB UPS are listed below:<br />
• Microprocessor control guarantees high reliability.<br />
• Equipped with Boost and Buck AVR.<br />
• Built-in RS-232/USB Communication Ports.<br />
• Free Software (Please check Software Installation.)<br />
• DC Start Function.<br />
• Auto restart while AC recovery.<br />
• Auto charging battery even though UPS is off.<br />
• Provides AC overload protection.<br />
• Provides Modem/Phoneline surge protection.<br />
.<br />
2. Safety – Caution<br />
• This UPS utilizes voltages that may be hazardous. Do not attempt to<br />
disassemble the unit. The unit contains no user serviceable parts.<br />
Only factory service personnel may perform repairs.<br />
• Internal battery voltage is 12Vdc.<br />
• Connection to any other type of receptacle other than a two-pole,<br />
three-wire grounded receptacle may result in shock hazard as well as<br />
violate local electrical codes.<br />
• In the event of an emergency, press the OFF button and disconnect<br />
the power cord from the AC power supply to properly disable the<br />
UPS.<br />
• Do not allow liquids or any foreign object to enter the UPS. Do not<br />
place beverages or any other liquid-containing vessels on or near the<br />
unit.<br />
• This unit intended for installation in a controlled environment<br />
(temperature controlled, indoor area free of conductive contaminants).<br />
Avoid installing the UPS in locations where there is standing or<br />
running water, or excessive humidity.<br />
4
• Do not plug the UPS input into its own output.<br />
• Do not attach a power strip or surge suppressor to the UPS.<br />
• Do not attach non-computer-related items, such as medical<br />
equipment, life-support equipment, microwave ovens, or vacuum<br />
cleaners to UPS<br />
• To reduce the risk of overheating the UPS, do not cover the UPS’<br />
cooling vents and avoid exposing the unit to direct sunlight or<br />
installing the unit near heat emitting appliances such as space<br />
heaters or furnaces.<br />
• Unplug the UPS prior to cleaning and do not use liquid or spray<br />
detergent.<br />
• Do not dispose of batteries in a fire as they may explode.<br />
• Do not open or mutilate the battery or batteries. Released electrolyte<br />
is harmful to the skin and eyes. It may be toxic.<br />
• A battery can present a risk of electrical shock and high short circuit<br />
current. The following precautions should be observed when working<br />
on batteries:<br />
1) Remove watches, rings, or other metal objects from the hands.<br />
2) Use tools with insulated handles.<br />
3) Wear rubber gloves and boots.<br />
4) Do not lay tools or metal parts on top of batteries.<br />
5) Disconnect charging source prior to connecting or disconnecting<br />
batteries terminals.<br />
• Servicing of batteries should be performed or supervised by<br />
personnel knowledgeable of batteries and the required precautions.<br />
Keep unauthorized personnel away from batteries.<br />
• When replacing batteries, replace with the same number and type of<br />
sealed lead-acid battery.<br />
• This pluggable type A equipment with battery already installed by the<br />
supplier is operator installable and may be operated by laymen.<br />
• During the installation of this equipment it should be assured that the<br />
sum of the leakage currents of the UPS and the connected loads<br />
does not exceed 3.5mA<br />
• Attention, hazardous through electric shock. Also with disconnection<br />
of this unit from the mains, hazardous voltage still may be accessible<br />
through supply from battery. The battery supply should be therefore<br />
diconnected in the plus and minus pole at the connectors of the<br />
battery when maintenance or service work inside the UPS is<br />
necessary.<br />
• The mains socket outlet that supplies the UPS shall be installed near<br />
the UPS and shall be easily accessible.<br />
5
3. System Description<br />
Front panel:<br />
1. Power Switch<br />
2. LED Indicators –<br />
For 400/600 Model:<br />
AC Mode: Green LED lighting<br />
Battery Mode: Green LED flashing<br />
For 800 Model:<br />
AC Mode: Green LED on<br />
Battery Mode: Yellow LED flashing<br />
Fault: Red LED on<br />
Back Panel--<br />
1. Output receptacles<br />
2. AC input with AC fuse<br />
3. Modem/Phoneline Surge<br />
Protection<br />
4. RS-232 Communication Port<br />
5. USB Port<br />
6
4. Installation and operation<br />
Installing the UPS is as easy as following the steps shown. Be aware of the<br />
Power Switch must be kept in the “ON” position, otherwise, the UPS will be<br />
disabled and your equipment will not be protected during a power failure.<br />
1. Inspection<br />
Remove the UPS from its packaging and inspect it for damage that<br />
may have occurred during shipping. If any damage is discovered,<br />
repack the unit and return it to the place of purchase.<br />
2. Placement<br />
Install the UPS unit in any protected environment that provides<br />
adequate airflow around the unit, and is free from excessive dust,<br />
corrosive fumes and conductive contaminants. Do not operate your<br />
UPS in an environment where the ambient temperature or humidity is<br />
high. On the other hand, place the UPS away from the monitor at<br />
least 20cm to avoid interference.<br />
3. Charging<br />
This unit is shipped from the factory with its internal battery fully<br />
charged, however, some charge may be lost during shipping and the<br />
battery should be recharged prior to use. For 400/600 models, plug the<br />
unit into an appropriate power supply and allow the UPS to charge fully<br />
by leaving it plugged in for at least 8 hours with no load (no electrical<br />
devices such as computers, monitors, etc.) connected. For 800 Model,<br />
please charge at least 4 hours.<br />
7
4. Computer Connection<br />
Connect one computer-related device into each of the power<br />
receptacles supplied on the back of the UPS.<br />
5. Modem/Phoneline Connection<br />
Plug incoming internet line into the “In” socket at the back of the UPS.<br />
Use one more internet line cable and plug one end of the internet line<br />
cable to the “Out” socket at the back of the UPS. Plug the other end<br />
to the modem input socket as shown below.<br />
6. Serial Cable Connection<br />
To allow for unattended system shutdown for your operating system,<br />
connect the RS-232 serial cable as per diagram below. For the USB<br />
serial cable, just simply plug into the UPS and PC and it will be auto<br />
detected.<br />
7. Turn On/Off<br />
PowerMust 400/600/800 USB series will be turned on automatically at<br />
first plug-in. At this moment, press power switch lightly to turn off the<br />
UPS. To turn on the UPS unit, press the power switch lightly. To turn<br />
off the UPS unit, press the power switch again.<br />
8
8. DC Start Function<br />
DC Start Function enables UPS to be started up when AC utility power<br />
is not available and battery is fully charged. Just simply press the<br />
power switch to turn on the UPS.<br />
9. Software Installation – WinPower (FOR WINDOWS O/S)<br />
1. Insert the installation CD into CD-ROM drive and then follow the<br />
on-screen instructions. If there no screen shows when inserting the<br />
CD after 1 minute, please execute setup.exe for initiating<br />
installation software.<br />
2. Enter Serial No: 511C1-01220-0100-478DF2A to install the<br />
software.<br />
When your computer restarts, the WinPower software will appear as a<br />
green plug icon located in the system tray, near the clock.<br />
5. Trouble Shooting<br />
Symptom Possible Cause Remedy<br />
No LED display on<br />
the front panel.<br />
1. Missing battery. 1. 400/600 models: Charge<br />
battery up to 8 hours.<br />
800 model: Charge battery<br />
up to 4 hours.<br />
2. Battery defect. 2. Replace with the same type<br />
of battery.<br />
Alarm buzzer beeps<br />
continuously when<br />
AC supply is normal.<br />
When power failure,<br />
back-up time is<br />
shorten.<br />
Mains normal but<br />
LED is flashing.<br />
Overload of the UPS.<br />
9<br />
Verify that the load matches<br />
the UPS capability specified in<br />
the specs.<br />
1. Overload of the UPS. 1. Remove some noncritical<br />
load.<br />
2. Battery voltage is too 2. 400/600 models: Charge<br />
low.<br />
battery 8 hours or more.<br />
800 model: Charge battery<br />
4 hours or more.<br />
3. Battery defect due to<br />
high temperature<br />
operation<br />
environment, or<br />
improper operation to<br />
battery.<br />
3. Replace with the same type<br />
of battery.<br />
1. Fuse is blown. 1. Replace the same type of<br />
fuse.<br />
2. Power cord is loose. 2. Reconnect the power cord<br />
properly.<br />
If any abnormal situations occur that are not listed above, please call service<br />
people immediately.
6. Specification<br />
MODEL<br />
PowerMust<br />
400 USB<br />
PowerMust 600<br />
USB<br />
PowerMust 800<br />
USB<br />
CAPACITY VA/W 400VA/240W 600VA/360W 800VA/480W<br />
INPUT Voltage 220/230/240VAC<br />
Voltage Range<br />
162~268VAC<br />
Frequency<br />
45-65 Hz (Auto Sensing)<br />
OUTPUT Voltage 220/230/240VAC<br />
Voltage Regulation<br />
(Batt. Mode)<br />
±10%<br />
Frequency<br />
50Hz or 60Hz<br />
Frequency Regulation<br />
(Batt. Mode)<br />
+/-1 Hz<br />
Output Waveform<br />
Modified Sinewave<br />
BATTERY<br />
Battery Type & 12V4.5 Ah x<br />
Number<br />
1<br />
12V7AH x 1 12V9AH x 1<br />
Back up Time at a PC<br />
load with 15” Monitor<br />
8-30 minutes<br />
(typical)<br />
Recharge Time<br />
4 hours to 90%<br />
8 hours to 90% after complete<br />
after complete<br />
discharge<br />
discharge<br />
TRANSFER TIME Typical<br />
2-6ms<br />
AC Mode<br />
Green LED lighting<br />
INDICATOR Backup Mode Green LED flashing Yellow LED flashing<br />
Fault No LED light Red LED lighting<br />
Backup Mode<br />
Sounding every 10 seconds<br />
Low Battery<br />
Sounding every second<br />
AUDIBLE ALARM Overload<br />
Sounding every 0.5 second<br />
Battery Replacement<br />
Sounding every 2 seconds<br />
Fault<br />
Continuously sounding<br />
PROTECTION Full Protection Discharge, overcharge, and overload protection<br />
PHYSICAL<br />
Dimension (mm),<br />
DXWXH<br />
330X100X140<br />
WEIGHT Net Weight (kgs) 6.5<br />
ENVIRONMENT<br />
INTERFACE<br />
Operating<br />
Environment<br />
Noise Level<br />
Smart RS-232<br />
0- 40°C, 0-90 % Relative humidity<br />
(non-condensing)<br />
Less than 40dB<br />
Support windows 95/98/NT/2000/XP, Novell,<br />
and Linux<br />
10


