Instruction manual (pdf) - Bischoff & Bischoff
Instruction manual (pdf) - Bischoff & Bischoff
Instruction manual (pdf) - Bischoff & Bischoff

You also want an ePaper? Increase the reach of your titles
YUMPU automatically turns print PDFs into web optimized ePapers that Google loves.
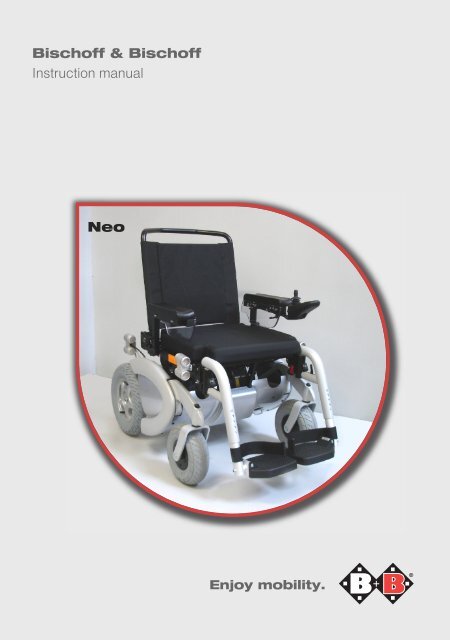
<strong>Bischoff</strong> & <strong>Bischoff</strong><br />
<strong>Instruction</strong> <strong>manual</strong><br />
Neo<br />
Enjoy mobility.
Contents:<br />
1| Preface 4<br />
1.1 Signs and symbols<br />
2| Important safety instructions 6<br />
2.1 General safety instructions<br />
2.2 Information on EMC interference<br />
2.3 Brakes<br />
2.4 Safety in vehicles<br />
2.5 Travelling in traffic<br />
2.6 Purpose<br />
2.7 Indications<br />
2.8 Contraindications<br />
2.9 Declaration of Conformity<br />
3| Overview of product and accessories 10<br />
3.1 Checking the delivery<br />
3.2 Package<br />
3.3 Overview<br />
3.4 Basic adjustments<br />
3.4.1 Leg rests<br />
3.4.2 Seat<br />
3.4.3 Back rest<br />
3.4.4 Arm rests<br />
3.4.5 Side section<br />
3.4.6 Control<br />
3.4.7 Seat belt<br />
2
Neo<br />
4| Using the wheelchair 17<br />
4.1 Description of controls<br />
4.1.1 VR2 control<br />
4.1.2 R-net control<br />
4.1.3 LCD display and the most important symbols<br />
4.1.4 Electrical adjustments<br />
4.1.5 Diagnostic display<br />
4.2 Entering and leaving<br />
4.3 Moving with the wheelchair<br />
4.4 Leg rests<br />
4.5 Pushing the scooter<br />
5| Technical Data 32<br />
6| User care instructions 33<br />
6.1 Cleaning and disinfection<br />
6.2 Inspection before use<br />
6.2.1 Brake check<br />
6.2.2 Checking lights, indicators and horn<br />
6.2.3 Checking the tyres<br />
6.3 Battery<br />
6.3.1 Charging<br />
6.3.2 Replacing batteries<br />
7| Maintenance instructions for dealers 37<br />
8| Disposal 38<br />
9| Transferring the wheelchair 38<br />
10| Maintenance 38<br />
11| Warranty 38<br />
12| Warranty — certificate 39<br />
English<br />
<strong>Bischoff</strong> & <strong>Bischoff</strong> GmbH • 04.05.2011 3
1. Preface<br />
You have selected a high-quality electric wheelchair from<br />
<strong>Bischoff</strong> & <strong>Bischoff</strong>. Thank you for your trust in our products.<br />
The electric wheelchair has been designed to give you many<br />
advantages and to meet your needs. The wide range of adjustments<br />
for lower-leg length, knee angle, seat width, seat and<br />
seat-back angle and the option of placing the control on the<br />
right or left make it easy to adjust the wheelchair to the user's<br />
individual body size.<br />
The wheelchair can optionally be fitted with electrically adjustable<br />
components. In this case it is supplied with the R-net<br />
control. The descriptions of basic adjustments in this <strong>manual</strong><br />
refer exclusively to the <strong>manual</strong> adjustments of knee angle,<br />
seat angle and back angle.<br />
The electric wheelchair is designed for use inside and outside.<br />
Please read and follow the instruction <strong>manual</strong> carefully before<br />
using your new electric wheelchair for the first time. The <strong>manual</strong><br />
is an integral and important component of the wheelchair.<br />
Keep the instruction <strong>manual</strong> at hand and include with the<br />
wheelchair when you transfer it to another owner. Repairs and<br />
adjustments require specialised technical training and must be<br />
carried out by <strong>Bischoff</strong> & <strong>Bischoff</strong> authorised dealers only.<br />
4
Neo<br />
1.1 Signs and symbols<br />
Caution! Indicates specially safety-relevant<br />
instructions. Follow instruction <strong>manual</strong>.<br />
English<br />
Important! Indicates particularly useful<br />
information in the specific context.<br />
<strong>Bischoff</strong> & <strong>Bischoff</strong> GmbH • 04.05.2011 5
2. Important safety<br />
instructions<br />
2.1 General safety<br />
instructions<br />
Practise using your new wheelchair on a small, flat area first to<br />
prevent falls and hazardous situations. We recommend having<br />
an assistant with you at this time.<br />
Before using the wheelchair check that all attached components<br />
are correctly fastened.<br />
Before using the wheelchair practise operating it on a level<br />
and restricted area. You should intensively practise using the<br />
brakes and accelerating in a straight line and in curves.<br />
Please note that changes in the balance of the wheelchair by<br />
body movements or the load may increase the risk of tipping<br />
to the side and backwards. The wheelchair must not be used<br />
to transport more than one person or loads. Note the intended<br />
use. Never use the wheelchair under the influence of alcohol<br />
or other substances that could detract from your alertness or<br />
physical and intellectual acuity.<br />
Always use ramps to drive over obstacles.<br />
Do not travel into an obstacle (step, kerb) without braking.<br />
Be aware that the wheelchair may tip over when driving over<br />
rough areas, hoists and ramps. Make sure that the clearance to<br />
the sides, above and below is sufficient.<br />
The controls must always be switched off when you get on or<br />
off the wheelchair.<br />
Always follow the traffic regulations on public streets. The<br />
lights on the wheelchair must always be visible to other traffic<br />
and pedestrians<br />
6
Neo<br />
English<br />
Wear bright, conspicuous clothing as much as possible. You will<br />
be more visible in traffic. Please note that padding that is exposed<br />
to direct sunlight may become hot and burn your skin if<br />
it comes into contact with it. Cover these parts or protect the<br />
wheelchair from direct sunlight.<br />
Note that the wheelchair can only be pushed<br />
with the drive uncoupled or on a level surface.<br />
This disables the electromechanical brake. If this<br />
is not observed fatal injuries may occur.<br />
2.2 Information on EMC<br />
interference<br />
Even though the wheelchair conforms to all applicable EMC<br />
Directives and standards, other electrical devices (e.g. mobile<br />
telephones) may cause interference with the electric wheelchair<br />
or it may itself cause interference. If you note any such<br />
interference, either switch off the other device or your electric<br />
wheelchair and move it away from the interference.<br />
2.3 Brakes<br />
The wheelchair is brought to a stop by the automatic brake<br />
when the joystick is released. When the wheelchair is being<br />
pushed no parking brake is available when the drive is disconnected.<br />
The drives must be connected to park the wheelchair.<br />
<strong>Bischoff</strong> & <strong>Bischoff</strong> GmbH • 04.05.2011 7
2.4 Safety in vehicles<br />
Please note that the wheelchair must not be used as seating<br />
in a vehicle. The user must transfer from the wheelchair to a<br />
standard vehicle seat.<br />
The wheelchair must be secured to prevent movement.<br />
2.5 Travelling in traffic<br />
The wheelchair is designed for use indoors and outdoors.<br />
Please note that the wheelchair will be operating in traffic<br />
and it must conform to laws and regulations governing traffic.<br />
Do not endanger pedestrians or other traffic by careless<br />
driving, particularly on footpaths.<br />
2.6 Purpose<br />
The Neo electric wheelchair is designed for use inside and<br />
outdoors for persons who are unable to walk.<br />
It is sufficiently compact and manoeuvrable for indoor use<br />
and can also cover medium distances and minor obstacles<br />
outdoors. Under EN 12184 it is classified in Category B.<br />
The maximum load capacity is 200 kg<br />
8
Neo<br />
2.7 Indication<br />
Walking disability or serious difficulty in walking as a result of<br />
• paralysis<br />
• loss of limb<br />
English<br />
• defect or deformity in limbs<br />
• joint contractures<br />
• joint damage (not on both arms)<br />
• other conditions<br />
The use of an electric wheelchair is indicated if the use of<br />
<strong>manual</strong>ly operated wheelchairs is impossible because of the<br />
handicap but competent operation of an electromechanical<br />
drive is still possible.<br />
2.8 Contraindication<br />
Electric wheelchairs are not suitable for persons<br />
• with severe equilibrium disorders<br />
• with reduced and inadequate vision<br />
• with serious cognitive restrictions<br />
2.9 Declaration of<br />
Conformity<br />
B+B as the manufacturer of the product declares in sole<br />
responsibility that the Neo electric wheelchair fully complies<br />
with the requirements of Directive 93/42/EEC.<br />
<strong>Bischoff</strong> & <strong>Bischoff</strong> GmbH • 04.05.2011 9
3. Overview of product<br />
and accessories<br />
3.1 Checking the delivery<br />
All B+B products are inspected before they leave our factory<br />
and the CE mark is applied. The wheelchair is supplied in a<br />
special carton. After unpacking the wheelchair, keep the carton<br />
if at all possible. It can be used for subsequent storage or<br />
return of the product.<br />
The wheelchair generally is delivered and instruction in its use<br />
is given by a qualified dealer in medical products.<br />
If the wheelchair is delivered by rail or road transport it must<br />
be inspected for shipping damage in the presence of the delivery<br />
person. If any damage is detected, contact our customer service<br />
department immediately (Tel.: + 49 700/6000 7070).<br />
Check the contents of the package for completeness and<br />
damage. If any discrepancies or damage are detected,<br />
contact our customer service department immediately<br />
(Tel.: + 49 700/6000 7070).<br />
10
Neo<br />
3.2 Package<br />
Check the contents of the package for completeness<br />
immediately on receipt.<br />
The package contains:<br />
English<br />
• packaging material<br />
• electric wheelchair (ready for use with 2 batteries)<br />
• VR2 control (R-net with electrical adjustment of components)<br />
• battery charger<br />
• seat cushion<br />
• tool kit<br />
• instruction <strong>manual</strong><br />
3.3 Overview<br />
Push handle<br />
Back rest<br />
Control<br />
Arm rest<br />
Side section<br />
Seat cushion<br />
Headlight and indicator<br />
Rear light and indicator<br />
Drive wheels<br />
Foot rests<br />
Swivelling wheels<br />
Fig. 1<br />
<strong>Bischoff</strong> & <strong>Bischoff</strong> GmbH • 04.05.2011 11
3.4 Adjustment<br />
Before using the wheelchair for the first time it must be<br />
adjusted for your body size. This is the only way to ensure<br />
extended use without fatigue in a physiologically correct<br />
posture. The basic adjustments of the wheelchair are described<br />
below. You should have all adjustments made by your dealer.<br />
3.4.1. Leg rests<br />
Lower leg length<br />
• The lower leg length can be adjusted over a range of<br />
35.5 - 42.5 cm.<br />
• Loosen the screw and pull the bolt out<br />
• Set the required height.<br />
• Insert the bolt and tighten the screw.<br />
Fig. 2<br />
Make sure that new self-locking nuts are always used<br />
for complete security.<br />
Foot plate angle<br />
• The angle of the foot plate can be adjusted<br />
by a toothed rack.<br />
• Loosen the screws at the side of the foot plate.<br />
• Set the angle of the foot plate as required.<br />
Fig. 3<br />
• Tighten the screw again. Use Loctite 243 for fastening.<br />
12
Neo<br />
Knee angle<br />
• The angle of the leg rests can be adjusted by<br />
a perforated plate.<br />
English<br />
• Release the red locking clip on the inside<br />
and pull the pin out.<br />
• Move the leg rest to the desired position.<br />
• Insert the pins and lock them with the locking clip<br />
to lock the leg rest in position.<br />
Fig. 4<br />
3.4.2 Seat<br />
Seat depth<br />
• The seat depth can be adjusted from 42 to 51 cm.<br />
• First remove the seat cushion.<br />
• Release the screws and move the seat base<br />
to the required position.<br />
• Tighten the screws again.<br />
Fig. 5<br />
Seat width<br />
• The width of the seat is adjusted by moving<br />
the side sections.<br />
• Loosen the screws and remove the memory stick.<br />
• Move the side tube to the desired position.<br />
• Insert the memory stick and tighten the screws.<br />
Fig. 6<br />
Make sure that both memory sticks are<br />
in the same hole position on the left and right.<br />
<strong>Bischoff</strong> & <strong>Bischoff</strong> GmbH • 04.05.2011 13
Seat angle<br />
• Loosen the clamping lever until the seat angle<br />
can be adjusted (do not pull out).<br />
• Set the required seat angle.<br />
• Tighten the clamping lever again.<br />
Fig. 7<br />
3.4.3 Back rest<br />
The angle the seat back of the electric wheelchair can be<br />
adjusted very simply and without requiring force. The back<br />
can also be folded completely forward.<br />
• The seat back angle can be adjusted<br />
from 5° forward to 75° back.<br />
• Release the red locking clips on the right and left<br />
at the perforated screen and pull the pins out.<br />
• Move the back rest back to the desired position.<br />
• Insert the pins and lock them with the locking clip<br />
Fig. 8a<br />
• To fold the back completely forward or to remove it release<br />
the bottom locking clips on the right and left and pull the<br />
pins out.<br />
• When you want to replace the seat back,<br />
proceed in reverse order.<br />
• Insert the pins and lock them with the locking clip.<br />
Fig. 8b<br />
14
Neo<br />
3.4.4 Arm rests<br />
The arm rests can be removed completely to allow the user to<br />
enter and leave the wheelchair from the side. The height of the<br />
arm rests and the distance to the seat back can also be adjusted,<br />
and they can also be moved to the side when the seat width is<br />
adjusted.<br />
English<br />
Removing arm rests<br />
• To remove the arm rests loosen the knurled screw<br />
and pull the arm rest upwards.<br />
• When installing the arm rests make sure that they<br />
are pushed in to the stop and fixed in position.<br />
Fig. 9<br />
Adjusting height<br />
• Loosen the lever screw and pull it out completely.<br />
• Move the arm rest to the desired position.<br />
• Tighten the lever screw again to fix it in position.<br />
Fig. 10<br />
Distance to seat back<br />
• Unscrew the Allen screw and remove it completely.<br />
• Move the arm rest to the desired position.<br />
• Replace the Allen screw and tighten it.<br />
Fig. 11<br />
<strong>Bischoff</strong> & <strong>Bischoff</strong> GmbH • 04.05.2011 15
3.4.5 Side section<br />
The height of the side sections can be adjusted with the arm<br />
rests and they can be moved sideways to adjust the seat width.<br />
• For side adjustment see the section on adjusting<br />
the seat width.<br />
• For height adjustment see the section on adjusting<br />
the arm rests.<br />
3.4.6 Control<br />
The control can be attached under the arm rest on the right<br />
or left. The position can also be adjusted to the length of the<br />
underarm.<br />
• Unscrew the lever screw under the arm rest.<br />
Fig. 12<br />
• Mount the control under the opposite arm rest.<br />
Tighten the lever screw.<br />
Note that the control cable will have to rerouted.<br />
Have this done by a technician.<br />
3.4.7 Seat belt<br />
The seat belt is attached to the sides of the frame.<br />
• Adjust the length of the seat belt to fit you<br />
by moving the buckle.<br />
• Lock the belt with the buckle.<br />
Fig. 13<br />
• Unlock the belt by pressing the red button<br />
on the belt buckle.<br />
16
Neo<br />
4. Using the wheelchair<br />
Once you have adjusted the wheelchair to your satisfaction,<br />
familiarise yourself with the functions of the controls.<br />
English<br />
4.1 Description of functions<br />
of controls<br />
If the wheelchair has been ordered without electrical adjustment<br />
of seat back, seat angle and knee angle, the VR-2 control<br />
made by PG Drives Technology is installed. Electrical adjustment<br />
components can be ordered as aftermarket components,<br />
but they must be installed by an authorised service technician.<br />
If the wheelchair has been ordered with electrical adjustment<br />
of seat back, seat angle and/or knee angle, the R-net control<br />
made by PG Drives Technology is installed. The functions of the<br />
two types of joystick control are described separately below.<br />
<strong>Bischoff</strong> & <strong>Bischoff</strong> GmbH • 04.05.2011 17
4.1.1 VR-2 control<br />
Joystick<br />
Control panel<br />
Charging and<br />
programming jack<br />
Fig. 14<br />
Fig. 15<br />
18
Neo<br />
Battery status display<br />
The battery status display shows the charge status. If the display<br />
is in the green range, the battery is sufficiently charged.<br />
If the display is in the red range, the wheelchair can only be<br />
used for a short distance and the battery should be charged<br />
as soon as possible (see charging procedure).<br />
English<br />
Fig. 16<br />
On/Off button<br />
Press this button to switch on the wheelchair.<br />
Fig. 17<br />
Display of mode<br />
The mode display shows the preselected mode. Settings from<br />
1 to 5 LEDs are available. The modes indirectly define the<br />
maximum available speed when the joystick is moved, i.e. in<br />
mode 5 the highest maximum speed is available and in mode<br />
1 the lowest.<br />
Fig. 18<br />
Setting the mode<br />
Press these buttons to change the mode, i.e. increase (right)<br />
or reduce (left) the maximum available speed. The speed is<br />
controlled by movement of the joystick.<br />
Fig. 19<br />
<strong>Bischoff</strong> & <strong>Bischoff</strong> GmbH • 04.05.2011 19
Light<br />
Use this button to switch on the active lighting system of your<br />
wheelchair when darkness falls or when travelling through<br />
dark areas such as tunnels. This will make you more visible to<br />
other traffic.<br />
Fig. 20<br />
Warning indicators<br />
Press this button to switch on the warning indicators in emergency<br />
situations, such as inability to move the wheelchair. All<br />
four indicator lights will flash and signal other traffic that your<br />
wheelchair is disabled.<br />
Fig. 21<br />
Indicators (left/right)<br />
Use this button to switch on the left or right indicators of your<br />
wheelchair to signal other traffic that you wish to change your<br />
direction of travel to the left or right. Press the button again to<br />
switch off the indicators.<br />
Fig. 22<br />
Immobiliser<br />
To protect your wheelchair from unauthorised use or theft<br />
store it in a locked room or activate the immobiliser.<br />
• Press and hold the On/Off button until you hear a beep<br />
and release it.<br />
• Move the joystick in the direction of travel and then to the<br />
neutral position. It will beep in each position. Now the<br />
control is locked.<br />
• Switch on the controller with the On/Off button.<br />
• Move the joystick in the direction of travel and then<br />
to the neutral position. It will beep in each position.<br />
Now the control is released.<br />
20
Neo<br />
4.1.2 R-net control<br />
English<br />
Joystick<br />
Charging and<br />
programming jack<br />
Fig. 23<br />
LCD Display<br />
Fig. 24<br />
<strong>Bischoff</strong> & <strong>Bischoff</strong> GmbH • 04.05.2011 21
On/Off button<br />
Press this button to switch on the wheelchair. The electrical<br />
components are also active at this stage.<br />
Fig. 25<br />
Horn<br />
Press this button to sound the horn.<br />
Fig. 26<br />
Setting the mode<br />
Press these buttons to change the mode, i.e. increase (right)<br />
or reduce (left) the maximum available speed. The speed is<br />
controlled by movement of the joystick.<br />
Fig. 27<br />
Mode<br />
Press this button to select a mode. The modes depend on<br />
the programming and the installed electrical components.<br />
Fig. 28<br />
22
Neo<br />
Profile<br />
Press this button to select the profiles.The profiles depend on<br />
the programming and the installed electrical components. The<br />
profiles are set with the authorised service technician.<br />
English<br />
Fig. 29<br />
Warning indicators<br />
Press this button to switch on the warning indicators in emergency<br />
situations, such as inability to move the wheelchair. All<br />
four indicator lights will flash and signal other traffic that your<br />
wheelchair is disabled.<br />
Fig. 30<br />
Light<br />
Use this button to switch on the active lighting of your wheelchair<br />
when darkness falls or when travelling through dark<br />
areas such as tunnels. This will make you more visible to other<br />
traffic.<br />
Fig. 31<br />
Indicators (left/right)<br />
Use this button to switch on the left or right indicators of your<br />
wheelchair to signal other traffic that you wish to change your<br />
direction of travel to the left or right. Press the button again to<br />
switch off the indicators.<br />
Fig. 32<br />
<strong>Bischoff</strong> & <strong>Bischoff</strong> GmbH • 04.05.2011 23
4.1.3 LCD display and the<br />
most important symbols<br />
Current profile<br />
Current profile<br />
Battery status display<br />
Speed<br />
Fig. 33<br />
Battery status display<br />
The battery status display shows the charge status.<br />
• Continuous light means: the charge is adequate.<br />
• Slow flashing means: all functions still operate correctly<br />
but a battery charge is recommended.<br />
Fig. 34<br />
• Sequential light means: the battery charger is connected<br />
and the batteries are being charged.<br />
Speed<br />
The current speed of the wheelchair is shown.<br />
Fig. 35<br />
24
Neo<br />
Profiles<br />
The profile number shows which profile is currently selected<br />
for the wheelchair. The text also describes the current profile.<br />
English<br />
Fig. 36<br />
Error<br />
This symbol appears if an error in the control that causes the<br />
system to shut down has occurred. Have the system checked<br />
by an authorised service technician as soon as possible.<br />
Fig. 37<br />
Immobiliser<br />
To protect your wheelchair from unauthorised use or theft<br />
store it in a locked room or activate the immobiliser.<br />
• Press and hold the On/Off button until you hear a beep<br />
and release it.<br />
• Move the joystick in the direction of travel and then to the<br />
neutral position. It will beep in each position. Now the control<br />
is locked.<br />
Fig. 38<br />
• Switch on the controller with the On/Off button.<br />
• Move the joystick in the direction of travel and then to the<br />
neutral position. It will beep in each position. Now the control<br />
is released.<br />
<strong>Bischoff</strong> & <strong>Bischoff</strong> GmbH • 04.05.2011 25
4.1.4 Electrical adjustments<br />
The seating position display must be enabled.<br />
Press the Mode button and scroll (joystick left or right) until<br />
you have reached the seating position display. There you can<br />
select every single electrical adjustment.<br />
Back rest<br />
The seat back adjustment is now enabled.<br />
Move the joystick in the direction of travel or the opposite<br />
direction to adjust the angle of the seat back.<br />
Then scroll to additional adjustments as described above.<br />
Fig. 39<br />
Seat angle<br />
The seat angle adjustment is now enabled.<br />
Move the joystick in the direction of travel or the opposite<br />
direction to adjust the angle of the seat.<br />
Then scroll to additional adjustments as described above.<br />
Fig. 40<br />
Foot rests<br />
The foot rest adjustment is now enabled.<br />
Move the joystick in the direction of travel or the opposite<br />
direction to adjust the angle of the foot rest.<br />
Scroll further to adjust the individual foot rests as described<br />
above.<br />
Fig. 41<br />
26
Neo<br />
4.1.5 Diagnostic Display<br />
If the controller detects an error in the system while the wheelchair<br />
is in use, the diagnostic display automatically opens.<br />
The display shows the error code, a short description of the<br />
error and the module in which the error has occurred.<br />
English<br />
Identified modules<br />
Error description<br />
Error code<br />
Identified modules<br />
PM Power Module<br />
JSM Joystick Module<br />
ISM Intelligent Seating/Lighting Module<br />
Fig. 42<br />
Error description<br />
The text shows a brief description of the error type.<br />
Error code<br />
The 4-digit code shows the exact error that was detected.<br />
Diagnostic Procedure<br />
Proceed as follows:<br />
• Read the error description, identify the module<br />
and the exact error code.<br />
• Switch off the control.<br />
• Check the connections to the modules.<br />
• Check the battery charge.<br />
• Carry out the procedure for the error code as described i<br />
n the Service Guide (with your authorised service technician).<br />
• Switch on the wheelchair again and check its operation. If<br />
the wheelchair does not operate normally, switch it off again<br />
and contact the service technician.<br />
<strong>Bischoff</strong> & <strong>Bischoff</strong> GmbH • 04.05.2011 27
4.2 Entering and leaving<br />
Entering and leaving from the side<br />
• Move the wheelchair as close as possible to the present<br />
or future seat so they are side by side.<br />
• If you wish to move from another wheelchair or room chair,<br />
lock it by setting the parking brakes.<br />
• Lock the Neo to prevent it from moving accidentally<br />
by pressing the On/Off button to switch off the control<br />
(all displays off).<br />
• Remove the arm rest and side section.<br />
• Fold the foot plates to the side or remove the leg rests.<br />
• Now slide sideways onto the other seat.<br />
• Make sure that you are sitting as far back in the seat<br />
as possible.<br />
• Move the arm rest and leg rests to the original position.<br />
Entering and leaving from the front:<br />
• First fold the foot plates up or remove the leg rests.<br />
• Move the Neo as close as possible to the present or future<br />
seat front to front.<br />
• If you wish to move from another wheelchair or room chair,<br />
lock it by setting the parking brakes.<br />
• Now slide onto the seat by turning your body around.<br />
• Then move the arm rest and leg rests to the original position.<br />
28
Neo<br />
4.3 Moving with the<br />
wheelchair<br />
Before moving check that the solenoid brake<br />
is correctly locked.<br />
English<br />
Commissioning<br />
Sit in the seat of your B+B wheelchair and place your legs of the<br />
footrests. Make sure that you are sitting as far back in the seat<br />
as possible. Make sure that there is no loose clothing such as<br />
scarves, shirts etc. is hanging from the wheelchair and could be<br />
caught in the wheels.<br />
Make sure that you are comfortably and securely seated. Press<br />
the On/Off button to switch on the Neo. All electrical driving<br />
functions are now available.<br />
Driving functions<br />
Your dealer can adjust the values for speed, acceleration and<br />
deceleration to your requirements subject to the legal<br />
regulations. For a start select a low mode and increase it while<br />
moving if required.<br />
Use the joystick to start moving. The joystick is used simultaneously<br />
to increase the speed and to change the direction of<br />
movement. When the joystick is in the central position, the<br />
wheelchair is mechanically braked and locked to prevent it<br />
from moving unexpectedly.<br />
Moving forward: to move forward in a straight line move the<br />
joystick cautiously forward. The further forward the joystick is<br />
moved faster your wheelchair. If you release the joystick the<br />
wheelchair will automatically be braked to a stop.<br />
Reversing: to move in reverse move the joystick cautiously<br />
back. The further back the joystick is moved faster your wheelchair.<br />
If you release the joystick the wheelchair will automatically<br />
be braked to a stop.<br />
<strong>Bischoff</strong> & <strong>Bischoff</strong> GmbH • 04.05.2011 29
4.4 Leg rests<br />
To make it as easy as possible to enter and leave your wheelchair,<br />
the foot plates can be folded up or the leg rests can be<br />
swung to the side out of the way or removed.<br />
• Open the lock to swing the leg rest to the side.<br />
Fig. 43<br />
• The leg rest in the swung-out position can be completely<br />
removed.<br />
• When you want to replace the leg rest, proceed in reverse<br />
order.<br />
• Move the leg rest to the forward position until you hear it<br />
lock into place.<br />
Fig. 44<br />
30
Neo<br />
4.5 Pushing the wheelchair<br />
If you wish to push the wheelchair in some situations, the<br />
brakes must be unlocked. The wheelchair is easy to push in<br />
freewheel mode.<br />
English<br />
Caution! The electromechanical brake is<br />
disabled in this mode.<br />
• Move the unlocking levers down.<br />
• A small jerk will indicate that the drives are now unlocked.<br />
• To lock them again pull the unlocking levers up<br />
and they will lock automatically.<br />
For safety reasons the motor drive is locked in<br />
freewheel mode.<br />
Fig. 45<br />
Caution! Danger of fatal injury!<br />
The drives must only be unlocked on level<br />
ground.<br />
<strong>Bischoff</strong> & <strong>Bischoff</strong> GmbH • 04.05.2011 31
5. Technical data<br />
Dimensions and weights<br />
Max. load capacity (kg): 200<br />
Seat width (cm): 45 (effectively 40 to 51)<br />
Seat height (cm): 50<br />
Seat depth (cm): 42 to 51<br />
Seat angle (°):<br />
2 to +19 (optional electrical adjustment)<br />
Seat back height (cm): 44<br />
Seat back angle (°): -5 to 75 (optional electrical adjustment)<br />
Knee angle (°):<br />
90 to 108 (optional electrical adjustment)<br />
Overall length (cm): 115 with supports<br />
Overall width (cm): 69<br />
Unloaded weight (kg): 131<br />
Tyres<br />
Drive wheels (mm): 3.00-8 (250 kPa)<br />
Swivelling wheels (mm): 3.00-4 (350 kPa)<br />
Electrical system<br />
Main fuse (A): 60<br />
Battery:<br />
2 x 12V / 60 Ah<br />
Battery charger:<br />
24VDC / 8A IUoU<br />
Motor:<br />
DC 24 V / Shihlin<br />
Controller:<br />
VR2 (PG Drives Technology)<br />
R-net (PG Drives Technology)<br />
Lights and indicators: as required by German traffic regulations<br />
Driving characteristics<br />
Speed (km/h): 6<br />
Climbing capacity (°): 12<br />
Obstacle height (mm): 50<br />
Range (km): 40<br />
Turning circle (cm):: 85<br />
32
Neo<br />
6. Care instructions for the<br />
user<br />
6.1 Cleaning and<br />
disinfection<br />
English<br />
Make sure that the wheelchair is switched off before starting<br />
to clean it.<br />
• The frame sections and panels of the wheelchair can be<br />
wiped with a damp cloth. A mild cleaning agent can be used<br />
for stubborn dirt.<br />
• The wheels can be cleaned with a damp brush with plastic<br />
bristles (do not use a wire brush).<br />
• The seat, seat back and arm rests can be cleaned of dust and<br />
minor dirt with a damp cloth. Do not use aggressive cleaning<br />
agents, because they may attack the surface of the material.<br />
The cushions can be washed with warm water at<br />
40°C and disinfected with a standard<br />
disinfectant.<br />
• Please note that electrical and electronic components must<br />
not come into contact with water unnecessa<br />
rily.<br />
Caution! Do not use high pressure cleaners<br />
or steam cleaners.<br />
<strong>Bischoff</strong> & <strong>Bischoff</strong> GmbH • 04.05.2011 33
6.2 Inspection before use<br />
6.2.1 Brake check<br />
Every time you use the wheelchair check the brake system.<br />
Move forward slowly and release the joystick. The wheelchair<br />
must come to a stop in the normal manner. When it is at a<br />
standstill the mechanical brake must lock with an audible<br />
click. If you detect unusual brake behaviour, inform your dealer<br />
immediately and do not use the wheelchair. The motor brake<br />
operates correctly if you cannot push the wheelchair when it is<br />
switched off. However, if it can be moved, the electromagnetic<br />
brake is faulty. Do not use the wheelchair if this is the case.<br />
Contact your dealer immediately.<br />
6.2.2 Checking lights,<br />
indicators and horn<br />
Before moving off in the wheelchair always check the operation<br />
of the lighting system, the indicators and horn.<br />
If you press the button and there is no response from the<br />
equipment, inform your dealer immediately and do not use<br />
the wheelchair.<br />
6.2.3 Checking the tyres<br />
Before moving off in the wheelchair always check that the<br />
tyres are undamaged and the tyre pressure is adequate. If the<br />
pressure is too low, the tyres must be pumped up. Check the<br />
tyre tread depth at least once a month. It should be at least 1<br />
mm. Defective or worn tyres must be replaced by the dealer.<br />
34
Neo<br />
6.3 Batteries<br />
Your wheelchair is fitted with maintenance-free gel batteries<br />
that do not require checking of levels and are electronically<br />
protected from deep discharge. If you do not use your wheelchair<br />
for an extended period, the batteries should be charged<br />
every two months, otherwise they may be destroyed by deep<br />
discharge. Make a habit of checking the battery status display<br />
on the control every time before using your wheelchair. If the<br />
battery status display shows only the red LEDs, do not travel<br />
long distances and connect the battery charger to the wheelchair<br />
as soon as possible (VR2 control). We recommend charging<br />
the battery after every time the wheelchair is used.<br />
English<br />
<strong>Bischoff</strong> & <strong>Bischoff</strong> GmbH • 04.05.2011 35
6.3.1 Charging<br />
Charging for the first time:<br />
To charge the batteries to their maximum capacity proceed<br />
as follows:<br />
• Discharge the factory-charged batteries until the LED display<br />
shows two bars.<br />
• Charge the batteries as described below (approx. 16 h).<br />
• Discharge the batteries again to two bars on the LED indicator.<br />
• Finally charge the batteries as described.<br />
Fig. 46<br />
Fig. 47<br />
Use only approved battery chargers to charge the batteries<br />
(see Technical Data). Follow the instructions for use of the battery<br />
charger.<br />
• Before using the battery charger check that the mains<br />
connection is 230 V.<br />
• Switch off the wheelchair first.<br />
• Connect the battery charger to the wheelchair.<br />
The charging jack is on the side under the control.<br />
• Plug the mains plug of the battery charger into the<br />
mains socket (230 V).<br />
• The charge indicator (green) of the battery charger<br />
shows the status of the charging process.<br />
Yellow – battery charger is switched on<br />
Steady – charging<br />
Flashing 10-20 times per min. – boost charge<br />
Flashing 5 times per min. – batteries charged<br />
• Once charging is complete, disconnect the mains plug<br />
and disconnect the battery charger from the wheelchair.<br />
6.3.2 Replacing batteries<br />
When working on the batteries be very careful, do not use<br />
metal tools, do not touch the battery terminals and follow the<br />
directions of the battery manufacturer.<br />
Caution! This work should only be done by a trained<br />
technician. Danger of electrocution!<br />
36
Neo<br />
Use only batteries approved for this wheelchair<br />
(see Technical Data).<br />
Make sure that the wheelchair is switched off before starting<br />
to replace batteries.<br />
English<br />
• First remove the battery cover.<br />
• Loosen the screws on the right and left.<br />
• Now the belts that hold the battery can be released.<br />
• Disconnect the battery cable. First the red terminal and<br />
then the black terminal. Make sure you use insulated tools<br />
and do not contact metal frame parts while disconnecting<br />
the cables.<br />
• Lift the batteries carefully out by the handles.<br />
• Install the new batteries in their correct position and<br />
connect the terminals. Note the correct colour-coding<br />
(red and black).<br />
• Secure the batteries with the belts and attach<br />
the battery cover.<br />
Fig. 48<br />
When the batteries have reached the end of their<br />
life, i.e. they can no longer be adequately charged,<br />
they must not be disposed of with household<br />
rubbish. Old batteries are returned to the dealer<br />
when new batteries are purchased and correctly<br />
disposed of.<br />
7. Maintenance instructions<br />
for dealers<br />
Fig. 49<br />
We recommend having the complete wheelchair inspected by<br />
the dealer at least once a year. If faults or defects in the wheelchair<br />
are found, it must be returned to the dealer for repair<br />
immediately. The dealer can receive the required information,<br />
documentation and circuit diagrams for repair and service on<br />
request. A training program is also available for dealers.<br />
B+B customer service is available to answer questions at<br />
+ 49 700/6000 7070.<br />
<strong>Bischoff</strong> & <strong>Bischoff</strong> GmbH • 04.05.2011 37
8. Disposal<br />
If the wheelchair is no longer used and you wish to dispose<br />
of it, please contact your dealer.<br />
If you wish to dispose of it yourself, please<br />
contact a local recycling company for the<br />
disposal regulations of your jurisdiction.<br />
9. Transfering the<br />
wheelchair<br />
When the wheelchair is transferred to a new owner, please include<br />
all the technical documentation with it for the new user.<br />
The wheelchair must be inspected in accordance<br />
with the service schedule and must be in good<br />
condition.<br />
10. Maintenance<br />
Our customer service can provide a service schedule<br />
for the wheelchair.<br />
11. Warranty<br />
Warranty claims can be made for all defects of the wheelchair<br />
that can be confirmed as due to material or manufacturing<br />
faults.<br />
If you make a claim under the warranty, please submit the<br />
completed warranty certificate.<br />
Caution! Warranty claims and product liability<br />
claims will not be accepted if the instruction<br />
<strong>manual</strong> is not followed and incorrectly carried<br />
out maintenance work and also technical modifications<br />
and additions (attachments) are made<br />
without approval by <strong>Bischoff</strong> & <strong>Bischoff</strong>.<br />
Our wheelchair is supplied with a warranty of five years for the<br />
frame. All other components are guaranteed for two years.<br />
38
Neo<br />
Warranty-certificate<br />
(Please note our general business terms and conditions)<br />
Model: Neo<br />
English<br />
Serial number*<br />
(to be entered by dealer)<br />
Dealer:<br />
Date and stamp<br />
*See the side frame for information stickers<br />
<strong>Bischoff</strong> & <strong>Bischoff</strong> GmbH • 04.05.2011 39
<strong>Bischoff</strong> & <strong>Bischoff</strong> GmbH<br />
Becker-Goering-Strasse 13 • D-76307 Karlsbad<br />
Tel.: +49 (0)700/6000 7070 • Fax: +49 (0)700/6000 8080<br />
www.bischoff-bischoff.com<br />
info@bischoff-bischoff.de