Repro Rev-D Owners Manual - RTZ Professional Audio
Repro Rev-D Owners Manual - RTZ Professional Audio
Repro Rev-D Owners Manual - RTZ Professional Audio

You also want an ePaper? Increase the reach of your titles
YUMPU automatically turns print PDFs into web optimized ePapers that Google loves.
<strong>Repro</strong>duce <strong>Rev</strong>-D<br />
1. INTRODUCTION<br />
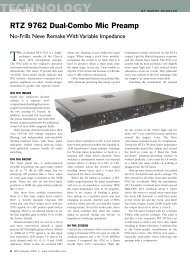
Thank you for purchasing your new <strong>RTZ</strong><br />
upgrade electronics for Ampex studio recorders!<br />
All of our cards are hand built and individually<br />
tested prior to shipping. Before installing any<br />
cards, please read this document thoroughly<br />
and retain it for future reference. Additional<br />
copies of this manual are available upon request<br />
or may be downloaded from our website at<br />
http://www.rtzaudio.com.<br />
All items are carefully packed to endure the<br />
rigors of shipping and handling. However,<br />
please inspect all contents and packaging<br />
immediately upon receipt. Please report any<br />
problems to us immediately. In the event of<br />
damage, retain all shipping and packaging<br />
materials for shipper damage claims inspection.<br />
2. DESCRIPTION<br />
The <strong>Rev</strong>-D reproduce cards are modern<br />
replacement electronics designed to greatly<br />
enhance the playback performance of vintage<br />
Ampex 440/1100/1200 series studio recorders.<br />
The original Ampex head amplifier design has<br />
been combined with a new modern head input<br />
transformer. The line amplifier stage has been<br />
completely redesigned to provide improved<br />
specifications and sonic performance. The<br />
PCB’s are full ground plane types for improved<br />
shielding and circuit stability. An onboard<br />
thermal poly fuse protects the PCB and<br />
components against further damage in the event<br />
of a short or component failure.<br />
Originally, Ampex made a number of minor<br />
circuit design and component changes during<br />
the evolution of the various machines supported<br />
by the <strong>Rev</strong>-D reproduce cards. As such, our<br />
cards are populated with the appropriate<br />
components upon ordering for the machine type<br />
specified. In some cases the reproduce cards<br />
may interchange between different series<br />
recorders with only EQ realignment and/or<br />
jumper changes required. In other cases, a few<br />
component values may need to be changed,<br />
added or removed to achieve proper alignment.<br />
Please refer to the schematic for additional<br />
information on component values and changes.<br />
In general, this document covers details specific<br />
to the <strong>RTZ</strong> <strong>Rev</strong>-D reproduce cards. Otherwise,<br />
you should perform the alignment procedures as<br />
originally specified in the Ampex Operation and<br />
Maintenance manual supplied with the machine.<br />
If you experience any difficulty installing or<br />
aligning the electronics, please contact us<br />
directly for assistance.<br />
3. HEAD INPUT TRANSFORMER<br />
CONFIGURATION<br />
The input transformer must be configured to<br />
match the head impedance of the recorder being<br />
upgraded. Jumper block JP1 selects the head<br />
input transformer ratio for either 1:4 or 1:8 turns<br />
ratio. The jumper configuration also depends on<br />
whether the head resonance trimmer (VR2) is<br />
installed. In either case, you may want to<br />
experiment between ratios and note the<br />
record/playback response during testing. The<br />
goal is to obtain the best matching between the<br />
playback head and head input transformer for<br />
both tape speeds.<br />
Note that the MM-1200 typically requires 1:8<br />
turns ratio with the head resonance trimmer VR2<br />
installed. Otherwise, the 1:4 ratio should be<br />
used with FET switch Q13 installed and no VR2<br />
resonance trimmer for the MM1200. The AG440<br />
series recorders usually require a 1:8 turns ratio<br />
for proper alignment. Refer to Table 1 for the<br />
jumper options. Confirm the JP1 jumper settings<br />
from the table below before installing the new<br />
cards.<br />
Table 1<br />
Ratio JP1 Jumpers Usage<br />
1:4 1 & 2 LOW-Z<br />
1:8 3 & 4 HIGH-Z<br />
It is extremely important that the recorder heads<br />
are in good condition to obtain optimum<br />
alignment and frequency response. Worn or<br />
damaged heads will make optimum alignment<br />
difficult and/or impossible. Likewise it is<br />
extremely helpful to plot the current frequency<br />
response of the recorder using the stock<br />
electronics with a calibrated test tape (we<br />
recommend MRL alignment tapes) before<br />
making any upgrades. In other words, you want<br />
to know what the frequency response of the<br />
machine is prior to upgrade for comparison<br />
purposes later. The original frequency response<br />
information will be needed if you encounter<br />
alignment difficulties after upgrading!<br />
<strong>RTZ</strong> <strong>Professional</strong> <strong>Audio</strong> 1