Moodle Tip Sheet: Getting Started
Moodle Tip Sheet: Getting Started
Moodle Tip Sheet: Getting Started

Create successful ePaper yourself
Turn your PDF publications into a flip-book with our unique Google optimized e-Paper software.
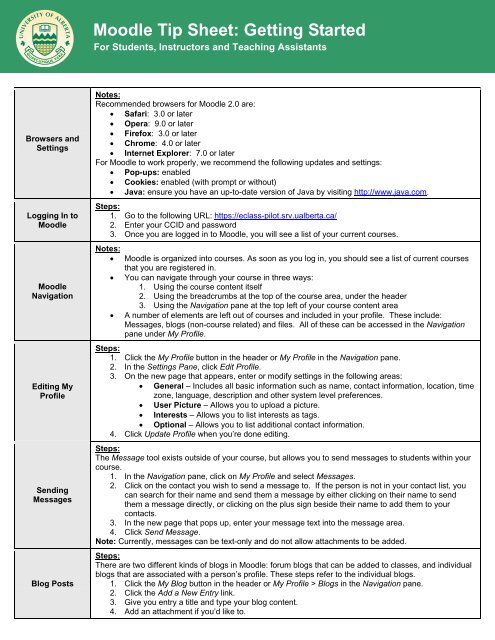
<strong>Moodle</strong> <strong>Tip</strong> <strong>Sheet</strong>: <strong>Getting</strong> <strong>Started</strong><br />
For Students, Instructors and Teaching Assistants<br />
Browsers and<br />
Settings<br />
Logging In to<br />
<strong>Moodle</strong><br />
<strong>Moodle</strong><br />
Navigation<br />
Editing My<br />
Profile<br />
Sending<br />
Messages<br />
Blog Posts<br />
Notes:<br />
Recommended browsers for <strong>Moodle</strong> 2.0 are:<br />
• Safari: 3.0 or later<br />
• Opera: 9.0 or later<br />
• Firefox: 3.0 or later<br />
• Chrome: 4.0 or later<br />
• Internet Explorer: 7.0 or later<br />
For <strong>Moodle</strong> to work properly, we recommend the following updates and settings:<br />
• Pop-ups: enabled<br />
• Cookies: enabled (with prompt or without)<br />
• Java: ensure you have an up-to-date version of Java by visiting http://www.java.com.<br />
Steps:<br />
1. Go to the following URL: https://eclass-pilot.srv.ualberta.ca/<br />
2. Enter your CCID and password<br />
3. Once you are logged in to <strong>Moodle</strong>, you will see a list of your current courses.<br />
Notes:<br />
• <strong>Moodle</strong> is organized into courses. As soon as you log in, you should see a list of current courses<br />
that you are registered in.<br />
• You can navigate through your course in three ways:<br />
1. Using the course content itself<br />
2. Using the breadcrumbs at the top of the course area, under the header<br />
3. Using the Navigation pane at the top left of your course content area<br />
• A number of elements are left out of courses and included in your profile. These include:<br />
Messages, blogs (non-course related) and files. All of these can be accessed in the Navigation<br />
pane under My Profile.<br />
Steps:<br />
1. Click the My Profile button in the header or My Profile in the Navigation pane.<br />
2. In the Settings Pane, click Edit Profile.<br />
3. On the new page that appears, enter or modify settings in the following areas:<br />
• General – Includes all basic information such as name, contact information, location, time<br />
zone, language, description and other system level preferences.<br />
• User Picture – Allows you to upload a picture.<br />
• Interests – Allows you to list interests as tags.<br />
• Optional – Allows you to list additional contact information.<br />
4. Click Update Profile when you’re done editing.<br />
Steps:<br />
The Message tool exists outside of your course, but allows you to send messages to students within your<br />
course.<br />
1. In the Navigation pane, click on My Profile and select Messages.<br />
2. Click on the contact you wish to send a message to. If the person is not in your contact list, you<br />
can search for their name and send them a message by either clicking on their name to send<br />
them a message directly, or clicking on the plus sign beside their name to add them to your<br />
contacts.<br />
3. In the new page that pops up, enter your message text into the message area.<br />
4. Click Send Message.<br />
Note: Currently, messages can be text-only and do not allow attachments to be added.<br />
Steps:<br />
There are two different kinds of blogs in <strong>Moodle</strong>: forum blogs that can be added to classes, and individual<br />
blogs that are associated with a person’s profile. These steps refer to the individual blogs.<br />
1. Click the My Blog button in the header or My Profile > Blogs in the Navigation pane.<br />
2. Click the Add a New Entry link.<br />
3. Give you entry a title and type your blog content.<br />
4. Add an attachment if you’d like to.
<strong>Moodle</strong> <strong>Tip</strong> <strong>Sheet</strong>: <strong>Getting</strong> <strong>Started</strong><br />
For Students, Instructors and Teaching Assistants<br />
My Private Files<br />
Preparing Files<br />
5. Indicate who can see your blog post. Generally, you would set this to Anyone on This Site unless<br />
it is a draft.<br />
6. Add tags if you’d like. Tags help organize blog posts by topic and/or course.<br />
7. Click Save Changes.<br />
Note: You can edit your blog post at any time by clicking Edit underneath it. You can also delete a post<br />
that you no longer want. Clicking on the Comment link allows you to comment on blog posts, whether they<br />
are your own or belong to others. Note also that if you are going to have students use individual blogs for<br />
your course, you should set up a specific tag that they can use to tag their relevant blog entries. You may<br />
also wish to enable the tag block.<br />
Steps:<br />
You can store files in <strong>Moodle</strong> that you can retrieve and post at any time.<br />
Viewing files:<br />
1. In the Navigation pane click My Profile > My Private Files. Any files that you have available will be<br />
listed on the page that comes up.<br />
2. Click on the file name to open the file you would like to see.<br />
Adding files:<br />
1. In the Navigation pane click My Profile > My Private Files.<br />
2. Click the Manage My Private Files button.<br />
3. On the screen that comes up, click Add…<br />
4. There are four locations to choose from: Server files, recent files, upload a file and private files. If<br />
you are uploading a new file, click the Upload a File button.<br />
5. Click the Browse button, find your file and click Ok.<br />
6. Give your file a name, author, license.<br />
7. Click Upload This File.<br />
Adding folders:<br />
1. In the Navigation pane click My Profile > My Private Files.<br />
2. Click the Manage My Private Files button.<br />
3. On the screen that comes up, click Create Folder.<br />
4. Give your folder a name and click Ok.<br />
5. Navigate to the folder by clicking on the folder name.<br />
Notes:<br />
• Generally, there are two ways to add content to a course: Adding existing files and creating new<br />
HTML files (pages).<br />
• We recommend using HTML (pages) for most content. Pages are easily editable using the builtin<br />
<strong>Moodle</strong> WYSIWYG and can be printed off by students easily. It is also easier for you to control<br />
content. Since students don’t download the file each time they look at it, it’s more likely that they<br />
will be looking at the most current version in <strong>Moodle</strong>.<br />
• If you want to upload existing files, we recommend that they be in PDF format. Some browsers<br />
cause security alerts when trying to download a document file. PDF files open automatically in the<br />
browser and cause fewer problems and less confusion.<br />
• If you are adding resource content within <strong>Moodle</strong> using the WYSIWYG (i.e., not uploading<br />
document files, but typing or pasting content yourself into pages or tabs), be cautious when<br />
pasting content from Microsoft Word. <strong>Moodle</strong> often maintains the hidden formatting in Word<br />
documents, which results in odd looking text within <strong>Moodle</strong>. If this happens, simply paste the text<br />
into a text editor (such as Notepad) and re-copy and paste back into <strong>Moodle</strong>.