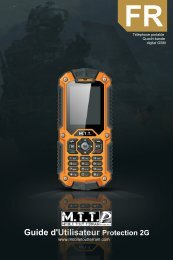
Protection 2G User Manual - Mobile Tout Terrain
Protection 2G User Manual - Mobile Tout Terrain
Protection 2G User Manual - Mobile Tout Terrain
You also want an ePaper? Increase the reach of your titles
YUMPU automatically turns print PDFs into web optimized ePapers that Google loves.
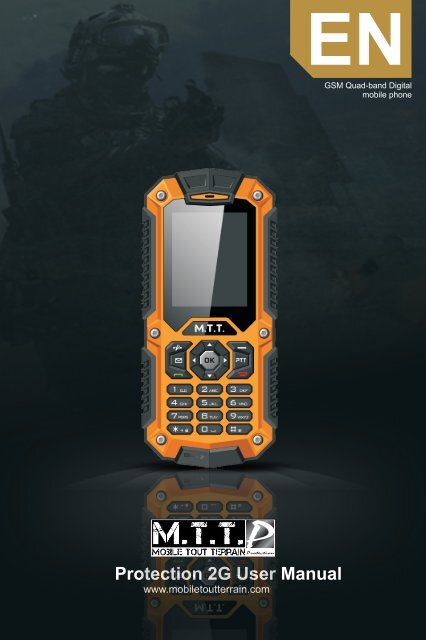
EN<br />
GSM Quad-band Digital<br />
mobile phone<br />
<strong>Protection</strong> <strong>2G</strong> <strong>User</strong> <strong>Manual</strong><br />
www.mobiletoutterrain.com
WELCOME<br />
EN<br />
PROTECTION <strong>2G</strong> USER MANUAL<br />
01<br />
Thank you to choose M.T.T. series mobile phone, the<br />
phone is a Drop resistance, waterproof, dustproof three<br />
anti-mobile phone. You can read this manual to fully<br />
understand use of M.T.T. series phones, the taste of its<br />
simple operation.<br />
M.T.T. <strong>Protection</strong> mobile phone in addition to the<br />
basic call functions, also supports text messaging, MP3<br />
player, video player, flashlight, e-books and other<br />
functions, will bring your work and life more convenient<br />
and fun.<br />
We M.T.T. <strong>Protection</strong> phone offers a wide range of<br />
specialty including rechargeable batteries, chargers and<br />
other accessories you choose to use.<br />
Use the accessories are not approved by the<br />
manufacturer may be dangerous, and the resulting<br />
damage is not covered under warranty.<br />
M.T.T. <strong>Protection</strong> mobile phone has passed the test<br />
of the network of the Ministry of Information Industry, the<br />
indicators have reached the national standard<br />
requirements, and access to the Network Access<br />
License issued by the Ministry of Information Industry
EN<br />
PROTECTION <strong>2G</strong> USER MANUAL<br />
02<br />
WELCOME.........................................................<br />
II<br />
1.IMPORTANT SAFETY PRECAUTIONS............05<br />
2.GETTING STARTED.......................................06<br />
2.1.BATTERY USE............................................06<br />
2.2.INSTALLING THE BATTERY.........................07<br />
2.3.CHARGE THE BATTERY............................. .08<br />
2.4.SIM CARD INFORMATION...........................08<br />
2.5.INSTALLING THE SIM CARD........................08<br />
2.6.ACCESS CODES.........................................09<br />
2.7.<br />
INSERT MEMORY CARD..............................10<br />
2.8. EARPHONE.................................................<br />
10<br />
2.9. STANDBY MODE.........................................<br />
10<br />
2.10. PHONE LAYOUT....................................... . 11<br />
2.11. ENTER TEXT.............................................<br />
13<br />
3. CALL FUNCTIONS..........................................<br />
13<br />
3.1.<br />
MAKE A CALL..............................................13<br />
3.1.1.<br />
TO MAKE AN INTERNATIONAL CALL.........13<br />
3.1.2.<br />
TO MAKE A CALL FROM THE PHONEBOOK.14<br />
3.2.<br />
CALL WAITING...........................................14<br />
3.3.<br />
CALL OPTIONS...........................................14<br />
4.<br />
MAIN MENU...................................................15<br />
4.1.<br />
CALL CENTER............................................15<br />
4.1.1.<br />
MISSED CALLS........................................15<br />
4.1.2.<br />
DIALED CALLS.........................................15<br />
4.1.3.<br />
RECEIVED CALLS....................................15<br />
4.1.4.<br />
DELETE CALL LOGS.................................15
EN<br />
PROTECTION <strong>2G</strong> USER MANUAL<br />
03<br />
4.1.5.CALL SETTINGS...................................... 16<br />
4.2.PHONEBOOK..............................................17<br />
4.2.1.ADD NEW CONTACT.................................17<br />
4.2.2.SEARCH..................................................17<br />
4.2.3.PHONE SETTINGS....................................18<br />
4.3.FILE MANAGER...........................................18<br />
4.4.ORGANIZER...............................................18<br />
4.4.1.SKYBUDDY..............................................18<br />
4.4.2.SOKOBAN............................................... 18<br />
4.4.3.CALENDAR..............................................19<br />
4.4.4.ALARM.....................................................19<br />
4.4.5.WORLD CLOCK........................................19<br />
4.4.6.CALCULATOR..........................................19<br />
4.4.7.EBOOK READER......................................19<br />
4.5.MESSAGES................................................20<br />
4.5.1.TEXT MESSAGE...................................... 20<br />
4.5.2.MULTIMEDIA MESSAGE...........................20<br />
4.5.4.INBOX.....................................................20<br />
4.5.5.DRAFTS...................................................20<br />
4.5.6.OUTBOX..................................................20<br />
4.5.7.SENT MESSAGES....................................20<br />
4.5.8.BROADCAST MESSAGE..........................20<br />
4.5.9.TEMPLATE...............................................21<br />
4.5.10.MESSAGE SETTINGS.............................21<br />
4.6.MULTIMEDIA...............................................21<br />
4.6.1.CAMERA..................................................21
EN<br />
PROTECTION <strong>2G</strong> USER MANUAL<br />
04<br />
4.6.2.IMAGA VIEWER........................................21<br />
4.6.3.VIDEO RECORDER..................................22<br />
4.6.4.VIDEO PLAYER........................................22<br />
4.6.5.AUDIO PLAYER.......................................22<br />
4.6.6.SOUND RECORDER.................................23<br />
4.6.7.FM RADIO................................................24<br />
4.7.SERVICES..................................................24<br />
4.7.1.SIM TOOL KIT...........................................25<br />
4.7.2.INTERNET................................................25<br />
4.8.PTT (PUSH TO TALK)...................................25<br />
4.8.1.what is PTT...............................................26<br />
4.8.2.How to USE PTT........................................26<br />
4.9.SETTINGS..................................................26<br />
4.9.1.DUAL SIM SETTING..................................26<br />
4.9.2.USER PROFILE........................................27<br />
4.9.3.PHONE SETTINGS...................................27<br />
4.9.4.NETWORK SETUP....................................27<br />
4.9.5.SECURITY SETTINGS..............................28<br />
4.9.6.CONNECTIVITY........................................29<br />
4.9.7.RESTORE FACTORY SETTINGS...............29<br />
5.TROUBLESHOOTING.....................................29<br />
6.TECHNISCHER SUPPORT..............................31<br />
Technical Support<br />
This product is designed as shockproof phone,<br />
however, please don't hit the phone intentionally.<br />
The brutal manipulation may bring damages to the<br />
performance of your phone, and it will be no longer<br />
under warranty.<br />
Technical Support<br />
Générale Télécom Services – 31000 Toulouse<br />
Tel: 05 61 63 60 60<br />
Fax: 05 61 63 60 67<br />
Email: sav@mobiletoutterrain.com
EN<br />
PROTECTION <strong>2G</strong> USER MANUAL<br />
05<br />
1、Important safety precautions<br />
◆ In a thunderstorm, do not use the phone while<br />
charging, or use the phone outdoors, to avoid being<br />
struck by lightning or other damage.<br />
◆ Do not leave the battery in hot places, it may<br />
cause fire or explosion.<br />
◆ Do not store or carry flammable liquids, gases, or<br />
explosive materials in the same compartment as the<br />
phone, its parts, or accessories.<br />
◆ Remember to follow any special regulations in<br />
force in the area you are in, and always switch off your<br />
phone whenever it is forbidden to use it, or when it may<br />
cause interference or danger.<br />
◆ Do not put the phone in or on heating devices,<br />
such as a microwave oven, stove, or radiator. The<br />
phone may explode when overheated.<br />
◆Do not attempt to open the phone’s casing. Nonexpert<br />
handling of the phone may cause damages to<br />
your phone. If the phone or any of its accessories are<br />
not working properly, take them to your nearest qualified<br />
service center. The personnel there will assist you, and if<br />
necessary, arrange for the phone to be repaired.<br />
◆Use only accessories and charging devices<br />
approved by the phone manufacture! Otherwise you risk<br />
serious damage to health and property. The battery<br />
could explode, for instance.<br />
◆Do not short-circuit the battery. Accidental shortcircuiting<br />
can occur when a metallic object like a coin,<br />
clip or pen causes a direct connection between the +<br />
and – terminals of the battery (metal strips on the<br />
battery). For example, do not carry a spare battery in a<br />
pocket or bag where the battery may contact metal<br />
objects. Short-circuiting the terminals may damage the<br />
battery or the object causing the short-circuiting.<br />
◆The battery can be charged and discharged
EN<br />
PROTECTION <strong>2G</strong> USER MANUAL<br />
06<br />
hundreds of times, but it will gradually wear out. When<br />
the operation time is noticeably shorter than normal, it is<br />
time to buy a new battery. Do not continue to use the<br />
broken USB data cable or battery charger.<br />
◆If you use any other personal medical devices,<br />
consult the manufacturer of your device to determine if it<br />
is adequately shielded from external RF energy. Your<br />
physician may be able to assist you in obtaining this<br />
information. Switch off your phone in health care<br />
facilities when regulations posted in these areas instruct<br />
you to do so.<br />
◆Do not use mobile phones when driving. When<br />
driving a car, driving is your first responsibility. When<br />
using your wireless phone while driving, follow local<br />
regulations in the country or region you are in.<br />
◆Keep the phone and all its parts and accessories<br />
out of the reach of small children and pets. They<br />
accidentally damage these things or choke on small<br />
parts.<br />
◆Do not clean the phone while charging the phone.<br />
You may be electric-shocked if you use the phone while<br />
charging the phone with the USB data cable or the<br />
battery charger. Make sure to disconnect the USB data<br />
cable or the charger before using the phone.<br />
◆Do not use harsh chemicals, cleaning solvents, or<br />
strong detergents to clean the phone. Wipe it with a soft<br />
cloth slightly dampened in a mild soap-and-water<br />
solution.<br />
◆Dispose of worn out batteries and phone in<br />
accordance with local provisions!<br />
2、Getting started<br />
You need to insert the SIM card and charge the<br />
battery before using the phone.<br />
2.1、Battery use<br />
To extend the battery life of your device:
EN<br />
PROTECTION <strong>2G</strong> USER MANUAL<br />
07<br />
1. Use the standard wall charger to charge the<br />
battery for the first time.<br />
2. During the first 3-5 charge cycles, charge the<br />
battery until the battery indicator on the display stops<br />
scrolling.<br />
3. Avoid partial charging. Also, wait for the battery to<br />
discharge completely before charging it again.<br />
4. Charge the battery using the USB cable only if the<br />
recommended wall charger isn’t readily available.<br />
2.2、Installing the battery<br />
1.Loosen the screw, hold the back cover and gently<br />
slide in upward direction to open.<br />
2. If the battery is in the compartment, lift and pull it<br />
out in the direction of the arrow(shown below).
EN<br />
PROTECTION <strong>2G</strong> USER MANUAL<br />
08<br />
3.Replace the battery. Align the contacts of the<br />
battery with the corresponding connectors in the battery<br />
compartment.<br />
2.3、Charge the battery<br />
To charge the device battery:<br />
1. Take the USB cable from the device packaging,<br />
and attach it to power adapter. Now connect the power<br />
adapter into a standard AC wall outlet.<br />
2. Connect the micro USB connector on the cable<br />
into its designated port on the device (left side). The<br />
battery level indicator on the device screen will start<br />
scrolling horizontally to indicate that the battery is being<br />
charged.<br />
3. When the battery is fully charged, the battery level<br />
indicator on the device screen will stop scrolling<br />
horizontally. Once charging is complete, disconnect the<br />
charger from the device, and then from the wall outlet.<br />
NOTE: Exercise extreme caution while connecting<br />
the charger to the device. The connectors on the<br />
charger and on the phone may get damaged if too much<br />
force is applied while connecting them. If the battery is<br />
completely discharged, it may take a while before the<br />
on-screen charging indicator starts scrolling.<br />
2.4、SIM card information<br />
When you subscribe to a cellular network, you<br />
receive a plug-in SIM (Subscriber Identity Module) card<br />
loaded with your subscription details, such as your PIN,<br />
and available optional services.<br />
Be careful to handle, insert or remove the SIM card<br />
since the SIM card and the contacts inside can easily be<br />
damaged by scratching or bending.<br />
2.5、Installing the SIM card<br />
Insert the SIM cards into their respective slots. Make<br />
sure that the contact area on the cards is facing the<br />
connectors on the device (as shown below).
EN<br />
PROTECTION <strong>2G</strong> USER MANUAL<br />
09<br />
2.6、Access codes<br />
There are access codes for your SIM card.<br />
These codes help you to protect the phone against<br />
unauthorized use.<br />
When requested for any of the code explained below,<br />
key-in the appropriate code (displayed as asterisks) and<br />
press the OK key.<br />
PIN<br />
The Personal Identification Number or PIN (4-8digits)<br />
protects your SIM card against unauthorized use. The<br />
PIN comes with the SIM card; see the SIM card<br />
instruction provided with your card.<br />
I f y o u e n t e r a n i n c o r r e c t P I N t h r e e t i m e s i n<br />
succession, the code will be disabled and cannot be<br />
used until you re-enable it by entering the PUK.<br />
PUK<br />
The 8-digit PUK (Personal Unblocking Key) is<br />
required to change a disabled PIN. The PUK may be<br />
supplied with the SIM card. If not, or in case you have<br />
lost it, please contact your service provider.<br />
To re-enable your PIN, proceed as follows.<br />
1. Key-in the PUK and press the OK key.<br />
2. Enter a new PIN of your choice and press the OK<br />
key.<br />
3. When the Confirm New PIN message is displayed,<br />
key-in the same code again and press the OK key.<br />
I f y o u e n t e r a n i n c o r r e c t P U K t e n t i m e s i n<br />
succession, the SIM card becomes invalid.
Please contact your service provider for a new card.<br />
2.7、Insert memory card<br />
Insert memory card. Take compatible T-Flash card,<br />
and place it into its slot. (shown below).<br />
EN<br />
PROTECTION <strong>2G</strong> USER MANUAL<br />
10<br />
2.8、Earphone<br />
Connect the earphone connector on the cable into its<br />
designated port on the device (left side).<br />
2.9、Standby mode<br />
In the main display, you may see several icons<br />
displayed on your status bar. The meaning for each icon<br />
is explained below:<br />
Vertical bars indicate the signal strength<br />
of the GSM network signal. Five bars<br />
indicate that your current position has<br />
the best reception.<br />
Dual SIM are Activated.<br />
Indicates new text message.<br />
Indicates that the SIM 1 call divert is activated.<br />
Indicates that the alert type of your phone is<br />
set as ring.<br />
Indicates that the alert type of your phone is<br />
set as mute.
EN<br />
PROTECTION <strong>2G</strong> USER MANUAL<br />
11<br />
2.10、Phone layout<br />
No. Key note Functional Description<br />
1<br />
2<br />
3<br />
Left soft<br />
key (LSK)<br />
Right soft<br />
key (RSK)<br />
Message<br />
keys<br />
Press to perform the function<br />
currently displayed in the lower<br />
left corner of the screen.<br />
Long press to activate the<br />
flashlight<br />
Press to perform the function<br />
currently displayed in the lower<br />
right corner of the screen.<br />
Quick access to inbox.<br />
4 Camera Quick access to camera<br />
5 Send key<br />
Indicates your phone is locked.<br />
Indicates that the alert type of your phone<br />
is set as headset.<br />
Indicates the alarm clock is set.<br />
Indicates the battery charge level.<br />
Indicates you are using Bluetooth.<br />
Press to make a call.<br />
Hold to redial the last number called.
EN<br />
PROTECTION <strong>2G</strong> USER MANUAL<br />
12<br />
6 End key<br />
7<br />
Navigation<br />
keys<br />
8 OK key Confirm key<br />
9<br />
Numeric<br />
keypad<br />
10 receiver receiver<br />
11/12<br />
USB port<br />
Earphone<br />
jack<br />
To hand up on a call during a<br />
call or power on/off.<br />
In the standby mode,quick<br />
access to<br />
(Up key) Music Player<br />
(Left key) <strong>User</strong> profiles<br />
(Right key) Add new contact<br />
(Down key) Alarm<br />
Move the cursor to select the<br />
menu you want.<br />
Input numbers or characters<br />
USB port<br />
Earphone jack<br />
13 LED Flashlight<br />
14/15 Volume key<br />
16 Camera camera<br />
17 loudspeaker loudspeaker<br />
18 Phone mic Phone mic<br />
Press to adjust the volume of<br />
your phone.
EN<br />
PROTECTION <strong>2G</strong> USER MANUAL<br />
13<br />
2.11、Enter text<br />
ABC, Zi, Number, and Symbol modes<br />
You can enter text in some features such as<br />
Messages, Phonebook, or Calendar, using ABC mode,<br />
Zi mode, Number mode, and Symbol mode.<br />
You can enter text by pressing the alphanumeric<br />
keys on the phone.<br />
Text Input Options:<br />
While you are in text editing mode, you will be in<br />
several modes.<br />
When you see [Option] and [Clear] in the soft key,<br />
press the soft key (left) for option: you can save the<br />
entry or change the Text Input Method. To erase a<br />
character, press the soft key (right) next to the character<br />
you want to erase.<br />
You can define the default Input Method of your<br />
phone and change input methods.<br />
To define your preferred input method, go to Phone<br />
Setup sub menu in Settings menu. Then select<br />
Preferred Input Method. Once you set the preferred<br />
input method, next time you edit in text input mode, the<br />
setting will be applied until you change to another.<br />
I f y o u w a n t t o c h a n g e t h e t e x t i n p u t m e t h o d<br />
temporarily, in the text input mode, press [Option] soft<br />
key, and select “Input Method” from the option.<br />
• the input methods will swap when you press the [#].<br />
• Press the [*] key to select Symbols.<br />
• Press [0] to insert a space.<br />
3、Call functions<br />
3.1、Make a call<br />
This gives you information about the calling service<br />
supported in your phone.<br />
In standby mode, key in the number, including the<br />
area code, and press send key. Your phone will dial out<br />
based on your default dial setting.<br />
3.1.1、To make an international call
EN<br />
PROTECTION <strong>2G</strong> USER MANUAL<br />
14<br />
For international calls, long press [*] for the<br />
international prefix (character +).<br />
Key in the country code, area code and the phone<br />
number.<br />
Press send key to call.<br />
3.1.2、To Make a call from the phonebook<br />
In the standby mode, press right soft key (RSK) to<br />
enter Phonebook. Scroll to the desired contact name or<br />
type the name in the input box, and then press send<br />
key to make the call.<br />
You can also press Menu and choose Phonebook<br />
submenu. Use navigation keys to select Search option.<br />
You can directly select a name from the phonebook list<br />
or enter the name in the quick search field. Then press<br />
send key to make the call.<br />
3.2、Call waiting<br />
You can answer another incoming call while you<br />
have a call in progress.<br />
During a call, press left soft key (LSK) to enter the<br />
Option menu to hold the current call and switch to the<br />
new incoming call. You can swap back anytime by<br />
pressing left soft key (LSK) again and select Swap.<br />
3.3、call options<br />
A call can be connected to any single caller by<br />
pressing Options. When you press Options during an<br />
active call, you would have following functions as listed<br />
in below:<br />
Hold single call: put a call on hold<br />
End single call: end a call.<br />
New Call: make a new call during an active call.<br />
Phonebook: shortcut to Phonebook menu.<br />
Messages: shortcut to Messages menu to write text<br />
message.<br />
Sound Recorder: to record your conversation during<br />
an active phone call.<br />
Mute: set On/ Off to mute the call during the conversation.
EN<br />
PROTECTION <strong>2G</strong> USER MANUAL<br />
15<br />
DTMF: set On / Off for DTMF (Dual Tone Multi-Frequency)<br />
tone dialing system.<br />
4、Main menu<br />
To access Menu mode, press [Menu] in Idle mode.<br />
Some menus are operator, network and subscription<br />
dependent.<br />
Overview of menu functions:<br />
Basic menu<br />
Call center<br />
Phonebook<br />
File manager<br />
Organizer<br />
Messages<br />
Multimedia<br />
Services<br />
Voice call<br />
Settings<br />
4.1、Call center<br />
To access this menu, press [Menu] in Idle mode and<br />
select Call History<br />
4.1.1、Missed calls<br />
In Call Record menu, choose Missed Calls, and<br />
press OK to view the records. This menu displays the<br />
most recent received calls that you did not answer.<br />
4.1.2、Dialed calls<br />
This menu displays the most recent calls you have<br />
dialed.<br />
4.1.3、Received calls<br />
This menu displays the most recent calls you have<br />
received.<br />
4.1.4、Delete call logs
EN<br />
PROTECTION <strong>2G</strong> USER MANUAL<br />
16<br />
This function can delete your call records all of the<br />
records<br />
In. Also can part delete: Missed calls, Dialed calls,<br />
Received calls<br />
4.1.5、Call settings<br />
4.1.5.1、SIM 1/2 call setting<br />
This option enables you to set the general call<br />
settings of the phone.<br />
The options are: SIM1/2 call settings<br />
Enable you to set the call settings for SIM1 and<br />
SIM2. The options are:<br />
• Call waiting: You can activate this function or<br />
deactivate it, and also view the current settings via<br />
query.<br />
• Call divert: You can set to forward the incoming call<br />
in different conditions and enable to Activate/Deactivate<br />
call diversion and check the Query status.<br />
• Call barring: In order to activate this service, it<br />
requires the services provided by the network service<br />
provider. When you change barring password, you need<br />
to input the old password.<br />
• Line switching: Enables you to touch Line ½ for the<br />
phone.<br />
4.5.1.2、Advanced settings<br />
Auto redial:<br />
You can touch to redial the number automatically<br />
when a call is not connected.<br />
Call time reminder:<br />
After setting this function to ‘on’, it will offer a warning<br />
tone towards the single or periodic setting as your own<br />
during the call process, so you will be reminded of the<br />
call time at periodic intervals during a call.<br />
connect notice:<br />
Open this function, the phone will have a voice on<br />
tips<br />
Answer mode:
EN<br />
PROTECTION <strong>2G</strong> USER MANUAL<br />
17<br />
set answer mode, Any key and Headset mode to be<br />
automatic answer<br />
Press middle key to set On or Off.<br />
4.2.1、Phonebook<br />
You can store phone numbers on your SIM card and<br />
in your phone’s memory. The SIM card and phone’s<br />
memory are physically separate, but they are used as a<br />
single entity called Phonebook. To access this menu,<br />
press [Menu] in Idle mode and select Phonebook or<br />
press RSK key to enter Phonebook .<br />
4.2.1、Add New Contact<br />
Use this menu to add a new contact to Phonebook,<br />
SIM1, SIM2 and phone private phonebook.<br />
4.2.2、Search<br />
Search names and numbers saved in the Phonebook.<br />
Select the one you wish to call, and press Send Key<br />
to make a call.<br />
In the search mode, you might press # key to change<br />
the input method.<br />
You can finish the following operations with the find<br />
number:<br />
View: view the detailed information of the selected<br />
number.<br />
Send text message: send SMS to the selected<br />
number.<br />
Send multimedia message: send MMS to the<br />
number.<br />
Call: call the number you select.<br />
Edit: edit the selected number.<br />
Delete: delete the number from phone or SIM card.<br />
Copy: copy the number from the SIM1card to phone,<br />
or copy from SIM1 card to SIM2 card.<br />
Caller groups : Edit the group name, select ring tone,<br />
which can discriminate the caller group.
EN<br />
PROTECTION <strong>2G</strong> USER MANUAL<br />
18<br />
4.2.3、Phone Settings<br />
Set the phonebook parameter.<br />
Preferred storage: set the preferred storage media:<br />
SIM1/2, Phone.<br />
Speed dial :If you assign the number to one of the<br />
speed dialing keys (from 2 to 9 ) saved in the phonebook<br />
list, you can call the phone number by long pressing the<br />
key in the standby mode.<br />
Extra numbers: You can set the SIM card 1 or 2 of<br />
the SIM card fixed dial-up, need to carriers network<br />
support<br />
Memory status: show the used storage and total<br />
storage of SIM card and phone.<br />
Copy contacts: it can allows copying the entries of<br />
SIM1/2 card or phone each other.<br />
Move contacts: Allows you move all contacts<br />
information to different storage location.<br />
Delete all contacts:You can delete all phonebook<br />
data in SIM1, SIM2 or Phone.<br />
4.3、File manager<br />
In this menu, you can manage images, audio, music,<br />
photos, and other contents you have downloaded. Two<br />
menus will be displayed: Phone, Memory. Scroll to<br />
Phone and press Options, the options include: Open<br />
and Format. Scroll to Memory card and press Options,<br />
the options include: Open, Memory Status and Format.<br />
4.4、Organizer<br />
4.4.1、Skybuddy<br />
In skybuddy face taik, skype, twitter, facebook and<br />
MSN, yahoo and practical function. This function need to<br />
opened GPRS networks and insert the memory card to<br />
cell phones, the first time use need to download the<br />
application to the phone.<br />
4.4.2、Sokoban<br />
Sokoban game is a classic game, it has 108 that<br />
roadblock, you can in the game experience
EN<br />
PROTECTION <strong>2G</strong> USER MANUAL<br />
19<br />
4.4.3、Calendar<br />
This feature allows you to keep track of your schedule<br />
and event saved in the calendar. You can also switch on<br />
the alarm with the task for reminding.<br />
Your phone provides the following selections for your<br />
option:<br />
View: To view the note stored in a specified date.<br />
View all: To view all notes stored in a specified date.<br />
Add event: To add a new event in a specified date.<br />
Delete event: To delete a specific task, multiple tasks<br />
or all tasks.<br />
Jump To Date: To jump to a specific date.<br />
Go to today: Jump to today<br />
4.4.4、Alarm<br />
This function allows you to set the alarm to ring at the<br />
time specified. The alarm clock works even when the<br />
phone is switched off.<br />
In the menu, choose Alarm Clock and press OK.<br />
Press Edit to set alarm time.<br />
Repeat: select the ring mode: Once, Everyday, Days.<br />
Snooze: set continuous alarm time.<br />
Alert type: select the alert type.<br />
4.4.5、World clock<br />
You can select a world city via the navigation left and<br />
right keys. When the cross points out a certain city, it will<br />
show the local date and time. Also, you may press<br />
Options to turn on/off Daylight Saving Time for a foreign<br />
region.<br />
4.4.6、calculator<br />
The calculator applies simple calculate function such<br />
as addition, subtraction, multiplication and division.<br />
4.4.7、Ebook reader<br />
You can read any file in TXT format saved in the<br />
memory card. Just copy the file in the folder of [eBook]<br />
in the memory card under the directory [File management],<br />
and run the ebook feature. If the file is not in the folder,
EN<br />
PROTECTION <strong>2G</strong> USER MANUAL<br />
20<br />
just “open the electronic book” through the options of the<br />
file, and the file will be moved to the folder automatically.<br />
4.5、Messages<br />
Use the Messaging menu to send and receive short<br />
messages and multimedia messages. You can also use<br />
a voice-mail, and cell broadcast message features. To<br />
access this menu, press [Menu] in Idle mode and select<br />
Messages. Message functions are available depending<br />
on network services that your service provider supports.<br />
4.5.1、Text Message<br />
Use this menu to create and send a message.<br />
4.5.2、Multimedia message<br />
Use this menu to create and send a multimedia<br />
message.<br />
Multimedia Message Service (MMS) delivers<br />
messages containing a combination of text, image, and<br />
audio,.<br />
Note: The maximum size allowed for a message can<br />
differ, depending on your service provider.<br />
4.5.4、Inbox<br />
This folder stores all of the messages you have<br />
received<br />
4.5.5、Drafts<br />
This folder stores messages you have saved to send<br />
at a later time.<br />
4.5.6、Outbox<br />
You can view the messages that the phone has failed<br />
to send.<br />
4.5.7、Sent messages<br />
This folder contains the storage is has been sent<br />
information<br />
4.5.8、Broadcast Message<br />
This network service allows you to receive the<br />
broadcast messages on various topics such as weather,<br />
traffic, local district code, local hospitals, taxis or
EN<br />
PROTECTION <strong>2G</strong> USER MANUAL<br />
21<br />
pharmacy in your area.<br />
For more information about broadcast message<br />
topics, please contact your service provider.<br />
Note: This service may not be available on all<br />
networks. For more information about the available<br />
subjects, please contact your network service provider.<br />
4.5.9、Template<br />
Use this menu to make and use templates of<br />
frequently used messages.<br />
4.5.10、Message settings<br />
The information set includes SMS, MMS, service<br />
information se<br />
4.6、Multimedia<br />
4.6.1、Camera<br />
To take a picture, press Options in the preview mode,<br />
you can adjust the setting.<br />
Switch to video recorder: By camera switching to<br />
video<br />
Photos: Into photo album<br />
Camera settings: Set anti-flicker and delay timer<br />
Image settings: Set Image size/Image quality.<br />
White balance: Auto/Daylight/Fluorescent/Incandescent<br />
Scene mode: Auto/Night<br />
Effect settings: Normal/Grayscale/Sepia/Sepia<br />
green/Sepia blue/Color invert<br />
Storage: Allows you to select the storage for saving<br />
images.<br />
Restore default: This menu allows you to restore to<br />
the camera’s default settings.<br />
4.6.2、Imaga viewer<br />
All images can be reviewed from the phone or<br />
memory card. You may choose to view your images in<br />
List Style or Matrix Style.<br />
Your phone provides the following selections for your<br />
option:<br />
View: Allows you to view the pictures saved in
EN<br />
PROTECTION <strong>2G</strong> USER MANUAL<br />
22<br />
Photo Album.<br />
Image information: View photo detailed information<br />
Browse style: Allows you to select between List<br />
Style or Matrix Style when you browse pictures.<br />
Send: Allows you to forward a photo image via<br />
MMS or Bluetooth<br />
Use as:can use as wallpaper<br />
Rename: Allows you to rename the file.<br />
Delete: Allows you to delete the pictures in the<br />
Photo Album.<br />
Sort by: Allows you to view the related information<br />
about the selected image.<br />
4.6.3、Video recorder<br />
In Multimedia menu, select Video Recorder and<br />
press OK. You can press ok key to start recording and<br />
press RSK to stop recording. On the preview mode, you<br />
can press Options. you can adjust the settings.<br />
Camcorder settings: Night mode, Banding.<br />
Restore default: Restore default settings.<br />
4.6.4、Video player<br />
Play videos stored on the micro T-Flash card or the<br />
phone memory. The supported video formats are 3GP<br />
and MP4. Press Options to perform additional functions.<br />
4.6.5、Audio player<br />
You may enter the music player via main menu or<br />
use the side quick key for quick access. Another way to<br />
access the music player is through the navigation left<br />
key. You may listen to the music, speech, or even listen<br />
to an English lesson in MP3 and AAC format. You may<br />
also download the music content via USB or other<br />
connection. Music tracks must be saved in My Music<br />
folder in File Manager in order to be automatically<br />
detected and added into the default play list. You may<br />
listen to the music through the headset or loudspeaker.<br />
The user-friendly interface is specially designed to<br />
enable users to control, play, pause, and stop the music
EN<br />
PROTECTION <strong>2G</strong> USER MANUAL<br />
23<br />
player as you wish.<br />
If you are a first-time user, your music player will<br />
automatically detect and add all the music tracks into<br />
the default play list.<br />
Into the music list interface can choose according to<br />
the left key play, check the detailed information, update<br />
the list and set music player<br />
Settings: Allows you to turn on auto refresh play list.<br />
In the Music Player menu, choose Settings. The setting<br />
options include:<br />
Player Settings:<br />
List auto gen.: You can choose to refresh play list<br />
automatically or not.<br />
Repeat: You can choose to repeat all songs, one<br />
songs or turn off this function.<br />
Shuffle: This function is to mix the music tracks with<br />
different order.<br />
Background Play: This function allows the phone to<br />
play the music continuously if you go back to the idled<br />
mode.<br />
4.6.6、Sound recorder<br />
With this menu, you can record sound in AMR, WAV<br />
and AWB format and use it as ring tone, message tone,<br />
caller ring tone, alarm tone.<br />
Your phone provides the following selections for your<br />
option:<br />
Play: Allows you to play the sound record.<br />
Append: Allows you to record in the same file.<br />
Rename: Allows you to rename a file.<br />
Delete: Allows you to delete the file saved in the<br />
Voice Recorder.<br />
Use As: Allows you to set the sound record file as<br />
ring tone, caller ring tone,<br />
Send: Allows you to forward the file to user profile or<br />
share with friends via MMS.and Bluetooth devices.<br />
Settings: Allows you to choose your preferred
EN<br />
PROTECTION <strong>2G</strong> USER MANUAL<br />
24<br />
storage and audio quality.<br />
4.6.7、FM radio<br />
To listen to the FM radio on your phone connects the<br />
compatible headset connector on the left side of the<br />
phone. Note that the quality of the radio broadcast<br />
depends on the radio station’s coverage in that<br />
particular area.<br />
Set Frequency: If you know the frequency of the<br />
radio channel you would like to listen to (between 87.5<br />
and 108.0 MHZ),<br />
Channel list:This menu shows you the existing<br />
channels<br />
<strong>Manual</strong> input: <strong>Manual</strong> input your channels<br />
Auto Search: If you want to search radio channel,<br />
press Yes when Preset list confirm message show up.<br />
The search stops when channels has been found and<br />
show channel in Channel list.<br />
Settings: FM radio setting options:<br />
Background play: Turn on/off Background play<br />
function.<br />
On: allow radio continuing playing when exit FM<br />
radio<br />
Off: when user exits FM radio, radio will stop.<br />
Loudspeaker: Open the function FM radio broadcast<br />
by speaker<br />
Note: Before use FM radio, please insert the headset<br />
first.<br />
4.7、Services<br />
Service describe in the following are supported by<br />
your service provider.<br />
Service describe in the following are supported by<br />
your service provider. If you cannot connect either one<br />
of those services, you might contact with your service<br />
provider for further information.<br />
4.7.1、SIM Tool Kit<br />
In addition to the functions available in the phone,
EN<br />
PROTECTION <strong>2G</strong> USER MANUAL<br />
25<br />
your service provider may offer additional applications<br />
such as weather or stock market information via the SIM<br />
card. This function is only supported when SIM card<br />
inserted.<br />
4.7.2、Internet<br />
The Wireless Application Protocol (WAP) on your<br />
phone allows you to access the wireless web. Using the<br />
web browser, you can access up-to-date information<br />
and a wide variety of media content.<br />
Note: To activate wap service, you need to contact<br />
your service provider.<br />
To access this menu, press [Menu] and select<br />
Services then Internet.<br />
Homepage:<br />
Once connected, the homepage is displayed. The<br />
content depends on the service provider. To exit the<br />
browser, press end key.<br />
Bookmarks:<br />
You can use this menu to save URL addresses to<br />
quick access a web site.<br />
Input address:<br />
You can edit URL addresses to access a web site.<br />
Recent pages:<br />
You can view the recent pages you have visited.<br />
Setting:<br />
In the Settings menu, you can set the WAP default<br />
page, data account, the browser option and Internet<br />
parameters Settings<br />
Data account:<br />
Default data accounts based on major operators at<br />
the time this phone is manufactured are provided.<br />
4.8、PTT<br />
1. Instrucciones para la función PTT (Push-to-talk):<br />
Esta función le permite comunicar con un interlocutor<br />
como lo haría con un walkie-talkie pero a través de la<br />
red GPRS/3G. Este método le permite comunicar de
EN<br />
PROTECTION <strong>2G</strong> USER MANUAL<br />
26<br />
manera instantánea.<br />
4.8.PTT user manual<br />
4.8.1.What is PTT (Push to Talk)<br />
PTT allows you to communicate with another contact<br />
just like using a walkie-talkie, but all messages are sent<br />
through network GPRS/3G.<br />
4.8.2.How to use PTT<br />
Before start using PTT, please make sure your phone<br />
h a s a m i c r o S D c a r d a n d b o t h p a r t i e s o f t h e<br />
conversation have installed this PTT on their phones.<br />
Select “PTT” from the main menu, then enter<br />
“Settings” to select a SIM card and network account.<br />
Return to last page, select “PTT”. For the first usage<br />
of PTT, it might take a while (depending on your<br />
network) to install the PTT. The PTT software will be<br />
installed automatically in the micro SD card, and once<br />
the installation is finished, the PTT will be launched<br />
automatically.<br />
Descriptions of the PTT menu<br />
a.Call: to input a phone number with whom you want<br />
to start communicating. Press “OK” to send him an SMS<br />
invitation if the other party hasn't activated the PTT.<br />
b.Recent contacts: to show all the recent contacts<br />
you have been communicated through PTT.<br />
Phone book: to select a contact from your phone<br />
book to start communication through PTT.<br />
4.9、Settings<br />
The Settings menu provides you with various setting<br />
options to customize the phone to your preferences and<br />
needs. You can also reset the settings to their default<br />
values.<br />
4.9.1、Dual SIM Setting<br />
Your phone support dual SIM mode which allows you<br />
to switch from one to the other as required. Dual-SIM<br />
operation allows the use of two services without the<br />
need to carry two phones at the same time.
EN<br />
PROTECTION <strong>2G</strong> USER MANUAL<br />
27<br />
You phone provides 3 different SIM settings,<br />
including: Dual SIM Open, Only SIM1 Open, Only SIM2<br />
Open.<br />
4.9.2、<strong>User</strong> profile<br />
The available profiles are General, Silent, Meeting,<br />
Outdoor. You can also set the tone, volume, alert, ring,<br />
and so forth with Options, Customize option, so that<br />
whenever you receive an incoming call or a new<br />
message, you can customize the use of your phone to<br />
different types of call environments.<br />
4.9.3、Phone settings<br />
You have following options listed under phone<br />
settings:<br />
Time and data:Let you set time zone, time and date,<br />
time and date format and so forth on the phone.<br />
Schedule power on/off: Let you set a particular time<br />
on the phone when the phone should power on/off itself.<br />
Language: This phone allows you to set a language<br />
for the display in this phone.<br />
Preferred input methods: This enables you to touch<br />
the text input method.<br />
Display :Under Display you can set a host of different<br />
characteristics of the Wallpaper, Set up open shutoff<br />
standby interface time date to show.<br />
Dedicated Key: This function allows you to re-assign<br />
the quick-access-feature default setting in 4-way<br />
navigation keys.<br />
Flight Mode:Switch into flight mode while being on<br />
board, screening off partial function of telecom , normal<br />
mode or decide on when boot up .<br />
Misc settings: You can set a host of different<br />
characteristics of LCD backlight and time.<br />
4.9.4、Network setup<br />
Network Selection<br />
The Network Selection feature enables you to select<br />
automatically or manually the network used when
EN<br />
PROTECTION <strong>2G</strong> USER MANUAL<br />
28<br />
roaming outside of your home network.<br />
Note: You can select a network other than your home<br />
network only if it has a valid roaming agreement with<br />
your home network.<br />
4.9.5、Security Settings<br />
U s e t h i s m e n u t o p r o t e c t t h e p h o n e a g a i n s t<br />
unauthorized use by managing the several access<br />
codes of your phone and SIM card.<br />
There are six types of security setting categories,<br />
and you can optimize security mode by choosing sub<br />
menus in “Security Settings” in “Settings” menu. These<br />
security settings will help you to keep privacy and to<br />
prevent other people from using the phone without your<br />
permission.<br />
4.9.5.1、SIM Security Setup<br />
This function allows you to activate password to<br />
protect your phone against unauthorized use.<br />
Your phone provides the following selections for your<br />
option:<br />
PIN Lock: This function allows you to lock the phone<br />
with a specific SIM card. The feature is designed to<br />
prevent the use of your SIM cards by means of another<br />
person’s phone if your SIM cards lost. You can switch on<br />
or off to activate the PIN Lock function.<br />
4.9.5.2、Phone security<br />
Phone lock:<br />
You can switch on or off to activate the phone lock<br />
function to protect your phone. If you switch Phone Lock<br />
on, you need to enter the password to set the request<br />
on. The default password is “1122”.<br />
Change Password:<br />
Allows you to change the phone lock password.<br />
Auto Keypad Lock:<br />
This allows you to lock the phone’s keypad to prevent<br />
accidental key pressed. In Auto Keypad Lock submenu,<br />
select the time that after the last key press will be
EN<br />
PROTECTION <strong>2G</strong> USER MANUAL<br />
29<br />
disabled, and press OK.<br />
Privacy protectz:<br />
Can set up open the phone book, information, call<br />
records privacy protection function, after open, access<br />
to relevant function need password. The password for<br />
1122<br />
4.9.6、Connectivity<br />
4.9.6.1、Bluetooth<br />
The Bluetooth connection can be used to listen to<br />
stereo music, send images, Video, texts and vCards.<br />
Power On/Off: Turn on/off the Bluetooth feature.<br />
Visibility: Set your bluetooth device is visible<br />
My device: show BT device list. If the list is null,<br />
press OK key to search the new device. Select one<br />
device, press middle key to access:<br />
Search Audio Device: Search the devices that are<br />
available.<br />
My name : You can view the device name<br />
Active Device: Activate the selected device.<br />
Settings: Allows you to set the following Options :<br />
Audio path, Storage and device address.<br />
Note: The received file saved in the Received folder.<br />
4.9.6.2、Data account<br />
According to need to link the network service choose<br />
corresponding data account, and can edit, add, delete,<br />
change the default setting the account<br />
4.9.7、Restore factory settings<br />
This feature would reset the phone to the same<br />
settings as those configured at the factory. In this case,<br />
it does not delete the downloaded objects and phonebook<br />
records.<br />
You will need to input password to restore factory<br />
settings. The initial password is 1122.<br />
5、Troubleshooting<br />
If problems occur when using the phone, try to find a<br />
solution here first.
EN<br />
PROTECTION <strong>2G</strong> USER MANUAL<br />
30<br />
Problems<br />
Can't switch on<br />
Can't connect<br />
to network<br />
The audio<br />
quality of the<br />
call is poor<br />
Standby time<br />
too short<br />
SIM card error<br />
Reasons and Solutions<br />
Press and hold end key until image<br />
appears on the display<br />
Check the battery contacts. Remove<br />
and insert battery and switch your<br />
phone on again<br />
Check the battery charge level<br />
Move into an area of better coverage<br />
Beyond the network cover area<br />
Contact your service provider if your<br />
SIM card is invalid<br />
Press navigator key to increase the<br />
volume when you are in a call<br />
Check the signal strength indicator<br />
on the display<br />
The line is busy and can not be<br />
connected to network; you can not<br />
make a call<br />
When failing to connect to network,<br />
the phone will keep searching base<br />
station that consumes much battery<br />
and reduces standby time. Move to<br />
an area with stronger signal strength<br />
or switch your phone off temporarily.<br />
Replace the battery.<br />
Make sure that the chips in SIM card<br />
are not damaged; use the clean cloth<br />
to scratch it.<br />
Make sure that SIM card is inserted<br />
correctly.<br />
SIM card invalid. Contact your<br />
service provider.
EN<br />
PROTECTION <strong>2G</strong> USER MANUAL<br />
31<br />
Can not dial<br />
calls<br />
Can not receive<br />
calls<br />
The battery<br />
won't charge<br />
Can not set<br />
some functions<br />
Make sure that the number you<br />
dialed is available and the dial<br />
key has been pressed.<br />
Make sure that there is enough<br />
money to make a call.<br />
Make sure that SIM card is valid.<br />
Make sure that your phone has<br />
connected to network (Check if<br />
the network is too busy or invalid).<br />
Make sure that there is enough<br />
money to receive the call.<br />
Make sure that SIM card is valid.<br />
Check call divert settings and I<br />
ncoming call barring settings<br />
Make sure that the battery is<br />
inserted correctly. Securely<br />
connect the charger to the phone.<br />
The operation is wrong.<br />
The network providers do not<br />
support the function, or you<br />
don't apply the function.<br />
Technical Support<br />
This product is designed as shockproof phone,<br />
however, please don't hit the phone intentionally.<br />
The brutal manipulation may bring damages to the<br />
performance of your phone, and it will be no longer<br />
under warranty.<br />
Technical Support<br />
Générale Télécom Services – 31000 Toulouse<br />
Tel: 05 61 63 60 60<br />
Fax: 05 61 63 60 67<br />
Email: sav@mobiletoutterrain.com
PTT


