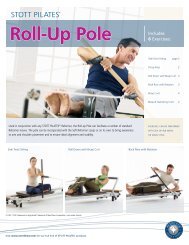
download pdf - Merrithew.com
download pdf - Merrithew.com
download pdf - Merrithew.com

Create successful ePaper yourself
Turn your PDF publications into a flip-book with our unique Google optimized e-Paper software.
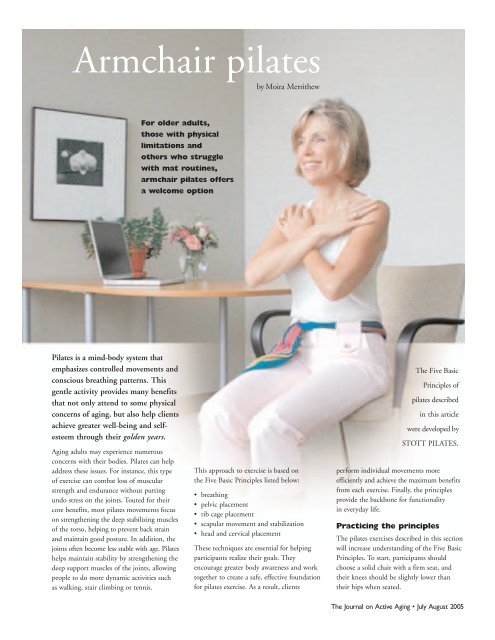
Armchair pilates<br />
by Moira <strong>Merrithew</strong><br />
For older adults,<br />
those with physical<br />
limitations and<br />
others who struggle<br />
with mat routines,<br />
armchair pilates offers<br />
a wel<strong>com</strong>e option<br />
Pilates is a mind-body system that<br />
emphasizes controlled movements and<br />
conscious breathing patterns. This<br />
gentle activity provides many benefits<br />
that not only attend to some physical<br />
concerns of aging, but also help clients<br />
achieve greater well-being and selfesteem<br />
through their golden years.<br />
Aging adults may experience numerous<br />
concerns with their bodies. Pilates can help<br />
address these issues. For instance, this type<br />
of exercise can <strong>com</strong>bat loss of muscular<br />
strength and endurance without putting<br />
undo stress on the joints. Touted for their<br />
core benefits, most pilates movements focus<br />
on strengthening the deep stabilizing muscles<br />
of the torso, helping to prevent back strain<br />
and maintain good posture. In addition, the<br />
joints often be<strong>com</strong>e less stable with age. Pilates<br />
helps maintain stability by strengthening the<br />
deep support muscles of the joints, allowing<br />
people to do more dynamic activities such<br />
as walking, stair climbing or tennis.<br />
This approach to exercise is based on<br />
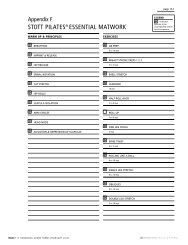
the Five Basic Principles listed below:<br />
• breathing<br />
• pelvic placement<br />
• rib cage placement<br />
• scapular movement and stabilization<br />
• head and cervical placement<br />
These techniques are essential for helping<br />
participants realize their goals. They<br />
encourage greater body awareness and work<br />
together to create a safe, effective foundation<br />
for pilates exercise. As a result, clients<br />
The Five Basic<br />
Principles of<br />
pilates described<br />
in this article<br />
were developed by<br />
STOTT PILATES.<br />
perform individual movements more<br />
efficiently and achieve the maximum benefits<br />
from each exercise. Finally, the principles<br />
provide the backbone for functionality<br />
in everyday life.<br />
Practicing the principles<br />
The pilates exercises described in this section<br />
will increase understanding of the Five Basic<br />
Principles. To start, participants should<br />
choose a solid chair with a firm seat, and<br />
their knees should be slightly lower than<br />
their hips when seated.<br />
The Journal on Active Aging • July August 2005
Principle 1: breathing<br />
Many people are unaware of their breathing<br />
patterns and tend to breathe in a shallow<br />
manner. Breathing more deeply, particularly<br />
during pilates, fully oxygenates the blood,<br />
helps prevent unnecessary tension, activates<br />
the deep torso stabilizer muscles, and helps<br />
focus the mind on what the body is doing.<br />
Breathing into the lower lobes of the lungs<br />
increases power, as the exercise below shows.<br />
Sample exercise:<br />
Sit as tall as you can near the front<br />
of your chair, keeping your feet<br />
flat on the floor.<br />
1. Breathe in through your nose and<br />
out through a slightly pursed lip.<br />
As you do this, keep your shoulders<br />
relaxed—don’t let them rise.<br />
Breathe in and out 5 times.<br />
2. Continue to breathe as you try to<br />
contract your pelvic floor. This helps<br />
you reach the deepest layer of your<br />
stomach muscles, which help support<br />
your lower back. Repeat 5 times.<br />
3. Place your hands at your waist like<br />
a girdle. Breathe in. As you breathe<br />
out, draw up the pelvic floor and try<br />
to tighten your stomach without<br />
allowing the spine to move.<br />
Repeat 5 times. (Feel this abdominal<br />
engagement. This is the position you<br />
should be in to begin each exercise.)<br />
4. Still with your hands at your waist,<br />
breathe in. As you breathe out,<br />
draw up the pelvic floor and try<br />
to squeeze your legs together, as<br />
if you had a tennis ball between<br />
your thighs. Repeat 5 times.<br />
For the rest of these exercises, clients should<br />
breathe in through the nose and out through<br />
the mouth, as well as tighten the stomach<br />
muscles before starting each movement.<br />
Principle 2: pelvic placement<br />
Back pain and strain and postural problems<br />
be<strong>com</strong>e more <strong>com</strong>mon with age. Pilates<br />
can help minimize back pain and achieve<br />
optimal posture, while maintaining the<br />
natural curves of the spine.<br />
The position of the pelvis dictates the<br />
position of the lower back. Being able to<br />
support the pelvis in a neutral position<br />
keeps strain off the lower back. Furthermore,<br />
it takes abdominal strength to move away<br />
from neutral as the spine bends, and to<br />
return to this position. The following<br />
The Journal on Active Aging • July August 2005<br />
exercise promotes awareness of the spine<br />
and how the abdominal muscles, in tandem<br />
with the deep spinal muscles, help keep the<br />
spine healthy.<br />
Sample exercise:<br />
Sit against the back of your chair,<br />
keeping your feet flat on the floor.<br />
Place a solid pillow behind your<br />
back, if necessary. Sit up on your sit<br />
bones, so that your lower back has<br />
a natural curve (neutral) and is not<br />
pressed into the chair or pillow behind<br />
you. Think of lengthening your ears<br />
away from your shoulders. Keep your<br />
shoulders relaxed.<br />
1. Keep your spine neutral as<br />
your breathe in.<br />
2. Breathe out as you contract your<br />
abdominal muscles and press your<br />
lower back into the pillow. Try to<br />
stay sitting as tall as possible and<br />
allow the movement to originate<br />
from your abdominals. Breathe<br />
in and return to neutral.<br />
Repeat 5 times.<br />
Principle 3: head and cervical placement<br />
Ideally, the neck (cervical spine) should hold<br />
its natural curve, with the head balanced<br />
directly above the shoulders when sitting<br />
in a neutral position. Excessive bending and<br />
rotation of the neck in any direction can<br />
put stress on the joints and lead to neck<br />
problems. One way to ensure participants<br />
stay within safe limits during exercise is<br />
to notice the focus of their eyes, as<br />
described below.<br />
Sample exercise:<br />
Sit near the front of your chair, your<br />
spine and pelvis as neutral as you can,<br />
feet flat on the floor.<br />
1. Sit tall, abdominal muscles<br />
tightened. Breathe in. As you<br />
breathe out, allow your eye level<br />
to drop to your knees as you lower<br />
your head. Avoid looking directly to<br />
the floor, as you will then be bending<br />
your neck too much. Breathe in and<br />
lift your head and eyes back to neutral.<br />
Repeat 5 times.<br />
2. Sit tall, abdominal muscles tightened.<br />
Breathe in. As you breathe out, turn<br />
to look toward the right shoulder.<br />
Breathe in and return to starting<br />
position. Repeat on other side. Repeat<br />
entire sequence 3 times each side.<br />
Principle 4: scapular movement<br />
and stabilization<br />
As the shoulder blades move with the arms,<br />
stability is important. Weakened muscles<br />
in the shoulder blade area can easily lead<br />
to neck and shoulder tension. Also, if the<br />
shoulder blades be<strong>com</strong>e rigid and lack<br />
mobility, pressure can build up into the<br />
shoulder joints, leading to pain and<br />
inflammation. The following exercise<br />
helps participants attain optimal shoulder<br />
position to minimize this possibility.<br />
Sample exercise:<br />
Sit near the front of your chair, spine<br />
and pelvis as neutral as you can, feet<br />
flat on the floor.<br />
To find a good position for your<br />
shoulders, place your hands on top of<br />
your head (so your fingers touch in<br />
the middle), lift your shoulders and<br />
open your elbows as wide as you can<br />
without changing your neck position.<br />
Slide your shoulders down and lower<br />
your arms. You should feel open<br />
through the front of your shoulders.<br />
This is your neutral shoulder position.<br />
1. Reach your arms out in front of you<br />
at shoulder height. Breathe in. As<br />
you breathe out, slide your shoulder<br />
blades together; breathe in and bring<br />
them back to neutral. Repeat 5 times.<br />
2. Reach your arms out in front of you<br />
at shoulder height. Breathe in. As<br />
your breathe out, slide your shoulder<br />
blades away from each other.<br />
Breathe in and return to neutral.<br />
Repeat 5 times.<br />
3. Reach your arms out in front of you<br />
at shoulder height. Repeat through<br />
the full range of movement you’ve<br />
just <strong>com</strong>pleted in the previous 2<br />
exercises: Breathe in and slide the<br />
shoulder blades together; breathe<br />
out and slide them away from each<br />
other. Repeat 5 times.<br />
4. Leave your arms by your sides.<br />
Breathe in and raise your shoulder<br />
blades, being careful not to tense<br />
them too much. Breathe out and<br />
lower your shoulder blades to<br />
neutral. Repeat 5 times.<br />
5. Leave your arms by your sides. Breathe<br />
in and slide your shoulder blades<br />
down, being careful not to tense<br />
them too much. Breathe out and<br />
raise them to neutral. Repeat 5 times.
6. Go through the full range of movement<br />
you’ve just <strong>com</strong>pleted in the<br />
previous 2 exercises: Slide your shoulder<br />
blades up toward yours ears and<br />
then carefully down. Avoid pressing<br />
down too much. Repeat 5 times.<br />
Roll your shoulders to get rid<br />
of any tension.<br />
Principle 5: rib cage placement<br />
Losing strength in the upper middle back<br />
(thoracic spine) can worsen lower back or<br />
neck tension, as the rib cage position directly<br />
affects the spine. Quite often the rib cage<br />
will lift up as an individual tries to sit tall or<br />
raise an arm. This flattens out the thoracic<br />
spine. Alternatively, the rib cage may drop<br />
down and give the appearance of an excessive<br />
curve in the upper middle back. When<br />
sitting or standing, it is best to have the<br />
rib cage directly above the pelvis.<br />
Sample exercise:<br />
Sit near the front of your chair, spine and<br />
pelvis as neutral as you can, feet flat<br />
on the floor, arms down by your sides.<br />
1. Arm scissors: Breathe in. Breathe out<br />
as you raise your right arm in front<br />
of you, being careful not to raise<br />
your rib cage. Repeat with the left<br />
arm. Alternate 3 times each side.<br />
2. Arm circles: Breathe in and raise both<br />
arms in front of you, being careful<br />
not to raise your rib cage. Breathe<br />
out as you open your arms wide and<br />
lower them. Repeat 5 times.<br />
Incorporating the principles<br />
Once people grasp the Five Basic Principles<br />
from the above movements, they can try<br />
the armchair pilates practice presented here,<br />
which incorporates these techniques.<br />
Performing exercises such as these correctly<br />
on a regular basis (3 times per week is<br />
re<strong>com</strong>mended) can help do the following:<br />
• improve the circulatory system<br />
through movement<br />
• improve postural strength<br />
• increase musculoskeletal strength<br />
and joint range of motion<br />
• maintain functional ability<br />
Pilates also connects the mind and body.<br />
Combined, these benefits make pilates an<br />
ideal form of exercise for older adults.<br />
Former professional dancer Moira <strong>Merrithew</strong>,<br />
co-founder of STOTT PILATES, was trained<br />
and certified at Joseph Pilates’ original studio<br />
in New York. Together with a team of health<br />
professionals, she has spent years refining the<br />
original pilates mind-body method of exercise<br />
to include modern principles of anatomy and<br />
exercise science. <strong>Merrithew</strong> is the featured<br />
performer and co-creator of more than 60<br />
STOTT PILATES videos, the author of<br />
numerous technical manuals and published<br />
articles, and a sought-after presenter and<br />
media personality. More information is<br />
available at www.stottpilates.<strong>com</strong>.<br />
Armchair pilates practice<br />
The exercises provided in this section<br />
incorporate the basic principles of<br />
pilates described on the previous pages.<br />
As with any exercise program,<br />
participants should consult a doctor<br />
before performing this routine.<br />
Contraindications: Seated exercise<br />
may be contraindicated for clients<br />
with intervertebral disc problems or a<br />
history of these problems. People with<br />
osteoporosis should not perform the<br />
Spine Twist, Spine Stretch Forward and<br />
Mermaid exercises; these movements may<br />
also be contraindicated for those with<br />
intervertebral disc problems or a history<br />
of these problems. Individuals should<br />
seek the advice of a physician.<br />
A. Spine Twist<br />
Sit near the front of your chair,<br />
spine and pelvis as neutral as you<br />
can, feet flat on the floor.<br />
Cross your arms in front of you.<br />
Breathe in. Breathe out as you<br />
rotate your upper body to one<br />
side, contracting your abdominals.<br />
Breathe in to stay; breathe out to<br />
return to center. Repeat other side.<br />
Repeat 3 times on each side.<br />
Repeat the exercise, this time<br />
placing your left hand on your<br />
left shoulder and your right hand<br />
on your right shoulder.<br />
The Journal on Active Aging • July August 2005
C. Breast Stroke Prep<br />
Sit near the front of your chair,<br />
spine and pelvis as neutral as you<br />
can, feet flat on the floor. Rest your<br />
hands against the front of the chair.<br />
D. Spine Stretch Forward<br />
Sit near the front of your chair, spine<br />
and pelvis as neutral as you can, feet flat<br />
on the floor, hands on your knees.<br />
B. Mermaid<br />
Sit near the front of your chair, spine<br />
and pelvis as neutral as you can, feet flat<br />
on the floor.<br />
Breathe in as you reach your right arm<br />
to the ceiling. Breathe out as you lean to<br />
the left. Breathe in to return; breathe out<br />
to lower arm. Repeat on the other side.<br />
Repeat sequence 3 times.<br />
The Journal on Active Aging • July August 2005<br />
Breathe in, sitting up tall. Breathe out<br />
as you press your hands against the chair<br />
and raise your chest towards the ceiling.<br />
Make sure to keep your abdominal<br />
muscles working. Breathe in to stay;<br />
breathe out to return. Repeat 3 times.<br />
More armchair pilates<br />
Additional chair pilates exercises<br />
and routines are available in the<br />
STOTT PILATES Armchair Pilates Series.<br />
To learn more, visit the Videos section<br />
at www.stottpilates and navigate to<br />
the At Home series webpage.<br />
Breathe in to sit up tall. Breathe out as<br />
you flex forward, leading from the top<br />
of your head and still working your<br />
abdominal muscles. Breathe in to stay;<br />
breathe out to roll up through your<br />
spine, leaving your head until last.<br />
Repeat 3 times.<br />
1326 Copyright 2005 <strong>Merrithew</strong> Corporation, all rights reserved. TM Trademark of <strong>Merrithew</strong> Corporation, used under license.