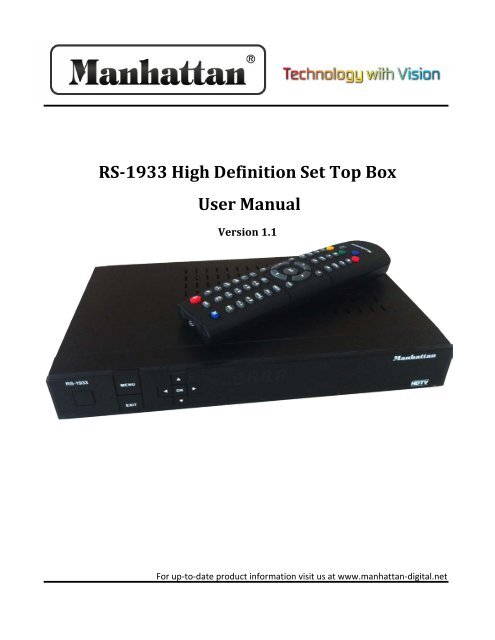
RS-1933 High Definition Set Top Box User Manual - Kusat
RS-1933 High Definition Set Top Box User Manual - Kusat
RS-1933 High Definition Set Top Box User Manual - Kusat

Create successful ePaper yourself
Turn your PDF publications into a flip-book with our unique Google optimized e-Paper software.
<strong>RS</strong>-<strong>1933</strong> <strong>High</strong> <strong>Definition</strong> <strong>Set</strong> <strong>Top</strong> <strong>Box</strong><br />
<strong>User</strong> <strong>Manual</strong><br />
Version 1.1<br />
For up-to-date product information visit us at www.manhattan-digital.net
DANGEROUS<br />
VOLTAGE<br />
IMPORTANT OPERATING<br />
INSTRUCTIONS<br />
WARNING:<br />
• To reduce the risk of electrical shock, do not open the cabinet.<br />
• Do not place where contact with water or immersion is possible. Avoid<br />
exposure to moisture.<br />
• Do not place near fire or open flames. Avoid exposure to excessive heat.<br />
• Slots and openings in the cabinet are provided for ventilation. Do not<br />
block these openings.<br />
• The unit should be connected only to the required power supply, as<br />
described in instructions or as marked on the unit. If not sure, contact<br />
your local dealer or power company.<br />
• Contact your local dealer for technical service if opening is required.<br />
NOTE:<br />
• To ensure proper use, read this manual carefully and retain for further<br />
reference.<br />
• Power off the unit when cleaning. You may clean the cabinet, panel, and<br />
remote control with a soft cloth lightly moistened with mild detergent<br />
solution. Allow to dry before powering on.<br />
I<br />
<strong>RS</strong>-<strong>1933</strong> <strong>User</strong> <strong>Manual</strong>
Specifications<br />
Technical Specifications<br />
Hardware<br />
Audio<br />
• MPEG-1 Layers 1,11,11<br />
• MPEG-2 Layer 2<br />
• MPEG-2 AAC LC and LC and AAC+<br />
• MPEG-4 AAC L2 2-Channels / 5.1 Channel MPEG-4<br />
AAC+SBR 2-Channel<br />
• Mono, dual Mono, Stereo, Joint Stereo<br />
• Dolby digital AC-3 through HDMI, SPDIF Coaxial<br />
output<br />
Front Panel<br />
• 8 Button Keys<br />
• 4 digit Seven Segment Display<br />
Accessories<br />
• Handset with batteries<br />
• <strong>User</strong> <strong>Manual</strong><br />
System Resources<br />
• ALi 3602 Chipset<br />
• 4 MByte Flash Memory<br />
• 64 MByte RAM Memory<br />
Software<br />
• 5000 C/Ku channel format<br />
• NTSC composite output<br />
• 64 satellites and 8 favorite groups settings<br />
• Recall last channel<br />
• 16 Day EPG<br />
• 8 event timers. Count-down timer<br />
• Update firmware through USB port<br />
• Language support: English, French, German,<br />
Russian, Arabic, Portuguese, Turkish, Spanish,<br />
Polish, and Italian<br />
• Dolby digital AC-3 downconverted through 2<br />
channel analog audio output.<br />
• OSD Transparency, 10-40%<br />
• Video resolution switch on remote<br />
• <strong>User</strong> can change Background graphics<br />
• Wake-up Channel Default by user<br />
• DiSEqC 1.0 – off, 1/2-2/2, 1/4 - 4/4<br />
• DiSEqC 1.2, Positioner. Satellite selectable with<br />
limits<br />
• DiSEqC 1.3 Support USAL for dish satellite<br />
programming<br />
Video<br />
• MPEG-1 (SD)<br />
• MPEG-2 MP@ML (SD) and MP@HL (HD)<br />
• MPEG-4 (H.264) MP@L3 (SD) and MP@L4.1<br />
• Video Format 4.3, 16.9, with Pan Scan Letterbox<br />
• Up-scaling of SD video on HD output<br />
• Down scaled HD video on SD output<br />
• Supported Resolutions: 1080i /720p /480p /576p<br />
/480i /576i<br />
• DVBS2 Tuner, Single HDTV Decoder with CI<br />
Rear Panel<br />
• IF in loop through<br />
• 1 x HDMI with HDCP<br />
• 1 x Coaxial SPIDF<br />
• 1 x USB 2.0 port<br />
• 1 x PCMCIA Interface Slot<br />
• Power on/off switch<br />
• 100-240v 50/60Hz @25w<br />
• Polarization H/V Auto<br />
• DVB-S Auto Scan @ 50 TP/S<br />
• Signal strength and quality level support<br />
• IF loop-through for multiple receivers<br />
DVR Function;<br />
• Through USB port<br />
• Up to 2.0 TB hard disk capability. Will separate files<br />
after 1 TB<br />
• Identifies program, music, and JPEG files<br />
independently<br />
• Identifies free space, record time and size<br />
• Time record. Can record in a set time<br />
• Can set FF & RW times in 30s, 1m, 5m, 10m<br />
• Play, pause, and stop function with jump selection<br />
• <strong>User</strong> can lock, delete, or rename recorded files<br />
• Browse records and preview files<br />
• <strong>User</strong> can sort by date and time<br />
• Hard Drive not included<br />
<strong>RS</strong>-<strong>1933</strong> <strong>User</strong> <strong>Manual</strong><br />
II
1. Getting Started<br />
1. Front panel<br />
2. Remote Controller<br />
3. Connecting<br />
2. Basic Operations<br />
1. Turning on<br />
2. Power<br />
3. Channel Up/Down<br />
4. Volume Up/Down<br />
5. Number Keys<br />
6. Mute<br />
7. Pause<br />
8. Recall<br />
9. Favorite<br />
10. Audio<br />
11. Information<br />
12. EPG<br />
13. TV/Radio<br />
14. Channel List<br />
15. Sleep<br />
16. Page Up/Down<br />
17. Text<br />
18. Subtitle<br />
19. Zoom<br />
20. Menu<br />
21. SAT<br />
22. Exit<br />
3. Menu Operations<br />
1. Menu<br />
2. Edit Channel<br />
2.1 TV Channel List<br />
2.2 -Favorite<br />
2.3 -Lock<br />
2.4 -Skip<br />
2.5 -Move<br />
2.6 -Edit<br />
3. Radio Channel List<br />
4. Delete All<br />
4. Installation<br />
1. Installation<br />
2. Antenna Connection<br />
3. Satellite List<br />
4. Antenna <strong>Set</strong>up<br />
5. Satellite Search<br />
6. Multi-Satellite Search<br />
7. TP List<br />
Contents<br />
1<br />
1<br />
1<br />
2<br />
3<br />
3<br />
3<br />
3<br />
3<br />
3<br />
3<br />
3<br />
3<br />
3<br />
3<br />
4<br />
4<br />
4<br />
4<br />
5<br />
5<br />
5<br />
5<br />
5<br />
5<br />
5<br />
5<br />
6<br />
6<br />
6<br />
6<br />
6<br />
6<br />
7<br />
7<br />
7<br />
8<br />
8<br />
9<br />
9<br />
9<br />
9<br />
10<br />
11<br />
11<br />
12<br />
5. System <strong>Set</strong>up<br />
1. System <strong>Set</strong>up<br />
2. Language<br />
3. TV System<br />
4. Local Time <strong>Set</strong>ting<br />
5. Timer <strong>Set</strong>ting<br />
6. Parental Lock<br />
7. OSD <strong>Set</strong>ting<br />
8. Favorite<br />
9. Other<br />
6. Tools<br />
1. Tools<br />
2. Information<br />
3. Factory <strong>Set</strong>ting<br />
4. Upgrade By USB<br />
5. Common Interface<br />
6. USB<br />
7. Game<br />
1. Game<br />
2. Othello<br />
3. Sudoko<br />
8. REC<br />
1. REC<br />
2. Record Manager<br />
3. Storage Information<br />
4. HDD Format<br />
5. DVR Configuration<br />
6. Jump<br />
9. Warranty<br />
Contents<br />
13<br />
13<br />
13<br />
13<br />
14<br />
14<br />
15<br />
15<br />
16<br />
16<br />
17<br />
17<br />
17<br />
17<br />
17<br />
17<br />
18<br />
21<br />
21<br />
21<br />
21<br />
22<br />
22<br />
22<br />
22<br />
22<br />
23<br />
23<br />
24<br />
III<br />
<strong>RS</strong>-<strong>1933</strong> <strong>User</strong> <strong>Manual</strong>
Getting Started<br />
OK/Select<br />
1. Front Panel<br />
Menu Up/Channel Up Right/Volume Up<br />
Power<br />
Exit<br />
Down/Channel Down<br />
Left/Volume Down<br />
EPG<br />
Power<br />
2. Remote Control<br />
Mute<br />
Zoom<br />
SAT<br />
Number Keys<br />
Favorite<br />
Audio<br />
Menu<br />
Left/ Volume Down<br />
Down/Channel Down<br />
Page Down<br />
Multi Picture<br />
Skip Back<br />
TV/Radio<br />
Recall<br />
Text<br />
Subtitle<br />
Exit<br />
Up/Channel Up<br />
OK/Select<br />
Right/Volume Up<br />
Page Up<br />
Skip Forward<br />
Rewind<br />
Play<br />
Stop<br />
Record<br />
Color Keys<br />
DVR<br />
Fast Forward<br />
Pause<br />
Information<br />
<strong>RS</strong>-<strong>1933</strong> <strong>User</strong> <strong>Manual</strong> 1
Getting Started<br />
3. Connecting<br />
If your TV is standard definition and<br />
does not have component input,<br />
please use a 3 lines cable (red, white,<br />
yellow) to connect to your STB’s CVBS,<br />
left and right analog audio port, as well<br />
as to your TV’s corresponding ports.<br />
If your TV is high definition and has a<br />
HDMI input port, connect your STB to<br />
your TV with an HDMI cable. This<br />
allows for maximum resolution to be<br />
displayed on your television.<br />
If your TV is standard or high definition<br />
and has component input ports, you<br />
can connect your STB to your TV with a<br />
5 lines cable (red, green, blue/ red,<br />
white)<br />
Connect your satellite antenna cable<br />
to your STB’s ‘SAT IN’ port. Then, turn<br />
on your TV and select the appropriate<br />
input on your television.<br />
Turn on your STB power, select a satellite in the “Satellite List” menu, and then enter the antenna setup to<br />
configure exact parameters of this antenna. Select “Single Satellite Search”, then “Auto Scan” to search programs.<br />
2 <strong>RS</strong>-<strong>1933</strong> <strong>User</strong> <strong>Manual</strong>
Basic Operations<br />
1. Turning On<br />
First, turn on the main power by flipping the switch<br />
on the back of the device to the ‘on’ position. When<br />
the device is first used, it will either display no<br />
channels, or the first channel from the default<br />
channel list. If the STB has been set up previously, it<br />
will display the last channel before turning off.<br />
2. Power<br />
When the power is switched ‘on’ on the back of the<br />
STB, pressing the power buttons on the front panel<br />
and remote control will enter standby mode. In<br />
standby, pressing the power button will call back the<br />
unit and play the previous channel. Disconnecting<br />
the unit will end the standby state.<br />
3. Channel Up/Down<br />
In full screen, press the [Up/Down] buttons to switch<br />
between channels.<br />
4. Volume Up/Down<br />
In full screen, press the [Left/Right] buttons to adjust<br />
the volume. This controls the volume output of the<br />
STB.<br />
5. Number Keys<br />
In full screen, use the [Number] keys on your remote<br />
control to input channel number and press the [OK]<br />
button to switch.<br />
6. Mute<br />
Press the [Mute] button to mute the sound on it will<br />
show up on screen. Press the button again to restore<br />
the sound.<br />
7. Pause<br />
In full screen, press the [Pause] button, and the<br />
picture will be paused. The sound on the channel will<br />
continue. Pressing the [Pause] button again will<br />
resume to the current playing picture.<br />
8. Recall<br />
Pressing the [Recall] button will switch to the<br />
previous channel you played.<br />
9. Favorite<br />
In full screen, pressing the [Favorite] key will display<br />
a favorite window on the left side of your screen. If<br />
you have not set any favorite channels, your screen<br />
will display no favorite channels.<br />
In the favorite window, you can move up and down<br />
and select a group by using [Up/Down] keys and<br />
pressing the [OK] button. Once you select a group,<br />
you can scroll through the favorite channels in that<br />
group. Press [Left] to select a different group. Hit the<br />
[Exit] button to return to full screen. <strong>Set</strong>ting up<br />
favorite channels is discussed further.<br />
10. Audio<br />
In full screen, pressing the [Audio] button will open<br />
the audio menu. You can modify the audio track by<br />
pressing [Up/Down] and the audio mode by pressing<br />
[Left/Right]<br />
Mode: Left, Right, Stereo, Mono<br />
<strong>RS</strong>-<strong>1933</strong> <strong>User</strong> <strong>Manual</strong> 3
11. Information<br />
In full screen, pressing the [Info] key will open the<br />
information window. The window displays<br />
parameters of current channel.<br />
12. EPG Cont.<br />
Basic Operations<br />
Pressing the [Red] button in the EPG menu will<br />
display the “Time Bar Menu”. You can press<br />
[Left/Right] to select back/current time/last program<br />
or -0:30/next program or +0:30/2:00/+2:00/last<br />
day/next day. Press [Up/Down] to change channel.<br />
12. EPG<br />
The EPG (Electronic Program guide) helps you<br />
navigate channels through all the possible viewing<br />
options. It supplies information such as channel<br />
listings and starting and ending times for all available<br />
channels. Press the [EPG] key to display [EPG]<br />
screen.<br />
Pressing the [Green] key in EPG menu will open<br />
timer menu. <strong>User</strong> can set time as desired.<br />
Pressing the [OK] button in each item will display<br />
more detailed information. Press the red button to<br />
cancel.<br />
In EPG Menu, press [Exit] to close screen.<br />
13. TV/Radio<br />
In TV mode, pressing the [TV/Radio] button will<br />
switch to radio. In radio mode, pressing the button<br />
again will bring you back to TV mode.<br />
14. Channel List<br />
In full screen, pressing the [OK] button will bring up<br />
the channel list. Press the [Left/Right] keys to change<br />
satellite. Press [Up/Down] keys to highlight and<br />
select channel by pressing the [OK] button.<br />
4 <strong>RS</strong>-<strong>1933</strong> <strong>User</strong> <strong>Manual</strong>
Basic Operations<br />
15. Sleep<br />
This function can set sleep timer. When you set a<br />
sleep timer and the time arrives, the system will<br />
enter standby automatically. You can set the sleep<br />
timer between off and 10/30/60/90/120 minutes.<br />
16. Page Up/ Down<br />
In “Channel List”, the [Page Up] and [Page Down]<br />
keys will skip pages in the list. In full screen, it will<br />
change the satellite directly.<br />
17. Text<br />
Press the [Text] key to open the teletext page on a<br />
channel. If the channel has no teletext information, it<br />
will display no teletext data on the screen.<br />
18. Subtitle<br />
Press the [Subtitle] key in full screen to switch<br />
subtitles on/off.<br />
19. Zoom<br />
The [Zoom] key allows you to magnify a certain area<br />
on the images. Pressing the [Zoom] key again will<br />
enlarge the image 2x, 4x, 6x, 12x, and 16x. Use<br />
up/down left/right to pan the image area you want<br />
to see. Press the exit key to leave zoom mode.<br />
20. Menu<br />
Pressing the [Menu] key will open the menu, exit the<br />
current menu to last menu, or close the window.<br />
21. SAT<br />
Press the [SAT] key in full screen to switch between<br />
the preset satellites. You can program the satellites<br />
from the menu.<br />
22. Exit<br />
Press the [Exit] key to return to the previous menu<br />
or close window.<br />
<strong>RS</strong>-<strong>1933</strong> <strong>User</strong> <strong>Manual</strong> 5
Menu Operations<br />
1. Menu<br />
When you press the [Menu] key, it will enter the<br />
menu screen like shown below.<br />
2.1. Cont.<br />
You can press [Page Up/Down] to implement the<br />
page up and down function. Use [Left/Right] keys to<br />
switch “Program Group” You can press [Menu] or<br />
[Exit] to go back to “Channel Edit” menu. Color Keys<br />
implement corresponding functions in Channel List.<br />
2.2. Favorite<br />
Pressing the [Favorite] key, then [OK] will open up<br />
the favorite menu like shown below.<br />
Use the [Up/Down] keys to switch between the<br />
menu pages “Edit Channel, Installation, System<br />
<strong>Set</strong>up, Tools, and Game, and Record”. Press [OK] or<br />
[Right] to enter “Edit Channel”. If menu lock is on, it<br />
will display a dialogue for the user to key in<br />
password. The default password is “0000”.<br />
2. Edit Channel<br />
Press the [Up/Down] keys to select menu items<br />
among: “TV Channel, Radio Channel, and Delete All”.<br />
Press [Left] or [Exit] key to go back to main menu.<br />
2.1. TV Channel List<br />
When you enter the “Channel List” menu, it will<br />
display like below.<br />
You can highlight between 8 favorite groups by<br />
pressing [Up/Down] and [OK] to make a favorite<br />
mark on the left side of selected Favorite group.<br />
Pressing [OK] again on a marked Favorite group will<br />
remove the mark. After marking, press [Exit] to<br />
return to Channel List and a favorite mark will show<br />
beside the channel.<br />
2.3. Lock<br />
Pressing the [Red] key will enter lock mode.<br />
You can move the highlight using [Up/Down] and<br />
[OK] to preview current program in side preview<br />
window.<br />
6 <strong>RS</strong>-<strong>1933</strong> <strong>User</strong> <strong>Manual</strong>
Menu Operations<br />
2.3. Cont.<br />
Use [Up/Down] to move the highlight, and select<br />
channel with [OK]. A dialogue will display to enter<br />
password. The default password is “0000”. If you<br />
input the correct password a lock will appear beside<br />
the channel. After you save and exit the menu, you<br />
will be requested to input password when watching<br />
a locked channel.<br />
2.4. Skip<br />
Pressing the [Green] key will enter “Skip” mode.<br />
2.5. Cont.<br />
This will allow you to move selected channel to<br />
desired position. Press [OK] key to confirm your<br />
decision.<br />
2.6. Edit<br />
Pressing the [Blue] key will open “Edit” menu.<br />
Pressing [Exit] will exit the “Edit Channel” menu.<br />
Sort:<br />
You can move the highlight using [Up/Down] and<br />
[OK] to make a skip mark on the right side of the<br />
channel. After you save and exit the menu, the<br />
channel will be skipped when change channels in full<br />
screen.<br />
2.5. Move<br />
Pressing the [Yellow] key will enter “Move” mode.<br />
Pressing the [Red] key will open the sort window<br />
like above. There are 4 different ways to sort;<br />
Name(A-Z): Alphabetical order, Name(Z-A): Reverse<br />
alphabetical order, Free/Scramble: Free channels will<br />
appear in the front or sequence and scrambled at<br />
the rear, and Lock: Accumulated locked channels in<br />
the last of TV Channel List.<br />
Edit:<br />
In the “Edit Channel” menu, press the [Green] key,<br />
then use [Up/Down] to move highlight and press<br />
[OK] to open rename window. It shows like below.<br />
Use [Up/Down] to move the highlight and [OK] to<br />
select a channel and make a moving mark.<br />
<strong>RS</strong>-<strong>1933</strong> <strong>User</strong> <strong>Manual</strong> 7
Menu Operations<br />
2.6. Cont.<br />
Pressing the [Red] key will switch capitals on. The<br />
[Green] key can delete the character on the cursor.<br />
The [Yellow] key will save the operation, and the<br />
[Blue] key will cancel the operation.<br />
Delete:<br />
Press the [Blue] key, move the highlight with the<br />
[Up/Down] keys, and select with [OK] to make a<br />
delete mark on the side of selected channel. After<br />
you save and exit the “Edit Channel” menu, the<br />
marked channel will be deleted.<br />
3. Radio Channel List<br />
The operation of the “Radio Channel List” is basically<br />
the same as the “TV Channel List”, with one point<br />
different; Radio has no video information, so it will<br />
always display the logo on the upper right preview<br />
window.<br />
4. Cont.<br />
The warning message will inquire you to delete all<br />
channels or not. If you select “Yes”, all channels will<br />
be deleted. If you select “No”, or press the [Exit] key,<br />
you can exit the function without saving.<br />
4. Delete All<br />
Press the [OK] key, and it will show a warning<br />
message like shown below.<br />
8 <strong>RS</strong>-<strong>1933</strong> <strong>User</strong> <strong>Manual</strong>
1. Installation<br />
Use [Up/Down] keys from the menu and select<br />
“Installation” with the [OK] or [Right] key. If menu<br />
lock is on, it will display a dialogue for the user to<br />
enter password. The default password is “0000”.<br />
Installation<br />
3. Cont.<br />
Press the [Red] key and you will enter the “Edit<br />
Satellite” menu. You can edit the satellite name and<br />
longitude.<br />
Use [Up/Down] to select menu items and the [Left]<br />
or [Exit] key to return to the main menu.<br />
2. Antenna Connection<br />
When you enter the Antenna Connection menu, it<br />
will display like the screen below:<br />
Press the [Green] key and you will enter the “Add<br />
Satellite” menu like shown below:<br />
Press [Left/Right] to select LNB option between<br />
“Fixed Antenna” and “Motor Antenna.”<br />
3. Satellite List<br />
When you enter the “Satellite List” menu, it will<br />
display like the screen below:<br />
Press the [Yellow] key, and you will be asked “Are<br />
you sure to delete” Select “Yes” to delete the<br />
satellite and “No” to cancel the operation.<br />
<strong>RS</strong>-<strong>1933</strong> <strong>User</strong> <strong>Manual</strong> 9
Installation<br />
4. Antenna <strong>Set</strong>up<br />
Fixed Antenna:<br />
If you select “Fixed Antenna” in “Antenna<br />
Connection” menu, it will display like below:<br />
Satellite: In this item, press [Left/Right] keys will<br />
switch satellites and [OK] will enter satellite list for<br />
you to select directly.<br />
LNB Freq: In this item, pressing [Left/Right] keys will<br />
select parameter. Options are: 5150/5750/5950/<br />
9750/10000/10050/10450/10600/10700/10750/<br />
11250/11300/5150-5750/5750-5150/Universal<br />
(9750-10600)<br />
DiSEqC1.0: You can use [Left/Right] keys to switch<br />
options between disable/LNB1/LNB2/LNB3/LNB4.<br />
22K:You can use the [Left/Right] keys to switch on<br />
and off. When this item is switched on, receiver will<br />
receive TV and radio input from 22K port. If item is<br />
switched off, receiver will receive information from<br />
0k port.<br />
Motor Antenna:<br />
If you select “Motor Antenna” in “Antenna<br />
Connection” menu, it will display like below:<br />
4. Motor Antenna Cont.<br />
LNB Type: 5150/5750/5950/9750/10000/10050/<br />
10450/10600/10700/10750/11250/11300/5150-<br />
5750/5750-5150/Universal(9750-10600)<br />
Motor Type: DiSEqC1.2/USALS<br />
Local Longitude/Local Latitude: If you select USALS,<br />
this option is available. Press [OK] and use [Number]<br />
keys to input.<br />
Delete All: This option will delete all satellite<br />
positions. It will display an “Are you sure...” dialogue.<br />
If you select “Yes”, it will delete all positions. If “No”,<br />
you will cancel the operation. This item is only<br />
available in “DiSEqC1.2” mode.<br />
Motor <strong>Set</strong>ting: If you select “DiSEqC 1.2”, Local<br />
longitude/Latitude is not available. It will show up<br />
like the screen below.<br />
Use [Left/Right] keys and [OK] key to change satellite<br />
or responder.<br />
Position No.&Save: You can use [Left/Right] or<br />
[Number] keys to select input position number.<br />
Go to X:Press [OK] to open list. You can select “go to<br />
X” or “go to reference”.<br />
After you select “Satellite” and “Position No.&Save”,<br />
you can move the highlight to West/Save/East line<br />
and use [Left/Right] to move dish and press [OK] to<br />
save the position. Move the highlight to<br />
“Recalculation” and press [OK] to recalculate.<br />
<strong>Set</strong> the satellite’s local longitude/latitude. USALS can<br />
move dish automatically. Move the highlight to<br />
“Motor <strong>Set</strong>ting” and press [OK] key, it will show the<br />
screen like on the following page:<br />
10 <strong>RS</strong>-<strong>1933</strong> <strong>User</strong> <strong>Manual</strong>
4. Motor Antenna Cont.<br />
Switching satellite can move the dish to the right<br />
place.<br />
Limit <strong>Set</strong>up:<br />
Installation<br />
5. Single Satellite Search Cont.<br />
Press the [OK] key otherwise to select directly.<br />
FTA Only: Press [Left/Right] key to scan all channels<br />
or scan free channels. If you select “Yes”, it will scan<br />
free channels only.<br />
Scan Channel: Press [Left/Right] keys to select scan<br />
TV + radio channels, or only TV/radio channels.<br />
Network Search: Press [Left/Right] keys to select<br />
network search or not. You can only do network scan<br />
when you select “Preset Scan”.<br />
Scan Mode: You can select “Auto Scan” to blind scan<br />
or select “Preset Scan” to scan all preset TPs.<br />
Search: Move highlight to “Search” and press [OK] to<br />
start scanning. The next screen will display the<br />
process and the current scanning channel.<br />
In the “Single Search” menu, press [Exit] key to draw<br />
back from scanning and meanwhile saving the<br />
current value.<br />
6. Multi Satellite Search<br />
When you enter the “Multi Search” menu, it will<br />
display like the screen below:<br />
When you set “Limit <strong>Set</strong>up” to “West Limit/East<br />
Limit”, you can move the highlight to “Limit <strong>Set</strong>up”<br />
Line and move the dish to east or west by pressing<br />
[Left/Right] keys manually. When you are moving<br />
the target place, press [OK] key to save the point.<br />
5. Single Satellite Search<br />
When you enter “Single Search” menu, it will display<br />
like the screen below:<br />
Satellite: In this item, press [Left/Right] keys to select<br />
satellite to scan.<br />
Satellite: In this item, press [OK] key to see the<br />
selected satellite. The system will use DiSEqC1.0/<br />
DiSEqC1.2/USALS function to search satellite and<br />
scan channels. It will scan all the satellites displaying<br />
in the bottom box.<br />
FTA Only: Press [Left/Right] keys to select “scan all<br />
channels” or “scan free channels”. If you select “Yes”,<br />
it will scan free channels only.<br />
Scan Channel: Press [Left/Right] keys to select scan<br />
TV + Radio Channels, or just TV/Radio channels.<br />
Network Search: Press [Left/Right] to select network<br />
search or not.<br />
<strong>RS</strong>-<strong>1933</strong> <strong>User</strong> <strong>Manual</strong> 11
6. Multi Satellite Search Cont.<br />
Scan Mode: You can select “Auto Scan” to blind scan<br />
or select “Preset Scan” to scan all preset TPs.<br />
Search: Move highlight to “Search” on press [OK] to<br />
start scanning.<br />
In “Multi Search” menu, press [Exit] key to draw back<br />
from scanning while saving the current value.<br />
7. TP List<br />
When you enter to “TP List” menu, it will display like<br />
the screen below:<br />
7. TP List Cont.<br />
Installation<br />
Pressing the [Yellow] key will open a dialogue asking<br />
you to confirm whether to delete current TP. Select<br />
“Yes” and you will delete the highlighted channel.<br />
Select “No” to cancel the operation.<br />
Use the [Left/Right] keys to switch satellite. Press the<br />
[Red] key to open “Edit TP” menu. <strong>User</strong> can edit TP<br />
info. Frequency:”3000~13450 MHz”, Symbol Rate:<br />
“1000~45000Ks/s”.<br />
Pressing the [Blue] key will display a dialogue box.<br />
You can select “FTA Only, Scan Channel, Network<br />
Search” items, then move highlight to “Yes” button<br />
and press [OK] to begin search.<br />
Press the [Green] key to open “Add TP” menu. <strong>User</strong><br />
can add a new TP.<br />
12 <strong>RS</strong>-<strong>1933</strong> <strong>User</strong> <strong>Manual</strong>
System <strong>Set</strong>up<br />
1. System <strong>Set</strong>up<br />
When you enter “System <strong>Set</strong>up” menu, the screen<br />
will display like below:<br />
Use the [Up/Down] keys to select pages among:<br />
“Edit Channel, Installation, System, Tools, Game, and<br />
Record”. Press [OK] or [Right] key to enter “System<br />
<strong>Set</strong>up”. If menu lock is on, it will display a dialogue<br />
for the user to enter password. The default<br />
password is “0000” Use [Up/Down] keys to select<br />
menu items among: “TV Channel, Radio Channel and<br />
Delete All.” Use [Left] or [Exit] key to go back to main<br />
menu.<br />
2. Language<br />
When you enter the “Language” menu, it will display<br />
like the screen below:<br />
2. Language Cont.<br />
First Audio: Some channels have more than one<br />
audio language for choosing. By this function you can<br />
set the audio for this channel. If the playing channel<br />
has the same audio as the “First Audio” you set,<br />
system will play this audio language by default. If the<br />
channel does not have the suited audio language, the<br />
system will compare automatically with second audio<br />
language.<br />
Second Audio: If the channel has no corresponding<br />
audio with “First Audio”, but has it for “Second<br />
Audio” system will play the second audio language as<br />
default. If no audio language corresponds with the<br />
“Second Audio”, then the default language of the<br />
current channel will be played automatically.<br />
Teletext: You can set teletext language. If the<br />
streams have this language you will see the teletext<br />
in the language you set.<br />
Pressing the [Exit] key will draw back from<br />
“Language” menu.<br />
3. TV System<br />
When you enter the “TV System” menu, you will see<br />
the screen like below:<br />
Language: Use [Left/Right] keys to select menu<br />
languages. The selection on languages include:<br />
English, Polish, German, Russian, Arabic, Portuguese,<br />
Turkish, Spanish, Polish, and Italian.<br />
Video Resolution: This option is for switching the<br />
outputting video resolution. <strong>High</strong>light and use the<br />
Left/Right keys to switch video resolution By Source/<br />
By Native/576i/ 576P/720P_50/720P_60/1080i_25/<br />
1080i_30. This effect is equal to pressing the Size key<br />
in full screen. By source means system will set the<br />
resolution according to the program it is playing. By<br />
Native means the system will be set according to the<br />
TV’s maximum supported resolution.<br />
<strong>RS</strong>-<strong>1933</strong> <strong>User</strong> <strong>Manual</strong> 13
3. TV System Cont.<br />
Aspect Mode: This option is for switching the screen<br />
aspect ratio mode. The following options are<br />
provided: 4:3 PS/4:3 LB/16:9/Auto. You can press the<br />
[Left/Right] keys to select each mode. “16:9” will<br />
provide a pillar box mode, which means the user<br />
uses a 16:9 display but sees a full 4:3 picture. The<br />
system will force press wide screen picture to be<br />
narrow with black bands on the left and right side.<br />
“Auto” will not do any system aspect translation. 4:3<br />
and 16:9 aspects work best on the appropriate<br />
displays.<br />
RF System/Channel: These are for the user to set the<br />
TV RF modulator output signal VHF/UHF channel and<br />
TV system mode. If your TV is too old to support<br />
CVBS/YPbPr/HDMI, you can use RF cable to connect<br />
STB’s TV RF output port to TV Antenna input port.<br />
HDMI Video Out: This is for setting the HDMI video<br />
output mode. It has the following options: RGB-<br />
Normal, RGB-Expand, YCbCr4:4:4 and YCbYr4:2:2.<br />
You can press [Left/Right] keys to select each mode<br />
circularly.<br />
Digital Audio Out: This is for setting both the SPDIF<br />
and HDMI’s digital output mode. It has the options<br />
LPCM Out, BS Out, and Auto. You can use the<br />
[Left/Right] keys to select each mode. “LPCM Out”<br />
means system will decode no matter AC3 or PCM<br />
audio track data to be LPCM, digital audio decoder<br />
or HDMI TV will get LPCM digital audio data. “BS<br />
Out” means system won’t do AC3 decode just output<br />
AC3 RAW data to SPDIF and HDMI. “Auto” means<br />
system will detect which the connected HDMI TV can<br />
decode and then output that data. If HDMI TV can<br />
decode SC3, system will just output RAW data, if<br />
HDMI TV can decode LPCM only, the system will just<br />
decode AC3 or LPCM to be LPCM and then output.<br />
Press [Exit] to draw back from TV System Menu.<br />
4. Local Time <strong>Set</strong>ting<br />
System <strong>Set</strong>up<br />
GMT Usage: This item is used for opening the usage<br />
of GMT. You can press the [Left/Right] keys to switch<br />
on and off.<br />
GMT Offset: This item is only valid when the setting<br />
of “GMT Usage” is on. You can press [Left/Right] keys<br />
to switch “GMT Offset” value, with the range -12:00<br />
~ + 12:00 increase each half hour progressively.<br />
Summer Time: This item only valid when the setting<br />
of “GMT Usage” on. When “Summer Time: is on, it<br />
will add one hour to the time.<br />
Date/Time: These items are valid only when the<br />
setting of GMT Usage is off. You can press the<br />
[Left/Right] keys moving the highlight and use the<br />
number keys to input directly. If the current channel<br />
provides the correct time information, you will see<br />
the current time when you enter the “Time” menu. If<br />
the channel does not provide time information, you<br />
have to input it manually.<br />
Use the [Exit] key to draw back from time menu.<br />
5. Timer <strong>Set</strong>ting<br />
Select “Timer <strong>Set</strong>ting item and press [OK] key to<br />
enter “Timer List” menu.<br />
14 <strong>RS</strong>-<strong>1933</strong> <strong>User</strong> <strong>Manual</strong>
System <strong>Set</strong>up<br />
5. Timer <strong>Set</strong>ting Cont.<br />
You can press [Up/Down] keys to select a timer, then<br />
the [Enter] key to open timer menu.<br />
6. Parental Lock Cont.<br />
Current time information will display on the first<br />
column. If the current time is incorrect, please<br />
modify the time information in the “Time” item.<br />
Timer Mode: The modes to set the timer include<br />
“Off, Once, and Daily.”<br />
Wakeup Channel: Press [OK] key to enter channel list<br />
and select channel that you want to set.<br />
Wakeup Date: Use the [Number] keys to input your<br />
wakeup date.<br />
On Time: Use [Number] keys to input your wakeup<br />
time. Once the time is up, no matter what state the<br />
system is in, it will automatically switch to the<br />
channel you want and start to play.<br />
Duration: After you set a time for “Duration” item,<br />
once the time is up, the system will automatically<br />
switch to standby mode. If you do not want to work<br />
this function, set the duration to 00:00.<br />
Move the highlight to “Save” button and press [OK]<br />
key to save timer. Select “Cancel” or press [Exit] key<br />
to cancel the operation.<br />
6. Parental Lock<br />
In the “Parental Lock” line, press the [OK] key and a<br />
dialogue will ask you to input the password. Default<br />
password is “0000”. When you input the correct<br />
password, you will see a screen like shown:<br />
Menu Lock: This is for determining that when users<br />
wish to enter “Edit Channel/Installation/Tools”<br />
menu, whether you have to enter a password or not.<br />
If the setting of “Menu Lock” is set “Yes”, the user<br />
will have to key in the password. If set “No”, it will<br />
unlock.<br />
Channel Lock: Determines whether the user wishes<br />
to play the locked channels by inputting password or<br />
not. If the setting is set to “Yes”, channels with the<br />
lock mark will display a dialogue on the screen and<br />
ask for password. If this setting is set to “No”, the<br />
lock function will be disabled.<br />
New Password: This is used for revising password.<br />
You can input the new password in this item by using<br />
the [Number] keys. After you fill the 4 digital<br />
numbers, the highlight will auto skip to “Confirm<br />
Password” and ask you to input the password again.<br />
If the password is correct, the screen will display a<br />
message of “Saving Data, Please Wait…” After you<br />
finish saving and draw back to “System <strong>Set</strong>up” menu,<br />
the revising is complete.<br />
Use the [Exit] key to draw back “Parental Lock”<br />
menu.<br />
7. OSD <strong>Set</strong>ting<br />
When you enter “OSD <strong>Set</strong>ting” menu, you will see a<br />
screen like on the following page.<br />
<strong>RS</strong>-<strong>1933</strong> <strong>User</strong> <strong>Manual</strong> 15
System <strong>Set</strong>up<br />
7. OSD <strong>Set</strong>ting Cont.<br />
8. Favorite Cont.<br />
OSD Timeout: When you switch channels in full<br />
screen, it will show some information about the<br />
current channel on the lower part of the screen. To<br />
set the duration of the information that shows on<br />
the screen, you can press the [Left/Right] keys to<br />
select the time. The range of duration is 1 second ~<br />
10 seconds.<br />
OSD Transparency: You can press [Left/Right] keys to<br />
select the values. There are 5 levels of transparency:<br />
No (no transparency function), 10%, 20%, 30%, and<br />
40%.<br />
Press [Exit] key to draw back from the “OSD <strong>Set</strong>ting”<br />
menu.<br />
8. Favorite<br />
When you enter the “Favorite” menu, it will display<br />
like the screen below:<br />
Pressing the [Red] key will switch to capital or not.<br />
Pressing the [Green] key will delete the character.<br />
The [Yellow] key will save the operation. The [Blue]<br />
key will cancel the operation.<br />
9. Other<br />
LNB Power: You can set this option to “On” or “Off”.<br />
If the setting is set to “On” the receiver will supply<br />
power to the satellite antenna. “Off” will not supply<br />
power to the antenna.<br />
Channel Play Type: This can set the channel play<br />
type. You can set the playing channels as “Free,<br />
Scrambled, or All” For example, if you select “Free”,<br />
all scrambled channels will be skipped when you<br />
change channels by using the [Up/Down] keys.<br />
Press [Exit] key to draw back from “Other” menu.<br />
When you press the [OK] key, you can rename the<br />
favorite group’s name. It will display a dialogue as<br />
shown:<br />
16 <strong>RS</strong>-<strong>1933</strong> <strong>User</strong> <strong>Manual</strong>
1. Tools<br />
When you enter the “Tools” menu, it will display like<br />
the screen below:<br />
3. Factory <strong>Set</strong>ting Cont.<br />
Tools<br />
If you select “Yes”, all the revised parameters of the<br />
receiver will reset to the default value. Please use<br />
this function carefully. If you select “No” or press<br />
[Exit], you can draw back without saving.<br />
Use the [Up/Down] keys to select “Tools” from the<br />
menu page options. Press [OK] or the [Right] key to<br />
enter “Tools”. If the menu lock is on, a dialogue will<br />
display for user to enter password. The default<br />
password is “0000”. Press [Up/Down] to select menu<br />
items. Press [Left] or [Exit] key to return to the main<br />
menu.<br />
2. Information<br />
When you enter the “Information” menu, you will<br />
see the screen like below:<br />
4. Upgrade By USB<br />
Open “Upgrade By USB” menu from “Tools” It will<br />
display like below:<br />
The screen displays the items as “BootLoader, HDCP,<br />
MAINCODE, LOGO, DefaultDB, <strong>User</strong>DB” information.<br />
Press the [Exit] key to draw back from the “Tools”<br />
menu.<br />
3. Factory <strong>Set</strong>ting<br />
When you press [OK] key in the “Factory <strong>Set</strong>ting”<br />
item, it will show a warning message inquiring you<br />
“The operation will load default and erase all the<br />
channels that user added. Continue”<br />
Upgrade Mode has only 1 option: “All Code”, which<br />
means that you can only upgrade the whole file to<br />
your STB’s flash. Please rename your new fw file<br />
name to be the format “all*.bin”, * means any other<br />
string is acceptable, but the initial 3 letters must be<br />
“all” and the extension name must be “.bin”. Then<br />
press OK key to start upgrade by USB.<br />
5. Common Interface<br />
Pressing [OK] key when you highlight “Common<br />
Interface” will enter the CAM card information Menu<br />
select as shown:<br />
<strong>RS</strong>-<strong>1933</strong> <strong>User</strong> <strong>Manual</strong> 17
Tools<br />
5. Common Interface Cont.<br />
6. USB Cont.<br />
USB menu will be disabled when no USB device is<br />
plugged. Media Play List will not be saved when USB<br />
plug out, stand by, or power off. The USB will display<br />
as shown below:<br />
Use the [Up/Down] keys to select slot 1 or slot 2.<br />
Press [OK] key again to enter the card information.<br />
You can preview the picture at the top right corner if<br />
the scroll bar is on the picture files (JPG,BMP), and a<br />
logo will show when on MP3 files. Move the scroll<br />
bar with the [Up/Down] or [Page Up/Down] keys. Go<br />
into subdirectory when you press the [OK] key in the<br />
file directory, play the selected file when scroll bar is<br />
on the file, and you will automatically return to the<br />
In the CAM card information menu, you can select<br />
each item by pressing [Up/Down] keys and [OK] to<br />
USB menu after play is over.<br />
Color key operation:<br />
enter. This information menu format and string is<br />
according to CI card itself. So, a different card may<br />
Green key: Put the selected file to play list when you<br />
have a different menu. Entering “Change CA PIN” can<br />
press the [Green] key, meanwhile showing “Add to<br />
change the pin code of the CA card in this CAM card.<br />
Play List”. This display will disappear after a short<br />
duration, and the file will be added into MP3play list<br />
6. USB<br />
if it is one MP3 file, and to image play file for one<br />
USB menu will be automatically shown when you<br />
image file.<br />
insert U disk to USB port except “Auto scan, Multi<br />
Yellow key: All the MP3 files in the current directory<br />
Picture, or Upgrade”.<br />
are added into MP3 play list by [Yellow key], and<br />
screen will display “Add to Play List”. Display will<br />
disappear after a short duration.<br />
Blue key: All the image files in current directory are<br />
added into image play list by [Blue] key, and screen<br />
will display “Add to Play List”. The display will<br />
disappear after a short duration.<br />
18 <strong>RS</strong>-<strong>1933</strong> <strong>User</strong> <strong>Manual</strong>
6. USB Cont.<br />
Red key: One operation window will show: “please<br />
select play list”. You can select Music or Image play<br />
by [Left/Right] keys, and open the selected play list<br />
by pressing the [OK] key. If there is no file, it will<br />
display “This type of play list does not exist”<br />
Music play operation:<br />
If you select music, and MP3 play list menu is<br />
activated, it will display like below:<br />
6. USB Cont.<br />
Tools<br />
Red key: Play the first music file by pressing the Red<br />
key. Play the file selected with scroll bar with [OK].<br />
Green key: Change play mode with [Green] key. Play<br />
mode includes: Sequential, Random, Single repeat,<br />
All repeat.<br />
Yellow key: Delete the selected file with [Yellow] key.<br />
Blue key: Delete all the files with [Blue] key. A<br />
dialogue will display asking “Are you sure to save”<br />
before the operation. If you select “Yes”, all files will<br />
be deleted and the play list window will close.<br />
After you begin to play MP3, it will show the MP3<br />
info like pictured above. Press the [Pause] key to<br />
pause. Press the [Play] key to play current track..<br />
Press the [Stop] key to stop and return time to<br />
00:00. Press the [Previous] button once to skip to<br />
beginning of track, or twice to skip to previous track.<br />
Press the [Next] key to go to next file. Press the<br />
[Forward] key to go forward 20 seconds. Press the<br />
[Back] key to go back. Jump to beginning or end if<br />
there is less than 20 seconds to the beginning or end<br />
of the music file. Return to USB list when play is over<br />
or press the [Exit] key.<br />
Image view operation:<br />
If the image view function is selected, a menu will<br />
display like shown below:<br />
Red key: Image browsing starts after you press the<br />
[Red] button, or play selected image with [OK] key.<br />
You will return after view is over or press [Exit] key.<br />
<strong>RS</strong>-<strong>1933</strong> <strong>User</strong> <strong>Manual</strong> 19
6. USB Cont.<br />
Yellow key: Delete selected image with the [Yellow]<br />
key<br />
Blue key: Pressing the [Blue] key will delete all the<br />
image files in play list. The system will display a<br />
dialogue to remind you “Are you sure” before the<br />
operation. If you select “Yes” all files will be deleted.<br />
“No” will cancel the operation.<br />
Red Key: The key will open setup menu like below:<br />
Tools<br />
Use the [Up/Down] keys to move the scroll bar, and<br />
[Left/Right] keys to switch options.<br />
Size: Real: Show the real size if the image is less than<br />
full screen size.<br />
Full: Full screen display. Full is default.<br />
Time: 0 ~ 10 seconds. 2 seconds is default.<br />
Move the scroll bar to the “Save” icon and press [OK]<br />
to save. Select [Exit] and [OK] to exit without saving.<br />
When in slideshow, press [Left/Right] to go to<br />
previous/next image.<br />
20 <strong>RS</strong>-<strong>1933</strong> <strong>User</strong> <strong>Manual</strong>
1. Game<br />
When you enter the “Game” menu, you will see two<br />
games like below:<br />
3. Sudoku<br />
Game<br />
The two games you can play include Othello and<br />
Sudoku.<br />
2. Othello<br />
Select “New Game” with the highlight and press [OK]<br />
to begin. Use the [Exit] key to return to option<br />
select. <strong>High</strong>light and select “Solve” to show answers<br />
for the current puzzle. You can set the difficulty by<br />
selecting “<strong>Set</strong>up” and using the [Left/Right] or [OK]<br />
key to switch between 3 classes. Select “Cancel” or<br />
use the [OK] key to quit game.<br />
Move highlight onto “<strong>Set</strong>up” and use [Left/Right]<br />
keys to select the game level difficulty. Move<br />
highlight to “Start” and press [OK] key to start the<br />
game. Move highlight to “cancel” and press [OK] to<br />
draw back from the game. Use the [Left/Right] and<br />
[Up/Down] keys to guide the chessman. Press [OK]<br />
to set chessman. Press the [Exit] key to quit game.<br />
<strong>RS</strong>-<strong>1933</strong> <strong>User</strong> <strong>Manual</strong> 21
REC<br />
1. REC<br />
When you enter the “REC” menu, it will display like<br />
the screen below:<br />
2. Record Manager Cont.<br />
Rename:<br />
Use the [Up/Down] keys to select “REC” from the<br />
menu pages. Press [OK] or [Right] key to enter<br />
“REC”. If menu lock is on, a dialogue will display for<br />
user to key in password. The default password is<br />
“0000”. Use the [Up/Down] and [OK] keys to select<br />
menu items. Press [Left] or [Exit] key to go back to<br />
main menu.<br />
2. Record Manager<br />
Press the [Red] key to rename the highlighted<br />
program. It will display a “Rename” window. You can<br />
press the [Red] key again to switch to capital letters.<br />
The [Blue] key will delete character. [Yellow] key will<br />
save the operation. [Blue] key will cancel the<br />
modification.<br />
3. Storage Information<br />
Move the highlight to “Storage Information” and<br />
press the [OK] key. It will display “Storage<br />
Information” like shown below:<br />
Lock: Press the [Green] key to lock a program on<br />
HDD. If you want to cancel lock, press the [Green]<br />
key again. You will be asked to enter password. Once<br />
you enter the correct password, it will cancel the<br />
lock feature for the program.<br />
Delete: Press the [Blue] key to make a delete mark<br />
next to the highlighted program. If you want to<br />
cancel the delete operation, press the [Blue] key<br />
again. When you exit “Record Manager” menu, the<br />
delete mark will be deleted automatically.<br />
4. HDD Format<br />
Press the [Yellow] key under “Storage Information”<br />
to open “Format” window. Use the [Left/Right] keys<br />
to select disk mode and select “OK’ to format. Select<br />
“Cancel” or press the [Exit] key to cancel the<br />
operation.<br />
22 <strong>RS</strong>-<strong>1933</strong> <strong>User</strong> <strong>Manual</strong>
REC<br />
4. HDD Format Cont.<br />
5. DVR Configuration Cont.<br />
You can use [Left/Right] keys to move the slide. You<br />
cannot exceed the current time. Press [OK] key to<br />
play from the current point selected. You can also<br />
use the [Pause] and [Previous/Next] keys. Time<br />
Shifting is only available when USB HDD is connected<br />
to system and read/write speed is high enough.<br />
5. DVR Configuration<br />
Move the highlight to “DVR Configuration” and press<br />
[OK] key. It will display as shown below:<br />
Press the [Stop] key the first time to end the playing<br />
mode. Pressing [Stop] a second time will stop the<br />
recording.<br />
6. Jump<br />
Move the highlight to “Jump” and press the [OK] key.<br />
It will display “Jump” as shown below:<br />
Use the Left/Right keys to switch timeshift “On/Off”.<br />
If timeshift is set “On”, it will timeshift the program<br />
when the user watches TV. Press [Info] key to see<br />
timeshift OSD like shown below:<br />
Use the [Left/Right] keys to switch the jump time.<br />
The options are 30s, 1m, 5, 10m, and 30m. When you<br />
play the recorded program, use the [Previous/Next]<br />
keys to jump programs.<br />
<strong>RS</strong>-<strong>1933</strong> <strong>User</strong> <strong>Manual</strong> 23
Warranty<br />
Warranty<br />
Manhattan-digital warrants this product Manhattan <strong>RS</strong>-<strong>1933</strong> satellite receiver. Free from defects in<br />
workmanship and materials for 1 year for the date of the original purchase. During the warranty<br />
period, Manhattan-digital will provide free of charge both parts and labor to correct defects in the<br />
workmanship and material,<br />
This warranty does not cover damage due to lightning, power surges, fire, flood, or other acts of<br />
God. Warranty does not cover abnormal conditions, improper use, improper installation or any<br />
modification done to its hardware and software. Warranty is void if any repair is done without<br />
proper authority or by an authorized service center by Manhattan-digital.<br />
Manhattan-digital liability under this warranty is limited to servicing of Manhattan <strong>RS</strong>-<strong>1933</strong> satellite<br />
receiver, if returned to a Manhattan-digital’s authorized service center under a Return<br />
Authorization number given by service center. Freight must be prepaid in compliance with repair<br />
warranty.<br />
Manhattan-digital authorized service center is;<br />
Grandview Satellite<br />
3859 E. Grandview Rd.<br />
Phoenix, AZ 85032<br />
twitulski@cox.net<br />
twitulski@manhattan-digital.net<br />
Manufactured under license from Dolby Laboratories. Dolby and<br />
the double-D symbol are trademarks of Dolby Laboratories.<br />
24 <strong>RS</strong>-<strong>1933</strong> <strong>User</strong> <strong>Manual</strong>
Notes:<br />
<strong>RS</strong>-<strong>1933</strong> <strong>User</strong> <strong>Manual</strong> 25