2.1.3 Port-based VLAN - VOLKTEK Ethernet & fiber
2.1.3 Port-based VLAN - VOLKTEK Ethernet & fiber
2.1.3 Port-based VLAN - VOLKTEK Ethernet & fiber

You also want an ePaper? Increase the reach of your titles
YUMPU automatically turns print PDFs into web optimized ePapers that Google loves.
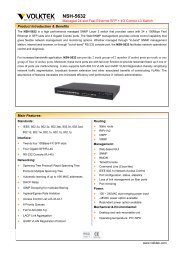
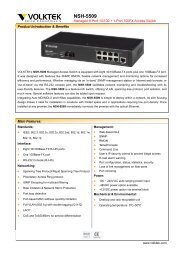
8-<strong>Port</strong> Gigabit Web Smart Switch<br />
NSH-9308P<br />
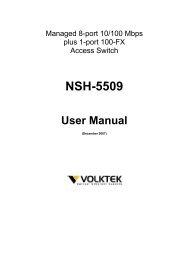
User Manual<br />
Version: 2.3<br />
September 2007<br />
1
TABLE OF CONTENT<br />
1 INTRODUCTION ...........................................................................................................................................................3<br />
1.1 MAIN FEATURES .........................................................................................................................................................4<br />
1.2 START TO MANAGE THIS SWITCH................................................................................................................................5<br />
2 WEB MANAGEMENT...................................................................................................................................................6<br />
2.1 CONFIGURATIONS........................................................................................................................................................7<br />
2.1.1 System information.............................................................................................................................................7<br />
2.1.2 <strong>Port</strong>s...................................................................................................................................................................9<br />
<strong>2.1.3</strong> <strong>Port</strong>-<strong>based</strong> <strong>VLAN</strong> .............................................................................................................................................10<br />
2.1.4 Tag-<strong>based</strong> <strong>VLAN</strong>...............................................................................................................................................11<br />
2.1.5 <strong>Port</strong> Trunking ...................................................................................................................................................13<br />
2.1.6 <strong>Port</strong> Mirroring..................................................................................................................................................14<br />
2.1.7 Quality of Service.............................................................................................................................................15<br />
2.1.8 Storm Control ...................................................................................................................................................17<br />
2.1.9 LACP................................................................................................................................................................18<br />
2.1.10 RSTP...............................................................................................................................................................19<br />
2.1.11 IGMP..............................................................................................................................................................21<br />
2.1.12 802.1x.............................................................................................................................................................22<br />
2.1.13 PoE status and command operation...............................................................................................................23<br />
2.2 MONITORING ............................................................................................................................................................24<br />
2.2.1. <strong>Port</strong> Statistics ..................................................................................................................................................24<br />
2.2.2 Detailed <strong>Port</strong> Statistic ......................................................................................................................................24<br />
2.2.3 LACP Status .....................................................................................................................................................25<br />
2.2.4 RSTP Status ......................................................................................................................................................25<br />
2.2.5 IGMP Status .....................................................................................................................................................26<br />
2.2.6 Ping ..................................................................................................................................................................26<br />
2.3 MAINTENANCE..........................................................................................................................................................27<br />
2.3.1 Warm Reboot ....................................................................................................................................................27<br />
2.3.2 Factory Default ................................................................................................................................................27<br />
2.3.3 Firmware Update .............................................................................................................................................27<br />
2.3.4 Config File .......................................................................................................................................................28<br />
3.0 TERMINAL MODE MANAGEMENT ....................................................................................................................29<br />
CONTACT INFORMATION ..........................................................................................................................................31<br />
2
1 Introduction<br />
The NSH-9308P Switch is a high performance web-smart managed switch, which provides up to 8<br />
10/100/1000Mbps copper <strong>Ethernet</strong> ports. This device provides a great flexibility for nowadays variety<br />
of network application at lower cost. User doesn’t have to learn many sophisticated management<br />
function which are usually shown in SNMP switch, but just need to learn some simple setting<br />
procedures through either out-of-band RS232 port or in-band <strong>Ethernet</strong> port. However, some<br />
advanced and important function such as Tag-<strong>based</strong> <strong>VLAN</strong>, Trunking, RSTP and IGMP are also<br />
supported in this Switch. This means, user doesn’t have to pay high cost as tradition layer 2 SNMP<br />
switches, when he wants to get advanced function to meet requirement of network application. This<br />
makes the Switch very suitable for small or medium size company to build up simple network at<br />
beginning phase with lower cost. Besides, an optional long-ear accessory also makes it possible to<br />
operate in the rack mount environment.<br />
The NSH-9308P Switch was designed to operate at non-blocking and line speed performance,<br />
auto-negotiation and auto-MDI/MDIX function are also supported on all 10/100/1000Mbps RJ-45<br />
Gigabit copper ports. No matter running with half or full duplex mode, these function make user easy<br />
to use, and reduce the matching effort between straight and cross-over cable issues.<br />
The NSH-9308P Switch supports both port-<strong>based</strong> and 802.1Q (tag-<strong>based</strong>) <strong>VLAN</strong> to catch-up the<br />
application needed. To increase bandwidth application, it supports up to 4 trunk groups with<br />
maximum 8 ports on one trunk, and these trunk ports are with fair-over function to provide redundant<br />
link when one or more trunk ports were malfunction. In addition, Rapid STP (RSTP) and multicast<br />
application IGMP were also supported at the software function. A reset button was provided to make<br />
user easy to go back to default settings.<br />
3
1.1 Main Features<br />
This switch provides the following main features:<br />
• Non-blocking, line speed, store-and-forward<br />
• Support jumbo frame, Max. packet length 9k bytes<br />
• Auto-Negotiation and Auto-MDI/MDIX on all 10/100/1000Mbps copper ports<br />
• 8 10/100/1000Mbps RJ-45 copper ports<br />
• 144K bytes packet buffer, 8K MAC entries<br />
• Support port-<strong>based</strong> <strong>VLAN</strong> and tag-<strong>based</strong> (802.1Q) <strong>VLAN</strong><br />
• Support RSTP, IGMP, DHCP<br />
• Support “relocate port number” on “ http operation “<br />
• <strong>Port</strong> trunk with fail-over capability<br />
• Support flow control for both full/half duplex operation modes<br />
• Support Multicast storm, Broadcast Storm control as well as Flooding Control<br />
• Support port mirroring<br />
• LED display for each port to show link and activity status<br />
• Desktop and optional Rack mountable kit<br />
• Reset to default “ push button “ and field code upgradeable<br />
4
1.2 Start to Manage This Switch<br />
User can start to manage this switch by ether web mode through <strong>Ethernet</strong> port or terminal mode<br />
through RS232 port.<br />
1.2.1 Web mode default settings are:<br />
Default IP Address: 192.168.223.100<br />
Default IP mask: 255.255.255.0<br />
Default gateway: 192.168.223.254<br />
Default Password: no preset value<br />
1.2.2 Terminal mode default settings are:<br />
Baud rate: 115,200<br />
Data size: 8bits<br />
Parity: None<br />
Stop bits: 1<br />
Flow Control: None<br />
Once terminal is connected, the basic operation rules are shown below:<br />
Press “ “ to find root operation page, then choose command by typing little alphabets.<br />
After enter command page, press “ “ to find command parameters and format, further more, type<br />
“ command “ to get explanation.<br />
Type “ up “ or “ / “ to go back to previous page.<br />
5
2 Web management<br />
After login through Web Browser, the switch’s main management page will show up. The left part on<br />
the page provides the function menus, while the right part provides the individual configuration value<br />
or system parameters’ value. Function manus are divided into three categories, they are<br />
Configuration, Monitoring and Maintenance, and all functions are shown briefly below.<br />
Configuration:<br />
System – system values, such as H/W, F/W version, IP, MAC address…etc<br />
<strong>Port</strong>s – port status and configure port parameters<br />
<strong>Port</strong>-<strong>based</strong> <strong>VLAN</strong> – to setup the port-<strong>based</strong> <strong>VLAN</strong><br />
Tag-<strong>based</strong> <strong>VLAN</strong> – to setup the tag-<strong>based</strong> <strong>VLAN</strong><br />
<strong>Port</strong> Trunking – to setup the trunk function<br />
<strong>Port</strong> Mirroring – to setup the port mirroring function<br />
Quality of Service – to set the Quality of Service function<br />
Storm Control – to setup storm limitation parameter<br />
LACP – to setup LACP parameter<br />
RSTP – to setup RSTP parameter<br />
IGMP – to setup IGMP parameter<br />
802.1x – to setup 802.1x parameter<br />
Monitoring:<br />
<strong>Port</strong> Statistics – display general statistic traffic information on each ports<br />
Detailed <strong>Port</strong> Statistics – display more detailed statistic traffic information on each ports<br />
LACP status – display LACP status<br />
RSTP status – display RSTP status<br />
IGMP status – display IGMP status<br />
Ping – provide ping function and result<br />
Maintenance:<br />
Warm Reboot – restart system<br />
Factory Default – reset parameters back to factory default<br />
Firm Upgrade – upgrade Switch firmware<br />
Config File – backup Switch configuration<br />
Logout – disconnect current session<br />
6
2.1 Configurations<br />
2.1.1 System information<br />
The system diagram shows common system information, they are H/W, F/W version, MAC address,<br />
IP address, subnet mask, IP gateway, default <strong>VLAN</strong> value of management port, name, password,<br />
timeout value, and SNMP communities…etc. Once you changed the settings, it’s needed to press<br />
the “Apply“ button to implement these settings, and you can press the “Refresh“ button to get<br />
updated status of system information.<br />
2.1.1.1 DHCP<br />
The default DHCP setting is disabled, so default IP address or user defined IP address was used<br />
when powered on this switch. If this switch needs an IP address assigned by DHCP server, you<br />
should check the square field and then press “Apply“ to implement. User must be aware that if DHCP<br />
setting was enabled from web page, and the DHCP server is working, the connection will be lose,<br />
7
ecause the IP address of this Switch has been changed.<br />
2.1.1.2 Relocate HTTP port number<br />
The default port number of HTTP access is 80, but unauthorized user may intrude this switch if he<br />
knows the IP address of this switch. You may relocate this port number to other value, from 1024 to<br />
65535. Once you change the port number of HTTP access and implement new setting, you will lost<br />
current connection and you must access the Switch by new setting:<br />
http://192.168.223.100:port_value<br />
2.1.1.3 Tag <strong>VLAN</strong> management group<br />
At first time you turn on this Switch, all ports belong to default <strong>VLAN</strong> ID group (VID=1), so they can<br />
communicate to each other, and any port can be used as web management port to access this<br />
Switch. But, for example, if you create <strong>VLAN</strong> ID=10 and assign port 7, 8 to this <strong>VLAN</strong>, then create<br />
another <strong>VLAN</strong> ID = 20 and assign port 5, 6 to this <strong>VLAN</strong>, 3 <strong>VLAN</strong> groups will be shown on VALN<br />
group table after you implement these settings. At this time, the management <strong>VLAN</strong> still remains on<br />
VID=1 group, you can only perform web management through ports assigned to this <strong>VLAN</strong> (port 1, 2,<br />
3, 4). If you want to perform web management from other port in existing different <strong>VLAN</strong> group, for<br />
example port 8 in VID =10, you must go to system configuration page, and select Tag <strong>VLAN</strong><br />
Management Group to 10, then press “Apply“ to implement new setting. Therefore, you can perform<br />
web management from ports assigned to management <strong>VLAN</strong>.<br />
IF you forget the setting about management, there are two ways to solve this condition below.<br />
(1) Through console port, change <strong>VLAN</strong> ID of management <strong>VLAN</strong>.<br />
(2) Press “Reset” button few seconds, let system return to default settings.<br />
8
2.1.2 <strong>Port</strong>s<br />
<strong>Port</strong> status page always shows current port status of all 8 ports. User can set link mode, enable or<br />
disable flow control and jumbo frame. However, be noticed that the jumbo frame is setting globally, it<br />
can’t be set on one port individually. A default diagram is shown below,<br />
9
<strong>2.1.3</strong> <strong>Port</strong>-<strong>based</strong> <strong>VLAN</strong><br />
<strong>Port</strong>-<strong>based</strong> <strong>VLAN</strong> is a kind of <strong>VLAN</strong>, which is a group of ports marked by same group ID, different<br />
<strong>VLAN</strong> (different ID) can’t communicate to each other.<br />
A default diagram is shown below.<br />
10
2.1.4 Tag-<strong>based</strong> <strong>VLAN</strong><br />
Tag-<strong>based</strong> <strong>VLAN</strong> is another kind of <strong>VLAN</strong>, which is a group of ports assigned to the same <strong>VLAN</strong> ID.<br />
Different <strong>VLAN</strong> (different ID) can’t communicate to each other. By default, all ports of the switch were<br />
belonged to same <strong>VLAN</strong>, which ID is 1 (<strong>VLAN</strong> ID=1).<br />
A default diagram is shown below.<br />
There are some attributes can be assigned for advanced tag-<strong>based</strong> <strong>VLAN</strong> application. Click “<strong>Port</strong><br />
Config“ button to modify these attributes.<br />
11
1. <strong>VLAN</strong> Aware mode:<br />
Enabled - Strip <strong>VLAN</strong> tag from received frame and insert <strong>VLAN</strong> tag in transmitted frame, except<br />
ingress frames which’s VID is the same as PVID.<br />
Disabled – Default state, switch doesn’t do <strong>VLAN</strong> tag stripping and inserting.<br />
2. Ingress filtering:<br />
Enabled - Check ingress frame <strong>VLAN</strong> ID. Ingress frame will be dropped if frame's VID is not the<br />
same as the VID of the ingress port.<br />
Disabled – Don’t do ingress <strong>VLAN</strong> frame checking, frames will be flood as normal.<br />
3. Accept Packet Type:<br />
ALL - Accept all ingress frames<br />
Tagged only - Only accept ingress frames with <strong>VLAN</strong> tag<br />
4. <strong>Port</strong> VID:<br />
Set port <strong>VLAN</strong> ID for untagged ingress frames. Set "None" for trunk port member.<br />
12
2.1.5 <strong>Port</strong> Trunking<br />
<strong>Port</strong> Trunking defines how to create a single high-speed logical link that combines several low-speed<br />
physical links. By default, all ports were set to normal state. You can group multiple ports to a trunk;<br />
up to 4 groups are supported.<br />
For example, choose port 1 and port 2 into group 1. After implementation, diagram will show as<br />
below.<br />
13
2.1.6 <strong>Port</strong> Mirroring<br />
Set the port mirroring option to monitor data being transmitted through a specific port.<br />
A default diagram is shown below.<br />
Choose the association of ports you want to implement mirroring function. For example, choose port<br />
2 to be monitored, and port 1 to monitor.<br />
14
2.1.7 Quality of Service<br />
QoS (Quality of Service) refers to the mechanisms in the Switch’s network software that make the<br />
actual determinations of which packets have priority.<br />
There are three QoS mode in the Switch: <strong>Port</strong>-<strong>based</strong>, 802.1p and DSCP.<br />
15
2.1.8 Storm Control<br />
Set storm control limitation to prevent abnormal traffic.<br />
Choose frame types that you want to control, and select the limitation. For example, choose<br />
Broadcast storm with 3,964 frames per second as upper limit, once the Broadcast frame rate higher<br />
than 3,964 frames per second at any of the ports, the special port will be disabled.<br />
17
2.1.9 LACP<br />
Different from the static port trunking, LACP provides another way to aggregate ports to a group<br />
(trunk) dynamically according to IEEE 802.3ad standard.<br />
− Protocol Enabled – to enable/disable LACP protocol on a port.<br />
− Key Value – a number (1~255) to identify the LACP group for a port. All member ports in a LACP<br />
group have the same key values. Key value will be generated automatically if the value was set to<br />
“auto”.<br />
Choose and click the trunk ports you want to group. For example, select port 7 and port 8 to group<br />
into a LACP group with key value 20 for both ports, then press “Apply” to implement the setting.<br />
18
2.1.10 RSTP<br />
The Spanning-Tree Protocol (STP) is IEEE 802.1d standardized method for avoiding loops in<br />
switched networks. Enable STP to ensure that only one path at a time is active between any two<br />
nodes on the network.<br />
The Rapid-Spanning-Tree-Protocol (RSTP) is a more advanced protocol than STP according to<br />
IEEE 802.1w standard. RSTP can shorten spanning tree convergent time while network topology is<br />
changed.<br />
19
You can modify the following parameters of RSTP function to accommodate your network.<br />
System Configuration<br />
• System Priority – A value to identify the root bridge. The bridge (switch) with lowest value has<br />
the highest priority and will be selected as the root. 16 numbers are provided in this field from 0<br />
to 61440 in increments of 4096, default value is 32768.<br />
• Hello Time -- the time interval (seconds) between Spanning-Tree Protocol configuration<br />
messages transmitting. Enter a value between 1 and 10, default value is 2.<br />
• Max Age – the time interval (seconds) bridge (switch) will wait before attempting to reset STP<br />
parameters when missing Spanning-Tree Protocol configuration messages. Enter a value<br />
between 6 and 40, default value is 20.<br />
• Forward Delay -- the time before bridge (switch) changes its ports from STP learning and<br />
listening states to the forwarding state. Enter a value between 4 and 30, default value is 15.<br />
• Force Version – normal: use RSTP; compatible: compatible with old STP protocol<br />
<strong>Port</strong> Configuration<br />
• Aggregations – Enable/disable the RSTP protocol on aggregation links.<br />
• Protocol Enabled – Enable/disable the RSTP protocol per port basis.<br />
• Edge – Enable/disable a port to be an edge port (connect to an end station).<br />
• Path Cost – A value on a port that switch uses to determine which port will be the forwarding<br />
port, if there are more than one path to the root bridge. The port with lowest path cost will be the<br />
forwarding port. The value can be set from 1 to 200000000 or “auto” to be automatically<br />
generated.<br />
20
2.1.11 IGMP<br />
This switch provides IGMP snooping feature to detect IGMP queries and report packets. This feature<br />
can limit the forwarding of multicast frames to certain ports that are members of multicast group.<br />
Only IPv4 IGMP frames are recognized for this system.<br />
The following parameters are provided for configuring IGMP snooping for this system:<br />
• IGMP Enabled – enable/disable IGMP snooping function globally.<br />
• Router <strong>Port</strong>s – specify administrative router ports for IGMP frames.<br />
• Unregistered IPMC Flooding Enabled – set forwarding option of unregistered (not joined) IP<br />
multicast traffic. Enabled: flood frames; Disabled: forward frames to router ports only.<br />
Two options can be set for each existing <strong>VLAN</strong> group:<br />
• IGMP Snooping Enabled – enable/disable snooping IGMP frames on this <strong>VLAN</strong>.<br />
• IGMP Querying Enabled – enable/disable sending IGMP querying frames on this <strong>VLAN</strong>.<br />
21
2.1.12 802.1x<br />
Before you enable the 802.1x function, contact the administrator of RADIUS server to get IP address,<br />
UDP port number and secret.<br />
22
2.1.13 PoE status and command operation<br />
PoE status definitions:<br />
Non-PD: The connected device is an <strong>Ethernet</strong> device but not a PD device.<br />
No Load: No device has been connected to this port.<br />
Loaded: A PD device was connected, and class level and allocated power would be displayed.<br />
PD Error: Current was overloaded (exceed 350 mA), and this port had been disabled automatically.<br />
Dedicated class: Display the class level of PD device.<br />
Allocated power: Maximum allocated power.<br />
23
2.2 Monitoring<br />
2.2.1. <strong>Port</strong> Statistics<br />
Select “<strong>Port</strong> Statistics” to display overview information of all ports.<br />
2.2.2 Detailed <strong>Port</strong> Statistic<br />
To display statistics of an individual port, select “Detailed <strong>Port</strong> Statistics” and click on the links for<br />
each port.<br />
24
2.2.3 LACP Status<br />
Select “LACP Status” to display information about LACP.<br />
2.2.4 RSTP Status<br />
Select “RSTP Status” to display information about RSTP.<br />
25
2.2.5 IGMP Status<br />
Select “IGMP Status” to display information about IGMP.<br />
2.2.6 Ping<br />
Use this tool to test reach ability to a remote host.<br />
26
2.3 Maintenance<br />
2.3.1 Warm Reboot<br />
Reboot system remotely, without changing current configuration.<br />
2.3.2 Factory Default<br />
Reset system configuration to default value, all of modified configuration will be lost.<br />
2.3.3 Firmware Update<br />
Click “Browse…” to select firmware residing in your desktop or other network device, then press<br />
“Upload“ to upgrade system firmware.<br />
27
2.3.4 Config File<br />
Click “Backup” and select a device path to store configuration file. The default file name is<br />
“switch.cfg”.<br />
Click “Browse…” to select configuration file residing in your desktop or other network device, then<br />
press “Restore“ to overwrite system configuration.<br />
28
3.0 Terminal Mode management<br />
Terminal mode is easy to operate; it is useful when in-band <strong>Ethernet</strong> communication was<br />
malfunction.<br />
No password is needed in terminal mode operation. Set up the terminal parameters, such as “Hyper<br />
Terminal” in Microsoft Windows System before you start the terminal mode connection.<br />
1. Select COM #: COM 1, COM 2 …<br />
2. Set “Baud rate” to 115,200 per second<br />
3. Set “Attributes” to 8, None, 1, None (8 bit, No parity, 1 stop bit, No flow control).<br />
After you login into this system, the basic operation rules are shown below.<br />
Type ““ and press “Enter” to display usable commands, type “up“ or “ / “ to go back previous level of<br />
commands.<br />
><br />
Commands at top level:<br />
System - System commands<br />
Console - Console commands<br />
<strong>Port</strong> - <strong>Port</strong> commands<br />
MAC<br />
- MAC commands<br />
<strong>VLAN</strong> - 802.1q (Tag-<strong>based</strong>) <strong>VLAN</strong> commands<br />
Aggr - Aggregation commands<br />
LACP - IEEE 802.3ad Link Aggregation commands<br />
RSTP - IEEE 802.1w Rapid Spanning Tree commands<br />
User Group - User Group (<strong>Port</strong>-<strong>based</strong> <strong>VLAN</strong>) commands<br />
QoS - QoS commands<br />
Mirror - Mirror commands<br />
IP<br />
- IP commands<br />
Dot1x - Dot1x commands<br />
IGMP - IGMP Snooping commands<br />
Debug - Debug commands<br />
><br />
System commands:<br />
System><br />
Commands at System level:<br />
29
System Configuration [all]<br />
System Restore Default [keep IP]<br />
System Name []<br />
System Reboot<br />
System Xmodem<br />
System SNMP [enable|disable]<br />
System Trap []<br />
System Read community []<br />
System Write community []<br />
System Trap community []<br />
Further more, type command to get more information, such as the following.<br />
System>configuration<br />
System Configuration:<br />
Name:<br />
S/W Version: 1.1<br />
CVS Tag: sw_8051_2_29e<br />
Compile Date: Dec 18 2006 12:26:43<br />
H/W Version: 1.0<br />
MAC address: 00-0a-17-02-10-06<br />
SNMP: enabled<br />
Trap IP: 0.0.0.0<br />
Read community: public<br />
Write community: private<br />
Trap community: public<br />
All other commands are operated likewise.<br />
30
Contact Information<br />
<strong>VOLKTEK</strong> CORPORATION<br />
4F, No. 192 Lian-Cheng Road<br />
Chung-Ho, Taipei 235, Taiwan ROC<br />
TEL: +886-2-8242-1000<br />
FAX: +886-2-8242-3333<br />
Tech Support: +886-800-286-286<br />
ISO 9001 Certified<br />
31