DMU-604 - Commtech-Fastcom.com
DMU-604 - Commtech-Fastcom.com
DMU-604 - Commtech-Fastcom.com

You also want an ePaper? Increase the reach of your titles
YUMPU automatically turns print PDFs into web optimized ePapers that Google loves.
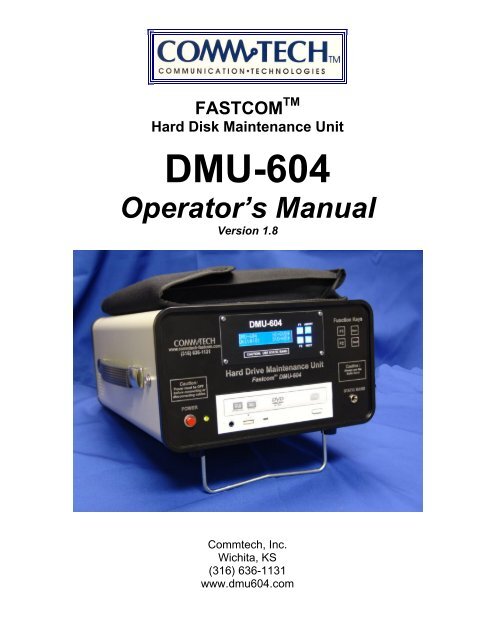
FASTCOM TM<br />
Hard Disk Maintenance Unit<br />
<strong>DMU</strong>-<strong>604</strong><br />
Operator’s Manual<br />
Version 1.8<br />
<strong>Commtech</strong>, Inc.<br />
Wichita, KS<br />
(316) 636-1131<br />
www.dmu<strong>604</strong>.<strong>com</strong>
Document Version: 1.8<br />
Document History:<br />
FASTCOM TM Hard Drive Maintenance Unit<br />
Model <strong>DMU</strong>-<strong>604</strong><br />
Version 1.0 – 1.3 Beta versions, pre-production<br />
Version 1.4 Baseline production document February 2005<br />
Version 1.4.1 Minor font changes, expansion to page 6<br />
Version 1.4.2 Cover picture change, expansion to page 8<br />
Version 1.5 Substantial updates to pages 5 through 21<br />
Version 1.6 IDE interface, Error codes, new options<br />
Version 1.7 SATA interface<br />
Version 1.8 Added error code 73<br />
Copyright © 2005, 2006 <strong>Commtech</strong>, Inc. Wichita, KS. All rights reserved.<br />
FASTCOM is a trademark of <strong>Commtech</strong>, Inc.
FASTCOM TM Hard Drive Maintenance Unit<br />
Model <strong>DMU</strong>-<strong>604</strong>
Contents<br />
FASTCOM TM Hard Drive Maintenance Unit<br />
Model <strong>DMU</strong>-<strong>604</strong><br />
<strong>DMU</strong> Description...................................................................................................5<br />
<strong>DMU</strong> Functions .................................................................................................5<br />
Features ............................................................................................................6<br />
<strong>DMU</strong> Design Objective......................................................................................6<br />
<strong>DMU</strong> Layout..........................................................................................................7<br />
Front Panel........................................................................................................7<br />
Function Keys ................................................................................................7<br />
LCD Display...................................................................................................7<br />
Power Switch.................................................................................................7<br />
Static Band ....................................................................................................7<br />
DVD Drive.............................................................................................................8<br />
DVD +R, DVD –R Media ...................................................................................8<br />
DVD DL Media ..................................................................................................8<br />
DVD RW Media.................................................................................................8<br />
Rear Panel............................................................................................................9<br />
Hard Disk Power Supply ...................................................................................9<br />
Narrow SCSI Interface ......................................................................................9<br />
Wide SCSI Interface........................................................................................10<br />
Ethernet...........................................................................................................10<br />
USB.................................................................................................................11<br />
SATA...............................................................................................................11<br />
Packing List ........................................................................................................11<br />
Unpacking the <strong>DMU</strong>............................................................................................11<br />
Testing the <strong>DMU</strong> .............................................................................................11<br />
<strong>DMU</strong> Dust Cap ................................................................................................14<br />
Operating the Unit Safely....................................................................................15<br />
<strong>DMU</strong> System Disks .............................................................................................16<br />
Updating <strong>DMU</strong> System Disks ..........................................................................16<br />
Universal System Restore Disks .....................................................................16<br />
<strong>DMU</strong> Operation Options......................................................................................17<br />
DVD Verify Option...........................................................................................17<br />
Repeat Last Image Option ..............................................................................17<br />
Backup and Restore Procedures ........................................................................18<br />
<strong>DMU</strong> Direct SCSI Interface Procedure............................................................19<br />
Hard Drive to DVD Backup Function ...........................................................19<br />
DVD to Hard Drive Restore Function...........................................................23<br />
<strong>DMU</strong> IDE Procedure........................................................................................25
FASTCOM TM Hard Drive Maintenance Unit<br />
Model <strong>DMU</strong>-<strong>604</strong><br />
USB to IDE Adapter.....................................................................................25<br />
USB-IDE Backup Procedure........................................................................25<br />
USB-IDE Restore Procedure .......................................................................29<br />
<strong>DMU</strong> SATA Procedure ....................................................................................32<br />
SATA Backup Procedure.............................................................................32<br />
SATA Restore Procedure ............................................................................35<br />
<strong>DMU</strong> Ethernet Interface Procedure .................................................................38<br />
Backup of the Hard Drive on the Network....................................................38<br />
Correcting Disk Errors with CHKDSK ..........................................................38<br />
Restoring the Hard Drive on the Network ...........................................................44<br />
System Maintenance ..........................................................................................47<br />
Maintenance....................................................................................................47<br />
Cleaning the DVD Drive...............................................................................47<br />
Warranty..........................................................................................................48<br />
Technical Support / How to Contact Us ..............................................................48<br />
Error Codes ........................................................................................................49<br />
Appendix A .........................................................................................................63<br />
Description of the issue: ..................................................................................63
<strong>DMU</strong> Description<br />
FASTCOM TM Hard Drive Maintenance Unit<br />
Model <strong>DMU</strong>-<strong>604</strong><br />
The FASTCOM Hard Drive Maintenance Unit (Model <strong>DMU</strong>-<strong>604</strong>) is a selfcontained,<br />
portable hard disk maintenance tool. The <strong>DMU</strong> is designed to<br />
perform two functions: hard drive backup to a DVD and hard drive restore from a<br />
DVD. A hard drive can be connected directly to the <strong>DMU</strong> (through the SCSI or<br />
USB interfaces) or through the Ethernet interface. Because the <strong>DMU</strong> is a hard<br />
drive imaging tool, it works with most hard drives regardless of the <strong>com</strong>puter,<br />
operating system, or disk interface.<br />
The <strong>DMU</strong> supports:<br />
Drive Type <strong>DMU</strong> Connection Example USPS Computer<br />
Narrow SCSI Direct to drive MicroVAX, IPSS<br />
Wide SCSI Direct or Ethernet FARC, SAR, USV, MIS (AFSM)<br />
EIDE Ethernet (or USB) CPOCS<br />
RAID Ethernet Site Server (AFSM), APPS<br />
These are just a few examples of the hard disks supported by the <strong>DMU</strong>. Other<br />
systems are supported and new systems are being added. Refer to the <strong>DMU</strong><br />
web site for a current list of tested and supported systems:<br />
www.dmu<strong>604</strong>.<strong>com</strong><br />
The amount of data that can be stored on the DVD depends upon how well the<br />
data can be <strong>com</strong>pressed. A very conservative estimate is that the data will be<br />
<strong>com</strong>pressed at the rate of two to one. Many hard disks can be backed up on one<br />
DVD, but some backups may require multiple DVDs.<br />
<strong>DMU</strong> Functions<br />
The Hard Drive Backup Function copies the exact contents and format of an<br />
existing hard drive, <strong>com</strong>presses it, and writes that image to a DVD disk.<br />
The Hard Drive Restore Function uses the <strong>com</strong>pressed data produced by the<br />
<strong>DMU</strong> on the DVD backup disk to create an exact image of the original hard drive<br />
on a new hard drive. You do not need to format or prepare the new hard disk in<br />
any way. Simply connect a new hard disk to the <strong>DMU</strong> and an exact clone of the<br />
original hard disk will be created.<br />
Page 5<br />
www.dmu<strong>604</strong>.<strong>com</strong>
Features<br />
FASTCOM TM Hard Drive Maintenance Unit<br />
Model <strong>DMU</strong>-<strong>604</strong><br />
• Fast - 10 minute backup or restore for a MicroVAX system hard drive.<br />
• Reliable - Rugged construction, field-tested unit.<br />
• Expandable - Up to 10 <strong>DMU</strong> units may be concurrently run on a network.<br />
• Upgradeable - <strong>DMU</strong> can be upgraded to support new systems.<br />
• Standardized - Uses off-the-shelf, inexpensive DVD+R disks.<br />
• Complete - Cables, disks, and documentation.<br />
• Support - Online support and direct telephone customer support.<br />
• Warranty - 1 year on parts and labor.<br />
<strong>DMU</strong> Design Objective<br />
The <strong>DMU</strong> was originally designed to reduce the time and labor required to<br />
restore a failed hard drive in the MLOCR MicroVAX <strong>com</strong>puter. Without the <strong>DMU</strong>,<br />
that process can take 4 to 8 hours (typically more if the tape drive fails on the<br />
MicroVAX). With the <strong>DMU</strong>, a failed hard drive in the MicroVAX can be replaced<br />
by new hard drive and the system can be up and running in less than 20 minutes.<br />
More importantly, you will have a high degree of confidence in the replacement<br />
hard disk because it is an exact clone of a known good drive.<br />
The <strong>DMU</strong> now supports many different USPS systems, including Windows and<br />
Linux based systems. As new systems are supported, software upgrades are<br />
posted on the <strong>DMU</strong> website for download. The design objective is the same;<br />
improve the efficiency of replacing the hard drive in critical systems.<br />
Page 6<br />
www.dmu<strong>604</strong>.<strong>com</strong>
<strong>DMU</strong> Layout<br />
Front Panel<br />
www.<strong>com</strong>mtech-fast<strong>com</strong>.<strong>com</strong><br />
(316) 636-1131<br />
Caution:<br />
Power must be OFF<br />
before connecting or<br />
disconnecting cables<br />
POWER<br />
FASTCOM TM Hard Drive Maintenance Unit<br />
Model <strong>DMU</strong>-<strong>604</strong><br />
HD DVD<br />
DVD HD<br />
Hard Drive Maintenance Unit<br />
tm<br />
<strong>Fast<strong>com</strong></strong> <strong>DMU</strong>-<strong>604</strong><br />
DVD R/RW<br />
<strong>DMU</strong>-<strong>604</strong> F1<br />
CAUTION: USE STATIC BAND<br />
Page 7<br />
www.dmu<strong>604</strong>.<strong>com</strong><br />
ABORT<br />
F2 NEXT<br />
Function Keys<br />
F1<br />
F2<br />
Abort<br />
Next<br />
Caution :<br />
Always use the<br />
Static Band<br />
STATIC BAND<br />
Function Keys<br />
There are four illuminated push button switches on the <strong>DMU</strong>. The F1 and F2 are<br />
soft function keys that select desired <strong>DMU</strong> system operations. The Abort key<br />
cancels the current system function. The Next key changes the functions of the<br />
F1 and F2 soft keys.<br />
LCD Display<br />
The LCD will display system prompts and messages.<br />
Power Switch<br />
Press and release the power switch to turn the <strong>DMU</strong> power On or Off. When the<br />
power is on, the green LED next to the power switch will illuminate. Note: LCD<br />
will not illuminate immediately when <strong>DMU</strong> power button is pressed. Internal selftest<br />
requires about one minute to <strong>com</strong>plete.<br />
Static Band<br />
Always wear a static band when handling static-sensitive <strong>com</strong>ponents. Plug the<br />
static band (included with the <strong>DMU</strong>) into this socket.
DVD Drive<br />
FASTCOM TM Hard Drive Maintenance Unit<br />
Model <strong>DMU</strong>-<strong>604</strong><br />
The DVD drive in the <strong>DMU</strong> supports most standard types of DVD media. DVD<br />
disks are available at most consumer electronic stores (like CompUSA, Best Buy,<br />
Radio Shack, Sam’s, etc.), or you may buy them directly from us. USPS Topeka<br />
Spares should also have a supply of them on hand.<br />
DVD +R, DVD –R Media<br />
You may use any good quality DVD –R (minus R) disks or DVD +R (plus R) disks<br />
in the <strong>DMU</strong>. The throughput on +R disks is a little faster. Disk speeds above 4X<br />
are re<strong>com</strong>mended. Note that the <strong>DMU</strong> defaults to the lowest write speed for the<br />
media (to increase reliability), so a fast DVD may not improve throughput time.<br />
Supplied with the <strong>DMU</strong> kit are 10 DVD +R disks. We have tested these disks<br />
and re<strong>com</strong>mend them based upon their price and reliability.<br />
DVD DL Media<br />
The <strong>DMU</strong> does support double layer (DL) DVD disks. Please note that if your<br />
backup requires two or more disks, all of the disks must be DL type disks. You<br />
cannot mix standard DVD disks with DVD DL disks when the backup spans more<br />
than one disk. If the backup requires multiple disks, the <strong>DMU</strong> will assume that if<br />
the first disk is a DL disk, all subsequent disks are DL disks.<br />
Double layer disks are more expensive than regular DVDs, but they will hold<br />
twice the data. There is no indication that DL disks are more or less reliable than<br />
regular DVDs.<br />
DVD RW Media<br />
While not re<strong>com</strong>mended, the <strong>DMU</strong> also supports DVD RW (re-usable) disks. If<br />
you insert a DVD RW disk in the <strong>DMU</strong>, menu options will appear on the LCD that<br />
will allow you to write over existing data. In most cases, this is not a good idea.<br />
If you must use RW disks, contact our technical support for additional<br />
information.<br />
Page 8<br />
www.dmu<strong>604</strong>.<strong>com</strong>
Rear Panel<br />
<strong>Fast<strong>com</strong></strong> is a trademark of<br />
<strong>Commtech</strong>, Inc.<br />
<strong>DMU</strong> software and case<br />
design (c) 2005 <strong>Commtech</strong>, Inc.<br />
All rights reserved.<br />
FASTCOM TM Hard Drive Maintenance Unit<br />
Model <strong>DMU</strong>-<strong>604</strong><br />
Wide SCSI Interface<br />
Ethernet<br />
Hard Disk Power Supply<br />
Hard Drive Maintenance Unit<br />
tm<br />
Model: <strong>Fast<strong>com</strong></strong> <strong>DMU</strong>-<strong>604</strong><br />
Page 9<br />
www.dmu<strong>604</strong>.<strong>com</strong><br />
Narrow SCSI Interface<br />
Technical Support:<br />
www.dmu<strong>604</strong>.<strong>com</strong><br />
(316) 636-1131<br />
www.<strong>com</strong>mtech-fast<strong>com</strong>.<strong>com</strong><br />
Very Important!!!<br />
SATA<br />
Hard Disk Power Supply<br />
Caution:<br />
<strong>DMU</strong> power must be<br />
OFF before connecting or<br />
disconnecting cables<br />
When connecting a hard drive directly to the <strong>DMU</strong>, you must connect the<br />
hard drive to the <strong>DMU</strong> Hard Disk Power Supply. Damage to the <strong>DMU</strong> and<br />
disk drive could occur if the hard drive is connected to any power source<br />
other than the <strong>DMU</strong>.<br />
A special extension cable is included for you to connect the <strong>DMU</strong> disk power<br />
supply to the hard drive. The hard disk power supply is designed only as a disk<br />
drive power supply. Damage to the system will occur if it is used for any other<br />
purpose.<br />
Narrow SCSI Interface<br />
Use this interface to directly connect to a 50-pin SCSI hard drive (like the<br />
MicroVAX or IPSS drives). A special 4‘ extension cable is included for this<br />
USB
FASTCOM TM Hard Drive Maintenance Unit<br />
Model <strong>DMU</strong>-<strong>604</strong><br />
interface. The narrow SCSI features a larger connector than the wide SCSI<br />
connector.<br />
Wide SCSI Interface<br />
Use this interface to directly connect to a 68-pin SCSI hard drive. This cable is<br />
not included with the <strong>DMU</strong>. Refer to the <strong>DMU</strong> website for a vendor and part<br />
number for this cable<br />
Please note: The original <strong>DMU</strong> units included this cable. However, we found<br />
that the original cable was in<strong>com</strong>patible with some SCSI hard drives. If your<br />
<strong>DMU</strong> included this cable, please discard it.<br />
Ethernet<br />
The <strong>DMU</strong> features a 10/100 Ethernet interface that can be connected to the local<br />
area network through a switch or hub. Up to 10 <strong>DMU</strong> units may be connected to<br />
the same network without conflict. When multiple <strong>DMU</strong>s are connected to a<br />
network, each <strong>DMU</strong> will automatically assume a unique number that will be<br />
displayed on its LCD screen. That unit number is used to assign a specific <strong>DMU</strong><br />
to a specific <strong>com</strong>puter on the network.<br />
<strong>DMU</strong> UNIT NUMBER<br />
<strong>DMU</strong> - <strong>604</strong><br />
UNIT #:01<br />
<strong>DMU</strong>-<strong>604</strong> F1<br />
HD DVD<br />
HD<br />
DVD<br />
CAUTION: USE STATIC BAND<br />
Page 10<br />
www.dmu<strong>604</strong>.<strong>com</strong><br />
ABORT<br />
F2 NEXT<br />
Use the enclosed Ethernet cable for standard network connections.<br />
If you wish, you may bypass the system network and connect the <strong>DMU</strong> Ethernet<br />
port directly to the <strong>com</strong>puter Ethernet port (NIC to NIC configuration). This will<br />
require a crossover Ethernet cable (not included in the <strong>DMU</strong> kit).
USB<br />
FASTCOM TM Hard Drive Maintenance Unit<br />
Model <strong>DMU</strong>-<strong>604</strong><br />
The Universal Serial Bus interface may be used to connect IDE drives to the<br />
<strong>DMU</strong>. A special USB to IDE adapter is required. Refer to the <strong>DMU</strong> web site for<br />
part numbers and sources for this adapter.<br />
SATA<br />
Use this interface to connect directly to a SATA drive. If it is required, an adapter<br />
has been supplied to connect the hard drive power cord to the special power<br />
connector on the SATA drive.<br />
Packing List<br />
Item Quantity Description <strong>Commtech</strong> Part # NSN<br />
1 1 <strong>DMU</strong>-<strong>604</strong> Unit <strong>DMU</strong><strong>604</strong> 7025-07-000-5196<br />
2 1 Static Band DESCO-9039<br />
3 1 AC Power Cable CABLAC<br />
4 1 4' 50 Pin Narrow SCSI cable CABLSCSIN 6150-07-000-5197<br />
5 1 25' Ethernet Cable CABLENET 6150-06-000-8759<br />
6 1 4' Hard Disk Power cable CABLDPS 6150-07-000-5198<br />
7 1 DVD Lens cleaner DVDCLEAN 7930-07-000-5199<br />
8 10 DVD+R disks DVD 7025-07-000-5200<br />
9 1 Disk Marking Pen Sharpie<br />
10 1 <strong>DMU</strong> System Maintenance Disk <strong>DMU</strong>MAINTCD<br />
11 1 <strong>DMU</strong> Network Boot Disk <strong>DMU</strong>NETCD<br />
12 1 <strong>DMU</strong>-<strong>604</strong> Documentation <strong>DMU</strong>DOC<br />
13 1 <strong>DMU</strong> Plastic Face Cap <strong>DMU</strong>CAP<br />
14 1 SATA cable<br />
15 1 SATA power adapter<br />
Unpacking the <strong>DMU</strong><br />
Take a moment and account for each item on the packing list. Any deficiencies<br />
should be immediately reported.<br />
Testing the <strong>DMU</strong><br />
The <strong>DMU</strong> is ready to use right out of the box; it does not require any system setup.<br />
Remove the <strong>DMU</strong> from the box, extend the stand, and connect the AC<br />
power cord to the back of the <strong>DMU</strong>. For this test, do not connect a hard drive to<br />
the <strong>DMU</strong>. To perform a basic system test, plug in the <strong>DMU</strong> and press the power<br />
button:<br />
Page 11<br />
www.dmu<strong>604</strong>.<strong>com</strong>
FASTCOM TM Hard Drive Maintenance Unit<br />
Model <strong>DMU</strong>-<strong>604</strong><br />
� Green power LED will illuminate.<br />
� Audibly verify that the cooling fans are running.<br />
� In about 40 seconds, the LCD and function buttons will illuminate.<br />
� Copyright notice will be displayed on the LCD.<br />
� About 5 seconds later, the software version number will be<br />
displayed.<br />
� You should now see the following:<br />
<strong>DMU</strong> - <strong>604</strong><br />
UNIT #:01<br />
<strong>DMU</strong>-<strong>604</strong> F1<br />
HD DVD<br />
HD<br />
DVD<br />
CAUTION: USE STATIC BAND<br />
Page 12<br />
www.dmu<strong>604</strong>.<strong>com</strong><br />
ABORT<br />
F2 NEXT<br />
The <strong>DMU</strong> has now passed its internal self-test. Press the NEXT button. The<br />
LCD will now display:<br />
<strong>DMU</strong>-<strong>604</strong> F1<br />
Hard Disk<br />
Maintenance<br />
Clean<br />
CAUTION: USE STATIC BAND<br />
ABORT<br />
F2 NEXT<br />
Press the NEXT button again. The LCD will now display:
FASTCOM TM Hard Drive Maintenance Unit<br />
Model <strong>DMU</strong>-<strong>604</strong><br />
<strong>DMU</strong>-<strong>604</strong> F1<br />
<strong>DMU</strong> - <strong>604</strong><br />
Revision 2.1.10<br />
CAUTION: USE STATIC BAND<br />
Press the NEXT button again. The LCD will now display:<br />
<strong>DMU</strong>-<strong>604</strong> F1<br />
Hard Disk Size:<br />
CAUTION: USE STATIC BAND<br />
Press the NEXT button again. The LCD will now display:<br />
<strong>DMU</strong>-<strong>604</strong> F1<br />
Last Image DVD<br />
Last Image HD<br />
CAUTION: USE STATIC BAND<br />
Press the NEXT button again. The LCD will now display:<br />
<strong>DMU</strong>-<strong>604</strong> F1<br />
Verify DVD ON<br />
CAUTION: USE STATIC BAND<br />
0<br />
Page 13<br />
www.dmu<strong>604</strong>.<strong>com</strong><br />
ABORT<br />
F2 NEXT<br />
ABORT<br />
F2 NEXT<br />
ABORT<br />
F2 NEXT<br />
ABORT<br />
F2 NEXT<br />
Press the Next button again and the LCD display will cycle back to the start.
FASTCOM TM Hard Drive Maintenance Unit<br />
Model <strong>DMU</strong>-<strong>604</strong><br />
The <strong>DMU</strong> may now be turned off. Press the Abort switch to get back to the<br />
main menu and then press the Power switch. When the Green LED goes off, the<br />
system can be unplugged.<br />
<strong>DMU</strong> Dust Cap<br />
Organize the cables in the pouch. Place the plastic cap over the face of the<br />
<strong>DMU</strong> unit and attach the snaps to hold the cap in place (as illustrated below).<br />
Page 14<br />
www.dmu<strong>604</strong>.<strong>com</strong>
FASTCOM TM Hard Drive Maintenance Unit<br />
Model <strong>DMU</strong>-<strong>604</strong><br />
Operating the Unit Safely<br />
� Carefully read all of the instructions that <strong>com</strong>e with this unit.<br />
� Before using the Hard Drive Maintenance Unit, be sure that all cables are<br />
connected correctly.<br />
� The power must be off before connecting or disconnecting hard drive<br />
cables.<br />
� Always observe static precautions. A wristband has been included with<br />
this unit.<br />
� Avoid dust, humidity, and temperature extremes. Do not place this unit<br />
where it may get wet.<br />
� Place the unit on a stable surface (no vibration).<br />
� Dropping the unit will damage it.<br />
� Do not operate the unit vertically.<br />
� Do not leave the unit on and unattended.<br />
IMPORTANT!<br />
Turn the power OFF and unplug the <strong>DMU</strong> before removing or adjusting any<br />
of the cables. Always observe static precautions when handling a hard<br />
drive. Use the static band included with this unit.<br />
Page 15<br />
www.dmu<strong>604</strong>.<strong>com</strong>
FASTCOM TM Hard Drive Maintenance Unit<br />
Model <strong>DMU</strong>-<strong>604</strong><br />
<strong>DMU</strong> System Disks<br />
There are two <strong>DMU</strong> system CDs included with the kit: the <strong>DMU</strong> Network Boot<br />
CD and the System Maintenance CD. We suggest that you copy them in case of<br />
loss or damage to the originals. Duplicates of the <strong>DMU</strong> CDs can be downloaded<br />
from the <strong>DMU</strong> web page (http://www.dmu<strong>604</strong>.<strong>com</strong>).<br />
The blue Network Boot CD is used when backing up or restoring a hard drive<br />
through the Ethernet interface. An example of this procedure is illustrated in the<br />
<strong>DMU</strong> Ethernet Interface Procedure section of this document.<br />
The red <strong>DMU</strong> System Maintenance Disk will only be used for <strong>DMU</strong> system<br />
restoration and system updates.<br />
Updating <strong>DMU</strong> System Disks<br />
As new features are added to the <strong>DMU</strong> and new systems are supported, both the<br />
Network Boot CD and the <strong>DMU</strong> System Maintenance Disk are updated. These<br />
software updates may be downloaded directly from the Downloads section of the<br />
<strong>DMU</strong> web page. Refer to the <strong>DMU</strong> website for the latest software revision.<br />
When you update your <strong>DMU</strong> software, please note that you must update both<br />
the Network Boot CD and the System Maintenance CD, not just one or the<br />
other. Follow the instructions found on the website to create these CDs.<br />
If you cannot create a CD, contact <strong>Commtech</strong>, Inc. at (316) 636-1131 and we will<br />
send new disks to you.<br />
Universal System Restore Disks<br />
Soon, you should receive an MLOCR MicroVAX Universal Restore disk from<br />
MTSC (Norman). This disk contains an image of Version 15.1.4 of the MLOCR<br />
software that can be installed on most hard drives available for the MicroVAX.<br />
Using this disk eliminates the need to first back up the MLOCR to DVD. This<br />
disk will also resolve most hard drive size in<strong>com</strong>patibility problems. For example,<br />
trying to put 1.5GB of data on a 1.2GB disk will not work. Simply connect the<br />
new hard drive to the <strong>DMU</strong> and select the DVD -> HD option. (See the “DVD to<br />
Hard Drive Function” section in this document.) If you have not received your<br />
MicroVAX Universal Restore disk, contact MTSC.<br />
We expect that a similar disk for the IPSS system and others will also be<br />
available from MTSC.<br />
Page 16<br />
www.dmu<strong>604</strong>.<strong>com</strong>
<strong>DMU</strong> Operation Options<br />
FASTCOM TM Hard Drive Maintenance Unit<br />
Model <strong>DMU</strong>-<strong>604</strong><br />
DVD Verify Option<br />
During the backup procedure, the <strong>DMU</strong> verifies the data it has written to the DVD<br />
by <strong>com</strong>paring it to the data it has read from your hard drive. This verification<br />
function is normally ON, but it can be turned OFF. In the OFF position, the verify<br />
step is skipped, and no checking of the data on DVD is performed. The Verify<br />
option defaults to ON each time the <strong>DMU</strong> is started.<br />
Pressing the Next Button 5 times (or 4 if there is not a stored image on the <strong>DMU</strong>)<br />
will bring you to the Verify DVD Menu:<br />
Verify DVD ON><br />
Pressing F1 will cycle the Display between:<br />
and<br />
Verify DVD ON><br />
Verify DVD OFF><br />
Press the Next button to return to other <strong>DMU</strong> menus.<br />
Repeat Last Image Option<br />
From the Main <strong>DMU</strong> menu, pressing the NEXT button 4 times will get you to the<br />
Last Image option:<br />
Last Image -> DVD > F1<br />
Last Image -> HD > F2<br />
The Last Image Menu is only displayed on the <strong>DMU</strong> if there is a valid Image on<br />
the <strong>DMU</strong>. The Last Image is data stored in the <strong>DMU</strong> after it <strong>com</strong>pletes a<br />
HD►DVD (Backup to DVD) or a DVD►HD (Restore to Hard Drive) operation.<br />
The <strong>DMU</strong> keeps its Last Image data until another Backup or Restore operation is<br />
started. If the <strong>DMU</strong> does not detect a previous image, the Repeat Last Image<br />
Option will be skipped.<br />
Pressing F1 will cause the <strong>DMU</strong> burn a new (set of) DVD(s) from the Last Image.<br />
This option can be used to create multiple backup DVDs without the need to reread<br />
the Hard Drive information. It can also be used to retry a failed DVD<br />
burning session/operation (provided the <strong>DMU</strong> successfully <strong>com</strong>pleted the hard<br />
disk reading process and failed during the DVD burning process).<br />
Page 17<br />
www.dmu<strong>604</strong>.<strong>com</strong>
FASTCOM TM Hard Drive Maintenance Unit<br />
Model <strong>DMU</strong>-<strong>604</strong><br />
Similarly, pressing the F2 key will cause the <strong>DMU</strong> to take the Last Image data<br />
and write it to the attached (direct or network) Hard Drive.<br />
After pressing F1 or F2, a confirmation message is displayed:<br />
Confirm YES> F1<br />
HD Overwrite NO > F2<br />
Pressing F2 here will return you to the Menu, aborting the operation. Pressing<br />
F1 will cause the <strong>DMU</strong> to write the last stored image to the connected Hard<br />
Drive. Be aware that this will destroy the current contents of the connected drive,<br />
replacing it with the contents of the stored Image from the <strong>DMU</strong>.<br />
Backup and Restore Procedures<br />
Note: LCD will not illuminate immediately when the <strong>DMU</strong> power button is pressed. The <strong>DMU</strong><br />
requires about a minute after power on to <strong>com</strong>plete its internal self test and load its operating<br />
system and program.<br />
The <strong>DMU</strong> can back up or restore a hard disk in two basic ways: a hard drive can<br />
be backed up or restored by directly connecting it to the <strong>DMU</strong>, or you can<br />
connect the <strong>DMU</strong> to your system network and image the hard drive while it is still<br />
installed in the <strong>com</strong>puter. You may also use a <strong>com</strong>bination of the two<br />
procedures. For example, if you make a hard disk backup through the network,<br />
you can restore that image to another hard disk that you have directly connected<br />
to the <strong>DMU</strong> SCSI interface. The resulting hard drive will be exactly the same as<br />
the original – the same format, the same OS, the same programs, and the same<br />
data.<br />
Important!<br />
In order for the <strong>DMU</strong> to be of value, you must make a DVD backup of the hard<br />
disk while the drive is still good! It is useless to back up a corrupted hard disk.<br />
Make backup copies of critical hard drives ASAP and store the DVDs in a safe<br />
place.<br />
Page 18<br />
www.dmu<strong>604</strong>.<strong>com</strong>
FASTCOM TM Hard Drive Maintenance Unit<br />
Model <strong>DMU</strong>-<strong>604</strong><br />
<strong>DMU</strong> Direct SCSI Interface Procedure<br />
Note: MicroVAX and IPSS hard drives must be directly connected to the <strong>DMU</strong>; the network<br />
interface is not currently supported.<br />
Hard Drive to DVD Backup Function<br />
This procedure illustrates how to create an image of a SCSI hard drive that has<br />
been directly connected to the <strong>DMU</strong> SCSI interface. Again, this process should<br />
be done before problems develop with the hard drive. The hard disk used in this<br />
example is from a MLOCR MicroVAX.<br />
1. Start with a known good, working hard disk.<br />
2. Plug the <strong>DMU</strong> into a suitable AC power source.<br />
3. Be sure that the Power is Off before connecting or disconnecting cables on<br />
the <strong>DMU</strong>.<br />
4. Put the Static Band on and plug it into the front panel of the <strong>DMU</strong>.<br />
5. Connect both the 50-pin SCSI cable and the hard drive power cable to the<br />
<strong>DMU</strong> and the hard drive. You must use the cables included with the <strong>DMU</strong>.<br />
6. Press the <strong>DMU</strong> Power button. The unit will boot in about 40 seconds. You<br />
will see a copyright notice on the display after the <strong>DMU</strong> has passed its selftest.<br />
7. When the following function menu appears, press F1 (HD ⇨ DVD).<br />
The <strong>DMU</strong> will now display:<br />
<strong>DMU</strong> - <strong>604</strong><br />
UNIT #:01<br />
<strong>DMU</strong>-<strong>604</strong> F1<br />
HD DVD<br />
HD<br />
DVD<br />
CAUTION: USE STATIC BAND<br />
<strong>DMU</strong>-<strong>604</strong> F1<br />
HD DVD<br />
Selected<br />
CAUTION: USE STATIC BAND<br />
Page 19<br />
www.dmu<strong>604</strong>.<strong>com</strong><br />
ABORT<br />
F2 NEXT<br />
ABORT<br />
F2 NEXT
FASTCOM TM Hard Drive Maintenance Unit<br />
Model <strong>DMU</strong>-<strong>604</strong><br />
DVD drive tray will open and the display will change to:<br />
<strong>DMU</strong>-<strong>604</strong> F1<br />
Waiting:<br />
Insert Blank DVD<br />
CAUTION: USE STATIC BAND<br />
Page 20<br />
www.dmu<strong>604</strong>.<strong>com</strong><br />
ABORT<br />
F2 NEXT<br />
8. Unwrap a new blank DVD-R or DVD+R disk, and place it in the tray.<br />
9. Close the DVD drive tray. The display will change to:<br />
<strong>DMU</strong>-<strong>604</strong> F1<br />
Reading HD 0%<br />
CAUTION: USE STATIC BAND<br />
ABORT<br />
F2 NEXT<br />
The progress indicator will go to 100% while the <strong>DMU</strong>-<strong>604</strong> reads the data from<br />
the SCSI drive. Depending upon the drive, this should take approximately 5<br />
minutes for the MLOCR. When the display reaches 100% the message will<br />
change to:<br />
<strong>DMU</strong>-<strong>604</strong> F1<br />
Information:<br />
1 DVD(s) Needed<br />
CAUTION: USE STATIC BAND<br />
ABORT<br />
F2 NEXT
FASTCOM TM Hard Drive Maintenance Unit<br />
Model <strong>DMU</strong>-<strong>604</strong><br />
After a few seconds, the display will change to:<br />
<strong>DMU</strong>-<strong>604</strong> F1<br />
Creating DVD 1/1<br />
0.00% /<br />
CAUTION: USE STATIC BAND<br />
Page 21<br />
www.dmu<strong>604</strong>.<strong>com</strong><br />
ABORT<br />
F2 NEXT<br />
When the progress reaches 100% (and the Verify function is turned ON) the DVD<br />
drive tray will open and then close. The display will change to:<br />
<strong>DMU</strong>-<strong>604</strong> F1<br />
Verifying DVD 1/1<br />
/<br />
CAUTION: USE STATIC BAND<br />
ABORT<br />
F2 NEXT<br />
Do not remove the DVD during the open/close cycle, or the verify step will<br />
fail! When the verify step is <strong>com</strong>pleted, you will be prompted to insert the next<br />
DVD (if more than one DVD was required for the backup). The DVD create-andverify<br />
loop will be repeated for each disk in the set.<br />
When the DVD creation process is <strong>com</strong>plete, the display will change to:<br />
<strong>DMU</strong>-<strong>604</strong> F1<br />
HD DVD<br />
Complete<br />
Eject<br />
CAUTION: USE STATIC BAND<br />
ABORT<br />
F2 NEXT<br />
10. Press the F1 button. The DVD drive tray will open.<br />
11. Remove the DVD and label it with the enclosed Sharpie pen. Store the<br />
DVD in a suitable place (no direct sunlight, etc., etc.).
The <strong>DMU</strong> will now display:<br />
FASTCOM TM Hard Drive Maintenance Unit<br />
Model <strong>DMU</strong>-<strong>604</strong><br />
<strong>DMU</strong>-<strong>604</strong> F1<br />
Close Tray - Turn Off<br />
HD DVD Complete<br />
CAUTION: USE STATIC BAND<br />
Page 22<br />
www.dmu<strong>604</strong>.<strong>com</strong><br />
ABORT<br />
F2 NEXT<br />
12. Press the open/close button on the <strong>DMU</strong> DVD drive to close the tray.<br />
13. Press the power button on the front of the <strong>DMU</strong> to turn it off.<br />
14. Disconnect the power and SCSI cables from the <strong>DMU</strong> and hard drive.<br />
15. Store the cables in the <strong>DMU</strong> pouch.<br />
16. Operation Complete!<br />
Note: Pressing the ABORT button will halt and cancel this process and open the<br />
DVD drive tray. The DVD disk must be discarded if the abort button has been<br />
pressed after the Creating DVD step has begun.
FASTCOM TM Hard Drive Maintenance Unit<br />
Model <strong>DMU</strong>-<strong>604</strong><br />
DVD to Hard Drive Restore Function<br />
1. Be sure that the Power is Off before connecting or disconnecting cables.<br />
2. Plug the <strong>DMU</strong> into a suitable AC power source.<br />
3. Put the Static Band on and plug it into the front panel of the <strong>DMU</strong>.<br />
4. Get a new, or blank, hard drive.<br />
� It is not necessary to format the hard drive prior to performing<br />
the restore function.<br />
� The disk must be of equal or larger size to the one that you<br />
backed up.<br />
5. Connect both the 50-pin SCSI cable and the hard drive power cable to the<br />
<strong>DMU</strong> and the hard drive. You must use the cables included with the <strong>DMU</strong>.<br />
6. Press the <strong>DMU</strong> Power button. The unit will boot in about 40 seconds. You<br />
will see a copyright notice on the display after the <strong>DMU</strong> has passed its selftest.<br />
7. When the following function menu appears, press F2 (DVD ⇨ HD).<br />
<strong>DMU</strong> - <strong>604</strong><br />
UNIT #:01<br />
<strong>DMU</strong>-<strong>604</strong> F1<br />
HD DVD<br />
HD<br />
DVD<br />
CAUTION: USE STATIC BAND<br />
Page 23<br />
www.dmu<strong>604</strong>.<strong>com</strong><br />
ABORT<br />
F2 NEXT<br />
8. The DVD drive tray will open and the display will change to:<br />
Waiting:<br />
Insert Next DVD<br />
Insert the DVD disk that you created with the hard disk backup process in<br />
the previous section.
FASTCOM TM Hard Drive Maintenance Unit<br />
Model <strong>DMU</strong>-<strong>604</strong><br />
9. Press the open/close button on the DVD drive to close the drive tray.<br />
The display will change to<br />
DVD ► HD<br />
Retrieving Image /<br />
After the image has been read from the DVD, the display will change to:<br />
DVD ► HD 0%<br />
The progress indicator will go to 100% and the display will change to:<br />
DVD ► HD eject><br />
Complete<br />
10. Press the F1 button, the DVD drive tray will eject.<br />
11. Remove the Image DVD and return to its storage location. The <strong>DMU</strong> will<br />
now display:<br />
Close Tray - Turn Off<br />
DVD ► HD Complete<br />
12. Press the open/close button on the DVD drive to close the drive tray.<br />
13. Press the power button on the front of the <strong>DMU</strong>-<strong>604</strong> to turn off the <strong>DMU</strong>.<br />
14. Remove the SCSI and power cables from the drive and <strong>DMU</strong>.<br />
15. Store the cables in the <strong>DMU</strong> pouch.<br />
The restore operation is now <strong>com</strong>plete, the drive can now be placed in the<br />
MicroVAX and it will operate as if it were the same (known good) drive that was<br />
used to create the image.<br />
Note: pressing the ABORT button will halt and cancel this process and open the<br />
DVD drive door.<br />
Page 24<br />
www.dmu<strong>604</strong>.<strong>com</strong>
FASTCOM TM Hard Drive Maintenance Unit<br />
Model <strong>DMU</strong>-<strong>604</strong><br />
<strong>DMU</strong> IDE Procedure<br />
The IDE drive backup procedure is almost identical to the SCSI drive procedure<br />
described above. The main difference between the two is that a USB-to-IDE<br />
adapter is required to connect the drive to the <strong>DMU</strong>. Several sources for this<br />
adapter are listed on the <strong>DMU</strong> web site. We have tested the <strong>DMU</strong> with the<br />
adapters listed on the <strong>DMU</strong> Web site; other USB to IDE adapters may not work.<br />
Refer to the <strong>DMU</strong> web site for part numbers and sources for this adapter.<br />
USB to IDE Adapter<br />
Why doesn’t the <strong>DMU</strong> have an IDE connector on it? We did considered putting<br />
an IDE interface on the <strong>DMU</strong>. However, unlike the SCSI interface, an IDE<br />
interface has severe cable length limitations (typically 10” to 12” long) and after<br />
internal connections within the <strong>DMU</strong>, we could only support a 3” to 5” external<br />
IDE cable. Since that cable length is unacceptable, we chose the USB-to-IDE<br />
adapter because it eliminates the IDE cable length restrictions. Additionally, it is<br />
noteworthy that the amount of time required to backup an IDE drive is not<br />
<strong>com</strong>promised by the USB interface.<br />
USB-IDE Backup Procedure<br />
As we have stated before, you must start with a known good, working hard drive.<br />
While not absolutely required before making a <strong>DMU</strong> backup of a hard drive, it is<br />
re<strong>com</strong>mended that you run your disk checking utility (in Windows, use CHKDSK)<br />
on each partition of the hard drive that you plan to backup. This will help insure<br />
the integrity of your backup.<br />
1. Plug in the <strong>DMU</strong>.<br />
2. Attach the static band to the <strong>DMU</strong>.<br />
3. Attach drive power cable to rear of <strong>DMU</strong>.<br />
4. Attach USB-IDE adapter to IDE drive.<br />
5. Set IDE drive jumper to MASTER (if not already set that way).<br />
6. Connect drive power cable to IDE drive.<br />
7. Connect USB cable to rear of <strong>DMU</strong>.<br />
Page 25<br />
www.dmu<strong>604</strong>.<strong>com</strong>
FASTCOM TM Hard Drive Maintenance Unit<br />
Model <strong>DMU</strong>-<strong>604</strong><br />
8. Push Red power button on the front of the <strong>DMU</strong>.<br />
Wait about a minute while <strong>DMU</strong>-<strong>604</strong> powers up.<br />
Wait for the <strong>DMU</strong> to display the following:<br />
9. Press F1 (HD ⇨ DVD).<br />
<strong>DMU</strong>-<strong>604</strong> HD ⇨DVD ►<br />
Unit#:01 DVD⇨HD ►<br />
The <strong>DMU</strong> will then display:<br />
HD->DVD<br />
Selected<br />
The DVD drive tray will open and the <strong>DMU</strong> display will change to:<br />
Waiting:<br />
Insert Blank DVD<br />
10. Unwrap a blank DVD+R or DVD-R disk, place it in the DVD drive tray, and<br />
close the tray.<br />
The <strong>DMU</strong> display will change to:<br />
Reading HD / 1.00%<br />
Part 1/1<br />
(Depending on the number of partitions on your IDE disk, the display could<br />
be different.)<br />
The <strong>DMU</strong>-<strong>604</strong> will read all of the used sectors on the IDE drive. When that<br />
process is <strong>com</strong>plete the <strong>DMU</strong> will display:<br />
Information:<br />
1 DVD(s) needed<br />
The numbers could be different depending on the number of partitions<br />
and/or the amount and <strong>com</strong>pressibility of the used data on the drive.<br />
The <strong>DMU</strong> display will then change to:<br />
Creating DVD 1/1<br />
0.00% /<br />
Page 26<br />
www.dmu<strong>604</strong>.<strong>com</strong>
FASTCOM TM Hard Drive Maintenance Unit<br />
Model <strong>DMU</strong>-<strong>604</strong><br />
The progress will go to 100%. At the <strong>com</strong>pletion of the burning process (if<br />
the Verify feature is turned ON), the DVD drive tray will open and close and<br />
the DVD display will change to:<br />
Verifying DVD 1/1<br />
/<br />
Do not remove the DVD during the open/close cycle, or the verify step<br />
will fail! When the verify step is <strong>com</strong>pleted, you will be prompted to insert<br />
the next DVD (if more than one DVD is required for the backup).<br />
When the verification process is <strong>com</strong>plete, if more disks are needed the<br />
DVD drive tray will open and the <strong>DMU</strong> will display:<br />
Waiting:<br />
Insert Blank DVD<br />
This process will repeat for each disk in the set. When the last disk has<br />
been verified, the <strong>DMU</strong> display will change to:<br />
HD ⇨ DVD Eject ►<br />
Complete<br />
11. Press F1 to eject the final disk, remove the DVD, and use the included<br />
sharpie pen to label it. Store the disk for future restore operations.<br />
The Display will now shift to:<br />
Close Tray-Turn Off<br />
HD ⇨ DVD Complete<br />
12. Close the Drive Tray. Press and release the Red power button on the front<br />
of the <strong>DMU</strong>. Wait for the Green power LED on the front of the <strong>DMU</strong> to turn<br />
OFF.<br />
13. Remove USB cable from the back of the <strong>DMU</strong>.<br />
14. Remove Drive power cable from the back of the <strong>DMU</strong>.<br />
15. Remove Drive power cable from IDE drive.<br />
16. Remove USB-IDE adapter from back of IDE drive.<br />
17. Unplug power cord from <strong>DMU</strong> unit and power outlet.<br />
18. Remove the static band.<br />
Page 27<br />
www.dmu<strong>604</strong>.<strong>com</strong>
FASTCOM TM Hard Drive Maintenance Unit<br />
Model <strong>DMU</strong>-<strong>604</strong><br />
19. Replace cables, etc. in <strong>DMU</strong> pouch.<br />
20. Place protective dust cover on the front of the <strong>DMU</strong> unit.<br />
21. Operation Complete.<br />
Page 28<br />
www.dmu<strong>604</strong>.<strong>com</strong>
USB-IDE Restore Procedure<br />
1. Plug in the <strong>DMU</strong>.<br />
FASTCOM TM Hard Drive Maintenance Unit<br />
Model <strong>DMU</strong>-<strong>604</strong><br />
2. Attach the static band to the <strong>DMU</strong>.<br />
3. Attach the hard drive power cable to the rear of <strong>DMU</strong>.<br />
4. Attach USB-IDE adapter to IDE drive.<br />
� It is not necessary to format the hard drive prior to performing the<br />
restore function.<br />
� The disk must be of equal or larger size to the one that you backed<br />
up.<br />
5. Set IDE drive jumper to MASTER (if it is not already set that way).<br />
6. Connect the drive power cable to IDE drive.<br />
7. Connect the USB cable to rear of <strong>DMU</strong>.<br />
8. Push Power button on the front of the <strong>DMU</strong>.<br />
Wait about a minute while <strong>DMU</strong>-<strong>604</strong> powers up.<br />
Wait for the <strong>DMU</strong> to display the following:<br />
<strong>DMU</strong>-<strong>604</strong> HD ⇨ DVD ►<br />
Unit#:01 DVD⇨ HD ►<br />
9. At the main <strong>DMU</strong> menu press F2 (DVD->HD).<br />
The <strong>DMU</strong> will then display:<br />
DVD ⇨ HD<br />
Selected<br />
Then the DVD drive tray will open and the <strong>DMU</strong> display will change to:<br />
Waiting:<br />
Insert Next DVD<br />
10. Take DVD from previous HD ⇨ DVD operation and place in DVD drive tray.<br />
Close DVD drive tray.<br />
Page 29<br />
www.dmu<strong>604</strong>.<strong>com</strong>
FASTCOM TM Hard Drive Maintenance Unit<br />
Model <strong>DMU</strong>-<strong>604</strong><br />
The <strong>DMU</strong> display will then display:<br />
DVD ⇨ HD<br />
Retrieving Image /<br />
If you have a multi-disk set, at the end of the first disk the drive tray will open<br />
and the message<br />
Waiting:<br />
Insert Next DVD<br />
will appear again. Insert the next DVD in the image set, and repeat until the<br />
last disk is inserted. At the end of the last disk the <strong>DMU</strong> display will shift to:<br />
DVD ⇨ HD / 1.00%<br />
part 1/1<br />
And the progress will go to 100% for each part (partition). At the <strong>com</strong>pletion<br />
of the last part the display shows:<br />
DVD ⇨ HD Eject><br />
Complete<br />
11. Press the F1 button to eject the DVD.<br />
The <strong>DMU</strong> display changes to:<br />
Close Tray - Turn Off<br />
DVD ⇨ HD Complete<br />
12. Remove the image DVD and return to storage.<br />
13. Close the DVD drive tray.<br />
14. Push and release the Red power button on the front of the <strong>DMU</strong>.<br />
15. Wait for the green LED on the front of the <strong>DMU</strong> to turn off.<br />
16. Remove the USB cable from the rear of the <strong>DMU</strong>.<br />
17. Remove the Drive power cable from the rear of the <strong>DMU</strong>.<br />
18. Remove the Drive power cable from the IDE drive.<br />
19. Remove the USB-IDE adapter from the IDE drive.<br />
Page 30<br />
www.dmu<strong>604</strong>.<strong>com</strong>
FASTCOM TM Hard Drive Maintenance Unit<br />
Model <strong>DMU</strong>-<strong>604</strong><br />
20. Restore the jumper settings on the IDE drive as required. (This drive has<br />
now had its image restored, and is ready for operation.)<br />
21. Remove the Static Band.<br />
22. Remove the <strong>DMU</strong> power cable from the rear of the <strong>DMU</strong>.<br />
23. Return the cables, etc. to the <strong>DMU</strong> storage pouch.<br />
24. Place protective dust cover on the front of the <strong>DMU</strong> unit.<br />
25. Operation Complete.<br />
Page 31<br />
www.dmu<strong>604</strong>.<strong>com</strong>
FASTCOM TM Hard Drive Maintenance Unit<br />
Model <strong>DMU</strong>-<strong>604</strong><br />
<strong>DMU</strong> SATA Procedure<br />
The SATA drive backup procedure is almost identical to the IDE drive procedure<br />
described above. Early SATA drives do not have the standard 4-pin power<br />
connection. An adapter has been supplied if you wish to provide power to the<br />
hard drive from the <strong>DMU</strong> in these situations. Later drives have both the unique<br />
connector and the standard 4-pin connector.<br />
SATA Backup Procedure<br />
As we have stated before, you must start with a known good, working hard drive.<br />
While not absolutely required before making a <strong>DMU</strong> backup of a hard drive, it is<br />
re<strong>com</strong>mended that you run your disk checking utility (in Windows, use CHKDSK)<br />
on each partition of the hard drive that you plan to backup. This will help insure<br />
the integrity of your backup.<br />
1. Plug in the <strong>DMU</strong>.<br />
2. Attach the static band to the <strong>DMU</strong>.<br />
3. Attach drive power cable to rear of <strong>DMU</strong>.<br />
4. Attach SATA cable to SATA drive.<br />
5. Connect drive power cable to SATA drive. Use adapter, if necessary.<br />
6. Connect SATA cable to rear of <strong>DMU</strong>.<br />
7. Push Red power button on the front of the <strong>DMU</strong>.<br />
…Wait about a minute while <strong>DMU</strong>-<strong>604</strong> powers up…<br />
Wait for the <strong>DMU</strong> to display the following:<br />
<strong>DMU</strong>-<strong>604</strong> HD ⇨DVD ►<br />
Unit#:01 DVD⇨HD ►<br />
8. Press F1 (HD ⇨ DVD).<br />
The <strong>DMU</strong> will then display:<br />
HD->DVD<br />
Selected<br />
The DVD drive tray will open and the <strong>DMU</strong> display will change to:<br />
Page 32<br />
www.dmu<strong>604</strong>.<strong>com</strong>
FASTCOM TM Hard Drive Maintenance Unit<br />
Model <strong>DMU</strong>-<strong>604</strong><br />
Waiting:<br />
Insert Blank DVD<br />
9. Unwrap a blank DVD+R or DVD-R disk, place it in the DVD drive tray, and<br />
close the tray.<br />
The <strong>DMU</strong> display will change to:<br />
Reading HD / 1.00%<br />
Part 1/1<br />
(Depending on the number of partitions on your SATA disk, the display could<br />
be different.)<br />
The <strong>DMU</strong>-<strong>604</strong> will read all of the used sectors on the SATA drive. When that<br />
process is <strong>com</strong>plete the <strong>DMU</strong> will display:<br />
Information:<br />
1 DVD(s) needed<br />
The numbers could be different depending on the number of partitions and/or<br />
the amount and <strong>com</strong>pressibility of the used data on the drive. The <strong>DMU</strong><br />
display will then change to:<br />
Creating DVD 1/1<br />
0.00% /<br />
The progress will go to 100%. At the <strong>com</strong>pletion of the burning process (If the<br />
Verify feature is turned ON) the DVD drive tray will open and close and the<br />
DVD display will change to:<br />
Verifying DVD 1/1<br />
/<br />
Do not remove the DVD during the open/close cycle, or the verify step<br />
will fail! When the verify step is <strong>com</strong>pleted, you will be prompted to insert the<br />
next DVD (if more than one DVD was required for the backup).<br />
When the verification process is <strong>com</strong>plete, if more disks are needed the DVD<br />
drive tray will open and the <strong>DMU</strong> will display:<br />
Waiting:<br />
Insert Blank DVD<br />
This process will repeat for each disk in the set. When the last disk has been<br />
verified the <strong>DMU</strong> display will change to:<br />
HD ⇨ DVD Eject ►<br />
Page 33<br />
www.dmu<strong>604</strong>.<strong>com</strong>
Complete<br />
FASTCOM TM Hard Drive Maintenance Unit<br />
Model <strong>DMU</strong>-<strong>604</strong><br />
10. Press F1 to eject the final disk, remove the DVD and use the included sharpie<br />
pen to label it, store the disk for future restore operations.<br />
The Display will now shift to:<br />
Close Tray-Turn Off<br />
HD ⇨ DVD Complete<br />
11. Close the Drive Tray. Push and release the Red power button on the front of<br />
the <strong>DMU</strong>. Wait for the Green power LED on the front of the <strong>DMU</strong> to turn<br />
OFF.<br />
12. Remove SATA cable from the back of the <strong>DMU</strong>.<br />
13. Remove Drive power cable from the back of the <strong>DMU</strong>.<br />
14. Remove Drive power cable (and adapter, if used) from SATA drive.<br />
15. Remove SATA cable from SATA drive.<br />
16. Unplug power cord from <strong>DMU</strong> unit and power outlet.<br />
17. Remove static band.<br />
18. Replace cables, etc. in <strong>DMU</strong> pouch.<br />
19. Place protective dust cover on the front of the <strong>DMU</strong> unit.<br />
20. Operation Complete.<br />
Page 34<br />
www.dmu<strong>604</strong>.<strong>com</strong>
SATA Restore Procedure<br />
1. Plug in the <strong>DMU</strong>.<br />
FASTCOM TM Hard Drive Maintenance Unit<br />
Model <strong>DMU</strong>-<strong>604</strong><br />
2. Attach the static band to the <strong>DMU</strong>.<br />
3. Attach the hard drive power cable to the rear of <strong>DMU</strong>.<br />
� It is not necessary to format the hard drive prior to performing the<br />
restore function.<br />
� The disk must be of equal or larger size to the one that you backed<br />
up.<br />
4. Connect the drive power cable to SATA drive. Use adapter if necessary.<br />
5. Connect the SATA cable to rear of <strong>DMU</strong>.<br />
6. Push Power button on the front of the <strong>DMU</strong>.<br />
…Wait about a minute while <strong>DMU</strong>-<strong>604</strong> powers up…<br />
Wait for the <strong>DMU</strong> to display the following:<br />
<strong>DMU</strong>-<strong>604</strong> HD ⇨DVD ►<br />
Unit#:01 DVD⇨HD ►<br />
7. At the main <strong>DMU</strong> menu press F2 (DVD->HD).<br />
The <strong>DMU</strong> will then display:<br />
DVD ⇨ HD<br />
Selected<br />
Then the DVD drive tray will open and the <strong>DMU</strong> display will change to:<br />
Waiting:<br />
Insert Next DVD<br />
8. Take DVD from previous HD ⇨ DVD operation and place in DVD drive tray,<br />
close DVD drive tray.<br />
The <strong>DMU</strong> display will then display:<br />
DVD ⇨ HD<br />
Page 35<br />
www.dmu<strong>604</strong>.<strong>com</strong>
FASTCOM TM Hard Drive Maintenance Unit<br />
Model <strong>DMU</strong>-<strong>604</strong><br />
Retrieving Image /<br />
If you have a multi disk set, at the end of the first disk the drive tray will<br />
open and the message<br />
Waiting:<br />
Insert Next DVD<br />
will appear again. Insert the next DVD in the image set, and repeat until<br />
the last disk is inserted. At the end of the last disk the <strong>DMU</strong> display will<br />
shift to:<br />
DVD ⇨ HD / 1.00%<br />
part 1/1<br />
And the progress will go to 100% for each part (partition). At the<br />
<strong>com</strong>pletion of the last part the display shows:<br />
DVD ⇨ HD Eject><br />
Complete<br />
9. Press the F1 button to eject the DVD.<br />
The <strong>DMU</strong> display changes to:<br />
Close Tray - Turn Off<br />
DVD ⇨ HD Complete<br />
10. Remove the image DVD and return to storage.<br />
11. Close the DVD drive tray.<br />
12. Push and release the Red power button on the front of the <strong>DMU</strong>.<br />
13. Wait for the green LED on the front of the <strong>DMU</strong> to turn off.<br />
14. Remove the SATA cable from the rear of the <strong>DMU</strong>.<br />
15. Remove the Drive power cable from the rear of the <strong>DMU</strong>.<br />
16. Remove the Drive power cable (and adapter, if used) from the SATA drive.<br />
17. Remove the SATA cable from the SATA drive.<br />
18. Remove the Static Band.<br />
19. Remove the <strong>DMU</strong> power cable from the rear of the <strong>DMU</strong>.<br />
Page 36<br />
www.dmu<strong>604</strong>.<strong>com</strong>
FASTCOM TM Hard Drive Maintenance Unit<br />
Model <strong>DMU</strong>-<strong>604</strong><br />
20. Return the cables, etc. to the <strong>DMU</strong> storage pouch.<br />
21. Place protective dust cover on the front of the <strong>DMU</strong> unit.<br />
22. Operation Complete.<br />
Page 37<br />
www.dmu<strong>604</strong>.<strong>com</strong>
FASTCOM TM Hard Drive Maintenance Unit<br />
Model <strong>DMU</strong>-<strong>604</strong><br />
<strong>DMU</strong> Ethernet Interface Procedure<br />
The following procedure illustrates how to back up and restore the AFCS FARC<br />
Windows based <strong>com</strong>puter via the Ethernet network interface. Other network<br />
systems follow a similar procedure.<br />
Backup of the Hard Drive on the Network<br />
As we have stated before, you must start with a known good, working hard drive.<br />
The first part of this procedure shows you how to use Windows CHKDSK to<br />
detect and correct any disk errors. While not absolutely required before making<br />
a <strong>DMU</strong> backup of a hard drive, it is re<strong>com</strong>mended that you run your disk<br />
checking utility (in Windows, use CHKDSK) on each partition of the hard drive<br />
that you plan to backup. This will help insure the integrity of your backup.<br />
Correcting Disk Errors with CHKDSK<br />
1. Start with a known good working hard disk, preferably freshly installed.<br />
On the FARC:<br />
2. Change to the Administrator account.<br />
3. Start->run, type “cmd” (without the quotes), press OK.<br />
A <strong>com</strong>mand window will open.<br />
4. Type “chkdsk /R” (without the quotes) and press enter<br />
The display will show:<br />
Chkdsk cannot run because the volume is in use by another process.<br />
Would you like to schedule this volume to be checked the next time the<br />
system restarts? (Y/N)<br />
5. Answer “Y” (type “Y” then enter)<br />
The display will show:<br />
This volume will be checked the next time the system restarts.<br />
Page 38<br />
www.dmu<strong>604</strong>.<strong>com</strong>
FASTCOM TM Hard Drive Maintenance Unit<br />
Model <strong>DMU</strong>-<strong>604</strong><br />
6. Type “chkdsk /R D:” and press enter.<br />
This <strong>com</strong>mand may or may not need to be scheduled for the next boot. If it<br />
is in use, then schedule it for the next boot also (answer Y), otherwise let<br />
the <strong>com</strong>mand run to <strong>com</strong>pletion.<br />
7. Type “exit” and press enter. This will close the <strong>com</strong>mand window.<br />
8. Shutdown and restart the system.<br />
9. When Windows boots, it will do the scheduled chkdsk; do not abort this<br />
process (i.e., do not press a key to abort the disk scan). Let the chkdsk run<br />
to <strong>com</strong>pletion, doing whatever it asks. When you are back in Windows<br />
proceed to step 10.<br />
10. Put the static band on and plug it into the front of the <strong>DMU</strong>-<strong>604</strong>.<br />
11. Plug the power cord into the back of the <strong>DMU</strong>-<strong>604</strong> unit and plug into a<br />
suitable power outlet.<br />
12. Connect the Ethernet cable to the Back of the <strong>DMU</strong>-<strong>604</strong>.<br />
The network connection illustration above<br />
is located in the back of the supervisor’s table.<br />
13. Connect <strong>DMU</strong> Ethernet cable to a suitable Network connection point (local<br />
switch/hub for the machine).<br />
14. Turn on the <strong>DMU</strong>; allow it to boot.<br />
Wait about one minute for the <strong>DMU</strong> to power on and display the main menu:<br />
<strong>DMU</strong>-<strong>604</strong> HD ⇨ DVD ►<br />
UNIT#:01 DVD⇨ HD ►<br />
Page 39<br />
www.dmu<strong>604</strong>.<strong>com</strong>
FASTCOM TM Hard Drive Maintenance Unit<br />
Model <strong>DMU</strong>-<strong>604</strong><br />
Make note of the UNIT# that is displayed on the LCD Display of the <strong>DMU</strong>-<br />
<strong>604</strong>. If several <strong>DMU</strong> units are being used simultaneously on the network,<br />
you will need to know the unit number of the one you are working with.<br />
15. Place the <strong>DMU</strong> Network Boot Disk in the FARC CD drive tray.<br />
16. Restart the FARC system so that it will now boot from the <strong>DMU</strong> Network<br />
Boot Disk.<br />
17. After the system POST on the FARC, you will see the menu:<br />
<strong>Fast<strong>com</strong></strong>:<strong>DMU</strong> <strong>604</strong> Companion Boot CD<br />
0) Standard Boot<br />
1) FICS Site Server<br />
2) APPS Raid Server<br />
boot:<br />
If you do not see this menu (i.e., Windows starts up), then you will need to<br />
shutdown/restart and enter the system BIOS setup to configure the boot<br />
order such that the CDROM is first in the boot order.<br />
Place the <strong>DMU</strong> on the AFCS Supervisor’s Table:<br />
Press 0 then enter on the FARC keyboard. This is for all systems other<br />
than the FICS site server and the APPS raid server. If you are imaging one<br />
of these two systems, type the appropriate number, then press enter.<br />
The screen will display:<br />
Page 40<br />
www.dmu<strong>604</strong>.<strong>com</strong>
Then:<br />
FASTCOM TM Hard Drive Maintenance Unit<br />
Model <strong>DMU</strong>-<strong>604</strong><br />
---=== <strong>DMU</strong>-<strong>604</strong> Network Units ===---<br />
Scanning for <strong>DMU</strong>-<strong>604</strong> Units<br />
. . . . . . .<br />
Enter <strong>DMU</strong> unit # to attach to or 0 to re-scan:<br />
---=== <strong>DMU</strong>-<strong>604</strong> Network Units ===---<br />
<strong>DMU</strong> UNIT#:01 AVAILABLE<br />
Enter <strong>DMU</strong> unit # to attach to or 0 to re-scan:<br />
18. Type “1” then press Enter on the FARC keyboard.<br />
(If your <strong>DMU</strong> unit number is not “1” then enter the appropriate number here)<br />
When you press enter the screen will change back to the “system booting”<br />
screen.<br />
In a short time it will then change to “Connecting to <strong>DMU</strong>”, then “Connected<br />
to <strong>DMU</strong>”<br />
On the <strong>DMU</strong>:<br />
19. Press the F1 button (HD ⇨ DVD).<br />
The <strong>DMU</strong> will then display:<br />
DVD ⇨ HD<br />
Selected<br />
The DVD drive tray will open and the display will change to:<br />
Waiting:<br />
Insert Blank DVD<br />
20. Unwrap a new blank DVD-R or DVD+R disk, and place it in the tray.<br />
21. Press the open/close button to close the DVD drive tray.<br />
The display will change to:<br />
Reading HD 0%<br />
Part 1/2<br />
The FARC display will change to “Backup in Process”<br />
Page 41<br />
www.dmu<strong>604</strong>.<strong>com</strong>
FASTCOM TM Hard Drive Maintenance Unit<br />
Model <strong>DMU</strong>-<strong>604</strong><br />
The progress indicator will go to 100% while the <strong>DMU</strong>-<strong>604</strong> reads the data<br />
from the drive. The Part 1/X line could be different (depending on the<br />
partitioning of your drive) and the % indicator will go from 0-100% for each<br />
partition of the hard disk.<br />
When <strong>com</strong>plete the message will change to:<br />
Information:<br />
1 DVD(s) Needed<br />
(Note: if your system is particularly large the <strong>DMU</strong> backup may span DVDs,<br />
and the messages will be different, i.e., 2 DVD(s) needed and creating DVD<br />
1/2 etc., etc.)<br />
At this point, the FARC will display a “<strong>com</strong>plete” message and either<br />
shutdown automatically or is ready to be powered off manually. Remove<br />
the <strong>DMU</strong> Network Boot Disk from the FARC drive and put it back into<br />
storage.<br />
On the <strong>DMU</strong>, you will see the following displayed:<br />
Creating DVD 1/1<br />
0.00% /<br />
When the progress reaches 100% (and the Verify function is turned ON) the<br />
DVD drive tray will open and then close. The display will change to:<br />
Verifying DVD 1/1<br />
/<br />
Do not remove the DVD during the open/close cycle, or the verify step<br />
will fail! When the verify step is <strong>com</strong>pleted, you will be prompted to insert<br />
the next DVD (if more than one DVD was required for the backup). The<br />
DVD create-and-verify loop will be repeated for each disk in the set.<br />
When the DVD creation process is <strong>com</strong>plete the display will change to:<br />
HD->DVD eject><br />
Complete<br />
22. Press the F1 button. The DVD drive tray will open.<br />
23. Remove the DVD, label it, and store in a suitable place (no direct sunlight,<br />
etc., etc.) for use in restoring the image later.<br />
The <strong>DMU</strong> display will change to:<br />
Close Tray - Turn Off<br />
Page 42<br />
www.dmu<strong>604</strong>.<strong>com</strong>
FASTCOM TM Hard Drive Maintenance Unit<br />
Model <strong>DMU</strong>-<strong>604</strong><br />
DVD ⇨ HD Complete<br />
24. Press the DVD open/close button to close the DVD drive tray.<br />
25. Press the power button on the front of the <strong>DMU</strong>-<strong>604</strong> to turn off the <strong>DMU</strong>.<br />
26. Disconnect the Ethernet cable.<br />
27. Operation Complete!<br />
Page 43<br />
www.dmu<strong>604</strong>.<strong>com</strong>
FASTCOM TM Hard Drive Maintenance Unit<br />
Model <strong>DMU</strong>-<strong>604</strong><br />
Restoring the Hard Drive on the Network<br />
The following step-by-step process will be illustrated using the AFCS FARC<br />
Windows based <strong>com</strong>puter.<br />
1. Obtain a new hard disk drive and install it in the FARC.<br />
� It is not necessary to format the hard drive prior to performing the<br />
restore function.<br />
� The disk must be equal or larger in size to the one that you backed<br />
up.<br />
2. Obtain the Image DVD(s) created in the above section.<br />
3. Put on the static band, and plug it into the front of the <strong>DMU</strong>-<strong>604</strong><br />
4. Plug the power cord into the back of the <strong>DMU</strong>-<strong>604</strong> unit and plug into a<br />
suitable power outlet.<br />
5. Connect the Ethernet cable to the Back of the <strong>DMU</strong>-<strong>604</strong>.<br />
6. Connect the other end of the Ethernet cable to a suitable network<br />
connection point (local switch/hub for the machine). You can use the<br />
network connection in the back of the supervisor’s table illustrated in the<br />
previous section.<br />
7. Push the power button on the front of the <strong>DMU</strong>-<strong>604</strong>.<br />
Wait about one minute for the <strong>DMU</strong>-<strong>604</strong> to power on and display the main<br />
menu:<br />
<strong>DMU</strong>-<strong>604</strong> HD ⇨ DVD ►<br />
UNIT#:01 DVD⇨ HD ►<br />
Make note of the UNIT# that is displayed on the Display of the <strong>DMU</strong>-<strong>604</strong>.<br />
On the FARC:<br />
8. Insert the <strong>DMU</strong> Network Boot CD in the CD drive of the FARC. Turn the<br />
FARC power on.<br />
9. After the system POST you will see the menu:<br />
<strong>Fast<strong>com</strong></strong>:<strong>DMU</strong> <strong>604</strong> Companion Boot CD<br />
0) Standard Boot<br />
1) FICS Site Server<br />
2) APPS Raid Server<br />
Page 44<br />
www.dmu<strong>604</strong>.<strong>com</strong>
oot:<br />
FASTCOM TM Hard Drive Maintenance Unit<br />
Model <strong>DMU</strong>-<strong>604</strong><br />
If you do not see this menu (i.e., no boot device message) then you will<br />
need to shutdown/restart the FARC and enter the system BIOS setup.<br />
Configure the FARC to boot from its CDROM.<br />
10. Press 0 then press enter, or just press enter, or just wait – the default is 0.<br />
(This is for all systems other than the FICS site server and the APPS raid<br />
server; if you are imaging one of these two systems, type the appropriate<br />
number and then press enter.)<br />
The screen will change to a “system booting” screen, and then:<br />
---=== <strong>DMU</strong>-<strong>604</strong> Network Units ===---<br />
Scanning for <strong>DMU</strong>-<strong>604</strong> Units<br />
. . . . . . .<br />
Enter <strong>DMU</strong> unit # to attach to or 0 to re-scan:<br />
The screen will display:<br />
---=== <strong>DMU</strong>-<strong>604</strong> Network Units ===---<br />
<strong>DMU</strong> UNIT#:01 AVAILABLE<br />
Enter <strong>DMU</strong> unit # to attach to or 0 to re-scan:<br />
11. Type “1” then press Enter on the FARC keyboard.<br />
(If your <strong>DMU</strong> unit number is not “1”, then enter the appropriate number.)<br />
When you press enter, the FARC screen will change back to the “system<br />
booting” screen. In a short time, it will then change to “Connecting to <strong>DMU</strong>”,<br />
then “Connected to <strong>DMU</strong>”<br />
On the <strong>DMU</strong>:<br />
12. Press the F2 button (DVD ⇨ HD)<br />
The <strong>DMU</strong> will then display:<br />
DVD ⇨ HD<br />
Selected<br />
The DVD drive tray will open and the display will change to:<br />
Waiting:<br />
Insert Next DVD<br />
Page 45<br />
www.dmu<strong>604</strong>.<strong>com</strong>
FASTCOM TM Hard Drive Maintenance Unit<br />
Model <strong>DMU</strong>-<strong>604</strong><br />
13. Place the Image DVD disk in the DVD drive tray.<br />
14. Press the open/close button on the DVD drive to close the drive tray.<br />
The display will change to:<br />
DVD->HD<br />
Retrieving Image /<br />
Note: Up to 20 minutes may be needed if DVD is full.<br />
If the image disk is part of a multi disk set, the tray will eject and the <strong>DMU</strong><br />
will ask for the next disk in the set.<br />
When the image has been read from the DVD, the display will change to:<br />
DVD->HD 0%<br />
Part 1/2 /<br />
At this point the FARC screen will change to “Restore in Process”. The<br />
progress indicator on the <strong>DMU</strong> will go to 100% for each part, and then<br />
display will change to:<br />
DVD ⇨ HD Eject><br />
Complete<br />
15. Press the F1 button, the DVD drive tray will eject.<br />
16. Remove the Image DVD and return to its storage location.<br />
The <strong>DMU</strong> display changes to:<br />
Close Tray - Turn Off<br />
DVD ⇨ HD Complete<br />
17. Press the open/close button on the DVD drive to close the drive tray.<br />
18. Press the power button on the front of the <strong>DMU</strong>-<strong>604</strong> to turn off the <strong>DMU</strong>.<br />
19. Disconnect the Ethernet cable.<br />
20. Operation Complete!<br />
At this point you can remove the <strong>DMU</strong> Network boot disk from the FARC and<br />
return to storage and reboot the FARC into Windows.<br />
Page 46<br />
www.dmu<strong>604</strong>.<strong>com</strong>
System Maintenance<br />
FASTCOM TM Hard Drive Maintenance Unit<br />
Model <strong>DMU</strong>-<strong>604</strong><br />
Maintenance<br />
If the unit is used frequently, the cables should be inspected for wear on the<br />
contacts. Replace the cables if they no longer attach firmly or appear worn. The<br />
Hard Disk Maintenance Unit may require that the DVD drive be cleaned with a<br />
DVD cleaning kit after about 100 disks have been made.<br />
Cleaning the DVD Drive<br />
When required, the DVD drive can be cleaned using the enclosed DVD drive<br />
cleaner disk. Use the following procedure:<br />
1. Do not connect a disk drive to the unit.<br />
2. Turn the unit ON. After about 40 seconds, the copyright notice will be<br />
displayed.<br />
3. When the following menu is displayed, press the NEXT function key.<br />
<strong>DMU</strong> - <strong>604</strong><br />
UNIT #:01<br />
<strong>DMU</strong>-<strong>604</strong> F1<br />
HD DVD<br />
HD<br />
DVD<br />
CAUTION: USE STATIC BAND<br />
4. The Maintenance Menu will now be displayed.<br />
<strong>DMU</strong>-<strong>604</strong> F1<br />
Hard Disk<br />
Maintenance<br />
Clean<br />
CAUTION: USE STATIC BAND<br />
Page 47<br />
www.dmu<strong>604</strong>.<strong>com</strong><br />
ABORT<br />
F2 NEXT<br />
ABORT<br />
F2 NEXT<br />
Select Clean DVD ⇨ function key (F1 key). Drive door will open.<br />
5. Insert DVD Cleaner disk. Close drive tray.<br />
6. Cleaning DVD will be displayed. The process requires about 1 minute.<br />
7. Remove disk, close tray, turn system power off.
Warranty<br />
1 year parts and labor.<br />
FASTCOM TM Hard Drive Maintenance Unit<br />
Model <strong>DMU</strong>-<strong>604</strong><br />
Before returning the unit, call <strong>Commtech</strong>, Inc. and get an RMA number.<br />
Pack the unit in its original container or suitable container for safe shipping.<br />
<strong>Commtech</strong>, Inc. will pay for return shipping to you only. Enclose a description of<br />
the problem, a person to contact if we have a question, and a return address.<br />
Damaged or out of warranty units will not be repaired without customer<br />
authorization.<br />
Technical Support / How to Contact Us<br />
If you require technical support or an RMA number, contact us between 9:00 am<br />
and 5:00 pm Central Time at (316) 636-1131.<br />
A list of frequently asked questions and their answers is available at:<br />
www.dmu<strong>604</strong>.<strong>com</strong><br />
or<br />
www.<strong>com</strong>mtech-fast<strong>com</strong>.<strong>com</strong>/dmu.html<br />
If you still have questions, use the technical support link you will find on that<br />
page.<br />
The <strong>DMU</strong>-<strong>604</strong> is designed and manufactured by <strong>Commtech</strong>, Inc., Wichita, KS.<br />
Page 48<br />
www.dmu<strong>604</strong>.<strong>com</strong>
Error<br />
Number<br />
FASTCOM TM Hard Drive Maintenance Unit<br />
Model <strong>DMU</strong>-<strong>604</strong><br />
Error Codes<br />
If the <strong>DMU</strong> encounters errors during the backup or restore process, the error<br />
code will be displayed on the LCD. These error codes are listed and explained<br />
below.<br />
0 ERROR:<br />
Text Displayed on<br />
<strong>DMU</strong><br />
No <strong>DMU</strong> Unit # (0)<br />
2 ERROR-Internal:<br />
chop processing (2)<br />
3 ERROR-internal:<br />
no create line (3)<br />
Description Resolution<br />
The IP address for the <strong>DMU</strong><br />
could not be assigned. The<br />
<strong>DMU</strong> attempts to use one of<br />
the following addresses:<br />
192.168.20.60<br />
192.168.20.62<br />
192.168.20.64<br />
192.168.20.66<br />
192.168.20.68<br />
192.168.20.70<br />
192.168.20.72<br />
192.168.20.74<br />
192.168.20.76<br />
192.168.20.78<br />
The system was unable to<br />
create the <strong>com</strong>mands that<br />
burn DVD's. Either the files<br />
are not there (problems with<br />
reading the disk) or<br />
something bad/unexpected<br />
occurred while parsing the<br />
names/sizes of the files.<br />
The number of expected<br />
disks to create does not<br />
match the number of<br />
<strong>com</strong>mands necessary to<br />
make the disks. Likely an<br />
error in the dividing up of files<br />
to disks.<br />
Can only happen on multidisk<br />
operations.<br />
Page 49<br />
www.dmu<strong>604</strong>.<strong>com</strong><br />
Option 1: You cannot have more than<br />
10 <strong>DMU</strong>s connected to your network.<br />
Wait for one to <strong>com</strong>plete and try<br />
operation again.<br />
Option 2: No other system in the<br />
network should be using these<br />
addresses. If something else is<br />
incorrectly using these addresses you<br />
should probably contact your Network<br />
Administrator.<br />
Retry the operation on the same drive.<br />
If that drive fails again, attempt the<br />
operation on a different drive. If the<br />
second drive works, then there is likely<br />
a problem with the first drive.<br />
If problem persists with the second<br />
drive contact <strong>Commtech</strong> technical<br />
support.<br />
We would like to know how many<br />
DVD’s it was trying to make, and on<br />
which DVD the error occurred.
Error<br />
Number<br />
Text Displayed on<br />
<strong>DMU</strong><br />
4 ERROR-internal:<br />
No create line (4)<br />
Obsolete:<br />
5 ERROR:<br />
Software version 2.1.10<br />
No Disk found (5)<br />
6 ERROR:<br />
No Disks Found (6)<br />
FASTCOM TM Hard Drive Maintenance Unit<br />
Model <strong>DMU</strong>-<strong>604</strong><br />
Description Resolution<br />
Same as (3) but for the last<br />
disk of the set (or first disk if<br />
single disk operation).<br />
Network backup: this<br />
message will occur when<br />
there are no hard disks<br />
detected on the remote<br />
system. The likely causes<br />
are a system that has not<br />
been encountered before,<br />
that has hardware that is not<br />
supported (unknown SCSI or<br />
IDE controller). The <strong>DMU</strong><br />
sees it as a remote system<br />
with no hard drive.<br />
Local backup: the equivalent<br />
message that will be<br />
displayed on a local backup<br />
is "Waiting For Remote"<br />
when you have a drive<br />
connected. If you do not<br />
have a drive connected, this<br />
is normal behavior waiting for<br />
the remote connection.<br />
(disklist cannot be opened)<br />
Problem is the same as #5<br />
(disklist opened, but empty)<br />
Page 50<br />
www.dmu<strong>604</strong>.<strong>com</strong><br />
Retry the operation on the same drive.<br />
If that drive fails again, attempt the<br />
operation on a different drive. If the<br />
second drive works, then there is likely<br />
a problem with the first drive.<br />
If problem persists with the second<br />
drive contact <strong>Commtech</strong> technical<br />
support.<br />
We would like to know what system is<br />
being backed up and if it is repeatable.<br />
We would really appreciate if that drive<br />
could be made available to us so that<br />
we could identify and fix the problem.<br />
Network: Check network cable<br />
Local: Check power and interface<br />
cable connections.<br />
Retry the operation on the same drive.<br />
If that drive fails again, attempt the<br />
operation on a different drive. If the<br />
second drive works, then there is likely<br />
a problem with the first drive.<br />
If problem persists with the second<br />
drive contact <strong>Commtech</strong> technical<br />
support.<br />
Same as #5
Error<br />
Number<br />
Text Displayed on<br />
<strong>DMU</strong><br />
7 ERROR-Aborting:<br />
Imaging error (7)<br />
FASTCOM TM Hard Drive Maintenance Unit<br />
Model <strong>DMU</strong>-<strong>604</strong><br />
Description Resolution<br />
Local drive imaging error.<br />
One of the routines that<br />
copies the used sectors of<br />
the disk failed. This can<br />
happen if the drive was not<br />
shutdown properly (i.e., in<br />
need of windows chkdsk) or if<br />
unrecoverable bad sectors<br />
are encountered.<br />
Also linked to backing up<br />
Ultra-320 SCSI drives with<br />
the supplied non-Ultra-320<br />
cable. If you are backing up<br />
an Ultra-320 drive you need<br />
to get a terminated Ultra-320<br />
cable to use in order for the<br />
operation to succeed (see our<br />
website for approved cables).<br />
If error occurs when backing<br />
up an “AFCS100 M1” see<br />
Appendix A.<br />
Page 51<br />
www.dmu<strong>604</strong>.<strong>com</strong><br />
• If you encounter this on a Windows<br />
based system, boot to Windows and<br />
run a full check on each partition on the<br />
drive:<br />
chkdsk /R X<br />
Changing X for every partition on your<br />
hard drive. Something like:<br />
chkdsk /R c:<br />
chkdsk /R d:<br />
Then try the backup operation again. If<br />
the error occurs again, try running the<br />
extended bad sector/surface scan of<br />
the drive using the hard drive<br />
manufacturers utility disk.<br />
• If you encounter this on a Linux based<br />
system, boot to Linux and run a full<br />
check on each partition on the drive.<br />
e2fsck -c -f /dev/X<br />
Changing the X for every partition on<br />
your hard drive. Something like:<br />
e2fsck -c -f /dev/sda1<br />
e2fsck -c -f /dev/sda2<br />
If, for example, you encounter a<br />
warning message saying that<br />
/dev/sda2 is already mounted DO<br />
NOT run the partition check on that<br />
partition. Instead run this:<br />
tune2fs -c 29 -C 29 /dev/sda2<br />
substituting your partition name. Then<br />
shutdown and reboot the system. The<br />
partition will be checked during the boot<br />
sequence.<br />
Then try the backup operation again. If<br />
the error occurs again, try running the<br />
extended bad sector/surface scan of<br />
the drive using the hard drive<br />
manufacturers utility disk.<br />
• If after doing these operations the<br />
<strong>DMU</strong> still fails with this error, please<br />
send the disk in so we can determine<br />
the cause, and update the list, fix the<br />
firmware, and/or determine the correct<br />
course of action.
Error<br />
Number<br />
Text Displayed on<br />
<strong>DMU</strong><br />
8 ERROR-Aborting:<br />
SCSI read error (8)<br />
9 ERROR-Aborting:<br />
10 ERROR:<br />
11 ERROR:<br />
Disk read error (9)<br />
Disk Read Error (10)<br />
Internal Error (11)<br />
FASTCOM TM Hard Drive Maintenance Unit<br />
Model <strong>DMU</strong>-<strong>604</strong><br />
Description Resolution<br />
Low-level SCSI Errors were<br />
detected during the course of<br />
the operation on the local<br />
(Non-VAX) drive.<br />
Also linked to backing up<br />
Ultra-320 SCSI drives with<br />
the supplied non-Ultra-320<br />
cable. If you are backing up<br />
an Ultra-320 drive you need<br />
to get a terminated Ultra-320<br />
cable to use in order for the<br />
operation to succeed (see our<br />
website for approved cables).<br />
Low-level SCSI Errors were<br />
detected during the course of<br />
the operation on the local<br />
VAX drive.<br />
Low-level SCSI Errors were<br />
detected during the course of<br />
the operation on the remote<br />
drive.<br />
Unable to open remote<br />
<strong>com</strong>mand file. This is a<br />
connectivity issue between<br />
the <strong>DMU</strong> and the Network<br />
booted system.<br />
Page 52<br />
www.dmu<strong>604</strong>.<strong>com</strong><br />
See # 7<br />
Retry the operation on the same drive.<br />
If that drive fails again, attempt the<br />
operation on a different drive. If the<br />
second drive works, then there is likely<br />
a problem with the first drive.<br />
If problem persists with the second<br />
drive contact <strong>Commtech</strong> technical<br />
support.<br />
Check the Ethernet cables, if using a<br />
switch/hub, try connecting directly to the<br />
<strong>DMU</strong> via an Ethernet crossover cable.<br />
Retry the operation on the same drive.<br />
If that drive fails again, attempt the<br />
operation on a different drive. If the<br />
second drive works, then there is likely<br />
a problem with the first drive.<br />
If problem persists with the second<br />
drive contact <strong>Commtech</strong> technical<br />
support.
Error<br />
Number<br />
12 ERROR:<br />
13 ERROR:<br />
14 ERROR:<br />
15 ERROR:<br />
Text Displayed on<br />
<strong>DMU</strong><br />
Imaging Error (12)<br />
Disk Read Error (13)<br />
Can't mount DVD (14)<br />
Not Image DVD (15)<br />
FASTCOM TM Hard Drive Maintenance Unit<br />
Model <strong>DMU</strong>-<strong>604</strong><br />
Description Resolution<br />
Remote drive imaging error.<br />
See Imaging Error (7)<br />
Low-level SCSI/IDE Errors<br />
were detected during the<br />
course of the operation on<br />
the remote drive.<br />
The <strong>DMU</strong> was unable to open<br />
the DVD.<br />
The <strong>DMU</strong> could not open the<br />
"sz" file on the DVD.<br />
Page 53<br />
www.dmu<strong>604</strong>.<strong>com</strong><br />
See # 7<br />
Retry the operation on the same drive.<br />
If that drive fails again, attempt the<br />
operation on a different drive. If the<br />
second drive works, then there is likely<br />
a problem with the first drive.<br />
If problem persists with the second<br />
drive contact <strong>Commtech</strong> technical<br />
support.<br />
See # 7<br />
Retry the operation on the same drive.<br />
If that drive fails again, attempt the<br />
operation on a different drive. If the<br />
second drive works, then there is likely<br />
a problem with the first drive.<br />
If problem persists with the second<br />
drive contact <strong>Commtech</strong> technical<br />
support.<br />
Try checking the DVD in a separate PC;<br />
the directory contents should be<br />
readable.<br />
Make sure the disk is not blank or<br />
damaged.<br />
Try checking the disk in a separate PC;<br />
the directory contents should be<br />
readable.<br />
Make sure the disk is not blank or<br />
damaged.
Error<br />
Number<br />
16 ERROR:<br />
17 ERROR:<br />
18 ERROR:<br />
19 ERROR:<br />
20 ERROR:<br />
Text Displayed on<br />
<strong>DMU</strong><br />
Image > Disk (16)<br />
Copying DVD (17)<br />
Copying DVD (18)<br />
Copying DVD (19)<br />
Copying DVD (20)<br />
FASTCOM TM Hard Drive Maintenance Unit<br />
Model <strong>DMU</strong>-<strong>604</strong><br />
Description Resolution<br />
The physical disk size that<br />
the image was made from is<br />
larger than the disk that is<br />
connected to the <strong>DMU</strong>.<br />
It is possible to place a<br />
smaller image on a larger<br />
drive, but not a larger image<br />
on a smaller drive.<br />
The <strong>DMU</strong> was unable to copy<br />
the "dirlist" file from the DVD.<br />
The <strong>DMU</strong> was unable to copy<br />
the "sz" file from the DVD.<br />
The <strong>DMU</strong> was unable to copy<br />
the "id" file from the DVD.<br />
The <strong>DMU</strong> was unable to copy<br />
the "type" file from the DVD.<br />
Page 54<br />
www.dmu<strong>604</strong>.<strong>com</strong><br />
With the firmware release (2.1.9) the<br />
restriction is modified somewhat for dos<br />
based drives (systems with a dos<br />
partition table such as DOS, Windows<br />
NT/2000/XP, Linux, QNX, and most<br />
everything except the VAX’s in the<br />
MLOCR and IPSS).<br />
The <strong>DMU</strong> will now use the maximum<br />
block as defined in the partition table as<br />
the limiting factor instead of the<br />
maximum block of the physical drive.<br />
This means that if you have an 18Gig<br />
drive, and you have two 2 Gig windows<br />
partitions on it, and 14G of<br />
unpartitioned space. The Image that<br />
the <strong>DMU</strong> creates could be restored to a<br />
physical drive that was at least 4Gigs in<br />
size (with the actual limit based on the<br />
maximum sector number in use in the<br />
partition table from the original disk, be<br />
mindful of marketing Gigs).<br />
With this scheme it is possible to move<br />
backwards in drive sizes, however it is<br />
not possible to squeeze an 18 Gig drive<br />
that has been partitioned out to use the<br />
entire disk to anything smaller than an<br />
18 Gig drive.<br />
Try checking the disk in a separate PC;<br />
the directory contents should be<br />
readable.<br />
Make sure the disk is not blank or<br />
damaged.<br />
Try checking the disk in a separate PC;<br />
the directory contents should be<br />
readable.<br />
Make sure the disk is not blank or<br />
damaged.<br />
Try checking the disk in a separate PC;<br />
the directory contents should be<br />
readable.<br />
Make sure the disk is not blank or<br />
damaged.<br />
Try checking the disk in a separate PC;<br />
the directory contents should be<br />
readable.<br />
Make sure the disk is not blank or<br />
damaged.
Error<br />
Number<br />
Text Displayed on<br />
<strong>DMU</strong><br />
21 ERROR: Ethernet with<br />
22 ERROR:<br />
23 ERROR:<br />
24 ERROR:<br />
25 ERROR:<br />
VAX DVD image (21)<br />
Copying DVD (22)<br />
Copying DVD (23)<br />
Copying DVD (24)<br />
Copying DVD (25)<br />
26 ERROR: eject><br />
SCSI Error (26)<br />
FASTCOM TM Hard Drive Maintenance Unit<br />
Model <strong>DMU</strong>-<strong>604</strong><br />
Description Resolution<br />
The DVD image inserted is a<br />
VAX image, but the current<br />
connection is configured to<br />
use the Remote Ethernet<br />
capability.<br />
The <strong>DMU</strong> could not copy the<br />
"boot sector" file from the<br />
DVD.<br />
The <strong>DMU</strong> could not copy the<br />
"partitions" file from the DVD.<br />
The <strong>DMU</strong> could not copy the<br />
disk image files from the<br />
DVD.<br />
The <strong>DMU</strong> could not copy the<br />
partition image files from the<br />
DVD.<br />
Low-level SCSI/IDE Errors<br />
were detected during the<br />
course of the operation on<br />
the local (VAX) drive.<br />
Page 55<br />
www.dmu<strong>604</strong>.<strong>com</strong><br />
The VAX image is not restorable<br />
remotely.<br />
Try checking the disk in a separate PC;<br />
the directory contents should be<br />
readable.<br />
Make sure the disk is not blank or<br />
damaged.<br />
Try checking the disk in a separate PC;<br />
the directory contents should be<br />
readable.<br />
Make sure the disk is not blank or<br />
damaged.<br />
If this is a multi disk set, please upgrade<br />
to 2.1.6 (or newer).<br />
If it is a single DVD backup, then there<br />
is an issue with the physical disk<br />
(scratches), or DVD drive.<br />
If this is a multi disk set, please upgrade<br />
to 2.1.6 (or newer).<br />
If it is a single DVD backup, then there<br />
is an issue with the physical disk<br />
(scratches), or DVD drive.<br />
See # 7<br />
Retry the operation on the same drive.<br />
If that drive fails again, attempt the<br />
operation on a different drive. If the<br />
second drive works, then there is likely<br />
a problem with the first drive.<br />
If problem persists with the second<br />
drive contact <strong>Commtech</strong> technical<br />
support.
Error<br />
Number<br />
Text Displayed on<br />
<strong>DMU</strong><br />
27 ERROR: eject><br />
Imaging Error (27)<br />
28 ERROR: eject><br />
Disk Write Error(28)<br />
29 ERROR: Ethernet with<br />
VAX DVD image (29)<br />
FASTCOM TM Hard Drive Maintenance Unit<br />
Model <strong>DMU</strong>-<strong>604</strong><br />
Description Resolution<br />
Problems were encountered<br />
while restoring the image.<br />
One of the routines that<br />
restore the used sectors of<br />
the disk failed.<br />
Has also been linked to bad<br />
memory on the remote (non-<br />
<strong>DMU</strong>) system.<br />
Low-level SCSI/IDE Errors<br />
were detected during the<br />
course of the operation on<br />
the local (non VAX) drive.<br />
The DVD image inserted is a<br />
VAX image, but the current<br />
connection is configured to<br />
use the Remote Ethernet<br />
capability.<br />
Page 56<br />
www.dmu<strong>604</strong>.<strong>com</strong><br />
See # 7<br />
Also, try testing the remote system’s<br />
memory. We re<strong>com</strong>mend using the<br />
free Memtest86 tool. You can find<br />
more information here:<br />
http://www.memtest86.<strong>com</strong>/.<br />
We re<strong>com</strong>mend using the "ISO images<br />
suitable for creating a bootable<br />
Memtest86 CDROM" which can be<br />
download from the Memtest86 website<br />
or can be downloaded directly from<br />
<strong>Commtech</strong>: http://support.<strong>com</strong>mtechfast<strong>com</strong>.<strong>com</strong>/memtest86-3.2.iso<br />
Simply burn the ISO image to a CD,<br />
insert the CD into your system and<br />
reboot your machine. Your machine<br />
will boot from the Memtest CD and will<br />
start running the test. The test will take<br />
a while, so please be patient and let it<br />
finish. Do not stop the test until there<br />
are at least one <strong>com</strong>plete test indicated<br />
by a non-zero in the "Pass" column. If<br />
the "Error" column shows 0 when you<br />
stop the test, then your memory is<br />
probably good.<br />
See # 7<br />
Retry the operation on the same drive.<br />
If that drive fails again, attempt the<br />
operation on a different drive. If the<br />
second drive works, then there is likely<br />
a problem with the first drive.<br />
If problem persists with the second<br />
drive contact <strong>Commtech</strong> technical<br />
support.<br />
The VAX image is not restorable<br />
remotely.
Error<br />
Number<br />
Text Displayed on<br />
<strong>DMU</strong><br />
30 ERROR: eject><br />
SCSI Error (30)<br />
31 ERROR: eject><br />
Internal Error (31)<br />
32 ERROR: eject><br />
Imaging Error (32)<br />
33 ERROR: eject><br />
Disk Write Error(33)<br />
34 ERROR-Aborting:<br />
Disk read error (34)<br />
Obsolete:<br />
34 ERROR:<br />
Software version 2.1.6<br />
Not in DVD set (34)<br />
FASTCOM TM Hard Drive Maintenance Unit<br />
Model <strong>DMU</strong>-<strong>604</strong><br />
Description Resolution<br />
Low-level SCSI/IDE Errors<br />
were detected during the<br />
course of the operation on<br />
the remote drive.<br />
<strong>DMU</strong> is unable to open<br />
remote <strong>com</strong>mand file. This is<br />
a network connectivity issue.<br />
Remote drive imaging error.<br />
One of the routines that<br />
copies the used sectors of<br />
the disk failed.<br />
Low-level SCSI/IDE Errors<br />
were detected during the<br />
course of the operation on<br />
the remote drive.<br />
Local drive imaging error.<br />
One of the routines that<br />
copies the used sectors of<br />
the disk failed.<br />
For a multi-disk backup, the<br />
disk inserted is not part of the<br />
multi-disk backup set.<br />
Page 57<br />
www.dmu<strong>604</strong>.<strong>com</strong><br />
See # 7<br />
Retry the operation on the same drive.<br />
If that drive fails again, attempt the<br />
operation on a different drive. If the<br />
second drive works, then there is likely<br />
a problem with the first drive.<br />
If problem persists with the second<br />
drive contact <strong>Commtech</strong> technical<br />
support.<br />
Check the Ethernet cables, if using a<br />
switch/hub, try connecting directly to the<br />
<strong>DMU</strong> via an Ethernet crossover cable.<br />
Retry the operation on the same drive.<br />
If that drive fails again, attempt the<br />
operation on a different drive. If the<br />
second drive works, then there is likely<br />
a problem with the first drive.<br />
If problem persists with the second<br />
drive contact <strong>Commtech</strong> technical<br />
support.<br />
See # 27<br />
See # 7<br />
Retry the operation on the same drive.<br />
If that drive fails again, attempt the<br />
operation on a different drive. If the<br />
second drive works, then there is likely<br />
a problem with the first drive.<br />
If problem persists with the second<br />
drive contact <strong>Commtech</strong> technical<br />
support.<br />
See # 27<br />
All disks after the first are checked to<br />
see if they are part of the image set or<br />
not. If they are not this message<br />
appears.
Error<br />
Number<br />
Text Displayed on<br />
<strong>DMU</strong><br />
35 ERROR-Aborting:<br />
Disk read error (35)<br />
36 ERROR-Aborting:<br />
Disk read error (36)<br />
37 ERROR-Aborting:<br />
Disk read error (37)<br />
38 ERROR-Aborting:<br />
Disk read error (38)<br />
39 ERROR: eject><br />
SCSI Error (39)<br />
FASTCOM TM Hard Drive Maintenance Unit<br />
Model <strong>DMU</strong>-<strong>604</strong><br />
Description Resolution<br />
Low-level SCSI Errors were<br />
detected during the course of<br />
the operation on the local<br />
VAX drive.<br />
Low-level SCSI Errors were<br />
detected during the course of<br />
the operation on the local<br />
VAX drive.<br />
The <strong>DMU</strong> detected that the<br />
image size created was 0.<br />
It is aborting the operation<br />
instead of burning a coaster.<br />
(Local VAX image)<br />
The <strong>DMU</strong> detected that the<br />
image size created was 0.<br />
It is aborting the operation<br />
instead of burning a coaster.<br />
(Local VAX image)<br />
While restoring the MLOCR<br />
image a low level SCSI error<br />
was detected.<br />
Page 58<br />
www.dmu<strong>604</strong>.<strong>com</strong><br />
See # 7<br />
Retry the operation on the same drive.<br />
If that drive fails again, attempt the<br />
operation on a different drive. If the<br />
second drive works, then there is likely<br />
a problem with the first drive.<br />
If problem persists with the second<br />
drive contact <strong>Commtech</strong> technical<br />
support.<br />
Verify connection to local drive.<br />
Retry the operation on the same drive.<br />
If that drive fails again, attempt the<br />
operation on a different drive. If the<br />
second drive works, then there is likely<br />
a problem with the first drive.<br />
If problem persists with the second<br />
drive contact <strong>Commtech</strong> technical<br />
support.<br />
See # 7<br />
Retry the operation on the same drive.<br />
If that drive fails again, attempt the<br />
operation on a different drive. If the<br />
second drive works, then there is likely<br />
a problem with the first drive.<br />
If problem persists with the second<br />
drive contact <strong>Commtech</strong> technical<br />
support.
Error<br />
Number<br />
Text Displayed on<br />
<strong>DMU</strong><br />
40 ERROR: eject><br />
Disk read error (40)<br />
41 ERROR: eject><br />
SCSI Error (41)<br />
42 ERROR: eject><br />
43 ERROR:<br />
44 ERROR:<br />
45 ERROR:<br />
Disk read error (42)<br />
No Disks Found (43)<br />
No Disks Found (44)<br />
No Image (45)<br />
FASTCOM TM Hard Drive Maintenance Unit<br />
Model <strong>DMU</strong>-<strong>604</strong><br />
Description Resolution<br />
While restoring the MLOCR<br />
image a low level SCSI error<br />
was detected.<br />
While restoring the IPSS<br />
image a low level SCSI error<br />
was detected.<br />
While restoring the MLOCR<br />
image a low level SCSI error<br />
was detected.<br />
No local disk connected and<br />
MLOCR image restore<br />
selected.<br />
No local disk connected and<br />
IPSS image restore selected.<br />
There was a problem opening<br />
"sz" file when performing the<br />
Last Image -> HD operation.<br />
Page 59<br />
www.dmu<strong>604</strong>.<strong>com</strong><br />
See # 7<br />
Retry the operation on the same drive.<br />
If that drive fails again, attempt the<br />
operation on a different drive. If the<br />
second drive works, then there is likely<br />
a problem with the first drive.<br />
If problem persists with the second<br />
drive contact <strong>Commtech</strong> technical<br />
support.<br />
See # 7<br />
Retry the operation on the same drive.<br />
If that drive fails again, attempt the<br />
operation on a different drive. If the<br />
second drive works, then there is likely<br />
a problem with the first drive.<br />
If problem persists with the second<br />
drive contact <strong>Commtech</strong> technical<br />
support.<br />
A local VAX SCSI disk must be<br />
connected to the <strong>DMU</strong> for this restore<br />
operation.<br />
A local VAX SCSI disk must be<br />
connected to the <strong>DMU</strong> for this restore<br />
operation.<br />
Repeat the backup operation with a<br />
new DVD->HD. Do not perform the<br />
“Last Image” again as it is broken. If<br />
the error persists, contact <strong>Commtech</strong><br />
technical support.
Error<br />
Number<br />
46 ERROR:<br />
47 ERROR:<br />
Text Displayed on<br />
<strong>DMU</strong><br />
Image > Disk (46)<br />
Copying DVD (47)<br />
48 ERROR-BurnDisk:<br />
DVD Create Fail (48)<br />
49 ERROR-BurnDisk:<br />
51 ERROR:<br />
DVD Create Fail (49)<br />
No maxblk (51)<br />
FASTCOM TM Hard Drive Maintenance Unit<br />
Model <strong>DMU</strong>-<strong>604</strong><br />
Description Resolution<br />
The physical disk size that<br />
the image was made from is<br />
larger than the disk that is<br />
connected to the <strong>DMU</strong>.<br />
It is possible to place a<br />
smaller image on a larger<br />
drive, but not a larger image<br />
on a smaller drive.<br />
The <strong>DMU</strong> was unable to copy<br />
the "sz" file from the DVD.<br />
DVD creation operation<br />
failed.<br />
DVD creation operation failed<br />
(last disk of a multi-set or<br />
single disk operation).<br />
The <strong>DMU</strong> was unable to<br />
determine the maximum used<br />
block from the connected<br />
(non VAX) hard disk.<br />
Page 60<br />
www.dmu<strong>604</strong>.<strong>com</strong><br />
See # 16<br />
Try checking the disk in a separate PC;<br />
the directory contents should be<br />
readable.<br />
Make sure the disk is not blank or<br />
damaged.<br />
Retry the operation on the same drive.<br />
If that drive fails again, attempt the<br />
operation on a different drive. If the<br />
second drive works, then there is likely<br />
a problem with the first drive.<br />
If problem persists with the second<br />
drive contact <strong>Commtech</strong> technical<br />
support.<br />
Also linked to using the new firmware<br />
with an old Network boot disk! Make<br />
sure that if you are using the new<br />
firmware they get the new network disk<br />
also.<br />
Retry the operation on the same drive.<br />
If that drive fails again, attempt the<br />
operation on a different drive. If the<br />
second drive works, then there is likely<br />
a problem with the first drive.<br />
If problem persists with the second<br />
drive contact <strong>Commtech</strong> technical<br />
support.
Error<br />
Number<br />
52 ERROR:<br />
Text Displayed on<br />
<strong>DMU</strong><br />
No maxblk (52)<br />
53 ERROR:<br />
No maxblk (53)<br />
54 ERROR-Aborting<br />
Disk read error (54)<br />
55 ERROR-VerifyDisk<br />
56 ERROR:<br />
DVD Create Fail (55)<br />
DVD Loaded (56)<br />
57 ERROR-Aborting:<br />
SCSI read error (57)<br />
58 ERROR-Aborting:<br />
SCSI read error (58)<br />
59 ERROR-Aborting:<br />
60 ERROR:<br />
Disk read error (59)<br />
Disk Read Error (60)<br />
FASTCOM TM Hard Drive Maintenance Unit<br />
Model <strong>DMU</strong>-<strong>604</strong><br />
Description Resolution<br />
The <strong>DMU</strong> was unable to<br />
determine the maximum used<br />
block from the connected<br />
(non VAX) hard disk.<br />
The <strong>DMU</strong> was unable to<br />
determine the maximum used<br />
block from the connected<br />
(non VAX) hard disk.<br />
The <strong>com</strong>mand(s) that read<br />
the sectors from the VAX<br />
drive failed.<br />
The contents of the created<br />
DVD image do not match<br />
what was copied to the <strong>DMU</strong>.<br />
During restore of a multi-DVD<br />
set, if you mistakenly re-insert<br />
the same DVD a second<br />
time.<br />
Same problem as error 8 See # 8<br />
Same problem as error 8 See # 8<br />
Same problem as error 9 See # 9<br />
Same problem as error 10 See # 10<br />
Page 61<br />
www.dmu<strong>604</strong>.<strong>com</strong><br />
Retry the operation on the same drive.<br />
If that drive fails again, attempt the<br />
operation on a different drive. If the<br />
second drive works, then there is likely<br />
a problem with the first drive.<br />
If problem persists with the second<br />
drive contact <strong>Commtech</strong> technical<br />
support.<br />
Check the cable and repeat the backup<br />
operation, if the error persists, contact<br />
<strong>Commtech</strong> technical support.<br />
Retry the operation on the same drive.<br />
If that drive fails again, attempt the<br />
operation on a different drive. If the<br />
second drive works, then there is likely<br />
a problem with the first drive.<br />
If problem persists with the second<br />
drive contact <strong>Commtech</strong> technical<br />
support.<br />
Attempt to re-burn the DVD image with<br />
the Last Image -> DVD<br />
Insert the correct next disk in the set.
Error<br />
Number<br />
61 ERROR:<br />
62 ERROR:<br />
63 ERROR:<br />
Text Displayed on<br />
<strong>DMU</strong><br />
Disk Read Error (61)<br />
Disk Read Error (62)<br />
Disk Read Error (63)<br />
64 ERROR: eject><br />
SCSI Error (64)<br />
65 ERROR: eject><br />
SCSI Error (65)<br />
66 ERROR: eject><br />
Disk Write Error(66)<br />
67 ERROR: eject><br />
Disk Write Error(67)<br />
68 ERROR: eject><br />
SCSI Error (30)<br />
69 ERROR: eject><br />
SCSI Error (69)<br />
70 ERROR: eject><br />
SCSI Error (70)<br />
71 ERROR: eject><br />
Disk Write Error(71)<br />
72 ERROR: eject><br />
Disk Write Error(72)<br />
73 ERROR-Internal: (73)<br />
howmany processing<br />
FASTCOM TM Hard Drive Maintenance Unit<br />
Model <strong>DMU</strong>-<strong>604</strong><br />
Description Resolution<br />
Same problem as error 10 See # 10<br />
Same problem as error 13 See # 13<br />
Same problem as error 13 See # 13<br />
Same problem as error 26 See # 26<br />
Same problem as error 26 See # 26<br />
Same problem as error 28 See # 28<br />
Same problem as error 28 See # 28<br />
Same problem as error 30 See # 30<br />
Same problem as error 30 See # 30<br />
Same problem as error 30 See # 30<br />
Same problem as error 33 See # 33<br />
Same problem as error 33 See # 33<br />
An internal error occurred<br />
during the calculation of the<br />
number of disks needed.<br />
Page 62<br />
www.dmu<strong>604</strong>.<strong>com</strong><br />
Retry operation (using Last Image-><br />
DVD). If the problem persists contact<br />
<strong>Commtech</strong> technical support.
FASTCOM TM Hard Drive Maintenance Unit<br />
Model <strong>DMU</strong>-<strong>604</strong><br />
Appendix A<br />
Instructions regarding Error 7 (if directly connected to drive) and Error 12 (if using the network<br />
boot disk for an AFCS100 M1 (Linux) <strong>com</strong>puter backup with the <strong>DMU</strong>-<strong>604</strong>):<br />
Boot the M1 system into Linux.<br />
Log in as the administrator.<br />
Go to a shell window (xterm) and type:<br />
tune2fs -c 29 -C 29 /dev/hda1<br />
tune2fs -c 29 -C 29 /dev/hda3<br />
tune2fs -c 29 -C 29 /dev/hda5<br />
Then shutdown and reboot gracefully, then type:<br />
reboot<br />
The system will shutdown, restart, and execute the file system check on all three partitions as it is<br />
booting. Wait for the system to return to operational. Then login as administrator again and<br />
place the <strong>DMU</strong>-<strong>604</strong> Network boot disk in the CD drive. Find the x-term window again and type:<br />
reboot<br />
Proceed with the <strong>DMU</strong>-<strong>604</strong> backup as usual, and the drive should backup to <strong>com</strong>pletion without<br />
the imaging error.<br />
Description of the issue:<br />
The M1 Linux box running RedHat 7.3 Linux has 5 partitions on an IDE drive (boot, swap, usr,<br />
extended, and root). Three of the 5 partitions are formatted with the ext3 file system. The file<br />
system is configured to do a file system check when -1 mounts have occurred, which is effectively<br />
disabling the file system checking. Being a journaled file system, this probably would not cause<br />
many issues. However, if the system has ever been powered off without being shutdown<br />
properly there could be errors on one of the partitions. As is, the system will never do the file<br />
system check to fix the resulting errors. These errors will just sit there. The <strong>DMU</strong> does a file<br />
system check to verify that the file system is clean (without errors) before doing the backup<br />
operation. Because the system never does the file system check and cleans itself, this file<br />
system check will fail and the resulting imaging error occurs.<br />
Since the file system is set to never do the checking, you must manually check the file system<br />
and get it back to a "clean" state. Unfortunately, you cannot do this while the file system is<br />
mounted (it can only be done at boot time before the file systems are mounted, or in single user<br />
/maintenance mode). As a result, the best way to approach this issue is to set the file system to<br />
force a check every 29 mounts, and also force the current mount count to be 29 (this is what the<br />
tune2fs -c29 -C29 /dev/hdaX <strong>com</strong>mand is doing). As a result of this change, the next time the<br />
system is booted the mount count will exceed the check count and the file system check will be<br />
forced. The system should "auto-magically" clean the file systems, and once that is done the<br />
<strong>DMU</strong> should be able to backup/restore the disk image. Note the number 29 is <strong>com</strong>pletely<br />
arbitrary, you can make the number be anything you want; essentially the number will be the<br />
number of boot cycles before the file system check will be done. If you set it to 1 it will check on<br />
every boot, 10 every ten boots etc, etc.<br />
Page 63<br />
www.dmu<strong>604</strong>.<strong>com</strong>