Taking Care of Our Laptops - JohnThurlow.com
Taking Care of Our Laptops - JohnThurlow.com
Taking Care of Our Laptops - JohnThurlow.com

You also want an ePaper? Increase the reach of your titles
YUMPU automatically turns print PDFs into web optimized ePapers that Google loves.
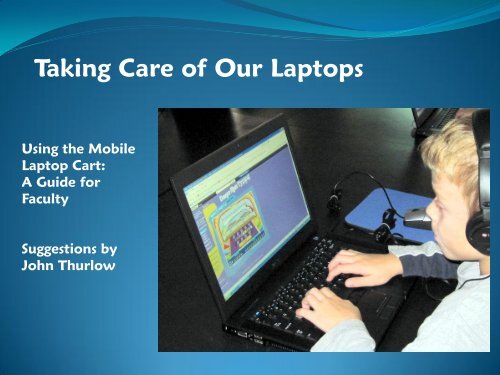
<strong>Taking</strong> <strong>Care</strong> <strong>of</strong> <strong>Our</strong> <strong>Laptops</strong><br />
Using the Mobile<br />
Laptop Cart:<br />
A Guide for<br />
Faculty<br />
Suggestions by<br />
John Thurlow
Using the Mobile Laptop Cart: A Guide for Faculty<br />
Suggestions by John Thurlow<br />
� Children should not move the cart, only adults.<br />
� The Key to the cabinet is kept on a hook in a secret location!<br />
� The cabinet must be locked securely<br />
� Get help moving the cart in and out <strong>of</strong> the elevator at Small School, first floor. There is a gap which makes moving it difficult.<br />
� To charge the laptops, you plug in 2 cords in the back to an outlet and make sure the switches are turned on. To tell, check both ventilation fans to<br />
make sure they are running.<br />
� The left door on the cabinet has two locking pins, top and bottom, to keep it secure. You have to pull those and turn them to open that door.<br />
� The fastest and safest way to distribute the laptops is to first unplug the charging cables for the number <strong>of</strong> laptops needed. You can quickly move<br />
down the shelves and pull them all out before removing the <strong>com</strong>puters<br />
� The next step is to slide out the machine and hand it to the kids.<br />
� 3 rd , 5 th and 5 th graders have learned to grasp the <strong>com</strong>puters with two hands and hold it close to their body. Younger children should not carry these<br />
machines.<br />
� If you have kids unplug and remove laptops themselves, it takes a lot more time and there are some sharp edges inside the cart to be aware <strong>of</strong>. Sliding<br />
out the laptop is one point where they are most vulnerable to dropping.<br />
� The space the laptop will be placed should be clear <strong>of</strong> all water bottles, pencils, and wiped clear with their sleeve or towel so nothing gets in the fan<br />
underneath or mouse.<br />
� Kids are asked to set the laptop on the desk away from the edge, open the screen carefully and power it up.<br />
� While it is booting, they can return to the cart buckets for headphones, mice and mouse pads.<br />
� They should never use the laptop as a tray for carrying the headphones or mice or other things. When they carry a laptop that is all they should carry.<br />
� Mouse pads are usually necessary due to the shiny surfaces <strong>of</strong> many desks which reflect the optical mice light.<br />
� Kids are taught not to move the laptop or turn it or pivot it to show a friend something. They should stay put.<br />
� Kids in grades 3-5 have learned how to plug in the mouse and headphones as shown. They are reminded not to bend the plugs.<br />
� The mouse sometimes won’t work immediately and may need to be plugged in and out for the laptop to recognize the mouse.<br />
� The mouse, pad, and headphones all are placed to the right <strong>of</strong> the laptop as shown, even for left-handed kids.<br />
� Please confirm that all <strong>com</strong>puters are shut down (no lights showing) before putting them back.<br />
� After plugging all charging cables in and plugging in the cart, scan the shelved laptops to make sure the blur charging light is glowing on all (ones left in<br />
the cart may be fully charged and have no blue light).<br />
� There is only ONE key. Please hang it where it belongs.
Troubleshooting<br />
� The most frequent reason a kid can’t log-in is because they have mistyped the<br />
user name or password.<br />
� The second most frequent is that the WiFi switch was turned <strong>of</strong>f (right side <strong>of</strong><br />
machine). Turn it on and wait 20 seconds or so then try logging in again.<br />
� If all else fails, hold down the power button for five seconds to shut down the<br />
<strong>com</strong>puter and start it up again.<br />
� The laptops will go to sleep in five minutes. Don’t push the power button, just<br />
wiggle the mouse or push any key.<br />
� If a laptop goes to hibernate, the power button will glow on and <strong>of</strong>f. Just push<br />
it once quickly.<br />
� To shut down the <strong>com</strong>puters, push the power button once for a second.
The Cart<br />
• Stored in the Library<br />
• Sign out with Librarian<br />
• Key on hook in secret location<br />
• Two plugs in back and two<br />
switches<br />
• Containers on top for<br />
headphones, mouse, mouse<br />
pads<br />
• Please make sure there is<br />
ventilation space all around<br />
• 27 laptops
Power to Cart for Charging<br />
The Power<br />
• The cart has had to be<br />
modified to prevent fuses from<br />
blowing.<br />
• The power strip on the right<br />
gets plugged in and the switch<br />
on it turned on.<br />
• The black power cable gets<br />
plugged in and the white<br />
switch to the left <strong>of</strong> it is turned<br />
on.<br />
• Just make sure both fans are<br />
running or the cart won’t<br />
charge the batteries.
Power for Charging Batteries<br />
The Cart<br />
• Please plug in both cords and<br />
make sure the switches are on.
Security<br />
• There is only one key.<br />
Please make sure it is<br />
returned<br />
• The left door has to be<br />
latched with two pins,<br />
top and bottom, before<br />
closing the right door and<br />
locking.<br />
• If the left door isn’t<br />
pinned the cabinet can be<br />
easily opened.
Locking Pins on Left Door
Security<br />
• Secure left door with pins first<br />
• Then close right door and lock.
Being <strong>Care</strong>ful<br />
• Please try to keep the cart<br />
looking like this.<br />
• The machines all go in the<br />
same direction for the charging<br />
cable to connect<br />
• The headphone and mice<br />
buckets stay on top.
Mice, Pads, Headphones
Charging Cables<br />
• Each shelf has its<br />
own charging cable.<br />
• Push in firmly
Removing and Replacing<br />
• Sliding the<br />
laptops in and<br />
out is one point<br />
where they are<br />
vulnerable to<br />
being dropped.<br />
• It is safer for<br />
adults to pull<br />
them out and<br />
hand them to<br />
kids.<br />
• The DELL Logo<br />
on the top goes<br />
in first when<br />
sliding in.
Cable Ties<br />
• Please do not<br />
remove these<br />
cable ties.<br />
• They are on all<br />
mice and<br />
headphones to<br />
prevent tangling.
Suggested Set Up