ADVANCE ZD manual - Defi
ADVANCE ZD manual - Defi
ADVANCE ZD manual - Defi

You also want an ePaper? Increase the reach of your titles
YUMPU automatically turns print PDFs into web optimized ePapers that Google loves.
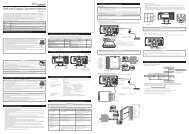
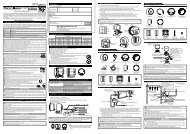
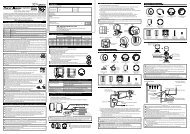
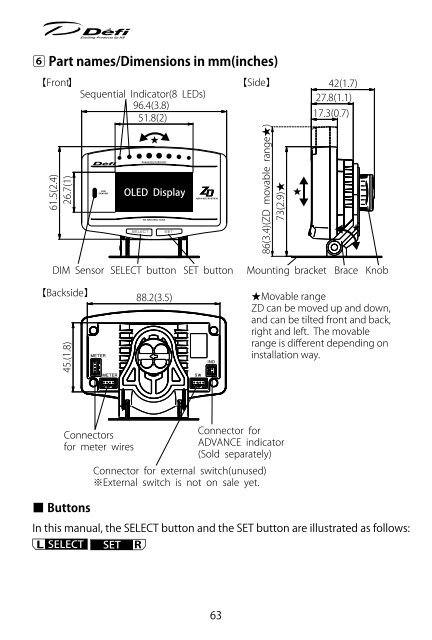
6 Part names/Dimensions in mm(inches)<br />
<br />
<br />
<br />
<br />
<br />
<br />
OLED Display<br />
<br />
<br />
<br />
<br />
<br />
<br />
<br />
<br />
<br />
<br />
■ Installation diagram<br />
<strong>ADVANCE</strong><br />
Control Unit<br />
CR<br />
BF<br />
<br />
<br />
<br />
<br />
<br />
<br />
<br />
<br />
<strong>ZD</strong><br />
<br />
<strong>ZD</strong><br />
CR<br />
BF<br />
CR<br />
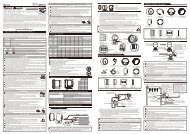
■ Buttons<br />
In this <strong>manual</strong>, the SELECT button and the SET button are illustrated as follows:<br />
<br />
<br />
<br />
<br />
<br />
<br />
<br />
<br />
<br />
<br />
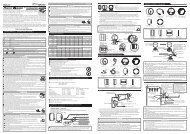
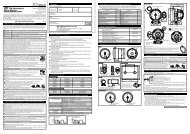
The meter wire can be connected to both two connectors of METER OUTPUT.<br />
Up to 7 gauges and displays in all can be connected to one control unit. (Ex. If<br />
7 gauges are connected to one line, none can be connected to the other line.<br />
If three gauges are connected to one line, up to 4 gauges can be connected to<br />
the other line.)<br />
※ Do not connect more than one gauge of the same variety. (Ex. You can NOT<br />
connect 2 turbo gauges together.) However, several <strong>ZD</strong>s can be connected.<br />
63 64