optimizing Efficiency With robot-assisted laparoscopic Sacrocolpopexy
optimizing Efficiency With robot-assisted laparoscopic Sacrocolpopexy
optimizing Efficiency With robot-assisted laparoscopic Sacrocolpopexy
You also want an ePaper? Increase the reach of your titles
YUMPU automatically turns print PDFs into web optimized ePapers that Google loves.
Optimizing <strong>Efficiency</strong> <strong>With</strong><br />
Robot-Assisted Laparoscopic<br />
<strong>Sacrocolpopexy</strong><br />
Charbel G. Salamon, MD; Amir Shariati, MD, MS; Patrick J. Culligan, MD<br />
The Cutting<br />
Edge<br />
Learn detailed tips on <strong>robot</strong>-<strong>assisted</strong><br />
sacrocolpopexy from this experienced<br />
cutting-edge team, then watch a video<br />
of the procedure online.<br />
Since it was first described by Lane nearly<br />
50 years ago, the sacrocolpopexy procedure<br />
has evolved tremendously. 1 Once a<br />
relatively morbid open abdominal procedure,<br />
this operation is now routinely performed<br />
<strong>laparoscopic</strong>ally, either with or without <strong>robot</strong>ic<br />
assistance. Two recent studies support the use of<br />
<strong>robot</strong>ic assistance for sacrocolpopexy. 2,3 In 2005<br />
our team began a transition away from traditional<br />
<strong>laparoscopic</strong> techniques toward the use of<br />
<strong>robot</strong>ic assistance for these cases. Having now<br />
performed more than 300 <strong>robot</strong>-<strong>assisted</strong> <strong>laparoscopic</strong><br />
sacrocolpopexies, we have adopted some<br />
new time-saving techniques that do not involve<br />
shortcuts that may change the nature of the procedure<br />
(such as the use of staples).<br />
In 2008, we published a detailed description<br />
of our <strong>robot</strong>ic techniques in this journal. 4 The<br />
purpose of this month’s article is to provide<br />
an update that includes our newest surgical<br />
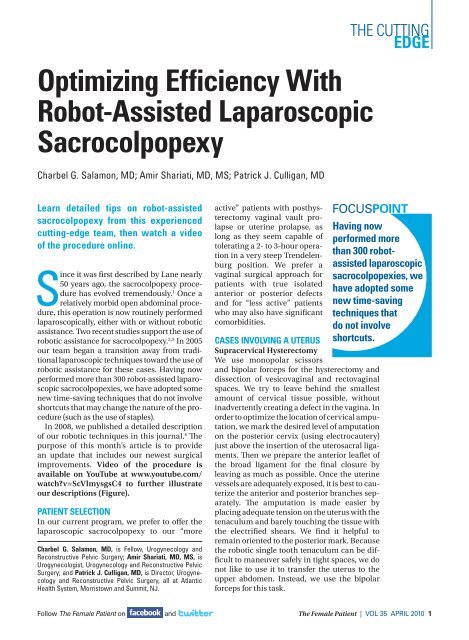
improvements. Video of the procedure is<br />
available on YouTube at www.youtube.com/<br />
watch?v=ScVlmysgsC4 to further illustrate<br />
our descriptions (Figure).<br />
Patient Selection<br />
In our current program, we prefer to offer the<br />
<strong>laparoscopic</strong> sacrocolpopexy to our “more<br />
Charbel G. Salamon, MD, is Fellow, Urogynecology and<br />
Reconstructive Pelvic Surgery; Amir Shariati, MD, MS, is<br />
Urogynecologist, Urogynecology and Reconstructive Pelvic<br />
Surgery; and Patrick J. Culligan, MD, is Director, Urogynecology<br />
and Reconstructive Pelvic Surgery, all at Atlantic<br />
Health System, Morristown and Summit, NJ.<br />
active” patients with posthysterectomy<br />
vaginal vault prolapse<br />
or uterine prolapse, as<br />
long as they seem capable of<br />
tolerating a 2- to 3-hour operation<br />
in a very steep Trendelenburg<br />
position. We prefer a<br />
vaginal surgical approach for<br />
patients with true isolated<br />
anterior or posterior defects<br />
and for “less active” patients<br />
who may also have significant<br />
comorbidities.<br />
FOCUSPOINT<br />
Having now<br />
performed more<br />
than 300 <strong>robot</strong><strong>assisted</strong><br />
<strong>laparoscopic</strong><br />
sacrocolpopexies, we<br />
have adopted some<br />
new time-saving<br />
techniques that<br />
do not involve<br />
shortcuts.<br />
Cases Involving a Uterus<br />
Supracervical Hysterectomy<br />
We use monopolar scissors<br />
and bipolar forceps for the hysterectomy and<br />
dissection of vesicovaginal and rectovaginal<br />
spaces. We try to leave behind the smallest<br />
amount of cervical tissue possible, without<br />
inadvertently creating a defect in the vagina. In<br />
order to optimize the location of cervical amputation,<br />
we mark the desired level of amputation<br />
on the posterior cervix (using electrocautery)<br />
just above the insertion of the uterosacral ligaments.<br />
Then we prepare the anterior leaflet of<br />
the broad ligament for the final closure by<br />
leaving as much as possible. Once the uterine<br />
vessels are adequately exposed, it is best to cauterize<br />
the anterior and posterior branches separately.<br />
The amputation is made easier by<br />
placing adequate tension on the uterus with the<br />
tenaculum and barely touching the tissue with<br />
the electrified shears. We find it helpful to<br />
remain oriented to the posterior mark. Because<br />
the <strong>robot</strong>ic single tooth tenaculum can be difficult<br />
to maneuver safely in tight spaces, we do<br />
not like to use it to transfer the uterus to the<br />
upper abdomen. Instead, we use the bipolar<br />
forceps for this task.<br />
Follow The Female Patient on and The Female Patient | Vol 35 april 2010 1
The CuttingEdge<br />
Robot-Assisted Laparoscopic <strong>Sacrocolpopexy</strong><br />
FOCUSPOINT<br />
We expose<br />
just enough of the<br />
anterior longitudinal<br />
ligament to place 2<br />
sutures safely, starting<br />
at the level of<br />
the promontory<br />
and progressing<br />
caudally.<br />
Anterior Vesicovaginal<br />
Space Dissection<br />
Next, we grasp the anterior<br />
cervix with the <strong>robot</strong>ic single<br />
tooth tenaculum and create<br />
tension by pulling toward the<br />
sacral promontory. This usually<br />
obviates the need for any<br />
vaginal instrumentation and<br />
saves the time and frustration<br />
associated with verbally instructing<br />
the vaginal probe<br />
holder. The endpoints of the<br />
anterior dissection include the<br />
bladder neck distally and the<br />
lateral vaginal sulcus. The latter<br />
is usually identified by longitudinal<br />
vessels that constitute<br />
the limit of the dissection. We hold the<br />
bladder peritoneum anterior and cephalad to<br />
expose the vesicovaginal plane of dissection. In<br />
that plane we try to create vertical fingerlike<br />
strings of tissue by gently pushing the loose<br />
areolar tissue. We use energy to cut strings of<br />
tissue that are less amenable to pushing and<br />
find it important to move evenly across the anterior<br />
vaginal wall in progressive horizontal<br />
sections. Depending on the total vaginal length,<br />
the anterior dissection would vary between 4<br />
and 6 cm of anterior vaginal wall exposed beyond<br />
the distal edge of the cervix.<br />
FIGURE. Robotic sacrocolpopexy.<br />
Video available at www.youtube.com/watch?v=ScVlmysgsC4<br />
Posterior Rectovaginal Space Dissection<br />
The detailed visualization of the rectovaginal<br />
space provided by the <strong>robot</strong>ic approach is<br />
unique. We begin by identifying the rectal reflection,<br />
the bottom of the cervix, and the insertion<br />
of the uterosacral ligaments. We grasp the posterior<br />
cervix with the tenaculum and pull anterior<br />
and toward the pubis but do not attempt to peel<br />
the peritoneum down from the cut edge of the<br />
cervix. Instead, we begin our posterior dissection<br />
about 1 cm below the bottom of the cervix<br />
and significantly higher than the rectal reflection.<br />
Starting closer to the rectal reflection will<br />
increase the risk of rectal injury and make the<br />
visualization more difficult due to a “curtain” of<br />
peritoneum hanging down from the cervix.<br />
We incise the peritoneum horizontally from<br />
one uterosacral ligament to the other, then<br />
using a combination of sharp and blunt dissection<br />
we expose the posterior vaginal wall from<br />
one sulcus to the other. The scope is then<br />
advanced into the posterior dissection space,<br />
which creates the impression of being in a<br />
“room” where the ceiling is the vagina, the floor<br />
is the rectum, and the distal wall is the perineal<br />
body. The length of the posterior dissection<br />
depends on the patient’s defect and defecatory<br />
dysfunction. 5 For larger defects and/or defecatory<br />
dysfunction, the dissection is continued<br />
down to the perineal body.<br />
Sacral Dissection<br />
We have adopted a minimalist approach to the<br />
sacral dissection. We expose just enough of<br />
the anterior longitudinal ligament to place 2<br />
sutures safely, starting at the level of the promontory<br />
and progressing caudally. The peritoneum<br />
is opened overlying the promontory using<br />
cautery, allowing the hot air from the energy to<br />
diffuse into the underlying areolar tissue. This<br />
helps to identify avascular windows that we use<br />
to further the dissection closer to the ligament.<br />
Meticulous hemostasis is paramount, as it allows<br />
for superior visualization of the surgical planes.<br />
The key is to remain oriented at all times in<br />
regard to the promontory and be mindful of<br />
unintended dissections of the lateral (hypogastric),<br />
superior (common iliac), or inferior (lateral<br />
sacral) veins. We extend the peritoneal incision<br />
down into the cul-de-sac, splitting the difference<br />
between the ureter and the rectosigmoid to<br />
join the posterior dissection. We incise the peritoneum<br />
layer only and spread the underlying<br />
areolar tissue just enough to ultimately facilitate<br />
peritoneal closure over the mesh as the final step<br />
of the case.<br />
Mesh Preparation and Sutures<br />
We currently use the Restorelle Y mesh. We cut<br />
the mesh arms based on information gathered<br />
from the office pelvic organ prolapse quantifica-<br />
2 The Female Patient | Vol 35 april 2010 All articles are available online at www.femalepatient.com.
Salamon et al<br />
tion examination plus examination under anesthesia<br />
prior to surgery. Typical posterior length<br />
is 8 to 10 cm; the anterior arm is cut down to 6<br />
to 8 cm. These measurements account for an<br />
average of 2 cm for the cervical length; the rest<br />
represent vaginal coverage beyond the distal<br />
edge of the cervix.<br />
We then fasten the anterior arm of the Y mesh<br />
to its sacral arm using a loosely tied suture; this<br />
keeps the anterior arm out of the way during the<br />
posterior suturing. We use soft, nonabsorbable,<br />
monofilament small-size sutures such as the<br />
Gore-Tex CV4 suture on a TH-26 needle. Delayed<br />
absorbable monofilaments would be an acceptable<br />
alternative.<br />
Posterior Vaginal Wall Suturing<br />
As stated above, we start by attaching the mesh<br />
to the posterior vaginal wall. We grasp the cervix<br />
with the tenaculum to place it under tension. We<br />
start with the mesh then pass through the vagina<br />
and tie; the knot will lie between the vagina and<br />
the mesh. This will keep the mesh out of the field<br />
of vision and out of the instrument’s working<br />
path. The first row of sutures is essential and can<br />
be challenging. We place 3 sutures to secure the<br />
mesh to the distal end of the dissected posterior<br />
vagina, just above the junction with the rectum.<br />
Pushing down on the rectum then brings that<br />
distal aspect of the dissection into view. Next we<br />
move up approximately 2 cm and place an additional<br />
suture in the midline. We then move up<br />
another 2 cm and place 2 lateral sutures; we<br />
repeat the lateral sutures up to the uterosacral<br />
ligaments. Well-placed sutures save time, as<br />
they decrease the need for extra sutures to correct<br />
a misaligned or gathered mesh. It is crucial<br />
to get the vagina as lateral as possible to avoid<br />
creating a narrow strip of coverage.<br />
Cervical Closure and<br />
Anterior Wall Suturing<br />
Once the posterior arm of the mesh is secured,<br />
we proceed to close the cervix. We use a zero<br />
monocryl running suture and apply an absorbable<br />
clip (Lapra-Ty) (off-label use) on each end in<br />
lieu of knots. 6 We close the cervix for 2 major reasons:<br />
first to prevent any vaginal discharge from<br />
the cervical os due to inflammation; second, the<br />
anterior vaginal wall is pulled up and behaves as<br />
one structural unit with the cervix. We cut the<br />
loose suture holding the anterior mesh arm<br />
back, then we lay the anterior mesh on the<br />
vagina, grasp the anterior cervix through the<br />
mesh, and pull toward the promontory. No vaginal<br />
instrumentation is used. We place the first<br />
row of 3 sutures at the very distal end of the dissection.<br />
We go through mesh, then vagina, then<br />
back through mesh and tie. As opposed to the<br />
posterior wall, anteriorly the knots will lie on top<br />
of the mesh. We then place additional lateral<br />
sutures every 2 cm up to the cervix. In patients<br />
with a large anterior defect, where the vagina is<br />
wider than the mesh, we will go to the lateral<br />
edge and gather the vagina to the mesh. This will<br />
create vaginal folds that we call “neo-rugae.” A<br />
minimum of 5 anterior and 7 posterior sutures<br />
are required to ensure adequate coverage and<br />
decrease the risk of pull out.<br />
FOCUSPOINT<br />
Sacral Suturing and<br />
Peritoneal Closure<br />
Next we close the peritoneum over the vaginal<br />
mesh using a zero monocryl with a Lapra-Ty clip<br />
at its end. We start from the left round ligament<br />
down to the rectovaginal peritoneal<br />
cut edge up through the<br />
anterior bladder peritoneum.<br />
After multiple passes across<br />
the anterior bladder peritoneum,<br />
the right round ligament<br />
is reached, and we<br />
proceed down to the cut edge<br />
of the pelvis peritoneum overlying<br />
the right uterosacral.<br />
Next we go over the mesh to<br />
the posterior rectal peritoneum,<br />
back through the anterior<br />
peritoneum, and place a<br />
Lapra-Ty clip. We will close the<br />
rest of the peritoneum over the<br />
mesh after the sacral suturing.<br />
Pull-out studies support the<br />
placement of sacral sutures at the level of the<br />
promontory as the orientation of suture placement<br />
does not matter (vertical vs horizontal). 7<br />
We routinely place 2 sutures starting at the<br />
promontory and one just below. First, we tension<br />
the mesh by having the assistant place a<br />
hand in the vagina. We use a zero Ethibond<br />
suture on an SH needle; start with the needle<br />
perpendicular to the ligament, then turn and<br />
start pushing and follow the needle curve.<br />
While tying the sacral sutures, the tension is<br />
taken off the mesh by using a vaginal probe.<br />
Care should be taken to have the knot lying flat<br />
on the sacrum without any intervening space.<br />
We finish the peritoneal closure over the mesh<br />
using the same zero monocryl suture, bringing<br />
the peritoneum from the right pelvic side to the<br />
Well-placed<br />
sutures save time,<br />
as they decrease<br />
the need for extra<br />
sutures to correct<br />
a misaligned or<br />
gathered mesh.<br />
Follow The Female Patient on and The Female Patient | Vol 35 april 2010 3
The CuttingEdge<br />
Robot-Assisted Laparoscopic <strong>Sacrocolpopexy</strong><br />
rectosigmoid side and place a Lapra-Ty clip at<br />
its end over the promontory.<br />
We undock, morcellate, then close the fascia<br />
at the umbilical port while the assistant is performing<br />
the cystoscopy and any vaginal procedure<br />
such as sling or perineorrhaphy. Note<br />
that we never switch scopes during the procedure;<br />
we only use a zero-degree scope. So far<br />
we have not had to convert any case to an open<br />
surgery.<br />
PostHysterectomy Cases<br />
Often patients have significant adhesions in the<br />
cul-de-sac and to the pelvic side wall. These<br />
adhesions could give the appearance of a “false<br />
cul-de-sac,” which increases the risk of injury.<br />
Caution should be taken to restore normal pelvic<br />
anatomy prior to beginning the vaginal and<br />
sacral dissections. In order to achieve adequate<br />
dissection in posthysterectomy cases, a vaginal<br />
probe is needed. A cone tip probe would be<br />
more suitable for initiating the right plane anteriorly;<br />
a wider probe would work better during<br />
the remainder of the dissection and suturing.<br />
For the posterior dissection and suturing we<br />
use a wide and long Breisky retractor to allow<br />
for better visualization.<br />
Dr Salamon reports no actual or potential conflict<br />
of interest in relation to this article.<br />
Dr Shariati and Dr Culligan are consultants for<br />
Intuitive Surgical, Inc.<br />
References<br />
1. Lane FE. Repair of posthysterectomy vaginal-vault prolapse.<br />
Obstet Gynecol. 1962;20:72-77.<br />
2. Geller EJ, Siddiqui NY, Wu JM, Visco AG. Short-term outcomes<br />
of <strong>robot</strong>ic sacrocolpopexy compared with abdominal<br />
sacrocolpopexy. Obstet Gynecol. 2008;112(6):1201-1206.<br />
3. Elliott DS, Krambeck AE, Chow GK. Long-term results of<br />
<strong>robot</strong>ic <strong>assisted</strong> <strong>laparoscopic</strong> sacrocolpopexy for the<br />
treatment of high grade vaginal vault prolapse. J Urol.<br />
2006;176(2):655-659.<br />
4. Shariati A, Culligan J. Robotic-<strong>assisted</strong> <strong>laparoscopic</strong><br />
sacrocolpopexy. Female Patient. 2008;33(4):30-37.<br />
5. Guiahi M, Kenton K, Brubaker L. <strong>Sacrocolpopexy</strong> without<br />
concomitant posterior repair improves posterior compartment<br />
defects. Int Urogynecol J Pelvic Floor Dysfunct.<br />
2008;19(9):1267-1270.<br />
6. Weld KJ, Arzola J, Montiglio C, Bush AC, Cespedes RD.<br />
Lapra-Ty holding strength and slippage with various<br />
suture types and sizes. Urology. 2008;71(1):32-35.<br />
7. White AB, Carrick KS, Corton MM, et al. Optimal location<br />
and orientation of suture placement in abdominal sacrocolpopexy.<br />
Obstet Gynecol. 2009;113(5):1098-1103.<br />
4 The Female Patient | Vol 35 april 2010 All articles are available online at www.femalepatient.com.


