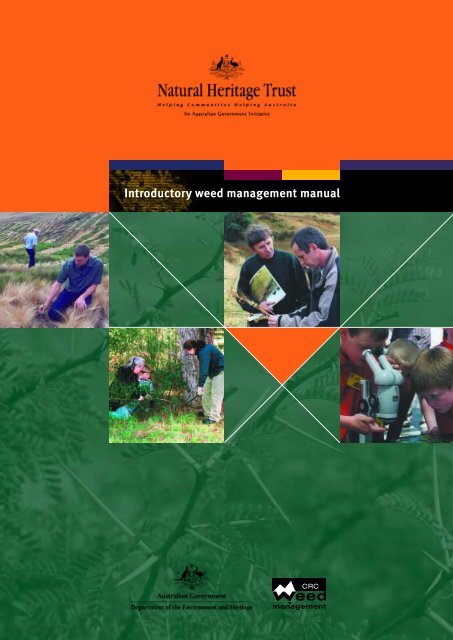
Introductory weed management manual - Greening Australia
Introductory weed management manual - Greening Australia
Introductory weed management manual - Greening Australia

Create successful ePaper yourself
Turn your PDF publications into a flip-book with our unique Google optimized e-Paper software.
<strong>Introductory</strong> <strong>weed</strong> <strong>management</strong> <strong>manual</strong>
Introduction<br />
This <strong>manual</strong> has been prepared as a training aid for the use of private landholders, conservation groups, catchment<br />
<strong>management</strong> groups, local, state and territory governments and industry. It is an introductory guide for those with<br />
little experience with <strong>weed</strong> <strong>management</strong>, particularly environmental <strong>weed</strong>s. It will be of use to those who wish to<br />
develop their <strong>weed</strong> <strong>management</strong> knowledge and skills, and as an extension resource for those who need to develop<br />
the <strong>weed</strong> <strong>management</strong> capacity of others. The <strong>manual</strong> is presented in four modules:<br />
Module 1: Developing and implementing a <strong>weed</strong> <strong>management</strong> plan<br />
Module 2: Weed control methods for community groups<br />
Module 3: Collecting and preparing plant specimens for identification<br />
Module 4: Presentation of information sessions to small groups<br />
Introduction<br />
This <strong>manual</strong> also compliments the <strong>weed</strong> <strong>management</strong> guide series prepared by the Weeds CRC for each of the<br />
species listed as Weeds of National Significance and the Department of the Environment and Heritage’s Alert List<br />
for environmental <strong>weed</strong>s. These brochure-sized publications are available via the <strong>Australia</strong>n Government’s Natural<br />
Resource Management network or can be downloaded via the <strong>Australia</strong>n Governments Biodiversity Publications<br />
web page at:<br />
http://www.deh.gov.au/biodiversity/invasive/publications/index.html#<strong>weed</strong>s<br />
or the Weeds CRC’s website at:<br />
http://www.<strong>weed</strong>s.crc.org.au<br />
The information presented in this <strong>manual</strong> is general in nature so that a wide audience can appreciate the principles<br />
outlined. The reader is encouraged to use the knowledge and guidance available at local, regional and state levels<br />
from natural resource <strong>management</strong> agencies so that <strong>weed</strong> <strong>management</strong> activities can be adapted for local situations.<br />
It also needs to be appreciated that regulations relevant to <strong>weed</strong> control, for example those applying to the use of<br />
herbicides, vary over time and from place to place so it is essential to check with relevant agencies before embarking<br />
on <strong>weed</strong> control projects.<br />
Relationship to National Competencies<br />
The Rural Training Council of <strong>Australia</strong> has developed vocational training packages relevant to a number of industries<br />
in rural and regional areas. Nationally recognised qualifications can be attained by formal recognition of self-acquired<br />
skills and knowledge or ‘Recognition of prior learning’, as measured against national competencies outlined in the<br />
training packages. A package has been developed entitled ‘Conservation and Land Management’ (CLM) which<br />
incorporates units which outline competencies for <strong>weed</strong> <strong>management</strong>. For readers who may be interested, the<br />
relationship between this <strong>manual</strong> and CLM units is detailed in Appendix 1 to this introduction. Appendix 1 is provided<br />
to help readers appreciate which competencies outlined in the CLM training package relate to which module in the<br />
<strong>manual</strong>. Please note this <strong>manual</strong> does not necessarily satisfy the requirements of the CLM training package. Anyone<br />
wishing to make further enquires regarding training packages are encouraged to contact the RTCA at:<br />
Rural Training Council of <strong>Australia</strong><br />
PO Box E10<br />
Kingston ACT 2601<br />
Phone: (02) 6273 2514<br />
Fax: (02) 6273 4811<br />
E-Mail: admin@rtca.com.au<br />
Website: www.rtca.com.au<br />
CRC for <strong>Australia</strong>n Weed Management • <strong>Introductory</strong> <strong>weed</strong> <strong>management</strong> <strong>manual</strong><br />
1
Acknowledgements<br />
Acknowledgements<br />
The <strong>Australia</strong>n Government’s Natural Heritage Trust has funded this <strong>manual</strong>. The material in this <strong>manual</strong> draws on<br />
numerous publications and the work of many of those dedicated to addressing the threat posed by invasive plants to<br />
<strong>Australia</strong>’s environment and economy. Contributions, permissions and references are gratefully acknowledged below.<br />
Reviews of drafts:<br />
Mr. Phil Maher, Queensland Department of Natural Resources and Mines<br />
Mr. Peter Martin, Weeds CRC<br />
Mr. Michael Michelmore, NSW Agriculture<br />
Mr. Andrew Storrie, NSW Agriculture/ Weeds CRC<br />
Mr. Bob Trounce, NSW Agriculture<br />
Ms. Birgitte Verbeek, NSW Agriculture/ Weeds CRC<br />
Ms. Sally Vidler, Weeds CRC<br />
Dr. John Virtue, Animal Plant Control Commission of South <strong>Australia</strong>/Weeds CRC<br />
Mr. Steve Wingrave, NT Dept of Primary Industries & Fisheries/Weeds CRC<br />
Acknowledgement of permissions<br />
Module 1 – Figure 3, A Guide for the visual assessment of <strong>weed</strong> infestation as a percentage of ground cover<br />
is reproduced with permission of NSW Agriculture and is derived from:<br />
Bayley, D. 2001, Efficient Weed Management, NSW Agriculture, Paterson NSW.<br />
Module 2 – Illustrations by Norman Yeend, whose drawings were based on originals by Virginia Bear; The website<br />
www.<strong>weed</strong>sbluemountain.org.au; and the free booklet <strong>weed</strong>s of Blue Mountain bushland, available from<br />
bushcare@bmcc.nsw.gov.au. Tables throughout the text summarising the advantages and disadvantages of various<br />
<strong>weed</strong> control methods reproduced with permission of Mr. Adam Muyt and are derived from:<br />
Muyt, A. 2001 Bush Invaders of South-East <strong>Australia</strong>: A guide to the identification and control of environmental<br />
<strong>weed</strong>s found in South-East <strong>Australia</strong>, R.G & F.J.Richardson, Melbourne.<br />
Module 3 – Derived from:<br />
Storrie, A. 2003, Collecting Specimens, which can be seen at:<br />
http://www.<strong>weed</strong>s.crc.org.au/<strong>weed</strong>_<strong>management</strong>/collecting_specimens.html<br />
Module 4 – Developed with the Department for Employment, Training & Further Education, Torrens Valley<br />
TAFE, Adelaide.<br />
Images<br />
Cover images:<br />
upper left: Victorian serrated tussock working group<br />
lower left: Rosey Boehm<br />
upper right: Peter Martin<br />
lower right: Peter Matin<br />
background: Acacia karroo Peter Martin<br />
2<br />
CRC for <strong>Australia</strong>n Weed Management • <strong>Introductory</strong> <strong>weed</strong> <strong>management</strong> <strong>manual</strong>
References:<br />
Ainsworth, N. 2003, ‘Herbicide use in riparian areas’, Proceedings of the first biennial <strong>weed</strong> conference,<br />
Developments in Weed Management, Weed Society of Victoria Inc; Bendigo, pp. 46-9.<br />
Bayley, D. 2001, Efficient Weed Management, NSW Agriculture, Paterson NSW.<br />
Blood, K. 2003, Responding to new <strong>weed</strong>s-in natural areas,<br />
http://www.<strong>weed</strong>s.crc.org.au/<strong>weed</strong>_<strong>management</strong>/responding_to_new_<strong>weed</strong>s.html (4 July 2003).<br />
Acknowledgements<br />
Blue Mountains City Council Bushcare 2002, Weeds of Blue Mountains Bushland,<br />
http://www.<strong>weed</strong>sbluemountains.org.au/control.asp (2 June 2003).<br />
Brown, K. & Brooks, K. 2002, Bushland <strong>weed</strong>s: A practical guide to their <strong>management</strong>, Environmental Weeds<br />
Action Network (WA) Inc., Perth WA.<br />
Hall, R. 1999 ‘Strategic <strong>weed</strong> <strong>management</strong>: The way forward’, Proceedings of the 12th <strong>Australia</strong>n Weeds<br />
Conference, Council of <strong>Australia</strong>n <strong>weed</strong> Science Societies, Hobart, pp. 82-85.<br />
Hawkesbury-Nepean Catchment Management Trust 2000, Aspects of Catchment Health: A Community Environmental<br />
Assessment and Monitoring Manual, Hawkesbury-Nepean Catchment Management Trust, Windsor, NSW.<br />
Kwong, R.M. 2003, ‘Biological control of <strong>weed</strong>s in Victoria’, Proceedings of the First Biennial Weed Conference,<br />
Developments in Weed Management, Weed Society of Victoria Inc. Bendigo, pp. 37-40.<br />
Lonsdale, W.M. 2002, ‘The highest form of generalship? A review of <strong>weed</strong> strategies’, Papers and Proceedings of<br />
the 13th <strong>Australia</strong>n Weeds Conference, Council of <strong>Australia</strong>n <strong>weed</strong> Science Societies, Perth, p. 7.<br />
Muyt, A. 2001 Bush Invaders of South-East <strong>Australia</strong>: A guide to the identification and control of environmental<br />
<strong>weed</strong>s found in South-East <strong>Australia</strong>, R.G & F.J.Richardson, Melbourne.<br />
Robertson, M. 1994, Stop bushland <strong>weed</strong>s: a guide to successful <strong>weed</strong>ing in South <strong>Australia</strong>'s bushland, Nature<br />
Conservation Society of South <strong>Australia</strong>, Adelaide.<br />
Sindel, B.M (ed), 2000, <strong>Australia</strong>n Weed Management Systems, R.G & F.J Richardson, Melbourne.<br />
van Oosterhout, E. 2003, General Information on Control Methods for Environmental Weeds<br />
http://www.nrm.qld.gov.au/pests/environmental_<strong>weed</strong>s/pdf/generalinfo.pdf (3 June 2003).<br />
Welsh, S. 2000, Tasmanian Weed Mapping Guidelines, Tasmanian Weed Mapping Network.<br />
CRC for <strong>Australia</strong>n Weed Management • <strong>Introductory</strong> <strong>weed</strong> <strong>management</strong> <strong>manual</strong><br />
3
Appendix 1: Relationship between modules in this <strong>manual</strong> and competencies contained in the Conservation & Land Management (CLM) training package<br />
Appendix 1: Relationship between modules in this <strong>manual</strong> and units contained in the<br />
Conservation & Land Management (CLM) training package<br />
CLM Training Package Unit Name Selected Unit Elements & Performance criteria Manual module which<br />
unit number (describes issues covered by the RTC unit) relates to the unit<br />
RTC 1801A Prepare for work 1.Observe safe work practices Module 2<br />
1.1 Protective clothing<br />
RTC 1701A Follow Basic safety rules 1. Follow workplace requirements and instructions Module 2<br />
concerning chemicals<br />
1.2 Safety procedures involved with chemical handling are recognised<br />
and followed as required<br />
2. Recognise risks associated with chemicals Module 2<br />
2.2 Chemical labels and symbols are recognised and hazards identified<br />
2.5 Instructions for use of personal protective equipment and application<br />
equipment are identified and observed<br />
3. Follow chemical handling and storage rules Module 2<br />
3.1 Chemical handling and storage instructions on labels are followed<br />
RTC 2016A Recognise Plants 1. Prepare plant for recognition. Module 3<br />
1.1 Range of plants requiring recognition is identified according to<br />
supervisors/customers needs<br />
1.2 Resources and equipment for use in recognition activity are located<br />
and identified<br />
1.3 Available processes for plant recognition are identified, selected and<br />
prepared for use<br />
2.2 Brief descriptions of plant habits, characteristics and significant<br />
features are recorded<br />
4<br />
CRC for <strong>Australia</strong>n Weed Management • <strong>Introductory</strong> <strong>weed</strong> <strong>management</strong> <strong>manual</strong>
RTC 2401A Treat <strong>weed</strong>s 1. Prepare to treat <strong>weed</strong>s Modules 1 & 2<br />
1.2 Details of <strong>weed</strong> occurrence are recorded and reported to supervisor<br />
1.3 Treatment methods are selected in consultation with the supervisor<br />
1.5 OHS hazards are identified, risks assessed and reported to<br />
the supervisor<br />
2. Treat Weed Module 2 in part<br />
2.1 Suitable personal protective equipment is selected, used<br />
and maintained<br />
2.2 Treatments are prepared according to supervisors instructions and<br />
manufacturers guidelines<br />
2.3 Treatments are applied in such a way that non-target damage<br />
is minimised<br />
3. Carry out post treatment operations Modules 1 & 2<br />
3.3 Records are maintained according to enterprise guidelines<br />
RTC 3218A Undertake a site assessment 2. Collect and collate base information Module 1<br />
2.3 Base plan is prepared of the site<br />
3. Prepare for site visit Module 1<br />
3.1 OHS hazards associated with undertaking a site visit are assessed<br />
for potential risks and controls implemented accordingly<br />
3.2 Location ownership and site boundaries are verified<br />
3.4 Climate and weather conditions are ascertained from historical data<br />
3.5 Where required, formal approval is sought to visit site<br />
4. Undertake site inspection Module 1<br />
4.1 Site orientation is undertaken<br />
4.2 Existing on-site and adjacent features that may impact upon the<br />
project objectives are identified and recorded<br />
5. Document information Module 1<br />
5.1 Site survey information is documented in accordance with<br />
enterprise procedures<br />
Appendix 1: Relationship between modules in this <strong>manual</strong> and competencies contained in the Conservation & Land Management (CLM) training package<br />
CRC for <strong>Australia</strong>n Weed Management • <strong>Introductory</strong> <strong>weed</strong> <strong>management</strong> <strong>manual</strong><br />
5
Appendix 1: Relationship between modules in this <strong>manual</strong> and competencies contained in the Conservation & Land Management (CLM) training package<br />
CLM Training Package Unit Name Unit Element & Performance criteria Manual module which<br />
unit number (describes issues covered by the RTC unit) relates to the unit<br />
RTC 3401A Control <strong>weed</strong>s 1. Assess <strong>weed</strong> infestation Module 1<br />
1.1 Scope and size of the infestation is assessed<br />
1.2 Pests and beneficial organisms are identified and reported or recorded<br />
in field notes<br />
1.5 Professional advice is obtained as required according to enterprise<br />
guidelines<br />
2. Plan the implementation of control measures Module 2<br />
2.1 Control measures suitable for the infestation are selected from the<br />
IPM strategy<br />
2.4 Suitable safety equipment and personal protective<br />
equipment are selected used and maintained<br />
4. Monitor control methods Module 1<br />
4.1 Control methods are monitored to identify side effects to other<br />
plants, animals or external environment<br />
4.2 Effectiveness of control methods are assessed in reference to specified<br />
industry or enterprise standards<br />
4.3 Adjustments to IPM control methods are implemented where<br />
necessary to meet enterprise specifications<br />
6<br />
CRC for <strong>Australia</strong>n Weed Management • <strong>Introductory</strong> <strong>weed</strong> <strong>management</strong> <strong>manual</strong>
M o d u l e 1<br />
Developing and implementing a <strong>weed</strong> <strong>management</strong> plan<br />
Module 1
<strong>Introductory</strong> <strong>weed</strong> <strong>management</strong> <strong>manual</strong><br />
Developing and implementing a <strong>weed</strong> <strong>management</strong> plan<br />
Module 1<br />
General Disclaimer<br />
The information contained in this publication is offered by the CRC for <strong>Australia</strong>n Weed Management (Weeds CRC), its partners and the Commonwealth<br />
Department of the Environment and Heritage solely to provide information. While all due care has been taken in compiling the information, it is applied<br />
on the basis and subject to the qualification that all the Weeds CRC and its partners, their officers and employees take no responsibility for its contents<br />
nor for any loss, damage or consequence whatsoever for any person or body relying on the information, or any error or omission, contained in this<br />
publication. Any recommendations contained herein do not necessarily represent Weeds CRC policy.<br />
Copyright © CRC for <strong>Australia</strong>n Weed Management 2004.<br />
This <strong>manual</strong> is copyright. Except as permitted under the <strong>Australia</strong>n Copyright Act 1968 (Commonwealth) and subsequent amendments, no part of this<br />
publication may be reproduced, stored or transmitted in any form or by any means, electronic or otherwise; without the specific written permission<br />
of the copyright owner.<br />
The copyright of reference sources rests with the publishers of those resources.<br />
The intellectual property on which the materials in this <strong>manual</strong> is based rests with the contributors.
Developing and implementing a <strong>weed</strong> <strong>management</strong> plan<br />
Introduction 3<br />
Why plan? 3<br />
Developing the plan 4<br />
Step 1: Site assessment 5<br />
Preparation of a site information sheet 6<br />
Preparation of a <strong>weed</strong> <strong>management</strong> map 6<br />
Drawing your map 6<br />
Mapping your <strong>weed</strong>s 8<br />
When to map 8<br />
Surveying the site for <strong>weed</strong>s 8<br />
Determining <strong>weed</strong> density 9<br />
Visual assessment of density 9<br />
Establishing photo points 10<br />
Step 2: Setting your objectives 10<br />
Determining <strong>weed</strong> priorities 10<br />
Setting your objectives 11<br />
Management approaches 11<br />
Step 3: Develop and implement the action plan 12<br />
Assessing your resources 13<br />
Funding 14<br />
Selecting control options. 14<br />
Integrated <strong>weed</strong> <strong>management</strong> 14<br />
A sample plan 14<br />
Step 4: Monitoring performance and making changes 15<br />
Recording 15<br />
Appendix 1: Weed control contacts 16<br />
Mapping/Aerial photography contacts 16<br />
Appendix 2: Site assessment sheet 17<br />
Appendix 3: Establishing your location 19<br />
Using a map 19<br />
What are Eastings and Northings? 19<br />
Using a GPS 22<br />
Appendix 4: Grid sheet 23<br />
Appendix 5: Useful resources 24<br />
Web links 24<br />
Further reading 25<br />
Weed <strong>management</strong> 25<br />
Crop and Pasture Weeds 25<br />
Environmental Weeds 25<br />
Weed Identification and Biology 25<br />
2<br />
CRC for <strong>Australia</strong>n Weed Management • Developing and implementing a <strong>weed</strong> <strong>management</strong> plan
Introduction<br />
This module is intended as an introductory guide for anyone who has an interest in <strong>weed</strong> <strong>management</strong> but little<br />
previous experience or knowledge in <strong>weed</strong> <strong>management</strong> planning. It should be read in conjunction with other<br />
modules in this <strong>manual</strong> and used with information specific to the species and situation being addressed.<br />
Introduction<br />
Why plan?<br />
Good <strong>weed</strong> <strong>management</strong> is about good land <strong>management</strong>. It is not just about trying to eradicate this or that <strong>weed</strong>.<br />
Good <strong>weed</strong> <strong>management</strong> is about making the landscape resistant to invasion by <strong>weed</strong>s and thus preventing <strong>weed</strong>s<br />
from establishing. This is true whether you are dealing with <strong>weed</strong>s in natural environments (environmental <strong>weed</strong>s)<br />
or <strong>weed</strong>s that threaten agriculture (agricultural <strong>weed</strong>s). We need to think in terms of restoring natural ecosystems,<br />
or restoring the productivity of agricultural land and protecting sites that are <strong>weed</strong> free. This approach will, in the<br />
long run, reduce the damage done by <strong>weed</strong>s to our environment, and our economy, and will prevent <strong>weed</strong>s<br />
reinvading areas where time, money, sweat and tears have already been expended to control them.<br />
Making landscapes resistant to <strong>weed</strong> invasion requires the planned integration of control techniques, or integrated<br />
<strong>weed</strong> <strong>management</strong>. This means using a variety of control methods in order to target vulnerable aspects of a <strong>weed</strong>,<br />
its lifecycle or its environment, in order to achieve more effective control.<br />
As you may have gathered, <strong>weed</strong> <strong>management</strong> is a long-term exercise. Do not despair! With planning and regular<br />
<strong>weed</strong> work, done at the right time, you can have a real impact on <strong>weed</strong>s.<br />
Developing a <strong>weed</strong> <strong>management</strong> plan is important because:<br />
• By developing a plan you will find out important information that will increase your chances of success.<br />
• A plan will help you identify the best time to control <strong>weed</strong>s and the best methods to use.<br />
• A plan will help you to prioritise the use of the limited resources available to control <strong>weed</strong>s in the most<br />
effective manner.<br />
• Following a plan will ensure that you monitor results, measure progress against objectives, adapt to changing<br />
conditions and be able to take advantage of any opportunities that occur.<br />
• A plan will also be very useful to support funding applications and will also provide a basis to report progress<br />
to funding bodies.<br />
Prevention is better than cure<br />
As you go through the planning process and implement your plan imagine if the <strong>weed</strong>s were never there in the<br />
first place! It is far more cost effective to prevent <strong>weed</strong> problems than to cure them. The majority of <strong>Australia</strong>’s<br />
<strong>weed</strong>s were deliberately introduced from overseas either as garden species or plants for agriculture. For tips on<br />
how to prevent <strong>weed</strong> problems visit www.<strong>weed</strong>s.crc.org.au<br />
CRC for <strong>Australia</strong>n Weed Management • Developing and implementing a <strong>weed</strong> <strong>management</strong> plan<br />
3
Developing the plan<br />
Developing the plan<br />
Developing a <strong>weed</strong> <strong>management</strong> plan requires a little strategic thought. This means following some steps to make<br />
sure all relevant factors are considered when you develop and carry out the plan. It is also important, yet often<br />
overlooked, to allow time to review progress against objectives and explore ways to improve the effectiveness of<br />
your work. The environment we work in is not static and many factors may change from month to month, season<br />
to season or year to year that impact on the effectiveness of <strong>weed</strong> work.<br />
Appreciate from the outset that your plan will probably need to change as you go along, but it is important that<br />
changes are made based on evidence gained whilst monitoring the results of the work carried out.<br />
The following are suggested steps to develop your <strong>weed</strong> plan. These steps relate best to developing a plan for a<br />
bushland site, perhaps as part of an Natural Heritage Trust project or similar. Nonetheless many of the principles<br />
will apply to those looking to control <strong>weed</strong>s on their own property.<br />
Step 1. Carry out a site assessment.<br />
Step 2. Set objectives based on resources available and priorities.<br />
Step 3. Develop and implement an action plan to achieve objectives.<br />
Step 4. Monitor performance and change actions as necessary.<br />
These steps need to be repeated over time. Weed <strong>management</strong> is an ongoing process of planning, doing, reviewing<br />
and replanning and doing and reviewing again and so on, as set out in the following figure.<br />
Figure 1: Weed <strong>management</strong> cycle<br />
Site assessment<br />
• identity <strong>weed</strong>s<br />
• map <strong>weed</strong>s and features<br />
• understand why <strong>weed</strong>s<br />
are present<br />
• identity risks<br />
• identity and other fauna<br />
& flora.<br />
Monitor and review<br />
• map <strong>weed</strong>s<br />
• assess impacts of actions<br />
• find out what has worked<br />
and what has not<br />
• revise plan if objectives not<br />
being met.<br />
Develop strategy<br />
• what are the priorities?<br />
• set measurable objectives<br />
to achieve priorities using<br />
resources available<br />
• keep a long term view.<br />
Implement strategy<br />
• agree on actions required<br />
to achieve objectives<br />
• allocate responsibility for<br />
actions<br />
• actions to be time-lined<br />
and measurable<br />
• commence action (Have<br />
some fun on the way too!).<br />
4<br />
CRC for <strong>Australia</strong>n Weed Management • Developing and implementing a <strong>weed</strong> <strong>management</strong> plan
Step 1: Site assessment<br />
Many of the tasks in the planning process will be made easier if you can get assistance from appropriate experts.<br />
This may be a Landcare or Bushcare officer, a local council or shire Weed Control officer, a state or territory agency<br />
officer (from departments of environment, agriculture and the like), a local agronomist or a person with expertise<br />
in local plants and natural resource <strong>management</strong>. A list of state and territory departments who can help with <strong>weed</strong><br />
control advice is included with this module (Appendix 1).<br />
Developing the plan<br />
To carry out a site assessment an understanding of <strong>weed</strong>s, local plants and animals will be very useful. Do not<br />
underestimate the time needed to complete your site assessment. It will be time well spent as a comprehensive<br />
collection of relevant information in the early stages of your <strong>weed</strong> work will save considerable time down the track<br />
and help you to avoid a range of potential problems.<br />
To simplify the task of conducting a site assessment it is suggested that it be broken down to the following tasks:<br />
1. Preparation of a site information sheet.<br />
2. Preparation of a <strong>weed</strong> <strong>management</strong> map.<br />
3. Establishment of photo points.<br />
Preparation of a site information sheet<br />
To assist with the task of collecting information a format for a simple site information sheet is included as Appendix 2.<br />
This represents basic data only and you may wish to add information that you consider useful. Together with a <strong>weed</strong><br />
<strong>management</strong> map and photo point images, the site information sheet allows you to record essential information. This<br />
will aid your <strong>weed</strong> <strong>management</strong> planning and <strong>weed</strong> work. It can also provide useful information to others who may<br />
be involved in planning at local, regional, state or national levels.<br />
Before completing a site information sheet, take time to walk around and observe the site to gain an appreciation<br />
of what <strong>weed</strong>s, other vegetation and animals are present. Make notes on these and other aspects that you observe<br />
which may affect your work on the site. For example the presence of hazards (disused wells, dumps, feral bee hives<br />
etc.) or <strong>weed</strong>s on neighbouring properties. It may take a few visits over several months to get to know the site,<br />
especially if it is new to you. Plants will be much easier to identify when in flower, so time visits to coincide with the<br />
range of flowering times of known <strong>weed</strong>s in the area and in nearby areas. Check under tall trees where birds are<br />
likely to perch, each time you visit your site, for new bird-dispersed <strong>weed</strong>s.<br />
Note that if isolated occurrences of <strong>weed</strong>s are encountered at this stage, and you are sure of their identity, then it<br />
may be worthwhile to remove or treat them immediately before they have a chance to spread and become harder<br />
to control. If at all unsure about the identity of a plant or how to treat it consult local authorities.<br />
Please refer to the “Collecting and preparing plant specimens for identification” module of this <strong>manual</strong> if you<br />
need to send plant material away to get a positive identification.<br />
As part of the site assessment it will be useful to collect a range of background information about the site including:<br />
• establishing the location of the site using a map or GPS coordinates (see Appendix 3 ‘Establishing your<br />
location’ later in this module)<br />
• land ownership. If it is not you, ensure the landowner has given permission for access to the site and for the work,<br />
including <strong>weed</strong> mapping, to be undertaken. If it is public land obtain permission from the appropriate authority.<br />
Ensure you know where all the boundaries are located<br />
• find out what regulations exist that will impact on your work. For example herbicide legislation, regulations regarding<br />
the use of fire, or laws protecting native vegetation<br />
• find out who else uses the area and what other people have an interest or association with the site. Determine<br />
if they need to be made aware of the work that will be undertaken or encouraged to avoid certain areas.<br />
CRC for <strong>Australia</strong>n Weed Management • Developing and implementing a <strong>weed</strong> <strong>management</strong> plan<br />
5
Developing the plan<br />
• if possible find out how <strong>weed</strong>s invaded the area. The manner in which <strong>weed</strong>s came to be present on the site<br />
may be evident. For example from a neighbouring property, dumped garden waste, spread by recreational activity,<br />
established following ground works or spread along stream banks. Knowing how the <strong>weed</strong> got there will enable<br />
the cause to be addressed to prevent reinfestation from other areas<br />
• fire history. For example history of fires over the last decade or two, their intensity and the area of the effected.<br />
Find out if the site is subject to periodic hazard reduction burning<br />
• disturbance history in general. For example previous land use, floods, livestock grazing and so on<br />
• safety risks. For example locations of wells, dumped metals, barbed wire, stinging insect nests, power lines,<br />
underground cables, cliffs, loose rocky slopes and so on. This knowledge will help people working on the site<br />
ensure their own safety. Make sure risks get included in a site map<br />
• <strong>management</strong> issues such as site accessibility, location of gates and so on.<br />
Preparation of a <strong>weed</strong> <strong>management</strong> map<br />
A <strong>weed</strong> <strong>management</strong> map is more than a map of where <strong>weed</strong>s are on your site. It should also be a record of what<br />
other features are present that will impact on your planning.<br />
Time spent mapping may seem non productive but the information provided will allow you to:<br />
• accurately target your <strong>weed</strong> control activities<br />
• budget costs and time required to implement controls<br />
• monitor how well controls are working<br />
• identify other important issues that will influence the restoration of the land that you are working with.<br />
Mapping helps you keep the planning ahead of the doing. It will also allow you to communicate your progress with<br />
<strong>weed</strong> activities effectively with volunteers, contractors, funding bodies and other interested parties. Most importantly<br />
mapping can provide information that will allow you to review progress with <strong>weed</strong> <strong>management</strong> and help identify<br />
changes that can be made to adapt your <strong>management</strong> to changing conditions.<br />
At a local level, and for the purposes of your own site assessment, it is not necessary to develop elaborate maps.<br />
The idea is to keep it as simple as possible, but to still produce a map or maps that are useful.<br />
It will be important to plan your mapping activity to minimise disturbance and avoid trampling to protect<br />
desirable vegetation, especially in sensitive bushland.<br />
There is no need to map every <strong>weed</strong> species that occurs on your site. It is a matter of deciding what are the priority<br />
<strong>weed</strong>s to manage in light of the seriousness of the problems they represent and the resources available to do the<br />
work. See Determining <strong>weed</strong> priorities on page 10.<br />
Keep things manageable and consider the nature of the <strong>weed</strong>s, size of the site, terrain, ease of access and how many<br />
helpers you will have and their mapping experience.<br />
Drawing your map<br />
To assist you to prepare your <strong>weed</strong> map it may be helpful to obtain a large-scale topographic map. For example<br />
a 1;10,000 or 1:5,000, unless the area involved is large in which case 1:25,000 may be okay. An aerial photograph<br />
of the site can also provide an excellent format on which to base your map. Topographic maps and aerial photographs<br />
can be obtained from state or territory government departments or private suppliers. A list of state contacts for maps<br />
and aerial photography is included in Appendix 1. The idea, in either case, is to get an accurate representation of the<br />
site or property that you are dealing with over which you can overlay a clear transparency sheet upon which information<br />
can be recorded using colour markers. Make sure to use permanent, waterproof marker pens. Separate transparent<br />
overlays are useful when developing the map. You could use one overlay to indicate site features and another devoted<br />
solely to <strong>weed</strong> infestations. The use of different overlays can make each section of the map easier to interpret and<br />
will also help determine <strong>management</strong> options.<br />
6<br />
CRC for <strong>Australia</strong>n Weed Management • Developing and implementing a <strong>weed</strong> <strong>management</strong> plan
It is vital that you have correctly located your site on the map or aerial photo and double check that features on the<br />
ground agree with those on the map or photo (note that some features may have changed since the map or photo<br />
was created). If an appropriate topographic map or aerial photo is not available then the preparation of a hand<br />
drawn map can make quite an acceptable alternative although you will still need to:<br />
• accurately locate the site on a smaller scale map (eg a 1:125,000 or 1:250000) or by using Global Positioning<br />
System equipment (GPS) see Appendix 3, Establishing your location<br />
• estimate the scale that you have used, (how far does say 10mm on the map represent on the ground?) and record<br />
it on the map<br />
• include key features of the site on the map so it can be correctly orientated in the future, and use a compass<br />
to establish a North arrow.<br />
Developing the plan<br />
Figure 2 is an example of a simple sketch map incorporating basic information and using different shades to identify<br />
<strong>weed</strong> location and extent. When preparing your map you could use different colous for each <strong>weed</strong> species. Areas<br />
containing native vegetation and a possible danger (old dump) are also included to aid planning. The approximate<br />
scale for this map is 1:2000 so 25mm on the map represents 50 m on the ground.<br />
Figure 2: Sketch map example<br />
Blackberries & gorse on next property<br />
Creek<br />
Main access<br />
gate & road<br />
Houses nearby to the North<br />
50 metres A<br />
North<br />
Native woodland<br />
Blackberry<br />
Gorse<br />
B<br />
A<br />
Point at which<br />
site location<br />
established<br />
C<br />
Native grasses<br />
D<br />
•• •••••••••• ••••••<br />
••••••• •••••••••••••••••••••••<br />
Old dump site<br />
Note: Areas A to E discussed later in text<br />
Chilean needle grass<br />
E<br />
Prepared October 2002<br />
CRC for <strong>Australia</strong>n Weed Management • Developing and implementing a <strong>weed</strong> <strong>management</strong> plan<br />
7
Developing the plan<br />
To help you accurately portray features on your map, you may find it useful to use graph paper or divide the sheet<br />
of paper you are using into even grids. Once you have established the approximate scale of the grid you can better<br />
represent the area of infestations, extent of native vegetation, the length of roads and so on. The Hawkesbury Nepean<br />
Catchment Management Trust utilise a grid system to estimate areas on maps, an example is included at Appendix 4.<br />
This system requires that you know the map scale. By photocopying the grid onto a transparency you can then overlay<br />
it on your map to calculate the area of each zone of infestation. It could also be useful to help you make your hand<br />
drawn map more accurate. Using this approach the following approximate information can be determined about<br />
the example site:<br />
Total area<br />
Area infested with Chilean needle grass<br />
Area infested with gorse<br />
Area infested with blackberry<br />
Area of Native grassland<br />
Area of Native woodland<br />
10.2ha<br />
0.70ha<br />
0.44ha<br />
0.67ha<br />
2.1ha<br />
0.71ha<br />
It is important to keep a balance between trying to make an accurate map, the time needed to prepare it and the<br />
needs of the people who will use it. The goal is to have a map that is accurate enough to allow you to monitor<br />
your progress and so that others working on the site can find their way around and identify the locations of <strong>weed</strong>s<br />
and relevant features. In the case of the example site a simple hand drawn map is fine. If however you are involved<br />
in a larger situation that includes numerous infestations on many properties then more elaborate mapping may be<br />
required. In these more complex situations mapping may need to be carried out with appropriate local or<br />
state/territory authorities and/or private contractors.<br />
Mapping your <strong>weed</strong>s<br />
It is best to map your site a section at a time, mapping all the target <strong>weed</strong>s that occur in that section. This reduces<br />
the amount of walking needed over the area, minimising impacts, which is particularly important for bushland sites.<br />
If there are several people available you could provide each of them with a copy of the site or sketch map with clearly<br />
defined sections and allocate a section for them to map. Ensure that each site map is clearly labelled with the date<br />
and the section being mapped to avoid confusion later.<br />
When to map<br />
The <strong>weed</strong> species that you are mapping will determine the best time to map. Larger woody <strong>weed</strong>s, trees and shrubs<br />
that are easy to identify can be mapped at any time. For smaller shrubs, herbs and grasses that are more difficult to<br />
distinguish it may be easier to map when the <strong>weed</strong>s are in flower and easier to identify, or at other stages of their<br />
life cycle when they are distinctive. For example, it may be best to do pasture <strong>weed</strong>s in temperate regions in winter<br />
when winter annuals have germinated and pastures are short so species can be more easily seen.<br />
As with all <strong>weed</strong> work consider prevailing weather conditions, safety of site access (e.g. roads not too wet and boggy)<br />
and so on before commencing work.<br />
Surveying the site for <strong>weed</strong>s<br />
Start at one edge of the site and walk across it at regular, parallel intervals. The intervals may be 10 to 50 m<br />
apart depending on the vegetation type and the visibility of the <strong>weed</strong>. A compass may be useful to help maintain<br />
direction of your crossing. If vegetation or other obstacles obstruct your mapping make observations from the best<br />
available position.<br />
Weeds may occur in discrete clumps, in which case mark their location on the site or sketch map. Use known features<br />
on the map, and the map scale, to estimate their location. It might also be useful to provide written notes of where<br />
to find small infestations (even a single plant), for example a brief comment like ‘go north past the dump for about<br />
20 metres then look to the western side of river red gum’ will help others locate small occurrences. In Figure 2 isolated<br />
occurrences of blackberry and Chilean needle grass are marked. Where a species dominates it is more appropriate<br />
to mark the boundaries of the infestation and this is how most of the blackberry and Chilean needle grass, and all<br />
of the gorse is mapped on Figure 2.<br />
8<br />
CRC for <strong>Australia</strong>n Weed Management • Developing and implementing a <strong>weed</strong> <strong>management</strong> plan
Determining <strong>weed</strong> density<br />
Knowing the density of <strong>weed</strong>s on your site can help you decide where to direct your <strong>weed</strong> control efforts and assess<br />
how well those controls have worked. Being able to measure <strong>weed</strong> density will allow you to set measurable objectives<br />
for <strong>weed</strong> control on your site.<br />
By density we mean what proportion of the area of each infestation is covered by each <strong>weed</strong> species, this is usually<br />
expressed as a percentage of the area of infestation. There are a number of ways that <strong>weed</strong> density may be determined<br />
each with advantages and disadvantages. Much like <strong>weed</strong> mapping, <strong>weed</strong> density needs to be determined with<br />
sufficient accuracy to be useful, but without exhausting available resources. For the purposes of community based,<br />
local scale <strong>weed</strong> work a visual assessment of density will suffice. It should be noted that this will not produce results<br />
as accurate as scientific quadrat or transect sampling.<br />
Developing the plan<br />
Visual assessment of density<br />
Visual assessment is the simplest way to determine <strong>weed</strong> density. It is quick and easy and useful for smaller sites<br />
and most species, but can be subjective. To improve the accuracy of visual assessments please refer to Figure 3,<br />
which gives you an idea of how different <strong>weed</strong> densities, as a percentage of ground cover, may look. Note how<br />
dense a cover of 50% appears.<br />
Figure 3: A guide for the visual assessment of <strong>weed</strong> infestation as a percentage of ground cover.<br />
5% groundcover<br />
10% groundcover<br />
20% groundcover<br />
30% groundcover<br />
40% groundcover<br />
50% groundcover<br />
Bayley, D (2001) Efficient Weed Management. NSW Agriculture Paterson NSW.<br />
CRC for <strong>Australia</strong>n Weed Management • Developing and implementing a <strong>weed</strong> <strong>management</strong> plan<br />
9
Developing the plan<br />
Establishing photo points<br />
Periodically take pictures of the site to indicate changes in vegetation over time. This will be useful to assess<br />
regeneration of the site as well as changes in <strong>weed</strong> populations. Photographs should be taken using clearly marked<br />
photo points.<br />
Establishing photo points involves marking out reference points on the ground to obtain a photo of the same area<br />
over the seasons and years to determine changes in vegetation. Some tips for setting up and using photo points:<br />
• mark location of each photo point. For example using a star dropper or a tin lid fixed securely into the ground,<br />
and note features to allow it to be relocated (mark location on your map)<br />
• use a ‘camera post’, 1.4-1.6 m high, to rest camera on. This may be the location marker if you have used a star<br />
dropper, or similar, of appropriate height. Alternatively, use a post, such as a stake or star dropper, of the appropriate<br />
height placed on the location marker if it is on the ground (tin lid etc.). It is important that the height is the same<br />
for each photo<br />
• place another marker 10 m in the direction of the photo area. Each time a photo is taken place a sighter pole<br />
(eg a star dropper) at this point and affix a label with sufficiently large writing on it that it will be clear in the<br />
resulting photo (keep the label to file with the photo). Note an identification number and date the photo was<br />
taken on the label so that there can be no confusion as to where and when the photo was taken<br />
• if possible align photo direction North – South to avoid excessive sun or shadow<br />
• if possible avoid steep terrain<br />
• use a 50mm lens and the same camera and film type on each occasion<br />
• take photos as frequently as necessary to reflect changes in vegetation but make sure you have photos taken at<br />
the same time each year to allow comparisons to be made<br />
• establish enough photo points to get good sample coverage of your site, the vegetation on it and the particular<br />
<strong>weed</strong> species with which you are concerned.<br />
Step 2: Setting your objectives<br />
By analysing your <strong>weed</strong> map together with the information that you have collected on your site information sheet<br />
you can determine your <strong>weed</strong> priorities and develop objectives and actions to address them.<br />
Determining <strong>weed</strong> priorities<br />
The decision on what <strong>weed</strong>s are to be the highest priority to manage should be based on an assessment of the<br />
significance of the impact of each <strong>weed</strong> present on the site and the feasibility of their control. The following<br />
approach may help you to decide:<br />
Weed threat<br />
Low<br />
High<br />
Feasibility of control<br />
Hard Lowest Priority 2nd Priority<br />
Easy 3rd Priority 1st Priority<br />
Table 1: Determining <strong>weed</strong> <strong>management</strong> priorities<br />
Whether a <strong>weed</strong> represents a low or high threat, is dependant upon a number factors that relate to its invasiveness<br />
and impacts, for example:<br />
• its ability to establish amongst existing vegetation<br />
• its competitiveness when established<br />
• likelihood of long distance dispersal (eg by birds, stock, wind or water, on machinery etc.)<br />
• extent of reduction in desired vegetation caused by the <strong>weed</strong><br />
• the change the <strong>weed</strong> causes to natural ecosystems<br />
• potential losses to agriculture.<br />
10<br />
CRC for <strong>Australia</strong>n Weed Management • Developing and implementing a <strong>weed</strong> <strong>management</strong> plan
To make an informed decision you will need knowledge about the <strong>weed</strong>s that are present and the nature of the<br />
problems that they represent. Consult <strong>weed</strong> control agencies in your state or territory for assistance. A list of useful<br />
resources is included in Appendix 5 of this module.<br />
Setting your objectives<br />
Objectives are statements of intended outcomes that you want to achieve over a certain time and that can be measured.<br />
It can be useful to set objectives to be achieved in the near term, say 1–2 years and the medium or longer term up<br />
to 5 to 10 years or beyond.<br />
Developing the plan<br />
Objectives should reflect your focus on what you are trying to protect or restore rather than <strong>weed</strong> <strong>management</strong><br />
alone, for example:<br />
• A near term objective for the example site in Figure 2 may be to protect the remnant native woodland and<br />
grassland from <strong>weed</strong> invasion. To achieve this priority <strong>weed</strong> species will need to be treated that occur within<br />
the native vegetation.<br />
• Medium to long-term objectives may be to reduce the extent of gorse, blackberry and Chilean needle grass by<br />
50 per cent, establish native species in the area treated and reduce the amount of time needed for ongoing<br />
control work by half.<br />
• A long-term objective may be to completely restore the site with appropriate indigenous native vegetation<br />
and stop the site being a source of gorse, blackberry and Chilean needle grass spread downstream and onto<br />
neighbouring properties.<br />
Objectives should be chosen that will bring satisfaction to those involved. Unachievable objectives will only produce<br />
exhaustion and disillusionment.<br />
Weed <strong>management</strong> is important for the success of native vegetation regeneration or revegetation work but<br />
it is not the only factor. Consult with local experts to determine the best ways to encourage regeneration or<br />
improve the success of revegetation for your site.<br />
If the property is used for stock grazing, realistic objectives may relate to reduction in <strong>weed</strong> control costs, improved<br />
soil condition, improved productivity and other improvements that will occur as a consequence of <strong>weed</strong> <strong>management</strong>.<br />
Management approaches<br />
When determining your objectives also consider the main <strong>management</strong> approaches available, particularly eradication<br />
and containment.<br />
Eradication of the <strong>weed</strong> in your area of concern whilst desirable may not be realistic. For a <strong>weed</strong> to be eradicated<br />
the following features need to apply:<br />
• the <strong>weed</strong> occupies only a small area and will not reinvade from adjoining areas<br />
• all of the infested area is known<br />
• the <strong>weed</strong> is obvious and easy to find at low density<br />
• the control method used kills all plants before maturity<br />
• the <strong>weed</strong> seed does not remain dormant on the soil, or the infestation is detected before seeds are released<br />
• if the plant has produced seeds they have not dispersed<br />
• the available resources must enable initial treatment, regular surveys and control for the lifespan of the seed bank.<br />
Weeds that are in the early stages of invasion may be candidates for eradication on your site. If this can be done<br />
ongoing vigilance will still be required to identify any new occurrences.<br />
CRC for <strong>Australia</strong>n Weed Management • Developing and implementing a <strong>weed</strong> <strong>management</strong> plan<br />
11
Developing the plan<br />
Containment of <strong>weed</strong> species to prevent and control new infestations is likely to be a more realistic <strong>management</strong><br />
approach if you are dealing with widespread, well established species. Containment is a worthwhile exercise as it<br />
protects areas of good native vegetation, reduces new <strong>weed</strong> infestations and reduces the need for future control<br />
by limiting the extent and intensity of infestations.<br />
The key to containment programs is to focus on treating isolated satellite infestations, rather than core infestations.<br />
The objective is to prevent <strong>weed</strong> populations extending beyond the perimeter of the core infestation.<br />
Containment also involves the restoration of treated areas through regeneration of native vegetation or revegetation<br />
of the area where <strong>weed</strong>s have been removed. Preferably this is done with local provenance native plants (species<br />
that are native specifically to the area you are working in), pasture establishment or the establishment of other<br />
desirable species as suits the situation. The restoration of the site will limit opportunities for <strong>weed</strong>s to reinvade.<br />
If you are working in a group discuss your <strong>weed</strong> priorities and <strong>management</strong> approaches together and try to reach<br />
consensus. If the entire group is involved in setting the objectives then all members are more likely to feel a sense<br />
of ownership for them and a desire to achieve them.<br />
Keep in mind that some level of <strong>weed</strong> infestation is probably going to be a fact of life; the main objective will usually<br />
be to keep infestations to a level that the threat to the natural ecology of the site is reduced or productivity of the<br />
land is maintained at acceptable levels.<br />
Step 3: Develop and implement the action plan<br />
You need to decide actions, what will be done by whom and when so that you can work towards achieving the<br />
objectives that have been set. A simple action plan is included in this section, which records actions for the example<br />
site we have been looking at. The actions included in this plan were arrived at after consideration of the following<br />
principles of <strong>weed</strong> <strong>management</strong>.<br />
1. Always work from the best areas to the worst<br />
2. Minimise soil disturbance<br />
3. If restoring natural bushland let native plant regeneration or revegetation establishment dictate the rate of<br />
<strong>weed</strong> removal.<br />
Consideration was also given to drainage patterns on the site. It is best to “start at the top” as many <strong>weed</strong>s can spread<br />
by movement of their seed or other plant parts down watercourses and slopes. By starting at the top you reduce<br />
the risk of <strong>weed</strong>s reinfesting treated sites downstream or down slope. Of course if infestations exist on neighbouring<br />
properties a lot of <strong>weed</strong> work can be undone as a result of reinfestation by seeds or other propagules from <strong>weed</strong>s<br />
on neighbouring properties. This highlights the importance of engaging with those responsible for neighbouring<br />
properties in order that <strong>weed</strong> <strong>management</strong> can be coordinated.<br />
Your action plan needs to be written with the following questions in mind.<br />
• What <strong>weed</strong>s and what locations are the highest priorities?<br />
• What resources are available?<br />
• What <strong>management</strong> options will be most effective, minimise environmental damage and make the site more<br />
resilient to <strong>weed</strong> invasion?<br />
In the example site it could be argued that Chilean needle grass should be the highest priority for <strong>management</strong><br />
because it represents the highest threat. It is very invasive in native grasslands and develops a large soil seed bank.<br />
The National Strategy for Chilean needle grass describes it as the worst environmental <strong>weed</strong> of native grasslands<br />
in southeastern <strong>Australia</strong>. However, it is particularly hard to control. Herbicides alone will not control Chilean needle<br />
grass but early removal by digging out isolated plants can be very effective (Area D). Mowing of the established area<br />
(Area E) of Chilean needle grass, using a catcher, when flowers are present will reduce seed set. Chilean needle grass<br />
also produces seed in the base of its stem, which will still add to the soil seed bank. Note that the extent of the<br />
Chilean needle grass infestation extends beyond the site boundary and coordination with neighbouring properties<br />
would be highly desirable. Clippings must be burnt and the mower must be thoroughly cleaned before it is used<br />
anywhere else. See the Chilean needle grass <strong>management</strong> guide in the Weeds of National Significance series for<br />
more detailed information.<br />
12<br />
CRC for <strong>Australia</strong>n Weed Management • Developing and implementing a <strong>weed</strong> <strong>management</strong> plan
Blackberry and gorse are both invasive species that can threaten natural ecosystems. On the example site the blackberry<br />
may be a higher priority than gorse as it is starting to invade the native woodland and it is growing along the stream.<br />
Keep in mind that both the blackberry and the gorse may be providing habitat for native fauna. If so, their removal<br />
needs to be staged gradually to allow native vegetation to regenerate or revegetation to establish so that alternate<br />
habitat is available.<br />
Having decided your priorities the most important decisions to be made are:<br />
• select what control methods will be applied to each <strong>weed</strong><br />
• when and how often they will be applied<br />
• who will do the work<br />
• what monitoring needs to take place to measure the impacts of the methods used.<br />
Developing the plan<br />
As well as keeping <strong>weed</strong> <strong>management</strong> principles in mind you will need to assess the resources that you have available.<br />
Assessing your resources<br />
People: This is the most important resource in any <strong>weed</strong> work. Whether it is yourself, your family or a community<br />
group undertaking a <strong>weed</strong> project, building skills and maintaining motivation of all involved is the key to long-term<br />
success. Think about the following ’people‘ aspects when developing your action plan:<br />
• what skills and experience do people bring to the project? What training and advice is available to give people the<br />
skills they need? Allow time for this to occur<br />
• if working with a group, be aware that individuals will have varying amounts of time to commit to the project and<br />
this needs to be accommodated<br />
• make sure people are aware of safety issues and understand the risks associated with <strong>weed</strong> work, eg safe herbicide<br />
handling, use and clean up, avoiding insect and snake bite and sunburn (wear protective clothing), correct lifting<br />
procedures for heavy items, use of sharp tools etc. In the example map everyone working on the site would need<br />
to be aware of the old dump. Make sure that well equipped first aid kits are on hand and that people know how<br />
to use them<br />
• ensure people know what they are expected to do on the site during each session and who to go to for help<br />
and advice<br />
• assess if people need to be covered by insurance and if so ensure the policy covers appropriate risks<br />
• avoid burnout. This is the biggest problem that groups and individuals encounter with <strong>weed</strong> projects. It is essential<br />
therefore that action plans set realistic tasks that can be carried out in a reasonable time and that plans are made<br />
to enjoy the process. Celebrate milestones, share experiences and pat each other on the back every now and then!<br />
Finance: A financial plan should be prepared to budget funds available against the costs associated with implementing<br />
the plan. It is important to budget for the long term and allow for a sustained effort and ongoing follow up work.<br />
When dealing with well-established infestations it is preferable to use resources to contain the infestations and remove<br />
<strong>weed</strong> threats from the best native vegetation and carry out ongoing follow up. Do not spend all your resources in<br />
one season to attack major infestations leaving nothing for follow up. This will only create disturbance, encouraging<br />
reinfestation or new infestations by other <strong>weed</strong> species.<br />
Many costs are self evident such as the purchase of chemicals if you are using herbicides, or the purchase or rental<br />
of machinery and equipment. Some costs may be less apparent. For example if you are going to use herbicide will you<br />
need to establish safe lockable storage in which to store chemicals? Will you need to buy protective clothing and<br />
safety equipment, a first aid kit and so on? Will dumping costs be involved if you are going to take <strong>weed</strong> material<br />
away for disposal? Will you need fencing to protect revegetation? If you are working with large areas of land, for<br />
example in a rangeland environment, will you need to purchase aerial photographs to help with mapping work?<br />
Will people involved with the plan need to attend training for which fees will be charged? Carefully think through<br />
all the likely costs that may be involved. To save costs it will be worthwhile checking what equipment and supplies<br />
are available for loan or at reduced cost through various groups, such as Landcare or Catchment groups that may<br />
operate in your area. If you are unfamiliar with developing a financial plan for <strong>weed</strong> <strong>management</strong> contact your local<br />
state or territory <strong>weed</strong> control contact for assistance.<br />
CRC for <strong>Australia</strong>n Weed Management • Developing and implementing a <strong>weed</strong> <strong>management</strong> plan<br />
13
Developing the plan<br />
Funding<br />
There may be a number of sources of funding to assist with your <strong>weed</strong> <strong>management</strong> work. Over recent years the<br />
<strong>Australia</strong>n Government’s Natural Heritage Trust has been a major source of funding for many <strong>weed</strong> projects, directly<br />
and indirectly. Applications for funding need to demonstrate that a clear plan exists to meet objectives that are in<br />
line with those of the funding provider. Applications also need to show how success will be measured and progress<br />
monitored. By developing a <strong>weed</strong> plan, which includes clear objectives, budgeted actions to achieve the objectives<br />
and monitoring activities to evaluate progress, you will be well on the way to meeting a funding providers’ need for<br />
information. Weed control contacts in your state or territory will be able to assist with more information on sources<br />
of funding.<br />
Time: Allow enough. Learn from experience – the time taken to carry out tasks in the first instance will provide a<br />
guide for future planning. Be aware that seasonal changes will impact on your plan. Favourable conditions will not<br />
always be available to carry out control and wetter or drier years will impact on <strong>weed</strong> populations and factors such<br />
as site regeneration. These impacts need to recognised and schedules adjusted accordingly. Be sure to inform funding<br />
providers of changes to plans and why they are necessary.<br />
Selecting control options<br />
Each control method has its own advantages and disadvantages and these need to be considered in light of the<br />
situation on your site and the objectives that you have set. The module Weed control methods for community groups<br />
discusses the major methods used and highlights the advantages and disadvantages of each.<br />
Integrated <strong>weed</strong> <strong>management</strong><br />
In many cases the most cost effective and sustainable way to control <strong>weed</strong>s is to combine or integrate a number<br />
of different control methods. Each method chosen needs to target <strong>weed</strong> species when they are most vulnerable.<br />
Knowledge of the life cycle of each species is essential to determine the timing of different treatments.<br />
Table 2 is a simple example of a first year action plan based on the site in Figure 2.<br />
Table 2: Example action plan. Year 1<br />
Month Blackberry Gorse Chilean Location Who<br />
needle grass<br />
Site assessment, mapping and photo pont establishment completed in spring of the previous year<br />
JANUARY Spray Mow A<br />
FEBRUARY Spray Mow A<br />
MARCH<br />
APRIL Cut & Paint B<br />
MAY Cut & Paint B<br />
JUNE Dig isolated plants D<br />
JULY Dig isolated plants D<br />
AUGUST<br />
C<br />
SEPTEMBER<br />
C<br />
OCTOBER Map & Map & Map & All<br />
Take photos Take photos Take photos<br />
NOVEMBER Spray Mow A<br />
DECEMBER Spray Mow A<br />
Note: This calendar is a simple example only, actual methods used and timing of application will depend on local conditions, seek advice from<br />
appropriate authorities.<br />
14<br />
CRC for <strong>Australia</strong>n Weed Management • Developing and implementing a <strong>weed</strong> <strong>management</strong> plan
Blackberry treatments have been divided into two areas. Area A on the map, where the infestation is away from native<br />
vegetation, and Area B where isolated plants are occurring near or in native vegetation. Note that area A includes<br />
an isolated patch to the south of the main infestation. In this example spraying of blackberry has only been planned<br />
for infestations away from native vegetation. Because of the proximity of native vegetation considerable care will still<br />
be needed to avoid spray drift and off target damage. Also as the infestation is near a stream, as is often the case<br />
with blackberry, the herbicide used will need to be registered for use near waterways.<br />
As herbicides are unlikely to completely kill blackberry in one application follow up is included in the plan. For area B<br />
cut and paint applications have been planned to minimise risk to native vegetation. This is a labour intensive method<br />
and blackberry plants, prickly as they are, are not the easiest to work with so protective clothing, heavy gloves and<br />
footwear will be required.<br />
Developing the plan<br />
Each activity has been timed with the intention that the method used will be most effective relative to the <strong>weed</strong>’s<br />
growth stage.<br />
Step 4: Monitoring performance and making changes<br />
Monitoring is often the most neglected area of <strong>weed</strong> <strong>management</strong>, yet it is a vital part of the <strong>weed</strong> <strong>management</strong><br />
cycle. Monitoring allows you to identify how well control measures are working, the rate of spread of <strong>weed</strong>s or the<br />
establishment of desirable vegetation, new threats to native vegetation, and factors that have arisen that will effect<br />
your site restoration. As a result of gathering fresh information, through a monitoring process, your <strong>weed</strong> <strong>management</strong><br />
plan can be altered as needed to improve results and respond to changes in the environment.<br />
Monitoring involves mapping the site at regular intervals, taking photos at selected photo points and revisiting site<br />
information to check if any data that impacts on your <strong>management</strong> needs to be updated. Monitoring activity<br />
should focus on:<br />
• changes in the extent of <strong>weed</strong> populations, ie is more or less area covered<br />
• changes in the density of <strong>weed</strong> cover<br />
• occurrences of other <strong>weed</strong> species<br />
• unexpected impacts of <strong>weed</strong> control activity, eg off target damage, erosion or invasion by other species<br />
• changes in the extent and condition of native vegetation or other desirable vegetation<br />
• changes in any conditions which will impact on site restoration work.<br />
Mapping needs to take place at a similar time to that when the original map was done to allow valid comparisons.<br />
By creating another site map and using the area grid mentioned previously (Appendix 4) and by making a fresh<br />
assessment of <strong>weed</strong> density you will be able to make useful comparisons between areas of native vegetation and<br />
<strong>weed</strong>s and what changes have occurred over time. Comparisons with photographs previously taken from photo<br />
points will also help you to identify changes. Whilst photographs can effectively portray change, the reasons for<br />
change may not always be evident in the images.<br />
You will need to make observations about seasonal conditions or other factors that may be impacting on the results<br />
that you see. For example, if the season that has passed was particularly dry, <strong>weed</strong> populations may have declined<br />
due to water stress rather than <strong>weed</strong> work. Unexpected site disturbances such as fire and vehicle impacts also need<br />
to be considered when monitoring results and setting plans for the following season and beyond. Any of these or<br />
other events may result in you needing to revisit your priorities and change your action plans and possibly even<br />
your objectives.<br />
Recording<br />
By recording the information that you have gathered during the monitoring process on the map and a fresh site<br />
information sheet and by reviewing regular photographs taken at photo points you will be able build a picture of<br />
what is happening on the site over time. This will enable informed <strong>management</strong> decisions to be made. You are then<br />
in a good position to review your plan make the necessary changes and commence the cycle again. It might be a<br />
good time to have a celebration!<br />
CRC for <strong>Australia</strong>n Weed Management • Developing and implementing a <strong>weed</strong> <strong>management</strong> plan<br />
15
Appendix 1: Weed control contacts<br />
State /<br />
Territory<br />
<strong>Australia</strong>n<br />
Capital<br />
Territory<br />
New South<br />
Wales<br />
Northern<br />
Territory<br />
Queensland<br />
South<br />
<strong>Australia</strong><br />
Tasmania<br />
Victoria<br />
Western<br />
<strong>Australia</strong><br />
Department<br />
Environment ACT<br />
NSW Agriculture<br />
Dept. of Infrastructure,<br />
Planning and Environment<br />
Dept. of Natural Resources<br />
and Mines<br />
Dept. of Water, Land and<br />
Biodiversity Conservation<br />
Dept. of Primary Industries,<br />
Water and Environment<br />
Dept. of Primary Industries<br />
Dept. of Agriculture<br />
Appendix 1: Weed control contacts<br />
Phone<br />
Ph: (02) 6207 9777<br />
Fax (02) 6207 2227<br />
Ph. 02 6391 3100<br />
1800 680 244<br />
Fax 02 6391 3336<br />
Ph. 08 89992020<br />
Fax: 08 89992015<br />
Ph. 07 3375 0700<br />
Fax: 07 3379 6815<br />
Ph. 08 8303 9500<br />
Ph. (cost of a local<br />
call) 1300 368 550<br />
Ph. 03 9210 9379<br />
Ph. 08 9368 3333<br />
Email<br />
EnvironmentACT@act.gov.au<br />
<strong>weed</strong>s@agric.nsw.gov.au<br />
<strong>weed</strong>info.DIPE@nt.gov.au<br />
enquiries@nrm.qld.gov.au<br />
apc@saugov.sa.gov.au<br />
Quarantine.Enquiries@<br />
dpiwe.tas.gov.au<br />
Christian.Goninon@<br />
dpiwe.tas.gov.au<br />
ktri@dpi.vic.gov.au<br />
enquiries@agric.wa.gov.au<br />
Website<br />
whttp://www.environment.act.gov.au/<br />
ie4/petsandlocalwildlife/pests.html<br />
http://www.agric.nsw.gov.au/<strong>weed</strong>s<br />
http://www.nt.gov.au/<br />
http://www.nrm.qld.gov.au/<br />
pests/index.html<br />
http://www.dwlbc.sa.gov.au/<br />
http://www.tas.gov.au/<br />
OR<br />
http://www.dpiwe.tas.gov.au/inter.n<br />
sf/ThemeNodes/SSKA-52J2K4?open<br />
http://www.dpi.vic.gov.au/<br />
http://www.agric.wa.gov.au/progser<br />
v/plants/<strong>weed</strong>s/index.htm<br />
Mapping/Aerial photography contacts<br />
State /<br />
Territory<br />
Department<br />
Phone<br />
Email<br />
Website<br />
<strong>Australia</strong>n<br />
Capital<br />
Territory<br />
Planning & Land Authority<br />
Ph. 02 62071925<br />
actpla.customer.services@<br />
act.gov.au<br />
http://www.actpla.act.gov.au/actlic/<br />
mapping/index.htm<br />
New South<br />
Wales<br />
Land & Property Information<br />
Ph. 02 92286666<br />
feedback@lands.nsw.gov.au<br />
http://www.lpi.nsw.gov.au/maps/<br />
Northern<br />
Territory<br />
Dept. of Infrastructure,<br />
Planning & Development<br />
Ph. 08 89996636<br />
mapsnt@nt.gov.au<br />
http://www.lpe.nt.gov.au/airphoto/<br />
Queensland<br />
Natural Resources & Mines<br />
Ph. 07 38963216<br />
geoinfo@nrm.qld.gov.au<br />
http://www.nrm.qld.gov.au/property/<br />
mapping/aerial_photography.html<br />
South<br />
<strong>Australia</strong><br />
Dept. of Environment<br />
& heritage<br />
Ph. 08 82264919<br />
mapland@saugov.sa.gov.au<br />
http://www.environment.sa.gov.au/<br />
mapland/aerial.html<br />
Tasmania<br />
Information & Land Services<br />
Division: TASMAP<br />
Ph. 03 62337741<br />
Maree.Holmes@<br />
dpiwe.tas.gov.au<br />
http://www.dpiwe.tas.gov.au/inter.<br />
nsf/ThemeNodes/JGAY-548VJT?open<br />
Victoria<br />
Land Victoria Dept.<br />
of Sustainability and<br />
Environment<br />
Ph. 136 186<br />
customer.service@<br />
dse.vic.gov.au<br />
http://www.land.vic.gov.au/<br />
Western<br />
<strong>Australia</strong><br />
Dept. of Land Information<br />
Ph. 08 92737555<br />
sales@dli.wa.gov.au<br />
http://www.dola.wa.gov.au/<br />
corporate.nsf/web/index.html<br />
16<br />
CRC for <strong>Australia</strong>n Weed Management • Developing and implementing a <strong>weed</strong> <strong>management</strong> plan
Appendix 2: Site assessment sheet<br />
Site Name Date sit mapped: / / Contact responsible for this information Land owner/access contact details<br />
Name: Name:<br />
Tel: Tel:<br />
Email: Email:<br />
Site Location<br />
Using map coordinates Easting _ _ _ _ _ _ Map title _______________<br />
Map scale (eg: 1:25,000 or 1:50,000) Zone _ _ Northing _ _ _ _ _ _ Year map published _ _ _ _<br />
OR Sheet Number _ _ _ _ _ _<br />
GPS Coordinates (use Datum WGS 84) S_ _ 0 _ _ . _ _ _’ E _ _ _ 0 _ _._ _ _’<br />
Site area in hectares _ _ _ _ (ha)<br />
Photo points marked on map Yes / No<br />
Weed species mapped on site<br />
Scientific name: Common name Area infested % Density of cover of infestation Treatments applied<br />
(ha) (also note if species now absent) Method Date Cost<br />
(if herbicides used note type & rate also<br />
note $ costs of treatment)<br />
Appendix 2: Site assessment sheet<br />
CRC for <strong>Australia</strong>n Weed Management • Developing and implementing a <strong>weed</strong> <strong>management</strong> plan<br />
17
Site <strong>management</strong> issues<br />
access comments/ risks on site, where<br />
are they? regulations that need to<br />
be followed<br />
Monitoring<br />
observations/seasonal impacts<br />
Stakeholders who are they?<br />
/relationship with site/contact notes<br />
Weed origins<br />
How did <strong>weed</strong>s get here (invasion<br />
from other properties, wind or water<br />
transport, garden waste, recreational<br />
vehicle use, soil disturbance etc.)<br />
Disturbances<br />
History of disturbance, fire, flood<br />
ground works, land use etc.<br />
Other comments<br />
Site information sheet cont. Comments (Date all comments)<br />
Appendix 2: Site assessment sheet<br />
18<br />
CRC for <strong>Australia</strong>n Weed Management • Developing and implementing a <strong>weed</strong> <strong>management</strong> plan
Appendix 3: Establishing your location<br />
The purpose of establishing your location is to enable you to communicate clearly to others where your site is. The<br />
valuable information you have collected can then be amalgamated with that from other sites to develop an overall<br />
picture of what is happening in your region, state or territory and for the entire nation. The idea is to record the<br />
location at or near the centre of your site.<br />
The location of your site can be readily established in a couple of ways.<br />
Using a map<br />
Topographic maps are readily available from many sources, via state or territory government departments or private<br />
mapping suppliers, and are relatively inexpensive. Topographic maps show landforms, streams, dams, and the<br />
location of roads, railways, buildings and so on. These maps can be used to locate your site and provided that they<br />
are of a large enough scale, may also be useful to help you with your site mapping. At this point we are only<br />
concerned with using these maps to determine the location of your site. Map suppliers will be able to help you find<br />
a map that covers your area.<br />
Appendix 3: Establishing your location<br />
Map scales, what are they about:<br />
Simply defined, map scale is the relationship between distance on the map and distance on the ground.<br />
Scales are normally expressed as ratios for example 1:10,000 or 1:100,000. A scale of 1:10,000 means that<br />
every millimetre on the map represents 10,000 millimetres (or 10 metres) in the real world, at 1:100,000<br />
every millimetre on the map represents 100,000 millimetres (or 100 metres) in the real world.<br />
With map scales bigger is smaller. A 1:5,000 scale map will show more detail and features will be much<br />
clearer and larger than a map with a 1:250,000 scale. But to represent the same area a 1:5000 map needs<br />
to be 50 times bigger than a 1:250,000 scale map.<br />
When using a map to establish the location of your site use full <strong>Australia</strong>n Map Grid (AMG) coordinates. A full grid<br />
reference will include a map sheet number, a zone number and “Eastings” and “Northings”. This will ensure that<br />
your information is compatible with other mapping projects.<br />
The map sheet number is simply the unique combination of numbers and letters, which identifies the map. It is<br />
normally located near the map title.<br />
For mapping purposes the entire <strong>Australia</strong>n continent has been divided up into zones of 6 degrees of longitude.<br />
The zone that applies to your map will be recorded under information entitled either ‘Universal Grid Reference’,<br />
‘Grid’, ‘Grid Zone Designation’ or similar and will be a two digit number. The zones covering <strong>Australia</strong> range from<br />
49 in the West to 56 in the East.<br />
To quote Eastings and Northings the recommended method for <strong>weed</strong> mapping is the ‘thirteen figure’ method (also<br />
known as the ‘6–7’ method), which produces an Easting reading of 6 digits, and a Northing reading of 7 digits.<br />
What are Eastings and Northings?<br />
Official maps employ a grid system, similar in concept to that used for street directories, but much more detailed.<br />
This allows coordinates to be used to accurately locate positions on the map. All points on the map can be<br />
referenced by their position within the grid squares created by the grid system. Maps are printed so that North is<br />
approximately at the top. Vertical lines on the map are numbered from West to East (i.e. from left to right) and<br />
these are called EASTINGS because positions on the map are determined by the extent that they are to the East<br />
(or to the right) of these lines.<br />
Horizontal grid lines on the map are numbered from South to North (i.e from the bottom of the map sheet to the<br />
top) and are called NORTHINGS because positions on the map are determined by the extent that they are to the<br />
North of (or above) these lines.<br />
CRC for <strong>Australia</strong>n Weed Management • Developing and implementing a <strong>weed</strong> <strong>management</strong> plan<br />
19
Appendix 3: Establishing your location<br />
When using Eastings and Northings to give a location on a map it is vital to remember that EASTINGS are always<br />
given before NORTHINGS.<br />
Do not confuse the Eastings and Northings grid system (AMG) with lines of latitude and longitude that will<br />
also appear on the map. These are expressed in degrees, minutes and seconds for example S 38 0 50’ and<br />
E140 0 10’ 30”, where the symbols 0 ,’ , “denote degrees, minutes and seconds respectively.<br />
To demonstrate how full grid references are determined we will work through how the coordinates are obtained<br />
for Point A in the example map shown in Figure 2.<br />
The map sheet number is 6628-2-S, and the zone number is 54. In this simple case the zone number is listed with<br />
“Grid” information, its location may vary a little between maps.<br />
To start, calculate the EASTING by recording the small number (always 1 digit for Eastings) at the far left hand side<br />
of the bottom horizontal grid line in our example this is 2.<br />
Next locate the first vertical line to the left of Point A. Record the first 2-digits of this number, in our example this<br />
is 96. Finally estimate the distance point A is to the East (or to the right) of the 96. On a map with a 1:25,000<br />
scale, as in this case, the distance between grid lines is 1 kilometre. A is approximately half way between 96 and<br />
the next grid line 97 so it is about 500 metres from 96. We would then record the easting as 2 96 500.<br />
Next calculate the Northing. Record the small number (always 2 digits for northings) at the bottom corner of the<br />
first vertical grid line. Our example shows 61. Next record the first 2 digits of the grid line immediately below Point<br />
A in our example this is 26. Then estimate how far Point A is to the North (or above) 26. It is approximately one<br />
quarter of the distance between 26 and 27 which equates to 250 metres. The Northing coordinate then is seven<br />
digits 61 26 250.<br />
20<br />
CRC for <strong>Australia</strong>n Weed Management • Developing and implementing a <strong>weed</strong> <strong>management</strong> plan
Point A<br />
Point B<br />
Appendix 3: Establishing your location<br />
61 26 250<br />
295000mE<br />
PRODUCTION... Mapping Branch<br />
PROJECTION... Transverse<br />
Mercator Projection<br />
<strong>Australia</strong>n Geodetic Datum 1984<br />
GRID... <strong>Australia</strong>n Map Grid Zone<br />
54<br />
2 96 500<br />
EASTINGS<br />
Sheet Number<br />
Zone number<br />
Eastings<br />
Northings<br />
6628-2-S<br />
54<br />
296500<br />
6126250<br />
The full grid reference for Point A then is:<br />
Sheet Number Zone Easting Northing<br />
6628_2_S 54 296500 6126250<br />
Have a go at working out the coordinates for Point B on the example map.<br />
The answer is<br />
6628-2-S 54 296600 6126850<br />
CRC for <strong>Australia</strong>n Weed Management • Developing and implementing a <strong>weed</strong> <strong>management</strong> plan<br />
21
Appendix 3: Establishing your location<br />
Using a GPS<br />
If you are able to access a Global Positioning System unit (GPS) this can make the task of locating your site easier.<br />
Certainly GPS units are relatively commonplace now and used in many walks of life. There are still a few things to<br />
make sure of to ensure that others can readily understand your information. Different setting options available on<br />
GPS units may mean that the way your information looks may vary from that given by a different unit at the same<br />
site. Most importantly ensure that the unit you use is set to the WGS 84 Datum that should be an option available<br />
under the units system or navigational set up menu. You can also select the way the GPS unit reads out the<br />
coordinates for example either by using Latitude and Longitude or by using Map Grids. For consistency use Map<br />
Grid readings.<br />
When taking a GPS reading allow the unit a few minutes to settle on a reading before recording it.<br />
22<br />
CRC for <strong>Australia</strong>n Weed Management • Developing and implementing a <strong>weed</strong> <strong>management</strong> plan
Appendix 4: Grid sheet<br />
Appendix 4: Grid sheet<br />
CRC for <strong>Australia</strong>n Weed Management • Developing and implementing a <strong>weed</strong> <strong>management</strong> plan<br />
23
Appendix 5: Useful resources<br />
Appendix 5: Useful resources<br />
Web links<br />
Web address<br />
National<br />
Natural Heritage Trust<br />
www.nht.gov.au<br />
Weeds of National Significance<br />
deh.gov.au/biodiversity/invasive/<strong>weed</strong>s/wons.html<br />
<strong>Australia</strong>n Government Dept. of the Environment www.deh.gov.au<br />
& Heritage<br />
Weeds <strong>Australia</strong> – National <strong>weed</strong>s Strategy<br />
<strong>weed</strong>s.org.au<br />
The CRC for <strong>Australia</strong>n Weed <strong>management</strong><br />
<strong>weed</strong>s.crc.org.au<br />
Council of <strong>Australia</strong>n Weed Science Societies<br />
http://home.vicnet.net.au/%7E<strong>weed</strong>ss<br />
Weedbuster week<br />
www.<strong>weed</strong>busterweek.info.au<br />
<strong>Australia</strong>n Association of Bush Regenerators<br />
www.zipworld.com.au/~aabr/<br />
Weedeck national guides to <strong>weed</strong> identification www.sainty.com.au<br />
Landcare <strong>Australia</strong><br />
www.landcareaustralia.com.au<br />
NSW<br />
New South Wales Agriculture<br />
Northcoast <strong>weed</strong>s advisory committee<br />
The Weed Society of New South Wales<br />
Weeds of Blue Mountains bushland<br />
Victoria<br />
Dept of Primary Industries<br />
Dept of Sustainability and Environment<br />
Weeds Society of Victoria Inc.<br />
South <strong>Australia</strong><br />
Dept. of Water, Land & Biodiversity Conservation<br />
Trees for life<br />
Tasmania<br />
Dept. of Primary Industries, Water & Environment<br />
Tasmanian Weeds Society Inc.<br />
Tamar Valley Weeds Strategy<br />
Western <strong>Australia</strong><br />
Dept. of Agriculture<br />
Environmental <strong>weed</strong>s action network (EWAN)<br />
Plant Protection Society of Western <strong>Australia</strong><br />
Northern Territory<br />
Dept. of Infrastructure, Planning & Environment<br />
ACT<br />
Environment ACT<br />
www.agric.nsw.gov.au/<br />
www.northcoast<strong>weed</strong>s.org.au/<br />
http://nb.au.com/nsw<strong>weed</strong>soc/<br />
www.<strong>weed</strong>sbluemountains.org.au/control.asp<br />
www.dpi.vic.gov.au<br />
www.dse.vic.gov.au<br />
http://home.vicnet.net.au/~<strong>weed</strong>soc/<br />
www.dwlbc.sa.gov.au<br />
www.treesforlife.org.au<br />
www.dpiwe.tas.gov.au<br />
www.tas<strong>weed</strong>s.org<br />
www.<strong>weed</strong>s.asn.au<br />
www.agric.wa.gov.au<br />
http://members.iinet.net.au/%7Eewan<br />
http://members.iinet.net.au/~<strong>weed</strong>s/<br />
www.nt.gov.au<br />
www.environment.act.gov.au<br />
24<br />
CRC for <strong>Australia</strong>n Weed Management • Developing and implementing a <strong>weed</strong> <strong>management</strong> plan
Further reading<br />
Weed <strong>management</strong><br />
<strong>Australia</strong>n Weed Control Handbook<br />
J.M.Parsons.<br />
Inkata Press. 1995.<br />
<strong>Australia</strong>n Weed Management Systems.<br />
B. Sindel.<br />
F.G and F.J.Richardson publications. 2000.<br />
Efficient Weed Management: Protecting your investment<br />
in the land<br />
D. Bayley<br />
Natural Heritage Trust and NSW Agriculture 2001<br />
Gardener’s Companion to WEEDS<br />
S. Ermert and L. Clapp<br />
Louise Egerton 2001<br />
Noxious and Environmental Weed Control Handbook.<br />
R Ensbey.<br />
NSW Agriculture publication. 2001.<br />
Precision Weed Management in Crops and Pastures.<br />
R.W.Medd and J.E. Pratley.<br />
CRC for Weed Management. Uni. South <strong>Australia</strong>.<br />
1998.<br />
Southern <strong>weed</strong>s and their control<br />
J. Moore and J. Wheeler<br />
Department of Agriculture of Western <strong>Australia</strong>,<br />
Bulletin No 4558/02<br />
Weed Control in Lucerne and Pastures.<br />
J.J.Dellow.<br />
NSW Agriculture publication. 2002.<br />
Weed Control in Summer Crops.<br />
A. Storrie.<br />
NSW Agriculture publication. 2000.<br />
Weed Control in Winter Crops.<br />
C.L.Mullen, J.J.Dellow and C.J.Tonkin.<br />
NSW Agriculture publication. 2002.<br />
Weed Navigator: Resource guide<br />
Kate Blood, Ursula Taylor, Toni Nugent and<br />
Susan Timmins<br />
CRC for Weed Management Systems. 1998<br />
Crop and Pasture Weeds<br />
Crop Weeds in Northern <strong>Australia</strong>.<br />
B. Wilson, D. Hauton, and N. Duff.<br />
Dept. of Primary Industries Queensland publication.<br />
1995.<br />
More Crop Weeds.<br />
M.R.Moerkerk and A.G.Barnett.<br />
R.G. and F.J.Richardson Publications. 1998.<br />
Pasture Plants of Southern Inland Queensland.<br />
D.Henry, T.Hall, D.Jordon, J.Milson, C.Schefe and<br />
R.Selcock.<br />
Dept. of Primary Industries Queensland publication.<br />
1995.<br />
Plants of the New South Wales Rangelands. The Glove<br />
Box Guide.<br />
G.Brook and L.Mc Garva.<br />
NSW Agriculture publication. 1998.<br />
Weeds: The Ute Guide.<br />
J.Cummins and M Moerkerk.<br />
Primary Industries South <strong>Australia</strong>. 1996.<br />
Western Weeds. A Guide to Weeds of Western <strong>Australia</strong>.<br />
A.Hussey, G.Keighery, R.Cousens, J.Dodd and S.Lloyd.<br />
Plant Protection Society of Western <strong>Australia</strong>. 1997.<br />
Environmental Weeds<br />
Bush Invaders of South-East <strong>Australia</strong>: A guide to the<br />
identification and control of environmental <strong>weed</strong>s<br />
found in South-East <strong>Australia</strong><br />
Adam Muyt<br />
R.G and F.J.Richardson Publications. 2001<br />
Environmental Weeds: A field guide for SE <strong>Australia</strong><br />
Kate Blood<br />
C.H. Jerram & Associates and CRC for Weed<br />
Management Systems 2001<br />
Potential Environmental Weeds in <strong>Australia</strong><br />
Edwards and Csurches<br />
Environment <strong>Australia</strong> 1998<br />
Weed Identification and Biology<br />
A Global Compendium of Weeds<br />
R.P. Randall<br />
R.G and F.J.Richardson Publications. 2002.<br />
Bushland Weeds: A Practical guide to their <strong>management</strong><br />
K. Brown and K Brooks<br />
Environmental Weeds Action Network (WA) Inc. 2002<br />
Flora of New South Wales. Vol 1, Supplement Vol 1,<br />
Vol 2, Vol 3, Vol 4.<br />
Gwen Harden.<br />
NSW University Press. 1990–2000.<br />
Herbicide Resistance in Plants. Biology and Biochemistry.<br />
S.Powles and J Holtum.<br />
Lewis Publications. 1994.<br />
Appendix 5: Useful resources<br />
Crop Weeds.<br />
J.L.Wilding, A.G.Barnett and R.L.Amor.<br />
R.G and F.J.Richardson Publications. 1993.<br />
Noxious Weeds of <strong>Australia</strong>.<br />
W.T.Parsons and E.G.Cuthberson.<br />
Inkata Press. 1992.<br />
CRC for <strong>Australia</strong>n Weed Management • Developing and implementing a <strong>weed</strong> <strong>management</strong> plan<br />
25
Appendix 5: Useful resources<br />
Plants of Western New South Wales.<br />
G.M.Cunningham, W.E. Mulham, P.L.Milthorpe<br />
and J.H.Leigh.<br />
Inkata Press. 1992.<br />
The Biology of <strong>Australia</strong>n Weeds Vol 1<br />
R.H. Groves, R.C.H. Shepherd and R.G. Richardson<br />
R.G and F.J.Richardson Publications. 1995.<br />
The Biology of <strong>Australia</strong>n Weeds Vol 2<br />
F.D. Panetta, R.H. Groves and R.C.H. Shepherd<br />
R.G and F.J.Richardson Publications. 1998.<br />
Waterplants in <strong>Australia</strong>.<br />
G.R.Sainty and S.W.L.Jacobs.<br />
<strong>Australia</strong>n Water Resources Council.<br />
(Sainty and Associates). 1994.<br />
Waterplants of New South Wales.<br />
G.R.Sainty and S.W.L.Jacobs.<br />
Water Resources Commission of NSW.<br />
(Sainty and Associates). 1981.<br />
Weedeck<br />
Sainty and Associates Pty. Ltd.<br />
Sainty and Associates Pty. Ltd and John Thorp<br />
<strong>Australia</strong> (on behalf of National Weeds Strategy<br />
Executive Committee)<br />
Weeds. An Illustrated Botanical Guide to the Weeds<br />
of <strong>Australia</strong>.<br />
B.A. Auld and R.W.Medd.<br />
Inkata Press. 1992.<br />
Weeds of the wet/dry tropics of <strong>Australia</strong><br />
N.M. Smith<br />
Environment Centre NT Inc. 2002<br />
Western Weeds: A guide to the <strong>weed</strong>s of Western <strong>Australia</strong><br />
Hussey, et al<br />
Plant Protection Society of Western <strong>Australia</strong> 1997<br />
Worlds Worst Weeds: distribution and biology<br />
Holm, et al<br />
University Press of Hawaii. 1977<br />
26<br />
CRC for <strong>Australia</strong>n Weed Management • Developing and implementing a <strong>weed</strong> <strong>management</strong> plan
Weed control methods for community groups<br />
M o d u l e 2<br />
Module 2
<strong>Introductory</strong> <strong>weed</strong> <strong>management</strong> <strong>manual</strong><br />
Weed control methods for community groups<br />
Module 2<br />
General Disclaimer<br />
The information contained in this publication is offered by the CRC for <strong>Australia</strong>n Weed Management (Weeds CRC), its partners and the Commonwealth<br />
Department of the Environment and Heritage solely to provide information. While all due care has been taken in compiling the information, it is applied<br />
on the basis and subject to the qualification that all the Weeds CRC and its partners, their officers and employees take no responsibility for its contents<br />
nor for any loss, damage or consequence whatsoever for any person or body relying on the information, or any error or omission, contained in this<br />
publication. Any recommendations contained herein do not necessarily represent Weeds CRC policy.<br />
Copyright © CRC for <strong>Australia</strong>n Weed Management 2004.<br />
This <strong>manual</strong> is copyright. Except as permitted under the <strong>Australia</strong>n Copyright Act 1968 (Commonwealth) and subsequent amendments, no part of this<br />
publication may be reproduced, stored or transmitted in any form or by any means, electronic or otherwise; without the specific written permission<br />
of the copyright owner.<br />
The copyright of reference sources rests with the publishers of those resources.<br />
The intellectual property on which the materials in this <strong>manual</strong> is based rests with the contributors.
Weed control methods for community groups<br />
Introduction 4<br />
Why can <strong>weed</strong>s be hard to control? 4<br />
Integrated <strong>weed</strong> <strong>management</strong> 4<br />
Timing 5<br />
Herbicies 6<br />
The right herbicide at the right dose 6<br />
Choosing the right herbicide application method 6<br />
Foliar spraying 7<br />
Minimising off-target damage 7<br />
Preventing spray drift 7<br />
Spraying and herbicide use in water catchments 8<br />
Basal bark spraying 9<br />
Cut and paint, cut and swab, cut and dawb and cut and spray 9<br />
Scrape and paint 10<br />
Stem injection 11<br />
Stem and leaf swiping 11<br />
Other herbicide application methods 12<br />
Granular or soil residual herbicides 12<br />
Aerial applications 12<br />
Wickwipers or <strong>weed</strong> wipers 12<br />
The right time 13<br />
The right operator: Training 13<br />
Keeping records 13<br />
Personal safety and herbicide use 13<br />
Hand control 15<br />
Hand pulling 15<br />
Digging 15<br />
Mechanical 16<br />
Slashing and mowing 16<br />
Bulldozers and tractors 17<br />
Grooming 17<br />
Cultivation 18<br />
Mulching and smothering 20<br />
Solarisation 20<br />
Competition 21<br />
Regeneration 21<br />
Manipulation of the seed bank 21<br />
Sowing of seed 21<br />
Planting seedlings 21<br />
Using fire for <strong>weed</strong> control 22<br />
The response of the <strong>weed</strong> to burning 22<br />
Habitat 22<br />
The fire regime employed 22<br />
The season of fire 23<br />
Wildfires or unplanned fire 23<br />
Flame <strong>weed</strong>ing and steaming 23<br />
Flame <strong>weed</strong>ing 23<br />
Steam <strong>weed</strong>ing 23<br />
2<br />
CRC for <strong>Australia</strong>n Weed Management • Weed control methods for community groups
Biological control (or biocontrol) 24<br />
Prioritising sites for biological control 24<br />
Integration with other techniques 25<br />
Setting up biological control 25<br />
Grazing 26<br />
Appendix 1: Weed control contacts 27<br />
Appendix 2: Herbicide application record sheet 28<br />
Weed control methods for community groups<br />
CRC for <strong>Australia</strong>n Weed Management • Weed control methods for community groups<br />
3
Introduction<br />
Introduction<br />
This module is an introductory guide for community group members and other individuals who have an interest in <strong>weed</strong><br />
<strong>management</strong> but little previous experience or knowledge in <strong>weed</strong> control techniques. It should be read in conjunction<br />
with other modules in this <strong>manual</strong> and used together with information specific to the species and situation<br />
being confronted.<br />
Why can <strong>weed</strong>s be hard to control?<br />
The vast majority of plants that have become <strong>weed</strong>s have been introduced deliberately from overseas for agricultural,<br />
horticultural or ornamental reasons. Plants that become a problem, either to the natural environment or to agriculture,<br />
often do so because they have characteristics that enable them to colonise areas quickly, for example:<br />
• the capacity to reproduce prolifically, either from seed or plant fragments<br />
• seeds that can endure prolonged dormancy<br />
• many dispersal mechanisms, including human activity<br />
• fast growth rates enabling them to out-compete slower growing species<br />
• introduced species are often free of the predators and diseases which keep their population in check in their<br />
countries of origin.<br />
These factors make <strong>weed</strong>s difficult to manage.<br />
Integrated <strong>weed</strong> <strong>management</strong><br />
Effective long-term <strong>weed</strong> <strong>management</strong>, where both effort and expense reduce over time, will generally only be<br />
achieved by the planned use of a number of appropriate methods in conjunction with other land <strong>management</strong><br />
practices, such as revegetation. It is the bringing of various <strong>weed</strong> control and land <strong>management</strong> methods together<br />
that is often referred to as integrated <strong>weed</strong> <strong>management</strong> (IWM).<br />
The aim is to incorporate methods which are cost effective, practical and which will help reduce reliance on herbicides.<br />
The methods used should reinforce each other with the ultimate goal of achieving long-term <strong>weed</strong> control without<br />
damaging the environment. Successful implementation of integrated <strong>weed</strong> <strong>management</strong> requires long term planning<br />
based on knowledge of the <strong>weed</strong>s life cycle, control methods and the environment (eg soil, climate, other vegetation).<br />
Plans also need to include regular monitoring to evaluate progress and allow actions to be adapted to changing<br />
conditions (see Module 1 Developing and implementing a <strong>weed</strong> <strong>management</strong> plan).<br />
A common example of IWM is the use of fire or slashing to destroy large vigorous <strong>weed</strong>s, followed by herbicide<br />
applications to control seedlings. This is then followed by hand removal of plants before they can re-seed. This may<br />
be complemented with either regeneration or revegetation with desirable species. An IWM approach generally means<br />
that less herbicide is needed and less follow up time required than if just one method of control was applied.<br />
This module presents many of the methods used to control various <strong>weed</strong>s, especially environmental <strong>weed</strong>s.<br />
In particular the following control categories are discussed:<br />
• herbicides<br />
• hand control<br />
• mechanical<br />
• cultivation<br />
• mulching and smothering<br />
• competition<br />
• use of fire<br />
• biological control<br />
• grazing.<br />
4<br />
CRC for <strong>Australia</strong>n Weed Management • Weed control methods for community groups
Discussion on each method concludes with a summary table of it’s advantages and disadvantages to help you make<br />
better control decisions. When used in conjunction with <strong>weed</strong> <strong>management</strong> guides, for example the Natural Heritage<br />
Trust series covering the Weeds of National Significance and the Alert List for environmental <strong>weed</strong>s, and local expertise<br />
this module can help you achieve your <strong>weed</strong> <strong>management</strong> objectives.<br />
Introduction<br />
Prevention<br />
The best, and most cost effective, means of <strong>weed</strong> control is prevention by detecting the presence of <strong>weed</strong>s<br />
early and treating them before they spread. However, in a bushland situation it is particularly important to<br />
ensure the plant is properly identified before it is removed.<br />
Timing<br />
Whilst reading this <strong>manual</strong> keep in mind that, irrespective of the methods used to control <strong>weed</strong>s, correct timing<br />
of control is crucial to success. An understanding of each <strong>weed</strong>’s growth cycle and the impact that the particular<br />
method used will have are important considerations when planning control activity. The best results are achieved<br />
when the <strong>weed</strong> is at its most vulnerable stage for the method being used. Correct timing will improve results and<br />
reduce future effort and cost.<br />
The importance of local advice<br />
Situations vary from location to location and different jurisdictions have different regulations concerning <strong>weed</strong><br />
control. In all cases it is important to check with local <strong>weed</strong> control authorities to determine what are the<br />
appropriate and approved methods (see Appendix 1 ‘Weed control contacts table’ ).<br />
CRC for <strong>Australia</strong>n Weed Management • Weed control methods for community groups<br />
5
Herbicides<br />
Herbicides<br />
Herbicides are chemicals that are applied to kill plants.<br />
Herbicides are often a very useful tool in the <strong>management</strong> of <strong>weed</strong>s. However, herbicides are poisons and the risks<br />
associated with herbicide preparation, use, handling and storage need to be understood. Proper procedures must<br />
be followed to ensure the safety of users and other people, and to minimise risks to the broader environment. The use<br />
of herbicides is controlled by legislation in each state and territory and specific regulations apply. These are detailed<br />
on the registered label of each herbicide container. In special circumstances specific permits are issued for the use<br />
of herbicides in situations other than that specified by the label.<br />
The aim of herbicide application is to get the right herbicide at the right dose, applied using the right method, at the<br />
right time and delivered by the right operator in an economical and safe way with minimal impacts on the environment.<br />
This discussion on herbicide use is not intended for agricultural or commercial operations although many of the<br />
points will still apply. Recommendations made do not replace or supersede information on herbicide product labels<br />
or other regulations.<br />
The right herbicide at the right dose<br />
The way in which herbicide is applied and the dose used are as important to the success of control as the selection<br />
of the herbicide itself.<br />
As each state and territory has its own legislation with respect to herbicides, the types of herbicide registered for<br />
use on a given species, the rates of application and even the method of application permitted may vary between<br />
state and territories and over time.<br />
The label attached to all herbicide containers sold in <strong>Australia</strong> contains important information to help you select the<br />
correct product and apply it properly. You have a legal obligation to read and follow instructions given on the label.<br />
Label information includes:<br />
• species on which the herbicide is registered for use<br />
• key safety advice<br />
• recommended protective equipment required when handling the herbicide<br />
• application rates<br />
• accidental spill and disposal instructions.<br />
READ AND HEED THE LABEL!<br />
For up-to-date information on herbicides contact your state or territory <strong>weed</strong> <strong>management</strong> agency or local shire or<br />
council. State and territory contact details are listed in Appendix 1 together with details for the <strong>Australia</strong>n Pesticides<br />
and Veterinary Medicines Authority, which hosts the PUBCRIS database. This database contains information on all<br />
herbicides that are registered for use on <strong>weed</strong>s in each <strong>Australia</strong>n state and territory.<br />
Choosing the right herbicide application method<br />
Herbicides may be applied in many different ways including foliar spray, stem injection, cut stump, drill-and-fill, frilling<br />
(or chipping), basal bark, scrape-and-paint and granular soil applications. Your decision on what application method<br />
to use needs to be made after considering:<br />
• the <strong>weed</strong> to be treated<br />
• label instructions<br />
• all the risks involved<br />
6<br />
CRC for <strong>Australia</strong>n Weed Management • Weed control methods for community groups
• the resources available to do the work, including follow-up<br />
• your <strong>weed</strong> <strong>management</strong> objectives.<br />
Foliar spraying<br />
Herbicides<br />
Foliar spraying is the application of herbicides, usually diluted with water or possibly diesel, at a specific rate using<br />
spray equipment onto the foliage of plants (until every leaf is wetted, but not dripping). Spray equipment may vary<br />
from a simple garden sprayer or a backpack sprayer to boom sprays operated from vehicles, including aircraft. All<br />
other options should be considered before using foliar spraying, particularly in bushland applications, because of<br />
the increased potential for off-target damage (see below).<br />
Minimising off-target damage<br />
When herbicides are used there is always some potential to damage plants and animals other than those that you<br />
wish to control, resulting in ‘off-target damage’. The potential for off-target damage depends on the herbicide used,<br />
soil type and landform, weather, application method used and the skill of the operator. To minimise off-target damage<br />
consider the following:<br />
• Only use spray application of herbicides if this is clearly the best option. Consider other methods such as stem<br />
injection, cut and swab and basal bark applications.<br />
• If spraying is the best option<br />
• minimise spray drift (see separate section)<br />
• if practical use ‘hoods’ on spray equipment to focus spray<br />
• Select a herbicide and application rate that is most effective at controlling the <strong>weed</strong> with the least damage to<br />
desirable plants, humans and the broader environment. Note that in some instances it may be appropriate to use<br />
higher rates (within label regulations) if this means that follow up spraying can be reduced and therefore herbicide<br />
use is actually reduced over the longer-term.<br />
• Develop a plan for storing, mixing, transporting, handling of spills and disposing of unused herbicides and containers<br />
before you purchase herbicides. Make sure all who will be involved in herbicide use know the plan and agree to<br />
follow it.<br />
• Ensure equipment is well maintained and leak free. Do not place herbicide concentrate or mixture in unlabeled<br />
containers, or containers from which it can be easily spilt.<br />
• The person applying herbicide needs a good understanding of safe spraying techniques and limiting off target damage.<br />
• Establish a mixing area on a site which has easy access, is flat, has no desirable species present, is not subject to<br />
erosion or run off and is rarely visited by the public.<br />
• Use a dye to minimise missed areas and avoid over-spraying. This is also useful for other herbicide methods. Dyes,<br />
normally made from vegetable matter, allow you to see where you have sprayed and help to detect over-spraying.<br />
• Always spray at the best possible time, when the plant is most susceptible to the herbicide used (usually when<br />
it is at its most vigorous growth stage) and when climatic conditions are most suitable (low wind, appropriate<br />
humidity and no rain expected). This will improve results and reduce the amount of herbicide that needs to be<br />
used in the future.<br />
• Regular monitoring of treated areas is important to identify the effectiveness of the method and check for off-target<br />
damage. If impacts on target species are not as expected, or if off-target impacts are occurring, reconsider the<br />
use of spraying, equipment used, spraying technique, type of herbicide used and operator training to determine<br />
what needs to be changed to avoid future problems.<br />
• Always follow up <strong>weed</strong> control work. If treatments are not followed up with further control of overlooked<br />
or surviving plants the initial treatment will have been wasted.<br />
Preventing spray drift<br />
When using foliar spraying as an application method you need to be acutely aware of the risk of spray drift. When<br />
spraying you have an obligation to prevent the drift of herbicide onto desirable vegetation and beyond the boundaries<br />
of the site or property that you are working on.<br />
CRC for <strong>Australia</strong>n Weed Management • Weed control methods for community groups<br />
7
Herbicides<br />
Some general guidelines to avoid spray drift are:<br />
• Identify where desirable vegetation is located and areas at risk of off-target damage on neighbouring properties.<br />
Avoid spraying when wind will blow spray towards these. Maintain a buffer distance from these areas.<br />
• Spray only in suitable weather conditions. Milder temperatures and higher humidity are best. The higher humidity<br />
of tropical areas may allow spraying at higher temperatures than in temperate regions but consult with local, state<br />
or territory agencies to find out the best conditions for your situation. Consistent light winds are preferable (5–15kph),<br />
blowing away from areas at risk.<br />
• Avoid spraying during<br />
• very calm conditions, as spray may travel in any direction, including toward sensitive areas<br />
• strong winds (greater than 15kph)<br />
• changing weather conditions<br />
• Stop if conditions change whilst spraying.<br />
• Select the least volatile herbicides (i.e. least likely to become a vapour). Seek expert advice if unsure.<br />
• Notify neighbours of your spraying intentions.<br />
• Minimise spray release height.<br />
• Set equipment to produce the largest droplets which still give adequate spray cover.<br />
Spraying and herbicide use in water catchments<br />
The use of herbicides and herbicide additives near waterways, or in situations where herbicides may eventually enter<br />
waterways, requires very careful consideration and special care. If at all possible it is best to avoid herbicide use in<br />
these situations because of the potential risk to aquatic life and other users of water. If herbicides are to be used they<br />
must be registered for use near waterways or in aquatic situations and label instructions need to be strictly adhered<br />
to. Special permits may be required from state or territory environmental protection authorities to use herbicides<br />
near or on waterways.<br />
Here are some tips on how you may reduce environmental risks associated with herbicide use near waterways:<br />
• High volume foliar spray applications increase chances of direct or indirect contamination of waterways. Consider<br />
alternatives such as knapsack spraying, basal bark application, wick wiping or cut-stump/stem injection to reduce<br />
contamination risks.<br />
• It is better to treat riparian <strong>weed</strong> infestations (situated near a waterway or water body) progressively rather than in<br />
one large-scale operation. This will reduce the risks of stream bank destabilisation and habitat loss. A progressive<br />
process will allow native vegetation to regenerate or revegetation to become established. Of course, as with all<br />
<strong>weed</strong> work, ongoing follow-up and vigilance will be required.<br />
• Select herbicides that have the lowest tendency to leach, are persistent in the environment for the shortest time<br />
and have the lowest toxicity that will still be effective against the target <strong>weed</strong>. Talk to <strong>weed</strong> control contacts in<br />
your state or territory for advice.<br />
• Mixing of chemicals and cleaning of equipment should be done well away from waterways in situations from which<br />
run-off will not directly enter waterways.<br />
• Avoid spraying <strong>weed</strong>s that overhang waterways.<br />
• Wherever possible direct spray away from waterways.<br />
• Move upstream when spraying rather than downstream to aid dilution of any contamination and to avoid creating<br />
a ‘slug’ of herbicide entering the waterway.<br />
• If land near waterways is cultivated run furrows across the slope to minimise run off. Establishment of a grass buffer<br />
strip between cultivated land and a waterway is also useful to intercept run off.<br />
• Only spray when rain is not expected for some days.<br />
• Keep records of spraying activity.<br />
Check with local authorities to find out what regulations apply in your area for the application of herbicides near<br />
waterways.<br />
8<br />
CRC for <strong>Australia</strong>n Weed Management • Weed control methods for community groups
Water used to mix with herbicides<br />
The quality of the water you use to mix with herbicides can affect your results. Always use clean, good<br />
quality water. Dirty water contains particles that can absorb active ingredients and reduce the effectiveness<br />
of herbicide. Dirty water may also lead to blocked and damaged spray equipment.<br />
Herbicides<br />
Hard water, which contains high concentrations of calcium and magnesium, and water that is either too<br />
alkaline or acidic, can reduce herbicide performance. When the only available water is too hard, alkaline<br />
or acidic, additives can be obtained which overcome these problems.<br />
Basal bark spraying<br />
This method involves mixing an oil-soluble herbicide in diesel and spraying the full circumference of the trunk or stem.<br />
Basal bark spraying is often used to treat thinly barked woody <strong>weed</strong>s and undesirable trees. It is an effective way to<br />
treat saplings, regrowth and multi-stemmed shrubs and trees.<br />
This method works by allowing the herbicide to enter the <strong>weed</strong>’s underground storage organs, slowly killing it.<br />
The stem or trunk needs to be reasonably free of mud or dust and should be fairly dry. It should be sprayed or painted<br />
with herbicide solution from ground level. The height to be covered varies with the species and maturity of the plant<br />
being treated. Check with local authorities for recommended coverage.<br />
Basal bark spraying is a useful method in difficult terrain and usually works well, provided bark is not too thick for<br />
the solution to penetrate.<br />
Basal bark spraying of mesquite. Lower stems are sprayed from ground<br />
level up to a height of 750 mm.<br />
Photo: Rachele Osmond<br />
Cut and paint, cut and swab, cut and daub and cut and spray<br />
All of these names describe similar methods to apply herbicides directly to plants and are particularly useful for<br />
woody <strong>weed</strong>s.<br />
To use these methods clear the area around the base of the stem, then cut the stem horizontally as close to the ground<br />
as possible, using secateurs, loppers, bush saw or chain saw. It is important that the cut is horizontal to avoid run<br />
off of herbicide, and sharp angled cuts may also present an injury risk. Herbicide is then applied as soon as possible<br />
(preferably within 10 seconds) to the exposed surface before the plant’s cells close up and inhibit the entry of the<br />
herbicide. On larger stems focus herbicide application on the sap wood and not the heartwood, as herbicide will<br />
not be translocated through the stump by the heartwood and will be wasted. It is easiest to have two people for<br />
this process, one to cut and one ready to apply the herbicide as soon as possible. This approach, though reliable,<br />
does not always provide a 100 % kill rate, and ongoing follow up and monitoring of treated plants will be required.<br />
CRC for <strong>Australia</strong>n Weed Management • Weed control methods for community groups<br />
9
Herbicides<br />
Step 1 Step 2<br />
Cut stem horizontally<br />
Herbicide only applied to sapwood<br />
A variation to the cut and swab method, in this case cut and spray, with<br />
a chain saw being a handy tool to use on a tough prickly acacia bush<br />
(Acacia nilotica). Herbicide is best applied within 10 seconds after<br />
cutting. Prickly acacia field day, northwestern Qld.<br />
Photo: Nathan March<br />
Scrape and paint<br />
This method is useful on vines and scrambling plants with a woody stem. Use a knife and, starting from the base,<br />
scrape 20 mm to 1 m of the stem to expose the sapwood and apply herbicide to the scraped area within 10 seconds.<br />
Do not ringbark the stem. Scrape about one third of the stem diameter. Larger stems (>10 mm) can be scraped on<br />
two sides.<br />
Vine “curtains” can be cut at chest level, then again at about 300 mm above the ground. Scrape or cut and paint<br />
these lower stems, or spray new growth. Pulling vines out of trees may cause a lot of damage to tree foliage or bark.<br />
It may be better to leave the vine to die in the tree after treatment.<br />
As with all herbicide methods avoid using cut and swab or scrape and paint and similar methods if rain is expected.<br />
Herbicide labels have information on the amount of time needed after application before rain for the chemical to<br />
still be effective.<br />
Stem scrape<br />
10<br />
CRC for <strong>Australia</strong>n Weed Management • Weed control methods for community groups
Stem injection<br />
There are a variety of methods in this category. The aim is to get herbicide into the sapwood tissue (cambium layer)<br />
of woody <strong>weed</strong>s and <strong>weed</strong> trees so that it will be transported throughout the plant. These methods target individual<br />
plants and the risk of off-target damage is diminished (provided accidental spillages do not occur).<br />
Herbicides<br />
Use a cordless drill or a brace and bit to drill holes into the base of the plant. Holes should be drilled at an angle of<br />
45 o and be made no more than 50 mm apart right around the trunk. This angle will aid herbicide retention in the hole,<br />
increasing absorption by the plant and reducing the risk of spillage. Herbicide must be injected in the holes within<br />
10 seconds of the hole being made. Again it will be easiest to have two people on hand for this task, one to drill<br />
and one to fill with herbicide. Be careful not to overfill the holes as excess herbicide running out of the hole is wasted<br />
and will contaminate the environment. Injection guns enable you to deliver a precise amount of herbicide to each hole.<br />
A squeeze bottle with a firmly fixed tube to dispense herbicide or veterinary syringes may also be useful.<br />
An alternative method, if a drill or injection gun is not available, is to use a chisel or tomahawk to make angled cuts<br />
into the sapwood around the base of the stem/trunk (chipping or sometimes referred to as frilling). These cuts are<br />
then filled with herbicide immediately. It is important not to ringbark the plant as this may kill vegetation above the<br />
ringbark but will prevent transportation of the herbicide through the plant’s entire system and allow trees to resprout<br />
below ringbark lines.<br />
Chipping is an alternate means to get herbicide into a willow (Salix spp.).<br />
Evenly spaced downward cuts are made around the trunk with a chisel<br />
or a tomahawk and filled with herbicide.<br />
Photo: Lisa Menke NSW Dept of Environment and Conservation<br />
A stem injection gun being used to apply herbicide to a willow.<br />
Photo: Trish Chadwick NSW DIPNR<br />
Stem and leaf swiping<br />
This method is useful for leafy herbaceous plants. If fruit or seed is present remove and bag this first to prevent<br />
additions to the soil seed bank. The method involves the use of a wick or rope applicator (equipment is available<br />
commercially), to swipe stems and/or leaves with herbicide. A flat bladed device may be required to provide some<br />
resistance for the applicator when leaf or stem being treated is soft.<br />
Extreme care is needed to avoid spillage and contact with skin.<br />
CRC for <strong>Australia</strong>n Weed Management • Weed control methods for community groups<br />
11
Herbicides<br />
Leaf swipe<br />
Other herbicide application methods<br />
Granular or soil residual herbicides<br />
These are herbicides that are mixed into a solid medium, such as clay, and formed into pellets or granules. They are<br />
then spread over the soil, either <strong>manual</strong>ly or by a mechanised dispenser or even an aircraft. The release of the herbicide<br />
is usually triggered by rain, which allows the active ingredient to be released from the pellet so that it can then be<br />
absorbed into the roots of plants. The herbicide may remain active in the soil for some time helping to control newly<br />
emerging <strong>weed</strong>s. This type of application is most suitable for <strong>weed</strong>s in agricultural and forestry situations where<br />
sensitive desirable vegetation is not at risk from the herbicide. Heavy rain may wash herbicide off site, potentially<br />
contaminating catchments and reducing effectiveness in the intended area of control. Granular applications can be<br />
a useful alternative to sprays where spray drift is a major problem or where access is difficult and aerial application<br />
onto large infestations may be warranted.<br />
Aerial applications<br />
Helicopters or fixed wing aircraft may be useful to apply herbicides where the area to be treated is large and/or<br />
inaccessible. Clearly the risk of off-target damage may be high, but if an area is dominated by a particular <strong>weed</strong> it<br />
can be appropriate and, at a large scale, economical to employ this method. Mimosa (Mimosa pigra) in the Northern<br />
Territory is an example of a species where aerial applications are often employed. However, it is essential that<br />
follow-up work is carried out to treat regrowth after spraying.<br />
Helicopter spraying of a large parkinsonia (Parkinsonia aculeata) infestation<br />
in central Queensland.<br />
Photo: John McKenzie<br />
Wickwipers or <strong>weed</strong> wipers<br />
This method employs vehicle-mounted or hand-held equipment to wipe or brush herbicide onto <strong>weed</strong>s. The herbicide<br />
is applied from wicks, sponges or other material saturated with herbicide. The level of application can be adjusted<br />
so that only species growing above a certain height will receive herbicide and in this way the method can be very<br />
selective. Problems with spray drift are also avoided. This method is particularly useful in pasture or grassland<br />
situations. Serrated tussock (Nassella trichotoma) is an example of a pasture-invading <strong>weed</strong> that can be treated in<br />
this way. Desirable species need to be grazed first so that they are well below the height of mature serrated tussock<br />
12<br />
CRC for <strong>Australia</strong>n Weed Management • Weed control methods for community groups
plants. This method is more effective if a second pass in the opposite direction is done but is not suitable if obstacles<br />
such as rocks and stumps are present. If <strong>weed</strong>s are present that are below the height of application, follow-up spot<br />
spraying or <strong>manual</strong> removal will be required.<br />
Herbicides<br />
The right time<br />
Usually it is best to apply herbicides when <strong>weed</strong>s are actively growing. Also time applications when plants are smaller<br />
if possible as less herbicide will be needed and they are easier to kill. Get to know the life cycle of the plant to assess<br />
when the most suitable conditions are likely to occur, but also take account of seasonal variations and local conditions<br />
which may impact on plant health. Avoid using herbicide when <strong>weed</strong>s are under stress, for example from extremes<br />
of heat or cold, drought, waterlogging or disease.<br />
Do not apply during wet, windy or very hot weather or when these conditions are anticipated.<br />
The right operator: Training<br />
It is beyond the scope of this module to cover all aspects of herbicide use. All people using herbicides are encouraged<br />
to undertake appropriate herbicide training. In most states and territories short courses are available, such as ‘Chemcert’<br />
which provide information and hands-on training in herbicides, equipment and safety precautions. In some states<br />
and territories, and in certain situations, training may be a prerequisite to using herbicides. Check with local<br />
authorities to determine what is required for your situation.<br />
Keeping records<br />
It is good practice to keep records of herbicide applications. This enables you to review the effectiveness of herbicide<br />
treatments as part of your <strong>weed</strong> <strong>management</strong> planning. It will also allow you to demonstrate to others what has been<br />
happening on the site in respect of herbicide treatments. A simple example of a record sheet is included with this<br />
module (Appendix 2). Commercial or agricultural operators are usually required to maintain more detailed records<br />
and this may also be required if special permits or restrictions apply to a particular herbicide.<br />
Personal safety and herbicide use<br />
Herbicides need to be handled with care. Herbicides should always be kept well away from children and preferably<br />
stored in a locked cabinet and in the original labelled container.<br />
Ensure that all who are going to use herbicides read and understand the label and can speak to someone qualified<br />
in herbicide use if they have any questions.<br />
Herbicides can enter the human body through the skin, by inhalation or swallowing. Basic safety precautions that<br />
should always be observed when using herbicides are:<br />
• Read the label before opening the container and follow instructions exactly. If you do not understand the instructions<br />
seek advice from appropriate people eg local or state government authorities.<br />
• Store only the amount of herbicide that you need. Surplus chemicals remain a hazard.<br />
• Wear protective clothing: Long sleeves, long pants, sturdy shoes and gloves and eye protection (goggles/safety<br />
glasses). Cotton, leather, canvas and other absorbent materials are not resistant to herbicides so the more layers<br />
the better. A PVC apron covering from shoulders to boots should be worn during the mixing process. Note that<br />
protective equipment should be worn during:<br />
• mixing of herbicides. Be extremely cautious at this point as herbicide is in its concentrated form<br />
• application<br />
• entering a treated area before the herbicide has dried or dissipated<br />
• Always wear chemical-resistant gloves. A respirator is advised when mixing or pouring liquid herbicides.<br />
• Do not eat, drink or smoke while using herbicide and wash hands after handling.<br />
• Wash skin and equipment afterwards. Shower and wash hair at the end of the workday. Wash contaminated<br />
clothing separately.<br />
• Know what the correct procedures are in the event of an accidental spill.<br />
CRC for <strong>Australia</strong>n Weed Management • Weed control methods for community groups<br />
13
Herbicides<br />
Additives<br />
There are a range of products available designed to be added to herbicides to improve their performance.<br />
These additives are sometimes called adjuvants. Adjuvants are available to help herbicide stick to plant surfaces<br />
or penetrate deeper into plants. Adjuvants that help herbicides stick or wet plant surfaces are called ‘surfactants’,<br />
whilst those that help herbicides to enter the plant are called ‘penetrants’. Control of <strong>weed</strong> species with waxy<br />
leaf surfaces or with other properties that repel liquid herbicide may be improved with the use of adjuvants.<br />
However, care needs to be taken to ensure that excessive run off does not result from their use (foliage may<br />
become saturated more rapidly) and that the adjuvant itself is safe to use. Some adjuvants for example may<br />
be harmful to aquatic life, even if the actual herbicide is not. As always check with local authorities to<br />
determine what is appropriate to use in your situation.<br />
Treatment<br />
Herbicides (sprays)<br />
Advantages (Benefits)<br />
• Selective (depending on choice of herbicide,<br />
timing, plant life cycles, operator skills)<br />
• Can prevent <strong>weed</strong>s seeding and spreading<br />
• Appropriate on small and large <strong>weed</strong> infestations<br />
• Minimises direct soil disturbances<br />
• Inexpensive<br />
Disadvantages (Limitations)<br />
• Potential for non-selective damage / may<br />
destroy local flora<br />
• Potential impacts on the broader environment<br />
• Technical proficiency required<br />
• Operator / public hazards<br />
Woody Weed<br />
Treatments (Cut & swab,<br />
stem injection, scrape &<br />
paint etc)<br />
• Selective<br />
• Minimises risks to local flora<br />
• Prevents seeding and vegetative spread<br />
• Inexpensive (on small infestations)<br />
• Site disturbances can be excessive, care is needed<br />
• Can spread <strong>weed</strong> propagules<br />
• Can destroy native fauna habitat<br />
• Can encourage <strong>weed</strong> growth / germination<br />
• Operator / public hazards<br />
• Costly and labour intensive (on large infestations)<br />
14<br />
CRC for <strong>Australia</strong>n Weed Management • Weed control methods for community groups
Hand control<br />
Hand, or <strong>manual</strong>, methods offer alternatives to herbicide treatments particularly in sensitive areas with high<br />
conservation value. They also form a useful part of an integrated approach, especially for follow-up control after<br />
herbicide applications or other methods have been used. These techniques are, of course, labour intensive and they<br />
are generally not suited to the treatment of extensive infestations. However, they do provide an opportunity to get<br />
close to the <strong>weed</strong>, which can improve your identification skills and aid your understanding of the <strong>weed</strong>’s biology.<br />
Hand control<br />
Hand pulling<br />
Hand pulling is useful for isolated occurrences of seedlings or other small, soft, non-bulbous <strong>weed</strong>s.<br />
It is best undertaken when soil is moist and loose so that you have a better chance of removing the entire plant whilst<br />
minimising soil disturbance. Remove any seeds or fruit that are present and bag these for disposal.<br />
For small seedlings and soft plants take hold of the plant firmly at ground level and pull. Avoid grabbing the plant too<br />
high as it is likely to break and remaining plant material may reshoot. After removing the plant tamp the disturbed<br />
soil down.<br />
For small woody plants like young boneseed and bitou bush (Chrysanthemoides monilifera spp.) take hold of the<br />
stem at ground level, and manipulate it backwards and forwards gently until it comes away cleanly. If the plant has<br />
a spreading root system it may be necessary to pull roots individually. If so always pull roots horizontally through<br />
the soil towards the plant, this reduces disturbance and the risk that roots will break. A screwdriver or similar may<br />
be useful to loosen roots.<br />
Plants that do not regrow from their roots can be crowned. Hold leaves and stems together and use a knife to cut<br />
through all the roots below the crown (the parts of the plant above the roots).<br />
Cutting out the crown<br />
Digging<br />
In a bushland situation, digging, hoeing or grubbing out <strong>weed</strong>s can be effective for isolated <strong>weed</strong> occurrences and<br />
are useful follow-up techniques. With practice, gentle digging and grubbing out of <strong>weed</strong>s will keep soil disturbance<br />
to a minimum. However, digging is not always the best method for species with extensive tuber, rhizome or root<br />
systems. For example, larger woody <strong>weed</strong>s may be more effectively treated with herbicides, which will cause minimal<br />
soil disturbance compared with digging out deep or extensive root systems. Species like bridal creeper (Asparagus<br />
asparagoides) develop extensive tubers and rhizomes underground that are difficult to completely remove and older<br />
established infestations may be better controlled with careful use of herbicides.<br />
Treatment<br />
Advantages (Benefits)<br />
Disadvantages (Limitations)<br />
Manual removal<br />
(hand-<strong>weed</strong>ing, digging,<br />
grubbing etc)<br />
• Selective<br />
• Minimises risks to local flora<br />
• Supplements other controls<br />
• Can prevent seeding and spread<br />
• Effective on small infestations<br />
• Develops plant identification skills and familiarity<br />
with sites<br />
• Can disturb soils if poorly done<br />
• Timing limitations, needs moist soils<br />
• Can spread <strong>weed</strong> propagules<br />
• Unsuited to large infestations<br />
• Inappropriate for some <strong>weed</strong> species and large<br />
plants<br />
• Labour intensive<br />
CRC for <strong>Australia</strong>n Weed Management • Weed control methods for community groups<br />
15
Mechanical<br />
Mechanical<br />
Machines, from lawn mowers to large earth moving equipment, can play an important role in <strong>weed</strong> <strong>management</strong>.<br />
The use of any machinery introduces risks of site disturbance and the potential to spread <strong>weed</strong>s as a consequence<br />
of plant material attaching to machinery and redepositing elsewhere. Good planning to minimise site disturbance<br />
and restore treated sites is essential, as is attention to machinery hygiene.<br />
Slashing and mowing<br />
Slashing and mowing may be valid components of an integrated <strong>weed</strong> <strong>management</strong> plan, depending on the <strong>weed</strong><br />
being treated. These methods will not eradicate <strong>weed</strong>s but they can stress <strong>weed</strong>s, providing desirable vegetation with<br />
a competitive edge, leaving <strong>weed</strong>s more susceptible to biocontrol agents and also preventing or greatly reducing<br />
<strong>weed</strong> seed production.<br />
Proper timing of the use of slashing or mowing is required for optimal results, otherwise these methods can actually<br />
spread <strong>weed</strong>s. Timing should be based on the growth stage of the <strong>weed</strong> species and the growth stage of desirable<br />
vegetation. Ideally mowing should be carried out at a time that is not so early that seed heads emerging later produce<br />
an abundance of seed, and not so late that viable seed has already been set. It should also coincide with the time when<br />
desirable plants are dormant. The idea is to exploit differences in the growth habits of grassy <strong>weed</strong>s and desirable<br />
grass species. This happy coincidence will not always be achievable and decisions will need to be made based on<br />
priorities for action. For example, in areas with little or no native vegetation that are already heavily degraded with<br />
<strong>weed</strong> infestations, mowing may provide an effective means to reduce <strong>weed</strong> seed production. This will help protect<br />
better quality areas from invasion. Resources can then be devoted to removing <strong>weed</strong>s from less infested areas.<br />
Timing decisions will be further complicated if multiple <strong>weed</strong> species are present with different flowering and seeding<br />
times. Again, it will be a matter of prioritising which species are most important for the <strong>management</strong> of the site and<br />
what opportunities exist to integrate mowing with other methods to manage priority species.<br />
Some <strong>weed</strong>s will regrow readily after mowing, and mowing can actually encourage fresh growth (eg Coolatai grass<br />
Hyparrhenia hirta). This new growth is more responsive to herbicide treatments.<br />
Where catchers can be used as part of mowing, seed heads can be collected for subsequent destruction or appropriate<br />
disposal – further helping to suppress subsequent generations of <strong>weed</strong>s and <strong>weed</strong> spread.<br />
Be mindful of the damage that heavy mowers can cause, particularly when the ground is wet. Thorough cleaning<br />
of machinery used in slashing and mowing is essential to ensure that seed from the area treated is not inadvertently<br />
transported to new areas. Machinery like mowers and slashers can potentially become major dispersers of grasses<br />
like Chilean needle grass (Nassella neesiana).<br />
Slashing trials being conducted on a Chilean needle grass (Nassella neesiana)<br />
infestation. This species produces seed at the base of its stem as well as<br />
normal seed heads, so follow up work will also be required as well as<br />
careful machinery hygiene to prevent seed spread.<br />
Photo: DPI Vic<br />
16<br />
CRC for <strong>Australia</strong>n Weed Management • Weed control methods for community groups
Mechanical<br />
Slashing with a brushcutter can help open up dense stands of blackberry<br />
(Rubus fruticosus aggregate) for follow-up control by other methods.<br />
Photo: Adam Whitchurch, DPI Victoria<br />
Mechanical control of parkinsonia (parkinsonia aculeata) with an Ellrott<br />
front-mounted bladeplough.<br />
Photo: John McKenzie<br />
Bulldozers and tractors<br />
For some species, and in certain circumstances, heavy earth moving equipment can form an effective part of integrated<br />
<strong>weed</strong> <strong>management</strong>, particularly for severe infestations of larger woody <strong>weed</strong>s. Bulldozers are important in dealing<br />
with large infestations of prickle bush species including prickly acacia, mesquite (Prosopis spp.) and parkinsonia and<br />
allow treatments such as blade ploughing, chain pulling, dozer pushing and stick-raking. The method used will depend<br />
on the extent of the infestation and the maturity of the plants to be treated.<br />
Blade ploughing employs a large plough device attached to a bulldozer which cuts off trees below the soil surface<br />
and below the zone from which they can rebud. This is best done when trees are young and easier to cut through.<br />
Chaining, where two bulldozers drag a heavy chain through dense infestations, is used to knock plants down to<br />
the ground to provide fuel for follow-up fires. Ongoing control with herbicides is required to treat regrowth. Dozer<br />
pushing is used to destroy individual trees and stick-raking attachments to bulldozers are used to cut the trees<br />
below ground level and mound them into windrows for burning.<br />
Heavy machinery can also be usefully integrated into the treatment of other woody <strong>weed</strong>s such as blackberry<br />
(Rubus fruiticosus agg.) and gorse (Ulex europaeus) where bulldozers or heavy tractors can be used to cut bushes off<br />
at or below the soil surface. Follow-up treatments and planned revegetation or pasture establishment will be required<br />
to help keep these <strong>weed</strong>s under control.<br />
Bulldozers, or heavy tractors, using blade ploughs can be used to ‘scalp’ <strong>weed</strong> infested land to depths often around<br />
200–300 mm to remove plant crowns and as much seed and root material as possible. This method also removes soil<br />
nutrients that may have accumulated from land use practices (applications of fertilizer etc.), which actually favour<br />
many <strong>weed</strong>s over native vegetation since the latter is generally adapted to low nutrient conditions. Scalping may be<br />
appropriate for highly degraded areas but expert assessment of the soil profile and selection of species to revegetate<br />
the site is needed to avoid causing serious damage.<br />
CRC for <strong>Australia</strong>n Weed Management • Weed control methods for community groups<br />
17
Mechanical<br />
A gorse infestation in Zeehan, Tasmania being mechanically cleared and<br />
mulched.<br />
Photo: <strong>Greening</strong> <strong>Australia</strong>, Tasmania<br />
Grooming<br />
Tractors and earth moving equipment fitted with specialised ‘grooming’ arms can be effective at treating large<br />
infestations of woody <strong>weed</strong>s in hard to reach places. The grooming devices shred plant material down to ground<br />
level, reducing biomass. Follow-up treatments of any regrowth, with herbicides or <strong>manual</strong> methods, require far less<br />
chemical and effort than would have been the case if the original infestation was treated. Initial use of grooming can<br />
be expensive but this needs to be balanced against long-term reduction in herbicide costs. The method has been<br />
useful for large infestations of blackberry where regrowth has revealed that the original large infestation was based<br />
on a few parent plants which could then become the focus of treatment.<br />
Clearly these methods cause major disturbance to vegetation and soil and should only be contemplated where<br />
resources exist to carry out necessary follow-up work. This includes restoration of the site with desirable vegetation.<br />
Earth moving equipment fitted with a grooming head treating a dense<br />
stand of blackberry.<br />
Photo: Sandy Cummings, Fleurieu APCB<br />
Cultivation<br />
Cultivation, defined as working the soil with implements, is often used in cropping situations to prepare the soil for<br />
sowing and to destroy competing plants. Its use is diminishing in order to conserve soil, with herbicides being used<br />
more extensively to control <strong>weed</strong>s.<br />
Cultivation works by cutting, uprooting and burying shallow rooted plants. It has a limited application in bushland<br />
settings where the disturbance caused would only serve to stimulate <strong>weed</strong> growth and help spread seeds and other<br />
propagules whilst destroying native vegetation. It may form a useful part of managing <strong>weed</strong>s invading pasture, such<br />
as serrated tussock, provided cultivation is followed up with the establishment of vigorous pasture to suppress<br />
germination of <strong>weed</strong> seeds from the soil seed bank.<br />
18<br />
CRC for <strong>Australia</strong>n Weed Management • Weed control methods for community groups
Treatment<br />
Soil Cultivation<br />
and Scalping<br />
Advantages (Benefits)<br />
• Can eradicate <strong>weed</strong>s<br />
• Reduces nutrient loads<br />
• Removes soil-stored seedbank<br />
• Can aid site rehabilitation<br />
Disadvantages (Limitations)<br />
• Non-selective<br />
• Disturbs soils<br />
• Spreads propagules<br />
• Destroys local flora and fauna habitat<br />
• Removes soil-stored local flora seedbank<br />
• Potential for erosion / run-off<br />
• Expensive<br />
• Site rehabilitation required<br />
• Technical proficiency required<br />
Mechanical<br />
Slashing, Mowing,<br />
Cutting (brushcutters,<br />
mowers, slashers)<br />
• Minimises soil disturbances<br />
• Minimises risks to local flora<br />
• Can prevent seeding and spread<br />
• Removes excess foliage (for follow-up treatments)<br />
• Supplements other methods<br />
• Helps to weaken plants, making them susceptible<br />
to other forms of control<br />
• Inexpensive<br />
• Usually doesn’t eradicate <strong>weed</strong>s<br />
• Can prevent seeding by local flora<br />
• Can introduce / spread <strong>weed</strong> propagules<br />
• Can encourage <strong>weed</strong> growth<br />
• Can increase fuel loads (dried material)<br />
Mechanical (grooming,<br />
bulldozer)<br />
• Can be quick<br />
• Can be cost effective for extensive infestations<br />
(prickle bushes)<br />
• Significant disturbance<br />
• Vehicle hygiene risks<br />
• Expense for small infestations<br />
• Comprehensive follow-up may be required<br />
CRC for <strong>Australia</strong>n Weed Management • Weed control methods for community groups<br />
19
Mulching and smothering<br />
Mulching and smothering<br />
Mulch may help to control <strong>weed</strong>s by excluding light from the soil surface, reducing temperature variations that would<br />
otherwise stimulate <strong>weed</strong> seed germination and by physically impeding <strong>weed</strong> growth. Many forms of vegetative<br />
material including bark, wood chips or mats made from vegetative material are used, as are synthetic materials such<br />
as black plastic sheeting or mineral aggregates.<br />
The application of mulches outside the garden or horticultural environment is probably limited, except perhaps for<br />
highly disturbed or degraded areas where no indigenous species regeneration will be affected by the mulch, or around<br />
seedlings planted as part of revegetation work. It is important that sheet materials used for mulching, synthetic or<br />
otherwise, are well secured to prevent them being torn (introducing gaps), blown or washed away.<br />
Mulching may assist revegetation establish by suppressing <strong>weed</strong>s around young native plants and improving retention<br />
of soil moisture. Organic mulches such as hay or straw, however, may also contain <strong>weed</strong> seeds and can temporarily<br />
tie up nitrogen in the soil.<br />
Solarisation<br />
This method also employs sheeting, usually black or clear plastic, to cover <strong>weed</strong>s and allow the sun’s energy to raise<br />
temperatures under the sheeting to an extent that <strong>weed</strong>s and their seeds are destroyed. It can be useful to treat small<br />
infestations of tenacious grass and herbaceous species and is best used in the warmer months and in locations with<br />
open and sunny aspects.<br />
Black plastic sheeting has been used to control some aquatic <strong>weed</strong>s, for example Lagarosiphon major, in still water<br />
conditions. This species is on the Alert List for environmental <strong>weed</strong>s.<br />
It is also a method to sterilise <strong>weed</strong>s to be disposed of, by accelerating composting and subjecting the material to<br />
high temperatures. This can eliminate the need to take material off-site and reduces the risk of inadvertently aiding<br />
<strong>weed</strong> spread.<br />
Treatment<br />
Mulches and<br />
smothering treatments<br />
Solarisation<br />
(plastic sheeting)<br />
Advantages (Benefits)<br />
• Inhibits / prevents <strong>weed</strong> seeding and spread<br />
• Can compliment site rehabilitation<br />
• Erosion / run-off control<br />
• Aesthetics enhanced<br />
• Can be selective<br />
• Can control tenacious <strong>weed</strong>s<br />
• Inhibits / prevents seeding and spread<br />
• Supplements other methods<br />
• Appropriate on a small scale<br />
• Low costs (once installed)<br />
Disadvantages (Limitations)<br />
• Usually non-selective<br />
• Can encourage <strong>weed</strong> growth<br />
• Prevents local plant growth and spread<br />
• Can introduce <strong>weed</strong> propagules<br />
• Can alter soil chemistry<br />
• Affects soil conditions and soil micro-fauna<br />
• On-going maintenance required<br />
• Aesthetics undermined<br />
• Costly and labour intensive<br />
• Usually non-selective<br />
• Ineffectual on many <strong>weed</strong>s<br />
• Unsuitable for large infestations<br />
• Prevents local plant growth and spread<br />
• Affects soil conditions and soil micro-fauna<br />
• On-going maintenance required<br />
20<br />
CRC for <strong>Australia</strong>n Weed Management • Weed control methods for community groups
Competition<br />
Ultimately, the best way to keep an area free of <strong>weed</strong>s, or at least to keep <strong>weed</strong> numbers down to a manageable<br />
level, is to have a good cover of desirable vegetation which prevents <strong>weed</strong>s establishing. In bushland settings, this<br />
cover should be comprised of native species indigenous to the area (local provenance). In agricultural settings, pasture<br />
species might be desirable.<br />
Competition<br />
The objective of most site plans involving bushland settings is to restore the original ecosystem by establishing local<br />
native species to replace the <strong>weed</strong>s. This may not always be possible, for example, if seeds of original species are<br />
unobtainable or if the site has been so extensively changed that original species would no longer grow there (eg a mine<br />
or quarry site). In these cases alternate species need to be found but these should still be from native species as close<br />
as possible to the site. Natives from other regions may themselves become <strong>weed</strong>s, for example Cootamundra wattle<br />
(Acacia baileyana) is a <strong>weed</strong> in <strong>Australia</strong> outside its original range in New South Wales.<br />
Regeneration<br />
Native species can be allowed to regenerate from seed stored in the soil-seed bank or seed held in remnant native<br />
canopy species. In these circumstances <strong>weed</strong> control should be paced so that gaps are not created for fresh invasion.<br />
This approach is embodied in the “Bradley” method developed by the sisters Joan and Eileen Bradley during the<br />
1960s–1970s. The main principles of this method are to:<br />
• work from minimally disturbed sites in towards the most <strong>weed</strong> infested areas<br />
• minimise disturbance to the soil<br />
• allow the rate of native plant regeneration to dictate the rate of <strong>weed</strong> removal.<br />
Manipulation of the seed bank<br />
Where a substantial native seed bank exists in the soil or the plant canopy this may be exploited by direct manipulation,<br />
such as burning, to stimulate germination. This technique should only be applied to sites where monitoring confirms<br />
the presence of a substantial seed resource and the ecosystem is fire adapted. It would not be appropriate for example,<br />
in rainforest ecosystems. Otherwise a more interventionist revegetation technique is required.<br />
Sowing of seed<br />
Direct seeding with desirable species requires knowledge about their germination and seedling establishment<br />
requirements so that the plants can be given the best opportunity to successfully establish in the shortest time possible,<br />
thus reducing the chances of reinvasion by <strong>weed</strong>s. Many seeds require some form of pre-treatment (eg scarification,<br />
heat or smoke) to stimulate germination. Timing of the sowing to take advantage of reliable rainfall or low seed<br />
predator activity may help to maximise chances of establishment.<br />
Planting seedlings<br />
Planting native seedlings is a more labour intensive and expensive task than seeding but generally achieves higher<br />
establishment rates. Planting should be carried out at times that will give plants the best chance of establishment<br />
and some temporary protection from grazing may be required. Mulch may also assist to suppress <strong>weed</strong>s and retain<br />
soil moisture whilst seedlings become established.<br />
Selection and revegetation timing can be complex matters and advice from suitably qualified and experienced people<br />
is well worth obtaining.<br />
Treatment<br />
Competition strategies<br />
& practices (direct<br />
seeding, plantings,<br />
natural recruitment)<br />
Advantages (Benefits)<br />
• Suppresses <strong>weed</strong>s<br />
• Can alter light levels and nutrient – moisture<br />
availability<br />
• Restores vegetation structure<br />
• Restores floristic diversity<br />
• Enhances fauna habitat<br />
Disadvantages (Limitations)<br />
• Altered conditions can favour <strong>weed</strong>s<br />
• Can undermine vegetation structure with<br />
inappropriate species selection<br />
• Often entails intensive <strong>management</strong> input during<br />
establishment phase<br />
• Can be labour intensive (costly)<br />
• Specialist knowledge required<br />
CRC for <strong>Australia</strong>n Weed Management • Weed control methods for community groups<br />
21
Using fire for <strong>weed</strong> control<br />
Using fire for <strong>weed</strong> control<br />
The use of fire is particularly relevant to the long-term <strong>management</strong> of environmental <strong>weed</strong>s in <strong>Australia</strong>, as the ecology<br />
of many native species is closely tied to, or even dependent upon fire. However, areas left bare by fire are susceptible<br />
to erosion and new <strong>weed</strong> invasions so it is advisable to restrict the area that requires follow-up after planned fires<br />
to manageable levels. In areas with good native vegetation, fire should not be used in frequent succession on the<br />
same site as this is more likely to favour <strong>weed</strong>y species. Moreover, the risks to people, fauna and property need<br />
be understood and managed and appropriate measures taken and legal permissions obtained before fire is used.<br />
If fire is to be used as a control method at least four aspects need to be considered.<br />
The response of the <strong>weed</strong> to burning<br />
Some <strong>weed</strong>s do not burn well whilst alive. Even when shoots are successfully burnt the plant may still regenerate.<br />
Fire may also affect germination from the soil-seed bank, either detrimentally by killing the native seeds exposed to<br />
excess heat or conversely by stimulating <strong>weed</strong> germination. In the case of bitou bush (Chrysanthemoides monilifera<br />
ssp. rotundata), seeds on the surface are killed by fire whilst seeds buried 30 mm or deeper in the soil may actually<br />
be stimulated to germinate. If the new bitou bush growth that occurs following fire is treated (with herbicide or<br />
hand pulling depending on scale of infestation), this can help deplete the soil seed bank of bitou bush seed.<br />
Habitat<br />
As burning may destroy fire-sensitive ecosystems, such as rainforest, it is not always an option for controlling <strong>weed</strong><br />
invasions. Lantana (Lantana camara), for example, invades the margins between rainforest and sclerophyll forest. Fire<br />
may kill the lantana but it may also promote certain sclerophyll species and be detrimental to the rainforest species.<br />
If the <strong>management</strong> aim of such areas is to maintain or increase the rainforest boundaries, fire is not appropriate.<br />
The fire regime employed<br />
Not all fires are alike. The factors which govern the impact of a fire on the native and <strong>weed</strong> flora include the fuel load,<br />
weather, topography and soil moisture, all of which influence the intensity of a fire, rate of spread and penetration<br />
of heat into the soil seed-bank. Fires of low-intensity, as is the case for many prescribed fires in a specified area, can<br />
produce responses substantially different from those of high-intensity wildfire. This is particularly the case for native<br />
species, which require a relatively high minimum temperature to shed seed stored in the canopy or a relatively high<br />
transmission of heat into the soil to germinate the seed bank. Thus the fire regime has implications beyond its<br />
potential to kill the <strong>weed</strong> species – it can also affect the composition of regenerating native species and hence the<br />
post-fire plant community.<br />
With sufficient fuel (grasses, rubber vine leaves, other vegetation) fire can successfully control rubber<br />
vine (cryptostesia grandiflora). Fire is especially efficient in combination with the biological control<br />
agent, rubber vine rust (maraualia cryptostegiae).<br />
Photo: Joe Vitelli<br />
22<br />
CRC for <strong>Australia</strong>n Weed Management • Weed control methods for community groups
The season of fire<br />
If the fire is mis-timed, with respect to fruiting maturity or seed shed of desirable species, it may deplete the seed<br />
bank. In terms of <strong>management</strong>, there are clearly seasons when the use of fire is dangerous because of the risk of<br />
escape, especially into adjacent urban areas. The level of risk may also depend upon seasonal conditions. The use of<br />
fire will also need to be outside fire ban seasons and requires the appropriate legal permissions from fire and native<br />
vegetation authorities.<br />
When dealing with large infestations, it may be inadvisable to use fire to burn the entire infestation. Apart from the<br />
risk of fire escaping control, large fires can cause significant change to organisms in the soil and the ecology of an<br />
area. It may be better to limit annual burning to 10 or 20 per cent of the area to be controlled.<br />
Using fire for <strong>weed</strong> control<br />
In addition to the above considerations fire should only be used when there are:<br />
• adequate resources to control it<br />
• adequate resources to do the follow-up <strong>weed</strong> control and revegetation<br />
• appropriate approvals from relevant local authorities.<br />
Wildfires or unplanned fire<br />
If your site is subjected to an unplanned fire then regular examination of the area will be needed to see what <strong>weed</strong><br />
activity is taking place after the fire and how desirable vegetation is coping. The information gained can inform<br />
ongoing <strong>management</strong> of the site. Your objectives may need to change and you might be able to capitalise on the<br />
opportunity to get easier access to <strong>weed</strong> seedlings and to re-establish desirable vegetation.<br />
Treatment<br />
Advantages (Benefits)<br />
Disadvantages (Limitations)<br />
Fire<br />
(control burns,<br />
spot-burns)<br />
• Removes rank and excessive foliage (for follow-up<br />
spray treatments)<br />
• Supplements other methods<br />
• Encourages local flora regeneration<br />
• Encourages germination of soil-stored <strong>weed</strong> seedbank<br />
(for follow-up treatments)<br />
• Relatively inexpensive<br />
• Kill <strong>weed</strong> seedbanks<br />
• Usually does not eradicate <strong>weed</strong>s<br />
• Inappropriate for non-fire adapted ecosystems<br />
• Seasonal and timing limitations<br />
• Encourages <strong>weed</strong> growth / germination<br />
• Altered nutrient-moisture availability can favour <strong>weed</strong>s<br />
• Potential for run-off / erosion<br />
• Fauna, people, property risks<br />
• Can be costly if establishment of fire breaks, spelling<br />
of pasture and personnel required to control fire are<br />
involved<br />
• Specialist knowledge required<br />
Flame <strong>weed</strong>ing and steaming<br />
These techniques employ a burst of intense heat to kill <strong>weed</strong>s and are generally used in horticultural applications<br />
and by some councils to treat roadside and footpath <strong>weed</strong>s where there is an objective to reduce chemical use.<br />
They are more effective on broadleaf <strong>weed</strong>s than grasses, which are more resistant to heat methods.<br />
Flame <strong>weed</strong>ing<br />
Flame burners are devices that employ propane gas or kerosene as fuel to provide a constant flame and use a hand<br />
wand to allow the flame to be applied onto the target <strong>weed</strong>s. The method does not require that the plant is burnt;<br />
in fact for many species this may actually stimulate regrowth. Rather, the method works best when plant leaves are<br />
severely wilted as a result of exposure to the intense heat and subsequently die.<br />
Steam <strong>weed</strong>ing<br />
This method uses apparatus to produce pressurised heated water directly onto target <strong>weed</strong>s to break down cell<br />
structure leading to plant death.<br />
Flame and steam <strong>weed</strong>ing are expensive to use, may require repeated applications and are also characterised by<br />
slow work rates. The risk of off-target damage and, in the case of flame <strong>weed</strong>ing, the risk of fire escaping needs also<br />
to be considered. Prolonged use of these methods in urban areas has seen a change in the <strong>weed</strong> flora to favour deeperrooted<br />
perennials that are more resistant to heat treatments.<br />
CRC for <strong>Australia</strong>n Weed Management • Weed control methods for community groups<br />
23
Biological control (or biocontrol)<br />
Biological control (or biocontrol)<br />
Biological control of <strong>weed</strong>s offers the potential to deliver inexpensive, long-term control. Additionally, impacts associated<br />
with other methods such as herbicide or mechanical controls are reduced. However, it needs to be appreciated that<br />
the establishment of effective agents requires considerable initial investment and time to find the agents, confirm<br />
that their actions are specific to the target species and establish them in the field. Although the return on this initial<br />
investment can be substantial, there are no guarantees that effective agents, suitable for release, will be found.<br />
Once a successful agent is established it becomes self-sustaining with target <strong>weed</strong> populations reduced to a level<br />
where investment in other <strong>weed</strong> control methods can be reduced.<br />
Classical biological control is based on the principle that populations of plants in their native range are held in check<br />
by organisms such as insects, birds and mammals, that feed on them or diseases which control them. When a plant<br />
is taken out of its native range and introduced into a new area these controls are absent and, if other conditions are<br />
right, the population of the plant may explode. This is one reason why many introduced species have become <strong>weed</strong>s<br />
in our environment.<br />
Biological control seeks to find organisms in the <strong>weed</strong>’s native range that are specific to that plant and will not<br />
damage native or desirable vegetation. Most often insects or organisms like fungus or rusts are likely candidates for<br />
biocontrol agents. Complete eradication is not a desirable or achievable objective of biological control. The aim is to<br />
create an ecological balance between a plant and its natural enemies in the introduced range and to reduce <strong>weed</strong><br />
density to a level below that at which it causes economic or environmental damage.<br />
Prioritising sites for biological control<br />
If biological agents are available for <strong>weed</strong>s that you are looking to control you will need to assess how appropriate<br />
your site is for their use. Knowing where your <strong>weed</strong>s are and the characteristics of their distribution, is the first step<br />
in prioritising the use of biocontrol as part of your <strong>weed</strong> <strong>management</strong> plan. The mapping of <strong>weed</strong>s is discussed in<br />
some detail in Module 1 Developing and implementing a <strong>weed</strong> <strong>management</strong> plan.<br />
Established <strong>weed</strong>s normally consist of three different types of infestations:<br />
• small, isolated infestations<br />
• the core of large infestations<br />
• infestation perimeters.<br />
The core of large infestations are usually the most expensive to control, have well developed soil seed banks and are<br />
often spread over a number of properties or sites where it may be difficult to coordinate chemical, <strong>manual</strong> or mechanical<br />
control activities. In these circumstances, biological control can help by suppressing the growth rate and reproductive<br />
capacity of target <strong>weed</strong>s, whilst chemical and or physical methods are used to control isolated populations and<br />
contain the spread of <strong>weed</strong>s at the perimeter of the larger infestation.<br />
Generally speaking, biological control is most appropriate where <strong>weed</strong> infestations are a low priority for immediate<br />
control. In agricultural situations, <strong>weed</strong> control is normally focused on protecting economic return in the short-term.<br />
Therefore biological control, which takes some time to establish, is more appropriate on agricultural lands or rangelands<br />
of relatively low productive potential. Similarly, control of <strong>weed</strong>s in areas of particularly high conservation or heritage<br />
value is best addressed by appropriate chemical or physical methods in order to achieve more immediate results.<br />
The feasibility of using conventional chemical or physical methods will also influence the decision to use biological<br />
methods. If access to the infestation is difficult due to the terrain, or if an area is sensitive to herbicide uses (eg aquatic<br />
or riparian locations where sensitive native plant species are present or the land is used for organic agriculture) then<br />
biological control may be a preferable option.<br />
24<br />
CRC for <strong>Australia</strong>n Weed Management • Weed control methods for community groups
Integration with other techniques<br />
The previous section addressed where you might use biological control as a priority method but what about its use<br />
in conjunction with other methods? Each <strong>weed</strong> species, where biological control is available, will require different<br />
integration strategies to achieve the best results of combining biological control with conventional methods in light<br />
of both the life cycle of the <strong>weed</strong> and that of the biological agent. For example, some agents are dormant at certain<br />
times of the year. By using herbicide applications during the hibernation period the agent will not be directly affected<br />
and, when they emerge from hibernation, will attack any target <strong>weed</strong>s that survived the herbicide treatment.<br />
In other cases it may not be feasible to alter the timing of control methods to suit the life cycle of a biological control<br />
agent. If the agent is likely to be killed as a consequence of the use of other methods (eg pesticides), then it may be<br />
necessary to maintain a small population of the <strong>weed</strong> species to act as a refuge for the agent. New <strong>weed</strong> infestations<br />
can then be recolonised by the agents from the refuge. An example of this approach can be seen in the Sunraysia<br />
district along the Victorian/New South Wales border where biological control is used in the battle against bridal creeper<br />
(Asparagus asparagoides). Bridal creeper causes problems in citrus orchards and herbicides can kill off agents such<br />
as the leafhopper (Zygina spp.) and rust fungus (Puccinia myrsiphilli). These agents have been released in roadside<br />
infestations and shelter belts near orchards and so provide a reservoir of agents, if needed, whilst at the same time<br />
suppressing bridal creeper spread in these unmanaged areas. This, in turn, helps to reduce reinfestation back into<br />
the orchards.<br />
Biological control (or biocontrol)<br />
In some cases agents can be so effective that no other control is needed. For example, the aquatic <strong>weed</strong> salvinia<br />
(Salvinia molesta) has been successfully controlled, though not eradicated, where it occurs in tropical and sub tropical<br />
climates by the salvinia weevil (Cyrtobagous salviniae).<br />
Setting up biological control<br />
If a decision has been made that a site could be suitable for the use of biological control, the following general<br />
protocol should be followed:<br />
• establish where agents can be acquired<br />
• determine the requirements to acquire and transport the agents<br />
• determine what permits are required<br />
• consult with others in the area and establish cooperation for the implementation and monitoring of the program<br />
• determine the methods and site requirements for introducing an agent (equipment, water etc)<br />
• find out what records should be kept at the time of establishment and for subsequent monitoring.<br />
The bridal creeper rust fungus attacks leaves and stems, reducing the amount of green plant material.<br />
Photo : John Virtue<br />
Treatment<br />
Biological controls<br />
Advantages (Benefits)<br />
• Selective<br />
• Can suppress <strong>weed</strong> growth and spread<br />
• Supplements other methods<br />
• Value for money<br />
• Minimal labour inputs (in the field)<br />
• Minimal direct environmental impacts<br />
Disadvantages (Limitations)<br />
• Timing limitations<br />
• Variable results<br />
• Does not eliminate <strong>weed</strong>s<br />
• Other controls required<br />
• Expensive to develop<br />
• Limited range of <strong>weed</strong>s have agents<br />
CRC for <strong>Australia</strong>n Weed Management • Weed control methods for community groups<br />
25
Grazing<br />
Grazing<br />
Livestock such as cows, sheep, horses and goats can contribute to <strong>weed</strong> control by:<br />
• reducing flowering and seed dispersal<br />
• stressing <strong>weed</strong> plants<br />
• preventing <strong>weed</strong> domination of pastures.<br />
Grazing, however, requires careful <strong>management</strong> that accommodates:<br />
• the timing of grazing with critical stages in <strong>weed</strong> life cycle whilst minimising permanent damage to desirable<br />
pasture species<br />
• the dietary needs of stock<br />
• different grazing habits of livestock species; goats for example will preferentially graze fibrous plants like blackberry<br />
that other stock will avoid. Other livestock may preferentially graze desirable species<br />
• the need to contain stock with good fencing to avoid off-target damage<br />
• condition of the land with intensity of grazing. For example, avoid heavy grazing pressure on regenerating pasture<br />
plants. Overgrazing may also leave bare ground – encouraging <strong>weed</strong> invasion.<br />
Grazing animals can damage native vegetation and soil structure and may introduce <strong>weed</strong> species transported on fur,<br />
hooves or in droppings from other areas. Cattle, for example, are major agents in the spread of prickly acacia. After<br />
cattle eat prickly acacia pods the seeds pass through their gut (scarified by gut acids) and are subsequently deposited<br />
on the soil in a perfect environment for germination. Also, a number of <strong>weed</strong> species palatable to stock are toxic.<br />
Paterson’s curse, also known as salvation Jane (Echium plantagineum), rubber vine (Cryptostegia grandiflora) and<br />
the fruit of lantana (lantana camara) are toxic to stock , so it is important to confirm that stock will not be harmed<br />
by the <strong>weed</strong> to be grazed.<br />
Treatment<br />
Advantages (Benefits)<br />
Disadvantages (Limitations)<br />
Grazing<br />
(goats, cows, sheep, horses)<br />
• Selective (depending on grazing animal and<br />
<strong>weed</strong> species being targeted)<br />
• Can remove excess foliage (for follow-up<br />
treatments)<br />
• Supplements other controls<br />
• Inexpensive<br />
• Timing limitations<br />
• Disturbs soils<br />
• Can introduce / spread <strong>weed</strong> propagules<br />
• Encourages <strong>weed</strong> growth<br />
• Destroys local flora<br />
• Inappropriate for many ecosystems<br />
• Can elevate nutrient levels<br />
• Potential for erosion / run-off<br />
• Site rehabilitation required<br />
• On-going <strong>management</strong> required<br />
• Danger to stock if <strong>weed</strong> toxic<br />
26<br />
CRC for <strong>Australia</strong>n Weed Management • Weed control methods for community groups
State /<br />
Territory<br />
<strong>Australia</strong>n<br />
Capital<br />
Territory<br />
New South<br />
Wales<br />
Northern<br />
Territory<br />
Queensland<br />
South<br />
<strong>Australia</strong><br />
Tasmania<br />
Victoria<br />
Western<br />
<strong>Australia</strong><br />
Appendix 1: Weed control contacts<br />
Department<br />
Environment ACT<br />
NSW Agriculture<br />
Dept. of Infrastructure,<br />
Planning and Environment<br />
Dept. of Natural Resources<br />
and Mines<br />
Dept. of Water, Land and<br />
Biodiversity Conservation<br />
Dept. of Primary Industries,<br />
Water and Environment<br />
Dept. of Primary Industries<br />
Dept. of Agriculture<br />
Phone<br />
Ph: (02) 6207 9777<br />
Fax: (02) 6207 2227<br />
Ph: (02) 6391 3100<br />
1800 680 244<br />
Fax: (02) 6391 3336<br />
Ph: (08) 89992020<br />
Fax: (08) 89992015<br />
Ph: (07) 3375 0700<br />
Fax: (07) 3379 6815<br />
Ph: (08) 8303 9500<br />
Ph: (cost of a local<br />
call) 1300 368 550<br />
Ph: (03) 9210 9379<br />
Ph: (08) 9368 3333<br />
Email<br />
EnvironmentACT@act.gov.au<br />
<strong>weed</strong>s@agric.nsw.gov.au<br />
<strong>weed</strong>info.DIPE@nt.gov.au<br />
enquiries@nrm.qld.gov.au<br />
apc@saugov.sa.gov.au<br />
Quarantine.Enquiries@<br />
dpiwe.tas.gov.au<br />
Christian.Goninon@<br />
dpiwe.tas.gov.au<br />
ktri@dpi.vic.gov.au<br />
enquiries@agric.wa.gov.au<br />
Website<br />
whttp://www.environment.act.gov.au/<br />
ie4/petsandlocalwildlife/pests.html<br />
http://www.agric.nsw.gov.au/<strong>weed</strong>s<br />
http://www.nt.gov.au/<br />
http://www.nrm.qld.gov.au/<br />
pests/index.html<br />
http://www.dwlbc.sa.gov.au/<br />
http://www.tas.gov.au/<br />
OR<br />
http://www.dpiwe.tas.gov.au/inter.<br />
nsf/ThemeNodes/SSKA-52J2K4?open<br />
http://www.dpi.vic.gov.au/<br />
http://www.agric.wa.gov.au/<br />
progserv/plants/<strong>weed</strong>s/index.htm<br />
Appendix 1: Weed control contacts<br />
CRC for <strong>Australia</strong>n Weed Management • Weed control methods for community groups<br />
27
Appendix 2: Herbicide Application Record Sheet<br />
Appendix 2: Herbicide Application Record Sheet<br />
Site Details: Location:<br />
Contact details of owner/manager:<br />
Date, start Operator details: Weed species Name of Amount of Total quantity Area sprayed (ha) Estimated wind Comments: Other<br />
& finish time Name address & treated & herbicide and concentrated applied: Total (Mark on <strong>weed</strong> speed & direction weather details,<br />
contact details method used any additives product used amount of water, map) risks identified etc.<br />
(if not self) used (Litres/millilitres oil or other<br />
or grams) substances mixed<br />
with concentrated<br />
product<br />
28<br />
CRC for <strong>Australia</strong>n Weed Management • Weed control methods for community groups
Collecting and preparing plant specimens for identification<br />
Module 3<br />
M o d u l e 3
<strong>Introductory</strong> <strong>weed</strong> <strong>management</strong> <strong>manual</strong><br />
Collecting and preparing plant specimens for identification<br />
Module 3<br />
General Disclaimer<br />
The information contained in this publication is offered by the CRC for <strong>Australia</strong>n Weed Management (Weeds CRC), its partners and the Commonwealth<br />
Department of the Environment and Heritage solely to provide information. While all due care has been taken in compiling the information, it is applied<br />
on the basis and subject to the qualification that all the Weeds CRC and its partners, their officers and employees take no responsibility for its contents<br />
nor for any loss, damage or consequence whatsoever for any person or body relying on the information, or any error or omission, contained in this<br />
publication. Any recommendations contained herein do not necessarily represent Weeds CRC policy.<br />
Copyright © CRC for <strong>Australia</strong>n Weed Management 2004.<br />
This <strong>manual</strong> is copyright. Except as permitted under the <strong>Australia</strong>n Copyright Act 1968 (Commonwealth) and subsequent amendments, no part of this<br />
publication may be reproduced, stored or transmitted in any form or by any means, electronic or otherwise; without the specific written permission<br />
of the copyright owner.<br />
The copyright of reference sources rests with the publishers of those resources.<br />
The intellectual property on which the materials in this <strong>manual</strong> is based rests with the contributors.
Collecting and preparing plant specimens for identification<br />
Introduction 3<br />
Collecting and preparing plant specimens for identification 3<br />
Materials required for successful plant collecting 3<br />
Collection details 3<br />
What to collect 3<br />
Grasses, sedges and small plants<br />
Specimen preparation 4<br />
Short term 4<br />
Long term – sending specimens for identification or storage in a collection 4<br />
Aquatic plants 5<br />
Sending specimens to the herbarium 5<br />
Contact details for various herbaria 5<br />
Specimen collection details template 6<br />
2<br />
CRC for <strong>Australia</strong>n Weed Management • Collecting and preparing plant specimens for identification
Introduction<br />
It is essential to identify plants correctly to ensure that you are dealing with the <strong>weed</strong> that you think you are and that<br />
the right control plan is developed. Some species are well known while others can be very difficult to identify and may<br />
be confused with plants that are not <strong>weed</strong>s, or even species that are rare or endangered. The Weed of National<br />
Significance Chilean needle grass (Nassella neesiana), for example, can be very difficult to differentiate from other<br />
tussock forming grasses including native Austrostipa species. The Alert List species Asystasia gangetica ssp. micrantha<br />
can also be difficult to separate from native Asystasia species. In cases like these, or where you have any doubt at<br />
all over the identity of a plant that you think may be a <strong>weed</strong>, it is essential to get it correctly identified. This module<br />
explains how to prepare plant specimens for presentation to botanists, state herbaria or other experts who can<br />
correctly identify the plant for you.<br />
Introduction<br />
Collecting and preparing plant specimens for identification<br />
The key to accurate identification of plants is to supply the agronomist or botanist with good quality specimens and<br />
sufficient information about the plant, including the conditions in which it was collected. This can be helped by photos<br />
of the plant in its habitat.<br />
Inadequate or poorly preserved and presented specimens will often not be accepted for identification. Always<br />
collect several sets of the same specimen so that you can keep a specimen for your later reference following correct<br />
identification. Specimens sent to a herbarium for identification won’t be returned and may be kept for herbaria<br />
reference collections.<br />
Materials required for successful plant collecting<br />
• a mattock or spade to ease plant specimens from the soil, leaving the roots and other underground organs intact.<br />
Never pull plants from the soil.<br />
• secateurs and/or small saw for removing small branches from trees and shrubs<br />
• plastic bags, rubber bands and “Esky” if weather is hot OR non-gloss newspaper and a portable plant press<br />
• pencil or permanent marker, jewellers tags to tie to individual specimens<br />
• notebook for recording details<br />
• camera for recording plants in position in their habitat before you collect them<br />
• a GPS unit is the best way to accurately determine the location of the specimen you are collecting. If this is not<br />
available then a topographic map may be used, see Appendix 3 of Module 1, Establishing your location.<br />
Collection details<br />
Supplying sufficient information about the size and habitat of the plant will help in identification.<br />
Completing the attached template will give sufficient details.<br />
What to collect<br />
Many plants have similar features and it is not possible to identify them from leaves alone. Therefore, it is important<br />
to supply different parts of the plant for correct identification, particularly flowering parts and seedpods. Identification<br />
of perennial species will often require underground parts such as roots, tubers, underground stems (rhizomes) or corms.<br />
Include a sample of bark if present.<br />
For plants with separate male and female flowers collect both sets of flowers. Record flower colour, as this may change<br />
when the specimens are dried.<br />
CRC for <strong>Australia</strong>n Weed Management • Collecting and preparing plant specimens for identification<br />
3
Introduction<br />
Grasses, sedges and small plants<br />
Include roots, basal leaves, flowers and fruits. An example of basal leaves are the rosette leaves of brassicas (such<br />
as turnip <strong>weed</strong>, and wild radish). Always include underground parts such as rhizomes, corms, tubers, and bulbs,<br />
if present.<br />
Larger plants such as shrubs and trees<br />
Collect a portion of stem that shows the branching pattern, preferably with flowers and fruits. Fruits include dry fruits<br />
like eucalyptus ‘gum nuts’ and pods which split open to release seeds and berries where the seeds remain in the fruit.<br />
If flowers and fruits are not present on the same stems, collect several samples. Eucalypts require collection of buds,<br />
fruits, juvenile and mature leaves, plus a description of the bark.<br />
Record the dimensions of the plant and for trees, note the trunk diameter at 1.2 m above ground level.<br />
Specimen preparation<br />
All specimens should be free of soil. Gently wash the roots to remove wet soil. Hard-set soil may need to be soaked<br />
off to prevent damage to the roots. Large plants such as tussock grasses and sedges can be carefully pried apart and<br />
a few tillers with seed heads can be kept for identification.<br />
There are two methods of preparation, depending on whether the specimens will be identified locally within a few<br />
days of collection or be sent away or stored for some time.<br />
Short term<br />
• Put plants and/or plant parts between damp newspaper and into a plastic bag with a few millilitres of water.<br />
Place roots toward the bottom of the bag.<br />
• Tag plants with a specimen number, date, collector and locality.<br />
• If the specimen is in sections, give each sample the same number.<br />
• It is preferable to put a written label in the bag as writing on the bag, even with waterproof pen, often rubs off.<br />
• Tie-off the top of the bag. This will keep the contents humid and fresh.<br />
• Keep the specimens out of the sun. Most specimens can be kept in a refrigerator for a few days. The main exception<br />
would be specimens with large, soft flowers.<br />
Long term – sending specimens for identification or storage in a collection.<br />
• Place the specimens between several sheets of newspaper, or folded broadsheet.<br />
• Arrange the samples so that leaflets/leaves and flowers can be clearly seen.<br />
• Larger specimens can be bent into a zigzag to fit the sheet.<br />
• Multiple samples in newspaper can be laid upon each other. These are then placed between rigid boards with weights<br />
such as bricks or books supplying pressure to flatten the specimens.<br />
• Change the newspaper daily for the first few days then weekly until the specimens are dry.<br />
Fleshy or succulent specimens such as cacti may need to be frozen for a few days before pressing. This ruptures the<br />
plant cells and helps drying.<br />
Keeping track of the correct identification during drying is a lot easier if the specimens are individually tagged.<br />
4<br />
CRC for <strong>Australia</strong>n Weed Management • Collecting and preparing plant specimens for identification
Introduction<br />
A simple plant press can be created from wire grids, newspaper and<br />
cardboard with nylon straps used to apply a constant pressure. A wooden<br />
frame, instead of wire grids, will serve equally as well.<br />
Photo: N.W. Richards<br />
Aquatic plants<br />
Floating or submerged aquatic plants may be difficult to collect. This is because the entire plant body is normally<br />
supported by water and tends to collapse when removed. Leaves are also often divided into many segments making<br />
them difficult to straighten.<br />
This method may improve results. Float the plant sample in a large shallow dish or tray part filled with water. Slip a<br />
piece of strong, thick paper under the specimen and then gently lift it whilst keeping it level so that the water<br />
drains away slowly. Done carefully the plant will be well distributed across the sheet. If initial attempts are<br />
unsuccessful then return the plant and sheet to the water and try again. When ready to press, the sheet of paper<br />
bearing the plant specimen is put into a newspaper fold in the usual way. The surfaces of aquatic specimens should<br />
be dried as much as possible before pressing, otherwise papers, blotters or cardboards will be too moist. When<br />
drying, some may tend to stick to the newspaper, and it may help to lay them out between layers of tissue paper.<br />
With rooted aquatics, wash away as much of the mud and silt from the rhizome and roots as possible before<br />
placing in paper and pressing.<br />
Sending specimens to the herbarium<br />
Specimens to be sent to the herbarium by mail should be forwarded in a pressed and dried state. Keep the<br />
specimens between sheets of newspaper. Insert a Plant identification sheet, such as the example at the end of this<br />
module, with all the collection details, and place between 2 pieces of firm cardboard. Any loose items such as<br />
seedpods or fruits should be placed in an envelope labelled with your name and collection number. If the envelope<br />
is not too bulky it can be attached to the newspaper folder.<br />
Attach a covering letter outlining your request for identification (don’t forget to include your contact details).<br />
Contact details for various herbaria<br />
State / Territory<br />
Postal Address<br />
Phone<br />
Website<br />
<strong>Australia</strong>n National<br />
Herbarium<br />
GPO Box 1600<br />
Canberra, ACT, 2601<br />
(02) 6246 5108<br />
www.anbg.gov.au/cpbr/herbarium/index.html<br />
National Herbarium<br />
of New South Wales<br />
Mrs Macquaries Rd<br />
Sydney, NSW, 2000<br />
(02) 9231 8111<br />
www.rbgsyd.nsw.gov.au<br />
National Herbarium<br />
of Victoria<br />
Private Bag 2000 Birdwood<br />
Avenue South Yarra, Vic, 3141<br />
(03) 9252 2300<br />
www.rbg.vic.gov.au/biodiversity/herbarium.html<br />
Northern Territory<br />
Herbarium<br />
PO Box 496<br />
Palmerston, NT, 0831<br />
(08) 8999 4516<br />
http://www.nt.gov.au/ipe/pwcnt/<br />
Queensland Herbarium<br />
c/- Brisbane Botanic Gardens Mt<br />
Coot-tha Rd Toowong, Qld, 4066<br />
(07) 3896 9326<br />
www.env.qld.gov.au/environment/science/herbarium<br />
South <strong>Australia</strong>n Plant<br />
Biodiversity Centre<br />
PO Box 2732<br />
Kent Town, SA, 5071<br />
(08) 8228 2308<br />
www.flora.sa.gov.au/index.html<br />
Tasmanian Herbarium<br />
Private Bag 4 Hobart, Tas, 7000<br />
(03) 6226 2635<br />
www.tmag.tas.gov.au/Herbarium/Herbarium2.htm<br />
Western <strong>Australia</strong>n<br />
Herbarium<br />
Locked Bag 104<br />
Bentley DC, WA, 6983<br />
(08) 9334 0500<br />
http://science.calm.wa.gov.au/herbarium/<br />
CRC for <strong>Australia</strong>n Weed Management • Collecting and preparing plant specimens for identification<br />
5
Introduction<br />
Specimen collection details template<br />
PLANT IDENTIFICATION<br />
Submit a separate form in duplicate for each specimen<br />
Send only specimens pressed flat between newspaper sheets<br />
Specimen or File no:<br />
ENQUIRER<br />
Date:<br />
Name:<br />
Address:<br />
INFORMATION REQUIRED Unless otherwise requested only identification will be supplied.<br />
COLLECTION DETAILS Collector:<br />
Date:<br />
Locality (Distance and direction from nearest town):<br />
Latitude:<br />
Longitude:<br />
Habitat: Crop (specify) Pasture Roadside<br />
Garden<br />
Native vegetation (specify)<br />
Other (specify)<br />
Occurrence: Growing naturally Cultivated<br />
Habit: Annual Perennial Shrub Tree Other Height m<br />
Trunk diam.<br />
Abundance: Rare Occasional >10 plants >100 >1000 >10000 Area covered ha.<br />
Flower colour:<br />
Bark colour & texture:<br />
Soil type:<br />
Remarks:<br />
6<br />
CRC for <strong>Australia</strong>n Weed Management • Collecting and preparing plant specimens for identification
Presentation of information sessions for small groups<br />
Module 4<br />
M o d u l e 4
<strong>Introductory</strong> <strong>weed</strong> <strong>management</strong> <strong>manual</strong><br />
Presentation of information sessions for small groups<br />
Module 4<br />
General Disclaimer<br />
The information contained in this publication is offered by the CRC for <strong>Australia</strong>n Weed Management (Weeds CRC), its partners and the Commonwealth<br />
Department of the Environment and Heritage solely to provide information. While all due care has been taken in compiling the information, it is applied<br />
on the basis and subject to the qualification that all the Weeds CRC and its partners, their officers and employees take no responsibility for its contents<br />
nor for any loss, damage or consequence whatsoever for any person or body relying on the information, or any error or omission, contained in this<br />
publication. Any recommendations contained herein do not necessarily represent Weeds CRC policy.<br />
Copyright © CRC for <strong>Australia</strong>n Weed Management 2004.<br />
This <strong>manual</strong> is copyright. Except as permitted under the <strong>Australia</strong>n Copyright Act 1968 (Commonwealth) and subsequent amendments, no part of this<br />
publication may be reproduced, stored or transmitted in any form or by any means, electronic or otherwise; without the specific written permission<br />
of the copyright owner.<br />
The copyright of reference sources rests with the publishers of those resources.<br />
The intellectual property on which the materials in this <strong>manual</strong> is based rests with the contributors.
Presentation of information sessions to small groups<br />
Introduction 3<br />
Preparing your information session 3<br />
What are your objectives and outcomes? 3<br />
How can you help participants learn? 4<br />
Principles of active learning: 4<br />
How to design a session plan for an information session 6<br />
Session plan structure 6<br />
The introduction 6<br />
The body 6<br />
The conclusion 7<br />
Learning resource materials 7<br />
What information will you record? 7<br />
How to deliver and review your training session 8<br />
Training Environment 8<br />
Presenting Skills 8<br />
Training Aids 8<br />
Giving and Receiving Feedback 9<br />
Receiving feedback 9<br />
How to review and evaluate your information session 9<br />
Asking questions: 10<br />
Closed questions 10<br />
Open questions 10<br />
When asking questions 10<br />
Techniques for answering participant’s questions 11<br />
Records 11<br />
Putting it all together 11<br />
Appendix 1: Session plan checklist 12<br />
Appendix 2: Session plan 13<br />
2<br />
CRC for <strong>Australia</strong>n Weed Management • Presentation of information sessions to small groups
Introduction<br />
The aim of this module is to provide you with ideas and techniques that will assist you to present information to small<br />
groups. It is included in the <strong>Introductory</strong> Weed Management Manual as an aid to community group leaders who need<br />
to communicate <strong>weed</strong> <strong>management</strong> information to their group, but who have not had the opportunity to develop<br />
presentation skills.<br />
Introduction<br />
These guidelines will help you prepare effective sessions for small groups and better communicate <strong>weed</strong> <strong>management</strong><br />
principles to others.<br />
The material in this module is derived from the TAFE short course “Certificate IV in Assessment and Workplace<br />
Training” Course Code BSZ404A. If you would like to further develop your training and presentation skills contact<br />
the TAFE centre in your region. Your regional TAFE centre may also be able to provide courses via distance learning<br />
and online packages.<br />
Preparing your information session<br />
When preparing for an information session there are three key areas to keep in mind:<br />
1. What is your message?<br />
2. Who are you presenting to?<br />
3. What is the best way to get your message across?<br />
Before designing your information session, it is important to identify the needs of the people to whom you will be<br />
presenting. A chat with group members to find out what they know, and would like to know more about, will help<br />
you to decide what needs to be covered.<br />
What are your objectives and outcomes?<br />
The content of your presentation will depend on the training need. When you have determined what the participants<br />
need from the information session, think about the objectives and outcomes of your session. What do you want your<br />
participants to achieve? What knowledge should they have by the end of your session? It may help you to write<br />
down a brief checklist of your objectives and outcomes for your session. This will help you with writing your session<br />
plan and designing activities for your session. Think about the key information or message that you wish to share<br />
with your audience.<br />
Consider how the information that you are presenting addresses the identified need of the audience. The closer the<br />
match, the more relevant and effective your session is likely to be. To help you to get started with your information<br />
session consider the What, Where, Why, How, When and Who aspects of any session you may be looking to run.<br />
The following table sets out how you might look at these.<br />
CRC for <strong>Australia</strong>n Weed Management • Presentation of information sessions to small groups<br />
3
Introduction<br />
What<br />
What is the topic and content?<br />
Where<br />
Where will the session be held?<br />
Why<br />
Why are you doing this?<br />
What are the benefits for<br />
the participants?<br />
How<br />
How will you achieve your objective?<br />
Site assessment for <strong>weed</strong> <strong>management</strong> planning.<br />
Meeting room at the Natural Resource Management Centre,<br />
16 Main Street.<br />
This session will inform participants of the key aspects of site<br />
assessment. This will equip participants with the knowledge<br />
necessary to contribute to planning for the NHT project.<br />
Participants will be taken through the site assessment process, and<br />
practice basic mapping skills. The session will be followed by a field<br />
trip on Saturday the 15th May to the project site where participants<br />
will help conduct a site assessment.<br />
When<br />
When is it scheduled?<br />
Who<br />
Who will facilitate the session?<br />
Who will you be presenting to?<br />
7.00pm to 9.00pm Wednesday 12th May 20XX.<br />
Russell Coight to present. Members of the NHT project group to attend.<br />
Start by jotting down your ideas as this will help you to clarify the basic information about your session. The “What”<br />
and “Why” questions are most important at this stage. The answers to the “How” question will take shape as you<br />
progress through this guide.<br />
How can you help participants learn?<br />
Adults often experience a number of feelings or thoughts when they are first in a training situation, especially if it<br />
is in a group. The feelings could be fear, embarrassment or anxiety and may be because they are concerned about<br />
things such as their level of confidence (‘Will I make a fool of myself?’), the pace of the training, age, interaction<br />
with others in the group etc. It is important for you, as the presenter, to demonstrate and use positive approaches<br />
that enhance the learner’s opportunity for learning. The ’principles of active learning,’ listed below, will help you<br />
to provide this positive learning environment that will help your participants to learn.<br />
Principles of active learning:<br />
1. Active learning<br />
2. Meaningful material<br />
3. Multi-sense learning<br />
4. First and last impressions<br />
5. Practice and reinforcement<br />
6. Feedback<br />
7. Reward<br />
Active learning:<br />
’Participants learn more quickly and effectively when they are actively involved in the learning process’ We learn<br />
by doing. You can help the learning process to be active by:<br />
• asking questions<br />
• using exercises in sessions<br />
• using discussion and other small group methods<br />
• providing practical work.<br />
4<br />
CRC for <strong>Australia</strong>n Weed Management • Presentation of information sessions to small groups
Meaningful material:<br />
’Participants learn more effectively when they can relate new material to their existing knowledge’:<br />
• train at the person’s/group’s level – not yours<br />
• use a definite form or sequence<br />
• use examples, illustrations, comparisons<br />
• teach from the known to the unknown<br />
• check what learners already know…ask them.<br />
Introduction<br />
Multi-sense learning:<br />
‘Learning methods which use two or more senses will be more effective than those which use only one sense.’<br />
When planning a session, use activities that combine the use of a range of senses – sight, hearing, smell, touch,<br />
taste’ – in the learning process. You could:<br />
• combine telling and showing<br />
• provide audio visual aids<br />
• make sure everyone can see and hear – ASK THEM !<br />
• where possible, allow participants to handle the real thing.<br />
First and last impressions:<br />
People tend to recall best those things they have learnt first and last in a sequence. Remember the saying –<br />
‘first impressions are lasting’:<br />
• always give a preview of the session<br />
• emphasise key points in conclusion<br />
• prepare your introductions carefully<br />
• give lots of small introductions and conclusions during lengthy sessions.<br />
Feedback:<br />
‘Effective learning is encouraged when trainers and learners share feedback with each other.’ To do this, you can:<br />
• encourage questions<br />
• test frequently<br />
• use your body language<br />
• discuss and correct errors rather than criticise<br />
• give learners immediate feedback of their progress.<br />
Reward:<br />
‘Learning that is rewarding is more likely to be retained’:<br />
• give feedback immediately to learner responses<br />
• provide for early successes in the course (nothing succeeds like success!)<br />
• prevent mistakes as much as possible<br />
• use problem solving approaches rather than information giving.<br />
Practice and reinforcement:<br />
Frequent revision can help learners to retain knowledge and practical skills. Learning is supported by frequent<br />
opportunities to practise and apply new skills and knowledge. You can help learners by:<br />
• allocating adequate time for them to practise new skills in your session planning<br />
• at the beginning of a session asking them to summarise the previous session<br />
• providing exercises which encourage them to recall and apply previous learning<br />
• asking questions frequently<br />
• using case studies, problem solving, hypotheticals and other methods to apply new knowledge.<br />
CRC for <strong>Australia</strong>n Weed Management • Presentation of information sessions to small groups<br />
5
Introduction<br />
Be aware that there may be different levels of ability in your participants. Try to show them that you are concerned<br />
about meeting their particular needs. You will need to incorporate these principles of learning when you are developing<br />
the learning activities for your training session plan.<br />
How to design a session plan for an information session<br />
Session plans are basically notes about what will happen in a session that are sequenced in a logical order. These plans<br />
include the topic, outcomes and the steps taken towards achieving the outcomes (what the trainer will do and what<br />
the participants will do). Refer to Appendix 1 for a checklist to help you prepare your session plan. Plans also include<br />
times and the resources required. See the example of a session plan in Appendix 2.<br />
Session plan structure<br />
A session should be made up of three parts:<br />
1. Introduction – participants interest will be high at this point<br />
2. Body – the interest is likely to drop away during this stage<br />
3. Conclusion – when the interest will pick up again.<br />
The introduction<br />
With a new group, spend a little time talking to the participants about yourself and establish a friendly atmosphere.<br />
You may have a short statement you can say about yourself, and the experience you have had with the topic being<br />
presented. You can make changes and adapt your introduction to suit the group you are presenting to.<br />
You may now find it helpful to develop a point form introduction for your session. This can be presented<br />
on an overhead transparency, whiteboard or flip chart or just read out.<br />
The body<br />
The body part of a session plan contains more detail. Information sessions have a ‘thinking’ feel to them. At the end<br />
of a theory session the participants have to use their knowledge and skills to THINK or SPEAK.<br />
For example, participants may be expected to:<br />
• Identify and understand the key activities involved in site assessment for <strong>weed</strong> <strong>management</strong> planning<br />
• Appreciate why site assessment is important for good <strong>weed</strong> <strong>management</strong>.<br />
Because participants have to learn information, many may think that theory sessions will be boring and will not<br />
involve anything active – they will just listen to the trainer. But this doesn’t have to be the case. (Remember the<br />
active learning principles?).<br />
The body of the information session is divided into three major steps:<br />
1. Explanation<br />
2. Activity<br />
3. Summary.<br />
Step 1: Explanation<br />
• Give an overview first, and then the details in small steps<br />
• Provide information in a logical sequence<br />
• Use examples to illustrate your points<br />
• Use questions to check the knowledge and understanding of your participants<br />
• Use training aids to emphasise key points.<br />
6<br />
CRC for <strong>Australia</strong>n Weed Management • Presentation of information sessions to small groups
Step 2: Activity<br />
Providing an activity allows participants to apply the information or concepts from the explanation stage. Some ideas<br />
for activities include:<br />
• Brainstorming<br />
• Questions to the group<br />
• Problem solving exercises<br />
• Case studies<br />
• Field trip.<br />
Introduction<br />
Applying new knowledge to a practical situation, whether real or simulated, reinforces learning and increases<br />
motivation. Activities should be simple to organise and facilitate and should have direct relevance to the content<br />
covered. The activity not only maintains the involvement of participants, but it also provides you with feedback about<br />
the participants understanding of the content you have covered in the explanation stage. If you find that participants’<br />
are having difficulty applying new information you will know that more explanation is required before moving on<br />
to the next step of learning.<br />
Step 3: Summary<br />
When the participants have applied the information to the activity, and achieve the necessary results you are ready<br />
to summarise the key points. For example ‘You have done a great job with the <strong>weed</strong> map, now lets summarise what<br />
we have covered so far.’ Key points may be reinforced using an overhead projector, flip chart, board or powerpoint<br />
slides. If you are out in the field you can simply state ‘These are the key points…’, and then state them. The idea is<br />
to help people remember the most important information.<br />
The conclusion<br />
The conclusion part of the training session gives the trainer the chance to:<br />
1.Remind the participants of the training outcomes they covered in the session<br />
2.Give participants some constructive feedback about how they went during the session. For example, highlight<br />
strengths of the group or activities that were achieved well<br />
3.Show the participants how the information and skills in this session relate to the future, whether relating to<br />
a future training session, future organisational plans etc.<br />
Refer to the Session Plan in Appendix 2 to get some idea of what they contain.<br />
Learning resource materials<br />
Almost anything can be used as a learning resource – equipment, pictures, people, <strong>weed</strong> <strong>management</strong> guides and<br />
so on. In addition to these suggested resources there are particular items of equipment that many trainers use when<br />
conducting their sessions in a training situation. These include powerpoint presentations, slide projectors, whiteboard,<br />
overhead projector, computers, flip charts, video players, and so on. Note that it does not have to be hi-tech to be<br />
effective as simple methods work fine.<br />
List the equipment you are most likely to use in your session.<br />
Always check your resources prior to the session.<br />
What information will you record?<br />
In the preparation stage, it is important to think about the key information that you will record for your session.<br />
Common examples of information that is useful to record include dates, the topic, name of the presenter and<br />
participants names etc. It can be helpful to use the first page of your session plan to record this information.<br />
CRC for <strong>Australia</strong>n Weed Management • Presentation of information sessions to small groups<br />
7
How to deliver and review your training session<br />
How to deliver and review your training session<br />
By this stage the session plan is developed and your content is organised and planned. In this section we will look<br />
at the following areas:<br />
• the training environment<br />
• presenting skills and Training Aids<br />
• feedback<br />
• asking questions<br />
• review of training sessions<br />
• keeping training records.<br />
Training Environment<br />
Learning is more likely to occur if the learning environment is a positive one. Ensure where possible that the physical<br />
aspects of the venue are conducive to learning. OH&S guidelines should be followed ensuring a safe environment is<br />
provided. Attention to the simple things is important. For example, is lighting adequate, can it be turned down/off<br />
easily during the use of visual aids, is the area quiet and so on.<br />
An atmosphere of mutual respect can be created by recognising the vast range of experience, knowledge and skills<br />
present in a group of adult participants.<br />
Presenting Skills<br />
When talking to a group, there are a number of things to keep in mind. These include:<br />
• Plan thoroughly. Know exactly what you want to achieve, and more importantly what you want the group to<br />
achieve in the session.<br />
• Imagine the scene – visualise yourself conducting the session.<br />
• Practice – conduct a trial run some anxiety or nervousness is usual in everyone before they do a presentation<br />
however, if you have practiced, it will flow better and you will feel better prepared.<br />
• Posture – stand straight, but in a relaxed way and point your feet towards the group with your weight evenly<br />
balanced.<br />
• Movements – try not to sway as you talk; your hands become an important part of any presentation, use them<br />
naturally rather than trying to keep them totally still.<br />
• Facial expressions – a natural smile works wonders, however a pasted on smile will not be very convincing.<br />
Excessive blinking and twitching your eyes will be distracting to the audience.<br />
• Eye contact – gain contact with each individual in the group (for short times only).<br />
• Voice – use a clear, strong voice and don’t speak too quickly, use an interesting conversational tone (not a monotone),<br />
stand tall, take deep breaths and be sure the group can hear you.<br />
Training Aids<br />
Training aids include resources or items that assist you with your session. They may include items such as:<br />
• charts<br />
• overhead projector<br />
• examples of <strong>weed</strong>s, either actual or good images<br />
• handouts (notes)<br />
• equipment used in <strong>weed</strong> control or <strong>weed</strong> mapping.<br />
Preparation and planning are an essential part of the effective delivery of a session. If you plan and prepare<br />
adequately, your session is more likely to go smoothly and, more importantly, the learners will be more likely to achieve<br />
the learning outcomes. Ensure that all equipment and resources are available for your use at the appropriate time.<br />
Make sure that you know how to use it ahead of time and that, if possible, know how to fix it (or have an alternative)<br />
for when things go wrong.<br />
8<br />
CRC for <strong>Australia</strong>n Weed Management • Presentation of information sessions to small groups
Giving and Receiving Feedback<br />
Participants are usually interested in knowing how well they are doing. It is part of your role as a presenter to know<br />
how and when to give constructive feedback. When giving feedback it is necessary to give it in such a way that it will<br />
not be threatening to the other person and not increase their defensiveness. All feedback should be constructive –<br />
meaning we give it so the person can use it to build themselves up and move forward.<br />
Examples of feedback given during a session.<br />
Positive feedback<br />
‘That’s good. You have done that very well.’<br />
Positive constructive ‘That plan looks good. All the major issues are covered, it’s nice and short<br />
feedback<br />
and easy to understand. Well done.’<br />
Negative feedback<br />
‘That plan is terrible. What went wrong? It’s awful.’<br />
Negative constructive ‘I notice you’re having some trouble selecting which <strong>weed</strong> treatment to use.<br />
feedback<br />
It can be confusing when there are so many options to choose from. Let me<br />
go through the issues again with you. Do you want to have another go?’<br />
How to deliver and review your training session<br />
When you are asked or expected to spend some time giving feedback to an individual participant after a training<br />
session, the following four-part model is helpful:<br />
1.Ask the participant what they think/feel they did well.<br />
2.Ask them what they would do differently next time.<br />
3.Add constructive feedback about the things not covered by the participant, both positive and negative.<br />
4.End on a positive note.<br />
By using these strategies during and after your training sessions you will be creating a learning environment where<br />
people feel at ease with each other. It is important to create an atmosphere of mutual trust and openness in the group.<br />
This will help everyone feel more comfortable about giving and getting feedback.<br />
Receiving feedback<br />
Even though we might feel nervous at the idea of it, we all need to know other people’s versions of how we<br />
come across – this can help us to improve the effectiveness of sessions we run. A few points that can help when<br />
receiving feedback:<br />
• thank the giver and respect their openness (and courage)<br />
• value their comments and their point of view<br />
• clarify it with them by paraphrasing or repeating it without being defensive<br />
• reflect on the feedback and whether you think it is reasonable<br />
• check it out honestly with others, rather than relying on this one source only<br />
• if it is reasonable, act as soon as you can to deal with the problem<br />
• if it is not reasonable, work through the issue with the giver<br />
• learn from the experience<br />
• model this process for your participants.<br />
How to review and evaluate your information session<br />
There are two main questions that you can consider when evaluating your sessions:<br />
1.Did the participants achieve their goals or objectives?<br />
2.Were the techniques and activities you used in your session the most effective ways to help participants achieve<br />
the required outcomes?<br />
To answer the first question, you will need to look back at the original needs. Work out whether the knowledge<br />
of the participants after the session is closer to the objective (or participants expectations) than it was before the<br />
session. It is important to gather feedback from participants, colleagues and others so that you can improve the<br />
techniques, activities and delivery of your training sessions. It is also useful to gather feedback at the end of each<br />
session from participants so that you can think about whether you need to make any improvements.<br />
CRC for <strong>Australia</strong>n Weed Management • Presentation of information sessions to small groups<br />
9
How to deliver and review your training session<br />
Feedback can be obtained in a number of ways. You might prepare a simple form that has questions about how useful<br />
the presented material was, what participants would like to see added or changed and any other general comments<br />
that participants might like to make. Of course, you can just ask the group at the conclusion of the session the same<br />
questions, although people may be less forthcoming verbally in a group.<br />
It will also be useful to conduct your own self-evaluation of the session and consider how well you think the session<br />
went and what areas may need to be changed.<br />
Asking questions<br />
Questioning is an essential skill for presenters to use. There are lots of reasons for asking questions. These days they<br />
are not used just for testing someone’s knowledge. They could be used:<br />
• to focus attention on a certain topic<br />
• to encourage interest<br />
• to promote activity<br />
• to check on and extend the participant’s understanding<br />
• to slow down or speed up the pace of a training session<br />
• to challenge the participants to think more deeply<br />
• to assess the participants progress.<br />
The questions a presenter asks are either thought up in advance of the session (pre-set) or arise during the session.<br />
There are two types of questions that trainers use during their sessions: 1. closed 2. open.<br />
Closed questions<br />
Closed questions are usually answered with YES or NO or a very short statement. Be careful when you use this type<br />
of question with participants who are a little shy or feel anxious. They may not feel confident to add anything further<br />
to their simple answers and you might never find out the real depth of their thinking. The speed and tone of voice<br />
are very important with these short, closed questions because it is easy for nervous participants to interpret them as<br />
being abrupt or even rude.<br />
Examples:<br />
• Have you used this equipment before?<br />
• Do you know how to conduct a site assessment?<br />
• Do you understand the protocols for <strong>weed</strong> mapping?<br />
Open questions<br />
Open questions cannot be answered with YES or NO. They are used to encourage the participants to give a more<br />
detailed answer usually containing their own feelings or opinions. They are very useful with a new group because<br />
they bring out a wide variety of responses and can get a group discussion started.<br />
Examples:<br />
• What do you know about site assessments for <strong>weed</strong> <strong>management</strong>?<br />
• What are the advantages and disadvantages of using herbicides?<br />
When asking questions<br />
• be brief and clear<br />
• keep it simple<br />
• allow for time for response (silence is okay)<br />
• show honest intentions (no trick questions)<br />
• give praise and encouragement<br />
• avoid sarcasm<br />
• avoid slang, colloquialisms, confusion.<br />
10<br />
CRC for <strong>Australia</strong>n Weed Management • Presentation of information sessions to small groups
Techniques for answering participant’s questions<br />
When participants ask questions in a session you can respond in a number of ways depending on the situation:<br />
• If you think the participant has done quite a bit of thinking about the question before asking it, you can<br />
encourage them to try to answer it themselves.<br />
• If you think another participant in the group should have a pretty good chance of handling it, you can redirect<br />
the question to another participant.<br />
• If it’s a question that you want all the participants to focus on you can redirect the question to the whole<br />
group to answer.<br />
• If the answer is fairly simple, you can hint at it. The extra clues may stimulate all the participants to think more<br />
broadly and possibly come up with an answer.<br />
• You can give an answer that provides factual information, expresses your own opinion or lets the participants<br />
know that you don’t have an answer but are happy to look further into it with them later.<br />
Records<br />
Records are an important aspect of managing your training program because they provide the details that people<br />
may need to refer back to in the future. It is helpful to record minimum details of your training session including<br />
the date, location, participants, topic, organisation and facilitator. Your evaluation of the session is also useful to<br />
keep in case you run a similar session at a later time.<br />
How to deliver and review your training session<br />
Putting it all together<br />
1.Is the venue appropriately set up considering activities, participant numbers, safety requirements and accessibility.<br />
2.Introduction: Provide an introduction to the session, including introduction of self and participants, details of<br />
learning objectives, linking of training to previous knowledge or training, outline of training delivery methods<br />
and competency requirements.<br />
3.Body of the information session: Use appropriate strategies and techniques to facilitate the learning of knowledge.<br />
4.Conclusion of training session: Review the learning objectives with participants providing relevant feedback, and<br />
linking to further training opportunities.<br />
5.Consider your presenting skills, training aids, and how you will give and receive feedback.<br />
6.Review and evaluate the session, using self-evaluation and feedback from participants and their supervisors and<br />
measuring outcomes against training objectives.<br />
7.Keep appropriate records.<br />
CRC for <strong>Australia</strong>n Weed Management • Presentation of information sessions to small groups<br />
11
Appendix 1: Session Plan Checklist<br />
• Research the material<br />
• Identify the learning outcomes<br />
• Choose appropriate:<br />
• learning methods (group, role play, discussion)<br />
• training resources and aids<br />
• Organise the content:<br />
• priorities<br />
• sequence<br />
• key points<br />
• Write the session plan<br />
• Check the plan (yourself, colleague)<br />
• Prepare and check the aids and facilities<br />
• Evaluate the plan.<br />
Appendix 1: Session Plan Checklist<br />
12<br />
CRC for <strong>Australia</strong>n Weed Management • Presentation of information sessions to small groups
Presenter: Russell Coight<br />
Session: Site Assessment<br />
Duration: 2 hrs<br />
Session Outcomes:<br />
Appendix 2: Session Plan<br />
Appendix 2: Session Plan<br />
By the end of this session, participants will:<br />
• Understand the key components of site assessment<br />
• Be able to establish location using a map to obtain AMG coordinates (or GPS unit if available)<br />
• Demonstrate an understanding of <strong>weed</strong> mapping.<br />
Materials required (per person):<br />
• All Handouts<br />
• 1:25000 map which includes training venue location (group to share map and use to establish location) or GPS<br />
unit to be shared by group<br />
• 2 x transparencies to use as overlays for site map<br />
• Blank sheets of A4 paper for site maps.<br />
Teaching Aids:<br />
• White board<br />
• Overhead projector.<br />
Names of those attending:<br />
CRC for <strong>Australia</strong>n Weed Management • Presentation of information sessions to small groups<br />
13
Appendix 2: Session Plan<br />
Presentation: Site Assessment<br />
Time Content Methodology<br />
10 mins Introduction<br />
Get Attention:<br />
• Welcome<br />
• Introduce self<br />
• If participants don’t know each other and it is a small group<br />
get each person to introduce themselves.<br />
Introduce topic: Site assessment<br />
Link:<br />
Describe where this session fits in with long term <strong>weed</strong><br />
<strong>management</strong> planning<br />
Stimulate:<br />
• Good <strong>weed</strong> <strong>management</strong> needs good planning. The site<br />
assessment is important because we need to know what we are<br />
dealing with before we can start planning. It will help us develop<br />
a workable plan and also provide the means to monitor the<br />
effectiveness of our work over time.<br />
Outcomes:<br />
• By the end of the session participants will understand key aspects<br />
of a site assessment and why it is important.<br />
• Participants will be able to establish their location using a map<br />
(or GPS unit), get to know what’s involved in completing a site<br />
assessment sheet, a simple <strong>weed</strong> map and setting up<br />
photo points.<br />
Structure:<br />
• Will go through each part of the site assessment process using<br />
hand outs and overheads<br />
• Participants will have a go at establishing the location of this<br />
venue using a map or GPS, creating a site map and become<br />
familiar with a site assessment sheet and photo points.<br />
• Next Saturday a field trip will be held to start a site assessment<br />
for the groups NHT site and we will then have a chance to put<br />
into practice what we have done.<br />
30 mins Body<br />
Site assessment:<br />
Explanation:<br />
• Go through material in <strong>manual</strong> (pages 4 through 6) plus other<br />
material relevant to your situation.<br />
• Stress value of the site assessment in helping to set realistic<br />
objectives, improving outcomes, will save time later and enable<br />
better communication with others.<br />
• Work through a sample site assessment sheet.<br />
• Explain how to establish location<br />
Explanation<br />
(Refer to module<br />
1 of <strong>manual</strong>).<br />
Handouts.<br />
Overhead<br />
Transparency<br />
or whiteboard<br />
or handout.<br />
Activity: Handout Appendix 3<br />
• Group to establish current location of training venue using either of module 1 (especially<br />
1:25000/1:50000 map to find AMG coordinates (Eastings & if map being used<br />
Northings) and/or a GPS unit<br />
to establish location).<br />
14<br />
CRC for <strong>Australia</strong>n Weed Management • Presentation of information sessions to small groups
Time Content Methodology<br />
Summary:<br />
• Summarise site assessment, reasons for it and usefulness of Have appropriate maps<br />
information for planning and for others.<br />
and/or GPS unit/s.<br />
30 mins Weed mapping<br />
Explanation:<br />
• Go through material pages 4 to 9 of module 1 (up to Photo<br />
points)<br />
• Place emphasis on importance of mapping to assess a situation, Handout or<br />
guide work and as a tool for monitoring progress and reporting Overhead transparency.<br />
to others (eg funding bodies).<br />
• Show a worked example of a simple map (eg example in<br />
module 1 or preferably a local example).<br />
Activity:<br />
• Practice mapping 1) develop a site/sketch map, consider issues Mapping materials,<br />
of scale, map orientation, marking out boundaries, features etc. transparencies, marker<br />
2) using transparent overlays to mark out <strong>weed</strong> infestations pens etc.<br />
(if venue has areas of vegetation nearby these could be used for<br />
a mapping exercise).<br />
Summary:<br />
• Review process, problems encountered and how these may be Show examples of<br />
overcome.<br />
photo points and<br />
• Ask each participant to speak on how they found the process, images taken over<br />
concerns or suggestions that they may have.<br />
time (examples on net).<br />
Appendix 2: Session Plan<br />
15 mins Break: Tea/coffee<br />
25 mins Photo points<br />
Explanation:<br />
• Go through information on page 11 and12 of module 1.<br />
Establish why photo points are used and how they are established<br />
and used.<br />
Activity:<br />
• Participants mark out what they regard as best locations Handouts (Pages 11<br />
for photo points on practice map they have created in & 12 module 1).<br />
previous session.<br />
• Open discussion guided by presenter and prompted by questions<br />
on why points chosen.<br />
Summary:<br />
• Review the photo point process and its importance as a means<br />
of seeing change over time, note that photo points do not explain<br />
why change has occurred. Other site information will be needed<br />
to establish this.<br />
10 mins Conclusion<br />
Key points: (review learning outcomes)<br />
Feedback:<br />
Future:<br />
Next session we will look at:<br />
• Interpretation of site information.<br />
• Setting priorities/objectives and developing the action plan.<br />
Overhead transparency<br />
or whiteboard.<br />
Thank you for your participation!<br />
CRC for <strong>Australia</strong>n Weed Management • Presentation of information sessions to small groups<br />
15