here - Snap-on Equipment
here - Snap-on Equipment
here - Snap-on Equipment
Create successful ePaper yourself
Turn your PDF publications into a flip-book with our unique Google optimized e-Paper software.
<str<strong>on</strong>g>Snap</str<strong>on</strong>g>-<strong>on</strong> ® HD35 SERIES<br />
Table of C<strong>on</strong>tents<br />
TABLE OF CONTENTS<br />
INTRODUCTION to the EETF303A & EETF304A....................... 2<br />
I. SAFETY INFORMATION ......................................................... 3<br />
- Secti<strong>on</strong> 1.01: Important Safety Notice....................................... 3<br />
- Secti<strong>on</strong> 1.02: Important Safety Instructi<strong>on</strong>s............................... 5<br />
II. SYSTEM FEATURES & SPECIFICATIONS ........................... 9<br />
- Secti<strong>on</strong> 2.01: Features............................................................... 9<br />
- Secti<strong>on</strong> 2.02: Dimensi<strong>on</strong>s & Technical Specificati<strong>on</strong>s............... 10<br />
- Secti<strong>on</strong> 2.03: Machine Overview............................................... 11<br />
- Secti<strong>on</strong> 2.04: C<strong>on</strong>trol Panel Overview....................................... 12<br />
- Secti<strong>on</strong> 2.05: Special Functi<strong>on</strong>s................................................ 15<br />
III. OPERATING PROCEDURES ............................................... 16<br />
- Secti<strong>on</strong> 3.01: Suggested Additi<strong>on</strong>al Tools................................. 16<br />
- Secti<strong>on</strong> 3.02: Transmissi<strong>on</strong> Fluid Exchange.............................. 18<br />
- Secti<strong>on</strong> 3.03: Power Steering Fluid Exchange........................... 19<br />
IV. TROUBLESHOOTING & ADDITIONAL HELP ................... 20<br />
- Secti<strong>on</strong> 4.01: Comm<strong>on</strong> Problems/Soluti<strong>on</strong>s.............................. 21<br />
- Secti<strong>on</strong> 4.02: Customer Service C<strong>on</strong>tact Informati<strong>on</strong>................ 21<br />
V. APPENDIX A – HOSES & ADAPTERS ............................... 22<br />
- Secti<strong>on</strong> 5.01: Adapter Hoses..................................................... 22<br />
- Secti<strong>on</strong> 5.02: Adapters...............................................................25<br />
VI. APPENDIX B – MAINTENANCE ........................................ 26<br />
- Secti<strong>on</strong> 6.01: Maintenance Procedures..................................... 26<br />
VII. APPENDIX C – REPLACEMENT PARTS .......................... 27<br />
- Secti<strong>on</strong> 7.01: Replacement Part List........................................ 27<br />
- Secti<strong>on</strong> 7.02: Replacement Part Illustrati<strong>on</strong>s............................. 29<br />
- Secti<strong>on</strong> 7.03: Ordering Informati<strong>on</strong>............................................ 30<br />
LIMITED WARRANTY ............................................................... 31<br />
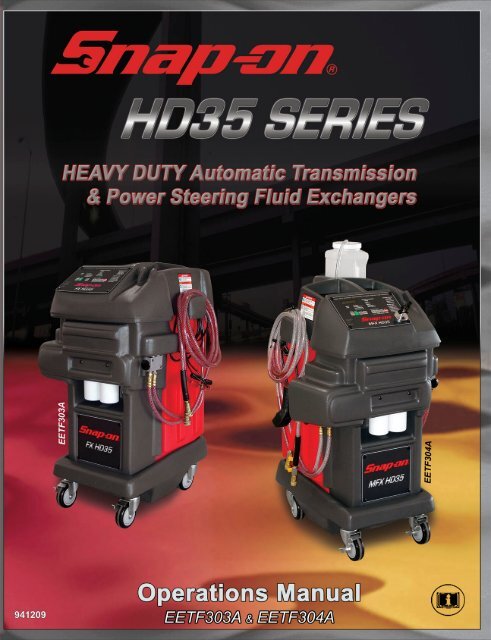
Operati<strong>on</strong>s Manual<br />
Printed in the U.S.A. for <str<strong>on</strong>g>Snap</str<strong>on</strong>g>-<strong>on</strong> ® 1
Introducti<strong>on</strong><br />
<str<strong>on</strong>g>Snap</str<strong>on</strong>g>-<strong>on</strong> ® HD35 SERIES<br />
INTRODUCTION<br />
to the EETF303A<br />
& EETF304A<br />
C<strong>on</strong>gratulati<strong>on</strong>s <strong>on</strong> the purchase of your <str<strong>on</strong>g>Snap</str<strong>on</strong>g>-<strong>on</strong> HD35 fluid exchanging machine!<br />
Simply put, this machine is the cleanest, safest, easiest, fastest, most thorough, and most costefficient<br />
method of fluid exchange ever devised. Suddenly, regular automatic transmissi<strong>on</strong> and<br />
power steering maintenance become a more realistic propositi<strong>on</strong>. Transmissi<strong>on</strong> and power<br />
steering fluid exchanging are cleaner and neater than ever!<br />
Transmissi<strong>on</strong> Fluid Exchange:<br />
To attain the highest level of protecti<strong>on</strong> for internal transmissi<strong>on</strong> comp<strong>on</strong>ents and increase the<br />
transmissi<strong>on</strong>’s life span to the maximum, it is recommended that the transmissi<strong>on</strong>’s lubricati<strong>on</strong><br />
system is serviced every 15,000 miles (or according to the vehicle owner’s manual). The <str<strong>on</strong>g>Snap</str<strong>on</strong>g>-<strong>on</strong><br />
HD35 SERIES exchanges virtually all of the used transmissi<strong>on</strong> fluid to new, without even<br />
requiring the transmissi<strong>on</strong> pan to be dropped. T<str<strong>on</strong>g>here</str<strong>on</strong>g> is no spillage, and no mess.<br />
Power Steering Fluid Exchange (EETF304A Only):<br />
Service neglect leads to power steering system complaints including poor handling, hard or<br />
sluggish steering, and objecti<strong>on</strong>able noise. Historically, power steering system fluid service has<br />
been neglected, often due to the lack of a c<strong>on</strong>venient method for providing such flush or fluid<br />
exchange services. Previous methods for flushing the power steering system or replacing the<br />
power steering fluid were time c<strong>on</strong>suming and often inefficient or incomplete. Now, it’s easier than<br />
ever to replace up to 95% of the old power steering fluid in less than 8 minutes, to ensure your<br />
power steering system has a l<strong>on</strong>g, trouble-free life.<br />
• The HD35 can be used practically anyw<str<strong>on</strong>g>here</str<strong>on</strong>g> – and with almost any vehicle.<br />
• It is compact, mobile, and self-c<strong>on</strong>tained.<br />
• It operates off the 12-volt battery of the vehicle being serviced.<br />
• It does not require a pit, lift, or ramp.<br />
• The HD35 hooks up directly to <strong>on</strong>e of the vehicle’s transmissi<strong>on</strong> cooler lines for a<br />
transmissi<strong>on</strong> fluid exchange.<br />
• The ATF fluid exchange, from setup to finish, typically takes 15 minutes or less!<br />
No w<strong>on</strong>der an ATF exchange is the most requested method of preventative automatic<br />
transmissi<strong>on</strong> maintenance today. Now t<str<strong>on</strong>g>here</str<strong>on</strong>g>’s the opti<strong>on</strong> of a power steering fluid exchange as<br />
well… Both in <strong>on</strong>e machine!<br />
Please take time to read through this manual to familiarize yourself with the HD35 before<br />
performing your first ATF or PSX exchange.<br />
2<br />
Printed in the U.S.A. for <str<strong>on</strong>g>Snap</str<strong>on</strong>g>-<strong>on</strong> ®<br />
Operati<strong>on</strong>s Manual
<str<strong>on</strong>g>Snap</str<strong>on</strong>g>-<strong>on</strong> ® HD35 SERIES<br />
I. Safety Informati<strong>on</strong><br />
I. SAFETY INFORMATION<br />
1.01 IMPORTANT SAFETY NOTICE<br />
For your safety, read this manual thoroughly before operating your HD35 unit.<br />
Your HD35 unit is intended for use by properly trained, skilled professi<strong>on</strong>al automotive<br />
technicians. The safety messages presented below and throughout this user’s manual are<br />
reminders to the operator to exercise care when using this unit. Before using your HD35<br />
unit, always refer to and follow the safety messages and applicable service procedures<br />
provided by the manufacturer of the vehicle being serviced.<br />
• Read All Safety Instructi<strong>on</strong>s<br />
Read, understand and follow all safety messages and instructi<strong>on</strong>s in this manual. Safety<br />
messages in this secti<strong>on</strong> of the manual c<strong>on</strong>tain a signal word with a three-part message<br />
and, in some instances, an ic<strong>on</strong>.<br />
• Signal Words<br />
The signal word indicates the level of the hazard in a situati<strong>on</strong>:<br />
Indicates an imminently hazardous situati<strong>on</strong> which, if not avoided,<br />
will result in death or serious injury to the operator or to bystanders.<br />
Indicates a potentially hazardous situati<strong>on</strong> which, if not avoided,<br />
could result in death or serious injury to the operator or to bystanders.<br />
Indicates a potentially hazardous situati<strong>on</strong> which, if not avoided,<br />
may result in moderate or minor injury to the operator or to bystanders.<br />
Indicates a situati<strong>on</strong> which, if not avoided, may result in damage<br />
to the HD35 or the vehicle being serviced.<br />
• Safety Messages<br />
Safety messages in this secti<strong>on</strong> c<strong>on</strong>tain three different type styles:<br />
• Normal type states the hazard.<br />
• Bold type states how to avoid the hazard.<br />
• Italic type states the possible c<strong>on</strong>sequences of not avoiding the hazard.<br />
Operati<strong>on</strong>s Manual<br />
Printed in the U.S.A. for <str<strong>on</strong>g>Snap</str<strong>on</strong>g>-<strong>on</strong> ® 3
I. Safety Informati<strong>on</strong> <str<strong>on</strong>g>Snap</str<strong>on</strong>g>-<strong>on</strong> ® HD35 SERIES<br />
• Safety Symbols<br />
A safety symbol, when present, gives a graphical descripti<strong>on</strong> of the potential hazard, and<br />
how to avoid the hazard:<br />
Risk of Fire<br />
Read Instructi<strong>on</strong>s Before Use<br />
Risk of Explosi<strong>on</strong><br />
Mandatory Eye Protecti<strong>on</strong><br />
Risk of Entanglement<br />
Mandatory Protective Gloves<br />
Dangerous Fumes<br />
Mandatory Protective Clothing<br />
Do Not Pull or Move<br />
4<br />
Printed in the U.S.A. for <str<strong>on</strong>g>Snap</str<strong>on</strong>g>-<strong>on</strong> ®<br />
Operati<strong>on</strong>s Manual
<str<strong>on</strong>g>Snap</str<strong>on</strong>g>-<strong>on</strong> ® HD35 SERIES<br />
I. Safety Informati<strong>on</strong><br />
1.02 IMPORTANT SAFETY INSTRUCTIONS<br />
Engine exhaust c<strong>on</strong>tains toxic gases.<br />
• Vent vehicle’s exhaust away from work area.<br />
• Do not breathe exhaust.<br />
Exhaust gases will cause injury or death.<br />
Improper use and operati<strong>on</strong>.<br />
• Read, understand and follow all safety messages and operati<strong>on</strong>al procedures in this<br />
manual before operating the <str<strong>on</strong>g>Snap</str<strong>on</strong>g>-<strong>on</strong> HD35.<br />
• This equipment should be operated <strong>on</strong>ly by qualified pers<strong>on</strong>nel.<br />
• Use this equipment <strong>on</strong>ly as described in this manual.<br />
Improper use and operati<strong>on</strong> of this product can result in injury.<br />
Engine systems can malfuncti<strong>on</strong> expelling fuel, oil vapors, hot steam, hot toxic exhaust gases and<br />
other debris.<br />
• Wear safety goggles and protective clothing, user and bystander.<br />
Engine systems that fail can cause serious injury.<br />
Risk of expelling pressurized fluids.<br />
• Wear safety goggles and protective clothing, user and bystander.<br />
• Verify that engine and machine are off before c<strong>on</strong>necting or disc<strong>on</strong>necting cooler lines<br />
and adapter hoses.<br />
• Always unplug the machine from its power source when not in use.<br />
• Keep the service hoses away from hot or moving engine parts. Hoses can split or burst<br />
causing fluid to be expelled.<br />
• Tighten all c<strong>on</strong>necti<strong>on</strong>s properly. Insufficient or excessive torque can result in fluid<br />
leakage.<br />
• Avoid c<strong>on</strong>tact with automatic transmissi<strong>on</strong> or power steering fluid.<br />
• Treatment methods are as follows:<br />
Eyes: Flush eyes with plenty of water.<br />
Skin: Wash with soap and water.<br />
Operati<strong>on</strong>s Manual<br />
Printed in the U.S.A. for <str<strong>on</strong>g>Snap</str<strong>on</strong>g>-<strong>on</strong> ® 5
I. Safety Informati<strong>on</strong> <str<strong>on</strong>g>Snap</str<strong>on</strong>g>-<strong>on</strong> ® HD35 SERIES<br />
Inhalati<strong>on</strong>: Move to unc<strong>on</strong>taminated area.<br />
Ingesti<strong>on</strong>: If large amount, get medical attenti<strong>on</strong>.<br />
If any irritati<strong>on</strong> persists, get medical attenti<strong>on</strong>.<br />
• Dispose of used fluid according to envir<strong>on</strong>mental laws and regulati<strong>on</strong>s.<br />
Although automatic transmissi<strong>on</strong> and power steering fluid pose no significant health hazards,<br />
some individuals may experience adverse reacti<strong>on</strong>s up<strong>on</strong> c<strong>on</strong>tact. Pressurized fluid can cause<br />
serious injury.<br />
Risk of unexpected vehicle movement.<br />
• Block drive wheels before starting vehicle’s engine to begin an exchange.<br />
• Unless instructed otherwise, set parking brake and put gear selector in park.<br />
• Do not leave a running vehicle unattended.<br />
A moving vehicle can cause injury.<br />
Engine has moving parts. Risk of entanglement.<br />
• Do not place tools <strong>on</strong> fenders or other places in engine compartment.<br />
• Keep yourself, clothing, battery cables and service hoses clear of moving parts such as<br />
fan blades, belts and pulleys.<br />
C<strong>on</strong>tact with moving parts can cause injury.<br />
Risk of fire or explosi<strong>on</strong>.<br />
• Do not operate the HD35 in the vicinity of open c<strong>on</strong>tainers of flammable liquids such as<br />
gasoline.<br />
• Keep hoses and jumper cables away from heat sources and sharp edges.<br />
• Do not operate equipment with damaged cords or hoses until they have been examined<br />
by a qualified serviceman.<br />
Fire or explosi<strong>on</strong> can cause injury.<br />
Risk of fire or explosi<strong>on</strong>. Gases produced by a battery are highly explosive.<br />
• Wear safety goggles and protective clothing, user and bystander.<br />
• This machine is equipped to operate <strong>on</strong> 12-volt DC power <strong>on</strong>ly. A power source greater<br />
than this can result in serious injury to the user as well as damage to the machine.<br />
• Do not smoke, place metal tools <strong>on</strong> battery or allow a spark or flame in vicinity of battery.<br />
• Clean battery terminals before hooking the machine’s battery clips to them. During<br />
cleaning, keep airborne corrosi<strong>on</strong> from eyes, nose and mouth.<br />
6<br />
Printed in the U.S.A. for <str<strong>on</strong>g>Snap</str<strong>on</strong>g>-<strong>on</strong> ®<br />
Operati<strong>on</strong>s Manual
<str<strong>on</strong>g>Snap</str<strong>on</strong>g>-<strong>on</strong> ® HD35 SERIES<br />
I. Safety Informati<strong>on</strong><br />
• Be sure both battery cables are tightly c<strong>on</strong>nected to the battery terminals as instructed<br />
before proceeding with a fluid exchange.<br />
• Never remove battery cables from the battery terminals while the machine is operating.<br />
Only use the “EMERGENCY STOP” butt<strong>on</strong> located <strong>on</strong> the c<strong>on</strong>trol panel to stop an<br />
exchange.<br />
Battery explosi<strong>on</strong> can cause injury.<br />
Battery acid is a highly corrosive sulfuric acid.<br />
• Wear safety goggles and protective gloves, user and bystander.<br />
• Have plenty of fresh water and soap nearby. If battery acid c<strong>on</strong>tacts skin, clothing, or<br />
eyes, flush exposed area with soap and water for 10 minutes.<br />
• While cleaning battery’s terminals, keep airborne corrosi<strong>on</strong> from eyes, nose and mouth.<br />
• Do not touch eyes while working near battery.<br />
Battery acid can burn eyes and skin.<br />
Risk of burns.<br />
• Wear gloves when working near hot engine comp<strong>on</strong>ents.<br />
• Do not touch hot exhaust systems, manifolds, engines, radiators, etc.<br />
• The automatic transmissi<strong>on</strong> fluid coming from the vehicle al<strong>on</strong>g with some of the<br />
machine’s comp<strong>on</strong>ents that the fluid comes into direct c<strong>on</strong>tact with (i.e. external: hoses<br />
and quick-disc<strong>on</strong>nect fittings; internal: hoses and all fittings) may reach temperatures<br />
uncomfortable to the touch. Exercise cauti<strong>on</strong> in avoiding c<strong>on</strong>tact with these items.<br />
Hot comp<strong>on</strong>ents can cause injury or discomfort.<br />
Ratchet mechanisms and tools may slip or break if dirty. Mismatched or partially worn parts can<br />
cause ratchet or any tool to slip or break.<br />
• Frequently inspect and clean any tools used, and lubricate all n<strong>on</strong>-sealed ratchet<br />
mechanisms with light oil.<br />
• Do not replace worn parts individually. If adapter hose fittings become worn, see<br />
“Appendix C – Replacement Parts” to order new hoses.<br />
• The use of any other accessories not specified in this manual may create a hazard.<br />
Tools that slip or break can cause injury.<br />
Risk of injury.<br />
• This equipment should be operated by qualified pers<strong>on</strong>nel <strong>on</strong>ly.<br />
• Use this equipment <strong>on</strong>ly as described in this manual.<br />
Operati<strong>on</strong>s Manual<br />
Printed in the U.S.A. for <str<strong>on</strong>g>Snap</str<strong>on</strong>g>-<strong>on</strong> ® 7
I. Safety Informati<strong>on</strong> <str<strong>on</strong>g>Snap</str<strong>on</strong>g>-<strong>on</strong> ® HD35 SERIES<br />
• Always unplug the machine from its power source when not in use.<br />
• Loop the power cord loosely in its proper locati<strong>on</strong> when machine is not in use.<br />
• Do not operate equipment with a damaged battery cables or hoses, or if the equipment<br />
has been dropped or damaged, until it has been examined by a qualified service<br />
representative.<br />
• Care should be taken to arrange the battery cables and service hoses so that they will<br />
not be tripped over or pulled.<br />
• Never pull <strong>on</strong> the power cables or service hoses to transport the HD35. Damage may<br />
occur to these comp<strong>on</strong>ents, or machine may tip over.<br />
• Keep area of operati<strong>on</strong> clear of unnecessary tools and equipment. Utilize recessed tool<br />
storage areas <strong>on</strong> the top of the machine.<br />
• Never leave the machine running unattended.<br />
• The HD35 is not designed for any other purpose than the exchanging of automatic<br />
transmissi<strong>on</strong> and power steering fluid.<br />
Operati<strong>on</strong> of your HD35 unit by any<strong>on</strong>e other than qualified pers<strong>on</strong>nel may result in injury.<br />
Risk of equipment damage.<br />
• Flushing high mileage cars that have not been previously serviced can cause operating<br />
problems in the transmissi<strong>on</strong>.<br />
• C<strong>on</strong>nect battery cables to a 12-volt power source <strong>on</strong>ly (i.e. vehicle’s battery).<br />
• Servicing, transporting, or storing this machine in an attitude other than the normal<br />
operating positi<strong>on</strong> can result in fluid spillage and/or comp<strong>on</strong>ent damage.<br />
• Use <strong>on</strong>ly the manufacturer’s recommended attachments.<br />
• The <str<strong>on</strong>g>Snap</str<strong>on</strong>g>-<strong>on</strong> HD35 is fully automatic. Refer to your c<strong>on</strong>trol panel at all times.<br />
• Never pull <strong>on</strong> the power cables or service hoses to transport the HD35. Damage may<br />
occur to these comp<strong>on</strong>ents, or machine may tip over.<br />
• Periodically clean the machine by wiping down with a clean, soft, dry cloth.<br />
Improper operati<strong>on</strong> of equipment may result in damage to machine or comp<strong>on</strong>ents.<br />
SAVE AND FOLLOW THESE INSTRUCTIONS!<br />
8<br />
Printed in the U.S.A. for <str<strong>on</strong>g>Snap</str<strong>on</strong>g>-<strong>on</strong> ®<br />
Operati<strong>on</strong>s Manual
<str<strong>on</strong>g>Snap</str<strong>on</strong>g>-<strong>on</strong> ® HD35 SERIES<br />
II. System Features & Specificati<strong>on</strong>s<br />
II. SYSTEM FEATURES & SPECIFICATIONS<br />
2.01 FEATURES<br />
Mechanical Features<br />
• Accurate sensor technology allows optimum fluid level to be maintained in<br />
vehicle’s transmissi<strong>on</strong>.<br />
• Two in-line 10-micr<strong>on</strong> absolute fluid filters capture microscopic particles and<br />
c<strong>on</strong>taminants.<br />
• Numbered quick-disc<strong>on</strong>nect hoses with adapters save time in identifying the proper<br />
hoses for the applicati<strong>on</strong><br />
• Easy to use adapters allow quick hookup to virtually any automobile make and model,<br />
saving time and m<strong>on</strong>ey.<br />
• Diverter valve reverses fluid flow without having to switch hoses.<br />
• Clear service hoses give visual c<strong>on</strong>firmati<strong>on</strong> of new and used fluid movements.<br />
• Erg<strong>on</strong>omically correct working height means greater productivity, less stress and strain.<br />
• Durable roto-cast polyethylene body and tanks prevent vehicle damage. The unit is also<br />
lightweight and durable, for easier handling and l<strong>on</strong>ger life.<br />
• Large 5-inch locking caster wheels make machine easy to maneuver.<br />
• Easy-access service panel provides hassle-free operati<strong>on</strong>s for greater efficiency.<br />
Electr<strong>on</strong>ic Features<br />
• Self-c<strong>on</strong>tained battery cables hook up to the vehicle’s 12-volt battery<br />
• Automatic m<strong>on</strong>itoring of fluid in new and used fluid tanks assures safe operati<strong>on</strong><br />
• Accurate sensor technology (+/- 5%)<br />
• Digital counter display with cumulative ATF opti<strong>on</strong>s<br />
• Indicating lamps are activated to show all machine operati<strong>on</strong>s and status functi<strong>on</strong>s<br />
• Four capacity selecti<strong>on</strong>s <strong>on</strong> machine to automatically pump specified quantity of ATF<br />
into transmissi<strong>on</strong> (capacities: 12, 16, 20 or 35 quarts)<br />
• Fluid measurements can be changed from quarts to liters<br />
• Drain used fluid tank (no need to tip machine upside-down)<br />
• Drain new fluid tank<br />
• Add new fluid to transmissi<strong>on</strong> in 2/10 quart increments (approx. 1/8” <strong>on</strong> the dipstick)<br />
• Remove fluid from transmissi<strong>on</strong> in 2/10 quart increments (approx. 1/8” <strong>on</strong> the dipstick)<br />
• Cycle valves feature allows you to electr<strong>on</strong>ically clean out valves<br />
• Totalizer check (indicates lifetime use)<br />
• Interactive opti<strong>on</strong>s menu:<br />
- “Auto Prime” feature automatically primes the system<br />
- Indicate new fluid volume<br />
- Indicate used fluid capacity<br />
Power Steering Fluid Exchange Unit (EETF304A Only)<br />
• Remote pendant for ease of operati<strong>on</strong><br />
• Compartment for new fluid bottle<br />
• Drains directly to waste tank<br />
Operati<strong>on</strong>s Manual<br />
Printed in the U.S.A. for <str<strong>on</strong>g>Snap</str<strong>on</strong>g>-<strong>on</strong> ® 9
II. System Features & Specificati<strong>on</strong>s<br />
<str<strong>on</strong>g>Snap</str<strong>on</strong>g>-<strong>on</strong> ® HD35 SERIES<br />
2.02 DIMENSIONS & TECHNICAL SPECIFICATIONS<br />
DIMENSIONS:<br />
39 1/2" Tall<br />
23" Wide<br />
25 1/2" Deep<br />
Service Hoses:<br />
10’ outside of machine<br />
Wheels:<br />
5” locking casters (fr<strong>on</strong>t)<br />
5” casters (back)<br />
Fluid Tanks:<br />
40-Quart New Fluid Tank<br />
40-Quart Used Fluid Tank<br />
Weight:<br />
135 lbs.<br />
TECHNICAL SPECIFICATIONS:<br />
Power:<br />
12-Volt DC from vehicle battery<br />
Fluid Sensors:<br />
+/- 5% accurate sensors<br />
Filters:<br />
10-micr<strong>on</strong> absolute fluid filters<br />
Operating Temperature:<br />
60º to 150ºF (15º to 65ºC)<br />
10<br />
Printed in the U.S.A. for <str<strong>on</strong>g>Snap</str<strong>on</strong>g>-<strong>on</strong> ®<br />
Operati<strong>on</strong>s Manual
<str<strong>on</strong>g>Snap</str<strong>on</strong>g>-<strong>on</strong> ® HD35 SERIES<br />
II. System Features & Specificati<strong>on</strong>s<br />
2.03 MACHINE OVERVIEW<br />
(EETF304A Shown)<br />
Operati<strong>on</strong>s Manual<br />
Printed in the U.S.A. for <str<strong>on</strong>g>Snap</str<strong>on</strong>g>-<strong>on</strong> ® 11
II. System Features & Specificati<strong>on</strong>s<br />
<str<strong>on</strong>g>Snap</str<strong>on</strong>g>-<strong>on</strong> ® HD35 SERIES<br />
2.04 CONTROL PANEL OVERVIEW<br />
EETF303A<br />
EETF304A<br />
12<br />
Printed in the U.S.A. for <str<strong>on</strong>g>Snap</str<strong>on</strong>g>-<strong>on</strong> ®<br />
Operati<strong>on</strong>s Manual
<str<strong>on</strong>g>Snap</str<strong>on</strong>g>-<strong>on</strong> ® HD35 SERIES<br />
II. System Features & Specificati<strong>on</strong>s<br />
OPTION MENU<br />
Opti<strong>on</strong>:<br />
OP 1 – ADD 1 QUART<br />
OP 2 – REMOVE 1 QUART<br />
OP 3 – DRAIN NEW TANK<br />
OP 4 – DRAIN USED TANK<br />
OP 5 – NEW FLUID VOLUME<br />
OP 6 – USED FLUID CAPACITY<br />
OP 7 – AUTO PRIME<br />
Functi<strong>on</strong>:<br />
Quickly adds fluid; Used for filling the pan.<br />
Quickly drains fluid; Used for draining the pan.<br />
Allows operator to drain the fluid<br />
from the new fluid tank.<br />
Allows operator to drain the fluid<br />
from the used fluid tank.<br />
Indicates exactly how much fluid is in<br />
the new fluid tank.<br />
Indicates the remaining capacity of the<br />
used fluid tank.<br />
Automatically purges any air out of the system.<br />
BUTTONS<br />
Butt<strong>on</strong>:<br />
SELECT / QUANTITY<br />
START / EXCHANGE<br />
or OPTIONS<br />
POWER STEERING<br />
OPTION MENU<br />
ADD ATF<br />
REMOVE ATF<br />
CYCLE VALVES<br />
STOP<br />
Functi<strong>on</strong>:<br />
Allows operator to choose <strong>on</strong>e of four<br />
different exchange volumes.<br />
Starts an exchange at the amount selected.<br />
Also activates opti<strong>on</strong>s when selected in the<br />
opti<strong>on</strong> menu.<br />
Switches machine to power steering mode.<br />
Scrolls through opti<strong>on</strong>s.<br />
Adds 2/10 qt. of new ATF to the vehicle.<br />
(approx. 1/8” <strong>on</strong> the dipstick)<br />
Removes 2/10 qt. of ATF from the vehicle.<br />
(approx. 1/8” <strong>on</strong> the dipstick)<br />
Allows operator to manually cycle both valves.<br />
Stops operati<strong>on</strong>s.<br />
Operati<strong>on</strong>s Manual<br />
Printed in the U.S.A. for <str<strong>on</strong>g>Snap</str<strong>on</strong>g>-<strong>on</strong> ® 13
II. System Features & Specificati<strong>on</strong>s<br />
<str<strong>on</strong>g>Snap</str<strong>on</strong>g>-<strong>on</strong> ® HD35 SERIES<br />
MACHINE OPERATION (LED lights)<br />
Light:<br />
STOPPED<br />
HALTED<br />
RUNNING<br />
COMPLETE<br />
SWITCH HOSES<br />
SHIFT TO NEUTRAL<br />
Indicati<strong>on</strong>:<br />
The machine is stopped.<br />
The machine has halted operati<strong>on</strong>.<br />
The machine is running.<br />
The exchange is complete.<br />
The service hoses need to be reversed.<br />
The vehicle needs to be shifted to neutral.<br />
MACHINE STATUS (LED lights)<br />
Light:<br />
NEW ATF LOW<br />
USED ATF FULL<br />
ADD / REMOVE ATF<br />
NEW / USED ATF DRAIN<br />
Indicati<strong>on</strong>:<br />
T<str<strong>on</strong>g>here</str<strong>on</strong>g> is not enough fluid in the new fluid tank<br />
to complete the quantity selected.<br />
The used fluid tank does not have enough<br />
remaining capacity to complete the exchange.<br />
The operator is either adding or removing ATF.<br />
One of the tanks is being drained.<br />
14<br />
Printed in the U.S.A. for <str<strong>on</strong>g>Snap</str<strong>on</strong>g>-<strong>on</strong> ®<br />
Operati<strong>on</strong>s Manual
<str<strong>on</strong>g>Snap</str<strong>on</strong>g>-<strong>on</strong> ® HD35 SERIES<br />
II. System Features & Specificati<strong>on</strong>s<br />
2.05 SPECIAL FUNCTIONS<br />
DANGER<br />
• Wear safety goggles and protective clothing, user and bystander.<br />
• Do not smoke, place metal tools <strong>on</strong> battery or allow a spark or flame in vicinity of battery.<br />
• Clean battery terminals before hooking the machine’s battery clips to them.<br />
• Avoid c<strong>on</strong>tact with automatic transmissi<strong>on</strong> or power steering fluid.<br />
• Dispose of used fluid according to envir<strong>on</strong>mental laws and regulati<strong>on</strong>s.<br />
• Read, understand and follow Safety Instructi<strong>on</strong>s in the fr<strong>on</strong>t pages of this manual and <strong>on</strong><br />
product safety labels.<br />
• TOTALIZER CHECK<br />
Hold “STOP” butt<strong>on</strong> for approximately 5 sec<strong>on</strong>ds.<br />
The c<strong>on</strong>trol panel will first display a dash with up to a 3 digit number. This number indicates how<br />
many times the totalizer has rolled over at 9999 quarts/liters. After a short delay, the total amount<br />
of fluid used since last rollover will be displayed in quarts/liters.<br />
• COMPLETELY DRAIN TANKS<br />
By draining the tanks using Opti<strong>on</strong>s 3 and 4, a small amount of fluid is left in the tanks. To empty<br />
ALL the fluid, select either Opti<strong>on</strong> 3 or 4 by repeatedly pressing the “OPTIONS” butt<strong>on</strong>. Press and<br />
hold the “START” butt<strong>on</strong> for 13 sec<strong>on</strong>ds, until tank begins to drain. The pump will c<strong>on</strong>tinue to run<br />
until the “STOP” butt<strong>on</strong> is pressed.<br />
NOTE: After tanks are completely drained, the system must be primed again before<br />
another exchange is performed.<br />
• SENSOR CHECK<br />
This feature allows you to test the accuracy of the new and used fluid sensors.<br />
1. Press and hold the “OPTIONS” butt<strong>on</strong> for at least 6 sec<strong>on</strong>ds, until you hear an audible<br />
beep.<br />
2. Scroll through the opti<strong>on</strong>s menu by repeatedly pressing the “OPTIONS” butt<strong>on</strong>, until “OP<br />
8” shows <strong>on</strong> the display, followed by a number.<br />
3. Reset this number to zero by pressing the “START” butt<strong>on</strong>.<br />
4. Pour 1 quart of ATF fluid into the new fluid reservoir, and record the number that shows<br />
up <strong>on</strong> the display.<br />
5. Scroll through the opti<strong>on</strong>s menu until “OP 9” shows <strong>on</strong> the display, followed by a number.<br />
6. Reset this number to zero by pressing the “START” butt<strong>on</strong>. Remove the used fluid<br />
screen located in the bottom of the recessed hose tray compartment.<br />
7. Pour 1 quart of ATF fluid into the used fluid reservoir, and record the number that shows<br />
up <strong>on</strong> the display.<br />
8. If the difference between the new and used fluid sensor values is less than 3, the sensors<br />
are within tolerance.<br />
9. If the difference between the new and used fluid sensor values is greater than 3, repeat<br />
steps 1 - 8.<br />
10. If the difference between the values is still greater than 3, refer to Appendix C -<br />
Replacement Parts to order a new board.<br />
Operati<strong>on</strong>s Manual<br />
Printed in the U.S.A. for <str<strong>on</strong>g>Snap</str<strong>on</strong>g>-<strong>on</strong> ® 15
III. Operating Procedures<br />
<str<strong>on</strong>g>Snap</str<strong>on</strong>g>-<strong>on</strong> ® HD35 SERIES<br />
III. OPERATING PROCEDURES<br />
3.01 SUGGESTED ADDITIONAL TOOLS<br />
CAUTION<br />
• Frequently inspect and clean any tools used, and lubricate all n<strong>on</strong>-sealed ratchet<br />
mechanisms with light oil.<br />
• The use of any other accessories not specified in this manual may create a hazard.<br />
• Read, understand and follow Safety Instructi<strong>on</strong>s in the fr<strong>on</strong>t pages of this manual and <strong>on</strong><br />
product safety labels.<br />
Line Wrenches End Wrenches Hex Wrenches<br />
3/8” 3/8” 1/8”<br />
7/16” 7/16” 11/16”<br />
1/2” 1/2"<br />
9/16” 9/16”<br />
5/8” 5/8”<br />
11/16” 11/16”<br />
3/4" 3/4”<br />
Nut Drivers Nut Drivers Filter Band Clamp<br />
(American) (Metric) For replacing canister filters<br />
3/16” 6 mm<br />
1/4” 8 mm<br />
5/16” 9 mm<br />
3/8” 10 mm<br />
7/16” 11 mm<br />
12 mm<br />
13 mm<br />
14 mm<br />
Metric End or<br />
Screwdrivers<br />
Line Wrenches Phillips Standard<br />
10 mm 1 l<strong>on</strong>g 1 l<strong>on</strong>g<br />
11 mm 1 short 1 short<br />
12 mm<br />
13 mm<br />
14 mm<br />
15 mm<br />
16 mm<br />
17 mm<br />
18 mm<br />
19 mm<br />
20 mm<br />
16<br />
Printed in the U.S.A. for <str<strong>on</strong>g>Snap</str<strong>on</strong>g>-<strong>on</strong> ®<br />
Operati<strong>on</strong>s Manual
<str<strong>on</strong>g>Snap</str<strong>on</strong>g>-<strong>on</strong> ® HD35 SERIES<br />
III. Operating Procedures<br />
DANGER<br />
• Vent vehicle’s exhaust away from work area.<br />
• Do not breathe exhaust.<br />
• Read, understand and follow Safety Instructi<strong>on</strong>s in the fr<strong>on</strong>t pages of this manual and <strong>on</strong><br />
product safety labels.<br />
WARNING<br />
• Wear safety goggles and protective clothing, user and bystander.<br />
• Do not operate the HD35 in the vicinity of open c<strong>on</strong>tainers of flammable liquids such as<br />
gasoline.<br />
• This machine is equipped to operate <strong>on</strong> 12-volt DC power <strong>on</strong>ly.<br />
• Do not smoke, place metal tools <strong>on</strong> battery or allow a spark or flame in vicinity of battery.<br />
• Clean battery terminals before hooking the machine’s battery clips to them. During<br />
cleaning, keep airborne corrosi<strong>on</strong> from eyes, nose and mouth.<br />
• Keep yourself, clothing, battery cables and service hoses clear of moving parts such as<br />
fan blades, belts and pulleys.<br />
• Unless instructed otherwise, set parking brake and put gear selector in park.<br />
• Do not leave a running vehicle unattended.<br />
• Keep the service hoses away from hot or moving engine parts. Hoses can split or burst<br />
causing fluid to be expelled.<br />
• Tighten all c<strong>on</strong>necti<strong>on</strong>s properly. Insufficient or excessive torque can result in fluid<br />
leakage.<br />
CAUTION<br />
• Use this equipment <strong>on</strong>ly as described in this manual. Use <strong>on</strong>ly the manufacturer’s<br />
recommended attachments.<br />
• Care should be taken to arrange the battery cables and service hoses so that they will<br />
not be tripped over or pulled.<br />
• The HD35 is fully automatic. Refer to your c<strong>on</strong>trol panel at all times.<br />
CAUTION<br />
•Flushing high mileage cars that have not been previously serviced can cause operating<br />
problems in the transmissi<strong>on</strong>.<br />
• Never pull <strong>on</strong> the power cables or service hoses to transport the HD35. Damage may<br />
occur to these comp<strong>on</strong>ents, or machine may tip over.<br />
• Servicing, transporting, or storing this machine in an attitude other than the normal<br />
operating positi<strong>on</strong> can result in fluid spillage and/or comp<strong>on</strong>ent damage.<br />
Operati<strong>on</strong>s Manual<br />
Printed in the U.S.A. for <str<strong>on</strong>g>Snap</str<strong>on</strong>g>-<strong>on</strong> ® 17
III. Operating Procedures<br />
<str<strong>on</strong>g>Snap</str<strong>on</strong>g>-<strong>on</strong> ® HD35 SERIES <br />
3.02 TRANSMISSION FLUID EXCHANGE<br />
IMPORTANT<br />
New transmissi<strong>on</strong> fluid MUST be 65°F or above for optimal performance.<br />
FIRST TIME OPERATION (Priming the System)<br />
(Only necessary when machine is received, before first operati<strong>on</strong>.)<br />
System must be primed before first use.<br />
1. Fill new fluid tank with at least 3 quarts of transmissi<strong>on</strong> fluid.<br />
2. Insert master c<strong>on</strong>nectors into service hoses (refer to Appendix A – Hoses & Adapters).<br />
3. C<strong>on</strong>nect and fasten two mating adapter hoses together (i.e. #72 & #73).<br />
4. Select “AUTO PRIME” (Opti<strong>on</strong> 7) by repeatedly pressing the “OPTION MENU” butt<strong>on</strong>.<br />
Press “START”. The system will automatically prime.<br />
5. Disc<strong>on</strong>nect adapter hoses, leaving master c<strong>on</strong>nectors attached to service hoses.<br />
NOTE: If the system does not prime, refer to Secti<strong>on</strong> 4.01- Comm<strong>on</strong> Problems/Soluti<strong>on</strong>s for<br />
troubleshooting.<br />
BASIC HOOKUP<br />
1. Positi<strong>on</strong> the HD35 in fr<strong>on</strong>t of vehicle to be serviced.<br />
2. Refer to Secti<strong>on</strong> 5.01- Adapter Hoses to identify the specific adapter hoses required for<br />
each particular vehicle.<br />
3. Locate and disc<strong>on</strong>nect the most easily accessible hose or fitting at the radiator end of the<br />
transmissi<strong>on</strong> cooler system.<br />
4. Attach the two adapter hoses to the vehicle. Be sure the master c<strong>on</strong>nectors are inserted<br />
into the adapter hoses.<br />
5. Attach HD35’s service hoses to the adapter hoses.<br />
BASIC OPERATION<br />
1. Check vehicle owner’s manual for recommended fluid type.<br />
2. Ensure the vehicle’s battery terminals are free of any corrosi<strong>on</strong>.<br />
3. C<strong>on</strong>nect the HD35’s battery cables to the vehicle’s battery (refer to c<strong>on</strong>trol panel).<br />
4. Start the vehicle’s engine (vehicle will automatically go into bypass).<br />
a. Check transmissi<strong>on</strong> fluid level.<br />
b. Check for any possible leaks at c<strong>on</strong>necti<strong>on</strong> points.<br />
5. Using the “QUANTITY” butt<strong>on</strong>, select the amount of fluid required for the particular<br />
vehicle (refer to vehicle’s owner’s manual).<br />
6. Press green “EXCHANGE” butt<strong>on</strong>.<br />
7. If the exchange does not begin within 5-10 sec<strong>on</strong>ds, and the “Shift to Neutral” light comes<br />
<strong>on</strong>, set the vehicle’s emergency brake, and shift the vehicle into Neutral. This will engage<br />
the vehicle’s transmissi<strong>on</strong> pump. Press “EXCHANGE” again.<br />
8. If the exchange does not begin within 5-10 sec<strong>on</strong>ds, and the “Reverse Machine Hoses”<br />
light comes <strong>on</strong>, turn vehicle off, switch the hoses (leave the master c<strong>on</strong>nectors <strong>on</strong><br />
adapter hoses), and then restart the vehicle and press “EXCHANGE” again.<br />
9. After the exchange, the machine will automatically shut off (vehicle will automatically<br />
return to bypass) and the counter display will indicate the amount of fluid flushed.<br />
10. Check transmissi<strong>on</strong> fluid level.<br />
18<br />
Printed in the U.S.A. for <str<strong>on</strong>g>Snap</str<strong>on</strong>g>-<strong>on</strong> ®<br />
Operati<strong>on</strong>s Manual
<str<strong>on</strong>g>Snap</str<strong>on</strong>g>-<strong>on</strong> ® HD35 SERIES<br />
III. Operating Procedures<br />
a. If the level is low, push the “ADD ATF” butt<strong>on</strong>. This will add 2/10 qt. of fluid<br />
(approximately 1/8 of an inch <strong>on</strong> the dipstick).<br />
b. If the level is high, push the “REMOVE ATF” butt<strong>on</strong>. This will remove 2/10 qt. of fluid<br />
(approximately 1/8 of an inch <strong>on</strong> the dipstick).<br />
11. Turn the vehicle’s engine off.<br />
12. Disc<strong>on</strong>nect the adapters (leave the master c<strong>on</strong>nectors attached to the adapter hoses),<br />
and c<strong>on</strong>nect the cooler line to the radiator.<br />
13. Start the vehicle for final inspecti<strong>on</strong>.<br />
a. Check transmissi<strong>on</strong> fluid level.<br />
b. Check for any possible leaks at c<strong>on</strong>necti<strong>on</strong> points.<br />
DRAINING THE USED ATF FLUID<br />
With the battery cables c<strong>on</strong>nected to a 12-volt battery source, c<strong>on</strong>nect an open-end hose (i.e. #55<br />
w/ master c<strong>on</strong>nector attached) to the red service hose (ATF side). Place this hose in your waste<br />
fluid receptacle (be sure black service hose is disc<strong>on</strong>nected from vehicle and is not c<strong>on</strong>nected to<br />
an adapter hose) and then select “DRAIN USED TANK” (Opti<strong>on</strong> 4).<br />
IMPORTANT<br />
• Dispose of used fluid according to envir<strong>on</strong>mental laws and regulati<strong>on</strong>s.<br />
• Read, understand and follow Safety Instructi<strong>on</strong>s in the fr<strong>on</strong>t pages of this manual and <strong>on</strong><br />
product safety labels.<br />
3.03 POWER STEERING FLUID EXCHANGE (EETF304A Only)<br />
NOTE: When in Power Steering mode, the used fluid tank is c<strong>on</strong>stantly m<strong>on</strong>itored. To prevent<br />
overfilling, if the used fluid tank becomes too full the system will disable the “DRAIN” butt<strong>on</strong> <strong>on</strong><br />
the pendant, and audible alarm will sound, and the “Drain Used Fluid” LED will light up. At this<br />
point the “FILL” butt<strong>on</strong> <strong>on</strong> the pendant will remain active, but the “DRAIN” butt<strong>on</strong> is disabled.<br />
1. Ensure the vehicle’s battery terminals are free of any corrosi<strong>on</strong>.<br />
2. Attach the HD35’s battery clips to the vehicle’s battery terminals.<br />
3. Activate power steering mode by pressing “POWER STEERING” butt<strong>on</strong>. The display will<br />
show “PS” to indicate it is in power steering mode.<br />
4. Remove cap from power steering fluid reservoir (and screen if applicable).<br />
5. With the vehicle’s engine running, place hoses (same length) into power steering fluid<br />
reservoir. Use the included dock magnet to hold the hoses in place.<br />
6. Turn the ball valves to the “<strong>on</strong>” positi<strong>on</strong> <strong>on</strong> both hoses.<br />
7. While watching the fluid level in the reservoir, use the “DRAIN” and “ADD” butt<strong>on</strong>s <strong>on</strong> the<br />
remote pendant to repeatedly drain and add fluid. Repeated purging and adding of fluid<br />
will flush the old fluid out of the reservoir.<br />
8. Turn the vehicle’s steering wheel all the way to the left, then all the way to the right, and<br />
back to center.<br />
9. Check the color of the fluid in the reservoir to ensure a clean exchange. Repeat steps 7<br />
& 8 if necessary.<br />
10. When finished, adjust fluid level, turn the ball valves to the “off” positi<strong>on</strong> <strong>on</strong> both hoses,<br />
and remove hoses from power steering fluid reservoir.<br />
11. Turn off vehicle’s engine, and replace reservoir cap and screen (if applicable).<br />
To return to ATF mode, either press the “POWER STEERING” butt<strong>on</strong> again, or disc<strong>on</strong>nect<br />
battery cables, and then rec<strong>on</strong>nect.<br />
Operati<strong>on</strong>s Manual<br />
Printed in the U.S.A. for <str<strong>on</strong>g>Snap</str<strong>on</strong>g>-<strong>on</strong> ® 19
IV. Troubleshooting & Additi<strong>on</strong>al Help<br />
<str<strong>on</strong>g>Snap</str<strong>on</strong>g>-<strong>on</strong> ® HD35 SERIES<br />
IV. TROUBLESHOOTING & ADDITIONAL HELP<br />
DANGER<br />
• Vent vehicle’s exhaust away from work area.<br />
• Do not breathe exhaust.<br />
• Read, understand and follow Safety Instructi<strong>on</strong>s in the fr<strong>on</strong>t pages of this manual and <strong>on</strong><br />
product safety labels.<br />
WARNING<br />
• Wear safety goggles and protective clothing, user and bystander.<br />
• Do not operate the HD35 in the vicinity of open c<strong>on</strong>tainers of flammable liquids such as<br />
gasoline.<br />
• This machine is equipped to operate <strong>on</strong> 12-volt DC power <strong>on</strong>ly.<br />
• Do not smoke, place metal tools <strong>on</strong> battery or allow a spark or flame in vicinity of battery.<br />
• Clean battery terminals before hooking the machine’s battery clips to them. During<br />
cleaning, keep airborne corrosi<strong>on</strong> from eyes, nose and mouth.<br />
• Keep yourself, clothing, battery cables and service hoses clear of hot or moving engine<br />
parts such as fan blades, belts and pulleys.<br />
• Block drive wheels before starting vehicle’s engine to begin an exchange.<br />
• Unless instructed otherwise, set parking brake and put gear selector in park.<br />
• Do not leave a running vehicle unattended.<br />
• Tighten all c<strong>on</strong>necti<strong>on</strong>s properly. Insufficient or excessive torque can result in fluid<br />
leakage.<br />
• Read, understand and follow Safety Instructi<strong>on</strong>s in the fr<strong>on</strong>t pages of this manual and <strong>on</strong><br />
product safety labels.<br />
CAUTION<br />
• Wear safety goggles and protective clothing, user and bystander.<br />
• Avoid c<strong>on</strong>tact with automatic transmissi<strong>on</strong> fluid.<br />
• Read, understand and follow Safety Instructi<strong>on</strong>s in the fr<strong>on</strong>t pages of this manual and <strong>on</strong><br />
product safety labels.<br />
CAUTION<br />
• Frequently inspect and clean any tools used, and lubricate all n<strong>on</strong>-sealed ratchet<br />
mechanisms with light oil.<br />
• The use of any other accessories not specified in this manual may create a hazard.<br />
• Read, understand and follow Safety Instructi<strong>on</strong>s in the fr<strong>on</strong>t pages of this manual and <strong>on</strong><br />
product safety labels.<br />
20<br />
Printed in the U.S.A. for <str<strong>on</strong>g>Snap</str<strong>on</strong>g>-<strong>on</strong> ®<br />
Operati<strong>on</strong>s Manual
<str<strong>on</strong>g>Snap</str<strong>on</strong>g>-<strong>on</strong> ® HD35 SERIES<br />
IV. Troubleshooting & Additi<strong>on</strong>al Help<br />
4.01 COMMON PROBLEMS / SOLUTIONS<br />
Problem: System does not power up, or operates erratically.<br />
Soluti<strong>on</strong>: Check battery c<strong>on</strong>necti<strong>on</strong>. Make sure t<str<strong>on</strong>g>here</str<strong>on</strong>g> are no loose c<strong>on</strong>necti<strong>on</strong>s, and the<br />
machine’s battery clips are not reversed. Remove all corrosi<strong>on</strong> from the battery<br />
terminals.<br />
Problem: Exchange does not start within 5-10 sec<strong>on</strong>ds, and “Shift to Neutral” LED<br />
lights up.<br />
Soluti<strong>on</strong>: Set the vehicle’s emergency brake and shift the vehicle into Neutral. This will<br />
engage the vehicle’s transmissi<strong>on</strong> pump. Press “EXCHANGE” again.<br />
Problem: Exchange does not start within 5-10 sec<strong>on</strong>ds, and “Reverse Machine Hoses”<br />
LED lights up.<br />
Soluti<strong>on</strong>: Pull black knob <strong>on</strong> diverter valve, and press “EXCHANGE” again.<br />
Problem: Either New or Used fluid tank will not drain.<br />
Soluti<strong>on</strong>: Tanks may not drain through the Black service hose. Make sure tanks are being<br />
drained through the RED service hose.<br />
Problem: Machine operati<strong>on</strong> becomes slow.<br />
Soluti<strong>on</strong>: Make sure fluid temperature is at least 65°F. If machine is still slow, replace filters.<br />
Problem: Machine stops after starting an exchange.<br />
Soluti<strong>on</strong>: Make sure system has been primed, and new transmissi<strong>on</strong> fluid is at least 65ºF.<br />
Problem: After starting an exchange, the machine powers off.<br />
Soluti<strong>on</strong> 1: The fuse is blown. Disc<strong>on</strong>nect the battery cables, wait 15 sec<strong>on</strong>ds, and then<br />
re-c<strong>on</strong>nect to reset the fuse.<br />
Soluti<strong>on</strong> 2: If the fuse blows again, replace the filters and try again.<br />
4.02 CUSTOMER SERVICE CONTACT INFORMATION<br />
If you are still experiencing problems, call technical support at:<br />
1-800-225-5786 (U.S.)<br />
1-800-661-1786 (Canada)<br />
Operati<strong>on</strong>s Manual<br />
Printed in the U.S.A. for <str<strong>on</strong>g>Snap</str<strong>on</strong>g>-<strong>on</strong> ® 21
V. Appendix A – Hoses & Adapters <str<strong>on</strong>g>Snap</str<strong>on</strong>g>-<strong>on</strong> ® HD35 SERIES<br />
V. APPENDIX A – HOSES & ADAPTERS<br />
CAUTION<br />
• Do not replace worn parts individually. If adapter hose fittings become worn, see<br />
“Appendix C – Replacement Parts” to order new hoses.<br />
• The use of any other accessories not specified in this manual may create a hazard.<br />
• Read, understand and follow Safety Instructi<strong>on</strong>s in the fr<strong>on</strong>t pages of this manual and <strong>on</strong><br />
product safety labels.<br />
5.01 ADAPTER HOSES<br />
STANDARD HOSES<br />
-Green- 5/8”-18 [F]<br />
941801- Hose #51 SAE 45° Flare - Swivel<br />
(Mates with #52)<br />
(Chrysler - 1993 and Newer)<br />
-Green- 5/8”-18 [M]<br />
941802- Hose #52 SAE 45° Flare<br />
(Mates with #51)<br />
(Chrysler)<br />
-Blue- 5/8”-18 [M]<br />
941803- Hose #53 SAE 45° Flare - Swivel<br />
(Mates with #57)<br />
(General Motors with 3/8" Tube Diameter Lines - All Years)<br />
-Black- 3/8” Diameter Hose [F]<br />
941805- Hose #55 Open End Hose w/Clamp<br />
(Mates with Step Fitting) (Import - 1987 and Newer)<br />
-Blue- 5/8”-18 [F]<br />
941807- Hose #57 SAE 45° Inverted<br />
(Mates with #53)<br />
(General Motors with 3/8” Tube Diameter Lines - 1997 and<br />
Newer)<br />
-Black- 1/2” Diameter Hose [F]<br />
941809- Hose #59 Open End Hose w/Clamp<br />
(Mates with Step Fitting) (Import)<br />
-Black- 5/16” Diameter Hose [F]<br />
941813- Hose #63 Open End Hose w/Clamp<br />
(Mates with Step Fitting) (Import)<br />
-Green- 1/4”-18 [M]<br />
941815- Hose #65 NPTF<br />
(Mates with #75) (Jeep Cherokee- 1980-1986)<br />
(C<strong>on</strong>tinued <strong>on</strong> next page)<br />
22<br />
Printed in the U.S.A. for <str<strong>on</strong>g>Snap</str<strong>on</strong>g>-<strong>on</strong> ®<br />
Operati<strong>on</strong>s Manual
<str<strong>on</strong>g>Snap</str<strong>on</strong>g>-<strong>on</strong> ® HD35 SERIES <br />
V. Appendix A – Hoses & Adapters<br />
-Red- 1/2”-20 [F]<br />
941816- Hose #66 SAE 45° Inverted<br />
(Mates with #67)<br />
(Chrysler, Ford Aerostar, Jaguar, Mercedes,& Cadillac-1985 and<br />
Newer) * Needs Ford Slide Tool 940140 for Aerostar / Windstar<br />
-Red- 1/2”-20 [M]<br />
941817- Hose #67 SAE 45°<br />
(Mates with #66)<br />
(Chrysler and Ford)<br />
-Red- 5/8”-18 [M]<br />
941818- Hose #68 SAE Inverted - Swivel<br />
(Mates with #69)<br />
(Ford With Large Nut Adapter - 1980 and Newer)<br />
-Red- 5/8”-18 [F]<br />
941819- Hose #69 SAE Inverted<br />
(Mates with #68)<br />
(Ford)<br />
-Blue- 1/2”-20 [M]<br />
941820- Hose #70 SAE 90° Inverted - Swivel<br />
(Mates with #71)<br />
(General Motors with 5/16" Tube Diameter Lines - All Years)<br />
-Blue- 1/2”-20 [F]<br />
941821- Hose #71 SAE Inverted<br />
(Mates with #70)<br />
(General Motors)<br />
-Red- 1/2”-20 [F]<br />
941822- Hose #72 SAE Inverted<br />
(Mates with #73)<br />
(Ford)<br />
-Red- 1/2”-20 [M]<br />
941823- Hose #73 SAE 90° Inverted - Swivel<br />
(Mates with #72)<br />
(Ford 5/16" Small / L<strong>on</strong>g Nut Adapter - 1980 and Newer)<br />
-Green- M14 x 1.5 [F]<br />
941825- Hose #75 Swivel O-ring<br />
(Mates with #65) (Jeep Cherokee, Ford Escort - 1980-1986)<br />
-Red- M14 [F]<br />
940874- Hose #78 Banjo Fitting<br />
(Mates with #79)<br />
(Ford Escort – 1994 and Newer)<br />
-Red- M14 x 1.5 [M]<br />
940875- Hose #79 Bolt w/ 2 Washers<br />
(Mates with #78)<br />
(Ford Escort - 1994 and Newer)<br />
-Black- 1/4” [M]<br />
941828- Hose #80 Universal Bump Fitting<br />
(Mates with #81)<br />
(Import)<br />
Operati<strong>on</strong>s Manual<br />
Printed in the U.S.A. for <str<strong>on</strong>g>Snap</str<strong>on</strong>g>-<strong>on</strong> ® 23
V. Appendix A – Hoses & Adapters <str<strong>on</strong>g>Snap</str<strong>on</strong>g>-<strong>on</strong> ® HD35 SERIES<br />
-Black- 1/4” Diameter Hose [F]<br />
941829- Hose #81 Open End Hose w/Clamp<br />
(Mates with #80)<br />
(Import)<br />
-Black- 5/16” [M]<br />
941830- Hose #82 Universal Bump Fitting<br />
(Mates with #63)<br />
(Infiniti, Lexus, and BMW - 1980 and Newer)<br />
-Black- 3/8” [M]<br />
941831- Hose #83 Universal Bump Fitting<br />
(Mates with #55)<br />
(Toyota, Nissan, H<strong>on</strong>da, Ford and Chrysler - 1975 and Newer)<br />
-Black- 1/2” [M]<br />
941832- Hose #84 Universal Bump Fitting<br />
(Mates with #59)<br />
(Toyota, Nissan and H<strong>on</strong>da - 1980 and Newer)<br />
-Green- 9/16”-18 [M]<br />
941835- Hose #87 JIC 37° Flare - Inverted<br />
(Mates with #88)<br />
(Dodge Durango/Dakota - All Years)<br />
-Green- 9/16”-18 [F]<br />
941836- Hose #88 JIC 37° Flare - Swivel<br />
(Mates with #87)<br />
(Dodge Durango/Dakota - All Years)<br />
-Black- 3/4”-16 [M]<br />
941841- Hose #89 SAE O-Ring<br />
(Mates with #90)<br />
(Chevy DuraMax w/Allis<strong>on</strong> Transmissi<strong>on</strong> – 2001 & Newer)<br />
-Black- 3/4”-16 [F]<br />
941842- Hose #90 SAE O-Ring Adapter<br />
(Mates with #89)<br />
(Chevy DuraMax w/Allis<strong>on</strong> Transmissi<strong>on</strong> – 2001 & Newer)<br />
ALLISON HOSES (Opti<strong>on</strong>al)<br />
-Black- MD3060, MD3066, & MD3560 Series<br />
941844- Hose #134 [Male]<br />
(Mates with #135)<br />
-Black- MD3060, MD3066, & MD3560 Series<br />
941845- Hose #135 [Female]<br />
(Mates with #134)<br />
-Black- 1000, 2000 & 3000 Series<br />
941846- Hose #136 [Male]<br />
(Mates with #137)<br />
-Black- 1000, 2000 & 3000 Series<br />
941847- Hose #137 [Female]<br />
(Mates with #136)<br />
24<br />
Printed in the U.S.A. for <str<strong>on</strong>g>Snap</str<strong>on</strong>g>-<strong>on</strong> ®<br />
Operati<strong>on</strong>s Manual
<str<strong>on</strong>g>Snap</str<strong>on</strong>g>-<strong>on</strong> ® HD35 SERIES <br />
V. Appendix A – Hoses & Adapters<br />
-Black- HD4060 & HD4560 Series<br />
941848- Hose #138 [Female]<br />
(Mates with #139)<br />
-Black- HD4060 & HD4560 Series<br />
941849- Hose #139 [Male]<br />
(Mates with #138)<br />
-Black- AT545 Series<br />
941850- Hose #140 [Female]<br />
(Mates with #141)<br />
-Black- AT545 Series<br />
941851- Hose #141 [Male]<br />
(Mates with #140)<br />
940837 12” Tube with Air Nipple<br />
(EETF304A Only)<br />
(All Vehicles)<br />
5.02 ADAPTERS<br />
The following adapters allow quick and easy hookup to virtually any vehicle make and model.<br />
940328 942163 942162<br />
1/2” Adapter GM Adapter Quick Disc<strong>on</strong>nect Tool<br />
940329 940334 940831<br />
3/8” Adapter 5/16” Adapter Master Hose C<strong>on</strong>nector<br />
Operati<strong>on</strong>s Manual<br />
Printed in the U.S.A. for <str<strong>on</strong>g>Snap</str<strong>on</strong>g>-<strong>on</strong> ® 25
VI. Appendix B - Maintenance<br />
<str<strong>on</strong>g>Snap</str<strong>on</strong>g>-<strong>on</strong> ® HD35 SERIES<br />
VI. APPENDIX B – MAINTENANCE<br />
NOTE: The <str<strong>on</strong>g>Snap</str<strong>on</strong>g>-<strong>on</strong> HD35 requires a minimal amount of maintenance.<br />
CAUTION<br />
• Frequently inspect and clean any tools used, and lubricate all n<strong>on</strong>-sealed ratchet<br />
mechanisms with light oil.<br />
• The use of any other accessories not specified in this manual may create a hazard.<br />
• Read, understand and follow Safety Instructi<strong>on</strong>s in the fr<strong>on</strong>t pages of this manual and <strong>on</strong><br />
product safety labels.<br />
6.01 MAINTENANCE PROCEDURES<br />
• Replace Canister Filters (Part#: 940796) every 50 exchanges, or as needed<br />
Use a standard filter band clamp tool to unscrew old filters, and replace them with new filters.<br />
Make sure new filters are <strong>on</strong> tight.<br />
• Clean Filter Screen (EETF304A Only) every 50 exchanges, or as needed<br />
Remove service door using appropriate tool. Open filter screen housing by unscrewing the top.<br />
Use a sharp pick to remove screen from housing. Clean using degreaser and brush, and blow out<br />
with air compressor. Put screen back in housing.<br />
• Clean Used Fluid Screen (Located in bottom of recessed hose tray area)<br />
This helps eliminate surface tensi<strong>on</strong> caused by debris and c<strong>on</strong>taminati<strong>on</strong> from the air.<br />
Using a sharp pick, remove screen. Clean using degreaser and brush, and blow out with air<br />
compressor.<br />
• Wipe Down Exterior using a soft, damp cloth.<br />
26<br />
Printed in the U.S.A. for <str<strong>on</strong>g>Snap</str<strong>on</strong>g>-<strong>on</strong> ®<br />
Operati<strong>on</strong>s Manual
<str<strong>on</strong>g>Snap</str<strong>on</strong>g>-<strong>on</strong> ® HD35 SERIES<br />
VII. Appendix C – Replacement Parts<br />
VII. APPENDIX C – REPLACEMENT PARTS<br />
7.01 REPLACEMENT PART LIST<br />
Part #<br />
Descripti<strong>on</strong><br />
NOR940969 C<strong>on</strong>trol Panel w/ Elec. Board & Label (EETF304A) [MFX]<br />
NOR941403 C<strong>on</strong>trol Panel w/ Elec. Board & Label (EETF303A) [FX]<br />
NOR941210 Battery Cable Assembly<br />
NOR940473 Motor C<strong>on</strong>trol Board<br />
NOR940469 Sensor Rod<br />
NOR941167 5/8" Fluid Tube<br />
NOR941226 Fluid Tube Elbow Fitting<br />
NOR940551 PSX Fill Pump [EETF304A Only]<br />
NOR940470 Manifold/Pump Assembly<br />
NOR940843 Pressure Switch (Factory preset to 6 psi)<br />
NOR940839 3/2 Solenoid Valve [Size 8] (S1)<br />
NOR940840 3/2 Solenoid Valve [Size 10] (S2)<br />
NOR940841 Coil with Spade C<strong>on</strong>nector [Size 8] (S1)<br />
NOR940842 Coil with Spade C<strong>on</strong>nector [Size 10] (S2)<br />
NOR940775 Standard Hose Kit<br />
NOR941168 Allis<strong>on</strong> Hose Kit<br />
NOR940927 Hose Tray<br />
NOR941220 Hose Rack<br />
NOR941171 Internal Hose Kit<br />
NOR940328 1/2 Adapter<br />
NOR940329 3/8 Adapter<br />
NOR940334 5/16 Adapter<br />
NOR942162 Quick Disc<strong>on</strong>nect Tool<br />
NOR942163 GM Adapter<br />
NOR940831 Master Hose C<strong>on</strong>nector<br />
NOR940785 Service Hose Black<br />
NOR940786 Service Hose Red<br />
NOR940787 Service Hose Black (PSX) [EETF304A Only]<br />
NOR940788 Service Hose Red (PSX) [EETF304A Only]<br />
NOR940837 12" Tube w/ Air Nipple (PSX) [EETF304A Only]<br />
NOR940834 Pendant Assembly (PSX) [EETF304A Only]<br />
NOR940663 Pendant Switch (PSX) [EETF304A Only]<br />
NOR940922 Dock Magnet (PSX) [EETF304A Only]<br />
NOR940913 New Power Steering Fluid Bottle [EETF304A Only]<br />
Operati<strong>on</strong>s Manual<br />
Printed in the U.S.A. for <str<strong>on</strong>g>Snap</str<strong>on</strong>g>-<strong>on</strong> ® 27
VII. Appendix C – Replacement Parts<br />
<str<strong>on</strong>g>Snap</str<strong>on</strong>g>-<strong>on</strong> ® HD35 SERIES<br />
NOR941162 Chassis Kent Gray<br />
NOR941163 Top Sink Kent Gray<br />
NOR941164 C<strong>on</strong>sole Kent Gray<br />
NOR942113 Tank Cap<br />
NOR941160 Red Tank - New Fluid<br />
NOR941161 Red Tank - Waste Fluid<br />
NOR940970 Service Door with Label (EETF304A) [MFX]<br />
NOR941404 Service Door with Label (EETF303A) [FX]<br />
NOR942118 Locking Caster Wheel<br />
NOR942137 Caster Wheel<br />
NOR940905 Vinyl Mat<br />
NOR940796 Canister Filter<br />
NOR940552 In-Line Filter (PSX)<br />
NOR942150 Used Fluid Screen (1 1/4" Diameter)<br />
NOR941209 Operati<strong>on</strong>s Manual<br />
NOR941208 Operati<strong>on</strong>al Overview / Hose Chart<br />
NOR940844 Adapter Instructi<strong>on</strong> Sheet<br />
NOR940851 <str<strong>on</strong>g>Snap</str<strong>on</strong>g>-<strong>on</strong> Marketing Kit<br />
NOR940872 Filter/Brochure Kit<br />
Shipping Cart<strong>on</strong> Package<br />
NOR940779 Top / Bottom Tray<br />
NOR940781 Tube<br />
28<br />
Printed in the U.S.A. for <str<strong>on</strong>g>Snap</str<strong>on</strong>g>-<strong>on</strong> ®<br />
Operati<strong>on</strong>s Manual
<str<strong>on</strong>g>Snap</str<strong>on</strong>g>-<strong>on</strong> ® HD35 SERIES<br />
VII. Appendix C – Replacement Parts<br />
7.02 REPLACEMENT PART ILLUSTRATIONS<br />
Operati<strong>on</strong>s Manual<br />
Printed in the U.S.A. for <str<strong>on</strong>g>Snap</str<strong>on</strong>g>-<strong>on</strong> ® 29
VII. Appendix C – Replacement Parts<br />
<str<strong>on</strong>g>Snap</str<strong>on</strong>g>-<strong>on</strong> ® HD35 SERIES<br />
7.03 ORDERING INFORMATION<br />
To order replacement parts for the <str<strong>on</strong>g>Snap</str<strong>on</strong>g>-<strong>on</strong> HD35 SERIES, call:<br />
1-800-225-5786 (U.S.)<br />
1-800-661-1786 (Canada)<br />
30<br />
Printed in the U.S.A. for <str<strong>on</strong>g>Snap</str<strong>on</strong>g>-<strong>on</strong> ®<br />
Operati<strong>on</strong>s Manual
<str<strong>on</strong>g>Snap</str<strong>on</strong>g>-<strong>on</strong> ® HD35 SERIES<br />
Warranty Informati<strong>on</strong><br />
LIMITED ONE (1) YEAR WARRANTY<br />
<str<strong>on</strong>g>Snap</str<strong>on</strong>g>-<strong>on</strong> EETF303A & EETF304A<br />
<str<strong>on</strong>g>Snap</str<strong>on</strong>g>-<strong>on</strong> warrants <strong>on</strong>ly to the original Purchaser that under normal use, care and service, the<br />
<strong>Equipment</strong> (except as otherwise provided <str<strong>on</strong>g>here</str<strong>on</strong>g>in) shall be free from defects in material and<br />
workmanship for <strong>on</strong>e year from the date of original invoice. External hoses, remote c<strong>on</strong>trol<br />
modules, adapters and all other attachments, supplies and c<strong>on</strong>sumables (except as otherwise<br />
provided <str<strong>on</strong>g>here</str<strong>on</strong>g>in) are warranted for 90 calendar days from the date of original invoice. Filter<br />
elements are not warranted. Printed circuit boards purchased from, but not installed by Seller are<br />
not warranted.<br />
SELLER’S OBLIGATIONS UNDER THIS WARRANTY ARE LIMITED SOLELY TO THE<br />
REPAIR OR, AT SELLER’S OPTION, REPLACEMENT OF EQUIPMENT OR PARTS WHICH<br />
TO SELLER’S SATISFACTION ARE DETERMINED TO BE DEFECTIVE AND WHICH ARE<br />
NECESSARY, IN SELLER’S JUDGEMENT, TO RETURN THE EQUIPMENT TO GOOD<br />
OPERATING CONDITION. NO OTHER WARRANTIES EXPRESS OR IMPLIED OR<br />
STATUTORY, INCLUDING WITHOUT LIMITATION ANY IMPLIED WARRANTY OF<br />
MERCHANTABILITY OR FITNESS FOR A PARTICULAR PURPOSE, SHALL APPLY AND<br />
ALL SUCH WARRANTIES ARE HEREBY EXPRESSLY DISCLAIMED.<br />
This warranty does not cover (and separate charges for parts, labor and related expenses shall<br />
apply to) any damage to, malfuncti<strong>on</strong>ing, inoperability or improper operati<strong>on</strong> of the <strong>Equipment</strong><br />
caused by, resulting from or attributable to (A) abuse, misuse or tampering; (B) alterati<strong>on</strong>,<br />
modificati<strong>on</strong> or adjustment of the <strong>Equipment</strong> by any<strong>on</strong>e other than Seller’s authorized<br />
representatives; (D) improper or negligent use, applicati<strong>on</strong>, operati<strong>on</strong>, care, cleaning, storage or<br />
handling; (E) fire, water, wind, lightning or other natural causes; (F) adverse envir<strong>on</strong>mental<br />
c<strong>on</strong>diti<strong>on</strong>s, including, without limitati<strong>on</strong>, excessive heat, moisture, corrosive elements, or dust or<br />
other air c<strong>on</strong>taminants, radio frequency interference, electric power failure, power line voltages<br />
bey<strong>on</strong>d those specified for the equipment, unusual physical, electrical or electromagnetic stress,<br />
and/or any other c<strong>on</strong>diti<strong>on</strong> outside of Seller’s envir<strong>on</strong>mental specificati<strong>on</strong>s; (G) use of the<br />
<strong>Equipment</strong> in combinati<strong>on</strong> or c<strong>on</strong>necti<strong>on</strong> with other equipment, attachments, supplies or<br />
c<strong>on</strong>sumables not manufactured or supplied by Seller; or (H) failure to comply with any applicable<br />
federal, state or local regulati<strong>on</strong>.<br />
Repairs or replacements qualifying under this Warranty will be performed <strong>on</strong> regular business<br />
days during Seller’s normal working hours within a reas<strong>on</strong>able time following Purchaser’s<br />
request. All requests for Warranty service must be made during the stated Warranty period.<br />
This warranty is n<strong>on</strong>-transferable.<br />
Operati<strong>on</strong>s Manual<br />
Printed in the U.S.A. for <str<strong>on</strong>g>Snap</str<strong>on</strong>g>-<strong>on</strong> ® 31
Maintenance Log<br />
Use to keep track of maintenance performed <strong>on</strong> your <str<strong>on</strong>g>Snap</str<strong>on</strong>g>-<strong>on</strong> HD35.<br />
Date<br />
ATF Filters<br />
(Replaced)<br />
PSX Screens<br />
(Cleaned)<br />
Other Maintenance<br />
Performed<br />
Performed by:
Notes
Notes


