Airplane Design Airplane Design - Delta Education
Airplane Design Airplane Design - Delta Education
Airplane Design Airplane Design - Delta Education

Create successful ePaper yourself
Turn your PDF publications into a flip-book with our unique Google optimized e-Paper software.
activity<br />
5<br />
<strong>Airplane</strong> <strong>Design</strong><br />
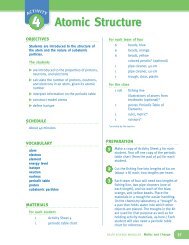
OBJECTIVES<br />
This activity introduces students to paper<br />
airplanes and some basic elements of<br />
airplane design.<br />
The students<br />
build and fly two different types of paper<br />
airplanes<br />
observe how the shape of the paper<br />
airplane affects its flight performance<br />
identify the parts of a real airplane<br />
discover that streamlining reduces drag<br />
in flight<br />
SCHEDULE<br />
Session I About 45 minutes<br />
Session II About 30 minutes<br />
VOCABULARY<br />
drag<br />
fuselage<br />
streamlined<br />
MATERIALS<br />
tail assembly<br />
wings<br />
For each student<br />
1 Activity Sheet 5, Parts A and B<br />
For each team of two<br />
2 shts paper, plain*<br />
1 paper clip, large<br />
For the class<br />
1 Dart <strong>Design</strong><br />
1 kite (from Activity 4)<br />
1 penny*<br />
pictures of airplanes*<br />
1 Slider <strong>Design</strong><br />
1 roll tape, transparent<br />
*provided by the teacher<br />
PREPARATION<br />
Session I<br />
1 Make a copy of Activity Sheet 5, Part A, for<br />
each student. Make a copy of the Dart<br />
<strong>Design</strong> and the Slider <strong>Design</strong> for each<br />
team of two.<br />
2<br />
3<br />
4<br />
Session II<br />
1<br />
2<br />
3<br />
Clear some space where students can<br />
launch their paper airplanes. You may<br />
want to conduct the activity in a large<br />
room, like the gymnasium or cafeteria, or<br />
go outdoors if it is not too windy.<br />
You will need to borrow a team’s kite (in<br />
good condition) from Activity 4. You will<br />
also need a penny and a piece of<br />
transparent tape.<br />
Each team of two will need two sheets of<br />
paper, a copy of the Dart and Slider<br />
<strong>Design</strong>s, one large paper clip, and a small<br />
piece of transparent tape.<br />
Make a copy of Activity Sheet 5, Part B, for<br />
each student.<br />
Several days before the activity, ask<br />
students to begin collecting pictures of<br />
different kinds of airplanes. Tell them to<br />
bring their pictures to class to share with<br />
others.<br />
The teams will need their Sliders and<br />
Darts from Session I.<br />
delta science modules Flight and Rocketry 13<br />
© <strong>Delta</strong> <strong>Education</strong> LLC. All rights reserved.
BACKGROUND INFORMATION<br />
When we think of flying machines, we<br />
usually think of airplanes. An airplane is a<br />
heavier-than-air craft supported in flight by<br />
the movement of air around its wings. As<br />
students will learn in Activity 7, the curved<br />
upper surface of the wing allows the plane<br />
to achieve lift and overcome gravity.<br />
The wings are attached to the midsection of<br />
the fuselage. The fuselage is the tubeshaped<br />
body of the aircraft that houses the<br />
passengers and cargo. The cockpit is<br />
located at the front end, or nose, of the<br />
fuselage. At the rear of the fuselage is the<br />
tail assembly. The tail assembly consists of<br />
horizontal and vertical stabilizers, which<br />
keep the plane balanced in flight.<br />
An airplane’s engines provide the power, or<br />
thrust, that pushes the craft forward<br />
through the air. As the airplane moves<br />
forward, it runs into molecules of air. This<br />
air resistance, called drag, hinders flight by<br />
reducing the speed of the aircraft and<br />
therefore the lifting capacity of the aircraft’s<br />
wings. The faster the plane moves through<br />
the air, the greater the drag.<br />
To reduce drag, airplanes are designed to<br />
be streamlined. The fuselage, for example,<br />
is shaped like a missile. Its streamlined<br />
shape allows air to flow freely and smoothly<br />
over the surfaces of the airplane body. The<br />
more streamlined the aircraft, the less drag<br />
it produces.<br />
The shape of the wings is as important as<br />
the shape of the fuselage. For example,<br />
high-speed jets have narrow, swept-back<br />
wings. The narrow wings are used because<br />
these planes have tremendous thrust and<br />
so do not need large wing areas to produce<br />
lift. The sleek wing design allows fast jet<br />
planes to travel through the air with<br />
minimal resistance. Single-engine planes<br />
have broad, rectangular wings. Broader<br />
wings are used to enhance lift on smaller<br />
planes with less powerful thrust. In short,<br />
the shape of an aircraft depends largely on<br />
the speed at which it will fly.<br />
In Session I of this activity, students build<br />
their own paper airplanes and observe how<br />
the shape of an aircraft—in particular, the<br />
wings—affects its flight performance. In<br />
Session II, students learn the parts of a<br />
real airplane (see Figure 5-1) and the<br />
importance of a streamlined design.<br />
tail assembly<br />
wing<br />
fuselage<br />
wing<br />
Figure 5-1. The parts of an airplane.<br />
14 activity 5 <strong>Airplane</strong> <strong>Design</strong><br />
© <strong>Delta</strong> <strong>Education</strong> LLC. All rights reserved.
Activity Sheet 5, Part A<br />
<br />
Activity Sheet 5, Part B<br />
<strong>Airplane</strong> <strong>Design</strong><br />
1. Draw pictures of your team’s Slider and Dart.<br />
Slider<br />
Dart<br />
<strong>Airplane</strong> <strong>Design</strong><br />
7.Add the following labels to the diagram of the airplane: wings, fuselage, tail<br />
assembly .<br />
wing<br />
tail assembly<br />
2. Predict:<br />
Which plane do you think can fly faster? Why?<br />
Answers will vary.<br />
Which plane do you think can stay in the air longer? Why?<br />
Answers will vary.<br />
fuselage<br />
wing<br />
8.What force slows a plane down as it moves through the air?<br />
Why are airplanes designed to be streamlined?<br />
drag<br />
to reduce the amount of drag they produce in flight<br />
3. Describe the flight path of the Slider.<br />
The Slider meanders and may fly in lazy circles.<br />
9.Add wings to the airplane bodies below.<br />
Does the slider fly better at high speeds or low speeds?<br />
4. Describe the flight path of the Dart.<br />
The Dart flies very straight.<br />
low speeds<br />
Does the dart fly better at high speeds or low speeds?<br />
5. Which plane flew faster?<br />
Which plane stayed in the air longer?<br />
the Dart<br />
the Slider<br />
6. How does the shape of each plane affect its flight performance?<br />
high speeds<br />
The Dart is more pointed and therefore flies quickly<br />
and in a straight path. The Slider is broad, which slows<br />
it down but also keeps it in the air longer.<br />
10.Think about your experiments with paper airplanes in Session I. Which of the<br />
planes above do you think flies better at high speeds? Which flies better at<br />
low speeds?<br />
The airplane with swept-back wings probably flies<br />
better at high speeds. The plane with broad, straight<br />
wings probably flies better at low speeds.<br />
1<br />
Guiding the Activity<br />
Session I<br />
Borrow a student’s kite from Activity 4.<br />
Remove the tail, paper clip, and string. Insert<br />
a penny into the ridge at the front end of the<br />
craft, and tape the penny in place.<br />
Stand where all students can see you. Hold<br />
the kite at about eye level, supporting it from<br />
underneath with both hands. Ask students,<br />
What do you think will happen if I let go of<br />
this kite?<br />
Release the kite by simply moving your hands<br />
out from under it. Then ask students, Did the<br />
kite fall straight to the floor?<br />
Ask, In what direction did the kite travel?<br />
Additional Information<br />
You may want to make a new kite if students’<br />
kites are crumpled or torn.<br />
Students will probably say that the kite will<br />
fall to the floor.<br />
Students should have observed the tailless,<br />
stringless kite “glide” to the floor.<br />
Elicit that the kite traveled forward as well as<br />
down.<br />
delta science modules Flight and Rocketry 15<br />
© <strong>Delta</strong> <strong>Education</strong> LLC. All rights reserved.
Guiding the Activity<br />
Ask, What kind of flying machine does this<br />
remind you of?<br />
Additional Information<br />
a glider or airplane<br />
2<br />
Tell students that this activity will introduce<br />
them to paper airplanes and some basic<br />
principles of real airplane design.<br />
Distribute a copy of Activity Sheet 5, Part A,<br />
to each student. Divide the class into teams of<br />
two, and distribute two pieces of plain paper,<br />
one copy of the Dart <strong>Design</strong>, one copy of the<br />
Slider <strong>Design</strong>, a large paper clip, and a piece<br />
of transparent tape to each team.<br />
Review the folding instructions with students.<br />
Then have one student in each team make the<br />
Dart while the other student makes the Slider.<br />
Tell students that their Slider will fly better if<br />
they attach the paper clip to the nose of the<br />
craft (see Figure 5-2). Have students write<br />
their names on their gliders.<br />
Remind students that paper airplanes fly best<br />
when they are folded carefully, with sharp<br />
creases at every fold.<br />
Dart<br />
Slider<br />
3<br />
Figure 5-2. The completed Dart and Slider.<br />
After the teams have finished making their<br />
paper airplanes, have students compare the<br />
designs. Ask, How would you describe the<br />
Slider?<br />
Ask, How would you describe the Dart?<br />
Have students draw pictures of their Sliders<br />
and Darts at the top of their activity sheets.<br />
Then ask, Which design do you think can fly<br />
faster? Why? Have students record their<br />
predictions on their activity sheets.<br />
The Slider is broad, with wide, straight<br />
wings.<br />
The Dart is very pointed, with narrow, sweptback<br />
wings.<br />
Again, answers may vary. Students may<br />
suspect that the pointed plane (the Dart) can<br />
fly faster.<br />
16 activity 5 <strong>Airplane</strong> <strong>Design</strong><br />
© <strong>Delta</strong> <strong>Education</strong> LLC. All rights reserved.
4<br />
5<br />
Guiding the Activity<br />
Ask, Which plane do you think can stay in<br />
the air longer? Why? Have students record<br />
their predictions on their activity sheets.<br />
Tell students that each team is going to<br />
conduct a series of test flights to see how<br />
their planes perform.<br />
Upon arriving, have the teams spread out to<br />
give themselves plenty of “airspace.”<br />
Starting with the Slider, have students launch<br />
the plane by giving it a very gentle push.<br />
Have students repeat the launch several<br />
times. Then ask, How would you describe the<br />
flight path of the Slider? Have students<br />
record their observations in step 3 of their<br />
activity sheets.<br />
Now have students launch the Slider with a<br />
harder push and observe what happens. Ask,<br />
What happened when you launched the<br />
Slider with a lot of force?<br />
Ask, Do you think the Slider flies better at<br />
high speeds or low speeds? Have students<br />
write their ideas on their activity sheets.<br />
Next, have students repeat the test flights,<br />
this time with the Dart. Begin by having<br />
students launch the Dart with some force.<br />
Additional Information<br />
Answers will vary. Some students may<br />
suspect that the plane with the larger wings<br />
(the Slider) can fly longer.<br />
Tell students to collect their paper airplanes,<br />
activity sheets, and a pencil, and to follow<br />
you to the launching area (if other than the<br />
classroom).<br />
Encourage partners to stand some meters<br />
apart and launch their planes at one another.<br />
This way students can take turns launching<br />
and observing. They will also spend less time<br />
retrieving planes.<br />
The Slider should be grasped from behind<br />
and launched by pushing it into the air. If the<br />
plane climbs steeply and then dives to the<br />
ground, tell students to angle the plane down<br />
a bit at launching. If the plane just dives to<br />
the ground, students should adjust the angle<br />
up a bit.<br />
The Slider has a meandering flight path.<br />
Some of the Sliders may fly in lazy circles.<br />
The Slider may have fallen straight to the<br />
floor, or it may have climbed or dived sharply<br />
before crashing. In any event, the Slider<br />
probably did not fly well when launched with<br />
a lot of force.<br />
Students should conclude that a Slider flies<br />
best at low speeds.<br />
Tell students to hold the Dart by the crease<br />
beneath the wings, a few inches back from<br />
the nose, and to launch it in the usual way. If<br />
their plane climbs steeply or dives, tell them<br />
to adjust their launching angle.<br />
delta science modules Flight and Rocketry 17<br />
© <strong>Delta</strong> <strong>Education</strong> LLC. All rights reserved.
Guiding the Activity<br />
After several test flights, ask, How would you<br />
describe the flight path of the Dart? Have<br />
students record their observations in step 4 of<br />
their activity sheets.<br />
Now have students launch the Dart with a<br />
very gentle push and observe what happens.<br />
Ask, What happened when you launched the<br />
Dart with very little force?<br />
Ask, Do you think the Dart flies better at<br />
high speeds or low speeds? Have students<br />
write their ideas on their activity sheets.<br />
Additional Information<br />
Unlike the Slider, the Dart has a very straight<br />
flight path.<br />
Without much speed behind it, the Dart<br />
probably crashed to the floor.<br />
Students should conclude that a Dart flies<br />
best at high speeds.<br />
6<br />
Next, have students see which plane they can<br />
get to fly the fastest and which they can get to<br />
fly the longest.<br />
7<br />
For the first contest, they should compare the<br />
flight speeds of each Glider. For the second<br />
contest, they should count aloud the number<br />
of seconds each plane is aloft.<br />
When students have finished, ask, Which<br />
plane flew the fastest? Which plane stayed<br />
in the air the longest? Have students record<br />
their answers on their activity sheets.<br />
After students have completed their test<br />
flights, return to the classroom to discuss<br />
their results.<br />
Ask, Which plane flew best at high speeds?<br />
Ask, Which plane flew best at lower speeds?<br />
Ask, Which plane flew fastest?<br />
Ask, Which plane remained in the air for the<br />
longest time?<br />
Borrow a team’s Dart and a Slider. Hold them<br />
up and encourage students to speculate<br />
about the differences in design that led to the<br />
difference in flight performance of these two<br />
paper planes. Tell students to write their<br />
conclusions at the bottom of their activity<br />
sheets.<br />
Students should have found that a Dart flew<br />
the fastest while a Slider remained airborne<br />
the longest.<br />
the Dart<br />
the Slider<br />
the Dart<br />
the Slider<br />
The Dart, with its narrow, swept-back wings,<br />
cuts through the air more cleanly and so<br />
travels fast and in a straight path. The Slider<br />
is a wider, bulkier glider, resulting in a slower,<br />
lazier flight. However, the broad wings keep<br />
it in the air longer.<br />
18 activity 5 <strong>Airplane</strong> <strong>Design</strong><br />
© <strong>Delta</strong> <strong>Education</strong> LLC. All rights reserved.
Guiding the Activity<br />
Tell students that in Session II, they are going<br />
to learn the parts of a real airplane and the<br />
importance of streamlining in airplane design.<br />
Additional Information<br />
8<br />
9<br />
10<br />
Tell students to save their paper airplanes for<br />
use in Session II. Tell them to store their<br />
activity sheets and copies of the Dart and<br />
Slider <strong>Design</strong>s in their folders.<br />
Session II<br />
Pass around the pictures of airplanes that<br />
students have collected. Give students an<br />
opportunity to study and compare the size<br />
and shape of the different aircraft.<br />
Then distribute a copy of Activity Sheet 5,<br />
Part B, to each student, and review the parts<br />
of an airplane as a class. Write the words<br />
fuselage, wings, and tail assembly on the<br />
board. Tell students to label the diagram on<br />
their activity sheet.<br />
Ask students, What do you notice about the<br />
shape of the fuselage?<br />
Ask, Why do you think the fuselage is<br />
shaped that way?<br />
Remind students of what happens as objects<br />
move through the air. Ask, What did your<br />
parachutes run into as they fell in Activity 2?<br />
Remind students that as an object moves<br />
through the air, it bumps into molecules of air<br />
and pushes them out of the way and that<br />
each molecule offers some resistance to<br />
being pushed aside.<br />
Write the word drag on the board. Explain<br />
that the air resistance that a airplane<br />
encounters as it is pushed through the air is<br />
called drag. Drag hinders flight by slowing<br />
down the speed of the aircraft.<br />
The body of the plane is the fuselage. The<br />
fuselage houses the passengers and cargo.<br />
The wings are attached to the middle of the<br />
fuselage. The tail assembly consists of<br />
vertical and horizontal stabilizers that<br />
balance the plane in flight.<br />
Students should comment on its narrow,<br />
tubular shape.<br />
Students will probably answer that the shape<br />
of the fuselage helps it move through the air<br />
more easily. Accept all answers for now.<br />
Students should recall that the parachutes<br />
ran into the molecules that make up air,<br />
which slowed their descent.<br />
delta science modules Flight and Rocketry 19<br />
© <strong>Delta</strong> <strong>Education</strong> LLC. All rights reserved.
Guiding the Activity<br />
Ask, Now do you have an idea of why the<br />
fuselage is shaped the way it is?<br />
Explain that airplanes are designed to be<br />
streamlined, or sleek and smooth. Write the<br />
word streamlined on the board. Then have<br />
students answer the question in step 8 on<br />
their activity sheets.<br />
Ask, What are some other things that are<br />
streamlined?<br />
Additional Information<br />
Students should be able to explain that the<br />
fuselage is designed to run into as few<br />
molecules as possible as it travels through<br />
the air.<br />
Answers will vary. Some possible answers<br />
include cars, boats, trains, fish, birds—<br />
anything that is meant to move through air or<br />
water.<br />
glider<br />
swept-forward wing<br />
straight wing<br />
swept-back wing<br />
delta wing<br />
11<br />
Figure 5-3. <strong>Airplane</strong> wings come in many shapes and sizes.<br />
Next, have students compare the shape of the<br />
wings in the pictures of airplanes (several are<br />
shown in Figure 5-3). Ask, Are all wings the<br />
same size and shape?<br />
Have students add wings to the diagrams of<br />
the airplanes in step 9 of their activity sheets.<br />
Ask, Why do you think wings come in so<br />
many different shapes and sizes?<br />
No. Some wings are narrow while others are<br />
broad; some stick straight out from the side<br />
of the airplane while others are swept back or<br />
forward.<br />
Students should realize from Session I that<br />
the shape of the wing affects flight<br />
performance.<br />
20 activity 5 <strong>Airplane</strong> <strong>Design</strong><br />
© <strong>Delta</strong> <strong>Education</strong> LLC. All rights reserved.
12<br />
Guiding the Activity<br />
Have students retrieve their Darts and Sliders<br />
from Session I. Tell them to compare the<br />
shape of the paper airplanes with the shape<br />
of the planes in the diagram they just<br />
completed at the bottom of their activity<br />
sheet. Ask, Which plane does the Slider<br />
resemble? Which plane does the Dart<br />
resemble?<br />
Ask, Based on the flight performance of your<br />
paper airplanes, which plane in the diagram<br />
do you think flies best at high speeds?<br />
Which flies best at slower speeds? Have<br />
students record their answers at the bottom<br />
of their activity sheets.<br />
Tell students that in the next two activities,<br />
they are going to learn how the wings on a<br />
real airplane help lift it into the air.<br />
Additional Information<br />
The Slider resembles the plane with the<br />
broad, straight wings. The Dart resembles<br />
the plane with the swept-back wings.<br />
The plane with the swept-back wings flies<br />
best at high speeds. The plane with the<br />
broad, straight wings flies best at slow<br />
speeds.<br />
R EINFORCEMENT<br />
Have students design their own paper<br />
airplanes and then enter them in a flying<br />
contest. Which flies the farthest? the fastest?<br />
Which does the most tricks in the air? After<br />
the contest, display the winning gliders in<br />
each category. Challenge students to select<br />
one design feature and to explain how it<br />
helped the airplane perform so well.<br />
Assessment Opportunity<br />
This Reinforcement also may be used<br />
as an ongoing assessment of students’<br />
understanding of science concepts<br />
and skills.<br />
SCIENCE JOURNALS<br />
Have students place their completed activity<br />
sheets and their Dart and Slider designs in<br />
their science journals.<br />
C LEANUP<br />
Students can store their airplanes in their<br />
folders. Save the pictures of the airplanes<br />
for use in Activity 7.<br />
SCIENCE AT HOME<br />
Have students ask their family members to<br />
each make a paper airplane. Tell students<br />
to examine the shape of the plane and<br />
observe how it flies. Tell them to explain to<br />
their family the relationship between<br />
airplane shape and flight performance.<br />
Invite students to bring in the best<br />
examples to share with the class.<br />
delta science modules Flight and Rocketry 21<br />
© <strong>Delta</strong> <strong>Education</strong> LLC. All rights reserved.
Connections<br />
Science Challenge<br />
Have students study drawings and<br />
photographs of birds of different sizes and<br />
shapes, for example, barn swallows,<br />
hummingbirds, eagles, seagulls, and<br />
herons. Ask students to predict how each<br />
bird flies, based on body type (wing<br />
spread, body shape, and so forth).<br />
Researching each bird’s feeding habits and<br />
natural habitat may also offer clues as to<br />
how it flies (for example, whether it soars<br />
high in the air, dives into the water, or<br />
hovers). Encourage students to watch birds<br />
outdoors. Or, locate a video of birds in<br />
flight. Encourage students to observe the<br />
flying styles and flight patterns of various<br />
birds. They may be able to make a<br />
connection between each bird’s body type<br />
and how it flies. (A similar study can be<br />
made of flying insects.)<br />
As an extra challenge, ask students to<br />
study pictures of a flightless bird, such as<br />
the emu or the penguin. Encourage them to<br />
analyze, based on the bird’s body, why it<br />
cannot fly.<br />
Science and Math<br />
Hold a competition for paper airplane<br />
designs. Encourage students to research<br />
different patterns for paper airplanes and, if<br />
they wish, make their own modifications to<br />
the designs. Then, set up three graphs—one<br />
for speed, one for distance, and one for timein-the-air—to<br />
record each plane’s<br />
performance during the competition. Label<br />
the vertical axes Speed (m/s), Distance (m),<br />
and Time-in-the-Air (s), respectively. Along<br />
the horizontal axes, list each student’s or<br />
team’s name.<br />
Science and the Arts<br />
Suggest that students find poems and/or<br />
songs about flying, which might include<br />
descriptions of birds in flight. Have them<br />
rehearse the poem or song in advance, then<br />
read it to the class. Discuss how the poet<br />
evokes flight and what words and poetic<br />
devices contribute to that evocation.<br />
Science and Careers<br />
Many people’s efforts and inventions<br />
contributed to the development of powered<br />
flight. Have students research the lives and<br />
contributions of one such person, then roleplay<br />
that person as another student does a<br />
“live interview.” Some names students might<br />
consider include the following:<br />
• Sir George Cayley (1773–1857), often called<br />
the inventor of the airplane because he<br />
was the first to propose the use of a fixed<br />
wing.<br />
• Octave Chanute (1832–1910), an engineer<br />
who, upon retirement, spent most of his<br />
time trying to invent the airplane. He was<br />
also the author of Progress in Flying<br />
Machines, a comprehensive book on<br />
heavier-than-air flight.<br />
• Otto Lilienthal (1848–1896), a German<br />
engineer whose work on fixed-wing gliders<br />
paved the way for other developments.<br />
Science, Technology, and Society<br />
Fighter planes, bombers, space shuttles,<br />
seaplanes, airbuses, gliders, light aircraft,<br />
pedal-powered planes, airliners, supersonic<br />
transports (the Concorde), helicopters, and<br />
hang gliders fill the skies. They are all able to<br />
fly because their designers understood and<br />
applied similar principles of aerodynamics.<br />
Suggest that students team up to research<br />
different types of aircraft, then use drawings<br />
and fact cards to create a bulletin board<br />
display. The fact cards should include<br />
information about how each machine is used<br />
and how it flies (for example, how fast, at<br />
what altitudes, and with how much<br />
maneuverability).<br />
22 activity 5 <strong>Airplane</strong> <strong>Design</strong><br />
© <strong>Delta</strong> <strong>Education</strong> LLC. All rights reserved.