
Create successful ePaper yourself
Turn your PDF publications into a flip-book with our unique Google optimized e-Paper software.
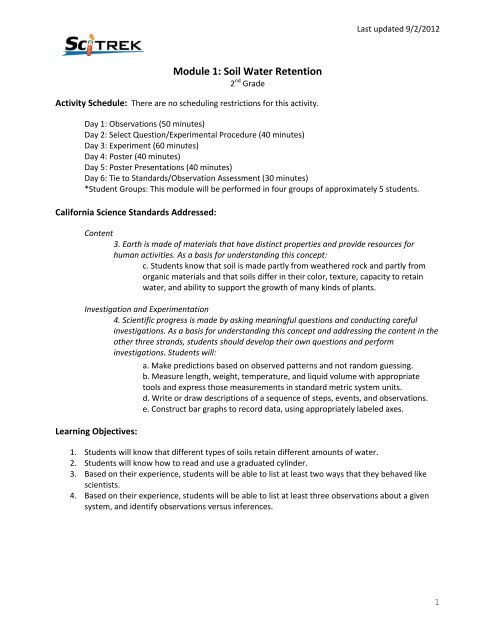
<strong>Module</strong> 1: <strong>Soil</strong> <strong>Water</strong> <strong>Retention</strong><br />
2 nd Grade<br />
Activity Schedule: There are no scheduling restrictions for this activity.<br />
Last updated 9/2/2012<br />
Day 1: Observations (50 minutes)<br />
Day 2: Select Question/Experimental Procedure (40 minutes)<br />
Day 3: Experiment (60 minutes)<br />
Day 4: Poster (40 minutes)<br />
Day 5: Poster Presentations (40 minutes)<br />
Day 6: Tie to Standards/Observation Assessment (30 minutes)<br />
*Student Groups: This module will be performed in four groups of approximately 5 students.<br />
California Science Standards Addressed:<br />
Content<br />
3. Earth is made of materials that have distinct properties and provide resources for<br />
human activities. As a basis for understanding this concept:<br />
c. Students know that soil is made partly from weathered rock and partly from<br />
organic materials and that soils differ in their color, texture, capacity to retain<br />
water, and ability to support the growth of many kinds of plants.<br />
Investigation and Experimentation<br />
4. Scientific progress is made by asking meaningful questions and conducting careful<br />
investigations. As a basis for understanding this concept and addressing the content in the<br />
other three strands, students should develop their own questions and perform<br />
investigations. Students will:<br />
Learning Objectives:<br />
a. Make predictions based on observed patterns and not random guessing.<br />
b. Measure length, weight, temperature, and liquid volume with appropriate<br />
tools and express those measurements in standard metric system units.<br />
d. Write or draw descriptions of a sequence of steps, events, and observations.<br />
e. Construct bar graphs to record data, using appropriately labeled axes.<br />
1. Students will know that different types of soils retain different amounts of water.<br />
2. Students will know how to read and use a graduated cylinder.<br />
3. Based on their experience, students will be able to list at least two ways that they behaved like<br />
scientists.<br />
4. Based on their experience, students will be able to list at least three observations about a given<br />
system, and identify observations versus inferences.<br />
1
Classroom Teacher Responsibilities:<br />
Prior to the <strong>Module</strong> (at least 1 week):<br />
Divide the class into 4 groups (~5 students each). Please send these lists to<br />
scitrekadmin@chem.ucsb.edu one week before the start of the module so that we can have<br />
nametags/notebooks made for your students.<br />
During the <strong>Module</strong>:<br />
One of SciTrek’s goals is to help teachers become comfortable leading student-centered inquiry<br />
activities. Therefore, we would eventually like the classroom teacher to serve as the SciTrek<br />
classroom leader. Even when the classroom teacher serves as the SciTrek leader, SciTrek will<br />
continue to support the teacher by providing materials and the additional volunteers needed for<br />
the open-ended student-centered inquiry modules that are run through SciTrek.<br />
As the classroom teacher becomes more comfortable with the process they can serve as one of<br />
the SciTrek volunteers and eventually work up to the position of lead SciTrek volunteer.<br />
Therefore, we would like the classroom teachers to join one of the small groups in order to gain<br />
experience and involvement with the SciTrek program. The classroom teacher is more than<br />
welcome to run a small group even the first time SciTrek comes to the classroom. Please let<br />
SciTrek know as soon as you feel comfortable taking over a group.<br />
On the first day of the module please help hand out the nametags or assign a student to help<br />
handout nametags.<br />
If you have a document camera in your classroom please have it available for use on day one of<br />
the module.<br />
The module requires some materials to be left in the classroom. Please have a space for us to<br />
leave a small amount of materials in your classroom.<br />
Day 1: Observation<br />
Schedule:<br />
Introduction (SciTrek Leader) - 2 min<br />
Technique Discussion: Reading a Graduated Cylinder (SciTrek Leader) - 10 min<br />
Discussion on Observations (SciTrek Leader) - 8 min<br />
Observations (SciTrek Volunteers) - 25 min<br />
Wrap-Up Discussion (SciTrek Leader) - 5 min<br />
2
Materials:<br />
(4) Boxes with the following materials:<br />
Student nametags<br />
Student notebooks<br />
Volunteer instructions<br />
Markers<br />
Volunteer lab coats<br />
Paper towels<br />
(2) 100 ml graduated cylinders<br />
(2) Small cups with holes in bottom (labeled A and B)<br />
(2) Large cups (labeled A and B)<br />
(4) Filters<br />
(2) ¼ Cup measuring cups<br />
Sand<br />
Gravel<br />
<strong>Water</strong><br />
Zip lock baggie (to put wet gravel in)<br />
(4) Large group notepads<br />
(4) Trays<br />
Hand Boiler<br />
Large Graduated Cylinder<br />
Waste bucket<br />
Last updated 9/2/2012<br />
3
SciTrek Notebook Pages Used with Students:<br />
Set-Up:<br />
Upon their arrival the SciTrek members will set-up the group stations by filling one of the ¼ cup<br />
measuring cups with sand and the other with gravel. Filters will be placed inside of the small cups<br />
and then slightly wet so that the filter sticks to the bottom of the cup. The small cup will then be<br />
set inside the larger cup and placed on the tray. Both graduated cylinders will be filled with 50 ml<br />
of water and set on the tray. The tray will sit in the middle of the table for observation. The<br />
observation set-up is seen on next page.<br />
4
Last updated 9/2/2012<br />
Make sure that your group notepad is set-up like the following (Note: To be done before arriving<br />
in the classroom):<br />
Experimental Set-up:<br />
Observations<br />
Cup A:<br />
Observations<br />
5
Cup B:<br />
Observations<br />
Introduction (2 min – Full Class – SciTrek Leader):<br />
Hi, we are scientists from UCSB and we want to show you what we do as scientists. We will show<br />
you an experiment and then you can make observations, select a question, and design your own<br />
experiment to find an answer to the question. We want to show you that you can do science and<br />
that it’s fun.<br />
Option: Each volunteer tells the students what area of science that he or she specializes in.<br />
Technique Discussion (10 min – Full Class – SciTrek Leader):<br />
Observations<br />
As the lead is starting the technique discussion, SciTrek volunteers should set a SciTrek notebook<br />
on each student’s desks.<br />
Tell the class that today they are going to work with a scientific apparatus called a graduated<br />
cylinder. Show the class the large graduated cylinder. Tell the class that graduated cylinders are<br />
used to measure the volumes of liquids. “Before we start our module today we need to learn<br />
how to read a graduated cylinder.” Tell the class that we read the gradated cylinder by placing<br />
the graduated cylinder on a flat surface and putting our eye at the same level as the liquid. Then<br />
we read off the number on the cylinder where the bottom of the water line is located. The water<br />
line will be curved the curve is called the meniscus. The units on the gradated cylinder are in<br />
milliliters which are abbreviated ml. Tell the students that they are going to practice reading<br />
graduated cylinders in their notebooks and then they will have the opportunity to use then during<br />
the module. Have students write their name on the front page of their notebook and then turn to<br />
page 2 of their SciTrek notebooks. (If there is a document camera in the room have a sample<br />
book and put it on display in the document camera.)<br />
Ask students what they think is the maximum amount of liquid that they can measure in the<br />
graduated cylinder on the sheet? (100 ml)<br />
6
Last updated 9/2/2012<br />
Tell the students that each of the largest lines represents 10 ml and is labeled.<br />
What do the medium lines represent? (5 ml)<br />
What do the smallest lines represent? (1 ml)<br />
To read the graduated cylinder, find the bottom of the meniscus. Have students put their finger<br />
on the meniscus in the first gradated cylinder. Then we drop down to the number that is below<br />
the meniscus. Then we count up by ones until we reach the water level. Therefore, the first<br />
graduated cylinder has 83 ml in it. Have the students read the other three graduated cylinders<br />
and record their answers.<br />
As the students are working on this, SciTrek volunteers should walk around and assist students.<br />
Tell the students they are also going to have to fill gradated cylinders. So we are going to practice<br />
finding where we fill the gradated cylinders to. Have the students turn to page three of their<br />
notebooks. Go over the worked example with them. For this example we want to put 58 ml in<br />
the gradated cylinder. Therefore, you find the 50 ml mark on the gradated cylinder and you count<br />
up to 8. This is where you will put the bottom of the meniscus.<br />
Have student fill in the other three gradated cylinders while SciTrek volunteers walk around and<br />
help.<br />
Discussion (8 min – Full Class – SciTrek Leader):<br />
Tell the class that today they are going to break up into groups and make observations of a<br />
system, but first we are going to practice identifying observations as a class.<br />
Show the class the hand boiler and tell them you are going to say some statements and they are<br />
going to identify if the statement is an observation or not:<br />
The liquid is (insert a color of liquid that is not the color in the hand boiler).<br />
Possible Answer: No the color of the liquid is another color.<br />
The liquid is (insert color of liquid in hand boiler).<br />
Possible Answer: Yes this is an observation.<br />
The hand boiler is fun to play with.<br />
Possible Answer: No, this is not an observation, it is an opinion. You can observe things<br />
like the person playing with the hand boiler is smiling but you do not know if it is fun to<br />
play with. Some people might not think that the hand boiler is fun to play with.<br />
The liquid can move from one compartment to another compartment within the hand<br />
boiler.<br />
Possible Answer: Yes this is an observation<br />
The liquid is being squeezed, by my hand, up the tube.<br />
Possible Answer: No this is a hypothesis or a guess at what is happening. We would have<br />
to developed a test to see if that was the case. We could try to put pressure on it by a<br />
mechanical device and see if we get the same results.<br />
The hand boiler contains water.<br />
7
Possible Answer: No this is not an observation. This is an inference because we have no<br />
proof that the liquid in the hand boiler is water.<br />
See if the students can give you any other observations about the system. Tell them that other<br />
observations could include: Texture, Size, Weight, Temperature, Material, and Relative Speeds.<br />
Inform the class that they will now work in their small groups to make observations about a<br />
different system and the group that comes up with the most observations will get a prize next<br />
session. However, it is important that the students come up with observations rather than<br />
inferences, because inferences will not be counted.<br />
Observations (25 min –Small Groups – SciTrek Volunteers):<br />
The class will be split into four groups. Once the students come to your group have them sit<br />
down. Make sure the table is set-up as described in the set-up section. Pour the ¼ cup of sand<br />
into cup A and the ¼ cup of gravel into cup B. Ask the students to make observations of the<br />
experimental set-up (all of the items on the table in front of them). As the students make<br />
observations record them in the group notepad. An example is seen below. Feel free to record<br />
other observations. The sample notepad below shows only the bare minimum.<br />
Observations<br />
Experimental Set-up:<br />
Materials are sitting on a green tray<br />
2 Graduated cylinders with 50 ml of<br />
water<br />
2 Sets of two cups<br />
2 Cups are stack inside each other<br />
Cups are clear<br />
Cup A:<br />
Observations<br />
Sand<br />
Little pieces of rocks<br />
Soft<br />
Colorful<br />
Light<br />
¼ Cup sand<br />
8
Cup B:<br />
Observations<br />
Rocks<br />
Some are smooth<br />
Heavier than sand<br />
Rocks are dark blue, grey, black and<br />
white<br />
¼ Cup gravel<br />
Last updated 9/2/2012<br />
Pour the water from the graduated cylinders into two cups at the same time and have the student<br />
make more observations. Make sure that these observations include comparisons between the<br />
two cups. In addition make sure that the students measure the amount of water that went<br />
through each cup. A sample of the group notepad is seen below.<br />
Observations<br />
The water goes through cup B faster<br />
than cup A.<br />
More water went through cup B<br />
than cup A.<br />
27 ml of water came out of cup A.<br />
41 ml of water came out of cup B.<br />
The water coming out of cup A is<br />
dirtier than the water coming out of<br />
cup B.<br />
Prepare two students in your group to share an observations each with the class during the group<br />
discussion.<br />
9
Wrap-Up (5 min – Full Class – SciTrek Leader):<br />
Clean-Up:<br />
Have each group share one or two of their best observations. Only allow each group to share one<br />
observation at a time and rotate between all of the groups.<br />
If there is time, the SciTrek leader will read the question options to the class to prepare for the<br />
next session.<br />
Before you leave collect all student nametags and notebook and put them in the group tub. Pour<br />
the wet sand and filter paper into the waste bucket. Put the wet gravel in the extra baggie that is<br />
in the tub. Put all other observation materials into the tub. Bring back all supplies to UCSB.<br />
Day 2: Select Question/Experimental Procedure<br />
Schedule:<br />
Materials:<br />
Introduction (SciTrek Leader) – 1 minute<br />
Select Question (SciTrek Volunteers) – 4 minutes<br />
Design Experimental Procedure (SciTrek Volunteers) – 30 minutes<br />
Wrap-Up Discussion (SciTrek Leader) – 5 minutes<br />
(4) Boxes with the following materials:<br />
Student nametags<br />
Student notebooks<br />
Volunteer instructions<br />
Markers<br />
Volunteer lab coats<br />
(4) Group notepads<br />
10
SciTrek Notebook Pages Used With Students:<br />
Set-Up:<br />
Last updated 9/2/2012<br />
Return to your group. Set out the student nametags and notebooks. When setting out the<br />
nametags and SciTrek notebooks try to seat students so they are sitting in a boy/girl/boy fashion.<br />
Have group notepad, and markers available.<br />
Make sure that your group notepad is set-up like the following sample pages (Note: to be done<br />
before arriving to the classroom.)<br />
11
Question<br />
Experimental Set-Up<br />
What we will not change:<br />
What we will change:<br />
We will measure<br />
Introduction (1 minute – Full Class – SciTrek Leader):<br />
Announce which group had the most observations from the previous session and distribute prizes<br />
(erasers) to that group.<br />
Tell students that today they are going to select a question to investigate and design an<br />
experiment to test the question.<br />
Select Question (4 minutes – Small Groups – SciTrek Volunteers):<br />
Procedure<br />
Materials<br />
6 Large cups<br />
6 Small cups with holes<br />
6 filters<br />
2 100 ml Gradated Cylinders<br />
As a group, have students select a question that they would like to investigate from the following<br />
list:<br />
If I change the amount of water, what will happen to the amount of water that passes through?<br />
If I change the amount of material in the cups, what will happen to the amount of water that<br />
passes through?<br />
If I change the type of soil, what will happen to the amount of water that passes through?<br />
If I change the type of liquid, what will happen to the amount of liquid that passes through?<br />
Once a question has been selected have the students circle the chosen question in their SciTrek<br />
notebooks. In addition copy the question onto the group notepad.<br />
12
Experimental Procedure (30 minutes – Small Groups – SciTrek Volunteers):<br />
Last updated 9/2/2012<br />
On the group notepad, have the group brainstorm about what they are going to keep constant<br />
and what they are going to change. Record these ideas on the group notepad. Have each student<br />
write a few of these (2 or 3) in their notebooks. It is also helpful if you record possible ideas for<br />
what they are going to change. Example: If they are changing the soil type, brainstorm and record<br />
different soils. Pick one student to share the variable that you are changing with the class during<br />
the group discussion.<br />
Have the group complete the following sentence frame for the discussion and record it on the<br />
group notepad: “Our group will measure _______. “<br />
See below for sample group notepad<br />
Question<br />
If I change the type of soil, what will happen<br />
to the amount of water that passes through.<br />
Experimental Set-Up<br />
What we will not change:<br />
Amount of water in<br />
Liquid<br />
Amount of soil<br />
What we will change:<br />
Type of soil (sand, potting soil, wood<br />
chips)<br />
We will measure amount of water coming<br />
out.<br />
Help students come up with a step-by-step procedure of how to answer their question and record<br />
the procedure on the group notepad. When designing the experiment remember that students<br />
will only get 6 cups. Therefore, no more than 6 experiments will be run. Copy the procedure<br />
onto the group notepad before students copy it into their notebooks. Try to keep the procedure<br />
as short as possible. An sample of an appropriate procedure on the group notepad can be seen<br />
on the next page.<br />
13
Help students come up with a list of materials that they need. Write materials on the group<br />
notepad. If there are other materials that you think your group will need also indicate these on<br />
the group notepad. Make sure that someone not running the module will understand the<br />
materials you need. For instance if you need a rock be specific and tell the size of rock or draw a<br />
picture of the rock to scale.<br />
If there is time have your group draw a picture of their experimental set-up.<br />
Wrap-Up (5 minutes – Full Class – SciTrek Leader):<br />
Clean-Up:<br />
Have each group present what variable they are changing for their experiment. Tell the students<br />
that the next time that we meet they will get to run their experiments.<br />
Before you leave collect all student nametags and notebooks and put them in the group tub.<br />
Bring all materials back to UCSB.<br />
Day 3: Experiment<br />
Schedule:<br />
Introduction (SciTrek Leader) – 2 minutes<br />
Experiments (SciTrek Volunteers) – 53 minutes<br />
Discussion (SciTrek Leaders)-5 minutes<br />
Procedure<br />
1) Fill cup with ¼ cup of each of the following<br />
(sand, potting soil, wood chips, small rock,<br />
medium rocks, large rocks)<br />
2) Pour 50 ml of water through each cup.<br />
3) Measure water that came out.<br />
Materials<br />
6 Large cups<br />
6 Small cups with holes<br />
6 filters<br />
2 100 ml Gradated Cylinders<br />
¼ Cup of each of the following: sand,<br />
potting soil, wood chips, small rock,<br />
medium rocks, large rocks<br />
14
Materials:<br />
(4) Boxes with the following materials:<br />
Student nametags<br />
Student notebooks<br />
Volunteer instructions<br />
Markers<br />
Volunteer lab coats<br />
Paper Towels<br />
2 100 ml graduated cylinders<br />
6 large cups<br />
6 small cups with holes<br />
6 filters<br />
Requested Materials<br />
6 Graph Parts<br />
Tape<br />
(4) Group notepads<br />
(2) Buckets<br />
SciTrek Notebook Pages Used with Students:<br />
Last updated 9/2/2012<br />
15
Set-Up:<br />
Have materials for your group’s experiment available. Use group notepad to record data on the<br />
data table.<br />
Make sure that your group notepad is set-up like the following (Note: To be done before arriving<br />
in the classroom.)<br />
16
Cup<br />
Letter<br />
Introduction (2 minutes – Full Class – SciTrek Leader):<br />
Results<br />
Contents Liquid<br />
Last updated 9/2/2012<br />
Tell the students that today they will be working in their groups to complete their experiments<br />
using the procedures they developed last session. Tell them they will be recording the results<br />
from their experiments in their SciTrek notebooks and creating a bar graph from the results.<br />
Experiments (53 minutes – Small Groups – SciTrek Volunteers):<br />
Volume<br />
In<br />
Volume<br />
Out<br />
Help the students set-up and complete their experiments. Create a data<br />
table and record data on the group notepad (see sample group notepad<br />
on next page). Help the student’s copy the data into their notebooks.<br />
Have each student be in charge of at least one of the experiments. For<br />
that experiment have them make the reading on the graduated cylinder<br />
and then fill out one of the partial graph papers that is seen to the right.<br />
17
Cup<br />
Letter<br />
A<br />
B<br />
C<br />
D<br />
Results<br />
Contents Liquid<br />
Small<br />
Rocks<br />
Medium<br />
Rocks<br />
Large<br />
Rock<br />
Wood<br />
Chips<br />
Volume<br />
In<br />
Volume<br />
Out<br />
<strong>Water</strong> 50 ml 40 ml<br />
<strong>Water</strong> 50 ml 44 ml<br />
<strong>Water</strong> 50 ml 47 ml<br />
<strong>Water</strong> 50 ml 36 ml<br />
E <strong>Soil</strong> <strong>Water</strong> 50 ml 31 ml<br />
F Sand <strong>Water</strong> 50 ml 27 ml<br />
Once the students have taken all of the data and completed the partial graph. Arrange the partial<br />
graphs so that they go either from smallest amount of water out to largest amount of water out<br />
or largest amount of water out to smallest amount of water out. Tape the partial graphs to the<br />
group notepad so that it looks like a complete graph (see sample group notepad below) and have<br />
students complete the graph in their notebooks.<br />
Bar Graph<br />
Our graph shows the harder and the biggest the<br />
size of the materials the more water goes<br />
through the material.<br />
18
Last updated 9/2/2012<br />
Once all the students have completed their graph as a group fill in the sentence frame “our graph<br />
shows _______.” See sample above. Then have student copy it into their notebooks. Prepare<br />
one student to share this sentence frame with the rest of the class.<br />
If there is time have each student individually fill out the sentence frame “I acted like a scientist<br />
when _______.”<br />
Wrap-Up (5 minutes – Full Class – SciTrek Leader):<br />
Clean-Up:<br />
Have each group present their sentence frame to the class. Tell the class that the next time we<br />
meet they will make a poster showing their finding to present to the class.<br />
Before you leave collect all student nametags and notebooks and put them in the group tub.<br />
Dump all used materials in the waste bucket. If any cups are particular sticky (for instance honey<br />
was used in it) put them in the waste bucket as well. Any cups that can be reused as well as<br />
gradated cylinders put in the to be washed bucket. Bring all supplies back to UCSB.<br />
Day 4: Poster<br />
Schedule:<br />
Materials:<br />
Introduction (SciTrek Leader) – 2 minutes<br />
Poster (SciTrek Volunteers) – 35 minutes<br />
Wrap-Up Discussion (SciTrek Leader) – 3 minutes<br />
Note: If your group needs to finish the bar graph or the sentence frame “I acted like a scientist<br />
when _______” they should do this but it should not take more than 10 minutes.<br />
(4) Boxes with the following materials:<br />
Student nametags<br />
Student notebooks<br />
Volunteer instructions<br />
Markers<br />
Volunteer lab coats<br />
Glue<br />
Highlighter<br />
Poster Parts<br />
Scientist names<br />
Question<br />
Experimental set-up<br />
Procedure<br />
Bar graph<br />
(6) “I acted like a scientist when_______”<br />
(6) Picture spaces<br />
19
Set-Up:<br />
(4) Group notepads<br />
Large paper for posters<br />
Return to your group. Set out the student nametags and notebooks. When setting out the<br />
nametags and SciTrek notebooks try to seat students so they are sitting boy/girl/boy. Have<br />
materials for poster available.<br />
Introduction (2 minutes – Full Class – SciTrek Leader):<br />
Tell students that today they are going to work on putting together a poster to present to the<br />
class for the next session. Remind them to write neatly on the poster so that the other class<br />
members can read their poster. Remind them that if they need 10 minutes to finish their graph/”I<br />
acted like a scientist when_______”, they can do that but their posters need to be finished by the<br />
end of the day.<br />
Poster (35 minutes – Small Groups – SciTrek Volunteers):<br />
Assign each student one of the poster sections to complete. Remind them that they are going to<br />
show the poster to the whole class so write neatly. (Note: If a student struggles with writing try<br />
to give them a shorter writing section.) When students finish writing their sections, have them<br />
draw a picture of their experiment. Glue the sections and pictures onto the big paper (see sample<br />
on next page). Each student will present the section that they filled out. The students will read<br />
their sections out of their notebooks, so highlight the appropriate section in each student’s<br />
notebook. (Note: A student who struggles with reading can read with another student at the<br />
same time.) If there is time, practice the presentation.<br />
Wrap-Up (3 minutes – Full Class – SciTrek Leader):<br />
Tell students that they will present their finding the next meeting and you are looking forward to<br />
hearing about all of their experiments.<br />
20
Clean-Up:<br />
Last updated 9/2/2012<br />
Before you leave collect all student nametags and notebooks and put them in the group tub.<br />
Stack all of the posters in a pile and leave them in the class room. Bring all other supplies back to<br />
UCSB.<br />
Day 5: Poster Presentations<br />
Schedule:<br />
Materials:<br />
Set-Up:<br />
Intro (SciTrek Leader) – 1 minute<br />
Poster Presentations (SciTrek Volunteers/SciTrek Leader) – 35 minutes<br />
Wrap-Up Discussion (SciTrek Leader) – 4 minutes<br />
(4) Boxes with the following materials:<br />
Student nametags<br />
Student notebooks<br />
Volunteer instructions<br />
6 Sharpened SciTrek Pencils<br />
Have your group’s poster available. Have pencils ready to distribute to your group after the<br />
poster presentations.<br />
Introduction (1 minute – Full Class – SciTrek Leader):<br />
Encourage students to ask each other scientific questions about their experiments, results, etc.<br />
Tell them whoever asks a scientific question will get a SciTrek pencil at the end of the poster<br />
presentation. Give an example of a scientific question such as, “Do you think you would have had<br />
the same results if you had used gravel rather than sand”. Encourage students not to ask the<br />
same question that someone else has already asked.<br />
Poster Presentations (35 minutes – Full Class – SciTrek Volunteers/SciTrek Leader):<br />
Sit with your group and make sure your group is respectful when other groups are presenting. At<br />
the end of each presentation, encourage the students to ask questions, and to not ask a question<br />
that someone else has already asked. If no students ask questions, ask questions yourself. For<br />
example, “How do you know…?” “Is there anything else you can do to get more information<br />
about your question?” Stand up with your group when they present and hold the group’s poster<br />
if needed. Students will read their sections out of their notebooks. Only have the students hold<br />
their notebooks during their presentation otherwise the SciTrek volunteer should have student<br />
notebooks.<br />
21
Wrap-Up (4 minutes – Full Class – SciTrek Leader):<br />
Clean- Up:<br />
Ask students the following wrap-up questions:<br />
Did you act like a scientist during this project?<br />
What did you do that scientists do?<br />
Tell the students that this is the last day with their SciTrek volunteers therefore, they should say<br />
goodbye to them. Tell them that you will be back one more time.<br />
Bring back all SciTrek materials. Students can keep their notebooks and the paper part of their<br />
nametags if they wish but we need the plastic part back. Leave the student posters in the<br />
classroom.<br />
Day 6: Tie to the Standards/Observation Assessment<br />
Schedule:<br />
Materials:<br />
Set-Up:<br />
Introduction (SciTrek Leader) – 2 minutes<br />
Tie to Standards (SciTrek Leader) – 18 minutes<br />
Observation Assessment (SciTrek Leader) – 10 minutes<br />
Pictures set (5 pictures total)<br />
Observation activity sheets (one for each student)<br />
(1) Tray<br />
(2) Small cups with holes<br />
(2) Large cups<br />
(1) Filter paper<br />
¼ Cup sand<br />
¼ Cup of soil<br />
(4) 100 ml graduated cylinders each filled with 50 ml water<br />
Piece of local sandstone<br />
Have pictures in alphabetical order and ready to show to the class. Place the small cup with filter<br />
and put a drop of water on the filter to secure the filter. Put the ¼ cup of sand in the small cup<br />
and then place the smaller cup in the larger cup. (The set-up should be similar to the experiment<br />
that the students have already done). Repeat the process with the dirt. Have (4) 100 ml<br />
graduated cylinders filled with 50 ml of water. This part of the demonstration will be done after<br />
showing picture D.<br />
22
Introduction (2 minutes – Full Class – SciTrek Leader):<br />
Discuss how the poster presentation went with students.<br />
Tie to the Standards (18 minutes – Full Class – SciTrek Leader):<br />
Last updated 9/2/2012<br />
Show the students the cups with sand and dirt in them. Ask students how they think the sand and<br />
dirt was formed. Try to encourage the students to use evidence to back up their answers.<br />
Example: I think the sand comes from rocks because if you look closely at the sand it looks like<br />
little rocks.<br />
Talk to the students about dirt being made from decomposing living materials like leaves and logs.<br />
Then tell the students about sand being formed from rocks rubbing together to make smaller<br />
rocks.<br />
Show the students the sandstone and have them make some observations about the rock. They<br />
should notice that the rock looks like it has sand that has been molded together.<br />
Tell the students that if sand is put under enough pressure it can reform into rock. These are the<br />
type of rocks that are found in our local hills.<br />
Show the students the following three pictures:<br />
A B<br />
C<br />
Ask the students what would happen if you poured a gallon of water on the ground in each case?<br />
23
Probing questions should be asked of students so that they come to the conclusion that different<br />
types of soil take in different amounts of water at different rates.<br />
Ask students if they saw that the different soils they used had different rates for allowing the<br />
water to pass through the system.<br />
Ask students what systems allowed water to pass through the fastest/slowest?<br />
Show the students the following picture:<br />
D<br />
Ask them what happened in this picture.<br />
Probing questions should be ask of the students until they come to the conclusion that water was<br />
deposited on the surface (maybe by rain) and the soil could not hold that much water so the<br />
water pooled on the surface.<br />
Ask do you think that all soil types can hold the same amount of water? Make sure that they<br />
know that all soils hold different amounts of water but all soils have a saturation point.<br />
Ask the students which soil types in their experiments held the most amount of water.<br />
Ask the students what will happen to the final amount of water if 50 ml of water is poured<br />
through sand and the soil and why.<br />
Pour the 50 ml of water through the sand and soil and then measure the amount of water that<br />
came out. It should be ~25 ml for the sand and ~20 ml for the soil.<br />
Ask students to predict what will happen when you pour another 50 ml through both of the same<br />
cup and why.<br />
Pour an additional 50 ml through the cup you should get the ~50 ml back out because the soil was<br />
already saturated and could hold no more water therefore, 50 ml came out. Note: It will take a<br />
little while for the water to go through the cups. Pour the water into the cups and then give the<br />
students the observation assessment, after they are done with the assessment have them discuss<br />
what happened and finish the rest of the Tie to standards.<br />
Ask students what do they think happens to the weight of the soil after the water passes through<br />
it.<br />
24
Show the students the following picture:<br />
Ask them what they think happened here and why.<br />
Last updated 9/2/2012<br />
Ask probing questions until they understand that the hill got saturated with water and became so<br />
heavy that the dirt slid down the side of the hill.<br />
Tell students that the experiments that they were doing are the starting points to help scientists<br />
understand the properties of soil so that they can help predict landslides.<br />
Observation Assessment (10 minutes – Full Class – SciTrek Leader)<br />
E<br />
Pass out the observation activity sheet to the students. This should be the third activity sheet<br />
that the students have done so they should be familiar with the procedure. Read each sentence<br />
out loud, and ask the students to circle the sentences that are observations. Answer questions<br />
that relate to a reading error or a miscommunication, but do not answer questions about the<br />
differences between observations and inferences. Collect all observations activity sheets once<br />
the students have finished.<br />
25