

SXVR-M26C handbook.pdf - Starlight Xpress
SXVR-M26C handbook.pdf - Starlight Xpress
SXVR-M26C handbook.pdf - Starlight Xpress

You also want an ePaper? Increase the reach of your titles
YUMPU automatically turns print PDFs into web optimized ePapers that Google loves.
Handbook for the <strong>SXVR</strong>-<strong>M26C</strong> Issue 1 March 2010<br />
Here is a small enlarged section of a daylight image which may be similar to your test<br />
image taken with a 50mm camera lens<br />
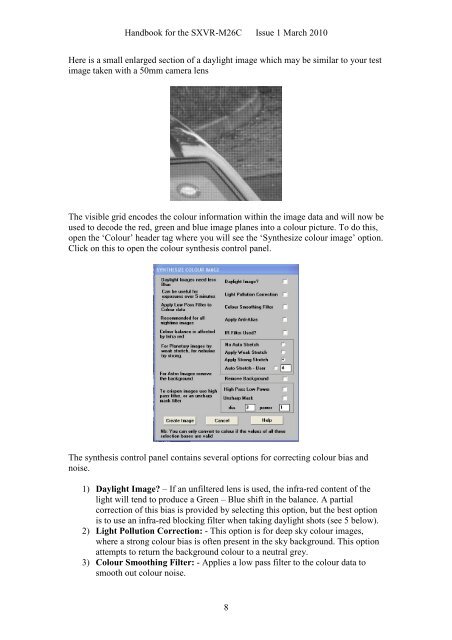
The visible grid encodes the colour information within the image data and will now be<br />
used to decode the red, green and blue image planes into a colour picture. To do this,<br />
open the ‘Colour’ header tag where you will see the ‘Synthesize colour image’ option.<br />
Click on this to open the colour synthesis control panel.<br />
The synthesis control panel contains several options for correcting colour bias and<br />
noise.<br />
1) Daylight Image? – If an unfiltered lens is used, the infra-red content of the<br />
light will tend to produce a Green – Blue shift in the balance. A partial<br />
correction of this bias is provided by selecting this option, but the best option<br />
is to use an infra-red blocking filter when taking daylight shots (see 5 below).<br />
2) Light Pollution Correction: - This option is for deep sky colour images,<br />
where a strong colour bias is often present in the sky background. This option<br />
attempts to return the background colour to a neutral grey.<br />
3) Colour Smoothing Filter: - Applies a low pass filter to the colour data to<br />
smooth out colour noise.<br />
8


