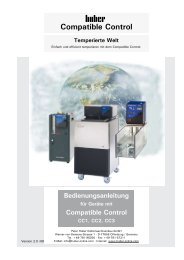
Operating manual 27.01.2010 Flow-through Chiller - HUBER
Operating manual 27.01.2010 Flow-through Chiller - HUBER
Operating manual 27.01.2010 Flow-through Chiller - HUBER

Create successful ePaper yourself
Turn your PDF publications into a flip-book with our unique Google optimized e-Paper software.
Valid for:<br />
DC30-NR (with natural refrigerant)<br />
DC31-NR (with natural refrigerant)<br />
DC32-NR (with natural refrigerant)<br />
<strong>Operating</strong> <strong>manual</strong><br />
<strong>27.01.2010</strong><br />
<strong>Flow</strong>-<strong>through</strong> <strong>Chiller</strong>
Contents V1.1/01.10<br />
Foreword ............................................................................................................3<br />
Chapter 1: Safety ................................................................................................4<br />
Description of Safety and Information symbols ........................................................5<br />
Intended Use and General Safety Instructions..........................................................5<br />
Description .........................................................................................................6<br />
Duties of responsible person .................................................................................7<br />
Operator reuqirements..........................................................................................7<br />
Machine operator duties .......................................................................................7<br />
Work area...........................................................................................................7<br />
Environmental Conditions......................................................................................8<br />
<strong>Operating</strong> conditions ............................................................................................9<br />
Location .............................................................................................................9<br />
Thermofluids ..................................................................................................... 10<br />
Chapter 2: Connnect the flow-<strong>through</strong> <strong>Chiller</strong>, fill and prepare for the temperature<br />
control task....................................................................................................... 11<br />
Power connection .............................................................................................. 12<br />
Safety instructions............................................................................................. 12<br />
Start / Stop <strong>Flow</strong>-<strong>through</strong> <strong>Chiller</strong>.......................................................................... 12<br />
Start up............................................................................................................ 13<br />
Decontamination / Repair .................................................................................... 14<br />
Cleaning the surfaces ......................................................................................... 14<br />
Chapter 3: Taking the <strong>Flow</strong>-<strong>through</strong> <strong>Chiller</strong> out of service ....................................... 15<br />
Decommissioning............................................................................................... 16<br />
Transport.......................................................................................................... 16<br />
Disposal ........................................................................................................... 16<br />
Appendix<br />
2
Foreword<br />
Dear Customer,<br />
The Huber team would like to thank you for ordering this product. You have made a<br />
good choice. We thank you for your trust!<br />
Please read and understand the instruction <strong>manual</strong> thoroughly before operating the unit.<br />
All instructions and safety information must be complied with.<br />
Please read this <strong>manual</strong> before transporting, commissioning, operating, maintaining,<br />
repairing, storing or disposing of this unit.<br />
Failure to comply with the instructions within this <strong>manual</strong> may invalidate any warranty<br />
for this unit.<br />
3
Chapter 1: Safety<br />
In this chapter is to be found the following sections:<br />
4<br />
- Description of safety and information symbols<br />
- Intended use and General Safety Information<br />
- Description<br />
- Duties of the responsible person<br />
- Operator requirements<br />
- Machine operator duties<br />
- Work area<br />
- Environmental conditions<br />
- <strong>Operating</strong> conditions<br />
- Location<br />
- Thermofluids
Description of Safety and Information symbols<br />
Safety information is shown with a pictogram and keyword.<br />
The keyword indicates the level of the corresponding danger.<br />
Danger!<br />
Warning!<br />
Caution!<br />
Information!<br />
Requirement!<br />
Immediate risk to the life and health of<br />
personnel (Serious injury or death).<br />
Possible risk to the life and health of<br />
personnel (Serious injury or death).<br />
Possible dangerous situation (possible injury<br />
to personnel or damage to property).<br />
User-tips and other useful information.<br />
Intended Use and General Safety Instructions<br />
Requirement to carry out a specific<br />
method, or action, for safe machine<br />
operation.<br />
Danger!<br />
Non-intended use can result in considerable personal injuries and material damage.<br />
No third persons are authorized to make any changes to the <strong>Flow</strong>-<strong>through</strong> <strong>Chiller</strong>. The<br />
device declaration becomes void, if any modification is carried out without<br />
manufacturers consent.<br />
Only personnel trained by the manufacturer may carry out modifications, repairs or<br />
maintenance work.<br />
The following must be observed:<br />
Always use the <strong>Flow</strong>-<strong>through</strong> <strong>Chiller</strong> in a perfect working condition!<br />
Only expert personnel may initially start-up and repair the device!<br />
Do not bypass, bridge-over, dismantle or switch off the safety mechanisms!<br />
5
The manufacturer is not liable for damages caused by technical changes<br />
to the <strong>Flow</strong>-<strong>through</strong> <strong>Chiller</strong>, inappropriate handling and / or use of the <strong>Flow</strong>-<strong>through</strong><br />
<strong>Chiller</strong> without regard to the operating instructions.<br />
The <strong>Flow</strong>-<strong>through</strong> <strong>Chiller</strong> is manufactured for commercial use only and may only be<br />
used, in connection with a temperature control device of the Peter Huber<br />
Kältemaschinenbau GmbH. Suitable thermal fluids are used <strong>through</strong>out the entire<br />
system. The technical specifications of the <strong>Flow</strong>-<strong>through</strong> <strong>Chiller</strong> are determined in the<br />
data sheet. Operation must be prepared and carried out according to the operating<br />
instructions. Any non-observance of the operating instructions is considered as nonintended<br />
use.<br />
The <strong>Flow</strong>-<strong>through</strong> <strong>Chiller</strong> corresponds to the state-of-the-art and the recognized safetyrelated<br />
regulations. Safety devices are built into your tempering device.<br />
The <strong>Flow</strong>-<strong>through</strong> <strong>Chiller</strong> is NOT approved for use as a medical product!<br />
This <strong>Flow</strong>-<strong>through</strong> <strong>Chiller</strong> is NOT built as explosion-proof and is NOT<br />
suitable for use in "ATEX" areas!<br />
Description<br />
The <strong>Flow</strong>-<strong>through</strong> <strong>Chiller</strong> can ideally be used for cooling against the heating of bath<br />
thermostats. Together with a temperature control machine from Peter Huber<br />
Kältemaschinenbau GmbH, externally closed applications can be temperature controlled.<br />
When using a PS level regulator, externally open applications can also be controlled.<br />
After switching on the main switch (36), the compressor runs continuously.<br />
6
Duties of responsible person<br />
The operating instruction is to be kept easily accessible and in immediate vicinity of the<br />
<strong>Flow</strong>-<strong>through</strong> <strong>Chiller</strong>. Only suitably qualified personnel should operate this <strong>Flow</strong>-<strong>through</strong><br />
<strong>Chiller</strong>. Personnel should be properly trained before operating the <strong>Flow</strong>-<strong>through</strong> <strong>Chiller</strong>.<br />
Make sure that the operators have read and understood the instruction <strong>manual</strong>. Supply<br />
appropriate Personal Protective Equipment as required.<br />
Operator reuqirements<br />
Only authorised personnel should operate this <strong>Flow</strong>-<strong>through</strong> <strong>Chiller</strong>. Personnel should be<br />
properly trained before operating the <strong>Flow</strong>-<strong>through</strong> <strong>Chiller</strong>. The minimum age for<br />
operators is 18 years. Personnel under 18 years should only operate the <strong>Flow</strong>-<strong>through</strong><br />
<strong>Chiller</strong> under the direct supervision of qualified personnel. The operator is responsible<br />
for third parties within the working area.<br />
Machine operator duties<br />
Make sure that the operators have read and understood the <strong>Flow</strong>-<strong>through</strong> <strong>Chiller</strong><br />
instruction <strong>manual</strong>. Please observe the safety instructions. Appropriate Personal<br />
Protective Equipment (e.g. safety goggles, safety gloves) should be worn when<br />
operating the <strong>Flow</strong>-<strong>through</strong> <strong>Chiller</strong>.<br />
Work area<br />
Work area is defined as the area in front of the machines control panel. Work area is<br />
determined by the peripheral equipment connected by the operator.<br />
It is the customer’s responsibility to ensure a clear, safe working area around the<br />
temperature control unit. The arrangement of the work area should be made after<br />
considering access to, and risk assessment of, the area and application.<br />
7
Environmental Conditions<br />
This unit, and operations, will comply with DIN EN 61010-1:2001, only when it is<br />
located in suitable environmental conditions.<br />
8<br />
- for indoor use only;<br />
- installation site ≤ 2000 m altitude;<br />
- installed on a level, even, non flammable surface;<br />
- maintain a clearance above and around the unit of 10 cm for water-cooled units,<br />
and 20cm for air-cooled units, to allow air to circulate around the unit;<br />
- for ambient temperature conditions please refer to the technical data sheet;<br />
remaining within these ambient conditions is imperative in ensuring accurate<br />
operation;<br />
- maximum relative humidity of 80% up to 32°C, decreasing linearly to 50%<br />
relative humidity at 40°C<br />
- use only as long a power cord as necessary;<br />
- the unit should be located so as not to restrict access to the mains power<br />
switch;<br />
- mains voltage should be ±10% of the rated value;<br />
- avoid voltage spikes;<br />
- transient voltage surges as they occur normally in the supply grid;<br />
- clean rating 2;<br />
- overvoltage category II
<strong>Operating</strong> conditions<br />
Your application is of prime importance.<br />
Please note that the application and system performance is dependent upon the<br />
temperature range, viscosity, and flow rate of the thermal fluid:<br />
- When choosing the thermal fluid, not only minimal and maximum temperatures<br />
have to be complied with, but also suitability regarding burn point, viscosity and<br />
/ or freezing. Furthermore, the thermal fluid has to be compatible with all the<br />
materials used in the unit.<br />
- Pressure changes with the length of hoses (keep as short as possible). Choose<br />
as large a diameter of hoses as possible (the width of the pump connections are<br />
considered as a point of reference) and may negatively affect temperature<br />
control results. <strong>Flow</strong> restrictions may occur if a too narrow connector is selected<br />
for corrugated hoses.<br />
- The use of unsuitable hoses or hose connections may cause thermal and toxic<br />
injury to personal and environment. Temperature control hoses and their<br />
connections have to be insulated / secured against contact / mechanical damage.<br />
- Do not kink the hoses.<br />
- Check hoses in regular intervals for material fatigue (e.g. cracks).<br />
Please refer to the sections on operating requirements and general safety precautions.<br />
Location<br />
Caution!<br />
- Transport the unit upright.<br />
- The unit should be mounted in an upright and secure position, on a solid, stable<br />
surface.<br />
- Place on a non flammable surface.<br />
- Keep the area around the unit clean, to avoid slip and trip hazards.<br />
- Set the brakes on the castors once the unit is in position.<br />
- Place suitable absorbent material under the unit to catch any condensate and<br />
thermal fluid spills.<br />
- Any spillage of thermal fluid should be immediately cleaned up.<br />
- For large units, check the weight / load capacity for the flooring<br />
9
Thermofluids<br />
We recommend the thermal fluids shown in our catalogue. The name of a thermal fluid<br />
is derived from the working temperature range and the viscosity at 25 °C.<br />
Examples of thermal fluids in our catalogue:<br />
M40.165.10:<br />
• Lower working limit -40 °C<br />
• Upper working limit 165 °C<br />
• Viscosity at 25 °C: 10 mm 2 /s<br />
The data sheet for the thermal fluid used is of utmost importance, and must be read<br />
before use and the data followed.<br />
10<br />
• Please note the classification of your machine according to DIN 12876 (primary<br />
circuit)<br />
• The chosen thermal fluid must be compatible with stainless steel 1.4301 (V2A)<br />
and FKM!<br />
• The maximum viscosity of the thermal fluid may not exceed 50 mm²/s at the<br />
lowest temperature reached!<br />
• The maximum density of the thermal fluid may not exceed 1kg / dm³
Chapter 2: Connnect the flow-<strong>through</strong> <strong>Chiller</strong>, fill and<br />
prepare for the temperature control task<br />
The following sections can be found in this chapter:<br />
- Power connection<br />
- Safety regulations<br />
- Start / Stop flow-<strong>through</strong> <strong>Chiller</strong><br />
- Start-up<br />
- Decontamination / Repair<br />
- Cleaning the surfaces<br />
11
Power connection<br />
. Danger!<br />
Check to make sure that the line voltage matches the supply voltage specified on the<br />
identification plate or data sheet.<br />
We disclaim all liability for damage caused by incorrect line voltages!<br />
Safety instructions<br />
Start / Stop <strong>Flow</strong>-<strong>through</strong> <strong>Chiller</strong><br />
Temperature control and circulation can be started / stopped via the ON (I) / OFF (O)<br />
key.<br />
12<br />
Danger!<br />
Caution!<br />
Danger!<br />
Only connect the unit to a power socket<br />
with earthing contact (PE – protective earth)!<br />
Do not move the unit from its location while<br />
it is running.<br />
Never operate equipment with damaged<br />
mains power cables.
Start up<br />
All models must be transported and installed in an upright position. Ensure stable<br />
positioning and security against tipping. Make sure that there is a sufficient supply of<br />
fresh air for the circulation pump and the compressors. The warm exhaust air must be<br />
able to exit freely toward upwards.<br />
The <strong>Flow</strong>-<strong>through</strong> <strong>Chiller</strong> is connected via the front housing with your temperature<br />
control circuit using connections M16x1 (please see drawing below). The temperature<br />
control thermostat (Heating circulator) thermal fluid outlet should always be connected<br />
to the lower connection of your <strong>Flow</strong>-<strong>through</strong> <strong>Chiller</strong> to guarantee better air purging.<br />
Trapped air in the temperature control circuit (<strong>Flow</strong>-<strong>through</strong> <strong>Chiller</strong>) can now escape<br />
<strong>through</strong> the bath. Connect your <strong>Flow</strong>-<strong>through</strong> <strong>Chiller</strong> with the mains cable at the back<br />
of the housing. Please note that the full cooling capacity can only be reached after<br />
5…10 min.<br />
Example:<br />
Outlet<br />
Inlet<br />
13
Freezing protection:<br />
The <strong>Flow</strong>-<strong>through</strong> <strong>Chiller</strong> contains a freezing protection when using water as thermal<br />
fluid. The freezing protection is set to +5°C and can not be changed. This is to<br />
guarantee that the <strong>Flow</strong>-<strong>through</strong> <strong>Chiller</strong> can not freeze. When working with<br />
temperatures below +5°C the freezing protection has to be deactivated and antifreeze<br />
added to your water. The water-antifreeze mixture has to be chosen so, that the<br />
highest admissible freezing point lies 10K below the operating temperature at the cooler<br />
exit (actual value which is displayed on the temperature control device).<br />
Example: You want the work with a temperature at -10°C- The antifreeze mixture must<br />
have a freezing point of -20°C.<br />
To activate / deactivate the freezing protection switch on the black rocker switch which<br />
is to be found at the back of the unit. Position On (I) means that freezing protection is<br />
active, position OFF (O) means that freezing protection is not active.<br />
Decontamination / Repair<br />
The user is responsible for making sure that there are no hazardous materials either in<br />
or on the unit. The level of decontamination should be appropriate to the amount and<br />
type of contaminants on the unit. The user should refer to the appropriate MSDS<br />
information for advice.<br />
The decontamination should be done BEFORE outside personnel comes into contact<br />
with the <strong>Flow</strong>-<strong>through</strong> <strong>Chiller</strong>, and BEFORE the <strong>Flow</strong>-<strong>through</strong> <strong>Chiller</strong> is sent out for<br />
repair or testing. The <strong>Flow</strong>-<strong>through</strong> <strong>Chiller</strong> should be clearly labelled that it has been<br />
decontaminated before it is sent.<br />
We have prepared a document to simplify this process. This is available in the appendix,<br />
and at our website www.huber-online.com.<br />
Cleaning the surfaces<br />
A normal steel cleaning spray is suitable for cleaning the stainless steel surfaces.<br />
Painted areas should be carefully cleaned with a gentle detergent.<br />
14
Chapter 3: Taking the <strong>Flow</strong>-<strong>through</strong> <strong>Chiller</strong> out of service<br />
The following sections can be found in this chapter:<br />
- Decommissioning<br />
- Transport<br />
- Disposal<br />
15
Decommissioning<br />
Safety notice and policy<br />
16<br />
Caution!<br />
- Injury to persons or property possible:<br />
- Danger of slippage due to contaminated floor and working area.<br />
- Danger of tipping due to insufficient stability.<br />
- Danger of electric shock due to faulty power connection.<br />
- Danger of burns at extreme temperatures if touched.<br />
- Danger of chemical burns of the eyes, skin or airway due to emission of<br />
dangerous vapours (with the appropriate thermal fluid).<br />
- Leakage of fluid remnants to be caught in a collecting vessel. Machine and floor<br />
contamination to be removed at once!<br />
All safety notices are essential and must be considered when working according to the<br />
operating <strong>manual</strong>!<br />
Switching off<br />
Set main switch (36) to “O”.<br />
Disconnect the thermostat from the power supply.<br />
Transport<br />
The <strong>Flow</strong>-<strong>through</strong> <strong>Chiller</strong> is now decommissioned and ready for transportation. The<br />
original packing material should be used as far as possible, and the <strong>Flow</strong>-<strong>through</strong> <strong>Chiller</strong><br />
must always be transported in the upright position.<br />
Disposal<br />
To minimise environmental pollution, please dispose of the <strong>Flow</strong>-<strong>through</strong> <strong>Chiller</strong> only via<br />
suitably licenced and experienced disposal or recycling companies.
BESTÄTIGUNG / CONFIRMATION<br />
An / To:<br />
Huber Kältemaschinenbau GmbH<br />
Werner-von-Siemens-Str. 1<br />
77656 Offenburg<br />
Von / from:<br />
Firma / company: Betreiber / responsible body:<br />
Strasse / street: Name / name:<br />
Ort / city: Funktion / function:<br />
Tel.: Gebäude / building:<br />
Fax: Raum / room:<br />
Email:<br />
Hiermit bestätigen wir, dass nachfolgend aufgeführtes <strong>HUBER</strong>- Temperiergerät:<br />
We hereby confirm that the following <strong>HUBER</strong>-equipment:<br />
� UNISTAT � UNICHILLER � MINISTAT � CC �<br />
Typ / Type:<br />
Serien-Nr. / Serial no: S<br />
mit folgendem Thermofluid betrieben wurde<br />
Was used with the below mentioned heat transfer fluid<br />
Beachten Sie bitte bei der Verwendung fremder Temperiermedien:<br />
Durch die Vielzahl unterschiedlicher Thermofluide sind wir gezwungen vor Beginn der Reparatur<br />
die Geräte zu spülen. Die dabei entstehenden Kosten müssen wir Ihnen in Rechnung stellen. Sie<br />
können die für Sie anfallenden Kosten niedrig halten, wenn sie das Gerät vor der Rücksendung<br />
mit Ethanol spülen. Vielen Dank!<br />
Please note that if you’re using none Huber heat transfer fluids we have to flush the system<br />
before we start with your repair. The resulting costs have to be added onto your bill. You can<br />
reduce your repair costs by flushing your system with ethanol before return. We appreciate your<br />
help!<br />
Darüber hinaus bestätigen wir, dass das oben aufgeführte Gerät sorgfältig gereinigt wurde,<br />
die Anschlüsse verschlossen sind und sich weder giftige, aggressive, radioaktive noch andere<br />
gefährliche Medien in oder am Gerät befinden.<br />
Additionally we confirm that the above mentioned equipment has been cleaned, that all<br />
connectors are closed and that there are no poisonous, aggressive, radioactive or other<br />
dangerous substances on or inside the equipment.<br />
Stempel Ort/ Datum Betreiber<br />
Seal City/ date responsible body<br />
17