Using modern sensor technology to improve water usage ... - adagio
Using modern sensor technology to improve water usage ... - adagio
Using modern sensor technology to improve water usage ... - adagio
You also want an ePaper? Increase the reach of your titles
YUMPU automatically turns print PDFs into web optimized ePapers that Google loves.
»<br />
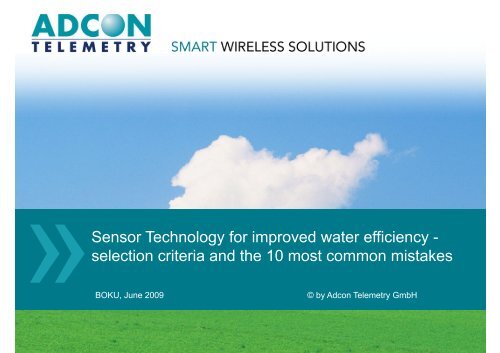
Sensor Technology for <strong>improve</strong>d <strong>water</strong> efficiency -<br />
selection criteria and the 10 most common mistakes<br />
BOKU, June 2009<br />
© by Adcon Telemetry GmbH<br />
© 2009 by Adcon Telemetry GmbH
» Sensor Technology <strong>to</strong> <strong>improve</strong> Water efficiency<br />
3 accepted technologies:<br />
- Weather Stations<br />
- Soil Sensors<br />
- Plant Sensors<br />
© 2009 by Adcon Telemetry GmbH
» Sensor Technology <strong>to</strong> <strong>improve</strong> Water efficiency<br />
Weather Stations:<br />
- Calculating Evapotranspiration ETo / ETc<br />
according <strong>to</strong><br />
- FAO-56 (P.M.)<br />
- Shuttleworth-Wallace<br />
th ll<br />
- Priestley-Taylor<br />
- Hargreaves,<br />
- etc.<br />
© 2009 by Adcon Telemetry GmbH
» Sensor Technology <strong>to</strong> <strong>improve</strong> Water efficiency<br />
Soil Sensors <strong>to</strong> moni<strong>to</strong>r<br />
- Soil Moisture<br />
- Soil Conductivity<br />
- Soil Salinity<br />
it<br />
- Soil Temperature<br />
© 2009 by Adcon Telemetry GmbH
» Sensor Technology <strong>to</strong> <strong>improve</strong> Water efficiency<br />
Plant Sensors <strong>to</strong> moni<strong>to</strong>r<br />
- Shrinkage and Expansion of trunk, branches<br />
and fruits (dendrometers)<br />
Best if used in conjunction with other methods, in<br />
particular with soil moisture <strong>sensor</strong>s.<br />
© 2009 by Adcon Telemetry GmbH
» The Process of Selection - Installation - Operation<br />
Bad Data in - Bad Data out.<br />
Before taking any decision follow this 7 step process:<br />
Step 1: Definition of the purpose of the equipment<br />
Step 2: Risk Assessment<br />
Step 3: Select equipment according <strong>to</strong> the results of Steps 1 and 2<br />
Step 4: Site Selection<br />
Step 5: Installation<br />
at Step 6: Ongoing Maintenance<br />
Step 7: Replacement<br />
© 2009 by Adcon Telemetry GmbH
» Step 1: Defining the Purpose of the Equipment<br />
a) What is the equipment needed for?<br />
• General Meteorology<br />
• Agro-Meteorology<br />
Disease modeling<br />
Evapotranspiration<br />
Soil and Plant Moni<strong>to</strong>ring<br />
• Hydro-Meteorology<br />
• Airport Meteorology<br />
• Wind energy site testing<br />
• Roadside Weather<br />
• A combination of the above<br />
• ....?<br />
© 2009 by Adcon Telemetry GmbH
» Step 1: Defining the Purpose of the Equipment<br />
b) Which requirements exist for the respective application?<br />
b1) Legal requirements<br />
Informal requirements – recommendations, rules, standards<br />
b2) Requirements as <strong>to</strong><br />
• <strong>sensor</strong> accuracy – e.g. WMO recommendations<br />
• logger accuracy<br />
• mechanical characteristics – orifice, sun shield, ventilation,<br />
heating, ..<br />
• installation method and location – distance <strong>to</strong> soil surface,<br />
distance from each other, distance <strong>to</strong> nearby objects, etc.<br />
• data collection method – number of samples, averaging<br />
methods, frequency of measurement,..<br />
• transmission intervals<br />
© 2009 by Adcon Telemetry GmbH
» Installation scheme according <strong>to</strong> WMO<br />
© 2009 by Adcon Telemetry GmbH
» Step 2: Risk Assessment<br />
Choose the equipment according <strong>to</strong> the purpose, e.g.<br />
- a3-year research project<br />
- a valuable crop<br />
- food security<br />
Questions <strong>to</strong> be answered:<br />
• What's at stake?<br />
• What are the potential benefits?<br />
• What are the potential damages?<br />
• What happens if ...?<br />
• Will my insurance accept data from my equipment?<br />
© 2009 by Adcon Telemetry GmbH
» Step 2: Risk Assessment<br />
Examples:<br />
1) 25 hectares of grapes, 14 avg. sprays at Euro 40/ha.<br />
Potential saving of 5 sprays = € 5.000,00 p.a.<br />
2) 200 hectares of pota<strong>to</strong>es, 6 avg. sprays at USD 40/ha.<br />
Saving only 1 spray = USD 8.000,00 p.a.<br />
3) 50 ha of grapes, average yield per ha: Euro 15.000. Total: € 750.000000<br />
Irrigating <strong>to</strong>o little or <strong>to</strong>o late, spraying <strong>to</strong>o late, resulting in a loss of<br />
only<br />
1% of crop quantity of quality ranking amounts <strong>to</strong> € 7.500,00<br />
4) 1000 hectares of corn, average yield per ha: 10mt@USD158/mt -<br />
2 stress days due <strong>to</strong> late or low irrigation = up <strong>to</strong> 10% lower yield ><br />
loss of USD 158.000,00 !<br />
© 2009 by Adcon Telemetry GmbH
» Step 3: Select Equipment acc. <strong>to</strong> steps 1 and 2<br />
Specification of technical characteristics of loggers and<br />
each <strong>sensor</strong> according <strong>to</strong><br />
• The required installation methods<br />
• The required accuracy<br />
• The cost / risk ratio<br />
• The insurance companies assessment<br />
© 2009 by Adcon Telemetry GmbH
» Installationsdiagramm nach WMO<br />
1. Temp. ventilated, t 200cm<br />
2. Temp. ventilated, 20cm<br />
3. RH, 200cm<br />
4. Wind, 250cm<br />
5. Solar radiation<br />
6. Leaf Wetness<br />
7. Soil Temp. in 5cm<br />
8. Soil Temp. in 20cm<br />
9. Soil Temp. in 50cm<br />
10. Heated Rain Gauge<br />
11. Bird Protec<strong>to</strong>r<br />
12. Ventilation for Air Temp.<br />
13. Data Logger<br />
14. Communications Cable<br />
15. 220V Power Supply<br />
(c) Bayr. LA f. Landwirtschaft, Weihenstephan<br />
© 2009 by Adcon Telemetry GmbH
» Step 3: Select Equipment acc. <strong>to</strong> steps 1 and 2<br />
© 2009 by Adcon Telemetry GmbH
» Step 3: Select Equipment acc. <strong>to</strong> steps 1 and 2<br />
© 2009 by Adcon Telemetry GmbH
» Step 4: Site Selection<br />
The site has <strong>to</strong> meet the requirements of the application.<br />
• Evaluate which application is of highest significance.<br />
• WMO – disease models – ETo differ in their requirements.<br />
• Disease models: old models – station outside of crop<br />
• recent models – stations inside the<br />
crop<br />
• ETo: 1ha of short-cut grass<br />
• Soil moisture <strong>sensor</strong>s: installation site must be typical for<br />
soil<br />
type, crop type, crop age, irrigation system, ...<br />
© 2009 by Adcon Telemetry GmbH
» Step 4: Site Selection<br />
Permanent installation or temporary?<br />
• If installation is permanent evaluate a site on a timeline –<br />
what will it look like in 10 – 15 – 20 years?<br />
• Are trees nearby ? Variety? Max. size? Can they be cut?<br />
• Are <strong>water</strong> bodies nearby? Flooding areas?<br />
• Zoning of the area – construction work <strong>to</strong> be expected?<br />
© 2009 by Adcon Telemetry GmbH
»<br />
Weather Stations for Irrigation Improvements<br />
• What is <strong>to</strong>days most important rule for irriga<strong>to</strong>rs?<br />
© 2009 by Adcon Telemetry GmbH
»<br />
Weather Stations for Irrigation Improvements<br />
• What is <strong>to</strong>days most important rule for irriga<strong>to</strong>rs?<br />
© 2009 by Adcon Telemetry GmbH
»<br />
Proper Installations<br />
• ETo as it should be in Chile<br />
© 2009 by Adcon Telemetry GmbH
»<br />
Proper Installations<br />
• A good example for leaf wetness from Styria<br />
© 2009 by Adcon Telemetry GmbH
» Step 5: Site Selection<br />
© 2009 by Adcon Telemetry GmbH
» Step 5: Site Selection<br />
© 2009 by Adcon Telemetry GmbH
» Step 5: Site Selection<br />
© 2009 by Adcon Telemetry GmbH
» Step 5: Site Selection - Sensor Positioning<br />
Moisture Zones in Drip Irrigation<br />
Sand Loam Clay<br />
Access Tubes<br />
To wet<br />
To dry<br />
Soil Moisture Optimum<br />
© 2009 by Adcon Telemetry GmbH
» Step 5: Installation<br />
Good equipment - great site - bad installation?<br />
• Pole well anchored in the ground and perfectly vertical<br />
• Guy wires if necessary (soft soil, strong winds)<br />
• Solar panel facing South<br />
• Wind direction facing North<br />
• Orifice of Rain gauge g and pyranometer must be absolutely<br />
horizontal<br />
• Sensors must not influence each other<br />
• Keep <strong>sensor</strong>s away from hot surfaces (esp. Temp., RH,<br />
Leaf<br />
wetness, pyranometres!)<br />
• Take a picture of the installation and note the GPS<br />
© 2009 by Adcon Telemetry GmbH
» Step 6: Installation - What‘s this- disease or ETo ?<br />
© 2009 by Adcon Telemetry GmbH
» Step 6: Ongoing Maintenance<br />
The best equipment will have a short lifetime and little<br />
reliability if no proper maintenance is being performed!<br />
• Clean the solar panel, pyranometer, rain gauge once per<br />
month<br />
• Visually check all <strong>sensor</strong>s for damage, dirt, foreign objects<br />
once per month / every visit<br />
• Check cables for nicks and animal bites.<br />
• Make sure all connec<strong>to</strong>rs are seated well.<br />
• If applying chemicals cover <strong>sensor</strong>s before spray or<br />
clean them thereafter.<br />
• Check <strong>sensor</strong> readings in the field with reference <strong>sensor</strong><br />
© 2009 by Adcon Telemetry GmbH
» Step 6: Ongoing Maintenance<br />
The best equipment will have a short lifetime and little<br />
reliability if no proper maintenance is being performed!<br />
• Replace the humidity <strong>sensor</strong> every 3 – max. 5 years.<br />
• Depending on the application recalibrate a e <strong>sensor</strong>s so s every e 1 – 5 years<br />
• Calibrate spare <strong>sensor</strong>s in the lab and only replace in the<br />
field.<br />
© 2009 by Adcon Telemetry GmbH
» Maintenance is key!<br />
© 2009 by Adcon Telemetry GmbH
» Maintenance - why birds love rain gauges<br />
© 2009 by Adcon Telemetry GmbH
» Maintenance - expect the unexpected!<br />
© 2009 by Adcon Telemetry GmbH
» Step 6: Ongoing Maintenance<br />
Keep an eye on your data! Much can be <strong>to</strong>ld from the office.<br />
• Check patterns of moisture: RH - rain - leaf wetness<br />
• Check RH <strong>sensor</strong> diurnal fluctuations<br />
• Check for regularly occurring errors.<br />
© 2009 by Adcon Telemetry GmbH
» Step 7: Replacement<br />
Even the best equipment, well maintained, i doesn’t live forever.<br />
Make appropriate accruals for replacement of certain<br />
components after x years.<br />
X will depend on quality level of equipment, maintenance,<br />
environmental conditions, etc.<br />
• Leaf Wetness: every 2 - 3 years<br />
• Data loggers: 10 - 15 years (aging of electronics, voltage<br />
references, oscilla<strong>to</strong>rs, ADC, etc.)<br />
• Wind speed and direction: 10 years (bearings)<br />
• Pyranometers: 10 - 20 years<br />
• Rain gauges: 10 years depending on model (min. reed<br />
switches)<br />
© 2009 by Adcon Telemetry GmbH
»<br />
Thank you for your attention!<br />
© 2009 by Adcon Telemetry GmbH


![Irrigation Water Use Efficiency IWUE [ kg/mm ] - adagio](https://img.yumpu.com/42584177/1/190x134/irrigation-water-use-efficiency-iwue-kg-mm-adagio.jpg?quality=85)


